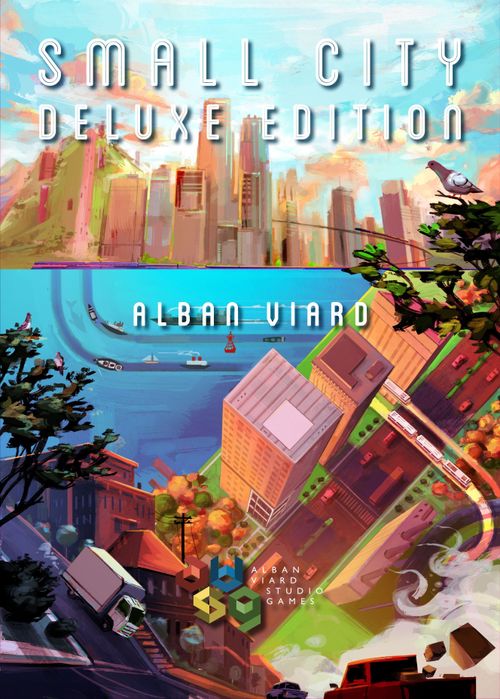
Small City: Deluxe Edition
Small City: Deluxe Edition Rulebook
Table of Contents
Table of Contents
Components
- 78 Residential Zones (5 development levels: 1–5)
- 40 Commercial Zones (4 development levels: 1–4)
- 37 Factories (3 development levels: 1–3)
- 4 Harbors
- 4 Refineries
- 12 Warehouses
- 24 Cultural Buildings (City Hall, School, Library, Museum, Metro Station, Clinic, University)
- 4 City Halls
- 55 Parks (small, medium, and large)
- 4 Police Stations
- 4 Fire Stations
- 48 Bank Note Tiles
- 8 +50 Vote Tokens
- 4 double-sided Borough Boards (easy/expert)
- 1 double-sided City Council Board (easy/expert)
- 1 Round Pawn
- 1 Mayor meeple
- 36 Building Materials (16 wood, 12 stone, 8 metal)
- 4 Player Screens
- 16 Promise Cards
- 16 Special Promise Cards
- 8 Action Cards
- In each player color: 22 Citizens, 7 discs
A Few Crucial Gameplay Concepts
Overview
To win the game you must have the most votes after 8 rounds. Votes can be earned over the course of the game by placing citizens in the residential zones, by erecting cultural buildings, by keeping commercial buildings in suitable areas, and also by making good on the promises that you made to the citizens at the beginning of the game. You must also keep an eye on pollution at all times, because high pollution levels will have a negative effect on your score at the end of the game.
Your Borough Board
Your Borough Board is divided into four areas:
- The large grid on the left is where you will construct tiles. At the start of the game, your Constructible Zone includes only the smallest area defined by the innermost of the lines with dots (easy side: 7×7; expert side: 6×6). Over the course of the game, you may increase your Constructible Zone, enabling you to build in spaces beyond that border, too.
- The Borough Size track reminds you of your Constructible Zone, which is indicated by where your disc is on it.
- The Pollution tracks show how much pollution has accumulated in your Borough; it starts at 00% (the left column is tens; the right, ones).
- The Career Center is where you keep your available Citizens.
Development Level
Several types of building (Residential, Commercial, and Factory) are available in different development levels. In essence, the development level of a building is the number of spaces in that building. In order to build or upgrade to a higher development level, the building must be influenced by other buildings (see Influence Area below). The higher the development level, the more influences required.
Influence Area
Each tile in your borough has an Influence Area, which is like a halo around the tile: The Influence Area includes every space that is orthogonally or diagonally adjacent to a space of the tile itself. So, a Refinery's Influence Area is 8 spaces, because it is a 1-space building, and a Level-2 Residence's Influence Area is 10 spaces. When something is in a tile's Influence Area, that thing is said to be Influenced by that tile.
Setup
Middle of the table:
-
Place the City Council board in the middle of the table (agree whether to play the easy or expert side), with the Round pawn on space 1 of the Round track.
-
Pile the 8 Action cards near the City Council board.
-
Separate the normal Promise cards (numbers 1–16) into three decks by difficulty: an easy deck (6 votes), a medium deck (12 votes), a difficult deck (18 votes).
-
Shuffle each Promise deck. Place all three decks face down near the City Council board.
-
For each of the following buildings, stack a number of them indicated for your player count near the City Council board (return the rest to the box):
Building 1p 2p 3p 4p Metro Station 1 1 2 3 Clinic 1 1 2 3 University 1
Playing the Game
The game lasts 8 rounds, each comprising the following 8 phases:
- Select Special Actions
- Build
- Move Citizens
- Collect Income
- Vote
- Measure Pollution
- Influence City Council
- Mayor's Next Visit
Phase 1: Select Special Actions
Parade for the Mayor
The players who are not hosting the mayor begin this phase by agreeing where to place the mayor on the borough board of the mayor's host. The Mayor must be placed on a street (a street is an edge between two empty spaces). This prevents the mayor's host from building on the two spaces adjacent to the mayor's street for this round.
If the non-mayor players cannot come to an agreement, then the previous mayor's host chooses where to place the Mayor meeple (in Round 1, the last player in turn order gets the final say). In the event that the same player hosted the mayor last round, the Mayor meeple must remain on the same street this round, too!
If the mayor's host does not have two adjacent empty spaces in their Constructible Zone, the mayor must go on a street in the next Constructible Zone. If this is impossible because their Constructible Zone is already maximum size, simply place the mayor near their board; in this case, the mayor does not prevent construction!
Choose Your Special Action for the Round
Shuffle the 8 Action cards and place them face down in a circle. Once the entire circle is placed, flip them face up. Each player will use their Special Action disc to choose a different Special Action, in turn order. The mayor's host chooses first, of course, by placing their Special Action disc on a card. This is always free for the mayor's host. The next player clockwise can choose either of the action cards that are directly adjacent to that card for free, or pay $1 to skip 1 empty card, or $2 to skip 2 empty cards, or $3 to skip 3 empty cards (thus taking the action on the opposite side from the card that the mayor's host chose), placing their Special Action disc on that card. The third player does the same thing, starting from the card that the second player picked, and so on.
Remember: You only pay to skip empty cards; do not count occupied cards when counting how much you have to pay to select the card you want. You are never allowed to choose the same action another player took. The money you owe must be paid from your reserve.
Example: Blue is hosting the mayor and chooses the Supporter. The second player can take the Urban Planner or the Mayor for free, could pay $1 to select the Engineer or the Mediator, $2 for the Opponent or City Councilor, or $3 for the Architect. Purple decides to pay $1 to take the Engineer. Then the third player, Orange, may choose the Urban Planner or the Opponent for free, or pay $1 to take the Mayor or the Architect, or $2 for the Mediator or City Councilor. Orange decides to take the Urban Planner. Finally, the fourth player, Brown, can take the Opponent or Mayor for free, pay $1 for the Mediator or Architect, or $2 for the City Councilor.
The Special Action Cards
- A. Mayor — The player who chooses this action will be the mayor's host (first in the turn order) next round.
- B. Architect — The player who chooses this action can pay one building material fewer (minimum 0) for one of the Cultural Buildings they build this round (see Phase 2: Build); however, this does not affect the cost to build other buildings.
- C. Mediator — The player who chooses this action can pay $1 less (minimum $1) for each building tile they build this round (see Phase 2: Build); however, this does not affect the cost to build Cultural Buildings.
- D. Engineer — Factories which produce building materials during this round will not create pollution for the player who chooses this action (see Phase 6: Measure Pollution).
- E. Supporter — The player who chooses this action must immediately take either $1 from the reserve or 2 votes.
- F. Urban Planner — The player who chooses this action may immediately move the disc on their Borough Size track one space to the right, expanding their Constructible Zone for the remainder of the game.
- G. City Councilor — The player who chooses this action may immediately advance one of their discs on the City Council board one column. They must pay the price indicated on the City Council board to move their disc. They immediately apply the effect depicted at the bottom of the new column. Any tiles built this way are eligible to be upgraded during Phase 2: Build of this round.
- H. Opponent — The player who chooses this card gets no bonus. Dealing with your opponent always feels like a waste of time.
Phase 2: Build
Place your player screens in front of your Borough boards to hide your construction until the end of the phase. Everyone can do this phase simultaneously; however, because there is a limited number of tiles available, if there is a conflict because more people want a particular type of tile than the number of them available, simply build in turn order.
For your individual choices this phase, do precisely one of the following:
- Build up to 3 tiles on empty spaces of your Constructible Zone.
- In any order, build up to 1 tile, and increase your Constructible Zone by moving the disc on your Borough Size track one space to the right.
General Building Rules
- Tiles generally cost $1 per space; however, there are a few exceptions (see Warehouse and Cultural Buildings).
- Build any level: When building a Residential Zone, Commercial Zone, or Factory, you can build any development level (e.g. Level-5 Residential Zone, Level-2 Factory, etc.), as long as the Construction Criteria are met (see Residential Zones, Factories and Warehouses, and Commercial Zones); however, in order to skip level 1, a single space of the intended building footprint must have all of the influences required. This is stricter than the requirement to upgrade (see Upgrades), which merely requires the entire building to have all of the influences, not just a single space.
- Your city hall also counts as a Cultural building.
- You may replace one of your build actions per Build Phase with a demolish action. Demolishing a tile costs $1 per space it occupied, and increases your pollution by 1 per space it occupied. Pollution generated by demolition is immediate, and does not count in Phase 6: Measure Pollution. All citizens on the tile return to your city hall; all tourists on it return to their city hall; return the demolished tile to the box. If there are not enough spaces in someone's city hall for the citizens/tourists to return, you cannot demolish the tile. Note: Demolishing a tile that provided the required influence for another building does not affect that building.
- You may choose which side of a tile to use when building it.
- In general, you can build a tile orthogonally adjacent to another of its type; however, the two tiles do not "merge" to act as a single, larger tile.
Residential Zones
Residential Zones are green, and are available in different development levels: 1–5.
Cost: $1 per space it occupies.
Construction Criteria:
- Residential Zones are not allowed to be Influenced by any Industrial buildings.
- Residential Zones are allowed to be orthogonally adjacent, but they do not "merge" to amplify the Votes of the Citizens in them (see Phase 5: Vote). Example: Four Level-1 Residential Zones can be in a contiguous layout like a single Level-4 Residential Zone, but they cannot become a Level-4 Residential Zone. Come Phase 5: Vote, the four Level-1 Residential Zones can generate no more than 4 Votes, but a Level-4 Residential Zone would be able to generate 10 Votes.
- Level 1: No requirements; however, you must immediately move 1 Citizen from City Hall to this tile, unless City Hall has no Citizens. This is only true for Level 1.
- Level 2: Must be Influenced by 2 Cultural Buildings.
- Level 3: Must be Influenced by 3 Cultural Buildings.
- Level 4: Must be Influenced by 4 Cultural Buildings.
- Level 5: Must be Influenced by 5 Cultural Buildings.
Special Powers: Citizens in Residential Zones will generate votes (see Phase 5: Vote).
Industrial Buildings: Factories
Factories are yellow, and are available in different development levels: 1–3. They produce building materials (see Phase 4: Collect Income).
Construction Criteria:
- Industrial buildings are not allowed to be Influenced by Residential Zones.
- Level 1: The only requirement is that you must also build a Warehouse in this tile's Influence Area (as a free action, and for $0). If you cannot build a Warehouse in this tile's Influence Area, you cannot build this tile.
- Level 2: Must be Influenced by a Refinery and/or a Harbor. If you are building a Level-2 Factory directly, you must also build a Warehouse as described for Level 1.
- Level 3: Must be Influenced by a Refinery and a Harbor. If you are building a Level-3 Factory directly, you must also build a Warehouse as described for Level 1.
Special Powers: Factories have no special powers.
Industrial Buildings: Warehouses
Each Factory, no matter what level it is, requires a Warehouse (see Industrial Building: Factories).
Cost: $0.
Construction Criteria:
- Industrial buildings are not allowed to be Influenced by Residential Zones.
- You can only build it as part of the process of building a new Factory tile (not upgrading one).
- It does not require a separate action to build, and must be built in the Influence Area of the Factory tile.
Special Powers: Warehouses have no special powers.
Industrial Buildings: Refineries
The Refinery is brown.
Cost: $1.
Construction Criteria:
- You can only build one Refinery. If you demolish it, you cannot rebuild it.
- Industrial buildings are not allowed to be Influenced by Residential Zones.
Special Powers: The Refinery has no special powers.
Industrial Buildings: Harbors
The Harbor tile is half brown, half water.
Cost: $2.
Construction Criteria:
- You can only build one Harbor. If you demolish it, you cannot rebuild it.
- Industrial buildings are not allowed to be Influenced by Residential Zones.
Special Powers: The Harbor tile comprises 2 spaces of Industrial building, and 2 spaces of water. Only the building counts for cost (thus $2) and Influence. Example: The Industrial spaces prevent Residential Zones from being built in the adjacent spaces. The water has no influence, so you can build Residential Zones on the rest of the spaces.
Commercial Zones
Commercial Zones are blue, and are available in different development levels: 1–4.
Cost: $1 per space it occupies.
Construction Criteria:
- Level 1: Must be Influenced by 1 Residential Zone (of any size).
- Level 2: Must be Influenced by 2 Residential Zones (of any sizes).
- Level 3: Must be Influenced by 3 Residential Zones (of any sizes).
- Level 4: Must be Influenced by 4 Residential Zones (of any sizes).
Example: You can build a Level-2 Commercial Zone overlapping a space influenced by 2 Residential Zones for $2. Note that if the new Commercial Zone is now influenced by 3 Residential Zones, it is eligible for upgrade; however, because it was just built this round, you cannot upgrade it until next round.
Special Powers: Your Citizens in Commercial Zones will produce money, or will allow you to trade building materials for money or votes.
Fire Stations
Cost: $3.
Construction Criteria: You can only build one Fire Station. If you demolish it, you cannot rebuild it.
Special Powers: You can activate the special power of the Fire Station by moving one Citizen from your Borough (but neither from City Hall nor the Career Center) to the tile either when it is built, or in Phase 3: Move Citizens. As long as the Citizen is there, its special power is in effect: Your Citizens cannot die from pollution in opponents' Boroughs (see Phase 6: Measure Pollution).
Police Stations
Cost: $2.
Construction Criteria: You can only build one Police Station. If you demolish it, you cannot rebuild it.
Special Powers: You can activate the special power of the Police Station by moving one Citizen from your Borough (but neither from City Hall nor the Career Center) to the tile either when it is built, or in Phase 3: Move Citizens. As long as the Citizen is there, its special power is in effect: All tourists Influenced by it when it is built/activated return to their respective City Halls. If there is no room in City Hall for a Citizen, return it to its owner's Career Center. Example: The activated Police Station protects the 10 spaces surrounding it from Tourists. If any Tourists had been in one of those spaces before the Police Station was built, its construction and activation would force them to return to their respective City Halls (and if there's no room at City Hall, to their Career Center).
Cultural Buildings
Cultural Buildings are red (or purple), and each one is different: Clinic, Metro Station, University, City Hall, Library, Museum, and School. Cultural Buildings have no monetary cost ($0), but do require building materials in order to build them. The required building materials must be in your Warehouses and/or City Hall.
Cost: City Hall costs you nothing, because your borough starts with it, and you cannot buy another. All of the other Cultural Buildings cost $0, but the following building materials:
- School: 1 wood.
- Library: 2 wood.
- Museum: 2 wood, 1 stone.
- Metro Station: 2 wood, 2 stone.
- Clinic: 2 wood, 2 stone, 1 metal.
- University: 2 wood, 2 stone, 2 metal.
Construction Criteria: You can only build one of each Cultural Building. If you demolish one, you cannot rebuild it.
Special Powers:
- Clinic — You can activate the special power of the Clinic by moving one Citizen to this tile in Phase 3: Move Citizens (this building is limited to one Citizen). As long as the Citizen is there, this special power is in effect: None of your Citizens can die from pollution; however, your Tourists in other Boroughs are still vulnerable (see Phase 6: Measure Pollution).
- Metro Station — As soon as you build a Metro Station, you may have 2 Citizens in each opponent's Borough, instead of just 1 (see Phase 3: Move Citizens; A. Move Your Citizens; Tourists). The Metro Station does not need to be activated by having a Citizen in it.
- University — You can activate the special power of the University by moving one Citizen to this tile in Phase 3: Move Citizens (this building is limited to one Citizen). As long as the Citizen is there, this special power is in effect: You get 3 Votes in Phase 5: Vote.
- City Hall — No special powers, but it can host citizens!
- Library — No special powers, but it can host citizens!
- Museum — No special powers, but it can host citizens!
- School — No special powers, but it can host citizens!
Parks
Parks are light green, and are available in three sizes: 1–3.
Cost: $1 per space it occupies.
Construction Criteria:
- Park tiles are allowed to be Influenced by any tiles.
- Although Parks are allowed to be orthogonally adjacent to each other, you cannot replace two adjacent tiles with one of the same shape.
- Parks cannot be upgraded!
Special Powers: You can move one Citizen to the tile in Phase 3: Move Citizens; however, the Park's special power is to mitigate pollution. This ability does not require a Citizen to activate it.
Upgrades
- Free and optional: Upgrading a building in the Constructible Zone is a free and optional action: It does not count as one of the 3 tiles that you are allowed to build, and you are never required to do it. Also, there is no cost associated with upgrading. The upgraded tile must be entirely within the Constructible Zone.
- Upgradable: There are 2 categories of tiles: those that can be upgraded (Residence, Commercial, Factory) and those that cannot (all others).
- The tile must already be Influenced by the correct mix of tiles: To upgrade a tile, certain criteria must already be met (see Construction Criteria for Residential Zones, Factories & Warehouses, and Commercial Zones). All of the conditions require that spaces of the existing tile are within the Influence Area of other specific tiles. Unlike skipping Level 1 when you build, the current building as a whole must have all of the required influences, but these influences do not need to be all affecting a single space. In some cases, the criteria also require the tile not to be in the Influence Area of specific tiles.
- The tile gets bigger; it doesn't move: When you upgrade a building, you replace it with a larger one and return the old one to the reserve, available to be built again. The new tile must completely cover the footprint of the old tile, but cannot cover any other tiles. If there were Citizens present on the old tile they must be placed in the exact same spaces on the new tile. When upgrading a Factory, the space that produced wood must still produce wood, and the space that produced stone must still produce stone; you can't shift or flip the Factory. The same goes for Commercial Zones. The concept is that you are expanding the existing tile.
- No build-and-expand: You cannot upgrade a tile built during the same Build Phase. If you built a tile on a previous turn, you are allowed to build the Influencing tiles required to upgrade it, and then make the upgrade all in the same Build Phase.
- Chain reactions are OK: Sometimes upgrading a tile expands it into the Influence Areas of other tiles, meeting the criteria for the next upgrade. That's fine: You can keep upgrading in the same Build Phase as long as the criteria are met for the next level!
All Done!
Once everyone has finished this phase, remove your Player Screens. Then, announce what you did, and how much it cost, as well as any upgrades you performed. This not only allows the other players to make sure you made no mistakes, it also ensures that you are aware when everyone is done playing simultaneously, so you can move on to the next phase.
Phase 3: Move Citizens
Starting from the mayor's host and then proceeding clockwise, each player gets one turn to move some or potentially all of their Citizens. In order to facilitate remembering which Citizens have already moved, lay each meeple down when it reaches its destination.
A. Move Your Citizens
Each of your Citizens must move to a new space (although it can be another space on the same tile), except those Citizens in Residential Zones and those Citizens activating tiles with special powers, namely Fire Station, Police Station, Clinic, and University.
- Citizens cannot move from City Hall during this part of your turn. They will move at the end of your turn into empty Level-1 Residential Zones spaces (see B. New Homes for New Citizens below).
- Citizens cannot move onto City Hall.
- Citizens (even as Tourists; see Tourists below) can only move onto spaces on tiles, never onto empty spaces on the Borough board.
- Each space can never, not even for a moment, hold more than one Citizen.
- Each Factory and Commercial Zone space that your Citizens occupied at the start of this phase (even as Tourists) cannot be re-occupied by one of your Citizens this phase; however, another player could use that space.
- Citizens (even as Tourists; see Tourists below) sitting in a Park, School, Library, Museum, or Metro Station do nothing. They are merely having a rest.
- You may find that you don't have enough spaces to host all of your Citizens. "Excess" Citizens must go to City Hall. If there is no room in City Hall for a Citizen, return it to your Career Center.
Tourists
You are allowed to have a maximum of 1 Citizen in each opponent's Borough (2 if you have built a Metro Station); we call such a Citizen a Tourist. However, if your opponent has an activated Police Station, no Tourists are allowed to be in the 10 spaces of its Influence zone.
To make one of your Citizens a Tourist, simply move it from your Borough to your left or right neighbor's Borough (respecting the limit above). Note: Thus, in a 4-player game, you cannot send a Citizen from your Borough directly to the Borough opposite you.
Each of your Tourists must move each round, no matter what. This could be within the same Borough, or to a neighboring Borough. If there are no valid destinations in the Tourist's current Borough, the Tourist must move clockwise or counterclockwise to a neighboring Borough (remember the limit of 1; 2 if you have a Metro Station!); if this is not possible, the Tourist comes back home to find a space in your Borough as a Citizen, and is no longer a Tourist.
- Your Tourists cannot be in opponents' Residential Zones, Fire Stations, Police Stations, Clinics, or Universities.
- Your Tourists always work for you as if the spaces they occupy were in your own Borough; however, while visiting a Cultural Building, they do not grant you any bonus (they're enjoying a little free time).
B. New Homes for New Citizens
After you have finished your turn (having moved all citizens you were required to move, and others as you wish), it's time to find new homes for Citizens at City Hall: To each Level-1 Residential Zone that is empty in your Borough, move one Citizen from City Hall. If you have more empty Level-1 Residential Zones than Citizens at City Hall, you choose which goes where. If you have fewer, the "excess" Citizens will stay at City Hall.
C. New Citizens Arrive
After all players have finished their turns, each player checks for new Citizens: Each empty Factory space in your Borough attracts 1 new Citizen from your Career Center to City Hall.
Phase 4: Collect Income
Everyone collects their income simultaneously, but you collect your income step by step as specified below. Remember to apply buildings' special powers activated by your Citizens. All income comes from the reserve. Building materials are finite, so if supplies are low, you should take income in turn order; in this case, each player takes their entire income before the next player does.
- Collect Income from Tourists — Each Tourist in your Borough (even in Parks!) earns you $1.
- Collect Commercial Income
- Each Citizen on a $1 space earns you $1.
- Each Citizen on a Building Material $ space allows you to trade one building material from one of your Warehouses or City Hall for money (wood sells for $2, stone for $3, metal for $5).
- Each Citizen on a $ Votes space allows you to buy one "lot" of 2–5 votes ($1 for 2 votes, $2 for 3 votes, $3 for 4 votes, $4 for 5 votes).
- Each Citizen on a Building Material Votes space allows you to trade one building material from your Warehouses or City Hall for votes (wood trades for 3 votes, stone for 5 votes, metal for 7 votes).
- You choose in which order you get your income from the Commercial Zones, which can allow you to chain conversions in whatever manner your Citizens in Commercial Zones allow.
- Collect Factory Income
- In any order you like, each Citizen on a Factory space produces one building material matching the space (wood, stone, or metal). You must place each building material either on an empty space in a Warehouse (not necessarily a Warehouse adjacent to the Factory) or in an empty space of City Hall (maximum 4).
- If you can't accommodate every building material produced, then perform each of the following steps until there is no more surplus:
- Some of your Tourists will be unable to send their building materials back home; find an empty Warehouse space in the Borough of the Factory that produced the building material, and put it there. If even your opponent has no place to store the building material, it goes to waste: Return it to the reserve.
- Some of the building materials your Citizens produced go to waste: Return them to the reserve.
Attention: The maximum capacity of City Hall is 4 Citizens and/or Building Materials total: One item on each space.
Phase 5: Vote
Everyone can tally their votes simultaneously. Adjust your score appropriately on the Votes track around the edge of the City Council board. Your Citizens earn you Votes as follows (Tourists do not vote):
- Residential Zone — The first Citizen in a Residential Zone earns you 1 vote, the second earns you 2, the third earns you 3, the fourth earns you 4 and the fifth earns you 5. So, a Citizen in a Level-1 Residential Zone always earns you 1 vote, a Level-5 Residential Zone with 3 Citizens would earn you 6 votes, and a full Level-5 Residential Zone would earn you 15 votes.
- University — If this is activated, it earns you 3 Votes.
Example: Two full Level-1 Residential Zones earn 1 vote each. A full Level-3 Residential Zone earns 1+2+3=6, and a full Level-4 Residential zone earns 1+2+3+4=10. 1+1+6+10=18.
Attention: If you surpass 50 Votes, take a +50 Votes tile and start tracking your votes again from 0.
Phase 6: Measure Pollution
Each Citizen in your Borough (including Tourists there) generates 1 pollution for you, except those in City Hall and those in Cemeteries (see Pollution Kills below). Pollution is cumulative, so this new pollution will add to your current pollution level.
- Each building material produced in the Borough (whether by your own Citizen or an opponent's Tourist) generates 1 pollution. If you chose the Engineer in Phase 1: Select Special Actions, skip this step.
- Each Park space generates −1 pollution (in other words, each Park space reduces pollution by 1); however the minimum pollution your Borough generates in a round is 0. Unfortunately, simply having lots of Parks doesn't magically clean up accumulated pollution.
- Adjust your pollution level accordingly, but keep in mind the pollution you generated this turn.
Attention: If your pollution level ever reaches 100%, you immediately lose the game, and all citizens in your Borough die; the normal protection from Clinics and Fire Stations has no effect against the dense and deadly accumulation of pollution. Your tourists defect in shame: The owner of the Borough each tourist is visiting removes it from the game, and replaces it with one of their own citizens. Tourists in your Borough flee to their City Hall. If there is no room in City Hall for a Citizen, return it to their owner's Career Center.
Pollution Kills
- If anyone's pollution is 10% or greater, Citizens start dying due to the environmental damage. Whichever player generated the most pollution this round must kill one Citizen in their Borough (see below). In the event of a tie, whichever tied player has higher cumulative pollution must kill one, if possible; if it is still a tie, each tied player must kill one. Even if nobody generated pollution this round, as long as anyone's pollution is 10% or greater, Citizens will die.
- You are allowed to choose a Tourist in your Borough as the Citizen who dies. If its owner has an active Fire Station, then instead of dying, the Tourist goes home (goes to its owner's City Hall; if there's no room, it goes to its owner's Career Center).
- If you have an active Clinic, none of your Citizens in your Borough will die; however, this protects neither Tourists visiting your Borough, nor your Tourists elsewhere.
- Pollution cannot kill a Citizen in City Hall.
- Choose an empty space (no tile, no Cemetery, but beside the mayor is OK) in your Constructible Zone, and lay the dead Citizen to rest on that space (even if it was a visiting Tourist), creating a Cemetery.
- If you already had a Cemetery, this new one must be orthogonally adjacent to the old one if possible. If impossible, you have free choice as if it were your first.
- If you can't create a Cemetery because you have no empty spaces in your Constructible Zone, the Cemetery must go on in the next Constructible Zone. If this is impossible because your Constructible Zone is already max size, simply remove the dead Citizen from the game. In this case, nobody knows what happened to the body!
Example, continuing from the Vote phase: Excluding any Citizens in City Hall, you have 12 Citizens and 1 visiting Tourist (as well as 1 Cemetery, but it doesn't count). 2 of your Factories produced building materials this turn. You have 5 Park spaces in your Borough. 13+2−5=10. You generated 10 pollution this round, and your pollution is high enough for people to start dying from it. Let's hope one of your opponents generated more than 10 pollution this round!
Phase 7: Influence City Council
In turn order, each player may make one contribution toward influencing City Council in one of four different areas, moving one of their discs. Several players can get the same benefit; simply stack the players' discs.
- If you choose to make a contribution this round, pay the cost to increase your influence with that Councilperson (by 1 column) in either money or votes, but not a combination of the two. Note: The price to move into column 1 is $1 or 1 vote; column 2 costs 2; column 3 costs 3, and column 4 costs 4.
- If you wish to switch rows, you are allowed to do so, but only by starting over in column 1 of the new row, and thus you pay the column-1 price of $1 or 1 vote to do this; however, you cannot have both discs in the same row! You may also choose to restart the same row, following these same rules.
- Immediately apply the bonus associated with the City Council space to which you moved a disc (see below). The benefits are not cumulative: You only get the benefit of the new space. You also cannot choose a previous column's benefit.
- Each Councilperson (row) offers a different type of benefit (building materials, new buildings, money or votes, or new citizens).
- Once a disc reaches the final column, it must stay there for the rest of the game; it can neither switch rows nor even restart in the same row.
The Councilpeople
- Row 1 — Department of Industry — You immediately get building materials that you must store in your Warehouses or City Hall. Return any for which you have no room to the reserve. If the finite supply of building materials doesn't have what you're due, you simply forfeit the rest.
- Column 1: 1 wood.
- Column 2: 2 wood or 1 stone.
- Column 3: 2 stone or 1 metal.
- Column 4: 2 metal.
- Row 2 — Department of Building — You may immediately build a tile that is not a Cultural Building, without paying its normal construction cost! You must respect the tile's Construction Criteria.
- Column 1: Build a 1-space tile.
- Column 2: Build a 2-space tile.
- Column 3: Build a 3-space tile.
- Column 4: Build a tile of size 1–4, without having to respect any Construction Criteria, except that Residential Zones and Industrial Buildings are still forbidden from Influencing one another! Example: You could build a Level-3 Factory with no Harbor, or a Level-3 Residential Zone influenced by no Cultural Buildings (but not beside an Industrial Building).
- Row 3 — Department of Economy — You immediately get the indicated money or votes — whichever you choose.
- Column 1: $2 or 2 votes.
- Column 2: $3 or 3 votes.
- Column 3: $5 or 5 votes.
- Column 4: $8 or 8 votes.
- Row 4 — Department of Tourism — You immediately get Citizens (of your color) from the common reserve. You must host the Citizens in City Hall; any for which you have no room go to your Career Center.
Phase 8: Mayor's Next Visit
If no one chose the Mayor special action card, then the mayor moves one player clockwise; otherwise, the mayor goes to the player who selected the Mayor special action. Advance the Round pawn one space. Stand up all meeples on tiles (but not the ones in Cemeteries).
If this was the end of Round 8, proceed to End of the Game and Final Scoring; otherwise, a new round begins.
End of the Game and Final Scoring
The game ends after Round 8, at which point, each player performs the final scoring below:
- Reveal your Promise Card:
- If you fulfilled the promise, add the indicated votes (6/12/18) to your total votes on the Vote track.
- If you failed to fulfill the promise, instead lose votes (−3/−6/−12) from your total votes on the Vote track.
- Subtract your pollution level from this new total.
The player with the most votes wins the game. In the case of a tie, the tied player with the lowest pollution wins. If still tied, the tied player with the most money wins.
Advanced Game
All of the rules of the basic game apply, with the following additions and modifications.
Additional Setup
- Use the expert side of the City Council board.
- Shuffle the Special Promise deck. Place it face down near the City Council board.
- Agree on one of the following victory conditions:
- Votes — This is exactly the same as the basic game, except that you will also have access to the new Special Promise cards.
- Economic — Have the highest sum of cash and net revenue.
- Citizens — Have the most Citizens in play (excluding City Hall).
- Cultural — Have the most spaces taken up by Cultural tiles.
For further details on the new victory conditions, see Specific Changes for Each Victory Condition below.
Playing the Game — Phase 7: Influence City Council
Instead of paying the depicted $ or Votes to influence City Council, you may take a Special Promise card: Draw a number of Special Promise cards as indicated in the column's cost, keep 1, and tuck the rest under the deck, face down. This is an additional Promise you must fulfill at the end of the game!
Example: In making a Special Promise to advance into the 1st column, you get to draw 4 cards, choose 1, and tuck the other 3 back under the deck. In order to advance to the 4th column via Special Promises, you are stuck with the 1 card you draw. The bigger the benefit, the greater the risk in offering favors!
Note: If you fulfill a Special Promise, it is worth +0, but if you fail to fulfill it, it is worth −5. There is no limit to the number of Special Promises you can take. Each Special Promise Card requires you to be the only person to meet its requirement.
Specific Changes for Each Victory Condition
Economic
Setup: Remove Special Promise #14 from the game.
Playing the Game — Phase 8: Mayor's Next Visit: Each Cultural Building and each Residential Zone (regardless of occupants) generates L² Revenue, where L is the level/size of the tile, in terms of number of spaces it occupies. Example: The Metro Station occupies 4 spaces, and thus produces 4 × 4 = $16 of Revenue. A Level-5 Residential Zone produces 5 × 5 = $25 of Revenue. Keep a running total of each player's Revenue from round to round.
Important note: Revenue is neither money you can spend, nor does it count as income; it is only used as a metric of victory.
Final Scoring: Promise cards you fulfilled increase your Revenue (rather than your Votes) by the positive number depicted. Similarly, unfulfilled Promise cards decrease your Revenue by the negative number depicted. Likewise, Special Promise cards you fulfilled increase your Revenue $0. Unfulfilled Special Promise cards decrease your Revenue (rather than your Votes) by the negative number depicted; i.e. −$5.
The player with the highest sum of cash and running total of Revenue wins.
- Your pollution does not subtract from this; however, if your pollution reaches 100%, you still immediately lose the game.
- In the event of a tie, the tied player with the least pollution wins.
- If still tied, the tied player with the most Votes wins.
Citizens
Setup:
- After placing the usual 3 Citizens in City Hall, place the other 19 Citizens on your Career Center. There is no common reserve.
- Remove Promise #11 from the game.
Playing the Game — Phase 7: Influence City Council: Row 4 — Department of Tourism: You immediately get Citizens (of your color) from your Career Center. You must host the Citizens in City Hall.
- Column 1: 1 Citizen.
- Column 2: 1 Citizen.
- Column 3: 2 Citizens.
- Column 4: 2 Citizens.
Phase 8: Mayor's Next Visit: Keep a running total of each player's Citizens in play (excluding City Hall) from round to round.
Final Scoring: The player with the highest running total of Citizens in play wins.
- Your pollution does not subtract from this; however, if your pollution reaches 100%, you still immediately lose the game.
- In the event of a tie, the tied player with the least pollution wins.
- If still tied, the tied player with the most Votes wins.
- If still tied, the tied player with the most cash wins.
Cultural
Setup:
- Remove Special Promise #16 from the game.
- Each player gets a set of the 6 different Cultural Buildings.
Final Scoring: The player with the most spaces of Cultural Buildings in their borough wins.
- Your pollution does not subtract from this; however, if your pollution reaches 100%, you still immediately lose the game.
- In the event of a tie, the tied player with the least pollution wins.
- If still tied, the tied player with the most Votes wins.
- If still tied, the tied player with the most cash wins.
Solo Variant
Setup
- You start with $4.
- Choose a Difficulty Level from the following list, which goes easiest to toughest: Citizen, Mayor, Governor, Senator, President.
- Use either the easy or expert side of your Borough board.
- Place 1 Cultural Building of each size, as well as 1 Refinery, 1 Harbor, 1 Fire Station, and 1 Police Station near your Borough board.
Playing the Game
Phase 1: Select Special Actions
- If this is an odd-numbered round, shuffle the 8 Action cards. Draw one card and place the mayor on it. Clockwise from that card, lay out the next three cards. Keep the 4 remaining action cards face down: You will use them next round.
- If this is an even-numbered round, discard the 4 face-up Action cards, and reveal the 4 remaining Action cards. Place the mayor on the first one.
- The card with the Mayor on it is the card chosen by an imaginary first player (you are eternally the second player). The two cards beside the Mayor are free, but to skip to the card opposite the Mayor, you must pay $2.
- Instead of visiting your Borough, the mayor visits the VIPs represented by the special action cards.
Phase 3: Move Citizens
There are no Tourists, because there are no other Boroughs to visit, and none from which Tourists might visit yours.
Phase 6: Measure Pollution
The amount your pollution increases this round and the Difficulty Level you chose determines how much pollution it takes to kill a Citizen:
- Citizen — No Citizens die, regardless of how much your pollution increased.
- Mayor — 1 Citizen dies if your pollution increased by more than 5.
- Governor — 1 Citizen dies if your pollution increased by more than 2.
- Senator — 1 Citizen dies if your pollution increased at all.
- President — 1 Citizen dies per point by which your pollution increased this round!
Note: You still lose the game immediately if your pollution reaches 100%.
Phase 8: Mayor's Next Visit
Remember: The Mayor is visiting the VIPs represented by the special action cards. He doesn't have time to visit the Boroughs.
End of Game and Final Scoring
The higher your score, the better your rating (see the Rating Table below).
Rating Table
| Score | Title |
|---|---|
| 50–59 | Homestead |
| 60–69 | Hamlet |
| 70–79 | Village |
| 80–89 | Neighborhood |
| 90–99 | Town |
| 100–109 | Suburb |
| 110–119 | City |
| 120–134 | Metropolis |
| 135–149 | Capital |
| 150+ | Megalopolis |