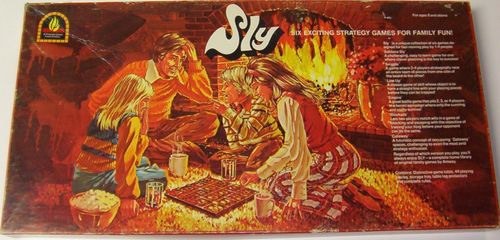
Sly
Sly Rulebook
Table of Contents
Solitaire Sly
—for one player. Object: Remove all but one of the pieces from the board.
The Set Up: Six squares and three triangles are used of each of the four colors—making a total of thirty-six pieces. These are placed on the board as shown in Illustration 1.
[Illustration 1: the 36 pieces placed in the centre of the 8 × 8 grid of the board, with rows numbered 1–8 and columns lettered A–H. Pieces occupy rows 2–7 in the middle columns, with the circled centre spaces empty.]
The Play: The player chooses any piece and jumps it over one or more pieces in a straight line—to the right, left, up, or down—and lands in the first empty space. The piece can pass over any other piece, except one of the same color as the piece jumping. All pieces passed over are removed from the board.
(As an example, in Illustration 1, the lined square piece in space 3D could jump up, landing in space 1D and removing one piece. It could jump to the right to space 3H, removing three pieces. And it could jump down to space 8D, removing four pieces. But it could not jump to the left because it would pass over a lined piece.)
Note: In the play, there is no difference between a square piece and a triangle piece.
Winning: The player wins by removing all the pieces except one. (As an example, in Illustration 2, the player could win by jumping the open square piece "A" to the left to space "B"; and then jumping the lined piece "C" up to space "D," left to space "E," and down to space "F.")
[Illustration 2: a partly cleared board with pieces lettered A to F, showing the winning sequence.]
If the player ends with two remaining pieces he has played a good game; with three remaining pieces he has played a fair game; with four or more, he has played a bad game.
Solution: By moving the pieces as shown, the game can be won in twenty-three moves. Can you do better?
- 5D-1D 7) 2B-2D 13) 1D-3D 19) 2G-2E
- 5E-1E 8) 2G-2E 14) 1E-3E 20) 2E-4E
- 7D-5D 9) 6B-2B 15) 2B-2D 21) 4E-6E
- 7E-5E 10) 6G-2G 16) 2D-4D 22) 6E-8E
- 7B-7D 11) 6C-2C 17) 4D-6D 23) 8D-8F
- 7G-7E 12) 6F-2F 18) 6D-8D
Transcription note: in the scan, the first character of move 14 is faint and was read as "1E"; the move is a straight-line jump over 2E.
Tips on Good Play: Try to keep the pieces together as much as possible. If one or more pieces become separated from the others by two or more spaces, it can be very difficult to get them together again. Watch for a lot of pieces of the same color near each other. If some of them are not removed they will cause trouble before the end of the game.
Variation: Instead of placing the pieces as shown in Illustration 1, mix them together (in a box or a bag) and then place them at random to fill the four fields in the middle of the board.
Sniggle
—for two, three, or four players. Object: Race your nine pieces across the board before any opponent can do the same with his pieces.
The Set Up: Six squares and three triangles of the same color are used for each player. These are placed in one field as shown in Illustration 3—which shows the set-up for two players.
[Illustration 3: the set-up for two players in the left-hand field of the board, with pieces lettered A to E.]
The player to go first is chosen in any convenient manner. With three or four players, the turn to play rotates to the left.
The Play for Two: (Changes when three or four play will be given later.) Each player, in turn, moves one of his pieces to the right—always staying in the same "track" (row) in which it started. If the space to the right is vacant, the piece moves into it. If there are one or two pieces to the right of the moving piece, it jumps over them and lands in the first vacant space. (Note: In the basic play there is no difference between a square piece and a triangle piece.) If, after moving, the piece is in the same column (same distance along the track) as either one or three of the opponent's pieces, the piece moves again. And the piece continues moving as long as it ends each move in the same column as one or three of the opponent's pieces.
(As an example, in Illustration 3, the black player starts by moving piece "A" to space "B." The open player then moves piece "C" to space "D." The piece is now in a column with one black piece, and moves to space "E.")
(As another example, in Illustration 4, if it is the open player's turn to play, he could move piece "A" to space "B." It is now in a column with three black pieces and moves to space "C." It is now in a column with one black piece and goes to space "D." If he chooses to move piece "E" it goes to space "F" and then to space "G." Since there are only two black pieces in the same column, it does not move again.)
A player may not leave an empty field between two fields in which he has pieces. (As an example, in Illustration 4, the black player is not permitted to move piece "H" to space "I" and then to space "J." He could, however, move to space "I" and stay there. This is the one situation in which a player can stop after moving into a column with one or three of the opponent's pieces.)
[Illustration 4: a mid-game position with pieces lettered A to J, black and open, across several rows of the board.]
Winning: The first player to move all nine of his pieces into the field at the right side of the board, regardless of their arrangement, is the winner.
The Play for Three or Four: Each player starts with nine pieces in a field at the left of the board. When a piece ends a move in a column in which the total number of all opponents' pieces is odd (one, three, five, etc.), the piece moves again.
When four play, each can play for himself or teams can be formed, with partners sitting so that the turn to play alternates between teams. When played with teams, both players of a team must move their pieces into the fields at the right side of the board to win.
Variation for Experienced Players: In order to win a player must move his nine pieces into the field at the right side of the board with the triangles in the same position in which they started. For further variety, the starting- and finishing-position of the triangles can be changed as desired; but keep a record to avoid argument.
Tips on Good Play: Try to keep your pieces so that there are two in a column, particularly when two are playing. Be careful not to leave one piece in a track lag too far behind the other two. If it does, it cannot take advantage of moving ahead by jumping. When playing the variation, be sure that you don't get pieces into the final field so that it becomes impossible to duplicate the starting position.
Line Up
—for two players. Object: Be the first player to form four of his five pieces into a straight line.
The Set Up: Each player uses two squares, two triangles, and one cylinder of the same color. At the start of the game the board is empty. During the game only the sixteen center spaces (marked with circles) are used. The player to go first is chosen in any convenient manner.
The Play: The players, in turn, place their pieces in empty centers in the following sequence:
| First Player | Second Player |
|---|---|
| Place first square | place first triangle. |
| Place the cylinder | place first square. |
| Place first triangle | place the cylinder. |
| Place second square | place second triangle. |
| Move the cylinder (as explained below) | place second square. |
| Place second triangle | move the cylinder. |
After this, the players continue moving pieces in the same sequence—square, triangle, cylinder, square, triangle, cylinder, etc. (which is the order of their height, from lowest to tallest).
A cylinder moves to any neighboring center—including diagonally—that is empty. A square or triangle moves to an empty neighboring center—horizontally or vertically, but not diagonally. Illustration 5 shows the allowable moves of the pieces.
[Illustration 5: a grid showing arrows from a central cylinder to all eight neighbouring centres; a triangle and a square each show arrows only horizontally and vertically to neighbouring centres.]
Winning: A player wins by forming a straight line—including diagonally—of four pieces. If, on a player's turn, he cannot move the required type of piece because all neighboring centers are occupied, he loses the game.
[Illustration 6: a mid-game position on the 4 × 4 grid of centres.]
(As an example, in Illustration 6, if it is the open player's turn to move a triangle, he wins by moving up as shown. If, instead, it is the open player's turn to move his cylinder, he must move it to the only empty neighboring center. The black player then moves his square and wins. But if it is the black player's turn to move his cylinder, he loses because all of the neighboring centers are occupied.)
Tips on Good Play: Always consider the type of piece you will be moving on your next turn, and also the one your opponent will be moving. Be careful to avoid having a piece trapped so that it cannot move. Since a player has only one cylinder, it is particularly vulnerable to being trapped.
Blockade
—for two players. Object: Engineer the escape of your "king" while blocking your opponent's from escaping, using your six "guards."
The Set Up: Each player uses the cylinder (called the "king") and the six squares (called "guards") of one color. At the start of the game only the two kings are on the board, in the positions shown in Illustration 9.
[Illustration 9: the two kings on the board, with dashed lines marking the escape paths available to each king.]
The player to go first is chosen in any convenient manner.
The Play: The object of each player is to arrange a path for his king to escape off the opposite side of the board. Until ready to escape, the king does not move from its starting position. In escaping, the king moves in a straight line—horizontally or vertically—until it escapes or until it is stopped by a guard of either color. When stopped by a guard, the king turns in either direction and continues until stopped again, etc. (As an example, see the escape path for the open king in Illustration 9.)
Each player in turn places a guard in any vacant space on the board, with the following exceptions. The first guard each player places may not be placed in a center space (marked with a circle). No guard of either color can ever be placed in the field (of 9 spaces) occupied by a king.
(As an example of the start of the game, in Illustration 9, the open player places guard "A," stopping the black king from an immediate escape. The open player is not permitted to place his first guard in space B, since it is a center. The black player places guard "C," stopping the open king. The open player now places guard "D," threatening an escape path as shown.)
After all the guards have been placed, the players, in turn, move one of their guards one or more spaces—in a straight line horizontally or vertically—into a vacant space in that line. A guard may not move over another piece—king or guard—of either color. A guard may not move into a space in either king's field, but may pass over a king's field in moving.
Winning: When a player, at the beginning of his turn, sees an escape path he moves his king along this path and wins. The escape path can have any number of turns due to guards. It can pass over the enemy king's field, but must stay completely clear of the enemy king.
[Illustration 10: a late-game position with escape paths for the black king marked toward the spaces A and B.]
(As an example of the finish of the game, in Illustration 10, it is the open player's turn to play. The black player threatens two escape paths—to "A" and to "B." Movement of guard "C" to space "D" would stop both paths, but a guard is not permitted to move over any other piece. There is no move that the open player can make to save the game.)
Tips on Good Play: Careful attention to every possible escape path is essential. Try to keep the opponent on the defensive by having an escape path at the end of each of your turns, but make sure that it isn't one that he can use against you.
Empire
—for two, three, or four players. Object: Take control of the "empire," using a complete force of eleven playing pieces.
The Set Up: Each player uses the cylinder (called the "commander"), the four triangles (called "horsemen"), and the six squares (called "archers") of one color. These are placed on the board as shown in Illustration 7—which shows the set up for two players.
[Illustration 7: the set-up for two players on the 16 × 9 grid. Four centre spaces are marked T; the throne spaces are marked T with subscripts identifying the coronation centres.]
The player to go first is chosen in any convenient manner. With three or four players, the turn to play rotates to the left.
The Play for Two: (Changes when three or four play will be given later.) Each player, in turn, moves one of his pieces. All pieces have the same move—in a straight line horizontally or vertically to any vacant space in that line. The moved piece can pass over any number of other pieces, either friendly or enemy. (As an example, in Illustration 7, the black horseman "A" could move to any space marked "B.")
A piece captures an enemy piece by landing in the space occupied by that piece. A captured piece is out of the game. A horseman can only capture by moving exactly three spaces (as an aid in remembering, a horseman has three corners). An archer can only capture by moving exactly four spaces (an archer has four corners). A commander can only capture by moving exactly two or five spaces. (As an example, in Illustration 8, the open archer "A" could capture the black horseman "B," but "B" could not capture "A." The black commander "C" could capture the open horseman "D" or the open archer "E.")
[Illustration 8: a mid-game position on the grid, with pieces lettered A to H.]
Winning: The four center spaces marked with a "T" in Illustration 7 are "throne" centers. A player wins if he has pieces in three throne centers and then moves a piece into the fourth—even if the piece could be immediately captured by the enemy. (As an example, in Illustration 8, if it is the open player's turn he could move archer "F" to capture the black archer "G." He has occupied the fourth throne center and wins—even though the black player has three pieces that could capture the moved piece.)
The throne farthest from a player's starting corner is his "coronation" center. (In Illustration 7, Ty is the open player's coronation center and Tr is the black player's coronation center.) If a player can move his commander into his coronation center without having it immediately captured, he wins. (As an example, in Illustration 8, if it is the black player's turn he could move his commander "C" to capture the open archer "E," occupying his coronation center. But the open player could immediately capture the black player's commander with his horseman "H" and the black player does not win.)
If a player captures the enemy commander, he wins.
The Play for Three or Four: Each player uses the eleven pieces of one color. These are set up in three or four corners of the board in the same arrangement as in Illustration 7. A player wins by occupying any three of the four throne centers. He also wins by moving his commander into his coronation center without having it immediately captured by any one of the opponents.
Capturing an enemy commander does not end the game, unless only two players remain at the time. Instead, any remaining pieces of the captured commander's army now join the capturer's army and can be used in the same manner as pieces of his own color.
When four play, each can play for himself (as explained above) or teams can be formed with partners sitting so that the turn to play alternates between teams. A team wins by occupying all four throne centers, by either partner occupying his own coronation center with his commander and not having it immediately captured by one of his opponents, or by capturing either enemy commander.
Tips on Good Play: It is usually wise to occupy throne spaces as quickly as you safely can. Then the enemy has the task of driving you out. Normally it is preferable to lose an archer rather than a horseman. There are less horsemen. Also, with their capturing move of three spaces, when they are occupying a throne center they attack two other throne centers. Always keep a careful eye on enemy commanders to see that they can't safely sneak into their coronation space.
Gateway
—a futuristic game for two, three, or four players. Object: Starting with three pieces, be the first player to enter eight additional pieces through the "gateways."
The Set Up: One cylinder, one triangle, and one square of each color are placed on the board as shown in Illustration 11—which shows the set up for 4 players.
[Illustration 11: the four-player set-up on the board, with pieces of four colors (black, open, dotted, and vertically lined); the letters B and D mark the spaces along the board's edges.]
When 3 play the three pieces of any one of the colors are omitted. When 2 play only the pieces of two colors are used—either dotted and open, or vertically lined and black.
Each player takes the remaining three triangles and five squares of his color and keeps them on the table before him.
The player to go first is chosen in any convenient manner. With 3 or 4 players, the turn to play rotates to the left.
The Play: Each player in turn moves one of his pieces. All pieces have the same move—in a straight line horizontally or vertically to any vacant space in that line, except a center space (marked with a circle). The moving piece can pass over any number of other pieces, either friendly or enemy. (As an example, in Illustration 11, the vertically lined triangle A could move to any space marked "B." The open cylinder "C" could move to any space marked "D.")
When a player moves a piece so that it is in line with two enemy pieces of the same color—one in a vertical line and the other in a horizontal line—and each piece involved is a different shape (one cylinder, one triangle, and one square), the player is entitled to enter a new piece. This new piece is placed on the center space (called the "gateway") of the field in which the piece ended its move, provided the gateway is not occupied. If it is already occupied, a new piece cannot be entered.
(To clarify this, let's take some examples:
(1) In Illustration 12, if the vertically lined player moves his triangle "A" down as shown, he ends his move in line with dotted square "B" and dotted cylinder "C." He enters a new piece in gateway "D."
(2) If the vertically lined player moves triangle "A" left as shown, he ends his move in line with an enemy cylinder "C" and an enemy square "E." However, they are of different colors so he does not enter a new piece.
(3) If the vertically lined player moves his triangle "A" right as shown, he ends his move in line with open square "E" and open cylinder "F." However, the gateway in the field is already occupied so he does not enter a new piece.
(4) If the vertically lined player moves his square "G" as shown, he ends his move in line with dotted square "B" and dotted cylinder "C." However, there are two squares and no triangle so he does not enter a new piece.
(5) If the open player moves his square "H" as shown, he ends his move in line with vertically lined triangle "A" and vertically lined cylinder "I." He enters a new piece in the gateway he just left.)
When a player enters a new piece he is free to enter either a triangle or a square, as long as both are available.
[Illustration 12: a mid-game position on the board, with pieces lettered A to K.]
When on a player's turn he has a piece on a gateway and there are two or more enemy pieces in that field, he must move that piece off the gateway—but not necessarily out of the field. (As an example, in Illustration 12, if it is the dotted player's turn he must move either the dotted square "J" or the dotted triangle "K." On his next move, he will have to move the other one.)
Winning: The first player to enter all of his pieces is the winner.
Special Rules for 4 Playing as Partners: Partners sit so that the turn to play alternates between teams. A player cannot enter a piece by being in line with two of his partner's pieces. In order for a team to win both players must enter all of their pieces. The one finishing first continues moving, to try and help his partner to finish.
Tips on Good Play: As the board fills up, it becomes harder and harder to find all the possible opportunities to enter new pieces. Since there is only one cylinder for each player, studying the positions of the cylinders helps to clarify the situation. By forcing an opponent to move a piece from a gateway, he can be caused to lose valuable time.