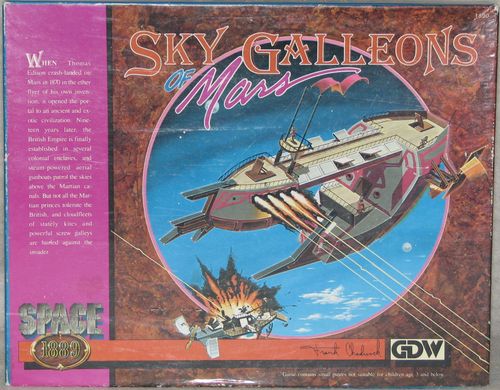
Sky Galleons of Mars
Sky Galleons of Mars Rulebook
Table of Contents
Table of Contents
Part I: Basic Rules
Game Components
Your copy of Sky Galleons of Mars includes this rules booklet, a background and history booklet entitled Space: 1889, a booklet of ship record forms, two maps showing parts of the surface of Mars, two game reference folders, five sprues of plastic playing pieces, and four dice.
The rules are divided into two main sections: basic and advanced. After the basic rules have been read you can play the first scenario. A variety of advanced rules can then be added to the game to allow play for a greater variety of situations. Each additional section of rules is accompanied by a scenario that illustrates those rules.
The Ship Record Form booklet has sufficient record forms for many gaming sessions, but it is a good idea to make additional photocopies of these forms for subsequent play. Although additional Ship Record Form booklets are for sale from GDW, you will find it more convenient and economical to copy those included in the game, and permission is hereby given to do so for your personal use.
The plastic playing pieces should be carefully cut away from their sprues with a sharp knife. Several of the pieces require some assembly. The accompanying illustration identifies the playing pieces and shows how they are to be assembled for use by players.
Sequence of Play
Sky Galleons of Mars is played in turns, each of which represents about one minute of real time. There are three phases in a turn: the Initiative Phase, the First Player Movement Phase, and the Second Player Movement Phase. In the Initiative Phase both players form or disband boarding parties and make any other changes in crew assignments they wish. In addition, each player rolls a die and the high die roll has the initiative and decides which player will be the first player (move first) and which will be the second player for that turn.
In each player movement phase, one player (the moving player) moves all of his vessels according to the rules of movement. After all of his movement is finished, both players may fire at the enemy. Each weapon may only fire once during the game turn, however, so weapons which fire at the end of the First Player Movement Phase may not fire again at the end of the Second Player Movement Phase. After both players have fired their weapons, the moving player fights any battles involving boarding parties of his on board enemy ships. After all such battles are fought, the moving player makes all damage repair rolls that he is entitled to.
After both players have completed their movement phases the turn is over, and a new turn begins with its Initiative Phase.
Facing
Each ship is always oriented in such a manner that its bow is facing one of the six hexsides in its hex. Whenever a ship moves its first hex entered must be the one directly in front of it. Ships may only change facing during movement, and the procedure for doing so is covered in the movement rule.
Facing also affects the ability of ships to fire. There are four firing aspects of a ship; these are determined by its facing. Most weapons may only fire at targets in certain firing aspects, as explained in the rules on gunfire. The four firing aspects (bow, starboard broadside, port broadside and stern) are illustrated in a diagram in the rulebook.
Movement
Each ship has a movement allowance, which is the number of movement points it may expend in a single turn. The enclosed picture at the top of each ship record sheet includes a large circle with a number in it to the right of the picture. This number is the ship's movement allowance. Each movement point spent allows a vessel to move one hex in the direction it is facing and change its facing by one hexside. Vessels which move one hex but do not change their facing still pay one movement point. At the cost of one movement point steam vessels may change their facing in a hex without moving. This maneuver is called a power turn.
If more than one ship ends a turn in the same hex, their relative position may be important, particularly for determining which guns bear in which direction. The player who moved last determines where in the hex his ship ends its move, and thus its relative position to the other ship or ships in the hex. He does so by announcing which firing aspect of his the other enemy ship is in and which firing aspect of it his ship is in. For example, he might say, "The enemy ship is in my broadside aspect; I am in his rear aspect."
The relative position and aspect chosen must be possible, given the facing of the ships. For example, if two ships in a hex are facing the same direction it is possible for them to be in each other's broadside aspect, or for either one to be behind the other. It is not possible for them to be in each other's bow aspect, however, as that would require them to face each other.
Collisions
Whenever a ship enters a hex already occupied by another ship there is a chance of a collision. Roll a die; there is a collision on a roll of 1 or 2. Add 1 to the die roll if the moving ship entered the hex by way of the bow or stern hexside of the nonmoving ship. Subtract 2 from the die roll if the moving ship attempts to turn while in the same hex as the nonmoving ship. If there is a collision, the moving ship immediately stops and may not move further that turn.
The enclosed picture at the top of each ship record sheet includes a large square in the lower left-hand corner of the enclosure. The number in the square is the ship's hull size. Each player involved in a collision rolls a die. If the result is equal to or less than the hull size of the other player's ship, the player who rolled the die suffers a hull hit on his own ship. If the other ship has a hull size greater than 6, then one hit is automatically taken and a second is suffered if the die roll is less than or equal to the amount by which the hull size exceeds 6. In other words, the bigger the ship you collide with, the more likely your own ship is to take damage.
Finally, the smaller ship in the collision has a chance of suffering a loss of trim. Roll a die. If the die roll is less than or equal to half of the difference in hull size (round fractions down), the smaller ship suffers a loss of trim. (See the section "Damage" for a description of the effects of loss of trim.)
If two ships begin a phase together in the same hex, the moving player's ship may move out of the hex immediately, but must roll for a collision again. If it collides, it remains in the hex for the rest of its move and checks for collision damage again.
Altitude
There are six altitudes: Very High (VH), High (H), Medium (M), Low (L), Very Low (VL), and Ground (G). In general, the surface of the planet is at ground level, but some mountains rise to higher altitudes. Mark the altitude of a ship by placing the correct altitude marker on its stand.
The maximum altitude of a vessel is noted on its ship status sheet. There is a block of several rows of boxes labelled "Hull Hits." The boxes on the left of the rows include an abbreviation for the various altitude levels. The highest level shown is the maximum altitude of the ship.
All ships may go down 1 altitude level per turn at no cost. Each altitude the ship goes up costs 2 movement points. Each level the ship goes down after the first one costs 1 movement point. Thus a ship with a movement allowance of 5 could move 5 hexes or move 3 hexes and climb 1 level, or move 1 hex and climb 2 levels. A vessel whose speed is reduced to 1 hex may still climb 1 level instead of moving. Each level of altitude change allows a 1 hexside change in facing. This does not apply to the 1 free altitude drop per turn.
If a vessel is in the same hex as another vessel but is at a different altitude, there is no possibility of a collision. If it changes altitude and thus both ships are at the same altitude, there is the normal chance of a collision.
If a vessel involuntarily drops to the same altitude as the surface of the planet, it crashes and is destroyed. If it voluntarily drops to the surface, it has landed. However, a vessel may only drop 1 altitude level and may only move 1 hex the turn it lands. If it moves more than 1 hex or drops more than 1 level, it crash lands. The crew is safe, but the vessel is crippled and is removed from play. If a vessel enters a hex which contains land at an equal or higher altitude as the vessel (such as a mountain top or cliff wall), and the vessel is moving at a speed of 1, it lands. If the vessel is moving faster than 1, it crashes.
Combat
Fire Combat
Firing may take place at the end of each movement phase. Ships of both players may fire at the end of each movement phase, but each weapon may fire only once per turn.
Each weapon has a limited arc of fire, as shown on the ship status sheet. Each gun mount is shown on the enclosed picture at the top of the sheet. The picture is a stylized deck plan of the ship showing placement of its guns. Each gun is indicated by a box. The type of gun is noted in the box, and its allowed field of fire is shown by the lines coming out of the box. A gun with lines pointing to the bow, stern, and side, for example, can fire into the bow, stern and broadside (on that side of the ship) firing aspects. The small circles next to the gun box represent the gun crew.
The number of shots that a weapon may take is called its rate of fire (ROF). Weapons with a rate of fire greater than 1 may take more than one shot in a turn, but all must be resolved at the same time and all must be directed at a single enemy vessel. Weapons with a rate of fire expressed as a parenthetical number take that many turns between shots to reload. Thus a gun with a rate of fire of (2) could fire on turn 1 of a game and then could not fire again until turn 4, having spent turns 2 and 3 reloading.
The chance of a shot hitting is determined by the range at which the gun is fired. The weapons chart lists the short range and long range of a gun in hexes. The first (smaller) number listed under range for the gun is its close range. Weapons with a close range of 0 conduct close range fire only when firing at targets in the same hex. Each shot from a gun hits on a roll of 3, 4, 5, or 6 at close range and on a roll of 5 or 6 at long range.
If there is more than one ship in the target hex, roll to hit normally. However, if the shot misses, roll a second time. If the second roll is a hit, then it hits the other ship in the hex. If there are several other ships in the hex, the second roll is made only once and the hit, if any, is assigned to one of the ships by means of a random die roll.
Altitude differences also affect the chance of hitting the target. No ship may fire at an enemy ship if the difference in altitude (in levels) is greater than the range (in hexes). For example, a ship cannot fire at a ship 2 hexes away but 3 hexes lower.
If fire is possible at a higher target, add 1 to the range for every level higher the target is compared to the firing vessel. Thus, a target 2 hexes away and 2 levels higher would be fired at as if it were at a range of 4. Firing at targets at lower elevations does not add to the range.
Finally, all fire at targets at different altitudes is conducted with a die roll modification of -1 on the hit die roll. Thus, at close range shots would only hit on rolls of 4, 5, or 6 and at long range they would hit only on rolls of 6.
Combat Charts
Weapon Characteristics: Martian Cannon
| Weapon | Pen | DV | ROF | Range |
|---|---|---|---|---|
| Sweeper | P | - | 2 | 0/1 |
| Light | 0 | 1 | 1 | 1/2 |
| Rod Gun | 3 | 1 | (1) | 3/6 |
| Heavy | 1 | 2 | 1 | 2/4 |
| Rogue | 2 | 3 | (1) | 3/6 |
| Lob Gun |
Weapon: The common weapon name. Pen: Penetration of the weapon. DV: Damage value of the weapon. ROF: Rate of fire of the weapon. Range: Maximum range (in hexes) the weapon may fire.
Weapon Characteristics: Royal Navy Guns
| Weapon | Pen | DV | ROF | Range |
|---|---|---|---|---|
| Maxim | - | P | 6 | 1/2 |
| Gardner | - | P | 2/3 | 1/2 |
| Nordenfelt | - | P | 5 | 1/2 |
| 1-pdr HRC | 0 | 1 | 3 | 2/4 |
| 3-pdr HRC | 1 | 1 | 3 | 2/4 |
| 6-pdr HRC |
HRC: Hotchkiss Rotating Cannon. Weapon: The common weapon name. Pen: Penetration of the weapon. DV: Damage value of the weapon. ROF: Rate of fire of the weapon. Range: Maximum range (in hexes) the weapon may fire.
Infernal Devices
| Device | Pen | DV | To Hit |
|---|---|---|---|
| Smutts Torpedo | 1 | 12 | As collision |
| Tether Mine (B) | 0 | 6 | 6 (if released) |
| Tether Mine (M) | 0 | 4 | 6 (if released) |
| Drogue Torpedo | 0 | 10 | 6 |
Device: The common device name. Pen: Penetration of the device. DV: Damage value of the device. To Hit: The die roll on which the device hits the target. B: British. M: Martian.
Hit Location
| Die Roll | Location |
|---|---|
| 1 | Hull |
| 2 | Hull |
| 3 | Crew |
| 4 | Crew |
| 5 | Gun |
| 6 | Critical |
Die Roll: The roll of one six-sided die. Location: The location the hit occurred (see Hit Location Explanation).
Critical Hit Table
| Die Roll | Result |
|---|---|
| 2 | Magazine |
| 3 | Bridge |
| 4 | Fire/Boiler |
| 5 | Trim Damage |
| 6 | Rudder Jammed |
| 7 | Fire |
| 8 | Lifters Jammed |
| 9 | Screw/Mast |
| 10 | Magazine |
| 11 | Bridge |
| 12 | Fire/Boiler |
Die Roll: The sum of the die roll results of two six-sided dice. Result: The result of the Critical Hit (see Critical Hit Explanation).
To Hit
| Range | Die Roll |
|---|---|
| Close | 3, 4, 5, 6 |
| Long | 5, 6 |
To Hit Modifiers:
- Different Altitude: -1
- Green Crew: -1
- Burning: -1
- Crack Crew: +1
- Shrapnel or Grape: +1
Range: The type of range at which the attempt to hit is being made. Die Roll: The die roll of one six-sided die. To Hit Modifiers: Modifiers to the die roll.
Damage
When a gunshot hits an enemy vessel, roll a die and consult the Hit Location table to determine what type of damage was inflicted on the enemy. Each gun on a ship has a damage value, which is the amount of damage it causes when it strikes an enemy vessel. The damage value of the round is the number of hits inflicted in that location. For example, if a gun with a damage value of 3 rolled a hull hit location, 3 hull hits would be recorded on the ship's ship status sheet.
If firing at a vessel at a higher altitude, all crew hits become hull hits instead.
It is possible to inflict the following types of damage to another vessel:
Gun: A Gun hit destroys one gun. If the firing gun has a damage value greater than one, all additional hits are crew hits, with the crew of the destroyed gun suffering casualties first. The destroyed gun must be mounted in such a way that it faces the firing aspect from which it received the fire. If several such guns are present, roll a die to randomly determine which gun is hit. If no guns are present in that firing aspect, reroll the hit location and continue to reroll until a nongun hit is achieved.
Hull: A Hull hit causes hits to be recorded in the hull boxes equal to the damage value of the gun. Each ship has a series of hull boxes arranged in rows. Each row has hull boxes equal to the ship's hull size and each row corresponds to one of the altitudes the ship can fly at. For example, a ship with a hull size of 3 and a maximum altitude of High would have 4 rows (one each for Very Low, Low, Medium, and High altitude) each with 3 boxes. Always check hull hits off from the row of the highest remaining altitude. When that row of boxes is completely filled in, the ship's maximum altitude is reduced to the next lowest level. If the ship is at its maximum altitude when this happens, it automatically drops one altitude level in its next movement phase. This drop in altitude does not cost the ship movement points. When all of the hull boxes on a vessel are checked off, the ship crashes.
Crew: Each Crew hit causes crew casualties equal to half of the damage value of the firing gun which achieved the hit, rounding all fractions up. Crew losses are selected by the player who suffered the casualties and may be from any part or parts of the ship desired. However, the firing player also rolls an additional die, and if the die roll is a 6 then one of the casualties must be an officer or petty officer (owning player's choice). This die roll is made only once in the phase when the ship suffers one or more crew casualties; it is not made separately for each casualty.
Gun crews are shown on the ship status sheet as small circles next to their respective guns. All other crew are shown below the deck diagram as boxes in one of four categories: Bridge, Deck, Maneuver, and Marines.
Critical: If a Critical hit is rolled, add together the numbers rolled on two dice and consult the Critical Hit table to determine the results. It is possible to inflict the following types of Critical hits:
Magazine: Each large gun is assumed to have its own magazine or shell locker, so detonation of a magazine will not necessarily destroy a ship. Detonating a magazine will do considerable violently explosive damage, however. The ship automatically loses one gun (determined randomly) with a damage value of 1 or greater. The gun is destroyed, and its crew is dead. The ship also takes hull hits equal to the damage value of the gun that was destroyed (not the gun that fired) and rolls for one additional Critical hit. The additional Critical hit is resolved as if caused by a gun with a damage value equal to that of the destroyed gun.
If there is no gun with a damage value greater than 1 mounted on the ship, treat this critical hit as a Fire result.
Bridge: Bridge crewmen are killed in an amount equal to half the damage value of the round that hit (round fractions up). In addition to this effect, the ship may not voluntarily change altitude or course in the next turn.
Fire: A fire is started on board the ship. The initial fire level is equal to the damage value of the firing gun. Once a fire has started it will eventually spread and consume the ship unless put out by the crew. At the beginning of each turn all fires presently burning are increased by 1 level except on kites. Fires burning on kites are increased by 2 levels. Any ship on fire receives an adverse die roll modification of -1 on all rolls to hit when firing weapons (including small arms fire) due to smoke interfering with the aim of the gunners. At the start of the friendly movement phase in which the level of the fire is greater than the vessel's hull size, the vessel takes one magazine critical hit. If the vessel has no magazines left it instead receives 1 die roll worth of hull hits.
Fires may be fought at the end of the player's friendly movement phase. Roll 1 die for each deckhand and each extra petty officer. For each die roll of 6 the fire is reduced one level. On steel ships the fire is reduced one level for every 5 or 6 rolled. In the basic game treat all British ships as being steel and all Martian ships as being wood.
Fire/Boiler: For ships which are not powered by steam treat this as a Fire result. Steam ships treat this as a Boiler hit. Roll a die. If the result is less than the damage value of the firing gun, the boiler blows up. If the boiler blows, the entire engine crew is killed, the ship's speed is permanently reduced to 0, and the ship suffers additional critical hits equal to the size of the boiler. All additional critical hits are resolved with a damage value of 1.
If the boiler does not blow, the ship's speed is reduced by the damage value of the firing gun. However, this speed reduction is not permanent, and the amount of the reduction is reduced by 1 each subsequent turn (as the engine gang patches the boiler, wraps rags around split steam lines, etc.).
Screw/Mast: The air screw (propeller) and its driving chains are hit on a screw galley or steam ship, or the masts and rigging are damaged on a kite. A steam ship or screw galley has its speed permanently reduced by 1. A kite permanently subtracts 1 from its movement die roll. If a vessel has its movement allowance reduced to zero due to screw or mast hits it may jury-rig a mast or temporary propeller. To jury-rig a mast or propeller, roll a 6 during the repairs part of the movement phase. A jury-rig allows the vessel to move with a movement factor of 1. A vessel may not have more than one jury-rig at a time.
Loss of Trim: The ship's trim controls are damaged and the ship suffers a sudden loss of trim. The owning player immediately attempts to recover trim by rolling greater than the damage value of the firing gun on 1D6. (If the loss of trim was caused by a collision, the player recovers by rolling greater than half the difference in hull sizes, rounding fractions down.) If the trimsman is dead, the captain makes the attempt, but with a die roll modifier of -1. If the captain is dead, any surviving officer or petty officer may make the attempt, but with a die roll modifier of -2. If all officers and petty officers are dead any crewman may make the attempt, but with a die roll modifier of -3. Ships with a hull size of 5 or larger have a +1 modification to the die roll. Ships with a hull size of 10 or larger have a +2 modification, etc.
A roll of 6 will always recover trim, regardless of the damage value of the firing gun or the die roll modifier in use.
If the ship recovers trim it remains at its current altitude. If the ship does not recover trim, it immediately drops 1 altitude level and the attempt to recover is repeated. This procedure is repeated until either the ship recovers trim or it crashes. In either case the ship may not move, fire, fight fires, or change any crew assignments for the next two movement phases. (The crew is still stunned.) If boarded the crew may defend itself.
Rudder Jammed: The ship may not change course until the rudder is freed. To free the rudder, roll 1D6 for a number greater than the damage value of the firing gun.
If a ship with a rudder already jammed suffers another jammed rudder result, add the damage value of the new result to that already suffered to determine the number needed to free the jam. For example, if a ship already has a rudder jammed by a damage value of 2 and suffers one with a damage value of 1, the player must now roll greater than a 3 to free the rudder. However, a roll of 6 will always free the rudder, regardless of the damage value of the round. Attempts to free the rudder are made at the end of the movement phase, at the same time as all other repair attempts.
Lifters Jammed: The ship's large lifting panels are temporarily jammed in place; the ship may not change altitude until they are freed. Freeing jammed lifters is done the same as freeing a jammed rudder.
Armor and Penetration
Each gun also has a penetration value, which is important only against heavily protected targets, such as armored gunboats and stone fortresses. The listed value is the gun's penetration at all ranges. Each ship status sheet lists the armor value of the ship. The number in the hexagon in the upper left-hand corner of the sheet is the ship's armor rating. If the armor value of a target exceeds the penetration of the gun, halve the gun's damage value. If this results in fractional hits, roll a die to determine if the hit takes effect, with a roll of 1-3 having no effect and a roll of 4-6 causing a hit. For example, a gun with a normal damage value of 3 which hits armor thicker than its penetration, would have a damage value of 1 1/2. If it caused a result that called for one hit per damage value, it would cause 1 hit automatically and a second hit on a die roll of 4-6.
If the armor value of a target is more than twice the penetration of the firing gun, the gun has no effect. For example, a gun with a damage value of 3 would have a damage value of 1 1/2 against armor of 6, but would have no effect against armor of 7. Guns with a penetration of 0 do full damage against unprotected targets, half damage against targets with an armor value of 1, and have no effect on targets with an armor value of 2 or more.
Not all parts of a ship are protected by armor. Armor protects the hull, magazines, bridge, trim controls, and boiler. In addition, some ships have some or all of their guns mounted under armor to protect them. Armored guns are represented on the ship status sheet by a large box drawn around the smaller gun box and the circles of the gun crew. Guns covered by armor receive the benefit of the armor. If there is a hexagon connected to the gun mount, the number in the hexagon is the armor value of the mount. In any other case, the gun mount has an armor value identical to the rest of the vessel.
Ship's Crew
The ship is manned by officers, petty officers, and ratings (enlisted men) who carry out many functions.
A. Officers
Each ship has a limited number of senior officers who perform key leadership functions. A boarding party must include at least one officer. If all officers in a boarding party are killed, it will retreat to its own vessel. If all officers on a vessel are killed, it will attempt to withdraw from the battle and escape. If it is immobilized or boarded it will surrender.
Officers may take the place of a key petty officer (helmsman or master trimsman) if no key petty officers remain alive to do so. An officer functioning as a helmsman or master trimsman still counts as an officer on board.
The ship's captain is represented by the box labeled "C" in the bridge section. Additional officers are labeled "O" in that section.
B. Petty Officers
Each vessel will normally have at least two petty officers: the helmsman and the trimsman. (In British service the helmsman is referred to as the quartermaster and the trimsman is referred to as the bo'sun.) In addition on British ships there may be several extra petty officers among the deckhands. Casualties among key personnel (as a result of a bridge hit, for example) may only be replaced by extra petty officers or by the ship's officers.
The helmsman is represented by the box labeled "H" in the bridge crew and the trimsman by the box labeled "T." All extra petty officers are represented by the boxes labeled "p" in the deck crew.
If there is no one at the helm of a vessel, it may not change course or speed (except as a result of additional combat damage or a collision). If for any reason there is no one at the trim station of a vessel, it may not voluntarily change altitude. In addition, roll 1D6 at the end of each maneuver phase. On a roll of 6 the vessel takes a loss of trim Critical hit result (and probably crashes). On any other result, it remains in trim.
C. Gunners
Each gun mount has an assigned gun crew. The ship status sheet has one or more crew circles by each gun mount. As gun crew are killed, mark off crew boxes. Each casualty on a gun crew reduces its rate of fire by 1. For weapons with a rate of fire of 1 or less, each casualty adds 1 turn to the reload time.
D. Maneuvering Crew
The maneuvering crew are those men assigned to man the boilers, masts, or crankshaft of a vessel. On a steam vessel these engineers are referred to as the "black gang." On a kite these are "topmen" who control the ship's rigging, masts and sails. On a screw galley these are called "turncranks." Each ship status sheet has a set of boxes representing the maneuvering crew of the ship. As crew casualties are taken, boxes are marked off. When a row of boxes is completely marked off the speed of the ship is reduced by 1. When the entire maneuvering crew is eliminated, the vessel's speed is reduced to 0. Each crewman lost on a steam vessel reduces the speed by 1.
E. Signalman
Each ship has one signalman, represented by the box labeled "S" in the bridge section. In the basic game he has no effect except to give the ship one extra crewman to use as the player wishes.
F. Deckhands
Deckhands are all crewmen other than those noted above. In combat the deckhands are responsible for damage control, are drawn on to form boarding parties, and replace losses among crewmen in other positions. Most crew casualties can be taken against any crewman desired, so the owning player will usually want to mark off a deckhand (possibly representing another type of crewman being killed and one of the deckhands replacing him).
This concludes the Basic Rules. Play Scenario 1 now.
Part II: Advanced Rules
Ramming and Grappling
In the Initiative Phase, each player secretly records the number of his ships that will attempt to ram or grapple enemy vessels. These are then revealed, and whichever player has the most ships attempting to ram or grapple has the initiative. If neither player attempts to ram or grapple, or both players have the same number of ships making the attempt, each player rolls a die. The high die roll wins the initiative.
Ships may only attempt to ram or grapple during the First Player Movement Phase. Thus, if a player wishes to ram or grapple, and he has the initiative, he must choose to move first. Each ship attempting to ram or grapple is moved, and makes its ramming/grappling attempt separately.
Ships attempting to avoid a ram or grapple expend half of their movement points (round fractions up) to do so. Players need to remember this so that the ship moves only half of its movement in its own phase.
To attempt to ram an enemy vessel, a ship must either move through, or end its movement, in the same hex as the target vessel and be at the same altitude. The player making the attempt then rolls a die. On a roll of 4 or less the attempt is successful. If the enemy vessel was avoiding the attempt, subtract the number of movement points spent avoiding the attempt from the number needed to ram.
If the target of the ramming attempt is immobilized due to battle damage, the ramming attempt is automatically successful.
For example, a ship moves into a hex containing an enemy vessel. The enemy vessel has a speed of 5 and maneuvers to avoid the ramming attempt. Avoiding the attempt uses half of the vessel's movement allowance rounded up, or 3 movement points. Normally the ramming vessel would roll for a 4 to ram, but this is reduced to a 1 because of the target's avoidance maneuver.
If a ram is successful, and the ramming ship was equipped with a ram, the effects are as follows: First, the rammed ship immediately suffers hull damage equal to half the hull size of the ramming ship (roll for odd numbers of hits, with a 1-3 having no effect and 4-6 causing a hit). The ramming ship suffers no damage itself. Second, the rammed ship may suffer a loss of trim. Roll the die. If the result is less than the number of hull damage points sustained, the rammed ship suffers a loss of trim. (See "Damage" for a description of the effects of loss of trim.) If the rammed ship does not suffer a loss of trim then the two ships are grappled (see below), and the rammer may send a boarding party across.
If the ram was successful, but the ramming vessel was not equipped with a ram, it is resolved the same as a collision, with two exceptions. First, if the ramming ship is smaller than the rammed ship, there is no chance of it losing trim. Second, if the rammed ship does not suffer a loss of trim then the two ships are grappled (see below), and the rammer may send a boarding party across.
To attempt to grapple an enemy vessel a ship must end its move in the same hex as an enemy vessel and be at the same altitude. Half the deck hands (round fractions up) may make grappling attempts. Roll a die for each attempt; it succeeds on a roll of 5 or 6. If grappled, a ship may be boarded immediately. It remains grappled as long as an attacking boarding party is on board. Once there is no attacking boarding party on board, the crew of the other ship may cut the grapple. The crew of the grappling ship may cut the grapple at any time, unless a hostile boarding party has boarded it. Grapples are cut during the Initiative Phase of the turn.
No vessel may move or change altitude while grappled to another. Grappled ships ignore any loss of trim Critical hits, and if they take battle damage which would normally force them to drop a level, they instead stay at the same height. They will drop an altitude if the enemy ship also suffers damage requiring it to drop an altitude or at such time as the grapple is cut. If a grappled ship suffers damage that would reduce its maximum altitude to 2 less than its current altitude, the grapple breaks, the vessel drops 2 levels, and it suffers a loss of trim Critical hit.
Towing
Players may want to tow captured enemy vessels or friendly vessels which have been immobilized by excessive battle damage. To do so, the two vessels must be grappled to join them together so that a tow cable can be established between them. A captured vessel will probably already be grappled. However, if a friendly vessel wishes to grapple another friendly vessel, it does so automatically by ending its movement in the same hex. (There is the normal risk of a collision.) Once two vessels are grappled, it takes one complete friendly movement phase for the crews to rig a tow cable. In the next friendly movement phase the player may begin towing.
All vessels which are towing another vessel have their movement allowance halved (rounding all fractions up). Kites halve their die roll, and if towing upwind, halve it again. In addition, divide the towed vessel's hull size by the hull size of the towing vessel, round all fractions down, and subtract the result from the towing vessel's speed to reflect the effect of the extra weight on the towing vessel's speed. For example, a towing vessel with a size-2 hull towing a ship with a size-5 hull would have its movement factor reduced by 2 (5/2=2.5, rounded down to 2) after it had already been halved. The same size-2 hull towing a size-3 hull would only have its movement factor halved.
A vessel being towed must have its trim station manned by an officer or a petty officer while it is in the process of being towed. Martians can man the trim station of a captured British vessel and vice versa.
Boarding Actions
Each player may form or disband a boarding party in the Initiative Phase of the turn. The player notes on his ship status sheet the composition of the boarding party (officers, petty officers, and other crewmen) and marks off crew boxes to correspond to them. For example, if the boarding party consisted of one officer and five crewmen, the player would have to mark off one officer box and five crew boxes from various positions in the ship, the same as if they were casualties. Note that crew formed into a boarding party cannot undertake any other action; they may not, for example, fight fires, man guns, or fire small arms.
If a boarding party is later disbanded, the survivors are distributed to various crew positions by erasing the correct number of crew casualty marks. Boarding parties are formed and disbanded during the Initiative Phase of each turn.
When two ships are grappled, the moving player may attempt to board the other ship. (A ship which already has enemy boarders on it cannot, in its own turn, board another enemy ship.) A ship is boarded by sending an already-formed boarding party across onto the enemy ship.
There are three restrictions on the number of boarders that may be sent from one ship to another in one phase. First, only crew already formed into a boarding party may board. Second, the maximum number of men that can cross in a phase is five times the hull size of the smaller of the two ships. Thus if a size-2 hull ship and a size-5 hull ship were grappled, the most men that could cross in a phase would be 10. If the boarding party is crossing its own bow or stern or that of the enemy, halve the number of allowed boarders (rounding fractions up). Third, any crew casualties suffered during the phase due to small arms fire, shrapnel, or grapeshot, are taken from the boarding party and reduce the number of men that cross that phase by that number. So in the above example if 10 men were crossing and their ship took six crew hits from small arms fire, shrapnel, or grape, six boarders would be killed and only four would be able to cross.
In the next friendly movement phase a total of 10 men would again be able to cross.
Attacking boarding parties fight with a defending ship's boarding party (if one is formed), and all deck hands, marines, and extra petty officers. If at the end of any round of boarding combat the deck of the vessel has been secured (all defenders killed), the remaining crew surrenders. (Note that in the Initiative Phase of the following turn the defending player could bring his entire crew on deck to fight the boarders, if he wished.)
Combat between boarding parties is resolved by rolling one die for each combatant. On a roll of 6, one opponent is killed. Officers and marines kill an opponent on a roll of 5 or 6. Boarding party combat is conducted in the movement phase of the boarding player. It is conducted after fire combat and before repairs. Both the attacking boarding party and the defenders are entitled to roll for enemy casualties. No casualties are removed until all rolls are completed.
When casualties are suffered by a boarding party, each player determines which of his own crewmen are casualties. However, each player also rolls a die, and if the die roll result is equal to or less than the total number of casualties suffered by the player, then one officer or petty officer (his choice) is one of the casualties. If a 1 is rolled exactly the casualty must be an officer. In both cases, if no crewman of the required rank is available, the casualty is an ordinary seaman or marine.
If, at the end of combat, an attacking boarding party does not have an officer or petty officer alive, it must retreat to its own ship. If a defending ship does not have an officer or petty officer alive it surrenders. If a defending ship does not have an officer alive, it may not add any additional seamen to its defensive boarding party.
If a vessel is captured, the victorious player has several options. It can bring it in tow behind a friendly vessel which is grappled to it, it can crew the vessel and operate it, it can defend it with its boarders, or it can abandon it and cripple its trim vanes, causing it to crash. In all cases one member of the boarding party is permanently detailed to guard the prisoners. This must be a marine if one is available. (Even if all of the crew have been "killed," some will actually have only been stunned and captured, or will be lightly wounded. The Martians seem barbaric, but do not generally execute prisoners taken in battle. Certainly no Englishman would!)
Martian crews may man any Martian vessels which they capture, but may not man a British ship. Likewise, British crews may man any British ship they recapture (or any hostile European vessel), but may not man a Martian ship.
If the boarding party decides to abandon and destroy a ship, they must first withdraw their entire boarding party except for one officer. This is done in the friendly movement phase after the ship is captured. On the following friendly movement phase the officer returns to the friendly ship, and the captured vessel crashes. Roll a die. If the player rolls a 1, the officer slips and falls (or gets his coat caught) trying to get off the enemy ship and goes down with it to an almost certain death.
Small Arms Fire
Marines (see next rule) may conduct small arms fire. In addition, all guns with a penetration value of "P" affect only personnel, and are counted as small arms fire. Small arms fire only causes crew casualties; it never causes any structural damage to the target ship.
Small arms fire may never be directed against a target ship at higher altitude.
First, determine how many dice are rolled for hits. Guns (such as Sweepers and Nordenfelts) roll dice equal to their rate of fire. Thus a Nordenfelt will roll 5 dice for hits. Marines roll dice based upon the number of marines firing and the type of weapon they are equipped with. British marines are equipped with modern rifles while Martian marines are equipped with muskets unless otherwise noted. Some Martian marines in some of the advanced scenarios may be equipped with bows or with rifle-muskets. The number of dice thrown for hits is calculated as follows:
- Modern Rifles: 1 die per 2 marines firing
- Bows: 1 die per 3 marines firing
- Muskets: 1 die per 3 marines firing
- Rifle Muskets: 1 die per 4 marines firing
The number needed to cause a hit is based upon the range at which the weapon was fired. Each die causes a hit if a 5 or 6 is rolled at close range, or if a 6 is rolled at long range. Close and long ranges for the various weapons are as follows:
| Weapon | Close | Long |
|---|---|---|
| Modern Rifle | 1 | 2 |
| Bows | 0 | - |
| Muskets | 0 | 1 |
| Rifle Muskets | 1 | 2 |
| Sweeper | 0 | 1 |
| Nordenfelt | 1 | 2 |
After the dice are rolled and the number of hits determined, the player who suffered the casualties makes a number of saving throw attempts. Saving throws represent the chance of a soldier or sailor being behind cover or taking an insignificant minor wound. The target player rolls dice equal to the number of hits suffered. Any rolls of 1 or 2 are saved (do not count as casualties).
If using the advanced rules, the roll is modified as follows based upon the troops firing (not those fired upon):
- Bowmen: -1
- Green Troops: -1
- Marksmen: +1
Marines
Some vessels carry marines and their normal crew. Marines may not fill in for any crew function, but are capable of small arms fire and serve best in boarding parties. Vessels with many marines may also have a marine officer. A marine officer may lead a boarding party and will keep a ship from withdrawing or surrendering. He may not take over the helm or trim station.
Martian Lob Guns
Most large Martian ships have a lob gun. A lob gun is a high-trajectory, large-bore weapon, similar to bombards of the middle ages. Due to its considerable downward recoil, the lob gun is mounted on a turntable in the center of balance of a ship. It would destabilize the ship if mounted anywhere else. This is why each ship has only one. The turntable allows 360-degree fire. The lob gun fires very large, heavy boulders, usually banded with iron. Four exceptions to the normal rules cover lob guns: First, lob guns hit only on a die roll of 6 at all ranges. Second, any hit from a lob gun causes an automatic loss of trim Critical hit in addition to any other damage it does. This loss of trim is due to the impact of the shot, not due to damaging the trim controls. As a result, the target ship suffers the loss of trim even if its armor is more than twice the lob gun's penetration. Third, altitude has no effect on a lob gun. Fourth, lob guns may not fire on a target in the same hex.
Play Scenario 2 now.
Wind Direction
At the start of each scenario, determine the direction of the wind. Roll the die and consult the following wind diagram.
(Wind diagram: a hexagon whose six hexsides are numbered 1 at the top, 2 at the upper right, 3 at the lower right, 4 at the bottom, 5 at the lower left and 6 at the upper left.)
Wind direction affects the movement of Kites (sail-powered vessels) and can be important when using certain other advanced rules.
Kites
Kites (wind-powered vessels) do not have a fixed movement allowance and follow special movement rules. Kites may either move downwind ("run") or upwind ("beat"). If facing toward one of the three downwind hexsides, the movement allowance of the kite is 1 plus a die roll. The die roll is made at the start of its movement phase. If a 4 were rolled, for example, the kite would have a movement allowance of 5 for that movement phase. If facing toward one of the two upwind hexsides adjacent to the exact direction of the wind, the kite has a movement allowance of one die roll halved, rounding fractions up. Kites may never move directly into the wind.
As with other ships, kites may change their facing by 1 hexside each hex they move. Kites also have the ability to execute a tack, which consists of changing the ship facing by 2 hexsides to avoid heading directly into the wind. There is no movement point cost to tack, but a kite may not make any other turns that movement phase.
Kites may change altitude by one level per turn at no movement point cost, but may never voluntarily change by more than one level.
Play Scenario 3 now.
Crew Quality
Quite often the quality of a ship's crew is more important than how well designed or armed the ship is. To take this into account, crews are divided into three general levels: Green, Trained, and Crack. Trained crews are the majority of ship crews, and all game rules are written around their capabilities. Green and Crack crews differ, as noted below.
Green crews subtract 1 from their chance of hitting with gunfire (not small arms fire), from their chance of ramming or avoiding a ram, and from their chance of recovering from a loss of trim. In addition, the targets of small arms fire from green troops add 1 to their chance of making a successful saving throw.
Crack crews add 1 to their chances of hitting with gunfire (not small arms fire), their chances of ramming or avoiding a ram, and their chance of recovering from a loss of trim. In addition, a crack crew adds 1 to each die roll in boarding actions.
High Martians
High Martians, or Flying Martians, have a number of unique characteristics. If a High Martian ship is ever in the same hex and at the same altitude as another ship, it may immediately board it. In addition, High Martians may form flying parties during the Initiative Phase of each turn. A flying party is formed during the Initiative Phase in the same manner and with the same restrictions as a boarding party. A flying party marker is placed on the map in the same hex as the vessel and at the same altitude.
A flying party may move in any direction desired and has no particular facing. It has a movement allowance of 2 hexes, pays both movement points to climb one level, pays 1 movement point to descend a level, and may never descend more than 1 level per turn. If the flying party ends its move in the same hex and at the same altitude as a ship, it may board it. Flying parties may only be fired at with small arms fire. (Exception: See Shrapnel and Grapeshot rule.)
All High Martians are considered Green for all purposes except boarding actions, for which they are considered Trained or Crack. High Martian screw galleys are powered by slave turnscrews who may not be used for any other purpose.
Throckmorton Conveyors
Small numbers of Throckmorton Aerial Conveyors may be available to the British in a scenario. Throckmorton Conveyors are personal flying machines and may be used to outfit a flying party. The party is outfitted the same as for a flying party of High Martians and obeys all of the same rules regarding movement, fire, and boarding.
Signal Communication
Each ship has one additional member of the bridge crew: the signalman. The signalman hoists signal pennants, flares, or lanterns and reads signals from other ships. If the signalman is killed and not replaced by another crewman, the player running that vessel may not communicate with the other players on his side or be part of their planning. By the same token, no ship can make out the signals of a ship which is on fire and upwind of it. If one player on a side is unable to communicate due to a dead signalman or a fire on board, the remaining players on that side should instead communicate by writing.
Optional Signal Rule: Each turn covers a very short period of time, and only a limited number of signals can be sent and read at a time. If players wish to simulate this, incorporate the following rule. Each player on a team may hoist (send) one six-word message per turn. In the Initiative Phase each player writes down his signal and then each reads it in turn. The six words may include a specific ship name, or may be addressed to all who can read it. Typical signals might read, "Aphid join action at once," "Form line to my stern," "Cease bombardment and break off action," etc. No ship may read signals from any ship on fire upwind of it, and in this case the written signal should be passed to those players who could read it. As naval codes were widely used, players may wish to allow friendly players only to read the signals.
Shrapnel and Grapeshot
British naval guns usually fire common shell or armor-piercing shell at enemy ships, but also carry quantities of shrapnel shells which burst after a specified time and scatter fragments. Martian ships, by the same token, carry grapeshot, numerous small cannon balls loaded into a larger gun and designed to cause crew casualties. Grape may only be fired at close range; shrapnel may be fired at either close or long range. Regardless of the range, add 1 to the die roll to hit. All Hull hits and Critical hits have no effect. All Gun hits become Crew hits instead. All Crew hits (and Gun hits which convert to Crew hits) cause crew casualties equal to the full damage value of the gun, not half its damage value.
Shrapnel and grape may be fired at flying parties. The normal rules to hit are followed, but all hits are automatically treated as crew hits and the flying party is allowed to make saving throws as if the casualties were caused by small arms fire.
Power Grapnel
A power grapnel is essentially a large harpoon gun which fires a barbed, collapsing grapnel designed to forcibly pierce the side of a ship or become entangled in a ship's rigging or deck gear. It trails a strong steel cable which is held up by a series of small liftwood aerial buoys. The cable is attached to a power winch, and upon hitting a vessel with the grapnel, the winch is engaged and used to pull the two vessels together.
Many Martian screw galleys use a device similar in design to the above, but actually attach the line to the vessel's driving crankshaft and use their own turncranks to pull the vessels together.
A power grapnel is shown on the deck plan as a gun box with the letter "G" in it and no crew. A power grapnel is mounted like any other gun. It has a rate of fire of (2), meaning that it takes 2 turns of reloading between shots. It has a full crew of 2, but no crew is provided for it, and it is instead manned by deckhands or gunners from another weapon if required to fire. (It is so seldom used that there is no point in maintaining a permanent gun crew.) Power grapnels have an effective range of 0 (same hex) and a long range of 1. If the shot hits, the two vessels are grappled. If the hit is made at long range the smaller of the two ships is moved into the hex of the larger. If both have the same hull size, roll a die to determine which ship moves into the other's hex.
Power grapnels are treated as any other gun for purposes of taking gun hits. They have no magazine, however.
Smutts Dischargers
A Smutts discharger is a steam-powered pneumatic launcher for Smutts Patent Aerial Torpedoes. These dischargers are only mounted on British steam-powered vessels and are always oriented to fire directly forward.
The Smutts Patent Aerial Torpedo is a finned projectile filled with dynamite, held aloft by means of liftwood vanes, and powered after launch by a propeller driven by a small flywheel. It also trails a cable with a small grapnel to snag vessels over which it passes.
On the turn it is launched, it will move directly forward from the firing ship 6 hexes, and does the same for the 4 subsequent turns. At the end of that time it detonates (to prevent capture by the enemy). If the Smutts Torpedo passes through a hex containing any vessel at the same altitude or one level lower than the torpedo, it will collide with it on a roll of 2 or higher. The target vessel may attempt to avoid the collision in the same manner as avoiding a ramming attempt. If two vessels are in the same hex, roll randomly to determine which to check first for a collision. If the Smutts Torpedo misses that vessel, roll to see if it hits the other. If one or both attempts to evade the ram, there is a chance the vessels will collide with each other (the same as if a vessel turns in a hex with another). If they collide they do not receive the die roll modifier to avoid the ramming attempt.
If the Smutts Torpedo hits, it detonates. It has a penetration of 1 and a damage value of 12. In addition, the force of the detonation will cause an automatic loss of trim, the same as a hit from a lob gun.
Each ship carries a limited number of Smutts Aerial Torpedoes. When these have all been used the discharger may not be fired again. The Smutts Aerial Torpedoes are represented by small triangles on the ship deck plan.
The Smutts discharger is treated as any other gun for purposes of gun hits, and has a magazine. If the Smutts Discharger's magazine is detonated by a Critical hit, all remaining Smutts Aerial Torpedoes on board blow up. Roll for each torpedo separately for hit location.
Tether Mines and Drogue Torpedoes
Tether Mines
Tether mines are explosive charges equipped with contact detonators, attached to liftwood buoys, and tethered in place at a selected altitude by means of a cable. Tether mines are shown on the ship status sheet by a circle with a cross superimposed on it.
During the Initiative Phase of each turn players commanding ships with tether mines must state if they intend to raise or lower them that turn. If they are lowered they have no effect. If they are raised they are fully operational.
Ships with tether mines raised may not move any faster than 3 hexes per turn and may not avoid a ram. However, a player may announce at any time that he is cutting his mines loose and then is free to attempt to avoid a ram or move at any speed desired. Once cut free the tether mines are lost.
Tether mines are raised one altitude level higher than the owning vessel. If any ship enters the same hex as the mines, at the same altitude as the mines, or is already in the hex and drops to the same altitude as the mines, it automatically collides with them. If a vessel with tether mines raised moves into the same hex as another vessel which is at the same altitude as the mines, or climbs so as to bring the tether mines to the same altitude as a ship already in the same hex, that ship collides with the tether mines on a roll of 6. If a ship begins its movement in the same hex and at the same altitude as raised tether mines it may leave the hex freely without colliding with the mine. If a ship cuts its tether mines loose for any reason, they will collide with any vessel in the same hex but at a higher altitude on a die roll of 6.
If a vessel collides with a tether mine, the mine detonates and is counted as a gun hit. Roll for hit location normally. All tether mines have a penetration of 0, but cause an automatic loss of trim critical hit in addition to any other damage, the same as a Martian lob gun. The damage value of the mine depends on the type being used. Martian tether mines have a damage value of 4; British tether mines have a damage value of 6.
Tether mines cannot be affected by anything except a magazine hit. If a magazine hit detonates the tether mines, each mine on board and not raised, explodes. Roll hit location for each mine separately.
Drogue Torpedoes
A drogue torpedo is an explosive charge dangled below a ship on a cable and equipped with a contact detonator. Drogue Torpedoes are represented on the ship status sheet by long ovals. During the Initiative Phase of each turn, players commanding ships with drogue torpedoes must state if they intend to raise or lower them that turn. If the drogue torpedoes are raised they have no effect. If they are lowered they are fully operational.
A ship with its drogue torpedo lowered has its movement allowance reduced by 1. The drogue torpedo hangs down one level below the ship, but in the same hex. Any ship which enters the same hex at the same altitude as the drogue torpedo, or changes altitude in the hex and arrives at the torpedo's altitude, collides with the torpedo on a roll of 5 or 6. Likewise, if the ship with the torpedo enters a hex or otherwise maneuvers so that another ship is in the same hex at the same altitude as the torpedo, it collides on a roll of 5 or 6.
Collision with a drogue torpedo has exactly the same effect as collision with a tether mine, except that all drogue torpedoes have a damage value of 10.
Drogue torpedoes cannot be affected by anything except a magazine hit. If a magazine hit detonates the drogue torpedoes, each torpedo on board which is not lowered, explodes. Roll hit location for each drogue torpedo separately.
Infernal Devices
Hale Rocket Batteries
It is very difficult to fire ordnance at a steep upward or downward angle from an aerial gunboat since the angular recoil will destabilize the boat and cause a loss of trim. This is not a problem with rockets, however, since the thrust of the rocket can be vented in any direction required to maintain stability of the ship. The British often employ banks of Hale rockets on their aerial gunboats to fire at higher or lower targets.
Each Hale Rocket Battery on a vessel is a bank of rockets, all of which are fired in a single salvo at a target. As Hale rockets are scarcely more accurate than their ancestor, the Congreve rocket, lack of accuracy is compensated for by volume of fire. Each bank of rockets is faced to fire into one firing aspect and is angled either up or down. Batteries angled up may only fire at targets higher than the firing ship while those angled down may only fire at lower ones. Hale Rocket Batteries may only fire at targets if the range to the target is equal to or less than the difference in altitude. For example, a target 2 hexes away can only be fired at if the altitude difference is at least 2 levels. Hale rockets have a maximum range of 4 hexes.
Altitude does not count against the range of the rockets. Hale rockets may always fire at targets in the same hex, regardless of firing aspect, provided they are either above or below the ship (as required by the specific battery firing).
A Hale Rocket Battery is shown on the ship status sheet by a triangle with a tail. The triangle points in the direction the battery is faced. If the tail of the triangle is hollow, the battery is angled up; if it is filled in, the battery is angled down.
When a Hale Battery is fired, it is not necessary to see whether or not there was a hit. Instead, roll the die, and the number rolled is the number of rockets that hit. Hale rockets have a penetration of 0 and a damage value of 1. One crewman is required to fire the battery, normally a deckhand. Once fired the battery is empty. It may not be reloaded during the course of the game.
Hale Rocket Batteries can be destroyed as a result of a gun hit. For purposes of determining the chance of a gun hit being on a Hale Battery, count all Hale Batteries on board as a single gun. A hit destroys 1 Hale Battery. Hale Batteries can also suffer magazine hits. If a Hale Battery suffers a magazine hit, one battery detonates. Roll the die to see how many hits are suffered, and then roll hit location on each one separately.
Martian Liquid Fire
Some vessels are equipped with one or more racks of Martian liquid fire, a nameless chemical compound that ignites and burns fiercely once exposed to oxygen. It does burn damage to anything that it touches. Martian liquid fire is dropped from a ship at a higher altitude onto ships at a lower altitude as the firing ship passes overhead. This attack is carried out during movement, not at the end of movement. No die roll is made to see whether or not the liquid fire hits the target; instead a die is rolled to see how much of it does. Roll one die and subtract 1 for each difference in altitude between the two ships involved. That is, if the firing ship is 2 levels higher, subtract 2 from the die roll. If the firing ship leaves the target's hex by crossing the same hexside toward which the target is facing, add 1 to the die roll. The result of the die roll is the level of fire started on the target ship. A modified die roll of 0 or less has no effect.
Each rack of Martian fire may be used only once per game. Once a rack is dropped it is expended and may not be reloaded during the game. There is no required crew for the liquid fire racks; their release controls are on the bridge. Each liquid fire rack is represented on the ship status sheet by a quartered square.
Liquid fire racks may be destroyed by gun hits, the same as Hale Batteries. If a magazine hit is made on a liquid fire rack, roll the die. The result is the level of fire that breaks out.
Machineguns
Maxim Guns
The Maxim gun was just coming into use at this time. Although no governments had yet purchased it, a prototype had been used in combat two years earlier by a British colonial expedition and a small number of these revolutionary guns had been purchased privately by a few officers.
If a Maxim gun is present (and there will never be more than one in a scenario) it fires like a Nordenfelt, but rolls 6 dice instead of 5. Its main advantage is that it is portable and may be moved about the ship. During the Initiative Phase of each turn the owning player may move his Maxim gun to fire out of any of the four firing aspects of his ship. The Maxim may not fire the turn it moves, but after that may fire out of the specified firing aspect. One member of the crew must be assigned as a gunner for the Maxim gun. The owning player should record which aspect the Maxim gun is trained on, but need never reveal this to his opponent until it fires.
Gardner Guns
The Gardner gun saw considerable service with the Royal Navy during this period (circa 1889). It was a lightweight, two-barrel, mechanical machinegun used for shore duty as well as shipboard work. The Gardner is portable and follows the same rules for movement on the ship as does a Maxim gun (see "Maxim Guns," above). However, the Gardner had a lower rate of fire and was prone to jamming if fired too fast.
The Gardner normally rolls 2 dice for small arms fire hits. If the player controlling the gun wishes, he may instead roll 3 dice, but if any one of the die roll results is a 1, then the gun jams. The gun may not fire until the jam is cleared. Each fire phase after the Gardner gun jams, the gunner may attempt to clear the jam by rolling a 4 or higher on the die.
Aerial Bombardment of Ground Targets
Naval forces are occasionally called upon to bombard ground targets, such as cities or fortresses. In the game this will be abstracted and will require the player to inflict a specified number of damage points on one or more hexes of a city or fortress. The hex must be fired at as if it were a ship. (Although the gun's shot will certainly come down somewhere in the hex, that is no guarantee that it will damage anything important.) If a hit is achieved, the gun's damage value is the number of damage points caused. Martian fire dropped on a hex causes damage points equal to the level of fire started.
Ground Batteries
Ground batteries have the advantage of being able to fire at high angles without having to worry about capsizing their cloudship. Heavy guns still require fairly elaborate carriages to allow them to fire at high angles, and not all guns are so fitted. All batteries mentioned in the scenarios, however, are assumed to be mounted for high angle fire.
A ground battery may fire at any target above it, even if the difference in altitude is greater than the range. The battery is still limited by the range of the gun it is firing, and still counts each altitude level higher by adding 1 to the range.
Many ground batteries are built into fortifications and so may have considerable armor. A ground battery is fired upon in the same manner as a ship, but hull hits have no effect. The gun crew and gun are both considered protected by armor. If a critical hit is made, only fire and magazine hits affect the battery; all other results are treated as no effect. A magazine critical hit destroys the battery.
Fire, either as a result of a critical hit or Martian liquid fire dropped on the battery, puts it out of action temporarily. The level of the fire will automatically go down each turn instead of up, and once it goes out the battery will come back into action.
Nonexploding Rounds (Optional)
Occasionally, some armor-piercing rounds may go completely through lightly armored or unarmored vessels without detonating. Likewise, Martian solid shot will do less damage if it just punches through both sides of a hull, than if it hits substantial resistance. To take this into account, use the following rule.
If a ship is hit by a gun which has a penetration more than twice the armor value of the ship, roll a die. On a result of 1-3 the hit is resolved normally. On a roll of 4-6 the round passes through the target without exploding. Hit location is still rolled and it causes damage, but is treated as if it has a damage value of 1, regardless of the size of the round. Note that rounds which already have a damage value of 1 are unaffected by this rule.
Line of Sight (Optional)
No provision is made in the basic rules for line of sight being blocked by another ship, but you obviously cannot shoot through an intervening vessel. In a three-dimensional game, however, defining line of sight often becomes difficult. Some cases are very easy, such as when the firing ship, target ship, and intervening ship are all at the same altitude. In this case the intervening ship blocks the line of sight if the line of sight passes through two nonadjacent hexsides of the hex the ship occupies. Alternatively, the line of sight is blocked if it passes through any part of any two hexes containing ships.
In the illustrated example Ship A is firing at Ship B. An intervening vessel in hexes 1, 2, 5, or 6 would block the line of sight, as it crosses two nonadjacent hexsides. A ship in hex 3 or 4, however, would not block the line of sight. Although the line of sight crosses two hexsides, they are adjacent hexsides. If both hexes 3 and 4 had vessels, the line of sight would be blocked, since it passed through two hexes containing ships.
If the vessels are at differing altitudes, use the altitude gauge printed on the Game Reference chart. Place the firing ship and the target ship at their respective altitudes and distance. Now plot the location of any ship which might block the line of sight. (Remember that to be blocked, the line of sight must pass through two nonadjacent hexsides.) After you plot the squares that all of the ships occupy, trace the line of sight between the firing and target ships. If the line of sight passes through the bottom half of a box containing an intervening ship, it is blocked.
For example, in the diagram below, ship A and ship B are exchanging fire. Any ship in position 1 would block the line of fire between the two ships, as the line of sight passes through the bottom half of its box. Any ship in position 2, however, would not block line of sight, as this condition does not exist.
Restricted Firing Arcs (Optional)
The four simple firing aspects presented in the basic rules actually allow too much flexibility for most gun mountings. The typical arc of a gun in a well-placed mounting will be 180 degrees, but the basic game firing aspects allow a considerably wider traverse. For a more realistic portrayal of fields of fire, use the firing arcs illustrated in the rulebook's diagram.
Scenarios
Scenario 1: Thieves Fall Out
The Cloud Captains of the Shistomik Mountains are a colorful, bloodthirsty company of pirates, brigands, and adventurers who generally observe a cautious truce among themselves, the better to predate upon others. In 1888, Armand Roquette, a French adventurer and Cloud Captain with a talent for diplomacy, managed to put together an organization of several captains, both human and Martian, and their ships, to raid some of the larger Umbran spice convoys bound for Syrtis Major. The first raid was successful beyond any of their expectations, and beyond any of their abilities to put aside their greed. Scarcely had the last of the merchant guards surrendered, when fighting broke out among the Cloud Captains.
Map: Use either map. The city is not present, and all terrain is at ground level.
Ships: Each player has a Sky Runner-type screw galley. Find the ship record sheet for it and make sure that each player has a copy. Each player should pick a ship model to represent his ship.
Set-up: Each player rolls a die. The lowest die roll sets up first, and the other players follow in clockwise order around the table. No player may set up closer than 4 hexes from another player. Each player, as he puts his ship out, must clearly show its facing and place an altitude marker on it. Once set up is complete, start the game.
Special Rule: Since this is a multiplayer scenario, the sequence of play is altered slightly. In the Initiative Phase, all players roll a die, with the high die roll winning the initiative. That player decides which player moves first. All other players take their turns in sequence after that player, in a clockwise order around the table.
Victory: The last captain flying wins.
Scenario 2: John Bull's Tyranny
For three years Liam O'Connor and his crew of Irish revolutionaries played a cat-and-mouse game with the Royal Navy along the trade routes north and east of Syrtis Major. Frequent raids on the ships of Britain's vassal princes proved embarrassing, but a daylight bombardment of the legation compound at Moeris Lacus was too much to tolerate. The Royal Navy redoubled its efforts to track down O'Connor and the crew of the Fenian Ram, and in April of 1887 they succeeded.
Map: Use either map. The city is not present and treat all terrain as being at ground level.
Ships: The Irish player has the Fenian Ram. The British player has one Aphid-class gunboat.
Set-up: The Irish player sets up in the middle of the map. The British may set up anywhere not within 5 hexes of the Fenian Ram. All ships start at medium altitude.
Special Rules: The Irish marines are armed with modern rifles.
Victory: The British must capture or destroy the Fenian Ram. The Irish must escape. To escape, the Irish must have damaged the Aphid so that it cannot pursue (either speed slower than the Fenian Ram or no guns left) and then exit the map.
Scenario 3: Diplomatic Incident
Despite outwardly cordial relations between the United Kingdom and the Empire of Germany, Bismarck's policy of ruthless expansionism in the extraterrestrial colonies has brought the two countries to the brink of war more than once. When the German agricultural attache to the court of Zhatublaan III revealed (in return, it was said, for a considerable payment of cash) a German plot to break the bhotan spice monopoly, and thus destabilize the Boreosyrtis League, German long-term ambitions in the northern polar region were dealt a crippling blow. Herr Roemer, the attache, immediately fled and sought protection from the British.
Anxious to exact revenge from Herr Roemer, who was now travelling under a British passport, the German colonial governor dispatched the newly assembled Luftkreuzer Hamburg to intercept the passenger ship on which Roemer was travelling, arrest him, and bring him back for trial. Unknown to the governor, however, Roemer's ship was accompanied by the two sister ships Dauntless and Daring.
Map: Use the canal map. The city is present and will inhibit play. Neither player may fire over or fly over the central island city. Players may fly over and fire over the city hexes not on the island. This is a neutral city and offending it will result in a major diplomatic setback.
Ships: The German player has the Hamburg, and uses a large British gunboat piece to represent it. The British have two Dauntless-class gunboats and one large kite. The kite is an unarmed Warm Winds merchantman and carries, among its other passengers, Herr Roemer. Use the model of the Aphid-class gunboat to represent one of the Dauntless-class boats.
Set-up: The German sets up in the center of the map. The British enter from the middle of any board edge and must exit off the opposite side to win.
Special Rules: The kite is not a military vessel and will not offer any resistance. It will attempt to run so long as it has a chance of doing so successfully. As soon as it takes any damage, however, it will stop moving and surrender. It will not move again until the battle has finished. Note that, even though there is no formal state of war in effect, there are no restrictions on fire except for the need to avoid damaging the neutrals.
Victory: The German player must board the kite, spend one turn in undisputed possession of it, return to their own ship (having captured Herr Roemer) and exit off the board. The British must prevent this, probably by destroying the Hamburg.
Scenario 4: Slash and Run
One of the most counterproductive of Britain's colonial policies was dubbed by its detractors "slash and run." It referred to the policy of launching strong punitive raids in response to an act of provocation, causing maximum damage and confusion, and then just leaving the natives to sort things out, more bitter and hostile than ever. Nevertheless, when the city-state of Shastapsh, one of the lesser trading centers of the Nepenthes-Thoth, refused to surrender six brigands accused of murdering two British subjects, the Colonial Office sent a gunboat squadron to "punish" the city.
Map: The canal map is used and the city is present.
Ships: The British have one Reliant-class gunboat. The Martians have two Endtime-type screw galleys, one Bloodrunner-type small gun kite, four Rod Gun ground batteries, two Lob Gun ground batteries, and four Tether bombs (mounted on the ground, on ships, or a combination, at the Martian player's option).
Set-up: All Martians start landing in the city. The British enter from any board edge at medium altitude.
Special Rules: The British should get on with it, not dither around trying to silence every gun in sight before beginning the bombardment. Keep track of the number of turns that the British do not have a ship over the city. For every 5 such turns the Martian receives another Endtime- or Bloodrunner-type ship, his choice.
Victory: The British must hit every city hex with at least 15 damage points, or else they lose.
Scenario 5: Hearts of Oak
The various High Martian petty kings of the Astusapes Highlands were always a menace to commerce and travel along the trace of the old Grand Canal running north toward Umbra. As the Umbran spice trade developed into a major source of revenue for English merchants, however, the Astusapes experienced a threat to their sovereignty heretofore unmatched in Martian history: a Motion before Parliament.
Map: Use the highland map. Each dark brown terrain outline is an elevation boundary. Thus, the highest point on the map is at High altitude. The fortress is ignored.
Ships: The British player controls one Thunderer-class aerial monitor. It has a Crack crew. The Martian controls two Small Bird-type small screw galleys and two Glory Sled-type large screw galleys. All Martians are High Martians, and are treated as Green crews for all purposes except boarding. For boarding they are treated as Trained.
Set-up: The British enter from one map edge, the Martians from the other.
Special Rules: All Martian marines are armed with bows.
Victory: The last player with a ship in the air wins.
Scenario 6: The Great Raid
In February of 1888, the merchant kite Summer Wind was attacked and taken by vessels of King Hattabranx, the High Martian lord of Kraag Barrovaar. Each of the High Martian kings of the Astusapes Highlands rules from his personal kraag, a fortress-city carved from the heart of one of the sheer rock mesas that stud the rocky region. Gradually made more elaborate over the course of generations, the kraags have generally been considered nearly perfect fortresses, and of them all, Kraag Barrovaar was the greatest.
The incident might have passed without notice except that the Summer Wind's passenger manifest included the United States envoy to the Oenotrian Empire, Mr. Sidney Boynton, and his daughter Elizabeth, both of whom were taken hostage and confined in the dungeons of the sinister kraag. King Hattabranx, an unstable and murderous monarch in the best of times, and now heavily under the influence of the Cult of the Worm, finally declared his intent to murder the hostages unless the British met a lengthy (and impossible) list of demands.
The American government supported the British in their decision to make an unprecedented raid on the kraag and free the prisoners. After decoying the bulk of Hattabranx's fleet away, two small British vessels made the dash to Barrovaar.
Map: Use the highland map. Each dark brown terrain outline is an elevation boundary. Thus, the highest point on the map is at high altitude. The fortress is Kraag Barrovaar.
Ships: The British have one Aphid-class (the Sandflea) aerial gunboat and one Dauntless-class (the Danger) aerial gunboat. The Martian defenders have two Small Bird-type small screw galleys, four Rogue ground batteries (on top of the kraag), 10 Tether mines (on top of the kraag), and six flying parties of 10 High Martians each. All marines and flying parties are armed with bows. The ground batteries have an armor value of 2.
Set-up: All Martians set up in the fortress hexes, on top of the fortress. The ships and flying parties are landed. The British enter from any map edge.
Special Rules: The landing party to rescue the prisoners must have a total of 10 men in it, must include one officer, and must have all of the surviving marines. Thus it is possible to take one or more marine casualties before making the landing, provided they are replaced by seamen.
The British land and recover their landing party by spending one complete turn stationary at Medium altitude in a hex adjacent to the High altitude hexes on top of the fortress. (This amounts to landing, as the hexes adjacent to the top of the fortress are themselves at Medium altitude.) The landing party will return to the same spot they were left at after several turns. They will be gone for at least 10 turns. After that, roll the die once per turn in the Initiative Phase. On a roll of 6 the landing party reappears in the same hex they were dropped at. Roll an additional die when they appear, and that is the number of men left in the landing party. Casualties will be heavy due to the necessity of fighting their way into and back out of the dungeon. The landing party will remain where they are, until picked up by a British ship or until overwhelmed by a flying party. The landing party may be picked up by the Sandflea or by the Danger.
Victory: The British win if there is one or more survivor of the landing party when it is picked up by a ship, and then that ship leaves the map.
Scenario 7: Pitched Battle
Long concerned by the growth of British power to the north, the Oenotrian Empire received with near-panic the news of the raid on Kraag Barrovaar. While the Oenotrian oligarchs had no love for Hattabranx (whom they called the "Thug King") or his crazed, blood-smeared Worm Priests, the thought of any kraag being within the reach of British power meant that for the first time in living memory the High Martian strangle hold on the Liftwood groves might be loosening. That the Princes of the Canals had to go to the High Martian thugs for liftwood was humiliating, but that was the way of things. To go to the red off-worlders was unthinkable. If the red devils were to be stopped, it would have to be at once. The Oenotrian fleet massed for a Cleansing War.
Map: Use the canal map and ignore the city.
Ships: The British have one Dauntless- and one Aphid-class gunboat, as well as the Triumph, the first in a new class of aerial cruisers. All British crews are of Crack skill level. The Oenotrians have their fleet vanguard squadron, consisting of two Clearsight-type small screw galleys, three Hullcutter-type large screw galleys, two Whisperdeath-type large kites, and one Swiftwood-type small kite. All Martian crews are Trained, except for the crew of any one vessel, which is Crack. All marines are armed with muskets except for those on the vessel with the Crack crew. Those are armed with modern rifles.
Set-up: The Martians enter from one map edge at High altitude. The British enter from the opposite side at High altitude.
Victory: The first side to lose half or more of its ships will withdraw. The other side wins. If the British lose the Triumph, they lose the game.
Additional Scenarios
The seven scenarios presented here are merely a start. Using the ships provided for the scenarios above you can create a wide variety of totally new scenarios. When you have finished those, use the ship design rules to design your own ships to fight against each other. Match the British against High Martian pirate-kings or the lowland Canal Princes, or even against another European gunboat, perhaps of Germany or France. Alternatively, run two or more Martian ships against each other.
You will probably want to experiment with scenario balance. There are so many variables in design that it is difficult to give hard and fast rules. However, cost is usually the limiting variable for fleets, so try running fleets of similar cost against each other, with the Martians having up to 50 percent more money. When using previously designed ships a simple rule of thumb is that it will take at least twice the tonnage of Martian ships to give a British squadron a good fight.
Don't forget the men behind the machines. A squadron that is slightly outgunned can often make up the difference with crew quality. Try running a large squadron with Green crews against a smaller one with Crack crews.
Finally, you may want to link your battles and form a continuing campaign, keeping track of the exploits of your ships, crews, and captains. Some suggestions for doing so are included in the next chapter.
Campaign Rules
Introduction
Great Britain's meager colonial forces are locked in a war with the armies and fleets of the Oenotrian Empire. Although the British have won early victories in the air and have maintained the initiative, keeping aerial superiority requires skillful and continuous use of nearly all of their aerial gunboats. And aerial superiority is essential, as it is the only thing that keeps the Oenotrian host from crushing the handful of colonial troops and British battalions that hold the vital canal routes to Syrtis Major.
But while Britain's aerial squadrons are otherwise occupied, a renewed outbreak of piracy threatens the Umbran spice trade, forcing much of it to take the longer route through Alclyon. However, an uprising in Shastapsh, encouraged by the Oenotrians and possibly funded by the Germans, has destroyed the garrison there and closed the canal to traffic. This blockade has forced much of the spice trade to risk either pirates along the Nilosyrtis Valley or desert raiders along the old caravan trails across the Nepenthes-Thoth Steppe to Moeris Lacus, now the eastern-most outpost of British power on Mars. While hastily raised new squadrons of the Meepsoor Lancers are hurried east to guard the caravans, for protection of the skies the British turn to the Red Captains.
You are newly mustered out of the navy and prepared to strike out on your own, following in the footsteps of Burnaby and the other great adventurers. You have a good working knowledge of Martian vessels, from the time spent attached to the Parhoon Squadron of the Royal Navy Auxiliary. And last, but not least, the current war has created an opportunity to establish yourself as a Red Captain and a chance to aid the Empire in an hour of need.
Getting Started
The colonial administration is offering auxiliary commissions for vessels outfitted to hunt down and destroy pirates, and letters of marque and reprisal to privateers willing to raid Oenotrian merchantmen. Furthermore, since you are an experienced officer of proven ability and loyalty, the administration is willing to front the funds to purchase and outfit a small vessel for this purpose. Unfortunately, the single naval yard at Syrtis Major is completely preoccupied with maintaining and repairing the British squadron, and there are no other yards on Mars capable of assembling armored steam vessels. Consequently, your ship must be of Martian construction from the Parhoon yards.
The colonial authorities advance you 30,000 pounds for the construction and outfitting of your ship. Unfortunately, due to the present naval emergency and heavy recruiting for the auxiliaries, the crew you assemble will be Green. You will begin in Parhoon with your ship and crew ready to go.
The Map
The strategic map provided (a map printed in the rulebook, with a terrain key) is a representation of the Martian territory around the British enclave at Syrtis Major, stretching from Polodar (one of the few cities on Mars that has substantial snow cover in the winter), to the equatorial city-states of the Oenotrian Empire. Each hex is 100 miles across from side to side, and the map covers an area 2000 miles by 2500 miles, or a total of approximately 5 million square miles. It takes months for the spice merchants to make their way by canal barge to Thoth and then overland by caravan to Moeris Lacus. But by aerial steam ship, or even kite for that matter, the trip from Umbra to Syrtis Major is only five days long, barring unforeseen mishaps.
Movement
Although screw galleys are capable of speeds of around 20 knots, and steam ships 30 knots or more, both types cruise at much slower rates. Screw galleys would exhaust their rowers in a very short time, and so maintain a steady, slow speed over long distances and keep their crews rested and ready. As the turncranks of a screw galley turn a large flywheel (storing energy over time) that turns the propeller, the normal procedure is to have a half-watch of rowers crank up the flywheel once an hour and then run at low revolutions for the rest of the hour. This gives a cruising speed of about 8 knots. Likewise, steam vessels usually cruise at about 12-15 knots, since coal consumption is only about 20 percent as much as at top speed, and long-range endurance in the game is based on cruising speed, not top speed. Kites can run at their top speed almost continuously.
Action on the strategic map is resolved in days, each day representing a campaign turn. Your ship moves this distance in a day:
- Steam Vessel (if you have one): 3 hexes
- Screw Galley: 2 hexes
- Kite, with the wind: 4 hexes
- Kite, against the wind: 2 hexes
Prevailing winds are from the west to the east. Unlike in tactical movement, a kite can move directly upwind on the strategic map. (It is tacking back and forth several times in a single 100-mile hex.)
Your ship may, if you desire, stay in a hex and patrol. Patrolling increases your chance of an encounter.
Ship Encounters
Encountering other ships depends on the territory you are in and whether you are moving through or patrolling.
Determining the Encounter: Consult the Encounter Map and find the specific hex your ship is moving through or patrolling in. Find the encounter numbers for the territory that hex is part of, and roll 1D6. If the ship is moving through the hex, and the die roll is equal to or less than the first number, an encounter has occurred. If the ship is patrolling in the hex, and the die roll is equal to or less than the second number, an encounter has occurred.
Roll once per day for each ship, whether moving or patrolling. The hex determining encounters is the final hex the ship occupies at the end of the day.
For example, if moving through the Astusapes Highlands, you have an encounter on a die roll of 1 or 2; if patrolling in the Astusapes Highlands, you have an encounter on a die roll of 1, 2, 3, 4, or 5.
Find the Type of Encounter: If an encounter occurs, roll 1D6 and use the table below to determine the specific ships encountered.
Preparing for the Game: Before the game, you should divide up the various ship designs included in the game among these categories. Add in your own ships as well. Then when you have an encounter, draw a ship of the correct general type at random. (You may want to hold out the bigger ships for the first couple of voyages just to give yourself a chance.) Once you've drawn the vessels, fight out the campaign. If there are several of you in the campaign, have one of the other players run the enemy ships against yours when you have an encounter.
Ship Encounters Table
Each territory is headed by its two encounter numbers (moving through / patrolling).
1/3 Neutral West
- High Martian Pirate
- High Martian Pirate
- High Martian Pirate
- Two High Martian Pirates
- Two High Martian Pirates
- High Martian Pirate with Prize Ship in tow
1/2 Neutral Northeast
- Pirate Ship
- Pirate Ship
- Cloud Captain
- Pirate Ship with Prize Ship in tow
- Cloud Captain with Prize Ship in tow
- Enemy Merchantman
1/2 Neutral Southeast
- Warship
- Warship
- Warship
- Warship escorting Enemy Merchantman
- Enemy Merchantman
- Enemy Merchantman
2/5 Astusapes
- High Martian Pirate with Prize Ship in tow
- High Martian Pirate with Prize Ship in tow
- High Martian Pirate with Prize Ship in tow
- High Martian Pirate
- Two High Martian Pirates
- Three High Martian Pirates
3/6 Shastapsh
- Warship
- Warship
- Warship
- Pirate Ship
- Pirate Ship with Prize Ship in tow
- Enemy Merchantman
2/6 Oenotria
- Warship
- Warship
- Two Warships escorting Enemy Merchantman
- Warship escorting Enemy Merchantman
- Two Enemy Merchantmen
- Three Enemy Merchantmen
1/3 Shistomik
- Cloud Captain
- Cloud Captain
- Cloud Captain
- Cloud Captain with Prize Ship in tow
- Cloud Captain with Prize Ship in tow
- Cloud Captain with Prize Ship in tow
Encounter Ship Types
- High Martian Pirate: A small, fast screw galley with High Martian crew. Use Clearsight and Small Bird classes.
- Pirate Ship: A small, fast screw galley or a kite, with Trained crew. Use Clearsight, Small Bird, Bloodrunner, and Swiftwood classes.
- Cloud Captain: An experienced pirate in a larger ship with a Crack crew. Use Fenian Ram, Glory Sled, Endtime, Whisperdeath, and Hullcutter classes.
- Warship: A large screw galley or a large kite, heavily armed and carrying marines and a Trained crew. Use Whisperdeath, Swiftwood, Hullcutter, or Endtime classes.
- Enemy Merchantmen: A merchant with light (or no) armament, Green crew, and fat with contraband goods. Use Warm Winds class.
- Prize Ship in Tow: A merchant previously captured by the enemy and under escort. Use Warm Winds class.
Money
Whenever you capture an enemy vessel and escort it back to a friendly city, it is auctioned off, and you receive a 10-percent share of the proceeds from the auction. (The rest is split among the British crown, your crew, and normal upkeep of your vessel.) With your share you must repair all damage to the ship. If any of the money is left, you can put it in the bank for later use or use it to buy additional equipment for your ship, or even a completely new ship.
The actual proceeds of the sale will amount to half of the original purchase price of the ship. If you have the cash available in the bank, you may purchase the prize ship outright and own it, and then still collect your 10 percent of the sale price. In most cases this option will be undesirable, however, as the ship will be fairly heavily damaged.
The cargo of the ship is also sold at auction, and you get a 10-percent share of that as well. The price of the cargo will be its weight in tons, times the roll of one die, times 100 (Weight in tons x 1D6 x 100). Your share, then, will be its weight in tons times a die roll times 10 (Weight in tons x 1D6 x 10).
All repairs and modifications to ships are done at the naval yard at Parhoon. Most repairs cost half of what the original component cost to install in the ship. Thus, a destroyed gun would cost half of its original price to replace. For hull hits, divide the original price of the hull by the total number of hits your hull can take, and then divide this number by 10 to find the cost to repair each hull hit.
Experience
Every time you return from a voyage with a prize ship taken in battle, your crew experience may go up. Actually, the experience of the crew that served with you will go up, but if you have taken heavy casualties you will recruit new men and that may dilute their experience enough to negate the effect.
Divide your original crew size by 6 and round fractions down. If you lost fewer than this, your experience automatically goes up. If you lost this number, roll a die. Your experience goes up unless you roll a 1. If you lost twice this number it goes up, except on a roll of 1 or 2, and so on. Once your crew quality is Crack it will not go up any higher.
If you return from a cruise without a prize vessel, there is a chance your crew quality will go down, as your best crewmen may want to ship out with a better (or just luckier) captain. If your crew quality is already Green, ignore this. If it is higher, then divide your original crew by 6, the same as described above. If you lost fewer than this number your experience stays the same. If you lost this number or more, it goes down on a roll of 1. If you lost twice this number, it goes down on a roll of 1 or 2. And so on.
An Epic Trek
If your ship is destroyed, but you survive by making a crash landing, or if you are captured and put over the side, you must attempt to make your way back to friendly territory. If you are already in friendly territory, this will be comparatively easy. If you are not, it may prove to be nearly impossible. Nothing, of course, is completely impossible.
Once you have landed, you will begin to roll dice for each hex you enter, starting with the one you landed in. The die roll will be compared to the Encounters table below to determine what happened to you and your men. Note that the table has different columns for "friendly," "neutral," and "hostile" versions of the same terrain. Friendly terrain is all terrain within the boundaries of British-controlled territory, as well as all grand canal hexes, clear hexes, and cities north of Gorovaan and Thoth, including those two cities. Hostile territory is all territory west and/or south of (but not including) the Syrtis Major-Crocea-Gorklimisk Canal (excluding all British territory and the Aerian Hills), all of the Astusapes Highlands, and the city of Shastapsh and six surrounding hexes. All other hexes are neutral.
If you can make it back to a friendly city, you and your surviving crew are safe.
Results: As you enter each hex, roll the die once to see the result. This may be Lost (abbreviated "L"), Found (abbreviated "F"), Passage (abbreviated "P"), Attacked (abbreviated "A"), or Captured (abbreviated "C").
Lost: A Lost result means that you have not found a path through the hex. In some cases, such as along a hostile canal, the way is obvious but the presence of enemy troops forces you to take time-consuming alternate routes. In any event, you must roll again for the hex.
Found: A Found result indicates that you have been found by a nonhostile party and will be taken to the nearest city along the canal you were found on. If you are in a neutral city a Found result indicates that you have contacted representatives of the British government and safe passage home for you has been arranged. You've succeeded.
Passage: A Passage result means that you have negotiated the hex without incident and may proceed to the next hex of your journey.
Attacked: An Attacked result means that you have been set upon by hostiles and will probably suffer losses. Losses are explained below. If you survive the attack you may proceed to the next hex of your journey.
Captured: A Captured result means you have been surrounded by overwhelming numbers of enemy troops and taken into captivity. You will probably be exchanged at a later date, but your days of sailing the clouds are at least temporarily ended.
If you make it back, you have survived an epic trek. The amount of terrain hex die rolls you made is how many weeks your journey took.
Losses: Some results on the table have a number after them which indicates the scale of losses your party takes due to the result. This may be due to hostile attacks, starvation, thirst, or other mishaps. The number shown is the number of men out of each six that are lost from your party. So if a 2 appears, it means that two men out of six are lost. If the size of your party is not evenly divisible by six, lose one man for every even set of six you have and roll the die once for each man extra. If you roll the loss number or less, that man is lost.
For example, if you are to lose two in every six and you have 15 men, you would lose two men immediately from the first 12 men in your party, and then roll three dice, one for each of the remaining three. You would lose one additional man for every 1 or 2 rolled.
Since you are the hero of this adventure, it is assumed that you will be the last of your party to perish.
Winning
There are no fixed criteria for winning, although money accumulated is as good a gauge to success as any other, given the nature of the campaign. If several players are involved, you may want to set a time limit in terms of the number of weeks of play, or perhaps set a certain monetary goal, and declare the first person to reach it the winner. Since fame is every bit as important as fortune, any player making a successful epic trek which lasts longer in weeks than the agreed time limit of the game should be declared the true winner, as his exploits will probably occupy the pages of the Times for months.
Epic Trek Encounters Tables
In each table, "-" means the result does not occur for that column.
Grand Canal
| Die | Friendly | Neutral | Hostile |
|---|---|---|---|
| 1 | P | P | P |
| 2 | F | P | P |
| 3 | F | P | L |
| 4 | F | F | L |
| 5 | F | F | A:3 |
| 6 | A:1 | A:1 | C |
Mountain
| Die | Friendly | Neutral | Hostile |
|---|---|---|---|
| 1 | - | P | P |
| 2 | - | L | L |
| 3 | - | L | L:1 |
| 4 | - | L:1 | L:1 |
| 5 | - | A:1 | A:1 |
| 6 | - | A:2 | A:3 |
Dry Canal
| Die | Friendly | Neutral | Hostile |
|---|---|---|---|
| 1 | - | P | - |
| 2 | - | P | - |
| 3 | - | F | - |
| 4 | - | F | - |
| 5 | - | A:1 | - |
| 6 | - | A:1 | - |
Steppe
| Die | Friendly | Neutral | Hostile |
|---|---|---|---|
| 1 | P | P | P |
| 2 | P | P | P |
| 3 | P | P | P |
| 4 | L | L | L |
| 5 | L | A:1 | A:1 |
| 6 | A:1 | A:2 | A:2 |
Clear
| Die | Friendly | Neutral | Hostile |
|---|---|---|---|
| 1 | P | P | P |
| 2 | P | P | P |
| 3 | P | P | L |
| 4 | P | L | L |
| 5 | P | L | A:2 |
| 6 | A:1 | A:1 | C |
Desert
| Die | Friendly | Neutral | Hostile |
|---|---|---|---|
| 1 | - | P | - |
| 2 | - | L | - |
| 3 | - | L:1 | - |
| 4 | - | L:1 | - |
| 5 | - | L:1 | - |
| 6 | - | A:1 | - |
Hill
| Die | Friendly | Neutral | Hostile |
|---|---|---|---|
| 1 | P | P | P |
| 2 | P | P | P |
| 3 | L | L | L |
| 4 | L | L | L |
| 5 | L | L:1 | L:1 |
| 6 | A:2 | A:1 | A:1 |
City
| Die | Friendly | Neutral | Hostile |
|---|---|---|---|
| 1 | - | P | P |
| 2 | - | P | A:3 |
| 3 | - | P | C |
| 4 | - | F | C |
| 5 | - | A:1 | C |
| 6 | - | A:2 | C |
L: Lost. You are lost: roll again for the hex. If a number is given, you lose that amount of men out of every six men that you have to exposure, thirst, etc. (See "Losses" for further explanation.) F: Found. You are found by a nonhostile party and taken to the nearest city along the canal you were found on. In a Neutral City hex, Found means that you have obtained safe passage home and succeeded in your trek. P: Passage. You have passed through the hex without incident. Proceed to next hex. A: Attacked. You are attacked by a hostile party. The number given indicates the amount of men out of every six men that you have that are lost to the attack. ("A:1" means lose one man out of every six that you have. See text for further explanation.) C: Captured. You have been taken into captivity. Your days of sailing the clouds are at least temporarily ended. Length of Journey: The number of terrain hex die rolls you make equals the number of weeks your trek took.
Ship Design
Part I: Basic Design
Ship design consists of two general procedures: basic design and ship rating. The basic design sequence is a simple six-step procedure that provides all the necessary raw information about your ship. Evaluation (rating) enables you to determine the performance of the ship in game terms.
The six steps involved in generating the ship's basic design determine its characteristics and performance. Before beginning the design, however, you must decide whether the ship is to be built in a British or Martian shipyard, as this affects the availability and price of the various components.
The price of a ship depends on whether it is constructed in a British or a Martian shipyard. All construction prices are listed in Pounds Sterling, although in a Martian shipyard the indicated amount would actually be paid in the equivalent amount of local currency.
1. Hull Size
Select a hull size (Hs). Hull size is any whole number. The size of the hull indicates how much liftwood is used in its construction and thus how much weight it may lift. Usually ships weigh about 100 tons per hull size number, but may weigh up to 160 tons per hull size number. It is a good idea to keep a running tally of the weight of your other components as you build your ship to make sure it isn't overloaded.
When the hull is selected, the designer also decides whether it will be fitted with a ram. If so, the ram weighs 10 tons per hull size.
Wooden hulls cost 5000 pounds per hull size in Martian yards and 8000 pounds per hull size in British yards. Wooden hulls may not be armored. Steel hulls cost 10,000 pounds per hull size in British yards and are not available in Martian yards. Rams cost 1000 pounds per hull size at all yards.
2. Propulsion
For steam-powered vessels, select an engine size (Es). The size of the engine times 10 is its weight in tons. Multiply the engine size by 6 and divide the result by the hull size to determine Speed (S = 6Es/Hs). If the calculated speed of the ship is greater than 6, reduce it by half the amount by which it exceeds 6, rounding fractional speeds down. For example, a calculated speed of 7 would reduce to 6 1/2, rounded down to 6. A calculated speed of 9 would reduce to 7 1/2, rounded down to 7. Starting in 1885, steam engines of a new variety came into use, called forced-draught engines. These are more compact and efficient than conventional engines, but are also more expensive. If building a vessel with forced-draught engines, all calculations are the same except that the weight of the engine is only 5 times its size number.
For screw galleys, select a number of turncranks (crewmen who turn the central crankshaft, much like rowers on an oar-powered ship). Each turncrank position weighs 10 tons (including all associated machinery). Speed is equal to the number of turncranks divided by hull size. However, the maximum efficient speed for screw galleys is 4.
For kites, rigging weighs 10 tons per hull size number. All kites have a speed of 1 + 1D6 with the wind and a speed of 1D6/2 (round up) against the wind.
Conventional steam engines cost 1000 pounds per size number in British yards. Forced-draught steam engines cost twice this amount in British yards. Neither type are available in Martian yards. Screw galley machinery costs 100 pounds per turncrank position in Martian yards and twice this in British yards. Kite rigging costs 600 pounds per hull size in Martian and British shipyards.
3. Coal Bunker
For steam-powered vessels, select a coal Bunker Size (Bs). The size of the bunker times 10 is its weight in tons. Multiply the bunker size by 10 and divide by the engine size to determine endurance in days (E = 10Bs/Es). (For purposes of this game, all ships should have a fuel bunker at least twice the size of their engine.)
The coal bunker does not cost anything to install.
4. Armor
Select an armor value (Av) for the ship. The armor value is any whole number. An armor value of 0 is allowed and indicates no armor affixed to the ship's basic structure. Determine the weight of the armor (Aw) in tons by multiplying the armor value by 10 times the hull size (Aw = 10AvHs).
As metal is extremely scarce on Mars, armored vessels are not constructed. Some vessels are built, however, with extremely thick hulls or with double hulls incorporating brickwork or rock waste in between. While this provides a measure of protection, it is much bulkier and heavier than steel or iron armor plate. These Martian ships are called "protected ships" rather than "armored ships," but the effects are much the same. Martian protected ships may be of any armor value desired. Determine the weight of the protection (Pw) in tons by multiplying the armor value by 20 times the hull size (Pw = 20AvHs).
Armor plate costs 10 pounds per ton of weight in British yards and is not available in Martian yards. A protected hull costs 50 pounds per ton of weight in a Martian yard and is not routinely built in British yards.
5. Armament
Select one or more weapons from the tables provided below. At the same time determine placement of the weapon and its field of fire. Each ship may have one forward mount, one stern tower mount, and two wing mount gun positions. The forward mount may fire forward and to either broadside. The stern tower may fire to the stern and to either broadside. The wing mounts may fire to one broadside and both forward and to stern. (Port wing mounts fire to port, bow, and stern. Starboard wing mounts fire to starboard, bow, and stern.)
Each 180-degree pivot position listed above may be replaced by two side-by-side 90-degree pivot mounts. For example, the bow could have two gun mounts, one of which fires to bow and port, the other to bow and starboard. All additional guns, beyond the pivot mounts listed above, fire only to a single broadside. See the illustrations in the rulebook.
If desired, the weapon may be placed in an enclosed armored mount (turret or sponson). This does not increase the weight of the gun if the gun fires only to one aspect. If the gun fires to more than one aspect (that is, it is in a pivot mount) it increases the weight of the gun by 10 percent per level of armor protection. The turrets may be a different armor value than the rest of the ship. A gun normally in a pivot position may be placed under armor at no extra weight if it is placed in a fixed mount. In this case the designer chooses which aspect the weapon will always fire into when the ship is designed. Guns with a rate of fire greater than 1 (including Nordenfelts) must be placed in pivot-type mounts if they are to receive armor protection, even if they are sited to fire into only one firing aspect.
Martian vessels may place fixed firing guns to fire out of gunports from the protected hull, but may not construct protected pivoting gun mounts.
Prices on the Weapon Characteristics tables list the prices in their respective shipyards. A ship built in a British shipyard may be equipped with Martian weapons at the same price as at a Martian shipyard. Ships built at a Martian shipyard may not be equipped with British weapons. Mounting a weapon in an armored turret or sponson increases the cost of the weapon by 20 percent.
6. Exotic Weaponry
A player may install a variety of exotic weaponry, the use of which is described in the advanced rules. Several restrictions should be observed, however.
First, due to limitations on deck space, no ship may have more Hale Rocket Batteries or liquid fire racks than its hull size number. Hale Rockets may not be mounted in wooden ships.
Second, due to the limitations of internal space, no ship may have more Smutts Torpedoes or tether bombs, or a combination of the two, than its hull size number. Only one Smutts Discharger may be mounted per ship, and it fires only into the bow firing aspect. Only one Lob Gun may be mounted per ship, and it fires into all firing aspects.
7. Additional Crew
Each additional crew member requires 2.5 tons of quarters and provisions. For game purposes, only Marines are considered as additional crew. (However, this will be important for designing passenger vessels.)
The quarters for each additional crewman cost 20 pounds.
Part II: Rating
1. Altitude
The lift of a hull is determined by its hull size. The extent to which the hull is overloaded or underloaded will determine its maximum altitude. To determine lift value (LV) divide hull capacity (100Hs) by total weight in tons (LV = 100Hs/T). If the lift value is 1.2 or higher, the craft's maximum altitude is Very High. If the lift value is 1 or higher, its maximum altitude is High. If the lift value is 0.8 or higher the maximum altitude is Medium. If the lift value is 0.6 or higher the maximum altitude is Low. Craft with a lift value of less than 0.6 may not fly.
2. Speed
For steam-powered vessels, multiply the engine size by 6 and divide the result by the hull size to determine Speed (S = 6Es/Hs). If the result is greater than six, reduce the excess by half (rounding fractions down). Thus a speed of 7 would reduce to 6, a speed of 8 or 9 would reduce to 7, a speed of 10 or 11 would reduce to 8, etc.
For screw galleys, speed is equal to the number of turncranks divided by hull size. If the result is greater than four, reduce the excess by half (rounding fractions down). Thus a speed of 6 or 7 would reduce to 5, etc.
All kites have a speed of 1 + 1D6 with the wind and 1D6/2 (round up) against the wind.
3. Hull Hits
Each time that a ship takes total hull hits equal to its hull size, its maximum altitude is reduced by 1 level. When its maximum altitude is reduced below Very Low, it crashes.
4. Crew
Quarters for a majority of the crew are built into the weights and costs of the facilities they man. Thus, a ship normally has the following crewmen for which no extra provision need be made:
- Gunners: Total the gun crew requirements of the various guns mounted on the ship to determine the number of gunners in the crew.
- Engineers: Each steam ship has one engineer per engine size.
- Turncrank: Each screw galley has one turncrank per turncrank position.
- Topmen: Each kite has one topman per hull size.
- Bridge Crew: Each ship has a bridge crew of four men: the captain, the helmsman, the trimsman, and the signalman. The captain is an officer, while the helmsman and trimsman are petty officers.
- Deckhands: All ships have one deckhand per hull size.
- Additional Officers: Total the above crew and divide by 15, rounding fractions down. The result is the number of additional officers in the ship's company.
- Additional Petty Officers: Only British ships have additional petty officers. Divide the crew (excluding officers) by 10, rounding fractions down, to determine the number of additional petty officers.
In addition to the normal ship's complement, additional quarters may allow the ship to carry marines or other passengers. If marines are carried, every tenth marine is a marine officer.
5. Maneuvering Crew Hits
Losses among the maneuvering crew of a ship (engineers, topmen, or turncranks) can cause a loss of speed. For steam vessels, each engineer lost causes a reduction in speed of one. For screw galleys and kites the procedure is different. Make a number of crew hit boxes equal to the total number of turncranks or topmen on board. Divide this up into a number of rows equal to the maximum speed of the galley, or into three rows for all kites. Each row should have boxes equal to the hull size, with all excess boxes being added to the top row.
For example, a ship with a size-4 hull, a top speed of 3, and 14 turncranks, would have 3 rows, each of 4 boxes. The top row would have the two extra boxes added to it.
Each casualty is marked off the top row until the row is gone. Then casualties are marked on the next row, etc. The ship's speed is reduced by 1 for every row completely marked off. When all boxes are marked off the ship may not move.
6. Background Data
These statistics are not necessary for game purposes, but are sometimes handy to know. To determine the speed of the vessel in knots, multiply its speed number by 5. To determine the horsepower of the vessel's engine, multiply its engine size by 125.
Weapon Characteristics Tables
Weapon Characteristics: Martian Cannon
| Weapon | Weight | Pen | DV | ROF | Crew | Rng | Cost |
|---|---|---|---|---|---|---|---|
| Sweeper | 10 | P | - | 2 | 1 | 0/1 | 200 |
| Light | 20 | 0 | 1 | 1 | 2 | 1/2 | 400 |
| Rod Gun | 30 | 3 | 1 | (1) | 2 | 3/6 | 800 |
Weapon Characteristics: Other Martian Ordnance
| Weapon | Weight | Pen | DV | ROF | Crew | Rng | Cost |
|---|---|---|---|---|---|---|---|
| Tether Mine | - | 0 | 4 | - | - | - | 200 |
| Drogue Torpedo | 10 | 0 | 10 | - | - | - | 20 |
| Power Grapnel | 20 | - | - | (2) | (2) | 0/1 | 200 |
Weapon Characteristics: Royal Navy Shell Guns
| Weapon | Weight | Pen | DV | ROF | Crew | Rng | Cost |
|---|---|---|---|---|---|---|---|
| 1-pdr HRC | 10 | 0 | 1 | 3 | 1 | 2/4 | 160 |
| 3-pdr HRC | 10 | 1 | 1 | 3 | 1 | 2/4 | 180 |
| 6-pdr HRC | 15 | 1 | 1 | 3 | 1 | 3/6 | 220 |
HRC = Hotchkiss Rotating Cannon.
Weapon Characteristics: Other Royal Navy Ordnance
| Weapon | Weight | Pen | DV | ROF | Crew | Rng | Cost |
|---|---|---|---|---|---|---|---|
| Nordenfelt | 5 | P | - | 5 | 1 | 1/2 | 100 |
| Hale Rockets | 5 | 0 | 1 | 6 | (1) | -/4 | 100 |
| Tether Mine | - | 0 | 6 | - | - | - | 200 |
Table Notes:
- Weight: Weight includes weight of weapon, mount, crew, and magazine.
- Pen: Penetration (Pen) is the value of armor the round will penetrate. Weapons with a penetration value of "P" are considered to be small arms fire and affect personnel (crew) only.
- DV: "DV" is the gun's damage value.
- Range (Rng): The first number under range is the weapon's effective range; the second is its long range.
- ROF: Rate of fire (ROF) is the number of shots the gun may take per turn. Weapons with a ROF of (1) may fire every other turn. For every crew position short a gun mount is, it takes one turn longer to reload. Thus weapons with an ROF of (1) and short 1 crewman would have an effective ROF of (2).
Errata, Clarifications and Variants
Originally published in Challenge #43.
The following errata, clarifications and variants are based on gamer feedback and suggestions received since publication of Sky Galleons of Mars (Space: 1889). Intended to be a consolidation of all errata and changes published to date, this article also includes new modifications to the game. The article is divided into three parts: Ship Design, Ship Combat, and Variants. The first two sections should be considered official, while the third is optional.
Ship Design
Official modifications to Sky Galleons of Mars are as follows.
Balanced Armament: Due to stability requirements on the vessel, all armament must be balanced (by weight) on each side. That is, if 40 tons of weapons are mounted on the port side, 40 tons must also be mounted on the starboard side.
Allowed Numbers of Marines: Due to limitations on deck size, a maximum of five marines may be carried per hull size. Any troops in addition to this are carried as passengers belowdeck and may not participate in combat.
Ship Combat
Official modifications to Sky Galleons of Mars are as follows.
Collisions: A ship may maneuver to avoid a collision in the same manner in which it maneuvers to avoid a ram. If the ship has already moved for this turn, the movement expended to avoid the collision is subtracted from its next turn's allowance.
Boarding Actions: No ship may fire at another ship which has a friendly boarding party on it.
Damage: When rolling to recover from a trim critical hit, the ship recovers if the player rolls higher than the damage value of the damage, or, if the damage value is 6 or more, if he rolls a 6. The favorable modification due to hull size is made to the die roll, not the damage value. For example, a ship with a hull value of 5 which suffers a trim critical with a damage value of 7 recovers on a roll of 5 or 6, not just a 6.
Small Arms Fire: When firing at armored ships, add the armor value of the ship to the small arms save number. A 6, however, never saves, regardless of the armor value of the ship. Armor also does not protect boarding parties.
Throckmorton Conveyors: A maximum of one Throckmorton conveyor may take off from a ship per hull size number per turn.
Tether Mines: If a ship has more than one tether mine raised, make only one roll for hits; if one mine hits, all mines detonate. This counts as a single hit, but the damage values of all the mines are added together. If tether mines are released, roll separately for each mine to see if it hits.
Drogue Torpedoes: If a ship has more than one drogue torpedo deployed, make only one roll for hits; if one hits, all the torpedoes deployed detonate. This counts as a single hit, but the damage values of all the torpedoes are added together. A drogue torpedo may be released and used as a bomb (see below). When using a drogue torpedo as a bomb, the same procedure is followed as when determining a bomb hit, but one hit is scored with any positive number. The drogue retains its own penetration and damage values.
Bomb Racks: Bombs are carried in racks and dropped on targets below the vessel. Normally these will consist of fortresses, cities, ships at anchor, or aerial vessels on the ground. Bombs may be dropped, however, on aerial or naval vessels either moving or stationary. Bombs are dropped during movement in the same manner as Martian liquid fire; roll one die per rack of bombs and subtract the difference in altitude between the ship and its target. If the target is moving, subtract its current movement (the number of movement points most recently expended) as well. The result is the number of bomb hits scored. Each bomb hit has a penetration of 1 and a damage value of 2.
Spike Droppers: Invented by Martians but soon copied by European powers, the spike dropper is little more than a hopper full of short, metal, finned spikes or darts. Attacks with spike droppers are made in exactly the same way as liquid fire racks, with the one exception that all hits scored are crew casualties.
Each hopper of spikes may be used only once per game. Once dropped, the hopper is expended and may not be reloaded during the game. No crewmembers need to man the spike dropper; its release controls are on the bridge. Each spike dropper is represented on the ship status sheet by a rectangle containing several spikes.
If spike droppers are located on a ship, count them as guns for hit location rolls.
Variants (Optional)
A number of players have commented that with sequential movement there is little emphasis in the game on maneuvering. Both players can do pretty much whatever they like based on absolute knowledge of their opponents' position. I think there is some truth to this charge. The correction commonly suggested is to use plotted simultaneous movement, as in games such as Avalon Hill's Wooden Ships and Iron Men, or Yaquinto's Ironclads. There are difficulties with this system, however.
First, with different altitudes (as well as changes in course and speed) available, deliberate ramming becomes virtually impossible.
Second, captains usually had some ability to respond to an enemy's maneuver, but in plotted movement it becomes almost entirely a guessing game, with ships sometimes steaming off in entirely different directions.
The variant which is presented below may provide a compromise.
Plotted Movement: Both players must plot half their movement (in terms of movement points) in the Initiative Phase of each turn, at the same time that crew assignments are changed. A player may plot less than half his total movement allowance, but this will reduce his total allowed movement for the turn.
After initiative is determined, both players move their vessels exactly as plotted at the start of the turn. Play now proceeds normally, except that each player may not expend more movement points in his own Movement Phase than he did in the plotted portion of his move.