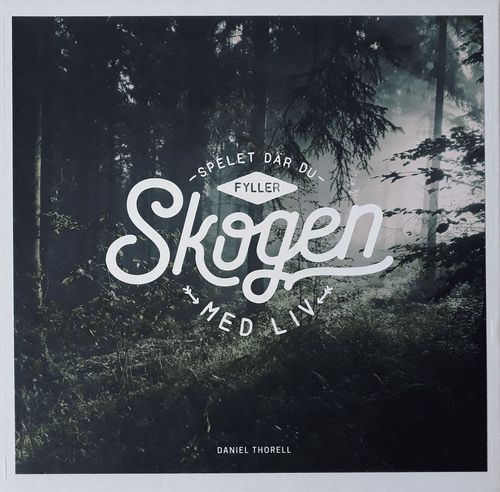
Skogen
Skogen Rulebook
Table of Contents
Table of Contents
Inside the Box
- 1 game board
- 6 player tokens
- 1 catastrophe die
- 1 rules folder
- 50 species tiles
- 47 element tiles
- 3 cloth bags
- 6 screens
- 18 action cards
- 19 life cards
- 1 Brook expansion (Bäck)
Preparation
- Place the game board on the table and place each player's token on the starting point.
- Place the elements in individual piles with the front side (the element itself) facing up: there will be 12 piles in total.
- Deal three random action cards (actionkort) to each player.
- Put the species tiles in their bags:
- Tiles with a circle symbol are placed in the circle bag (green) and are each worth 1–3 points.
- Tiles with a triangle symbol are placed in the triangle bag (blue) and are each worth 6 points.
- Tiles with a square symbol are placed in the square bag (red) and are each worth 5–9 points.
- Each player draws four species tiles from the bags, without looking. You can take the tiles from whichever bag you like. In the beginning you might want to take tiles from the green circle bag, since these are easiest to play.
- Each player takes a screen and hides their species tiles behind them. (You can look at your own tiles.)
How to Win
The game is over when either of the following things happen:
- All of the cloth bags containing species tiles are empty, and one player has no species tiles left.
OR
- If no player can play a species tile after two complete rounds.
The player with the most points when the game is finished is the winner. You don't need to count up how many points you have collected, just look at which player token is furthest round the board. Player tokens can "lap" round the board if necessary.
Getting Started
The player who last spent time in a forest begins. When it's your turn, choose one of the following two alternatives:
- Take one element tile of your choice, then place as many species tiles or element tiles as you would like on the board, and play as many action cards as you want. Count up your points, and move your player token. At the end of your turn, collect as many species tiles as you've played: again, draw them without looking in the bag/s. You should always have at least four species tiles when starting your turn.
- Or, take two element tiles of your choice.
Play rotates around the table clockwise.
Components
Element Tiles
Element tiles, when placed on the board, create the right conditions and allow species tiles to be played.
Species Tiles – Front
Species tiles are placed on the board next to the right elements with the front side facing up.
Species Tiles – Back
On the back side of the species tile, you can find information on the conditions that are needed for it to be placed on the board.
What Do the Symbols Mean?
Apart from the green catastrophe die squares, the icons on the game board fulfill no purpose – other than looking nice.
The notes below refer to the species tile back (the example tile shows a Marten, MÅRD, with its requirements on its back):
a) The icons at the top of the species tiles' back sides show which element cards have to lie directly adjacent to the species card on the game board.
b) If there are other species on the species card, these all need to exist somewhere on the game board. They do not need to lie directly adjacent to the species tile, though.
c) The symbol on the bottom left shows which bag the tile should go into.
d) On some tiles, you will find a letter – for example a "B" on the marten tile. This means that you should pick up the Balans life card when you place the marten on the board. (Read more about life cards on the next page.)
e) This number tells you how many points the card is worth.
f) When, for example, you place the black woodpecker on the game board, you can also pick up the tree-hole element tile, and either use it right away or save it for another round.
On certain species tiles, you will find a "+" sign and another species. For example: "+ VALFRI FÅGEL" or "+ SKÄGGLAV". In this case, the named species tile must already exist somewhere on the game board. It does not have to be adjacent to the tiles being played.
How to Place the Tiles
In order to be able to place a species tile on the board, you need to make sure that it has everything it needs to thrive. Namely: the elements that it requires should all be directly adjacent to it, in any or all of the eight squares around the tile.
You get points for all of the species and all of the elements that you place in your turn, but not for any elements that were already on the board.
Example 1: You want to place a Blue tit (Blåmes) (1) on the board. On the back side of the tile, there are the symbols for Deciduous tree (2) and Tree-Hole (3). This means that the element tiles representing the deciduous tree and the tree-hole need to be directly adjacent to the blue tit on the game board, edge-to-edge or corner-to-corner. In this example, the deciduous tree tile is already on the board. You have the tree-hole tile, and place it on the board. Finally, you can place the blue tit so that it is adjacent to both the deciduous tree and the tree-hole.
The player gets points for every tile that they place on the board. In this example: the tree-hole gives 2 points and blue tit gives 3 for a total of 5 points. No points are awarded for deciduous tree, since it was already on the board. The player moves their token forwards 5 steps.
Example 2: The Siberian jay (Lavskrika) needs the Conifer and Old tree elements, as well as "SKÄGGLAV". In order to be able to place the Siberian jay species tile, it needs to be adjacent to the conifer and the old tree. Additionally, the beard lichen ("skägglav") tile also needs to be on the board already.
Life Cards
If you play a species tile with either "B", "F", "P" or "M" on it, you can pick up the corresponding life card. Any player who has two life cards in their possession can, for the rest of the game, have five species tiles in their possession at any one time; players with four or more can have six.
At the end of the game, life cards give you extra points. The player with the most life cards at the end of the game gets ten points. In the event of a tie, the players with the most life cards get five points each. Any player who has at least one life card of every type also gets ten points/an additional ten points.
The four life cards are:
- B – Balans (Balance)
- F – Fröspridning (Seed dispersal)
- P – Pollinering (Pollination)
- M – Mykorrhiza (Mycorrhiza)
Example: You play the Marten card. Because the marten has "B" on the back of its card, you pick up the Balans life card.
Action Cards
At the start of the game, every player takes three action cards at random. Players are allowed to look at the cards, and they can use them during their turns. Action cards cannot be used after the player's token has been moved (with the exception of the Expedition card). Each action card can only be used once.
The six action cards are:
- Korsbefruktning (Cross-pollination): You may exchange one of your species tiles for one of your opponents' species tiles. All players must show their species tiles. Your opponent gets in exchange the species tile you choose.
- Hot Spot: You may place one species tile on top of another species tile on the game board. More than two species tiles may lie on top of each other.
- Expedition: Choose any species tile from any bag. (It can only be used at the end of your turn, when you fill up the species tiles.)
- Migration: You may take any element tile from any player without giving anything back.
- Energiboost (Energy boost): You may pick up an extra element tile.
- Katastrof (Catastrophe): You may roll the catastrophe die.
Translator's note: the card effects above are translated from the Swedish text printed on the cards, since the English sheet only names the cards and does not describe their effects.
The Catastrophe Die
When your player token lands on a green square, you must roll the catastrophe die. Depending on whether you roll wildfire, storm or flood, you then choose and take an element tile from the selection below.
- Wildfire: choose between the yellow sun element, the grey element, or the red-orange element (the source prints these only as icons, so they are described here by colour).
- Storm: choose between the yellow sun element or the grey element.
- Flood: choose between the green leaf element, the grey element, or the blue element.
If there are none of the right sort of element tiles left, you can roll the die again.