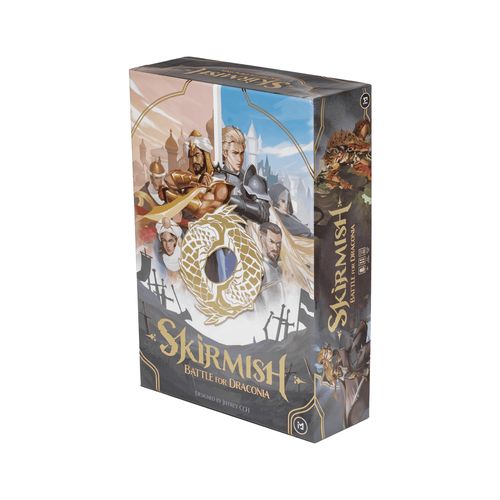
Skirmish: Battle for Draconia
Skirmish: Battle for Draconia Rulebook
Table of Contents
Table of Contents
Factions
Ironshroud — Heavily armored legions from the highly developed cities near the Edwige Rivers. They are famous for their high defense and steady supply lines.
Scorching Sands — Cavalry and warriors from the Scorching Plain. They are versatile strategists well-known for swiftly switching between fast attacks and ambush tactics.
Amazania — Guardians of the White Tooth Gorge. While they may not excel in attack and defense, they can overcome any opponent using their dreadful poison and sneaky attacks.
Frostfjell — Skilled axe-wielding warriors based in the Northern Mountains. They are the most formidable and reckless fighters, showing courage and readiness to sacrifice for their clan.
Zig-mar — Beyond the Arid Wastes lie towering pyramids, forbidden tombs and a mysterious kingdom. They can take painful losses and recover their strength, even their slain soldiers seem to come back from the dead.
Highwood — Masters of the arrow and bow, these warriors dwell in the Misty Forests. They bide their time, ambush from the trees and bombard enemy lines when all defenses are down.
Components
- 6 Faction boards
- 12 Settlement cards (2 for each of the 6 factions)
- 102 Unit cards (17 for each of the 6 factions)
- 1 First player token
- 14 Settlement tokens
- 24 Supply tokens
- 24 Fortify tokens
- 4 Graveyard cards
- 4 Camp cards
- 22 Health (1) tokens
- 6 Health (5) tokens
- 12 Faction unit card lists
- 4 Player-aids
Set Up (for 2 players)
Select a Faction Each player selects 1 of the 6 factions and takes the corresponding deck of 17 unit cards. Then, each player places the faction board of the chosen faction in front of them. Players should use the 2-player side of the faction board. 2-player faction boards do NOT have the 3-4 player symbol on the bottom right corner.
Optional: Select a Settlement card (Recommended for experienced players) If players have chosen to play in Settlement mode (refer to the Settlement Mode section), players can choose 1 of the 2 Settlement cards of the selected faction and place it below their faction board. Prepare the corresponding settlement token(s) if any.
Set Up Health Tokens Each player takes 10 health tokens to represent the starting health in the game. (In Settlement mode, refer to the card for your starting health)
Set Up Token Pool Place the supply and fortify tokens in a pile in the center. Players take tokens from the pool throughout the game.
Set Up Areas Players also set up areas for the Camp and the Graveyard by placing the 2 cards next to their player boards. The Camp and the Graveyard areas should be easily observed by both players. During the game, players should place units with the card class and card abilities visible to all players when putting them in the Graveyard or Camp.
- Graveyard — Eliminated units will be placed in the Graveyard.
- Camp — After a round, units that survived will be placed in the Camp. They may return to the player's hand during the Camp Phase in later rounds.
Determine the First Player Randomly determine the first player. The first player picks the first player token.
Note: In Skirmish: Battle for Draconia, possessing the first player token doesn't guarantee the player to be the first to act. Refer to the Order Phase for more details.
Draw Setup Hand Each player takes the faction leader and the 2 champions from the deck. They then shuffle the deck and randomly draw 4 cards from it. Combining them with the leader and the 2 champions, to form the starting hand of 7 cards.
The Battlefield (2-player)
- Card slots — Unit cards are placed here.
- Battlelines — Units can ONLY attack the opposite card slot of their opponent (unless they have abilities that say otherwise or it's a 3-4 player game).
- Player's token pile — Supply tokens and some settlement tokens are placed here.
- Status slots — Fortify tokens, supply tokens, and some settlement tokens are placed here to boost or affect the corresponding battleline. Fortify tokens are placed here directly when Fortify is activated. While supply tokens are placed here from the token pool, during the Camp Phase, if the player wants to.
Card Abilities
Card Details
- Attack value
- Defense value
- Card abilities
- Card class
- Unit name
- Faction emblem
General Abilities
Haste: Reveal all Haste units in the Order Phase, the player with the most Haste acts first.
Ambush: When the Ambush unit is attacked, reveal this card, deal 1 damage to the opponent and cancel their attack. (Unless it is a Cautious Attack or if the card has been revealed before the attack, refer to the Action Phase section)
Command: Your unit(s) adjacent to this unit have +1 attack. (can be stacked)
Arrows: When your turn begins, before your action, if your units have any number of Arrows, you may perform ONE single arrow strike: Select one of the opponents' unit as a target (regardless of its position) and reveal it if it's face-down. If the number of Arrows your units possess is greater than the defense of the target, eliminate the target and deal damage to the opponent's health with the value difference. An arrow strike does not count as an attack; it will NOT trigger Ambush, Revenge, and fortify tokens.
Supply: During the Back Line Phase, gain 1 supply token.
Fortify: During the Back Line Phase, place 1 fortify token on the status slot of the corresponding battleline. Your unit on the battleline gains +1 defense for the next defense. You can hold 2 fortify tokens at most on each status slot.
Faction Abilities
Ironshroud: Persistent In the Camp Phase, you can spend 1 supply token to retrieve this unit from Graveyard.
Scorching Sands: Maneuver When this unit's attack is blocked by the opponent's defense, you may retrieve this unit to your hand and place another unit from your hand onto the battleline face-down. It cannot be the same unit as before. If the attack is canceled by Ambush, Maneuver won't take effect. (You cannot perform an attack with this newly placed card in this turn.)
Amazania: Poison When this unit's attack is blocked by the opponent's defense, eliminate the target unit. If the attack is canceled by Ambush, Poison won't take effect.
Frostfjell: Revenge When this unit is eliminated by the opponent's attack (or Poison), eliminate the attacking unit. Units eliminated by Arrows won't trigger Revenge.
Zig-mar: Revive During the Back Line Phase you restore 1 health OR retrieve 1 basic unit (not leader nor champion!) from the Graveyard.
Highwood: Bombard During the Back Line Phase directly deal 1 damage to the opponent.
Round Sequence (2-Players)
Skirmish: Battle for Draconia is played over no more than 6 rounds. Each round is divided into 6 phases. After each completed round of phases, a new round begins starting with phase 1.
- Deploy Phase — Simultaneously deploy 3 units
- Order Phase — Determine who acts first in the Action Phase
- Action Phase — Attack with the units on the field
- Back Line Phase — Activate back line abilities
- Camp Phase — Retrieve a card from Camp & spend supply tokens
- Upkeep Phase — Draw 2 cards and pass the first player token
Victory Condition To defeat your opponent:
- Bring their health to 0
- OR eliminate 8 of their units. (Refer to the End of the Game section)
1. Deploy Phase
Each player simultaneously places 3 unit cards, face down, in their player area. The 3 units are now on three battlelines, on the field. After both players are ready, proceed to the battle.
2. Order Phase
Players must reveal all the face-down units with the Haste ability. The player with more Haste on the field will take action first in the following Action Phase. If there is a tie, the player with the first player token will take action first.
Example: Beth has the first player token, however Alan has more Haste. Therefore Alan acts first.
Note: Don't change the possession of the first player token in this phase. The token only serves as a tie-breaker and will only be passed in the Upkeep Phase.
3. Action Phase
Players take turns to act in the order that was determined in the previous phase.
Arrow Strike If your units have any number of Arrows, you may perform ONE single arrow strike. Select one of the opponents' unit as a target (regardless of its position) and reveal it if it's face-down. If the number of Arrows your units possess is greater than the defense of the target, eliminate the target and deal damage to the opponent's health with the value difference.
Example: It's the beginning of Player 1's turn. Player 1 reveals two of his units, showing 3 Arrows. They then selects the middle unit of the opponent as a target and performs the arrow strike. The target, a Tombkeeper, is revealed. Although Tombkeeper has Ambush, it is not triggered in arrow strike. Tombkeeper's defense is 1, it is eliminated, and Player 1 deals 2 damage to the opponent.
Main Action After the arrow strike, the player can now choose 1 of the following 3 main actions:
A) Skirmish Each of your units on the field perform an attack (refer to the Performing an Attack section for more details about attacking). Declare your unit as an attacker and perform attack one by one. You can choose any order in which the attacks happen, this can have a powerful strategical advantage.
Example: Alan performs Skirmish, deciding to attack from left to right. The 1st attack is successful, Prince William has 3 attack to Beth's Tara with 2 defense. So Tara is eliminated and Beth's health is hit with the value difference of 1. The next attack has Alan's Shadow Archer 2 attack defended by Beth's Dastan 3 defense, no units or health is lost. The last attack is canceled by Beth's Shamshir Warrior Ambush, as a result Alan loses 1 health.
B) Cautious Attack Declare one of your units as an attacker to perform ONE single attack. The defender's Ambush is ignored.
Sometimes we need to act cautiously to get those sneaky foes...
Example: Alan performs a Cautious Attack with Prince William with 3 attack. It is revealed that Beth had Shamshir Warriors with Ambush and 1 defense. However, Ambush is not in effect so Alan's attack is NOT canceled and he deals damage. Shamshir Warriors is eliminated and Beth loses 2 health.
C) Rest Gain 2 supply tokens and place them in your own token pile.
Let your soldiers take a breath and prepare for the next battle...
Performing an Attack
Attacking is the main way to win the game. When a player attacks, perform the following steps:
-
Reveal attacking unit: If the attacking unit is face-down, reveal it.
-
Reveal defending unit: The opposing unit, according to the battleline, is the defending unit. If it is face-down, reveal it. If the newly-revealed unit has Ambush and the attack is not a cautious attack, deal 1 damage to the attacking player, and cancel the attack. (Ambush will not be triggered if defending card is revealed before the attack.) If there is no opposing unit in the battleline, the attack is also canceled.
Without a target, the army stands down...
-
Token: The attacking player must move the supply token (if any) of the corresponding status slot onto the attacking unit to boost its attack, and the defending player must move the fortify token(s) of the corresponding status slot onto the defending unit to boost its defense.
-
Resolve the attack: Compare the attack of the attacker with the defense of the defender. If the attack is greater than the defense, eliminate the defending unit (by moving it to the Graveyard) and deal damage to the opponent with the value difference. If the attack equals or is smaller than the defense, nothing happens. Discard all the tokens on the units afterwards.
The Attack Ends.
Revealing Units
Units can be revealed in the following ways:
- In the Order Phase, all units with the Haste must be revealed.
- The active player can freely reveal any unit owned by them, during their turn.
- When a unit attacks or defends, it must be revealed.
- When a unit is targeted by arrow strike, it must be revealed.
- In the Back Line phase, all units must be revealed.
Once a unit is revealed, it cannot be faced-down again in the battle. Its ability only takes effect when it is facing up.
Tip: Understanding Unit Classes & Compositions Alongside abilities, there are 7 kinds of units categorised by class. When making an attack, consider what classes your opponent has and what they can do. For example, during the Camp Phase, check to see if your opponent still has a powerful card like a Champion or if they still have plenty Ambushers. It may change the type of attack or the type of units you want to deploy. Check the faction unit card lists to help you.
To know your strength is to know your enemy's...
Unit Classes: The Leader, Champion, Attacker Class, Defender Class, Ambusher Class, Charger Class, Supplier Class
4. Back Line Phase
After ALL players take their turn, reveal all the face-down units. Activate all back line abilities (the icons with hexagon shape) of the surviving units on the field. The back line abilities are:
- Supply
- Fortify
- Revive
- Bombard
5. Camp Phase
Starting with the player with the first player token, the player takes turns to:
- Retrieve 1 card from their Camp to hand. If there is no card in it, skip this step.
- Spend supply token(s) for effects. Players can spend tokens any way they like as long as they have enough supply tokens.
- Spend 2 supply: Restore 1 health.
- Spend 1 supply: Retrieve 1 extra card from their Camp to hand.
- Spend 1 supply: Place the supply token on the status slot of one of the battlelines. Their unit on this battleline gain +1 attack for the next attack. Players can hold 1 supply token at most on each status slot.
6. Upkeep Phase
- Each player moves all of their units on the field to their Camp.
- Each player draws two cards from the top of their deck.
- Pass the first player token to the other player.
End of the Game
During the game, a player is eliminated if they meet ONE of the following conditions:
- 0 or less health;
- 8 or more units in the Graveyard
The game ends and the surviving player wins the game immediately!
Also, the game ends when the sixth round ends (the decks are empty and players cannot draw cards in the Upkeep Phase). The player with more health wins! If there is a tie, the player with fewer units in the Graveyard wins. If there is still a tie, the players share the victory!
Game Modes
3-4 Player Variant More players, only one winner. In this mode, each players' left and right line will be confronting specific opponent's line corresponding to the position. The middle line could attack any opponents' middle line.
Deck Construction & Draft Variant Skirmish: Battle for Draconia can also be played in deck construction and drafting variant mode, offering more depth and space for strategies. Before the game, players can construct their customized deck by simple rules: 1 base, 1 leader, 2 champions, 14 basic units. In deck construction, the rules allow you to mix and use cards from maximum 3 factions. In draft variant, your card deck choices are limitless from any faction to build a truly wild army.
Note: Deck Construction and Draft Variant are compatible with settlement mode and all player counts.
Settlement Mode Players start with a settlement of their faction. In setup, after selecting a faction, they simultaneously select 1 of 2 settlement cards of their selected faction as their base. Each provides a distinct ability and even winning objectives!
Note: Settlement mode is compatible with Deck Construction, Draft Variant and all player counts.
3-4 Player Variant
Skirmish: Battle for Draconia can be played with 3-4 players, with the following additional rules:
-
Set Up: Each player uses the 3-4 player side of the faction board. Each player sets up their own Camp and Graveyard areas that are easily visible to other players.
-
Battlelines & Attacking: Battlelines in 3-4 player games are arranged differently. Each player's left and right units are confronting a specific opponent's unit.
Example: Alan's left unit attacks Beth's right unit. Alan's middle unit can attack any of the opponent's middle unit.
-
Turn Order: Just like a 2-player game, the player with the most Haste on the field will act first in the Action Phase. When there is a tie, the player with the first player token OR the player who is closest to the first player token, counting in a clockwise direction, will take action first.
-
Arrow Strike: An arrow strike can be assigned to any unit of any opponent.
-
Bombard: Using Bombard on the left or right unit will target the corresponding opponent. If Bombard is activated by the middle unit, the player can choose ANY opponent as the target.
-
Eliminating a Player: When a player has zero or less health OR 8 or more units in the Graveyard, the player is knocked out. The game continues with the remaining players. The battlelines will change immediately when a player is knocked out.
Example: In a 4-player game, if the player sitting on your left is knocked out, the player sitting directly opposite you becomes the player on your left. Alan and Carl now share a border, and more conflicts are foreseeable. When a game is down to 2 players, they play in a 2-player game setting from now on. The final player who survives is victorious and wins!
Example: Turn Order Alan has the first player token and no Haste, Beth has one, Carl has two, and Dora has one. In the Action Phase, Carl will be the first one to act because he has the most Haste. Beth and Dora have the same number of Haste, but as Beth is closer to the first player token, counting in a clockwise direction, she will be the second player to act. Next will be Dora. Alan will be the last to take the turn. In the Camp Phase, Alan has the first player token so it begins with him. Players then take turns in a clockwise direction to carry out steps. In the Upkeep Phase, Alan passes the first player token to Beth.
Example: Arrow Strike Alan decides to perform an arrow strike to Carl's right unit. So reveals all his units with Arrows first. As he has two Arrows on his units, he performs an arrow strike with a value of 2 to Grim Bjorn. The position of this unit makes it unreachable for Alan, but the arrow strike is not limited by that. Grim Bjorn has 3 defense and survives. After resolving, Alan declares a Skirmish as their action. As a result, his left unit attacks Beth's right unit, his right unit attacks Dora's left, and he can choose which middle units of the three opponents he wants to attack with their middle unit. He decides to attack Carl's middle unit. After all the attacks are resolved, Alan's turn ends.
2vs2 Player Games 4-player games can also be played as a team game. Players will form teams of 2 and go head to head against each other. Team members must sit opposite each other and attack enemy players to their left and right. Many of the same 3-4 player game rules apply to this mode except for Elimination.
A team is eliminated when ONE team member has 0 or less health OR 8 or more units in the Graveyard.
Advanced Play
Deck Construction
Before a game, players can construct their own decks to match their tactical style and imagination. A customized deck must have 17 cards, which always include 1 leader, 2 champions, and 14 basic units of any class. (Yes! You can construct a deck with more than 8 Ambushers if you want to).
Players are free to mix no more than 3 factions together when building a deck. And in case players are using multiple game copies, make sure no identical champions, and no more than 4 identical basic units, by title, are included in a player's deck.
If the players would like to play with Settlement mode (refer to the Settlement Mode section), the settlement cards should be selected during deck construction, and it must be a settlement from the faction that matches the leader of the deck.
Draft Variant
Before a game, the players can draft their decks from randomly shown cards, and battle right after the decks are completed. Throughout the draft, all picked cards should be revealed and remain face up in front of the players. Players can always check the picked cards of ALL players.
-
At the start of a draft, the players must first create 3 draft piles. Shuffle all the leader cards of all factions to form the leader draft pile. Shuffle all the champion cards of all factions to form the champion draft pile. And shuffle all the basic unit cards of all factions to form the basic unit draft pile.
Note: Unlike the rules of deck construction, there is no restriction on the mix of factions in the draft variant.
-
Once all the piles have been formed, randomly select a player as the first player. The draft will begin with the leader draft: a. Deal 3 cards from the leader draft pile to the center of all players. Starting from the first player, players take turns in a clockwise direction, to pick 1 of the 3 cards as the leader of their deck and place it in front of them face up. b. After each pick, deal a new card from the leader draft pile to the center before the next player's pick, so there are always 3 options.
-
The players will then draft the champion cards. The rules are the same as before: Deal 3 cards from the champion draft pile to the center of all players. Starting from the first player, players take turns to pick a champion card from the 3 options, until each player has picked 2 champion cards. After each pick, deal a new card from the Champion draft pile.
-
The basic unit draft is slightly different from the leader & champion drafts: Deal 6 cards from the basic unit draft pile to the center of all players, forming a row. Starting from the first player, players take turns picking a basic unit from the 6 cards. After a player has picked a card, place the picked card in front of them, and always DISCARD the left-most card in the row to a discard pile. Then slide the remaining cards in the row to the left, draw 2 new cards from the basic unit draft pile, and add them to the right-side of the row. Repeat the steps until players have 14 basic units.
If the basic unit draft pile is running out of cards, shuffle all the discards in the discard pile to form a new basic unit draft pile.
Settlement Draft If the players would like to play with Settlement mode (refer to the Settlement Mode section) before the draft, shuffle all the settlement cards of all factions, and randomly deal 3 settlement cards face-down to each player. The players can check their cards secretly throughout the draft to plan for the synergy between the settlement and the deck. After the draft is complete, the players pick a settlement card from the 3 and reveal it simultaneously.
The draft variant is compatible with the 2v2 variant. While in 2v2, teammates should be sitting opposite each other during the draft so the two teams can pick the cards alternately.
Return all the unpicked cards to the box. The draft is complete, and the players can now play a game with the decks they have just built.
Important Note: Unlike the rules of deck construction, it is not necessary for the settlement card to be from the same faction as the leader.
Settlement Mode
After your first game, you are recommended to play in settlement mode to further diversify different tactic styles!
During setup, players choose 1 of the 2 Settlement cards of the selected faction and place it below their faction board. If needed, prepare the corresponding settlement token(s) and place them in the player's token pile.
Instead of always starting with 10 health tokens, shield on the settlement card now defines the player's starting health. It also provides a distinct ability to the player.
Refer to the Settlement Cards section for a detailed explanation of the abilities.
Settlement Cards
Each kingdom holds strange and fantastical places, from scorching hot deserts of Saria to the mysterious mist-covered valleys of Highwood. Utilise the many benefits your kingdom's land may hold and unlock their potential.
Glimmerspire Once per ROUND: In the Camp Phase, you can spend 2 supply tokens to place 2 fortify tokens on one of your status slot.
Crimson Palace Prepare 1 Palace token. Once per GAME: At the end of the Order Phase, after the turn order is determined, you can choose to retrieve all your units with the Haste back to your hand from the field. Flip the Palace token when it is used.
Emmerest River When an Ambush is successful, you deal 2 damage instead of 1.
The Saria Desert Prepare 3 Burn tokens. When you deal 2+ damage to the opponent on a single attack, and there are no Burn token on that battleline of the opponent, place a Burn token on the corresponding status slot of the opponent. You win immediately when all 3 Burn tokens are placed!
Jungle of Mouths If there are 4+ units in an opponent's Graveyard, all your units with Supply (ability) gain +2 attack. Multiple supply on a unit also grants +2 attack only.
The Beast's Bellow Prepare 2 Bellow tokens. Twice per GAME: When your unit with Command enters the Graveyard, you can flip a Bellow token to let it enter the Camp instead.
White Tooth Gorge Prepare 3 Blessing tokens. Once per GAME: In the Camp Phase, you can choose 1 of 3 Blessing tokens and place it on one of your status slots facedown. You may only use ONE token per game. In the next round, when your unit on the battleline is revealed, reveal the token and it comes into effect until the end of the round. Once the round is over, discard all 3 blessing tokens.
- Your unit on the battleline gains +2 defense.
- Your unit on the battleline gains Ambush.
- Your unit on the battleline gains Arrows.
Fjord Krak Prepare 2 Crack tokens. When you deal 3+ damage to the opponent on a single attack, you may place a Crack token on the corresponding status slot of the opponent. You win immediately when the same status slot receives the Crack token again!
Anvira Prepare 3 Pyramid tokens. Three times per GAME: In the Camp Phase, you may spend the cost to place a Pyramid token on one of your status slots. The token stays there and comes into effect until the end of the game. You can place multiple Pyramid tokens on one battleline.
- Spend 3 supply tokens: Your unit on the battleline gains +1 attack.
- Spend 3 supply tokens: Your unit on the battleline gains +1 defense.
- Spend 5 supply tokens: Your unit on the battleline gains +1 attack and +1 defense.
The Veiled Catacombs If there are 6+ units in an opponent's Graveyard, you win immediately!
Moonlit Deep When your unit(s) initiate an arrow strike, gain +1. It has no effect when you have no Arrows on the field.
Graymist Valley All your units with the Fortify (ability) lose all of that ability. For each Fortify they lose, they gain +1 attack and +1 defense.
Quick Summary
Round Sequence
- Deploy Phase: Deploy 3 units
- Order Phase: Determine turn order
- Action Phase
- Arrow Strike: Reveal Arrows Units
- A. Skirmish: All units attack
- B. Cautious Attack: 1 unit attacks
- C. Rest: Collect 2 supply tokens
- Back Line Phase: Activate back line abilities
- Camp Phase: Retrieve 1 unit from Camp & spend supply tokens
- Upkeep Phase: Draw 2 cards & pass first player token
Reminders
- Reveal: Players can reveal any unit during their turn to activate its ability.
- Empty Battleline: If there is no opposing unit on a battleline, cancel the attack and move on.
- Arrow Strike: Players can only target ONE unit no matter how many Arrows they have.
- Token Capacity: A status slot can only hold a maximum of 2 fortify tokens & a maximum of 1 supply token during a round.