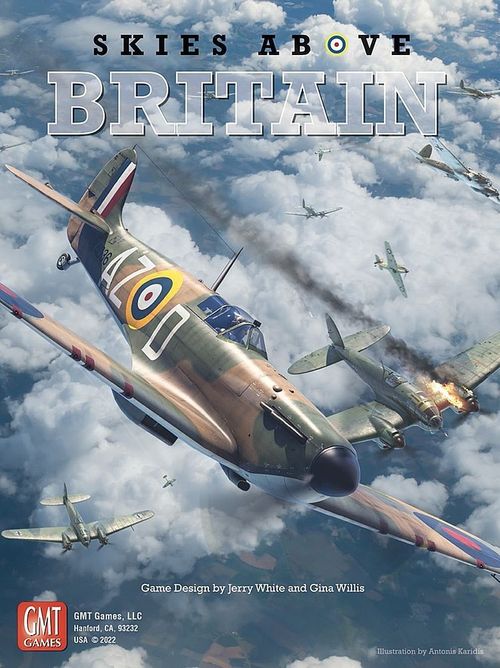
Skies Above Britain
Skies Above Britain Rulebook
Table of Contents
Table of Contents
Introduction
Historical Context
The air campaign known as the Battle of Britain began on 10 July 1940. German planning initially expected the Luftwaffe to incapacitate RAF Fighter Command by the middle of August, preparing the way for Operation Sea Lion, Hitler's planned amphibious invasion of Britain. The Germans had every reason to be optimistic. They outnumbered the RAF in trained and experienced fighter pilots. Operating from the occupied French coast meant the invasion zone was within range of hunting German fighters. It also meant German bombers could have fighter escort as they pummeled British airfields and tried to destroy Fighter Command on the ground.
But the British had several advantages of their own; chief among them the world's first radar-controlled integrated air defense system. This gave early intelligence about incoming raids and allowed the RAF to deploy its smaller force effectively. British aircraft factories kept supplying new planes at a rate sufficient to replace losses. RAF pilots could see below them the homes and communities they were fighting for. And, if RAF pilots had to bail out over land, they knew it would be friendly territory and they could often rejoin their units within hours.
Components
- Game Board: 17" x 22" (single-sided)
- Squadron Display Board: 9" x 17" (double-sided)
- Circle Display: 8.5" x 11" (single-sided)
- Roster & Log Pad: 8.5" x 11" (double-sided)
- Stickers: one sheet
- Wood Blocks: 32 black (large), 4 black (small), 4 blue (small)
- Wood Cubes: 6 large (red, yellow, blue, green, black, gray), 4 small (red, yellow, blue, green)
- Wood Cylinder
- Dice: 2 (twelve-sided)
- Punch Boards: 4 (2 countersheets, 2 bomber tile boards)
- Cards: 24 Medium Bomber, 24 Light Bomber, 16 Escort Reaction, 24 Spitfire/Tailed, 24 Spitfire/Head On & Tailing, 24 Hurricane/Tailed, 24 Hurricane/Head On & Tailing, 16 RAF Advantage, 24 Luftwaffe Advantage
- Player Aids: three 11" x 17" (double-sided)
- Rule Book
- Situation Manual
- Optionals
How to Play
This Rule Book is organized to support learning the game by playing scenarios. After reading the Introduction, read the Dogfight section and play the first scenarios in the Situation Manual. Player aids present the sequence of play in its entirety and have page references to this Rule Book, so when you are ready to play a full patrol you can rely on them to guide you. We start with the Dogfight Cycle, because it can be initiated in a variety of ways during a patrol.
You don't have to read the entire Rule Book to start playing. Read this Introductory section and then the Dogfight section. You'll be ready to play the Dogfight scenarios in the Situation Manual. That booklet contains information you need to set up scenarios, and when you're ready, campaigns. Most scenarios are followed by an illustrated example of play. For now, work your way to the bomber scenarios. When you are comfortable with the Dogfight and Bomber Cycles, try the two intercept scenarios. Then you will be ready for a patrol and the campaign.
Campaigns & Chapters
The game is designed to be played as a campaign comprised of one or more chapters, each chapter comprised of six or eight patrols. Each patrol confronts you with a series of challenges as you lead your squadron against a German Raid (Luftwaffe bombers and their escort of fighters).
Patrol
The action of the game is the patrol. When playing the campaign and using the full sequence of play, you will start with the Raid Vector Sequence. The German Raid will appear and your squadron will make contact with it, initiating the Interception Sequence in which you will attempt to intercept the bombers. It uses the Interception Map printed on the game board. During either sequence, or both, the Dogfight Cycle may be triggered but you will usually strive to avoid that and initiate the Bomber Cycle. That will allow your fighters to enter the Bomber Formation Area and do their work. A patrol ends when your fighters have returned to base (RTB), but some may have found their way to Fate Boxes where they await their own personal outcomes.
Stickered Blocks
To play Skies Above Britain, you must apply stickers to blocks:
- 24 large black blocks: 12 Hurricanes, 12 Spitfires (apply sticker to one side only).
- 4 large black blocks: 2 Squadrons, 2 Flights (apply sticker to one side only).
- 4 small black blocks: 4 Sections (apply sticker to one side only).
- 4 large black blocks: each Section has a 4th fighter (for example, Green 4); the 4th fighter is only used when playing the Advanced Squadron Display. Unlike other stickers, stick these to opposite sides of the same block.
- 4 small blue blocks: no stickers — they are altitude blocks and do not get stickers.
Squadron Display and the 12-sided Die
Occasionally throughout the game, you may need to randomly assign a result to one of your RAF Fighters or to a Section. Do this by rolling the die and referring to the Squadron Display.
Roll a die to randomly select a Section (for example, a roll of '5' selects Blue Section). Roll a die to determine which of the two Fighters in a Section will be affected — an odd roll selects the fighter on the right, an even roll the one on the left (for example, a roll of '3' is odd, so Blue Leader, the one on the right, is affected). To randomly select a RAF Fighter directly, roll the die and refer to the Squadron Display (for example, a roll of '11' selects Yellow Leader). Let's say a RAF Fighter in a Section is affected by a result — to determine which one, roll a die (for example, a roll of '9' selects Yellow 2).
The Game Space
Game play takes place on the game board and around it. You are welcome to move components around — for example, the Squadron Display can be located below the game board or on the other side of it, switching places with the Bomber Formation Area. Organize the game space any way you like.
The vic was a formation of three fighters, a leader in the middle and two wingmen. Designed to gather the power of three aircraft into a single unit, the wingmen were trained to remain close to the leader and act on his command. It was excellent on paper, but was replaced by the finger-four by 1941.
Cards: Place six card decks along the left edge of the game board. You will only use two of the four Dogfight Decks, those for either Hurricanes or Spitfires, depending on your squadron's aircraft. And you will use only the Bomber Deck matching the type of bomber in the raid. Rarely will you know what type of bomber you face at the start of a patrol, so you will most likely leave that space empty at first. Shuffle each deck at the start of a scenario or patrol or when a deck is empty.
Squadron: Find room on your table for the stickered blocks that represent your squadron's RAF Fighters. Organize them into Sections and arrange each Section in a vic of three fighters. The top band of the display leaves space for you to organize Pilot markers.
Game Board: The Interception Map is printed on the game board and is used to track formations (Squadrons, Flights, and Sections) as they search for and close on the German raid.
Bomber Formation Area: Space on your table to one side of the game board should be reserved for the Bomber Formation Area. Bomber tiles go here when you learn what bombers you face. Move RAF Fighters here from the Squadron Display when they or their formation intercepts the bomber formation. German fighters will likely be placed in this space, too. This happens as a result of an Escort Reaction Card during the Entropy Phase (during the Interception Sequence, Help Arrives step). Once here, RAF Fighters operate independently, not as Sections.
Lost Contact: Reserve space on your table for a Lost Contact area, or just use Lost Contact markers to denote which RAF Fighters and Sections have "fallen off" the Interception Map. Lost Contact means being at some distance from the German bomber formation (the "raid") and (usually) from the rest of the squadron. An RAF Fighter or Section that is "lost contact" is no longer in proximity of the bomber formation, and is no longer on the Interception Map. It will have to use Chase during the Interception Sequence to catch up, or return to base (RTB).
RAF Formations
There are three types of formations: Squadrons, Flights, and Sections. A formation is represented on the Interception Map by a stickered block. They do not belong in the Bomber Formation Area (a formation's fighters operate independently there). Most scenarios do not use the Interception Map, in which case you won't need formation markers. Scenarios 1-9 don't use them.
Squadron: A squadron is a formation of 12 RAF Fighters organized into two flights. The fighters are either 12 Hurricanes or 12 Spitfires (never a combination of both types). When the squadron's formation marker is in play, that marker (stickered block) also represents its two flights and their sections.
Flight: A flight is a formation of 2 Sections. When a flight's formation marker is in play, it also represents its two sections.
Section: A section is designed to have 3 RAF Fighters, but can operate with only 2. A Section must start a patrol with 3 fighters. When in play, a Section marker represents those 2 or 3 fighters. When using the Innovator Ace skill, a Section is designed to have 4 RAF Fighters (but can operate with 2 or 3). With only 1 fighter, the Section no longer exists (remove the Section's formation marker).
Ad Hoc Section: During a patrol, it is possible for a Section's fighters to leave formation and become Lost Contact. Two or three Lost Contact fighters from different Sections may form a Section of their own but only during the Interception Sequence and only if at least one of them is a Veteran pilot (they do this via Reform).
Formation Division: During a patrol, the squadron may divide into two independent flights, each tasked with its own order. A single section can leave the squadron in the same manner, or it can be dislodged by enemy action (Messerschmitts!). Use formation markers (stickered blocks) to represent the evolving state of the squadron and its echelon formations (flights and sections). Reform is a game function allowing you to knit formations back together.
RAF Fighter: RAF Fighters are not formations. They are individual aircraft represented by stickered blocks. When one breaks out of its Section, it becomes an "independent RAF Fighter." Each RAF Fighter is designated by number and its Section's color (e.g., "Red 2," or "Yellow Leader"). Each RAF Fighter is manned by a single pilot (pilots are represented by Pilot markers). Pilot markers may be attached to the stickered block representing its RAF Fighter, or for convenience kept on the Squadron Display (or you are welcome to devise your own way of noting which pilot is manning which RAF Fighter). During the course of a campaign, a pilot can fly different fighters (Red 2 and then Green 3, for example — a pilot may fly the same or a different RAF Fighter each patrol).
Dogfight Cycle
Combat between British and German fighters is called a dogfight, which occurs in a sequence of play called the Dogfight Cycle. A dogfight can be triggered in eight different ways and at different times in the course of a patrol (as shown on the Sequence of Play aid). Dogfights are generally to be avoided, since they divert planes from your primary goal of attacking German bombers. German fighter escorts, however, are aggressive, and it can sometimes be useful to attack them with part of your squadron in order to occupy them and draw them away from other fighters targeting bombers (but that is a concern for the Interception Sequence).
A Dogfight begins with one side or the other having a tactical advantage in the starting set-up. It's better to be tailing the enemy — where your guns can shoot at him — than to be tailed by him. A head-on orientation still favors the German slightly because their fighters have more firepower in the nose than yours do. You'll draw a dogfight card for each RAF Fighter or Section engaged with one or more enemy fighters. Once each dogfight card is drawn and its results have been applied, you have completed one Dogfight Round. Additional Dogfight Rounds get played immediately as long as your fighters are still engaged.
Luftwaffe Fighters
The Me-109 was roughly equivalent in speed and performance to the Spitfire, but with its direct fuel-injected engine the 109 could outclimb and outdive both British fighter types. The Me-109 also packed more destructive punch, with two 7.92mm machine guns in its cowling and a 20mm cannon in each wing. But the 109's biggest handicap in the specific circumstances of the Battle of Britain was its limited range and endurance when operating from across the Channel. It could spend only 20 to 30 minutes over the typical raid target in England before low fuel would force it to head home. The 109 was also handicapped when it was forced to escort bombers closely instead of flying "top cover" or ranging ahead in a fighter-hunting role.
The Me-110 was a fast, twin-engine, long-range escort whose Achilles heel was lack of maneuverability. It was easy prey for both Hurricanes and Spitfires, yet the 110 was still dangerous because its nose carried four 7.92mm machine guns and two 20mm cannon. This also made a 110 more dangerous than a 109 in a Head-On situation. Tailing a 110 also required some care as it also had a single rear-facing 7.92mm machine gun.
Hurricanes & Spitfires
The Hawker Hurricane Mk. I was the workhorse of the Battle of Britain. There were twice as many Hurricane squadrons as Spitfire squadrons in the summer of 1940. The Hurricane's thicker, heavier wing made it the more stable gun platform, and its wood-and-fabric construction made it more resilient to damage and easier to repair than the Spitfire. The Hurricane and the Spitfire could easily turn inside German fighters, but the Hurricane was 30 to 40 miles per hour slower than the Me-109 in level flight. One dangerous flaw in the Hurricane was its propensity to catch fire when hit.
The Supermarine Spitfire Mk. I had a distinctive elliptical wing that gave it outstanding agility and superior performance in a turning dogfight. Like the Hurricane, it carried eight .303 wing-mounted machine guns. Since German bombers tended to fly at 17,000 feet or lower and the Spitfire's best performance was at 18,000 feet, the RAF often tried to send Hurricane squadrons after the bombers while Spitfire squadrons tried to neutralize higher-flying German fighter escorts.
"An Me-109 had got on my tail and I saw tracer bullets passing on my right. After making sharp left turn through 300 degs I found opportunity for two bursts of deflection shots on Me-109 turning outside me. This A/C I observed to be hit in the starboard wing, emitting a white trail of petrol or smoke." - Pilot Officer Kenneth Gundry, Aug. 1940
"But the 109s were there. One was off to my right, coming towards me. Slightly above but flying in the opposite direction. I instinctively turned towards it and, pulling hard, fired. The Hun ignored me, curving away in a slight dive." - Pilot Officer Tom Neil, Sept. 1940
Components
Squadron: A Squadron comprises 12 aircraft, organized as four Sections of 2-3 aircraft each, using either all Spitfires or all Hurricanes (never a combination).
Squadron Display: Use the side with four Sections. The four Sections of your Squadron are placed on the display; you decide where each Section belongs. If you play using pilots and pilot experience, use the top band on the Squadron Display to organize pilots not currently assigned to the patrol, and to track their fatigue.
Dogfight Cards: There are four decks of Dogfight Cards, but you will never use more than two in any scenario or campaign. Select the two that correspond to the RAF Fighters in play, Spitfires or Hurricanes. When a deck of cards (any deck) is empty, shuffle the cards to make a fresh deck. You can also do that after each scenario or patrol.
Advantage Cards: There are two decks of Advantage Cards. You need them both. You will use them to generate Luftwaffe Fighter markers.
Luftwaffe Fighter Markers: There are two types of German fighters, 109s and 110s. Each type is represented by large (schwarm, 4 fighters) and small (rotte, 2 fighters) counters.
Misc. Markers: Place the Hit markers in a cup, and draw them randomly when needed. Hopefully, they won't be needed often (they represent Hits to your fighters).
What is a Dogfight?
A "dogfight" is a battle between agile fighter aircraft, your RAF Fighters against Luftwaffe fighters, 109s or 110s.
Triggering a Dogfight
Scenarios that only use the Dogfight Cycle will either begin with the revealing of an Advantage Card, or it will tell you the effects of the card. The function of an Advantage Card is to establish the starting conditions of a Dogfight; scenarios 1-3 will incorporate the effects of the Advantage Cards in their set-ups (cards are not used). During a patrol, a Dogfight starts when you draw an Advantage Card.
Important: No matter when it happens, when you draw an Advantage Card, a Dogfight must be played immediately. Continue playing dogfight rounds until the RAF Fighter or Section is no longer engaged.
Advantage Cards
There are two decks of Advantage Cards, one for when RAF pilots have advantage and one for when the Luftwaffe has advantage. The airplane graphics on these cards tell you how many Luftwaffe fighters are generated. Each card is organized into two areas. On the left, the graphic tells you the number (rotte or schwarm) of enemy fighters engaged and their orientation (attitude) relative to your RAF Fighter or Section. On the right, special instructions (called "event text") may modify that number and their attitude. The text's effect should be applied immediately (before drawing a Dogfight Card in Step A - Combat).
Which German Fighter Type? The Advantage Card will not tell you which type of fighter you are battling. That is determined by the situation. The default type is 109. Use 110s instead if:
- 110 Escort Station: intercepting an Escort Station of 110s, or if a 110 Escort Station marker intercepts your formation as it attempts to intercept bombers.
- 110 Help Arrives: an Escort Reaction Card indicates that a 110 station reacts during the Entropy Phase.
- 110 Ambush: an Escort Reaction Card indicates that 110s attack.
- Chase: the only unsuppressed Escort Station marker on the Interception Map is a 110.
Note: Messerschmitts! (Raid Vector icon) and Channel Patrol Checks always spawn 109s.
Event Text
We hope the text on the Advantage Card is self-explanatory, but this section may help if you require clarification. Keep in mind that even when the event text is to be ignored (because it does not apply to the situation), the left side of the Advantage Card still applies (unless noted otherwise). Also, references to "Green" apply to Green pilots (as opposed to regular or veteran pilots).
Behind You!, Blast'em!, and Bounced!: These events require the presence of heavy escort.
- Intercept Phase: the event text on these cards apply if the formation targeted a heavy Escort marker (Escort Order) or was intercepted by one (failure result while executing a Bomber or Cruise Order). In the case of a Bomber Order or Cruise Order, it applies if the number used to execute the order belonged to a station with a heavy Escort Station marker in it.
- Entropy Phase: the event text applies in some cases but not others:
- Help Arrives — applies if the reacting Escort Station has a heavy Escort Station marker in it (the text does not apply if the Escort Station marker is suppressed).
- Ambush & Chase — applies if there is an unsuppressed Heavy Escort marker on the Interception Map (that marker spawns the fighters). Note that for Chase, unsuppressed Escort Station markers ARE considered when determining which row to use on the Chase Table (they help make the raid visible), yet when Chase fails and Interception is triggered, fighters from a suppressed marker will NOT be the intercepting fighters (they are struggling to regroup).
- Messerschmitts! and Channel Patrol: does NOT apply.
Fingers Off!: This event text applies only if the independent RAF Fighter is a Green pilot, or if a Section, one of its pilots is Green. The Low Ammo happens before drawing a Dogfight Card. If already Low Ammo, the fighter becomes No Ammo, and if already No Ammo, select another Green pilot (if none to select, the event text does not apply).
Hun in the Sun!: This event text applies only if there is sun (which necessitates clear or haze visibility). If this card was drawn during the Intercept Phase, or Help Arrives, it only applies if the Escort Station is in the sun. If drawn as the result of Chase, Messerschmitts!, Ambush, or a Channel Patrol Check, however, the condition of the Interception Map and its Escort Stations does not matter (the event text applies if there is sun anywhere on the map).
Madness: This event text applies only to a Section and only if it has at least one Green pilot. Before drawing a Dogfight Card, roll a die and apply the result indicated on the Advantage Card. If Friendly Fire, apply a Hit to one randomly determined fighter in the Section, and another fighter in the Section becomes Low Ammo. Perform Hit Check at the end of Round 1.
Scatter: Your fighter(s) tail a schwarm, but it splits into a pair of rottes.
- Section: You may immediately break one RAF Fighter (or Element) out of the Section to engage one rotte (tailing). The rest of the Section tails the other rotte. If you choose not to break one RAF Fighter out of the Section, place one rotte so that it tails the Section.
- Independent RAF Fighter: Your fighter tails one rotte, but the other rotte has your fighter tailed.
Stay on them!: This event text applies only if the German fighter type is 110. Ignore if 109s. Also, it applies only if the pilot is Veteran, or if one pilot in the Section is Veteran. If it applies, discard the card (do not apply the left side of the card), and draw a RAF Advantage Card.
Stay tight!: This event text applies only to a Section and only if it has at least one Green pilot. If it applies, before drawing a Dogfight Card, one Green pilot in the Section is now an independent RAF Fighter. The schwarm breaks into two rottes (replace the schwarm with a pair of rottes). One rotte tails the Section, the other tails the newly independent RAF Fighter. Conduct two dogfights (one for each rotte).
Steady: This event text applies only if the independent RAF Fighter is a Veteran pilot, or if a Section, any pilot is Veteran. If it applies, before drawing a Dogfight Card, replace the schwarm with a lone German fighter.
Where are you?: This event text applies only if the independent RAF Fighter is a Green pilot, or if a Section, one of its pilots is Green. It applies at the start of the Dogfight. If the Green pilot is in an independent RAF Fighter, he lets the Germans go and Returns to Base (remove the schwarm and place the fighter on the RTB Track under its Section's Fuel cube).
If the Escort Station marker is 'heavy,' the right side of an event-text card (such as Behind You!) applies — for example, a rotte would be replaced by a schwarm. If there is no sun on the Interception Map, the right side of a Hun in the Sun! card is not applicable; if there is sun, a second rotte would be added and it would tail the RAF Fighter.
Three Attitudes
In a Dogfight, situate Luftwaffe Fighter markers in one of three attitudes to your RAF Fighter or Section: Head-On, Tailing, or Tailed. It is possible (but unlikely) for all three attitudes to happen simultaneously with three different Luftwaffe Fighter markers.
Head-On: Fighters fly towards each other, guns blazing. A brief but violent encounter.
Tailed: Germans chase RAF Fighters, shooting at them. Very dangerous for your pilots and their machines. You will need to Maneuver to gain the advantage or lose them. (We don't include a flank attitude because that attitude very quickly reverted to tailed or tailing.)
Tailing: Your fighters chase German fighters, shooting at them from behind. A relatively safe position, but remember that 110s have rear-facing gunners.
Let Them Go: When tailing, you may choose to let the Germans go (remove the Luftwaffe Fighter marker). It cancels your tailing attack. You must make this decision before drawing a Dogfight Card.
Engaged: Head-On, Tailed, and Tailing Sections or RAF Fighters are considered "engaged" to the German fighters represented by the Luftwaffe Fighter markers. In the case of a Section, the German fighters engage the Section as a whole.
Unengaged Luftwaffe Fighter: If a Luftwaffe Fighter marker is not engaged with your RAF Fighter or Section, remove it from play (the marker may be used again).
Engaged to multiple Luftwaffe Fighter markers: The Reinforcement result on a Dogfight Card adds a Luftwaffe Fighter marker to the engagement. That can result in two markers being engaged with a Section or RAF Fighter in the same attitude. In that case, draw a separate Dogfight Card for each Luftwaffe Fighter marker.
Sequence of Play
The Dogfight Cycle is played in rounds. In each round, perform steps A through C. If still engaged at the end of step C, play another round. Continue until no longer engaged.
Lost Contact: If engaged at the end of the first round, the engaged fighters automatically become Lost Contact. During the Raid Vector Sequence, a Lost Contact fighter or section may rejoin the squadron via Reform. During the Interception Sequence, they may get back onto the Interception Map by performing Chase.
A. Combat. Once an Advantage Card has been drawn, resolve combat between the engaged fighters. First, resolve the Head-On combat. Then, if none of the RAF Fighters in the Section have a Hit marker, you may select a Maneuver, and then resolve the Tailed combat (if you don't select a Maneuver, or can't, you still resolve the Tailed combat). Finally, resolve the Tailing combat. For each combat, you draw one Dogfight Card.
Combat Sequence: In each dogfight, it is possible for more than one Luftwaffe Fighter marker to be engaged with your fighter or Section. In that situation, play through the round first by resolving the head-on combat (if any), then resolve the tailed combat (if any), and finally, the tailing combat (if any). If two or more Luftwaffe Fighter markers are engaged in the same attitude (for example, two rotte markers tail a Section), perform each Tailed combat separately, drawing a Dogfight Card for each marker.
Situation Changes? If a new Luftwaffe Fighter marker joins the dogfight and tails a RAF Fighter or Section as a result of a Head-On Dogfight Card (Reinforcement result), you must resolve its combat during step 2 (Tailed). Likewise, if you let go a Luftwaffe Fighter marker that you are tailing, then your RAF Fighter or Section forfeits its attack against it in step 3 (in that case, skip step 3).
If tailed by two Luftwaffe Fighter markers, you would draw two cards. Draw them one at a time and apply the results of the first card before selecting a second Maneuver and drawing the second card. If the consequences of the first card place the RAF Fighter(s) in Fate Boxes, there is no need to draw a second card (the second Luftwaffe Fighter marker would be removed since it is no longer engaged).
Tailed: Maneuver. Before resolving step 2 (tailed combat — that is, your fighter is tailed by Germans), you are allowed to select one of three Maneuvers for the tailed RAF Fighter or Section. If a Section, the Maneuver applies to all the fighters in the Section.
Hit Marker Prohibits: If the RAF Fighter has a Hit marker attached, you may NOT select a Maneuver (if only one fighter has a Hit marker, its Section is barred from maneuvering).
Maneuvers
There are three Maneuvers: Evade, Slip, and Turn. Before resolving a tailed combat (but after resolving all head-on combats, if any), you may select a Maneuver. Maneuvers influence combat results as explained below. A Hit marker prevents you from selecting a Maneuver.
Tailing and Tailed? If the tailed RAF Fighter or Section maneuvers, it automatically frees any Luftwaffe Fighter markers it is tailing. Remove the Luftwaffe Fighter marker (you do not get a chance at tailing combat). If you choose not to select a Maneuver, you may resolve tailing combat after surviving the tailed combat.
Evade: Draw two Tailed Dogfight Cards instead of one. Select one card and apply its results, discarding the other card. If still tailed after applying the combat results, apply an automatic Reduce Luftwaffe Fighter marker result. Then, if a Section, you may break one RAF Fighter out of the Section to become Lost Contact (you effectively impose a Loose result on the Section; the fighter is now an independent RAF Fighter). The Luftwaffe Fighter marker may 'follow' the newly independent RAF Fighter (the RAF Fighter is tailed by it) or it can remain tailing the Section (your choice).
If the selected dogfight card generates a Reduce result and the maneuver is Evade, apply the card's result. Then, if still tailed, apply the automatic Reduce result for the maneuver.
Slip: Section only — this Maneuver is available only to a Section, not to an individual RAF Fighter (exception: Slick Ace skill). It is an attempt to 'slip' one fighter behind pursuing German fighters. There is no effect unless a Slip icon appears as one of the combat results. If the icon appears, all other results are ignored and one RAF Fighter in the Section is immediately placed so that it is tailing the Luftwaffe Fighter marker. Then, the German pilots break off their pursuit as they attempt to evade the RAF Fighter tailing them (they let your fighters go). That is, the newly tailing RAF Fighter becomes independent, engaged with the Luftwaffe Fighter marker in front of it, while the rest of the Section is no longer engaged.
Turn: If the Tight Turn icon does not appear as a result on the Dogfight Card, the Turn maneuver has no effect. Tight Turn: If the Tight Turn result appears on the Dogfight Card, shift the Luftwaffe Fighter marker so that it is now head-on. Then, apply icon results inside the Tight Turn icon (if any), but ignore those below the Tight Turn icon.
Example: If a Tight Turn icon appears on the Dogfight card, the maneuver forces the Luftwaffe Fighter marker from tailed to head-on. A Hit result inside the icon is ignored, but a Loose result inside the Tight Turn icon must be applied; resolve the Head-On combat in the next Dogfight round.
Tailed by two Luftwaffe Fighter markers? Draw a Tailed Dogfight Card for each Luftwaffe Fighter marker, selecting a Maneuver for each of them. Draw the cards one at a time, applying results before applying the next card's results. If Hit before drawing a card, the Hit cancels the second Maneuver.
Dogfight Cards
Draw a Dogfight Card to resolve each combat, and apply the results. There are two Dogfight Card decks, one for head-on and tailing attitudes, and one for tailed attitudes. Draw the card corresponding to the attitude. Then, locate the results corresponding to the situation: use the column corresponding to the type of German fighter, either 109 or 110, and use the row corresponding to your fighters, either an independent RAF Fighter or a Section. The results are found at the intersection of column and row. Apply them all. They are explained in the Icon Results section of this Rule Book, and on the player aid.
RAF Fighter or Section? A Dogfight can occur between Luftwaffe Fighters and an independent RAF Fighter or a Section. RAF Fighters in a Section do not dogfight individually, they do so as a Section. Likewise, German fighters in a rotte or schwarm do not dogfight individually.
Dogfight Results: Results are presented in the form of icons on the Dogfight Card, at the intersection of column and row. Apply all of them, in any order (exception: Slip and Tight Turn results may cancel other results). Results are explained in the Icon Results Section of this Rule Book, and on the player aid. If a result is to be applied to a RAF Fighter in a Section, assign it randomly by rolling a die.
Dogfight Examples
Example One — Section of Hurricanes tailed by 110s: The player chose a Turn maneuver and reveals the Tailed Dogfight Card. One of the results is Tight Turn, which cancels the results below it (had the player selected a different Maneuver, the icons would not have been cancelled and the Tight Turn's contents would have been ignored). The Fuel icon inside the Turn icon applies, so Red Section burns 1 Fuel (slide the Red Fuel cube one space right; in Dogfight scenarios, ignore fuel and Fuel icons — they matter only when you play the Interception Sequence). At the end of the round, the Section remains engaged, so it becomes Lost Contact.
Example Two — RAF Fighter (Spitfire) head-on against 109s: The player is not permitted a Maneuver (their fighter is engaged head-on; Maneuver applies only when RAF Fighters are tailed). The card shows Vanish (the 109 rotte is removed from play, the fighters fly past each other) and Hit (the RAF Fighter suffers a Hit — draw a Hit marker from the cup randomly and place it on the fighter, then roll a die to resolve the Hit during the Hit Check step; had the Hit been scored on a Section, roll a die to randomly determine which fighter was Hit).
B. Hit Check
After cycling through steps 1 to 3, end the Dogfight round by checking each Hit marker attached to RAF Fighters.
Hit Check Procedure: Select Hit markers in any order you like (if there is more than one), resolving the check for one marker before checking the next. Roll a die for each check, and compare the number rolled to the number printed on the Hit marker. If a fighter has multiple Hit markers, check one of them before checking the next one.
Trivial Hit: If the number rolled is equal to or higher than the printed number, the Hit is trivial. Put the Hit marker back in the cup (there is no other effect).
Severe Hit: If the number rolled is less than the printed number, the Hit is severe. Note the type of hit printed on the Hit marker (cockpit, engine, wing, etc.). Place the RAF Fighter in the Fate Box on the game board corresponding to the hit type. Put the Hit marker back in the cup. If the fighter has other Hit markers still attached, put them back in the cup too (they are automatically trivial). You will resolve the fate of fighters in Fate Boxes at the end of the patrol or scenario.
Example: A Hit marker with printed number 7 is attached to a fighter. Rolling a '5,' which is less than the Hit number, means the Hit is severe, and the fighter moves to the Fate Box.
Fate Box: Once in a Fate Box, a fighter remains there for the duration of the patrol (or scenario). It is out of play. The fighter is on its way to the ground and we won't know what happens to its pilot until the RTB Phase.
The Hit Check procedure is identical to Step D of the Bomber Cycle.
C. Resume?
After checking all Hit markers, the Dogfight round ends.
Engaged? If the Section or independent RAF Fighter is still engaged with German fighters, it is Lost Contact. Move both the RAF and German fighters to the Lost Contact area of your game space (or mark them with a Lost Contact marker). Then, play the next Dogfight round starting with step A.
If no longer engaged, the Dogfight ends. Resume the sequence of play, either the Raid Vector Sequence or the Interception Sequence. If other Dogfights are pending, however, resolve them.
Dogfight Scenarios: if you read this far, you are ready to play the Dogfight Scenarios (1-5) in the Situation Manual.
Bomber Cycle
Combat between RAF Fighters and German bombers happens in the Bomber Formation Area (to one side of the game board; make space for it on your table). Three bombers are printed on each tile, each depicting medium bombers (Heinkels, Dorniers, or Junkers) or light bombers (Stukas). Each tile depicts a three-plane element that the Luftwaffe called a kette. Those tiles are arranged in a formation, which is specified by the Situation Manual.
You start a Bomber Cycle when your fighters enter the Bomber Formation Area. Place fighters next to their targeted bombers to engage them (Approach step). Each RAF Fighter targets a bomber on a tile, and combat is resolved one fighter at a time by drawing a Bomber Card for each fighter's attack.
An RAF Fighter conducts its attack on its bomber by drawing a bomber card and applying the results (Burst step). Some fighters stay engaged while others disengage, passing through the formation and looping around for another pass. They remain in the Bomber Formation Area and will attack in the next Bomber round, but that will happen during the next Entropy Phase (or if playing a scenario that does not use the Interception Sequence, the next round is played immediately).
Some attackers might get lucky and damage or destroy their targeted bomber on the first pass. But more often, a successful patrol is the result of attrition — disrupting the formation's cohesion by isolating kettes from each other, knocking down a bomber's supporting wingmen, or inflicting mounting damage until the cumulative effect makes bombers start to fall out of formation or out of the sky.
You'll seldom have the leisure to make pass after pass at a bomber formation. Attacks from escorting German fighters are likely, even in the Bomber Formation Area as they come to the bombers' rescue (Help Arrives). Decreasing fuel and ammo also limit how many attack passes your fighters can afford to make before deciding it's time to return to base (RTB). A fighter may RTB during the Orders Phase, at the start of the Bomber round, or at the end of the Entropy Phase.
Luftwaffe Bombers
Germany lacked a heavy bomber, so in the Battle of Britain it relied on three medium bomber types: Heinkel-111, Dornier-17 and Junkers-88. They had weak defensive armament, so they relied primarily on escorting fighters for protection. Nevertheless, the medium bombers were surprisingly hard to destroy. The RAF calculated it took 300 bullet hits to down a Heinkel-111. One favored way to attack medium bombers was from the high flank, forward of the dorsal gunner's firing arc. Walking bullets along the wings might hit the engines, or even take out the dorsal gunner and leave the bomber defenseless against new attacks from above and behind. Some RAF squadrons specialized in the head-on attack, where bullets could smash the bomber's glass-fronted cockpit and rake the length of the crew compartment. But this attack required split-second timing and carried a risk of collision. Even when it failed, bomber pilots often veered for safety, compromising the integrity of their formation.
The Luftwaffe's light bomber, the Junkers-87 "Stuka," was an effective dive-bomber, but it suffered heavily against British fighters because of its slow speed and its vulnerability as it pulled up from its dive. The Stuka, too, required fighter escort. By late August the Luftwaffe's Stuka losses became so high that the plane was withdrawn from the campaign.
"I turned and made a head-on attack at one of the JU-88s. The enemy aircraft opened fire from its front gun at about 200 yards, but I held my fire until within range, and one short burst was sufficient to dispose of the enemy. It immediately slid sideways into the sea at a very fast speed." - Pilot Officer Robert Stanford, Aug. 1940
"We came in from the beam again...but this time I had a clear sight of my quarry. Heinkels! Big, fat Heinkels. Like slugs. Huddled together as though for warmth. This time we couldn't miss." - Pilot Officer Tom Neil, Sept. 1940
Components
In the Bomber Formation Area, RAF Fighters operate independently, not as Sections and vics.
Bomber Cards: There are two decks of Bomber Cards, one for medium bombers (Heinkels, Junkers, and Dorniers) and one for light bombers (Stukas). Only one deck will be used in each patrol or scenario (exception: a Straggler result may invoke a different bomber type). If playing a scenario, instructions will tell you which type of bomber you are up against, but if playing a patrol you may not know the type until your Squadron arrives on the Interception Map. If clouds, you won't know until your fighters enter the Bomber Formation Area.
Bomber Tiles: The Situation Manual will tell you how many tiles you need as well as their configuration. Use that manual's diagram, each rectangle representing a Bomber Tile, to set up the Bomber Formation Area. There should be no gaps between adjacent tiles. That is, no tile starts isolated, each must start adjacent to at least one other tile (all tiles start "contiguous").
Markers: Place the Hit markers in a cup, allowing you to draw them randomly when needed. Place Damage markers in another cup (hopefully you will dip into that cup often, they represent hits on Bombers).
Luftwaffe Fighter markers: It is possible that 109s and 110s will enter the Bomber Formation Area. This happens during the Escort Reaction Step of the Entropy Phase, and the Entropy Phase happens during the Interception Sequence. When playing a scenario that does not use the Interception Sequence, special instructions will tell you when and if Luftwaffe fighters arrive.
Sequence of Play
The Bomber Cycle is played in rounds. In each round, perform steps A through E. Usually, after concluding a round, you will resume the Interception Sequence, delaying the next round until the next Entropy Phase. When playing introductory scenarios that do not use the Interception Sequence, however, immediately start the next Bomber round.
Initiating the Bomber Cycle
The Bomber Cycle starts because your fighters reached the Bomber Formation Area. They did this because your Intercept Bomber order was successful (during the Interception Phase of the Interception Sequence), or because Chase was successful. It can also be triggered by a Straggler result. In scenarios that don't use the Interception Sequence, the cycle is considered to have already started. In either case, RAF Fighters begin the Bomber Cycle in the Bomber Formation Area.
Bomber Formation Area Set-Up
The Situation Manual will indicate how to arrange Bomber Tiles to create the bomber formation on your game table. Follow the pattern by placing tiles adjacent to each other, and the bombers should all face in the same direction. Arrange the formation in any direction on your table. Make sure there are no gaps between tiles that are supposed to be adjacent to each other (gaps may be created during the course of the Bomber Cycle, but at set-up, there should be no gaps or isolated tiles; every tile must be connected to at least one other tile, each tile part of a single contiguous bomber formation).
Bomber Type? Unless playing a scenario, you won't know the type of bomber you face nor its formation's configuration at the start of the patrol. Once Contact with the Raid happens, initiating the Interception Sequence, the type of bomber and its configuration will be known and you can set up the Bomber Formation Area. If visibility is clouds, however, postpone this until your fighters enter the Bomber Formation Area.
A. Approach
A bomber round starts with the Approach step. During it, each RAF Fighter in the Bomber Formation Area must either engage a Bomber or Return to Base (RTB). Fighters approach and attack individually, not as a Section or vic. Proceed to step B only when all fighters in the Bomber Formation Area are engaged to bombers.
Target: Each approaching RAF Fighter must target a Bomber. Bombers are printed on Bomber Tiles. If a Bomber has Fallen out of formation and is represented by a Bomber marker, it is an eligible target too (it is still in the Bomber Formation Area). Place the RAF Fighter next to the Bomber so that the Bomber is in front of the RAF Fighter. More than one RAF Fighter may attack the same Bomber, but they will do so one at a time (and one card at a time).
Approach Angle: There are four approaches, each relative to the Bomber: nose, two flanks, and tail. You must choose one of these angles for each RAF Fighter engaging a Bomber.
Round 1: In the first round, RAF Fighters must approach from the angle corresponding to their route into the Bomber Formation Area during the Intercept Phase. For example, if they intercept the bombers from the Port position, all fighters must approach from the port flank in the Bomber Formation Area. If they arrived by performing Chase, or attacking a straggler, they may approach from any angle on round 1. (Example: Flight A is in the Tail position behind the bomber formation. When it successfully intercepts the bomber formation and its RAF Fighters enter the Bomber Formation Area, they attack the bombers. During the Approach step of Round 1, all of them must approach from the tail angle. From Round 2 onward, they may approach from any angle.)
Round 2: Starting with Round 2, fighters may engage Bombers from any angle. However, engaging from the tail or the nose imposes a one round delay. Indicate this by placing a Delay marker on those fighters. This delay represents the time required to race ahead of the bombers in order to attack from the nose, or to settle into position behind them while avoiding the bomber's rear-facing gunner.
Already on the tail: In Rounds 2 and later, if already engaged on a bomber's tail, the fighter may remain engaged on that tail (do not attach a Delay marker, the fighter attacks immediately).
Round 3+: At the start of each Approach step, remove all Delay markers already in play (those fighters may not engage a different Bomber, they must remain where they are and attack this round in step B - Burst). Then, as you place other RAF Fighters, attach a Delay marker to those engaging from the nose or tail (they won't attack this round). (Round 1 clarification: there is no delay on round one.)
Return to Base (RTB)? At the start of step A (Approach), during any round, an unengaged RAF Fighter may RTB (it may not have a Delay marker attached). Place it on the RTB Track in the space under its Section's Fuel cube (if playing a scenario that doesn't use the game board, remove the fighter from play). Once on the RTB Track, the fighter is out of play until the end of the patrol.
B. Burst
During this step, RAF Fighters attack Bombers they are engaged with. Resolve each attack one at a time (one fighter at a time). Do this by drawing a card for each attack.
Delay prohibits attack: RAF Fighters with Delay markers skip this step (they don't attack this round; the Delay marker will be removed at the start of the next Approach step).
Attack procedure: Select a fighter and draw a Bomber Card. Refer to the column corresponding to the angle of attack (nose, flank, tail), and the row corresponding to the Bomber's support. Find the results at the intersection of column and row. Apply all results in any order. Results are explained on the player aid (and in the Icon Results section of this Rule Book). Then, select the next fighter and draw another card (continue until all fighters have attacked).
Support: The Bomber Card is organized into three rows. Use the top row if the target Bomber is printed on a Bomber Tile AND that tile is adjacent to at least one other Bomber Tile (that is, it touches another tile). Use the middle row if the tile is isolated (that is, it is no longer adjacent to another Bomber Tile). Use the bottom row if the target Bomber has Fallen (that is, the fighter is attacking a Bomber marker and not a Bomber in a Bomber Tile), or it is attacking a Bomber on an isolated tile AND it is the only Bomber on that tile. The top row represents the combined gunnery of the bomber's neighbors, while the bottom row represents an absence of support when straying out of formation. The middle row represents the breaking apart of the formation; a dissolution of support.
Round 1 — angle and altitude penalties: On Round 1 (during the Intercept Phase), impose a penalty for fighters that entered the Bomber Formation Area from the Nose position at low altitude and the Tail position at high altitude (if the RAF Fighter entered the Bomber Formation Area during Chase, or when attacking a straggler, these penalties don't apply).
Nose Low: ignore Disruption results. Although an attack from the nose could fracture a bomber formation, climbing blunted the violence of such a maneuver.
Tail: if the Return Fire result is a Hit, flip the marker over (it becomes a Hit marker) and then draw a second Hit marker. Compare their Hit Check numbers. Keep the highest number and put the other back in the cup. Bombers were equipped with rear-facing guns. Light Bomber Exception (Stuka): the Tail penalty applies only when the approach is Tail High. Stukas did not have ventral guns.
Burst example 1: Green 3 attacks a Bomber from the starboard flank, using the top row (the tile is one of five contiguous tiles). The card's icon results are a Collision check (roll a die — a '1' destroys both fighter and bomber) and a Disruption icon, but since only 2 markers and 1 fighter are on the tile (and those contiguous with it), the Disruption result has no effect (4 is needed to trigger it).
Burst example 2: Green 3 attacks from the starboard, and the card results include a Low Ammo icon and a Damage result that drops the Bomber to Fallen — now only three tiles remain contiguous. Because the tile is now isolated, use the middle row for further attacks on it. Meanwhile Red 2 has a Delay marker, so it doesn't attack this round but stays engaged with its bomber; next round it will use the nose column and the bottom row (a Bomber on an isolated tile with no other bomber on that tile is unsupported).
No Target? If you assigned more than one RAF Fighter to approach the same Bomber, and the Bomber becomes Fallen, all of the RAF Fighters approaching it remain engaged and may attack it (bottom row of the card). If the Bomber is destroyed before a fighter gets a chance to perform the Burst step, draw a Bomber card and apply all results except Damage (same row as the previous attack).
C. Disengage
All RAF Fighters engaged with Bombers disengage. Move them away from their respective Bombers but keep them in the Bomber Formation Area. They made their run and now are turning for another pass.
Tail approach exception: fighters engaged on a Bomber's tail may remain engaged (do not attach a new Delay marker).
Delay remains engaged: RAF Fighters with Delay markers attached must remain engaged. However, if the Bomber they were engaged with was destroyed by another fighter, the fighter disengages (remove the Delay marker).
D. Hit Check
After resolving all Dogfight combat and applying results, check each Hit marker attached to RAF Fighters.
Hit Check Procedure: Select Hit markers in any order you like, resolving the check for one before checking the next Hit marker. Roll a die for each check, and compare the number rolled to the number printed on the Hit marker.
Trivial Hit: If the number rolled is equal to or higher than the printed number, the Hit is trivial. Put the Hit marker back in the cup (there is no other effect).
Severe Hit: If the number rolled is less than the printed number, the Hit is severe. Note the type of Hit printed on the Hit marker (cockpit, engine, wing, etc.). Place the RAF Fighter in the Fate Box on the game board corresponding to the Hit type. Put the Hit marker back in the cup. If the fighter has other Hit markers still attached, put them back in the cup too (they are automatically trivial). You will resolve the fate of fighters in Fate Boxes at the end of the patrol or scenario.
Example: a Hit marker with printed number 5 is attached to a fighter. Rolling a '7,' which is more than the Hit number, means the Hit is trivial — remove the Hit marker (put it back in the cup). This Hit Check procedure is identical to Step B of the Dogfight Cycle.
E. Resume
After checking all Hit markers, the Bomber round ends. Resume whatever sequence the game is in, either the Raid Vector Sequence or the Interception Sequence.
Bomber Scenarios: if you read this far, you are ready to play the Bomber Scenarios in the Situation Manual.
Interception Sequence
The Dogfight and Bomber Cycles are pieced together by the Interception Sequence. It prompts you to assign Orders to your squadron as you strive to penetrate the center of the Interception Map. Escort markers in Escort Stations may spawn Luftwaffe fighters to derail your efforts. It is common for Entropy to become the dominant phase in the Interception Sequence as the squadron's cohesion dissolves. Hopefully, the Bomber formation will also lose coherence.
Components
The Interception Sequence encompasses both the Dogfight and Bomber Cycle, so you also need those components as well as: Fuel cubes (place them on the Fuel Track in the space corresponding to the RAF Fighter type, Hurricane or Spitfire), the Squadron formation marker, Flight formation markers, Section formation markers, Altitude blocks (no stickers), Escort Station markers (109, 110, and heavy variants), Sun & Visibility markers, and Escort Reaction Cards. You might also need the Circle Display.
Set-Up
The Interception Sequence is initiated when Contact happens in the Raid Vector Sequence (ending that sequence). The Contact result will tell you where to place the Squadron formation marker on the Interception Map, and Fuel cubes will already be on the Fuel Track. If playing a scenario, instructions will provide that information. In general, follow this procedure when preparing the Interception Sequence:
A. Escort Stations. If not already on the Interception Map, place Escort station markers in Escort stations. Do this after Contact (and after adjustment, if any). Most likely, during the Raid Vector Sequence, Escort Station markers were placed on the Interception Map when the Raid marker entered play (Raid result). Once on the map, Escort Station markers stay on the map even if visibility is no longer clear and there is no sun.
B. Bomber Types. Use the Situation Manual to determine the type of bomber (Dornier, Heinkel, Junkers, or Stuka). If Visibility is clouds, postpone this until fighters enter the Bomber Formation Area during the Intercept or Entropy Phase.
C. Bomber Formation Area. When you determine the bomber type, gather together Bomber tiles and place them in the Bomber Formation Area on the game table.
Interception Map
The Interception Map's center of gravity is the "Bomber Formation." Around it are positions and stations, and sun locations, all oriented to that center. Arrows connect positions to the Bomber Formation while stations guard the center from attack. The squadron and its echelon formations (flights and sections) are allowed in positions, while Escort Station markers are allowed in stations ("station" is short for "Escort Station").
Positions: The Squadron and its echelon formations (flights and sections) are not allowed in Escort Stations nor in Sun locations. If a formation successfully reaches the Bomber Formation, remove the formation marker from play and transfer its RAF Fighters to the Bomber Formation Area. (Why remove the formation marker? Why not just leave it there? Once the wolves enter the chicken coop, they lose all cohesion and function as a loosely organized pack.)
Lost Contact: When a RAF formation becomes Lost Contact, it must be removed from the Interception Map. Place it in the Lost Contact area. It can return to the map by performing a successful chase during the Entropy Phase.
Altitude: Each position has two altitudes, high and low. Use a block to indicate high (place the formation on the block). If it's not high, the formation is low (no block). Altitude is relative to the bombers.
Stations: Escort Station markers belong in stations. RAF formations are not allowed there, but they may attack Escort Stations there (via an Escort order). (Example: in this example, a heavy escort of 109s occupy the Low station. The actual number of German fighters represented by this marker is not known to you and your pilots.)
Sun locations: Four Sun locations are printed on the Interception Map. Place the Sun marker in the sun's current location (only one location may have the Sun marker in it at a time, use the other marker on the Visibility Track). When the Sun marker is in a location, its corresponding position and Escort Station are in the sun. That means an Escort Station marker there is "in the sun," and an RAF Formation at high altitude there is "in the sun." If visibility is clouds, there is no sun (remove the Sun marker). Being in the sun affords advantages to your formation executing an order (Bombers, Cruise, Escort). Conversely, Advantage cards govern the advantage German pilots get when in the sun.
Visibility: The Visibility track is printed on the game board. Use it to note the current visibility state: clear, haze, or clouds. Starting visibility is determined by the Situation Manual, but a Raid Vector marker may change it.
Lost Contact (state): A formation that becomes Lost Contact is no longer on the Interception Map. Place it in the Lost Contact space on the map or just set it aside and place a Lost Contact marker on it as a reminder. This can also happen to an independent RAF Fighter (set it aside and attach a Lost Contact marker to it). We suggest designating an area on your game table as the Lost Contact area. Place Lost Contact formations and fighters there. "Lost Contact" is both a space and a state. It means being out of contact with the Raid, the bombers and their escort. You will have a chance to remedy this state in the Chase step of the Entropy phase. (Concept note: Lost Contact is potentially a vast sphere of the sky in orbit around the bomber formation. It stretches to (and maybe beyond) the horizon.)
Sequence of Play
The four phases of the Interception Sequence should be played in order. Most have multiple steps and they, too, need to be played in order.
1. Orders Phase
Assign an Order to each RAF formation on the Interception Map. You may split a formation by assigning an Order to a lower-echelon formation within it (for example, assign an order to one section, thereby breaking that section out of the squadron; in this case, you would place the Section marker in the position with the squadron marker, assigning it an orders marker).
RTB instead: A formation may instead Return to Base. Remove the marker and place its RAF Fighters on the RTB Track in the space under their Section's Fuel cube.
Lost Contact? A formation that is Lost Contact may not be assigned an order, nor may it Return to Base now (RTB). It takes action during the Entropy Phase (Chase), and is vulnerable to Ambush.
No formation? If there are no formations on the Interception Map, skip this phase (also skip the Intercept Phase).
Three Orders: To receive an order (Bombers, Cruise, Escort), the formation marker must be in a position on the Interception Map. You can't assign an Order to individual RAF Fighters. An Order is an instruction you give the formation. That instruction will be carried out during the Intercept Phase.
Bombers Order: This order instructs the formation to enter the Bomber Formation Area to attack bombers. It will follow the arrow from its position to the bomber formation at the center of the Interception Map (and thus, into the Bomber Formation Area). If one or more Escort stations are occupied, enemy fighters may interfere and even prevent the order from being carried out (they might initiate the Dogfight Cycle).
Cruise Order: This order instructs the formation to move to another position on the Interception Map, or to change its altitude, or both. If you want the formation not to move at all, give it a Cruise order. Regardless of destination, this order may be interfered with by the Germans (the Dogfight Cycle might be triggered).
Escort Order: This order instructs the formation to engage enemy fighters in a specific Escort Station. The formation won't actually move there (it will become Lost Contact). Usually the objective is to keep the Luftwaffe escort so busy that another of your formations can perform its order without interference (Escort Suppression Check).
Orders example: the Squadron is in the Port position at low altitude. The player opts to assign each flight its own order, thus dividing the squadron in two. Flight A receives an Escort order while Flight B receives a Bombers order. Both flights are in the Port position. Note that both flights could be given the same order. If so, they would resolve their orders one at a time. For example, if both are assigned the Escort order, you would resolve one flight's order and then resolve the other (and they could target the same or a different station). In contrast, if both flights are assigned the same order and will target the same station and you want them to perform that order simultaneously, do not divide the squadron. Instead, assign an Escort order to the squadron instead of to each flight.
2. Intercept Phase
Each formation on the Interception Map performs its assigned order. Once this phase begins, you may not change a formation's order. Escort orders must be performed first, one formation at a time, followed by those with Bombers orders, and then Cruise orders.
A. Intercept Escort
Select a formation with an Escort order, and then select an Escort marker on the Interception Map (that Escort marker is the target). Consult the Intercept Table and roll a die, then apply the result. Finish by performing an Escort Suppression Check. Two or more RAF formations may target the same Escort marker, but they resolve their interception one at a time (do not combine them for Escort Suppression).
Intercept Escort procedure: There are four Intercept Escort Tables, each corresponding to a position on the Interception Map. Use the table corresponding to the RAF formation's position. The table is organized by rows; use the row corresponding to the formation's altitude (high or low). Each row is subdivided by Escort type (109 or 110); use the one corresponding to the target's Escort type. The table is also organized by columns, each representing a station. Use the column corresponding to the target's station. Find the intersection of column and row and roll a die. If the number rolled is equal to or higher than the red number printed at the intersection, the attempt succeeds. If lower, it fails. Regardless of the result, the Dogfight Cycle is triggered and the formation is now Lost Contact. Remove the formation marker but leave the Escort Station marker where it is.
- Success (equal to or higher): Dogfight is triggered. Draw an RAF Advantage Card for each Section in the formation.
- Failure (lower): Dogfight is triggered. Draw a Luftwaffe Advantage Card for each Section in the formation.
Prohibited: If the intersection of column and row doesn't have a red number, and has an 'X' instead, the Order is cancelled. The formation is Lost Contact (remove it from the Interception Map).
Out of the Sun: If the formation's position is in the Sun, and it is high altitude, roll two dice and add their numbers together. Compare their sum to the red number.
Intercept Escort Table — FLANK position (starboard and port), as printed on the player aid, for illustration of the table's structure. Columns are Lead, Ahead, Starb'd or Port (same side / other side), High, Low, Trailing:
| Formation altitude | Escort type | Lead | Ahead | Starb'd or Port | High | Low | Trailing |
|---|---|---|---|---|---|---|---|
| high | 109 | 9 (Fuel) | 8 (Fuel) | 6 (Fuel, same side) / 9 (other side) | 9 | 5 | 6 |
| high | 110 (Circle) | 8 (Fuel) | 5 (Fuel) | 5 / 8 | 7 | 3 | 5 |
| low | 109 | X (prohibited) | 11 (Fuel) | 10 (Fuel) / 11 (Fuel) | 12 (Circle) |
(There are three further Intercept Escort Tables for the Lead, Ahead, and Trailing positions, each with its own set of red numbers, Fuel requirements, and Circle triggers, printed on the player aid.)
Intercept Escort example: the flight in the Port position (Low altitude) targets the 109s in the High station. The formation must spend 1 Fuel — Red and Yellow Sections are in the flight, so they spend Fuel. The player rolls a '5,' which is a failed result. Determined, the player spends Extra Fuel and rolls again, rolling a '10,' which still fails. They draw a Luftwaffe Advantage Card for each Section to initiate the Dogfight Cycle (play immediately). When the dogfight ends, the player makes an Escort Suppression Check, rolling a die — an '8,' which suppresses the Escort station but does not reduce it.
Fuel?
If the red number is accompanied by a Fuel icon, the Sections in the formation must spend 1 Fuel (slide their Fuel cubes one space to the right on the Fuel Track). Do this before rolling the die. If already in the vapor space of the Fuel Track, Fuel can't be spent (this prevents actions requiring Fuel expenditure; treat as 'prohibited').
Extra Fuel?
After rolling the die (or dice, if out of the Sun), if you don't like the result, you may spend 1 Fuel to roll again. If you choose to do this, spend the Fuel (slide the cube to the right) and roll the die. The new result is final. Note that you may spend extra Fuel whether or not you were required to spend Fuel by the Interception Table.
Circle?
If the target Escort marker represents 110s, and the result of the Interception attempt succeeded (because you rolled equal to or higher than the red number), there is a chance the 110s will form a defensive circle before Dogfight starts. Roll another die and consult the Circle Table (it is printed on the Intercept Escort Tables player aid). Use the row corresponding to the RAF formation's altitude (high or low), and the column corresponding to the size of the formation (section, flight, or squadron). Compare the number rolled to the red number printed at the intersection of row and column. If the number rolled is equal to or higher than the red number, the 110s form a circle. If lower, they do not.
Circle Table — rows are Fighter's altitude (high/low), columns are formation size (section / flight / squadron):
| Fighter's altitude | Section | Flight | Squadron |
|---|---|---|---|
| high | 11 | 5 | 3 |
| low | 12 | 6 | 5 |
Circle formed (equal to or higher): Do not draw an Advantage Card. Instead, use the Circle Display. Place the formation's RAF Fighters on that display. 110s are printed on it, so Luftwaffe Fighter markers are not used unless one of them is reduced or disrupted.
No Circle (lower): The RAF Fighters engage the 110s before they form a circle (or they never attempted to form a circle). Draw a RAF Advantage Card and play the dogfight.
Circle Display: If the 110s form a defensive circle, use the Circle display to organize combat. Do not draw Advantage Cards. The display is neither Lost Contact nor on the Interception Map and is temporary. Place RAF Fighters on it so that each engages a schwarm, and then resolve each attack. After the first round of combat, all RAF Fighters on it are Lost Contact (remove the display).
Circle example: due to the Circle icon in the 110's row on the Intercept Escort Table, the player rolls another die, rolling a '7,' and so the 110s do indeed form a defensive circle. Advantage Cards are not drawn. Instead, the player uses the Circle Display.
Engaging the 110 Circle
On the Circle Display, a fighter may engage a schwarm head-on, tailing it, or by the flank.
Attack Head-On or Tailing (Engage Box): Between each schwarm is an Engage box. To engage a schwarm head-on, or to tail a schwarm, place RAF Fighters in those boxes, one fighter per box maximum. Orient the RAF Fighter so that it faces its target. Doing this also presents the RAF Fighter as a target to the 110s in front and behind it.
Resolve combat one RAF Fighter at a time, drawing two Dogfight cards for each and apply results from both cards simultaneously, as follows:
- Head-On (Engage Box): Head-On card — apply all results; Tailing card — ignore all results except Hits.
- Tailing (Engage Box): Tailing card — apply all results; Tailed card — no Maneuver allowed, apply all results except Tight Turn and Slip.
(For example, a fighter head-on facing a schwarm but with 110s behind it draws 2 Dogfight Cards, Head-On and Tailing. A fighter tailing a schwarm but with 110s tailing it draws 2 Dogfight Cards, Tailing and Tailed.)
Attack on the Flank: An RAF Fighter may attack a schwarm by engaging it on the Flank. Place it to the side of the schwarm. This allows the RAF Fighter to treat its target as though it were a light Bomber and you will use a Bomber Card instead of a Dogfight Card to resolve combat (top row, middle column). The RAF Fighter disengages immediately after the attack (before drawing a card to resolve another combat). Once disengaged it is Lost Contact.
Bomber Card results (Light Bomber): Only apply the results at the intersection of the starb'rd or port column and the top row.
Disruption? Treat the display as a bomber formation, and count only the number of RAF Fighters on it (do not count markers and don't count the schwarms). If the number of RAF Fighters equal or exceed the Disruption number (at that moment), place a Fallen marker over the schwarm image on the display, and place a new Luftwaffe Fighter schwarm marker in the Lost Contact area. The RAF Fighter that scored the Disruption may immediately engage it (tailing), or let it go (if you let it go, there is no need to place the Luftwaffe Fighter marker; remove it). If other RAF Fighters were engaged to the Fallen 110s, they attack the Fallen marker (apply only Low Ammo results and those derived from Return Fire results, if any).
End of round (Circle display): After all RAF Fighters have attacked, those still in Engage Boxes are now Lost Contact. Each tails a rotte (110s) (place the fighter and the Luftwaffe Fighter marker in the Lost Contact area and play the dogfight). Remove the Circle display and play dogfights for each engaged RAF Fighter.
Summary: When 110s form circle, your fighters get one round to attack it. Afterwards, some fighters may be engaged with 110s, but the action migrates to the Lost Contact area as the circle disbands or escapes.
Escort Suppression Check
Make an Escort Suppression Check after executing the Escort Order and playing the Dogfight Cycle it triggered. Do not make this check after resolving a Bomber or Cruise order (even if Dogfight was triggered).
Timing and Procedure: After completing the Dogfight(s), consult the Escort Suppression Table printed on the game board and roll a die. Add +1 if a German fighter was destroyed in the dogfight (Damage or Collision result). Use the row corresponding to the size of the Escort Station marker (heavy or light). If the action took place on the Circle display, use the bottom row. Use the column corresponding to the RAF formation's size as measured in RAF Fighters (that is, the size of the RAF formation at the start of the Dogfight). Locate the intersection of column and row. There are two numbers printed at the intersection. Compare the number rolled to each, one at a time:
Escort Suppression Table — rows are station size (heavy, light, circle), columns are RAF Fighters engaged (2-3, 4-7, 8+); each cell shows the reduce number (red) / suppress number (blue):
| Station size | 2-3 | 4-7 | 8+ |
|---|---|---|---|
| heavy | 11 / 8 | 9 / 5 | 6 / 3 |
| light | 9 / 6 | 8 / 4 | 6 / 2 |
| circle (any size) | 8 / 4 | 6 / 3 | 4 / 2 |
- Reduction? If the number rolled is equal to or higher than the big red number, the Escort Station marker is reduced. Flip it over to its 'light' side (it is now light; if already light, remove it from play). If less than the red number, there is no reduction effect (this means the German pilots managed to maintain cohesion or only a fraction of their aircraft engaged your fighters). If another formation has an Escort order and you intended for it to intercept the now absent Escort Station marker, it either targets another station or performs a Cruise order (your choice).
- Suppression? If the number rolled is equal to or higher than the small blue number, the Escort Station is suppressed. Place a Suppressed marker on it as a reminder (you will remove the marker during the Escort Recovery step of the Patrol Complete Phase). If the number rolled is less than the number, there is no suppression effect.
It is possible to both reduce and suppress the escort, and it is also possible to suppress but not reduce it. However, it is impossible to reduce but not suppress the escort.
Effects of Suppression: For the purpose of Bomber Interception (step B of the Intercept Phase), the suppressed Escort Station marker is ignored. This is also true during the Entropy Phase (step C, Escort Reaction). In other words, the Escort station is considered to be empty. These effects are temporary. You will remove the Suppression marker during Step B of the Patrol Complete Phase (Escort Recovery). In contrast, reduction is permanent.
Escort Suppression example: a flight (two Sections each with 3 fighters) performed an Intercept Escort action against the 110s in the High Escort station. After the Dogfight, the Sections are Lost Contact. The player rolls a die for the Escort Suppression Check, rolling a '6.' The Escort Station marker is not reduced, but it is suppressed. The Escort Suppression marker remains on the 110 Station marker until Step B of the Patrol Complete phase — during that time, treat that station as if it were empty.
B. Intercept Bombers
Select a formation with a Bombers order. Consult the Intercept Bombers table on the player aid and roll a die, then apply the result.
Intercept Bombers procedure: There are four Intercept Bombers Tables, each corresponding to a position on the Interception Map. Use the table corresponding to the RAF formation's position. The table is organized by rows; use the row corresponding to the formation's altitude (high or low). Then, scan the Escort Stations noted in the table's columns. Each column corresponds to an Escort Station. Ignore columns that represent empty stations (that is, if an Escort Station does not have an Escort marker in it, or its Escort marker is suppressed, ignore that station for this procedure). Each altitude row is further subdivided into two rows, each corresponding to the type of Escort (109 or 110). Use the appropriate sub-row according to Escort type. Locate the column that has the highest red number, at the intersection of that sub-row, and use that number to resolve the intercept attempt. If there are two equally highest numbers, choose either one (however, choose 109s over 110s). Find the intersection of column and row and roll a die. If the number rolled is equal to or higher than the red number printed at the intersection, the attempt succeeds. If lower, it fails.
Intercept Bombers Table — FLANK position, columns are no Escort, Lead, Ahead, Starb'd or Port (same/other side), High, Low, Trailing, with the Escort type each row applies to:
| Formation altitude | Escort type | no Escort | Lead | Ahead | Starb'd or Port | High | Low | Trailing |
|---|---|---|---|---|---|---|---|---|
| high | 109 | 5 | 4 | 6 | 8 (same side) / 4 (other side) | 10 | 5 | 3 |
| high | 110 | 5 | 2 | 4 | 8 / 3 | 8 | 4 | 2 |
| low | 109 | 7 (Fuel) | 5 |
- Success (equal to or higher): The formation successfully intercepts the German bombers. Immediately remove the formation marker and move its RAF Fighters into the Bomber Formation Area and initiate the Bomber Cycle. Perform one round of Bomber Combat. If you have not yet set up the Bomber Formation Area, do so now by rolling a die and referring to scenario or campaign instructions. If there are other fighters already in the Bomber Formation Area, they do nothing until Entropy.
- Failure (lower): The attempt fails. What happens next depends on the status of escort:
- Escort: If you used a column other than the "no Escort" column, your formation is intercepted by German fighters. It is Lost Contact, and German fighters from the station engage the Sections of your formation. Draw a Luftwaffe Advantage Card for each Section in your formation, and immediately play the Dogfight. Use Luftwaffe Fighter markers that match the Escort Station type, 109s or 110s. There is no Escort Suppression Check.
- No Escort: If you used the "no Escort" column on the Interception table, the RAF formation changes altitude and moves to a new position on the Interception Map. See the player aid for the new position. Exception: if visibility is clouds, the RAF formation is Lost Contact (remove it from the map).
Intercept Bombers example: a flight (two Sections) attempts to intercept the bombers. The High and Low Escort stations are both occupied by 110s. The formation is at Low altitude, and therefore must spend 1 Fuel (shift both Section's Fuel cubes one space right). The player compares the red numbers in the High and Low columns, each representing an occupied Escort station (the High station and the Low station, all other columns are ignored). Nine is the larger number so the player must use it instead of the 3. The player rolls a die — a '10' — and the attempt succeeds. The player removes the formation and shifts its RAF Fighters into the Bomber Formation Area, initiating the Bomber Cycle.
Fuel? If the formation is at low altitude (notice the Fuel icon in the Low row of the Intercept Tables), or Trailing (either altitude), the Sections in the formation must spend 1 Fuel (slide their Fuel cubes one space to the right on the Fuel Track). Do this before rolling the die. If already in the vapor space of the Fuel Track, Fuel can't be spent (this prevents actions requiring Fuel expenditure; the fighter becomes Lost Contact).
Extra Fuel? After rolling the die, if you don't like the result, you may spend 1 Fuel per Section to roll again. If you choose to do this, spend the Fuel (slide the cube or cubes to the right) and roll the die (or dice, if out of the sun - option A). The new result is final. (Extra Fuel note: you may spend extra Fuel whether or not you were required to spend Fuel by the Interception Table.)
Out of the Sun: If the RAF formation is in a position with the sun and is high altitude, it earns the Out of the Sun advantage. This gives you two options (make this choice before rolling the die for the Interception attempt):
- A. Roll 2 dice and add the numbers together.
- B. In the initial attack against the bombers (round 1 Bomber Cycle), ignore all Hit results. Return Fire results still apply, but if a Return Fire result turns out to be a Hit, that Hit is cancelled.
Option B means your pilots are using their position to surprise the bomber crews. Option A means they are using it to avoid the German fighters, perhaps altering their vector to keep their distance while sacrificing their advantage against the bombers. And what if the formation and the escorts are both in the sun? The formation enjoys the benefit of intercepting "out of the sun." Of course, so do the escorts. If they intercept your formation and draw a Hun in the Sun Luftwaffe Advantage Card, they most certainly utilized their advantageous position. But if you roll two dice to intercept, chances are that your pilots recognized the situation for what it was and exploited it before the German fighter pilots reacted.
C. Cruise
Select a formation with a Cruise order. If there are no Escort Station markers on the map (or those on the map are suppressed), move the formation to a new position, or change its altitude, or both (this completes the order; move on to the next formation or to the Entropy Phase). However, if there is an unsuppressed Escort Station marker on the map, you must make a Cruise Check. Do this by consulting the Cruise Check Table on the Intercept Escort side of the player aid and rolling a die. There are two tables, A and B, use only one of them.
Cruise Check Procedure: There are two Cruise Check Tables. Use the one corresponding to the formation's current position on the Interception Map. The procedure varies depending on the table.
Use Table A if there is an unsuppressed Escort Station marker in the High, Port, Starb'd, or Low station, or if one is in the Sun. If none of those stations are occupied or no others are in the Sun, use Table B (in which case the Cruise order will automatically succeed but an Escort Station marker might move or split).
Table A - Procedure: This table has four cells, each with a red number in it. Use only one red number.
Which Red Number? Use the cell that corresponds to the occupied station's Escort type. For example, High station with 110s. If more than one station has an Escort marker in it (and thus, more than one cell qualifies), use the cell with the highest red number.
Table A — Occupied unsuppressed Escort station is High, Port, Starb'd, Low station, or in the Sun:
| Situation | 109 | 110 |
|---|---|---|
| High station or in the Sun | 11 | 10 |
| Flank or Low station | 8 | 6 |
How many dice? Roll one die unless the formation is in the Sun (that is, its current position is in the Sun). If in the Sun, roll two dice and add the numbers to make a sum.
Roll again? If the formation is in the Nose position, or moving from a high altitude to a low altitude, you may roll the die or dice once again to garner a better result.
Compare numbers: Compare the red number to the number you rolled (or sum). If the number rolled (or sum) is equal to or higher than the red number, the check is passed (success). If less than the red number, the check fails.
- Success (equal to or higher): The order is carried out. Move the formation to another position, or change its altitude, or both.
- Failure (lower): Remove the formation from the Interception Map and initiate the Dogfight Cycle (your fighters were intercepted and are now Lost Contact). Draw a Luftwaffe Advantage Card for each Section in the formation.
Table A note — Remain in place? If the intent of the Cruise order was to remain in the same position and altitude, a Success Table A result allows the formation to remain where it is.
Cruise Order example: a flight attempts to move from Port low to Tail high. Both the High and Low stations are occupied, so Table A is used. The player rolls a die, garnering a '7,' which fails (a '10' or better was needed, matching the High-station 110 entry). A Dogfight is triggered with 110s. The formation is now Lost Contact and a Luftwaffe Advantage Card is drawn for each Section in the Flight.
Table B - Procedure: First, move the formation to another position or altitude, or both (this automatically succeeds). Then, consult Table B and roll a die. This table has two columns. Use the heavy column if there is an unsuppressed heavy Escort Station marker on the Interception Map. Otherwise, use the light column. Then, roll a die. If Visibility is clouds, subtract 2 from the number rolled. Find the result in the row corresponding to the number rolled. Apply the result.
Table B — other station, by Escort size:
| Escort size: Heavy | Result | Escort size: Light | Result |
|---|---|---|---|
| 4 or less | no effect | 7 or less | no effect |
| 5-9 | shift | 8-12 | shift |
| 10-12 | break | — | — |
(Modifier: -2 if clouds.)
Table B - results:
- No Effect: Besides the formation moving to a new position or altitude (or both), there is no other effect of the Cruise order.
- Shift: After moving the formation to a new position or altitude (or both), move one unsuppressed Escort Station marker to an unoccupied station nearest the formation's new position (when in doubt, choose High). If more than one marker is eligible to move, choose the one farthest away from the formation's new position.
- Break: Replace the heavy Escort Station marker with a light Escort Station marker, and add a new light Escort Station marker of the same type to an unoccupied station nearest the formation's new position (when in doubt, choose High). If more than one marker is eligible to break, choose the one farthest away from the formation's new position.
Cruise example: a flight attempts to move to the Starb'd position. It is at low altitude. The only unsuppressed Escort Station marker is in the Ahead station, so Table B is used. The Escort Station marker is heavy, so the left (Heavy) column is used. The player rolls a '10.' The heavy Escort becomes two light escorts, and one shifts to the Starb'd station.
3. Entropy
During this phase the Bomber Cycle continues, German escort may react, and your Lost Contact fighters have an opportunity to chase the bomber formation or go home. Play the three steps in the order presented here.
A. Bomber Formation Area
All RAF Fighters in the Bomber Formation Area play another Bomber round (Bomber Cycle). Attitude penalty for nose low attacks are ignored, as are tail high penalties. If none of your fighters are in the Bomber Formation Area, skip this step.
B. Escort Reaction
If one or more RAF Fighters are still in the Bomber Formation Area, draw an Escort Reaction Card. Do this even when there are no Escort Station markers on the Interception Map, or when all are suppressed (the card handles a variety of conditions besides the behavior of escort). Draw only one card. Apply results and initiate new Dogfights if necessary. If none of your fighters are in the Bomber Formation Area, skip this step.
(An Escort Reaction Card's decision tree runs through, in order: 1. Clouds Escape? 2. Help Arrives? 3. Reduce? 4. Shift? — if the Port Station is empty, Ahead moves there, for example — and 5. Ambush?)
Example: the player elects to change the flight's altitude to high. It now is in a good position to either intercept the escort station or to come out of the sun at the bombers.
Escort Reaction Card
The card tells you many things. Follow this procedure:
1. Clouds Escape? If Visibility is clouds, roll a die (if not clouds, skip to Help Arrives?). If the number rolled is equal to or higher than the number printed in the clouds icon on the card, the Raid vanishes in the clouds (remove formations from the Interception Map, they are Lost Contact; Escort stations are not affected and neither is the Bomber Formation Area; Chase is no longer permitted during this patrol; do not check for Clouds Escape again even if visibility changes). If the number rolled is less than the printed number, there is no effect.
2. Help arrives? If a card icon appears in a station occupied by an unsuppressed Escort Station marker, draw a Luftwaffe Advantage Card to initiate a Dogfight in the Bomber Formation Area (German fighters from that Escort Station engage your fighter; do not move or change the Escort Station marker). Starting with 109 Escort Station markers, immediately draw a Luftwaffe Advantage Card for each card icon, and apply each card to one RAF Fighter. Select RAF Fighters randomly, unless one has a Delay marker (which makes it the Germans' first choice). Regardless of the number of card icons, do not draw more cards than there are RAF Fighters.
Delayed RAF Fighter: when a fighter is engaged by German fighters, the Delay marker is removed and it immediately disengages from the Bomber. It may maneuver if tailed.
3. Reduce Escort? If a Reduce icon appears in a station, reduce the Escort Station marker there (if any). A heavy Escort becomes light and if already light it is removed from play. In some cases, reduction happens only if the Escort Station marker represents 109s.
4. Shift Escort? If a Shift arrow (accompanied by a note) appears, shift the Escort Station marker as directed. The destination must be empty (that is, there can't already be an Escort Station marker there). If there is no Escort Station marker in the departure station (that is, from the station where the marker is supposed to depart), ignore the arrow (no shifting happens).
5. Ambush? If an "Ambush" note appears in the bottom right corner, draw a Luftwaffe Advantage Card and apply it to a Section that is Lost Contact. If there isn't a Section that is Lost Contact, then apply it to an independent RAF Fighter that is Lost Contact. If none, apply it to a RAF Fighter in the Bomber Formation Area. If none, ignore this result. The Luftwaffe fighter type is 109 or 110, as indicated by the Escort Reaction card. This triggers an immediate Dogfight.
Escort Reaction example: the player draws an Escort Reaction Card. The player ignores the Clouds Escape number, but must draw three Luftwaffe Advantage Cards (one for 109s and two for 110s; if there are only two RAF Fighters in the Bomber Formation Area, the player would draw only one card for the 110 Escort Station marker). The heavy escort shifts to Starb'd while the 110 Escort Station marker is removed from play (it is light and is removed when reduced). Finally, the player must draw another Luftwaffe Advantage Card for this ambush — 110s attack a Lost Contact Section or RAF Fighter.
C. Chase
During this phase, each Lost Contact formation and independent RAF Fighter must either choose to make a Chase attempt, Return to Base (RTB), or Reform (for Reform, follow the same procedure explained in E. Reform). A formation or independent RAF Fighter can lose contact with the Bomber Formation and its Interception Map. This can happen as a result of combat against bombers or dogfighting, or attacking stragglers. There are other ways it can happen as well. However it happens, Chase is the mechanism that can get the pilots back onto the Interception Map in pursuit of the Raid.
Return to Base (RTB): A Lost Contact Section or RAF Fighter may return to base, thereby ending the patrol for those pilots (they are out of play). Put RAF Fighters on the RTB Track in the space below their Section's Fuel marker. (Example: Red Leader is Lost Contact. If it RTBs, place it under its Section's Fuel cube. The fighter remains there until the patrol ends — it is out of play.)
Chase attempt: A Lost Contact formation or RAF Fighter may attempt to make contact with the Raid. If the formation is larger than a Section, each Section performs Chase independently. Unlike during the Raid Vector Sequence, contact is not automatic. If successful, a Section returns to the Interception Map, while an independent RAF Fighter enters the Bomber Formation Area. You may dissolve a Section to allow its fighters to make their attempts independently.
Chase procedure: Perform Chase one at a time, selecting either a Section or RAF Fighter. Roll one or two dice and then consult the Chase Table printed on the game board. After applying results, select the next Section or RAF Fighter.
How many dice? If a Section performs Chase, roll one die. If an independent RAF Fighter performs it, roll two dice and select the lowest number rolled.
Chase example 1: Red Section is Lost Contact and attempts Chase. There is at least one heavy Escort Station marker on the Interception Map and visibility is clear. The player rolls a die — a '4.' The attempt fails so the Section remains Lost Contact. Unfortunately, the number rolled is so low that a dogfight is initiated with 109s. The player draws a Luftwaffe Advantage Card to resolve the dogfight in the Lost Contact area.
Chase Table
The table is organized by columns that represent Visibility (clear, haze, or clouds). Use the current Visibility's column. Use the row corresponding to the size of Escort Station markers on the Interception Map (none, light, or heavy; include suppressed Escort stations). If all Escort stations are empty, use the "none" row. If at least one Escort station has an Escort Station marker that is heavy, use the "heavy" row. Otherwise, use the "light" row.
Red number: If the number rolled is equal to or higher than the red number printed at the intersection of column and row, the attempt succeeds. If less than the red number, it fails.
Green numbers: If the number rolled falls in the range of green numbers printed at the intersection of column and row, the attempt not only fails but the Section or RAF Fighter is intercepted by German fighters.
- Success (equal to or higher): The effect of this result depends on whether a Section or an individual RAF Fighter is chasing:
- Section: Place the Section on the Interception Map. Roll another die to determine where.
- Fighter: Place the individual RAF Fighter in the Bomber Formation Area. This does not start a Bomber round, the fighter must wait until the next Entropy Phase to attack.
- Failure & Interception (lower): The Section or independent RAF Fighter remains Lost Contact. If interception happened, draw a Luftwaffe Advantage Card and initiate the Dogfight Cycle. German fighters are 109s unless the only unsuppressed Escort Station markers are 110s (in that case, use 110s).
Chase succeeds — where the Section or Fighter arrives, by die roll:
| Roll | 1-2 | 3-10 | 11-12 |
|---|---|---|---|
| Section | Port low | Trailing low | Starb'd low |
| Fighter | no die roll; enter Bomber Formation Area instead |
Chase example 2: Green 3 is Lost Contact and attempts Chase. There is at least one heavy Escort Station marker on the Interception Map and visibility is clear. The player rolls two dice — a '6' and a '10' — and must take the lower number. That means Green 3 slips through to the Bomber Formation Area. Green 3 must wait until the Bomber Formation step of the next Entropy Phase to approach a bomber.
Chase example 3: Yellow Section is Lost Contact and attempts Chase. The only Escort Station marker on the Interception Map is light, and visibility is haze. The player rolls a die — an '8' — so the effort succeeds. The player rolls another die — a '5' — and Yellow Section arrives Trailing low.
4. Patrol Complete?
If all RAF Fighters are on the RTB Track or in Fate Boxes, the patrol ends. Initiate the RTB Sequence. If at least one RAF Fighter is still in play, play continues by following these steps:
A. Fuel
Each Section spends 1 Fuel (slide each Fuel cube one space to the right on the Fuel Track). If a cube is already in the Vapor space, its Section's fighters must immediately Return to Base (place them on the rightmost space of the RTB Track; do this even if engaged with a Bomber).
B. Escort Recovery
Remove Suppression markers (if any) from Escort Station markers on the Interception Map.
C. Escort Exit?
Check each Escort Station marker on the Interception Map (if any) to see if it reduces or is removed from play. Roll a die for each Escort Station marker and compare the number rolled to the red number printed for its type (one number for 109s, another for 110s) in the Raid marker's space on the Raid Track. If the number rolled is equal to or higher, a heavy Escort Station marker becomes light and if already light it is removed from play. If less than the red number, there is no effect.
Which number? Use the number corresponding to the escort type, 109 or 110. If there is only one number, it applies to 109s (in this case, 110s automatically pass their check; they remain in play and are not reduced). If there are no numbers, do not make this check at all. (The Me109 had a more limited range than the 110, so there is a greater chance of a 109 Escort Station marker becoming reduced or exiting. This is also true during Entropy.)
Escort Exit example: the player rolls a '9' which reduces the heavy 109 Escort Station marker (it is more than the '8' needed to reduce it).
D. Channel Patrol
If the Raid marker is in a space with a Channel Patrol number, make a Channel Patrol Check by rolling a die. If the number rolled is equal to or higher than the printed number on the track, draw a Luftwaffe Advantage Card and apply it to an RAF Fighter or Section (this triggers a dogfight which must be played immediately against 109s). If less than the printed number, there is no effect. Choose randomly.
Example: in the next step, the player rolls a die for Channel Patrol — another '9' — and that means nothing happens. Had they rolled a '12,' 109s would have attacked.
E. Reform
Flight: On the Interception Map, two Sections in the same position and altitude may combine into a Flight (both Sections spend 1 Fuel).
Section: Lost Contact RAF Fighters may join their Section if it, too, is Lost Contact (the Section spends 1 Fuel to do this).
Ad hoc Section: Two or three Lost Contact fighters from different Sections may form a Section of their own. One of them must be a Veteran pilot (he becomes Section Leader). Use a gray or black Fuel cube if necessary to track this new Section's fuel status (fighter with the lowest fuel establishes the cube's starting space). Forming an ad hoc Section costs Fuel (that is, the new Section immediately spends 1 Fuel).
Ad hoc Fuel example: Green 3 and Red Leader are Lost Contact. They reform into an ad hoc Section using a new Fuel cube.
F. Raid Vector
Reveal Vector markers in the Raid marker's space one at a time and apply their results until the space is empty of Vector markers. If the space is already empty, move the Raid marker to the next space on the track and then reveal the Vector markers in its new space.
Scenario: If playing a scenario that doesn't use the Raid Track and its Raid Vector Markers, skip this step.
Last Space? If the Raid marker starts this step in the last space of the outbound row of the track, the patrol ends. Place Lost Contact fighters and those in the Bomber Formation Area on the RTB Track, and then perform the RTB Sequence.
Last Space & Engaged? If engaged against a Bomber, resolve one last Bomber round and then place the fighter on the RTB Track.
Raid Vector example: the player moves the Raid marker to the next space on the Outbound Row. Then, they reveal the marker (unlike the Inbound Row, there is always just one Raid Vector marker in each space of the Outbound Row). It is a New Trade result — that means the rearmost Bomber Tile in the Bomber Formation Area becomes isolated. (If the rearmost tile is already isolated, the next rearmost tile is isolated instead.)
G. Swirl Again
If the patrol has not ended, restart the Interception Sequence with the Orders Phase.
Intercept Scenarios: if you've read this far, you are ready to play the Intercept Scenarios (10 and 11) in the Situation Manual.
Raid Vector Sequence
This sequence is the game's way of providing you with operational context while partnering with you to establish the starting conditions of the Interception Sequence. The sequence ends with your decision to have your Squadron make Contact (Contact ends the Raid Vector Sequence and initiates the Interception Sequence). Afterwards, the Raid marker remains in play and moves during the Patrol Complete? phase of the Interception Sequence (Raid Vector step).
Until the Raid marker is on the track, your squadron has not yet located the German bombers (you are in the thick of the fog of war). Ground control is vectoring your squadron to a point of contact. Once the Raid marker is on the track, Contact is allowed. Once made, Contact ends the Raid Vector Sequence.
Components
The Raid Vector Sequence precedes the Interception Sequence. You need the Raid marker (set it aside at set-up; it will enter play when you reveal its presence during the Reveal Phase, Raid result), the Squadron formation marker (only one Squadron formation is used; use the "2nd Squadron" only when called for by the optional Random Events Table result in the Optionals booklet, Big Wing), and Raid Vector markers (inbound & outbound).
Set-Up
The Situation Manual will dictate how many Raid Vector markers you place on the Raid Track, and where they go. It will also tell you where to place your squadron (that is, which zone the Squadron's formation marker starts). The Bomber Formation Area and the Interception Map start empty, except perhaps for the Sun marker.
A. Assignments. Arrange RAF Fighters on the Squadron Display. Then, you can skip the rest of this step unless you are playing a Campaign (refer to the Situation Manual for campaigns). Assign pilots to fighters. If starting a Campaign, roll a die to determine the experience levels of your pilots (see the Pilot Experience section of this Rule Book for an explanation of experience levels and Ace skills). Note all this on your Pilot Roster. (When assigning pilots to fighters, either place the Pilot markers on the fighter blocks or make use of the pilot slots near the top of the Squadron Display.)
B. Fuel. Place each Section's Fuel cube in the "full" space of the Fuel Track. The full space corresponds to the type of fighter you are using (Hurricane or Spitfire).
C. Visibility. Consult the Visibility Table in the Situation Manual and roll a die to determine the Visibility (clear, haze, clouds). You may need to roll another die to locate the Sun on the Interception Map (place it there now, and use the Sun marker to record the visibility state).
D. Raid Proximity. Randomly draw Vector markers. Place them on the inbound row of the Raid Track. The Situation Manual explains where they go. Do not look at the back side of the markers (keep them face down).
E. Climb to Station. Consult the Situation Manual to place the Squadron formation marker in its zone on the Raid Track. You may need to roll a die for this, and you may be required to spend Fuel.
Raid Track
The progress of the German bomber raid as it traverses into Britain's airspace is abstractly represented on this track. It allows the game to handle a number of factors that influence the battlefield (Luftwaffe fuel constraints, sun position, presence of the Luftwaffe's patrols over the English Channel, flak, and the consumption of your squadron's fuel before making contact with the raid). It also introduces the 'fog of war' as your squadron is vectored to a point of interception by ground control.
Inbound: Fill the Inbound row of the track with large Vector markers at set-up (as directed by the Situation Manual). During the Reveal Phase of the Raid Vector Sequence you will reveal one or more markers, and that is how you will discover the Raid. Eventually, or maybe quickly, you will place the Raid marker in one of these spaces. Once on the track the raid is visible to your pilots, allowing you to intercept it via a Contact Check.
Set-up Shortcut: To make setting up a patrol faster, you can keep Raid Vector markers in a bowl instead of putting them on the track. When you need to reveal one during the Reveal step, blindly draw it from the bowl. In this way, you will gradually add them to the track rather than remove them. Don't add more than instructed by the Situation Manual.
Outbound: The top three rows of the track represent the Raid's trajectory back to France. Once German bombers release ordnance and make their turn home, you will place Vector markers into each space on the outbound track (use the square markers, selecting them randomly and blindly).
Zones: At set-up, you will be instructed by the Situation Manual to place the Squadron's formation marker in one of three zones (deep, middle, coast). During the Raid Vector Sequence you may move the Squadron to an adjacent zone or change altitude (high or low, relative to the expected altitude of the raid). Once you make the decision to make Contact with the Raid, you will transfer the Squadron's formation marker to the Interception Map. A Contact Check is necessary to determine its position on that map entailing a die roll.
If at high altitude, place the Squadron on an altitude block. If not on an altitude block, the squadron is at low altitude. Altitude is relative to the bombers (or their expected altitude) and not meant to be an absolute indicator of the squadron's distance from the ground.
Sequence of Play
The four phases of the Raid Vector Sequence should be played in order. At the start of this sequence, the Raid marker is not yet in play, the Interception Map is empty (except maybe for the Sun marker). The Bomber Formation Area is empty. Well, it's not really empty, there are bombers there, you just can't see them.
1. Reveal
The procedure of this phase varies depending on the status of the Raid marker:
If the Raid marker is not in play: Reveal the Inbound Vector markers in the rightmost space of the track with a Vector marker in it. If there is more than one Vector marker in the space, reveal all of them one at a time, applying each marker's effects before revealing the next marker. Most Inbound markers have two effects. Apply the top first (effects are explained in the Icon Results section of the Rule Book as well as on the player aid). Continue doing this until all markers in the space have been revealed, then proceed to the Fuel step.
Reveal Example: a patrol commences with the Squadron's formation marker in the middle zone. The player begins the Reveal Phase by flipping over the Vector marker in the rightmost space of the Inbound row of the Raid Track.
If the Raid marker is in play: Move the Raid marker to the next space on the Raid Track. If on the Inbound row it moves to the left (from coast towards deep). If on the Turn space it follows the arrow to the leftmost space to one of the Outbound rows. If on the Outbound row it moves to the right. Then, reveal the Vector markers in that new space. If there is more than one Vector marker in the space, reveal all of them one at a time, applying each marker's effects before revealing the next marker.
Example: the revealed Raid Vector marker presents two results. "New Trade" must be applied first (it's on top). New Trade brings the Raid marker into play (place the Raid marker in the Vector marker's space on the track). Then, "Flak" allows the player an opportunity — after placing two Damage markers on the Bomber Formation space of the Interception Map, the player is allowed to move the Squadron or make Contact. In this example, however, the squadron is low altitude, so may not perform Tally Ho to make Contact.
Fighter Command employed a number of codewords and phrases denoting the raid, such as "New Trade," the favored phrase of the 1968 film The Battle of Britain.
2. Fuel
Each Section spends 1 Fuel. Shift their Fuel cubes one space to the right on the Fuel Track.
Vapor: If a Fuel marker is already in the last space of the track, it can't shift to the right. All of its pilots Return to Base (place the fighters on the RTB Track below the vapor space).
3. Contact?
If the Raid marker is not on the Raid Track, skip this step. If it is on the Raid Track, you may perform Contact. Success is automatic, but roll a die and refer to the Contact Table to determine the squadron's starting position on the Interception Map (this is a Contact Check).
Example: in this example, the Squadron is too far from the Raid marker to perform Contact.
Contact Allowed? You may perform Contact if the Squadron's formation marker is in the same zone, or an adjacent zone, to the Raid marker. The squadron may be at any altitude (high or low). If not in or adjacent to the Raid's zone, Contact is prohibited.
Contact Tables: There are two Contact Tables, one for Contact in the same zone, the other for making Contact in an adjacent zone. If the Squadron's formation marker is in the same zone as the Raid marker, use the "in same zone" table. If in an adjacent zone to the Raid marker, use the "in adjacent zone" table (note that the adjacent zone requires each Section in the Squadron to spend 1 Fuel).
Contact Check Procedure: Consult the Contact Table and roll a die. Each table has one or two modifiers, noted below the table.
Contact Table — in same zone (modifiers: -1 if clouds; +1 if high altitude):
| Die roll | Position | Adjustment |
|---|---|---|
| 3 or less | Tail Low | Tail High or Flank Low |
| 4-9 | Flank Low | Flank High or Nose Low |
| 10 or more | Nose Low* | Flank Low or Nose High |
* If Squadron is high, spend to start in any position in the sun instead.
Contact Table — in adjacent zone (modifier: -2 if clouds):
| Die roll | Position | Adjustment |
|---|---|---|
| 2 or less | Trailing Low | Tail Low |
| 3-8 | Tail Low | Flank Low |
| 9-12 | Nose Low | Nose High |
Modifiers: Clouds (visibility state) -1 (same zone) or -2 (adjacent zone). High altitude +1 (in same zone only). After modifying the number rolled, locate that number in the table's row. The column on the right will tell you where to place the Squadron's formation marker on the Interception Map (place it there immediately). It will also tell you the squadron's new altitude.
Adjustment: You may adjust the Squadron's position (this adjustment happens immediately, before starting the Interception Sequence). "Adjust" means moving the formation to a different position or altitude on the Interception Map. The cost to adjust is 1 Fuel for each Section (shift the Squadron's Fuel cubes one space to the right on the Fuel Track). Alternatively, you may split the squadron into echelon formations (flights and sections) and have some but not all formations make the adjustment. For example, Flight A might spend Fuel to move while Flight B does not. Only the formations that adjust are required to spend fuel.
In the Sun? If you roll 10 or better on the "in same zone" Contact Table, you may spend 1 Fuel to ignore the result and place the Squadron's formation marker in the position that is in the Sun (high altitude). To allow this, the Squadron must be in the same zone as the Raid, and the squadron must also be at high altitude.
Lost Contact? If you choose to make Contact while one or more RAF Fighters or formations are currently Lost Contact, they immediately RTB. Place all Lost Contact fighters on the RTB Track, in the box beneath their Section's Fuel cube. (Why do Lost Contact fighters return to base at Contact? When they broke away from the squadron they vectored in a contrary direction. Or, in making Contact the squadron changed course or altitude in such a way that the Lost Contact elements of the squadron are now long gone.)
Contact! Contact ends the Raid Vector Sequence and initiates the Interception Sequence (Raid Vector markers will henceforth be revealed during the Patrol Complete Phase). After rolling the die for the Contact Check and placing the squadron's formation marker on the Interception Map, you must set-up the rest of the game space:
- Escort: If escort station markers are not yet on the map, place them there now (roll a die and consult the Situation Manual, each chapter has its own set-up chart for escort stations). It is possible and even likely that escort station markers will already be on the map. If so, leave them where they are (the map is already set up).
- Bombers: Place Bomber Tiles in the Bomber Formation Area. Roll a die to do this and consult the Situation Manual. Each chapter has its own chart telling you the number of tiles to place, their type, and their configuration. Clouds exception: if visibility is clouds, defer this die roll and leave the Bomber Formation Area empty until a fighter enters the Bomber Formation Area or visibility changes.
Contact example: Squadron is high altitude and in the same zone with the Raid marker (coast). Visibility is clear. The player elects to perform Contact and rolls the die — an '8.' It is modified to a 9 for High altitude. The Squadron formation marker may be placed in either Flank position, so the player chooses Port (it has the sun). They then elect to spend Fuel to remain at High altitude (adjust).
4. Vector
During this phase, make an Escort Exit Check for each Escort Station marker on the Interception Map (follow the procedure explained in C. Escort Exit?). Then, you may take actions to improve your Squadron's situation. You may either move or reform, or do nothing (you may not move and reform). Then restart the Raid Vector Sequence with the Reveal Phase.
Move: You may move the Squadron's formation marker to an adjacent zone (from deep to middle, for example). Or, change its altitude (low to high, for example). You may move and change altitude at the same time, but that requires Fuel expenditure (shift all of the Squadron's Fuel cubes one space to the right).
Reform: Sections and RAF Fighters that are Lost Contact may return to the Squadron or RTB. If they return, place them back on the Squadron Display or remove their Lost Contact marker. This costs all Sections 1 Fuel (the entire squadron spends Fuel while pilots maneuver to regroup).
Return to Base
When a patrol ends, check the fate of severely hit fighters (they are in Fate Boxes). Also check the fuel state of other RAF Fighters, they may have to bail out. Then, tally Victory Points (VP) earned. If playing using the Pilot Experience rules, note the patrol and tally kills earned by pilots to determine if their Experience Levels change or if an Ace Skill is earned.
During a patrol, when a fighter Returns to Base (RTB), place it on the RTB Track under its Section's Fuel cube.
1. Fate
Check each RAF Fighter in a Fate Box. Do so by rolling a die and noting the number rolled on the table printed in the Fate Box to get the result (if Fatigued, subtract 1 from the die roll, treat a '0' as a '1'). Use the column corresponding to the fighter type (Hurricane or Spitfire). With the exception of "Hangar," all results require a second die roll (subtract 1 if Fatigued).
Hangar: This result means the pilot landed without incident and the pilot is available to participate in the next patrol.
Crashes, Fire? This result means the fighter is destroyed. The fate of the pilot must be determined by a second die roll. It will tell you if the pilot bailed out, ended up in the hospital, or was killed. The fighter is automatically replaced, but the pilot is not.
Bail Out: This result means the pilot managed to bail out of the fighter before it was destroyed. The pilot is not hurt and is ready for duty, but he is not at the squadron's aerodrome. He can't participate in the next patrol, but he can be assigned to a fighter after the next patrol. Keep the Pilot marker in the Bailout Box as a reminder, or just keep it off to the side.
Channel Dunking? If the pilot's fighter was placed in the Fate Box when the Raid marker (on the Raid Track) was in a space with the Channel Bailout icon, you must make a Channel Recovery Check for him.
KIA: This result means the pilot died. If replaced, reuse the Pilot marker.
Green Pilot (Fate): If the first result of the Fate Check was anything but Hangar, and if the pilot is Green (that is, he is neither Regular nor Veteran), use the bottom row to determine the outcome of the second die roll. That is, instead of using the Crashes or Fire rows of the table, use the bottom row in red instead.
Fate Box example: Spitfire Green 3 is piloted by a Regular pilot. It is in the Fuselage box and the player rolls a die — a '5' — which results in the aircraft crashing. To determine if the pilot bails out to save himself another die is rolled — a '7' — and so he does indeed leap to safety (he needed a '6' or better). And yet, there is a Channel Bailout marker on the fighter (earlier in the patrol, the fighter was placed in the Fate Box when the Raid marker was on a Channel Bailout space, which is why the player marked the fighter with the Channel Bailout marker as a reminder). That means the pilot marker should be placed in the Channel Recovery Box (he will undergo a Channel Recovery Check in a moment).
Wounded: This result means the pilot survived but is now in the hospital. Place the Pilot marker in the Hospital Box, and at the start of the next Patrol roll a die for him (do this after assigning pilots to aircraft). If Discharged, his injuries are so severe that he can't return to duty. Treat this result as a KIA result. If the result is Hospital, the pilot remains in the box until the start of the next patrol when you may check his status again (you may elect to voluntarily apply a Discharge result instead). If the result is Returns, the pilot is ready for duty. He must sit the next patrol out, but you can move his Pilot marker out of the Hospital Box thus allowing you to assign him to a fighter after the next patrol.
Wounded example: a pilot's Fate Box result puts him in the Hospital. The player places the pilot marker in that box and rolls a die — a '10' — which means he returns to duty and can be assigned to a fighter after the next patrol.
2. Fuel Check
After checking the fate of RAF Fighters in Fate Boxes, check those on the RTB Track. If the fighter is in a space on that track with a Bail Out number, roll a die for its pilot. If the number rolled falls in the range of numbers, the pilot bails out (he is unhurt but must sit out the next patrol). Place the Pilot marker in the Bailout Box as a reminder that he can't fly the next patrol (you may assign another pilot to the fighter he was flying).
Channel Dunking? If the pilot's fighter was placed on the RTB Track when the Raid marker (on the Raid Track) was in a space with the Channel Bailout icon, you must make a Channel Recovery Check for him.
Fuel Check example: earlier in the patrol, Green Leader RTB'd when its Section's Fuel cube was in the Empty space of the track. The player placed the fighter in the space below the cube. Later, during the Fuel Check step of the RTB Sequence, the player rolls a die to check for bailout — a '9' — which means the fighter did not run out of fuel and the pilot successfully landed his Spitfire. He may fly the next patrol. The player places Green Leader (stickered block) on the Squadron Display in preparation for the next patrol, and may assign the pilot to that same fighter or to a different fighter (or the pilot may sit the next patrol out). Meanwhile, the Section's Fuel cube is reset to the Full space on the Fuel Track (in this example, the patrol had ended with that cube in the Vapor space; but it was moved there after Green Leader RTB'd). Yes, the aircraft was destroyed when the pilot bailed out, but machines are easily replaced.
3. Channel Recovery Check
If a fighter is placed in a Fate Box or the RTB Track while the Raid marker is in a space with the Channel Recovery icon, a Channel Recovery Check is necessary if the pilot bails out (not if the result is Wounded or KIA). To perform the Channel Recovery Check, roll a die and apply the result indicated in the Channel Recovery box printed on the game board.
Rescued: The pilot bailed out and was returned to Britain. He must sit out the next two patrols.
POW: This result means the Germans managed to rescue the pilot from the English Channel. He may not be assigned to another patrol. If replaced, reuse the Pilot marker. (At this time in the war, the Germans were more aggressive and successful at fishing pilots out of the channel.)
Channel Recovery Example: Robbins is a regular pilot who was flying Blue 2 and bailed out before crashing in the Channel (Fate Box result = crash and then bailout). The player rolls a die to check for recovery — an '8' — which means he is captured by the enemy (POW result). He is removed from play but may be replaced with a green pilot.
4. Pilots (Campaign only)
In order to track their progress to veteran status, record the patrol for each pilot on your roster (fill in the bubble on the roster). Also keep a record of the bombers and Luftwaffe fighters they shoot down (kills). If a pilot dies or is captured in the English Channel, or is discharged from the hospital, scratch him from your Pilot Roster. In a campaign, you are permitted to replace one scratched pilot after each patrol (also see the Graduated Replacements optional rule). The New Men result on the Random Events Table (another optional rule) may alter this. To replace a pilot, invent a new name for the replacement and write it in the space under the old pilot's name. The new pilot is Green (zero patrols flown and zero kills).
Squadron Limit: Your squadron may never have more than 20 pilots (or 16 in chapter 4).
Pilot Roster: The roster indicates how many patrols a pilot must fly to lose his Green status (4 patrols), and how many more patrols are needed to become Veteran (5 patrols). It also indicates how many kills are needed to earn an Ace skill (5 kills).
What happens to the fighter? When destroyed (for example, Red 2 crashes), a fighter is automatically returned to play. The RAF replaces its machine losses.
Roster example: it is Chapter 2 of the campaign and Pilot Officer Preston just flew his fourth patrol (it was the third patrol of Ch.2). He is no longer a green pilot. He also downed one German fighter, his second of the campaign.
5. Tallying Points
Finally, note the number of Victory Points (VP) your squadron earned. A scenario may have unique victory conditions, but VP in a patrol (during a campaign) are earned as follows:
- Bomber Destroyed: 1 VP. Your squadron earns 1 VP for each Bomber destroyed by your RAF Fighters. A Bomber destroyed by Flak does not count.
- 4 Luftwaffe Fighters Destroyed: 1 VP. Each Damage result against a Luftwaffe Fighter marker is considered a "destroyed" fighter.
- Isolated Bomber Tile: 1 VP. This VP is earned only if the tile was isolated before the Raid dropped ordnance (that is, only if it happened when the Raid marker was on the Inbound row of the Raid Track). Also, you earn the VP only if you have a RAF Fighter in the Bomber Formation Area at the moment the tile is isolated. For example, if isolation happens as a result of New Trade, you do not earn the VP prior to Contact.
VP example: 1 bomber destroyed = 1 VP. 4 Luftwaffe fighters (escort) destroyed = 1 VP. 1 isolated kette (bomber tile), isolated before ordnance drops = 1 VP.
Pilot Experience
The tactical battle fought in the skies above Britain was not merely a technical matter of flying machines, it hinged on the expertise and experience of pilots. This section of the Rule Book allows you to infuse pilot experience and skill into the game. It complicates matters, but it also provides the player with more decisions, and it crafts a more immersive narrative over the course of a campaign.
Components
Record experience on the Pilot Roster. You will also need to use Pilot markers, and Green and Ace markers.
Pilot markers: Use these as you like, but the Squadron Display is designed with Pilot marker boxes near the top. A Pilot may fly any RAF Fighter, but during a patrol, keep track of which Pilot flies which RAF Fighter. A pilot does not have to fly the same fighter each patrol, and a destroyed fighter automatically returns for the next patrol (destroyed and damaged fighters are automatically replaced, not so their pilots).
(Example: Pilot 'A' is sitting this patrol out, resting. He is a green pilot and is fatigued. Pilots 'H' and 'I' are also sitting this patrol out. They are regular pilots. 'I' is fatigued. Green Leader is Veteran; Green 2 is a Green pilot. Yellow 3 is in the Bomber Formation Area, but for convenience its Pilot marker remains on the Squadron Display.)
Experience
Pilots range in experience from "Green" to "Veteran." Experience is measured in the number of patrols the Pilot flies. As a pilot survives patrols he will gradually shed his Green status and eventually become Veteran. A remarkable few will gain one or more Ace Skills (an Ace Skill is gained by accumulating 5 kills).
Green: When playing a scenario or starting a campaign, you will be assigned a number of Green pilots. They are fresh out of flight school and have limited experience flying a modern fighter let alone doing so in the face of an enemy. Green pilots suffer adverse effects as noted on many card types (Advantage, Dogfight, Bomber). When a Green pilot survives four patrols, they lose their Green status and become "Regular" pilots.
Regular: A Regular pilot is neither Green nor Veteran. He has survived long enough to lose whatever Green penalties the game imposes, but he does not yet enjoy Veteran privileges. "Regular" is the game's default experience level.
(Example: when starting a campaign, a Regular pilot assigned to you by the Pilot Assignment table in the Situation Manual has already flown 4 patrols and is no longer green. He becomes a Veteran after flying 5 more patrols.)
Fatigue
In a campaign, use the Pilot Roster to keep track of the patrols flown by pilots. A pilot who flies two consecutive patrols becomes Fatigued after that second patrol. He remains Fatigued until rested. To rest, a pilot must not fly one patrol (sitting out a patrol in the Bailout or Hospital boxes also counts as resting). A Fatigued pilot suffers a -1 die roll modifier when making Hit Checks, Fate Checks, and Collision Checks. If a pilot flies four consecutive patrols, he automatically goes to the Hospital (he is Exhausted, treat him the same as a wounded pilot).
Veteran
A Regular pilot is elevated to the status of Veteran after he survives five patrols (do not count those flown while Green). As a Veteran, once every patrol, the pilot is granted one Veteran privilege.
Veteran Privileges
There is a pool of six privileges that all Veteran pilots draw from. The privilege is not permanently assigned to the Veteran, he may use any privilege during a patrol. The same privilege may be used by multiple pilots, and a pilot may use one privilege during one patrol and a different privilege the next. The privilege doesn't have to be pre-assigned before the patrol starts. To use a privilege, record that the pilot avails himself of it and apply the effect. You may use the Pilot Roster for this, or rotate the Pilot marker 90 degrees as a reminder that he used a privilege. The effects are explained below:
A. Discipline: Cancel a Low Ammo result. Only a result applied to the Veteran himself may be cancelled, not one applied to another pilot in the formation.
B. Practiced Maneuver: When tailed in a Dogfight, replace the Dogfight Card's results with a Slip result. This is possible only if the Veteran is in a Section, but it is prohibited if one or more pilots in that Section are Green. Also, the Section's Maneuver must be Slip, and the Veteran invoking the privilege must be the pilot to slip behind the Germans.
C. Pull Tight: When tailed in a Dogfight, replace the Dogfight Card's results with a Tight Turn result. This privilege may be used when the Veteran is in an independent RAF Fighter or is Section Leader (the Maneuver must be Turn).
D. Stay Trim: Use this only when the Veteran is in a Section with a Green pilot. It saves that Green pilot from one result on an Advantage or Dogfight Card that specifically affects a Green pilot. That is, it cancels either of these icons. No Bombers: this privilege may only be used in the Bomber Formation Area when the Veteran and Green pilot are approaching the same bomber from the same attitude (they must belong to the same Section).
E. Follow My Lead: When tailed in a Dogfight, cancel an icon result on a Dogfight Card. The pilot must be in an independent RAF Fighter or be Section Leader, and the Maneuver must be Evade.
F. Pluck: Give yourself a positive modifier; add +1 to a die roll. You may apply this to Chase, Interception, or a Suppress Escort Check, or during a Fate Check (but it applies only to the Veteran in the Fate Box). You may roll first and then decide to use the modifier.
- Chase: The pilot may be independent or the leader of a Lost Contact Section. Add +1 to the die roll.
- Interception: The pilot must be the leader of a Section. This may be used when attempting an Intercept Escort or Intercept Bombers action. Add +1 to the die roll.
- Suppress Escort: When making a Suppress Escort Check after completing a Dogfight (at the end of an Intercept Escort order), add +1 to the die roll. The pilot must be Section Leader and must have been involved in the Dogfight. If more than one Section was involved in the order, and more than one had a veteran pilot as their Section Leader, you may combine this privilege (two veteran Section Leaders provide a +2 modifier, for example, and each uses their privilege for this patrol).
Decide When? You may elect to use this privilege after rolling the die.
Ace
Any Green, Regular, or Veteran pilot may become an Ace. They do so by scoring 5 kills. An Ace pilot earns a specific Ace Skill that they may use once each patrol. Once the Ace skill is achieved, you must select the skill for the pilot. It is permanent and may not be changed later. More than one Ace Skill may be earned, but the second skill requires another 5 kills.
Kill: A pilot earns 1 Kill (k) when they score a Damage result in a Dogfight. They also earn a kill when a Bomber is destroyed, but only if its destruction was the immediate result of a Bomber Card during the Burst step generated by the pilot (that is, the pilot's RAF Fighter was engaged with the destroyed Bomber and its burst drew the card that destroyed it).
Ace Skills
When a pilot scores 5 kills, select an Ace skill and record it on the Pilot Roster. That skill is permanent and may not be changed. During a patrol, use the Ace marker to help you remember which pilot is Ace or which Ace has used their skill (a pilot may use their skill only once each patrol). If a pilot earns more than one skill, they may use each skill every patrol.
A. Lucky Charm: During a Dogfight or the Burst step of a Bomber round, when you draw a Dogfight or Bomber card, cancel an icon. Only one icon on the card may be canceled. A Hit or Return Fire marker may be drawn before making this decision.
B. Slick: During a Dogfight, perform a Slip Maneuver AND add a Slip result to the Dogfight Card. If in a Section, the Ace doesn't have to be Section Leader, but he must be the pilot that slips behind the German fighters. If the Section's maneuver was Evade or Turn, this skill automatically changes it to Slip. This skill may be used when the Ace pilot is independent, tailed by a Luftwaffe Fighter marker (the Slip allows the Ace to tail the German fighters).
C. Innovator: This skill represents the ace pilot's experimentation with what would soon become the standard RAF fighter formation, the Finger Four, in emulation of the German schwarm. This skill is available only in chapters 3 and 4. This skill may only be used if the Ace pilot is veteran, and is Squadron Leader. "Squadron leader" here merely means that the ace is one of the Section leaders, such as Blue Leader (there is no game function or effect called "squadron leader").
Innovator Effects: This skill allows you to use the back of the Squadron Display (the Advanced Squadron Display), organizing the Squadron into three Sections of four RAF Fighters. Use any three sections of fighters, leaving one out. You will need to add the fourth fighter to each section (Green 4, for example, and Red 4, etc.). Innovator ace skill also adds a new Veteran privilege to the Veteran privilege pool, called Break.
Break (veteran privilege): Any Veteran may use this privilege as long as their Section currently has four fighters and is tailed. To use Break, the Innovator Ace must begin the patrol as squadron leader on the Advanced Squadron Display, but if he RTBs or is in a Fate Box, veteran Section Leaders may still use Break.
Break [continued]: When a Section is tailed, before drawing a Tailed Dogfight Card, you may immediately break the Section into two pairs. Each pair comprises its own Element of 2 fighters. An 'element' is a Section and uses the Section row on Dogfight Cards. If necessary, keep track of Fuel using the extra cubes provided. When you use the Break privilege, roll a die. Apply the result corresponding to the number rolled, EVEN or ODD (this tells you how the Germans respond):
- EVEN: Replace the Luftwaffe Fighter marker with two lesser markers (replace a schwarm with two rottes, for example); place one Element behind one of the Luftwaffe Fighter markers so that it is tailing it, while the other Element is tailed; a lone German fighter can't break, instead treat as a Slip (RAF) result.
- ODD: Same as EVEN, except both Elements are tailed by a Luftwaffe Fighter marker.
Break examples: a Veteran-led Section of four (Vet Leader, Green 2, Green 3, Green 4) is tailed by a 110. Rolling ODD, both resulting Elements end up tailed by 110s. In another example the Section is tailed by a heavy 109 escort; rolling EVEN, the schwarm splits into two rottes, one Element tailing a rotte and the other tailed by the other rotte.
D. Vision: When a Dogfight is triggered, you may replace a Luftwaffe Advantage Card with an RAF Advantage Card. If already drawing an RAF Advantage Card, draw two and select one (discard the other). The ace need not be Section leader for a section to benefit from this ability, but the ace must be in the section.
E. Bloodhound: The Chase attempt automatically succeeds. No die roll necessary (choose trailing or flank position). If Section Leader, you may spend 1 Fuel to place the Section's RAF Fighters directly in the Bomber Formation Area (just as though they were independent RAF Fighters that successfully performed a Chase attempt).
Icon Results
Much of the game relies on the appearance of various icons, usually printed on a card or on a marker drawn randomly. This section of the Rule Book explains what those icons mean. A shorthand explanation can be found on the player aid, and an even shorter shorthand (a legend) can be found on the game board.
Vector marker icons
Flak: Note the number printed on the marker and draw that many Damage markers "Hurr" side up and check for Catastrophic effect, if any (you do not earn VP if the bomber is destroyed by flak). Place them randomly on bombers, one marker per tile selecting the largest contiguous set of Bomber Tiles. Place one Damage marker per tile starting with the tile with the fewest Fallen, Destroyed, and Damage markers (if more markers than tiles, distribute as evenly and scattered as possible).
No Bomber Tiles: If there are no tiles in the Bomber Formation Area yet, place the Damage markers on the Interception Map. Later, when you finally place tiles in the Bomber Formation Area, apply the Damage markers.
Friendly Fire: If any RAF Fighter is in the Bomber Formation Area, place an equal number of Hit markers randomly on RAF Fighters there (but no more than one marker per fighter). Perform Hit checks.
("Flak" refers to bursts emanating from anti-aircraft batteries on the ground, directed at the raid.)
Tally Ho? [Raid Vector Sequence] If the Raid marker is on the Raid Track, you may spend 1 Fuel to immediately perform Contact (slide the Squadron's Fuel cubes one space to the right). The squadron must be high altitude to make Contact. If you prefer not to perform contact or can't, or if the Raid marker is not yet on the Raid track, you may spend 1 Fuel to move the Squadron formation marker to an adjacent station or change altitude (not both).
Tally-Ho - Raid? If you perform Contact and the Flak icon is on the same marker as the Raid icon, and above the Raid icon (which means Flak is applied before Raid), postpone applying the Raid result until the Raid Vector step of the Interception Sequence.
(Pilots often relied on bursts from flak batteries to direct them to the precise whereabouts of a German raid. Example: two Damage markers are applied to bombers, one knocking the bomber out of formation, it is now Fallen. Two Hit markers are drawn from the cup and randomly assigned to fighters in the Bomber Formation Area.)
Messerschmitts! One Section or RAF Fighter is attacked by 109s. If a Section, it immediately spends 1 Fuel. Draw a Luftwaffe Advantage Card and immediately fight a dogfight.
Who fights? Select a Section at random. If none, select a fighter at random.
Deep Zone: If either the Raid marker or Squadron marker is in the Deep zone of the Raid Track, this result is converted to a Straggler result.
New Trade: The effect of this marker depends on where the Raid marker is.
- Raid is not yet in play: If the Raid marker is not yet on the Raid track, treat this as a Raid result instead.
- Raid marker on the Raid Track: If the Raid marker is already on the track, this result affects the Bomber Formation Area. Shift the rear-most Bomber Tile away from the others so that it is now isolated. If already isolated, select another tile and isolate it. If all tiles are already isolated, treat as a Raid result instead (bombers turn for home; but if the Raid marker is already on the Outbound Row of the track, there is no effect).
- Empty? If the Bomber Formation Area does not yet have tiles in it, place Bomber Tiles there now regardless of visibility; follow chapter instructions in the Situation Manual.
Raid:
- No Raid marker: If the Raid marker is not yet in play, place the Raid marker in the Vector marker's space on the Raid Track. Then, if Visibility is clear, roll a die to place Escort Station markers in Escort stations on the Interception Map (apply the result indicated in the Situation Manual). If haze or clouds, place the Raid marker but defer rolling a die for Escort markers until Contact happens.
- Raid marker: If the Raid marker is already on the Raid Track, the bombers release ordnance. Move the Raid marker along the curving arrow to the Turn space. Remove all Inbound Vector markers from the track (including this one, cancelling its second icon, if it has one). Then, randomly draw Outbound Vector markers and place one in each box of the Outbound row of the Raid Track. When the Raid marker is moved to the Turn space on the Raid Track, move the Sun marker to a new location (roll a die):
New Sun location, by current Sun location and EVEN/ODD roll:
| Sun is... | EVEN | ODD |
|---|---|---|
| nose | port | starboard |
| flank | nose | other flank |
| tail | nose | starboard |
Then... (ordnance was released and the Raid marker is now in the Turn space)...
- Raid Vector Sequence: if this result is garnered during the Raid Vector Sequence, the Reveal step is ended. Proceed to the Fuel step.
- Interception Sequence: if this result is garnered during the Interception Sequence, the Vector step is ended. Restart the Interception Sequence with the Orders Phase.
Raid result example: the player revealed a Raid Vector marker and resolved the Flak result (the squadron is low altitude and could not Tally Ho). Now, the player must resolve the Raid result. They move the Raid marker (cylinder) to the Turn space, and then remove all of the remaining Raid Vector markers from the inbound row of the track. Then they populate the Raid marker's outbound row with new Outbound Raid Vector markers (they draw them randomly without looking at their backs). Finally, the player rolls a die to shift the Sun marker to a new location. They roll a '3,' which moves it to the opposite flank.
Straggler: Place a lone bomber marker in the Lost Contact area. The bomber type should match those in the Bomber Formation Area (if their type has not yet been determined, select randomly). One Section or one independent RAF Fighter that has Lost Contact may attack it immediately (if a Section, it spends 1 Fuel). If this result happens during the Raid Vector Sequence, you may assign one or more Sections to attack it (they do not need to be Lost Contact but they must spend 1 Fuel). Unless Lost Contact, you may not assign a lone RAF Fighter to attack the straggler.
(The Straggler is effectively a Bomber Formation Area located within the Lost Contact area. Once there, fighters attack independently, not as a Section.)
No Attack? If you do not assign a Section or RAF Fighter to attack the bomber immediately, remove the Bomber marker from play.
Straggler (continued) — Bomber rounds: Immediately play Bomber rounds one after the other until the lone bomber is destroyed or the attacking fighters are out of ammo or in Fate Boxes. Surviving RAF Fighters RTB (they may not rejoin the Squadron; they must RTB).
Round 1 Approach? In the initial Bomber round, RAF Fighters may approach from any angle. Ignore penalties for Nose/Low and Tail approaches.
Escort Reaction: After each Bomber round, draw an Escort Reaction Card for the lone bomber but ignore everything on it except the Clouds Escape number and the Ambush icon.
- Clouds Escape? If visibility is clouds, roll a die (if equal to or higher, the bomber escapes). If the bomber escapes, the Bomber Cycle for this lone bomber ends and the RAF Fighter(s) RTB. If not clouds, skip this check.
- Ambush? If this icon appears on the card, draw a Luftwaffe Advantage Card and apply it to one RAF Fighter attacking the straggler (play the dogfight immediately). The RAF Fighter must RTB at the end of the dogfight if engaged after the first round (if it doesn't RTB, it may resume its attack on the straggler).
Straggler note: why not leave the fighters in the Lost Contact area, instead of forcing them to RTB? The straggler may have taken your fighters in a direction far from the raid. After a fruitless scavenge, they go home.
Turn Point: Roll a die. If the number rolled is EVEN, shift the Sun position clockwise. If ODD, shift it counterclockwise.
No Sun? Visibility is now clear and the Sun's location is:
| Die roll | Sun location |
|---|---|
| 1-3 | Nose |
| 4-6 | Tail |
| 7-9 | Starboard |
| 10-12 | Port |
If Escort Station markers are not yet in play, roll a die to populate the Interception Map with them (as per the Situation Manual's Escort Station table).
Weather: Visibility changes to haze (if the sun is on the Interception Map, it remains there). If haze already, it is now clouds (remove the Sun marker if on the Interception Map).
Card icons
Because this game simulates things that in real life are happening simultaneously and rapidly, all combat card results in a cell apply simultaneously. You, of course, have to physically implement them one at a time. But, rather than imposing a lot of extra rules for the order of effects, the game lets you implement them in any order you choose, as long as all the icons get implemented before you proceed to another card or another step in the sequence of play.
Damage: The effect of this result depends on the target (Bomber or Luftwaffe Fighter marker).
Luftwaffe Fighter: When a Luftwaffe Fighter marker receives a Damage result, reduce it. Each Damage is counted as a Kill for the RAF pilot (in a Section, randomly determine which RAF Fighter earned the kill).
Reduced: If the Luftwaffe Fighter marker is a schwarm, flip the marker over (it now represents 3 fighters). If already flipped, replace with a rotte marker. If a rotte is reduced, flip it over, and if already flipped, remove the German fighter marker. If a lone Luftwaffe Fighter is reduced, remove the marker. (Reducing a Luftwaffe Fighter marker as an effect of an Evade maneuver does not earn the pilot a kill — in that case, the German fighter breaks away.)
Bomber: Draw a Damage marker and apply it to the Bomber. "Apply it" means placing it on the Bomber's image on the Bomber tile or the Bomber marker. Damage markers are fighter specific, so when playing Hurricanes use the side that says "Hurr," and when playing Spitfires use the other side. A double-Damage result means you draw two Damage markers and apply both.
Catastrophic Effect? Some Damage markers are printed with a Catastrophic Effect icon, and sometimes with a number. If the number appears, roll a die. The effect is triggered if the number rolled is equal to or higher than the number printed on the marker (if no number, the effect is automatically triggered). These are the Catastrophic Effects:
- Cockpit: The Bomber is destroyed. Place a Destroyed marker on it and remove all Damage markers from the destroyed Bomber (put them back in the cup).
- Destroyed: The bomber is destroyed. Place a Destroyed marker on it and remove all Damage markers from the destroyed Bomber (put them back in the cup).
- Fallen: The Bomber falls out of formation. Place a Fallen marker on it and place a new Bomber marker of the same Bomber type in the Bomber Formation Area (if the Bomber is a Bomber marker already, there is no additional effect). If the Bomber had one or more Damage markers on it before it was Fallen, move them to the new Bomber marker (including the one that made it fall out of formation). If another fighter is approaching the Bomber, move it with the fallen bomber.
Catastrophic Effect example: the player draws a Wing Damage marker and rolls a die — a '7' — so there is no Catastrophic Effect. The marker remains on the bomber. You only check for Catastrophic Effect once (the moment you draw the marker).
Damage result example - Fighter: the player drew a Dogfight Card which garnered a Damage result (among other results). The player replaces the Luftwaffe Fighter marker with a rotte marker to reduce it and notes on the Pilot Roster that Yellow 2 earned an escort kill (this is Adley's sixth).
Cumulative Effect? A Bomber is destroyed if the number of Damage markers on it reaches its limit. That limit depends on the Bomber type and the Damage type (the type of Damage is printed on the Damage marker).
Bomber type / Damage limit (destroyed) — a Bomber is destroyed by 1 Cockpit marker, OR the listed number of Engine markers, OR the listed number of markers of any type(s) combined:
| Bomber type | 1 Cockpit | Engine (alone) | Any type(s) combined |
|---|---|---|---|
| Stuka (light) | destroys it | 1 | 3 |
| Dornier (medium) | destroys it | 3 | 4 |
| Heinkel / Junkers (medium) | destroys it | 2 | 4 |
(1 Engine marker invokes an automatic Fallen result to any medium bomber type; it destroys a light bomber.)
Damage result example - Fighter: the player drew a Dogfight Card which garnered a Damage result (among other results). The player replaces the Luftwaffe Fighter marker with a rotte marker to reduce it and notes on the Pilot Roster that Yellow 2 earned an escort kill (this is Adley's sixth).
Damage result example - Bomber: the player drew a Bomber Card which garnered a Damage result (among other results). The player draws a Damage marker from the cup and applies it to the bomber. The bomber is a Dornier and now has 2 Engine Damage markers. A third will destroy it. It is a lone bomber, so the Fallen Catastrophic Effect doesn't matter (it already fell out of formation).
Collision? There is a chance that impact happens. Roll a die: if a '1,' the pilot is killed and the German fighter or Bomber is destroyed. If the result appears on a Dogfight Card, reduce the Luftwaffe Fighter marker (if a Section, only one RAF Fighter collides; select the killed RAF pilot randomly). If on a Bomber Card, place a Destroyed marker on the Bomber and remove its Damage markers (if any; put the Damage markers back in the cup). On a roll of '2' or higher, there is no effect — unless the pilot is Fatigued, in which case impact happens on a die roll of '1' or '2.'
Disruption? The attack may disrupt the bomber formation. Count the number of RAF Fighters engaged with Bombers on the Bomber Tile and all those on tiles contiguous to it. Add the number of Damage markers on those tiles. Also add Fallen and Destroyed markers. (If this result happens on the Circle Display, count only RAF Fighters.) If the sum is equal to or greater than the Disruption number, isolate the Bomber tile.
Isolation: To isolate a Bomber Tile, separate it from the other tiles (slide it away from others so that no other tile or lone Bomber marker touches it). The isolated tile remains in the Bomber Formation Area but is no longer supported (when drawing a Bomber Card for it, use the middle row). While isolated, its Bombers remain eligible targets for RAF Fighters. All RAF Fighters engaged with Bombers on the newly isolated tile remain engaged (they move with the tile).
Isolation on the Circle Display: place a Fallen marker on the schwarm image and place a new Luftwaffe Fighter marker (110 schwarm) in the Lost Contact area. The RAF Fighter may tail it or let it go (if you let it go, remove the marker). Fighters that are engaged to that same schwarm image must remain engaged on the display (they 'attack' the Fallen marker). Apply only Hits, Low Ammo, and Reinforcement results.
(Bomber Tiles that are adjacent to each other are considered to be "contiguous." Disruption can fragment the original bomber formation into smaller bomber formations of contiguous tiles, all contained within the Bomber Formation Area.)
Distress? The attack may force the Bomber out of its kette. Count the number of RAF Fighters engaged with Bombers in the Bomber Tile, and add the number of Damage markers on the Bomber tile. Also add Fallen and Destroyed markers. If the sum is equal to or greater than the Distress number, place a Fallen marker on the Bomber and then place a new lone Bomber marker in the Bomber Formation Area. Transfer any Damage markers from the Fallen Bomber to the new Bomber marker. Fighters engaged with the Fallen bomber are transferred to the lone Bomber marker.
Dorsal Gunner: The bomber suffers fuselage Damage (with a special effect). Place a Dorsal marker on the Bomber (it counts as a Fuselage Damage marker). If the fighter is No Ammo, however, this result is canceled. If Jammed guns, roll a die (apply the result if the number rolled is EVEN; if ODD, this result is cancelled and the Jammed marker is removed).
Dorsal Damage Effect: Cancel Hits for RAF Fighters in the tail approach. If the Bomber already has a Dorsal Gunner marker, there is no additional Dorsal effect (it counts as another fuselage Damage marker).
Dorsal Gunner effect example: Yellow 2 attacks the Dornier and incurs a Return Fire result. After drawing the Return Fire marker, it turns out to be a Hit. But that Hit is cancelled. Dorsal Gunner on the Circle Display: if on the Circle Display, treat the result as a Damage result.
Fuel: The Section must spend 1 Fuel. Do this by sliding its Fuel cube one space to the right on the Fuel Track. Once in the Vapor space, it remains there (Fuel may not be spent). If playing scenario 1-9, ignore Fuel results.
Fuel result example: Red Section spends 1 Fuel.
Hit: The RAF Fighter is hit. Randomly draw a Hit marker from the cup and place it on or next to the RAF Fighter. If the result appears on a Dogfight Card and affects a Section, select the RAF Fighter in the Section randomly (apply the Hit to that fighter). If a double Hit appears on the card, randomly apply each (the same fighter may receive both Hits).
Hit Effect: A fighter or Section with one or more Hit markers can't Maneuver.
Hit Check: During the Hit Check step of the Dogfight or Bomber Cycle, check each Hit marker. Roll a die; if the number rolled is equal to or higher than the number printed on the marker, the Hit is trivial (put the marker back in the cup). If less than the number on the marker, the Hit is severe (move the RAF Fighter to the corresponding Fate Box and then put the marker back in the cup; if the fighter has more Hit markers yet to be checked, put them in the cup too).
Hit example: Green 2 attempted a Turn maneuver but failed. He is Hit. The player randomly draws a Hit marker from the cup and places it on or next to the RAF Fighter.
Hit Check example: Green 2 has a Hit marker and now the player rolls a die — a '7' — which is less than the 9 printed on the Hit marker. Green 2 immediately goes to the Fate Box (fuselage) and the 110 rotte is removed from play (it is no longer engaged).
Hit (Green pilot): If the pilot is Green, his RAF Fighter suffers a Hit. If a Section invokes this icon, it applies to any Green pilot in the Section (select randomly if more than one). If no Green pilot, there is no effect.
Hit (Green pilot) example: Yellow 2 attacks head-on and suffers a Hit. The player draws a Hit marker and places it on or next to Yellow 2.
Jammed Guns: Attach a Jammed marker to the RAF Fighter (select randomly if in a Section). Each time the jammed fighter garners a Damage result, roll a die: the Damage result applies only if you roll an EVEN number. If you roll an ODD number, the Damage result is cancelled and the Jammed marker is removed.
Already Jammed or No Ammo? If in a Section, apply the Jammed result to another fighter in the Section. If an independent RAF Fighter, ignore the Jammed Guns result.
Double Damage? If you roll ODD, one of the Damage results is cancelled (the other is not cancelled), and you remove the Jammed marker. If EVEN, neither Damage result is cancelled.
Loose: The RAF Fighter becomes independent and is now Lost Contact. Randomly select the affected fighter and move it out of the Section. If the Section is tailed, you may have the Luftwaffe Fighter marker move with the loose fighter so that it tails it instead of the Section.
Section dissolves? There must be at least two RAF Fighters in a Section, so if this result happens to a Section with only two fighters, they both become independent RAF Fighters and are Lost Contact. They are no longer flying together.
Loose example: Yellow Leader's Section (Yellow Leader, Yellow 2, Yellow 3) is tailed by a schwarm. Yellow 2 breaks out to become independent and Lost Contact. The player elects to have the schwarm pursue the newly independent fighter. It is now engaged with that RAF Fighter and will attack it in the next Dogfight Round.
Loose (Green pilot): This result only affects a Green pilot. If there is no Green pilot in the Section, it has no effect. If more than one pilot is Green, select randomly. The affected Green pilot breaks out of the Section (this is an identical result to Loose).
Lost Contact: The RAF Fighter has spun out of the Bomber Formation Area losing contact with it. It is now in a state of Lost Contact. Set aside space on your game table as a Lost Contact area. When a RAF formation or fighter becomes Lost Contact, place it there. Or, denote the Lost Contact status by using Lost Contact markers.
Low Ammo: Attach a Low Ammo marker to the RAF Fighter (if a Section, select one fighter randomly). If already Low Ammo, it is No Ammo.
No Ammo effect: A No Ammo RAF Fighter ignores Damage results that it generates in a Dogfight and against Bombers. If the No Ammo fighter is in a Section, No Ammo has no effect unless all the fighters in the Section are No Ammo.
Already No Ammo? If in a Section, apply the Low Ammo result to another fighter in the Section. If an independent RAF Fighter and No Ammo, ignore the Low Ammo result.
Already Jammed? Apply a Low Ammo result even if the RAF Fighter has jammed guns. The pilot is clearing ammunition in a desperate effort to get his guns to work.
Reduce: One German fighter flies away (it is not destroyed and does not count as a kill). For example, reduce a schwarm of 4 fighters to a schwarm of 3 fighters (flip the schwarm marker over). If a lone German fighter, remove it.
Reinforcements: Place a new rotte (Luftwaffe Fighter marker) so that it is engaged with the Section or RAF Fighter. Do not draw a new Advantage Card.
- Type: Note the silhouette, it indicates the Luftwaffe Fighter type.
- Angle: Note orientation of the silhouette, it indicates the rotte's angle of attack, either head-on or tailing your fighter(s).
Circle Display Reinforcements: if on the Circle Display, move the RAF Fighter to Lost Contact and put a 110 rotte (Luftwaffe Fighter marker) so that it engages it. Play the dogfight.
Return Fire: Draw a Return Fire marker and apply the result to the RAF Fighter. The icon results of those markers are explained in the Return Fire Icons section of this Rule Book and on the player aid.
('Return Fire' represents the result of bomber gunnery as well as the bobbing, veering, banking maneuvers a pilot executes when discretion and caution intrude upon a pilot's resolve. It is also the game's way of reminding the player that aircraft sometimes have mechanical failures.)
Split (German): Germans maneuver behind your fighter. Split the tailed Luftwaffe Fighter marker into two smaller units. For example, replace a tailed schwarm with two rottes. Then, place one of the Luftwaffe Fighter markers so that it is tailing the RAF Fighter or Section. If this result is combined with a Damage result, apply the kill to the Luftwaffe Fighter marker that remains tailed by your fighter or Section.
Lone German Fighter? If tailing a lone fighter, ignore this result (the German fighter remains tailed and does not slip behind your fighter(s)). (The flexibility of the schwarm and rotte formation proved advantageous against the vic.)
Circle Display Split: if on the Circle Display, move the RAF Fighter to Lost Contact and put a 110 rotte behind it (your fighter is tailed). Play the dogfight.
Slip (RAF): Slip Maneuver only: Ignore this icon unless the Section or RAF Fighter performed a Slip maneuver.
Effect: Ignore all other results on the card. Then, move one RAF Fighter in the Section so that it is tailing the Luftwaffe Fighter marker. Then, you may break the Luftwaffe Fighter marker out of the Section with the newly tailing RAF Fighter still engaged to it.
Tight Turn (RAF): Turn Maneuver only: Ignore this icon unless the Section or RAF Fighter performed a Turn maneuver.
Effect: Shift the Luftwaffe Fighter marker so that it is now head-on. Then, ignore all of the icon results on the card except the icon inside the Turn icon (if any).
Turn (German): Germans maneuver. Turn the Luftwaffe Fighter marker around so that it is head-on.
Circle Display Turn (German): if on the Circle Display, move the RAF Fighter to Lost Contact and put a 110 rotte in front of it (it is head-on; play the dogfight).
Vanish: Remove one Luftwaffe Fighter marker. If engaged with more than one marker, remove the one that the Section or RAF Fighter is battling now. This does not count as a kill for pilot experience.
Circle Display Vanish: if on the Circle Display, the RAF Fighter disengages (Lost Contact), and it may tail a new lone 110 Luftwaffe Fighter marker (play the dogfight). If Reinforcements is also a result, the fighter does not tail the 110.
(The term 'vanish' covers a range of real-world effects — from an enemy pilot permanently breaking off for unknown reasons, maybe he was out of ammo or fuel, to the enemy simply leaving your pilot's visual range or situational awareness for a few moments. Two fighter planes approaching each other at 450 mph would have had a closing speed of 900 mph — which means that by the time a pilot could even see the bogey, there was barely time for a quick shot before it would have passed him and vanished from view. Whatever the reason, 'vanish' simply means that an engaged enemy is suddenly gone from the tactical situation, or just from your view.)
Vanish example: Green 2 is tailed by 109s and is also attacked head-on by 110s. In resolving the head-on combat the player draws a Dogfight Card. One of the results is Vanish, and so, the player removes the 110 rotte.
Return Fire Icons
Return Fire icons appear on the back of Hit markers. When the Return Fire icon appears on a Bomber Card, draw at random a marker from the cup and place it Return Fire side face up on the RAF Fighter. Apply the effect of the marker's icon to the fighter. In most cases, you will put the marker back in the cup after applying the effect.
Fuel Line Emergency: Note the fighter's Fuel cube on the Fuel Track (that is, its Section's Fuel cube). If it is in the Low, Empty, or Vapor space, the pilot bails out. If not, the fighter Returns to Base (RTB) (place it on the RTB Track under its Section's Fuel cube). In either case, put the Return Fire marker back in the cup.
Channel Bailout? If the pilot bails out and the Raid marker is currently in a space with a Channel Bailout icon, place a Channel Bailout marker on the fighter as a reminder that it requires a Channel Recovery Check during the RTB sequence at the end of the patrol.
Hit: Flip the Return Fire marker over. It is now a Hit marker (the fighter is Hit). For the effect of a Hit, see the Hit icon result.
Hit (Green Pilot): If the pilot is Green, flip the Return Fire marker over. It is now a Hit marker (the fighter is Hit). If not Green, put the marker back in the cup (there is no effect).
Jammed Guns: Place a Jammed marker on the RAF Fighter and put the Return Fire marker back in the cup.
Lost Contact: The RAF Fighter has spun out of the Bomber Formation Area losing contact with it. It is now in a state of Lost Contact. Put the Return Fire marker back in the cup.
Circle Display LC: if on the Circle Display, the RAF Fighter disengages and becomes Lost Contact. If it also scored a Fallen result (Disruption), the Lost Contact RAF Fighter may not tail the 110 schwarm.
Low Ammo: The RAF Fighter is Low Ammo. Place a Low Ammo marker on it and put the Return Fire marker back in the cup. If already Low Ammo, it is now No Ammo. If already No Ammo, there is no effect. In any case, put the Return Fire marker back in the cup.
Mechanical Failure: Roll a die: if the number rolled is EVEN, the RAF Fighter exits the Bomber Formation Area and is now Lost Contact; if ODD, place the RAF Fighter on the RTB Track (place in the space under its Section's Fuel cube). In either case, put this marker back in the cup.