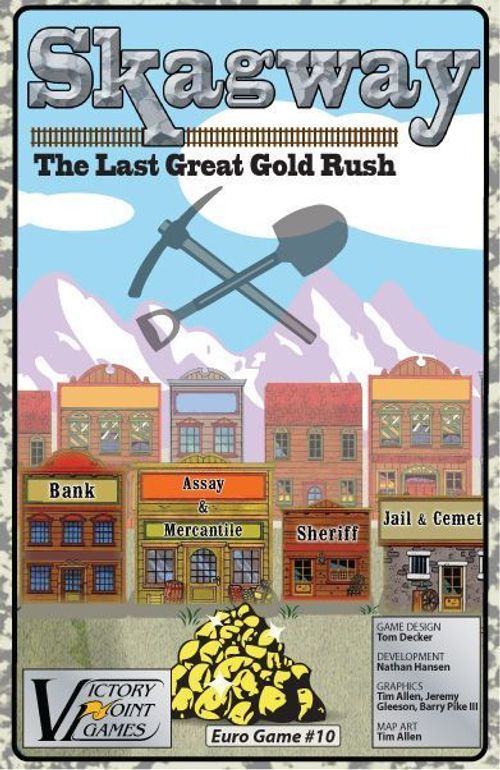
Skagway: The Last Great Gold Rush
Skagway: The Last Great Gold Rush Rulebook
Table of Contents
Table of Contents
[0.0] Using These Rules
New gaming terms, when they are initially defined, appear in dark red lettering for quick referencing. The following italicized text represents that term's definition, if applicable.
The instructions for this game are organized into major "Rules" sections, as shown in large Red font, and represented by the number to the left of the decimal point (e.g., Rule 4.0 is the fourth Rule). These Rules generally explain the game's components, procedures for play, the game's core systems and mechanics, how to set it up, and how to win.
With each Rule, there can be "Cases" that further explain a rule's general concept or basic procedure. Cases might also restrict the application of a Rule by denoting exceptions to it. Cases (and Subcases) are an extension of a Rule, shown in the way that they are numbered. For example, Rule 4.1 is the first Case of the fourth Rule; and Rule 4.1.2 is the second Subcase of the first Case of the fourth Rule.
Important information is in bold text.
Text like this, is the developer's voice addressing you to explain ideas and concepts that are not, themselves, a Rule or a Case.
References to brief examples of a Rule or Case are in blue boxes like this.
In the game, wealth is tracked by the points along the edges of the game board. These points represent a player's wealth in the game, and will move up or down depending on the player's fortunes. On the game board and cards, points are shown as a coin symbol.
When players earn, spend, or lose points, move their respective Points markers up or down on the points track. If a player earns more than 40 points, flip over their Points marker to the side showing +40 and move it back to the top of the points track. At the end of the game, the player with the most points on this track wins!
[2.0] Game Components
- 1 Rules Booklet
- 1 Game Board of Skagway
- 4 Player Mats
- 1 Six-sided die
- 65 Counters:
- 14 round Gold counters
- 8 round Workers (in 4 player colors)
- 5 round Hired Hands
- 1 round First Player marker
- 4 Points markers (in 4 player colors)
- 9 Railroad counters
- 12 Player Ownership markers (3 each in 4 player colors)
- 1 Hired Hand Recruiter
- 4 Buildings Purchased markers (in 4 player colors)
- 4 Gunfight Kills markers (in 4 player colors)
- 3 Large Player Buildings
- 25 Cards:
- 10 Prestige Building cards
- 14 Railroad Goods cards
- 1 Railroad Goods Values chart
If any of these pieces are missing or damaged, please email us at [email protected]
[3.0] Game Setup
[3.1] Game Board
Place the Game Board in the center of the playing area where everyone will have easy access to it.
Place the round Gold counters face down (hiding their numeric value) near one side of the board (forming the "Gold Supply") and the Railroad counters face down (hiding their numeric value) near the other. Alternatively place each set of counters into different opaque containers for drawing. If playing with 2 or 3 players, remove two ($3) Gold counters and remove one (2) Railroad counter.
The 5 Hired Hands are placed face down near the DOCKS. Place the Hired Hand Recruiter alongside the Docks as well.
[3.2] Personal Status Player Mats
Each player now selects a Player Mat, which will be used to keep track of the types of buildings purchased, number of Gunfight kills, purchased Prestige Buildings and Railroad Goods cards.
Each mat has an associated color for the game. Players take their Buildings Purchased marker corresponding to their chosen color and place it on the 0 space of their Buildings Purchased Track. Then, players take their Gunfight Kills marker in the appropriate color and place that on the 0 space of their Gunfight Kills Track.
[3.3] Workers and Player Buildings
Each player takes the 2 Workers and 3 Player Ownership markers of their chosen color and places them near their Player Mats. Workers are represented by round counters with one large number on them representing their gunfighting ability. The two location icons for their preferred "night spots" are displayed to the left and right of the Gunfighting Ability number. The primary choice of location is to the left of this number while the alternative choice icon is to the right.
Place the three large Player Buildings to the side until purchased. Each building has two sides, one representing a "GOOD" side and one for a "BAD" side. These buildings may flip from one side to the other during the course of the game. Flipping a building does not change ownership.
[3.4] Starting Player
Determine a starting player randomly and place the Points markers as follows, going clockwise for each successive player:
- 1st Player starts with 2 points
- 2nd Player starts with 3 points
- 3rd Player starts with 4 points (if being played)
- 4th Player starts with 5 points (if being played)
The starting player takes the First Player marker and begins the game.
[4.0] Sequence of Play
Skagway is played in a series of turns. Each turn of the game consists of six phases. At the end of the sixth phase, a new turn begins, starting again with Phase One. This continues until the end game conditions are met.
[4.1] Phase One: Early Workers
Place the Railroad Hired Hand (if in play) on the Railroad and the Miner Hired Hand (if in play) on the first space of "To the Mines". (See [4.3.4] on how to get a Hired Hand).
[4.2] Phase Two: Head out to Work
Beginning with the First Player and going clockwise, place Workers (including Stooge Hired Hands), one at a time face-up (Gunfight Ability number showing), on the spaces of the board. Players proceed to place their Workers alternately until all available Workers are placed on the board. Players may not choose to hold anyone back or skip a turn when it is their turn to place a Worker.
[4.2.1] To the Mines
Players placing Workers here start on the 1 space and proceed numerically. Only two Workers may be placed here in a 2-3 player game. The third spot is only available to Workers in a four player game.
[4.2.2] Railroad
Worker counters are stacked from bottom to top on the Railroad space as people go to work on the Railroad.
[4.2.3] Assay & Mercantile
Players placing Workers here start on the 1 space and proceed numerically. Only four Workers may be placed in the Assay & Mercantile.
[4.2.4] Docks
Only one player per turn may place a Worker on the Docks. Hired Hands (Stooges) may never be placed on the Docks.
[4.2.5] Sheriff/Deputy
Place a Worker on the Deputy space if there is no Worker already there. Hired Hands (Stooges) may never be placed as the Sheriff or Deputy. A Worker may not be placed directly onto the Sheriff space during this Phase, even if it is currently empty.
[4.3] Phase Three: Resolve the Worker spaces
After Workers perform their tasks, return them to the player's area in front of them. Resolve the spaces in this order:
[4.3.1] To the Mines
The player with the Worker in the first spot takes two random Gold counters from the Gold Supply to start. Next, Workers in the second and third spots take one random Gold counter each. (The third space cannot have Workers placed there in a two or three player game as per [4.2.1]). A player may additionally choose to remove one of their own Workers placed in any space at the Assay & Mercantile during Phase Two to receive one extra Gold counter as well. This represents the Worker purchasing mining supplies at the mercantile to assist the miner.
Gold taken can be looked at but should remain face down in front of the player.
If no Gold counters remain, Workers earn points instead. The Worker in the first spot earns 3 points while all other placed Workers earn 1 point.
Note that players cannot hold more than 2 Gold counters into the next turn (see [4.6] Phase Six).
[4.3.2] Railroad
Start with the top of the stack and proceed down to the bottom in order. Take a random Railroad counter and score two points for each Worker stacked on the Railroad space. Players may look at their own counters, but should keep them face down in front of them.
When a player takes the last Railroad counter they score two points and then immediately the Railroad is scored.
This represents the completion of the Railroad into Skagway. Now players determine ownership of the Railroad.
To score it, every player with Railroad counters reveals them. The player with the highest total is given ownership of the Railroad. If there is a tie, then the player with the (3) Railroad counter takes ownership of the Railroad (whether that player was one of the tied players or not!). The owner of the Railroad takes the (3) Railroad counter (which says "Deed" on it) to denote ownership. All other Railroad counters are removed from play.
Once the Railroad is completed and scored, instead of Railroad counters, players will now take a random Railroad Goods card for each Worker placed on the Railroad. The owner of the Railroad receives one bonus point for each opponent Worker who takes a Railroad Goods card. Railroad owners do not receive a bonus point for their own Workers. If there are no Railroad Goods cards available, then the placed Worker receives nothing (and the owner of the Railroad does not receive a bonus point). After all players with Workers at the Railroad have taken cards in this way, the First Player rolls one die and cross references the result on the Railroad Goods Values chart to see the value in points of each Railroad Goods card the player has. Players may immediately turn in their Railroad Goods cards to receive the points indicated on the chart. Players may choose to hold onto their Railroad Good card(s) rather than cash it. All Railroad Goods cards cashed in are then re-shuffled into the deck.
Note on the source: the rulebook refers to the Railroad Goods Values chart, a separate printed component (see Game Components). The point value of each Railroad Goods card for each die result is printed on that chart and is not reproduced in this rulebook text.
If the game ends before the Railroad is completed, there is no owner of the Railroad (for end of game scoring purposes).
[4.3.3] Assay & Mercantile
Players resolve the Assay in order placed. Some spaces may have been vacated by Workers who assisted miners (see Section [4.3.1]). Players turn in Gold counters, one at a time for as many counters as they choose to turn in, to the Bank space, moving their Points marker ahead by one point for each point shown on the Gold counter (the number displayed on the front side of the Gold counter). These counters are placed face up in the Bank and may be viewed by players at any time. If a ($4) Gold counter is turned in, all the revealed Gold counters (those in the Bank and those robbed which are off the board, not including the 4's) are immediately returned face down to the Gold Supply, which is mixed up. A ($4) Gold counter that is turned in is not placed in the Bank space and will never return to the Gold Supply. It should be removed from the game after it is scored. A player turning in more than one Gold counter turns in each counter one at a time. The order turned in can be very important if the player has a ($4) Gold counter. Players may choose to turn in all, some, or none of their Gold counters.
After turning in Gold with that Worker, a player may purchase one building. Only one building may be purchased per Worker in the Assay & Mercantile (but if the player has more Workers in the Assay & Mercantile, more buildings may be purchased, i.e. one building purchased per Worker). Buildings cost points to purchase (4 points for Player Buildings and 9 points for Prestige Buildings). (See [6.0] Purchase Buildings for more details on how to purchase buildings and their effects).
Once the Assayer/Mercantile space is resolved by all players, if there are NO Gold counters remaining in the Gold Supply, this triggers the end of game conditions (see [5.0] Game End).
[4.3.4] Docks
If there is a Worker at the Docks, the player selects two of the Hired Hands from the Hired Hand pool at random. Place the two newly selected Hired Hands face down in the player's area. This denotes that they are unavailable for work this turn and will not "Come Home" this turn. However, they will be required to return to Skagway (see Section [4.4]) in Phase Four next turn when they perform their work. It is rare, but possible, that fewer than two Hired Hands will be available in the pool. If this is the case, the Worker at the Docks can only recruit what is available.
The Railroad and Miner Hired Hands are placed in Phase One of the next turn. The Stooge Hired Hands may be placed on the following turn like any of the player's other Workers, except that they cannot be placed at the Sheriff/Deputy or the Docks.
The Gunfighter Hired Hand will be placed on the Street during Phase Four.
On the final turn, the player who places a Worker on the Docks receives ownership of the Docks and does not take any Hired Hands. Instead, that player will earn points for ownership of the Docks.
[4.3.5] Sheriff/Deputy
If there is a Worker at the Deputy spot, move that Worker into the Sheriff spot and return the previous Sheriff (if there was one) to its owner. The new Sheriff takes the First Player marker, and will be considered the First Player in all resolutions until another Sheriff replaces them.
The Sheriff may now choose to convert one (and only one) building type to its opposite by flipping over the Player Building. Ownership of the Player Building does not change. Example: A Brothel can be made into a Hotel and vice versa. A Saloon can be changed into a Restaurant and vice versa. Or a Gambling Hall can be converted into a Church, and vice versa. The Sheriff may decide to make no change at all. If the Sheriff flips a Player Building to its "BAD" side, then the player with that Sheriff moves their Buildings Purchased marker one space to the "BAD" side, and if the Sheriff flips a Player Building to its "GOOD" side, then that player moves their Buildings Purchased marker one space to the "GOOD" side. (See section [6.0] for clarifications on "GOOD" and "BAD" buildings).
The Sheriff may now decide to step down if the player would like. Return the Worker to the player and give the First Player marker to the next player to the left. A Sheriff removed in this way will still need to return to town during Phase Four.
On the final turn, the Sheriff is not replaced by the Deputy and the Deputy will not move into an empty Sheriff space. Instead, the final Sheriff will earn 5 points and the Deputy will earn 4 points for their respective players (if their spaces are occupied).
[4.4] Phase Four: The Workers Come Home
The Workers return to town and are placed in Player Buildings or on the Street. However, the Sheriff remains on the Sheriff spot on the Game Board and does not go to one of the buildings.
[4.4.1]
Place all Workers on the Player Building shown by the icon to the left of their Gunfight Ability number. If that Player Building is not on the board, place them in the Player Building shown by the icon on the right side of their counter. If that Player Building is also not on the board, place them on the Street. Exception: If there is no Player Building on the residency building space (the Hotel or Brothel), any Worker who would normally go to one of those is placed in the empty Player Building space and pays nothing. A Worker placed this way is not considered to be "on the Street."
[4.4.2]
In turn order, players pay 1 point for each Worker at the Brothel or Hotel to the owner and 3 points for each Worker at the other buildings. Each player pays for all of their Workers before moving to the next player. To pay, move the player's Points marker down that number of points and move the owner's marker up that many points. Players do not pay for Workers at their own buildings, nor do they earn money from them. Hired Hands must come back to town and must be paid for by the owning player (but only on the turn they perform the work, not on the turn they are first selected).
[4.4.3]: An important note about points
A player's points may never fall below zero. Anything that would force them to go below zero just stops the Points marker at zero. A player may not choose an option if that option would take them below zero points. However, if forced to go below zero (due to loss in a gunfight or paying for Workers coming home), the Points marker stops at zero. This only affects the player losing points, not the player gaining them.
Example: A player has to pay 3 points for a Worker to go to Church. The player has only 2 points. That player's Points marker is moved to zero. However, the owner of the Church still receives their full 3 points.
[4.5] Phase Five: Resolve the Workers on the Street
The Worker with the highest Gunfight Ability number will become active first. Ties are resolved starting with the First Player, and then proceeding clockwise.
[4.5.1] The active Worker has four choices:
- Rob the Bank. In this case, the Worker is moved onto the Bank space. If there is already a marker there, this one stacks on top of the previous one(s). (See [7.0] Robbing the Bank).
- Challenge and kill the lowest ranked Worker on the Street in a duel. The killed Worker is placed face down (name side up) in the Cemetery space. The killer receives 3 points, while the loser loses 1 point. If there is more than 1 lowest ranked Worker, the active Worker can choose which one to kill. The player with the killer moves their marker up one on the Gunfight Kills Track on their Player Mat. Note that this marker stops at 5+ kills and cannot be moved higher than that.
- Challenge the Sheriff to a duel. Each player rolls a die. If there is a difference in Gunfight Ability numbers, the higher one will add that difference to their die roll. The higher number wins, ties go to the Sheriff. If the Sheriff is killed, its Worker counter is moved face down (name side up) to the Cemetery space. The shooter gains 4 points and takes the First Player marker while the Sheriff loses 2 points. This player moves the Gunfight Kills marker ahead one space. (Players may shoot their own Sheriffs if they choose, which would net 2 points, a dead Worker, and earn another Gunfight Kill point). If the Sheriff wins, the shooter is placed face down (name side up) in the Cemetery space, but loses no points. The Sheriff gains 2 points. Victorious Sheriffs do not improve their Gunfight Kills marker on their tracks.
The Gunfight Kills track is for noting outlaw kills and earning notoriety. A Sheriff killing an outlaw, therefore, does not earn points on the Gunfight Kills track.
- Sleep it off on the Street and do nothing.
The active Worker marker is then removed from the Street and returned to its owning player (or placed in the Bank space when Robbing the Bank) and the Worker with the next highest Gunfight Ability becomes the active Worker. This continues until there are no more Workers on the Street.
At this point, if there are Workers in the Bank space, a robbery may occur (see [7.0] Robbing the Bank).
[4.6] Phase Six: Prepare for the next turn.
Any face up Worker (Gunfight Ability number showing) in the Cemetery or Jail is returned to the owning player (or to the Hired Hands pool). Any face down Worker is then turned face up. The Sheriff remains on the Sheriff space on the Game Board.
Any player holding more than 2 Gold counters at this time may keep only 2 (player's choice) and return the others to the Gold Supply (or remove them from the game if the Gold Supply is already empty). Any player holding a Railroad Goods card must now roll a die for each card held. On a 1, the Railroad Goods card decays and is returned to the bottom of the Railroad Goods card deck.
Hired Hands who just completed their work for the day are returned face down to the pool (and the pool is mixed up) and the player who had them returns the Hired Hand Recruiter marker. If a player has any face down Hired Hands, they are now turned face up and that player takes the Hired Hand Recruiter marker. This marker denotes to which player the active Hired Hands belong as they perform their tasks and return to Skagway during the following turn.
All other Workers are returned to their respective owners.
[5.0] Game End
When there is no more Gold in the Gold Supply at the end of resolving the Assay & Mercantile space for all players, the end of game sequence begins and the game will end on the following turn.
On that final turn, the game comes to an immediate end after Phase Three. The Workers do not return to town. Instead, they scatter in search of greener pastures.
The fate of Skagway is determined by the combined number of Prestige Buildings owned by all players, cross referenced with the combined totals for the Buildings Purchased markers for all players. The number of Prestige Buildings will total LOW, MEDIUM, or HIGH.
- 0 – 3 Prestige Buildings is LOW
- 4 – 7 Prestige Buildings is MEDIUM
- 8 – 10 Prestige Buildings is HIGH
All players will look at their Buildings Purchased markers. Those to the left of 0 (on the BAD side) total theirs while those to the right (the GOOD side) total theirs. If the BAD total is higher, the results are BAD. If the GOOD side is higher, or if it is a tie, the results are GOOD.
This will result in one of 6 different possible outcomes for the town of Skagway:
- LOW BAD
- LOW GOOD
- MEDIUM BAD
- MEDIUM GOOD
- HIGH BAD
- HIGH GOOD
Look at the back of this Rules Booklet to determine the fate of Skagway Today!
Players owning Player Buildings, the Railroad, and the Docks score points depending on how the town evolved into the Skagway of today. Players will also earn points for Prestige Buildings they have purchased as detailed on the back of this Rules Booklet. Players may lose points for Gunfight Kills at this point, too. At the end of the game, the player with the most points wins. If there is a tie, the player with the most Player Buildings wins. If still a tie, the player with the Nuggets Hockey Prestige Building wins.
[6.0] Purchase Buildings
Player buildings cost 4 points to buy. A player cannot purchase one of the three Player Buildings if they have less than 4 points. When purchasing a Player Building (see [4.3.3]), the purchasing player places one of their Ownership markers on the Player Building that they just purchased. If the building purchased has not been placed on the Game Board previously, place it on its matching space on the Game Board now, placing the Ownership marker on top.
If the Player Building is already on the board (on either side), remove the Ownership marker from the previous owner, move the Points marker ahead two for the displaced owner (representing money earned from the sale of the building), and place the new owner's Ownership marker onto the Player Building, flipping it to the side that the player wishes to purchase.
Each building space on the Game Board may contain only one of the two Player Building types shown on each side, either its "GOOD" or its "BAD" side. The Residency Building space may be either the Hotel ("GOOD side") or the Brothel ("BAD side"). The Grub Building space may be either the Restaurant ("GOOD side") or the Saloon ("BAD side"). And the Enrichment Building space may be either the Church ("GOOD side") or the Gambling Hall ("BAD side").
IMPORTANT: A player may not replace a building that was purchased already in the same turn. (Players may choose to note newly purchased Player Buildings by rotating them when purchased and then putting them back at the end of this phase).
Purchasing a Hotel, Restaurant, or Church, moves the Buildings Purchased marker on the Player Mat one space to the right (to the "GOOD" side). Purchasing a Brothel, Saloon, or Gambling Hall moves this marker one space to the left (to the "BAD" side). The Buildings Purchased marker cannot be moved farther to the left than the 3+ space, nor can it be moved further to the right than the 3+space. If a purchased building would move it another space off the track, it remains on the 3+ space instead. In a later turn it can be moved in the opposite direction normally, no matter how many times it would previously have moved off the track.
Example: John, the green player, decides to buy the Restaurant. He moves his Points marker down 4 points for the purchase. He places one of his green Ownership markers onto the Restaurant Player Building, which was already on the board as a Saloon. John flips the building to its Restaurant side. Mary previously had her Saloon on that spot. She removes her Player Ownership marker and gains 2 points.
Prestige Buildings cost 9 points to buy. These buildings are placed along the bottom of the Player Mat and remain there until the game ends, when they will score a certain number of points. Unlike Player Buildings, Prestige Buildings are permanent and may not be removed or purchased by another player once purchased. A player may not have more than four Prestige Buildings and may not purchase more or replace existing ones after a fourth is purchased. Points for Prestige Buildings are scored at the end of the game and may vary based on certain conditions, as detailed on the back of this Rules Booklet.
[7.0] Robbing the Bank
At the end of resolving Workers on the Street (see section [4.5.1]), when all the Workers in the Street have been removed, if there are Workers on the Bank space, the Bank may be robbed. The leader is the Worker at the bottom of the stack. The leader may bribe the Sheriff to "look the other way" with any number of points, as agreed between the leader and the Sheriff. Only points (from the Points Track on the Game Board) may be used, not Gold or Railroad counters. However, these points can be taken from an agreed "share" of the money to be robbed. If there is no Sheriff, then skip the next paragraph as there will be nobody to stop the robbers.
If the Sheriff chooses to try to catch the bandits, the Sheriff player rolls one die and subtracts the result from the Sheriff's Gunfight Ability number. If the result is zero or negative, the Sheriff fails to catch anyone. If the result is 1 or above, the resulting number is the number of bandits who were caught, beginning with the leader and moving up from the bottom of the stack. Caught bandits are placed face down (name side up) in the Jail area and the Sheriff scores 2 points for each one caught.
Any remaining bandits take the Gold counters from the Bank and evenly divide the total to determine how many points each Worker takes. Any remainder points are given to the leader, who remains the bottom one on the stack, even if the previous leader was caught and removed from the stack. Gold counters removed this way are placed to the side of the board, face up, near the Bank. They may be moved back into the Gold Supply if a player turns in a ($4) Gold counter to the Assay & Mercantile.
[8.0] Extended Example of Play
Fred (Green), Marina (Blue), Jolene (Yellow), and Bob (Red) are playing a four player game of Skagway, sitting in that order around a table. The game is about mid-way through to completion. This example will go through one complete turn of the game.
Jolene currently has the Hired Hand Recruiter marker and has the Railroad Hired Hand and a Stooge. Bob currently has placed one of his Workers (Jim) as the Sheriff. Bob also has the First Player marker.
For Phase One, Jolene places her Railroad Hired Hand on the Railroad space.
For Phase Two, Bob places his one remaining Worker (Ted) on the Docks space. He does this because he intends to keep the Sheriff if he can, and he would like to have more than just one Worker to place each turn.
Proceeding clockwise around the table, Fred then places Clarence on the "To the Mines" space, on the first space with a "1" on it. This is going to allow him to draw TWO Gold counters instead of just one and is often a good play when that space is available.
Marina then places Jane on the "To the Mines" space as well. For the sake of this example, Marina is low on funds, and so going mining is always a good way to get some quick cash.
The rest of Phase Two plays out like this:
- Jolene places Joe on the Railroad, stacking him on top of her Hired Hand already there.
- Bob is out of Workers, so he is done with this Phase.
- Fred places Bill on the Assay & Mercantile, on the "1" space.
- Marina places Frank on the Assay & Mercantile space, on the "2" space.
- Jolene places Bart on the Deputy space, foiling Bob's plan of holding onto the Sheriff.
- Since everyone is out of Workers except for Jolene, Jolene then makes the final move of this Phase, placing her Stooge Hired Hand on the Assay & Mercantile, on the "3" space.
The game moves on to Phase Three. For the Mines, Fred removes Clarence, placing his marker back in front of him, and takes two Gold counters. He looks at them, finding a "$2" and a "$4". Fred already has a "$2" from a previous turn, so he will need to turn at least one in at the Assay or he will lose one at the end of the turn. He places all three Gold counters face down in front of him. Marina is on the "2" spot of the Mines, but she wanted extra money, so she removes Frank from the Mercantile and with the extra equipment, Jane is able to double her haul of Gold, coming back with two Gold counters. Both Frank and Jane are placed back in front of Marina. And Marina checks her two Gold counters to find two "$3"'s. She shrugs from her pretty good haul and places both counters face down in front of her. Since no other Worker is at the mines, the Phase proceeds to the Railroad.
Here at the Railroad, Jolene has two Workers. She removes the top one first, Joe, moves her Points marker up 2 spaces (wages earned working on the Railroad) and draws a Railroad counter. She gets a "1" but disguises her disappointment with a happy smile. She then removes the Hired Hand and adds 2 more to her points. Her second Railroad counter is also just a "1". With just one more counter left in the pool, there is a good chance the Railroad is going to score next turn. Jolene was hoping to have a better total going into the Railroad scoring, but she still may have a chance at gaining ownership. She returns both Workers to the area in front of her. She has to hang on to the Hired Hand because he will go to Skagway during Phase Four, where Jolene might have to dish out some money (in the form of valuable points) for him.
Moving on to the Assay & Mercantile, Fred is on the first space here with his Worker, Bill. He removes Bill and decides to turn in all of his Gold counters. He first turns in both of his "$2" counters and moves his Points marker up 4 spaces. The Gold counters are placed in the Bank space. Then he turns in the "$4" which removes all the Gold counters currently in the Bank (including the two he just turned in) and any off the board that were previously robbed and reshuffles them back into the Gold Pool by the side of the board. He moves his Points marker up four and the "$4" is removed from the game. This means the Bank is empty and not a very attractive place to rob. Had Fred turned in his "$4" first, the two "$2" Gold counters would have gone into the Bank, available for robbing.
Fred decides he would like to purchase a Player Building. So he spends 4 points and decides he would like the Church. Jolene currently owns a Gambling Hall in that spot, so she earns 2 points from the sale and removes her Player Ownership marker. Fred flips the Player Building over to its Church side and places his green Player Ownership marker on his new Church, clearing out the gamblers making a mockery of the place! This completes Fred's activity at the Assay & Mercantile.
Jolene then gets her turn there, using her Stooge Hired Hand to handle the sale of her Gold. She had no Gold counters, but she can still build a building. She cannot buy back the Church or Gambling Hall this turn. Each Player Building may only be purchased once each turn. But she has 12 points, so she decides to splurge on a Prestige Building. First, she must reduce her points by 9, ending up at 3. Seeing that she has already at the "3+" space on the "BAD" side of her Buildings Purchased track on her Player Mat, she decides the Moulin Rouge is a good risk. She takes the card and places it on her Player Mat, face up for everyone to see. If she manages to stay "BAD" for the rest of the game, this building will earn her 18 points.
Since there are still Gold counters in the Gold Pool, the end game is not triggered.
For the Docks, Bob takes his Worker (Ted) and draws two Hired Hands from the pool. He gets a Stooge Hired Hand and the Gunfighter Hired Hand. He places them both face down in front him and returns Bob to the area in front of him.
Moving on to the Sheriff, Bob must now remove Jim from the Sheriff and place him back in his play area in front of him. Jolene moves Bart in to the Sheriff space and announces, "There's a new sheriff in town!" She takes the First Player marker from Bob and acts as starting player immediately.
Jolene now has the option to flip a building to its other side, influencing whether it's a "GOOD" building or a "BAD" building. She decides to bring the gamblers back into the church and flips Fred's newly purchased Church back to a Gambling Hall. Fred retains ownership of the building, but it's now a Gambling Hall. Since Jolene made this change, she would normally move her Buildings Purchased marker one more space to the "BAD" side, but she's already maxed out on the "3+" making her Moulin Rouge purchase looking better and better. She chooses to have Bart remain as Sheriff and not step down at this point.
This completes Phase Three. Now the Workers must come home to Skagway. Each Worker out is placed in their respective buildings, depending on their first preference, the icon to the left of their Gunfight Ability number, or their second preference, the icon to the right. If neither building is currently available, then the Worker is placed on the Street.
Jolene's Bart would normally go to the Gambling Hall, but since he's the new Sheriff, he remains on that spot. Jim, the newly displaced Sheriff, does go to the Gambling Hall for Bob. Jolene's Railroad Hired Hand ends up at the Gambling Hall.
At the Saloon (owned by Marina): Marina's Frank and Jolene's Joe.
At the Hotel (owned by Fred): Both of Fred's Workers, Marina's Jane, and Bob's Ted. Jolene's Stooge Hired Hand ends up in the Street.
In turn order, Jolene goes first and has to pay three points to Fred for her Railroad Hired Hand. This drops her point total to zero. Fred takes his 3 points and moves his Points marker up 3 spaces. Jolene must also pay for Joe at Marina's Saloon. However, since she has no points, her Points marker remains at zero. Marina still moves her Points marker up its full 3 points. Bob must then pay Fred 3 points for Jim being at his Gambling Hall. Bob must then pay another point to Fred for Ted, who is at Fred's Hotel. Bob lowers his Points marker by 4, while Fred raises his by four. Fred does not have to pay anything for his two Workers, who are both at his Hotel. Finally, Marina doesn't have to pay anything for Frank, who is at her Saloon, but she does have to pay 1 point for Jane, who is at Fred's Hotel. Marina moves her points total down one and Fred moves his up one. This completes Phase Four: The Workers Come Home.
For Phase Five, the only Worker who ended up on the Street was Jolene's Stooge. She was hoping he would rob the Bank, but because Fred cleverly emptied out the Bank, there's nothing to rob! Since Jolene also currently has the Worker on the Sheriff space, it really doesn't do any good to have him shoot the Sheriff. And with no other Workers in the Street, all she can really do is sleep it off and do nothing.
To end the turn, any face up Workers in the Jail/Cemetery space are returned to their owner and any face down ones are turned face up. For this example, nothing happens this turn.
Jolene's two Hired Hands are returned face down to the pool and mixed up with the others who are there. Bob now takes the Hired Hand Recruiter marker and reveals his two Hired Hands that he drew earlier.
This completes the turn and the players prepare for the next one. This also concludes this Extended Example of Play.
[9.0] Designer's Notes
The origins of Skagway (this game, not the city in Alaska) stem from a game I played at summer camp about the Gold Rush. My father has run many summer camps and I think he may have even invented the specifics of the game we played in that camp. Basically, it involved searching for gold painted rocks hidden around the camp, turning them in to the assayer, and then purchasing areas of the campground. Anyone using or trespassing on your purchased area had to pay a fee. At the end of the day, the team with the most money was the winner.
In the Alaskan Gold Rush of the 1890s, often the people who became rich were the ones who owned the local shops and real estate, often earning enough from that to buy out the claims of the original miners. This was a concept I wanted to put into the board game. You search for the gold first, but then you invest in the real estate to make your real profits.
The Klondike region is one of the most remote areas of the world, even to this day. Hidden behind a range of mountains, the most direct route in the 1890s involved ports, such as Skagway, and then crossing treacherous mountain passes to reach the gold fields. Other routes involved taking a boat along the oft-frozen Yukon River that took you miles and miles out of the way or going cross-country through the cold and barren Canadian territories. Today there is tourism along the coast, as Skagway has turned into a major stop for cruise ships, but there is very little in the interior at Dawson City where the Gold Rush took place. Considering all the mining towns and tourism throughout California from its Gold Rush, it's revealing of the remoteness of that area that it has virtually no tourism (Columbia State Historic Park in California averages 500,000 people annually, while Dawson City attracts no more than 60,000). In fact, much of the area is still privately owned, and you are warned not to trespass on the old gold fields. There is actually still a lot of gold mining (and phosphate mining) taking place up there to this day.
Historically, the game might have been better centered in Dawson City rather than Skagway. You could not head out during the day from Skagway to look for gold and come back in the evening. But for this game's purposes, those distances and the time is compressed so that it all takes place in Skagway. There aren't many documented cases of gunfights and bank robberies either, but I added those things in for the fun of the game. One final note: in the game one of the Prestige Buildings is a Hockey Team. This is actually based on a real hockey team from the town of Dawson City, which competed in the Stanley Cup in 1905, just a few years after the Gold Rush. They had to travel a long way to get there, part of the way by dog sled, and they lost in the most lopsided game in Stanley Cup history. It's too much to discuss here, but look it up...it's a great story!
Reference Card
Unheaded summary card printed on the page before the back cover; its wording is transcribed as printed.
Game Phases
- Early Workers Placed
- Workers Head out to Work (placed one at a time, in turn order)
- Resolve Worker Spaces
- a) Mines
- b) Railroad
- c) Assay & Mercantile
- d) Docks
- e) Sheriff/Deputy
- Workers Come Home to Skagway (pay in turn order)
- Resolve the Street (from highest to lowest), choose one
- a) Rob the Bank
- b) Gunfight lowest
- c) Gunfight Sheriff
- d) Do nothing
- Prepare for Next Turn
Points spent
- 4 to buy a Player Building
- 9 to buy a Prestige Building
- 1 for each Worker in another player's Hotel or Brothel in Phase Four
- 3 for each Worker in another player's Church, Gambling Hall, Saloon, or Restaurant in Phase Four
- 1 for losing a gunfight
- 2 for losing a gunfight as the Sheriff
- "X" points to bribe the Sheriff
- 0 points for losing a gunfight to the Sheriff
Points earned
- 1 for each point shown on a Gold counter when turned in to the Assayer
- 1 for each Worker at the Gold Mine after gold is depleted (3 if in the first spot)
- 2 for each Worker at the Railroad before completion
- 1 for owner of the Railroad each time another player's Worker takes a Railroad Goods card
- 2 whenever another player removes one of your Ownership markers from a Player Building
- 1 for each Worker in your Hotel or Brothel in Phase Four
- 3 for each Worker in your Church, Gambling Hall, Saloon, or Restaurant in Phase Four
- 3 for winning a gunfight
- 2 for winning a gunfight as the Sheriff
- 4 for winning a gunfight against the Sheriff
- 1 point for each share earned from a Bank robbery
- 2 points for each bandit the Sheriff catches robbing the Bank
End game points
- 5 for final Sheriff (Phase Three of the final turn)
- 4 for final Deputy (Phase Three of the final turn)
- Points earned from Prestige Buildings at the end of the game
- Points earned from Skagway Today at the end of the game
- Subtract one point for each Gunfight Kill from 1 to 4 at the end of the game. (Lose none for 0 or 5+ kills.)
Skagway Today
Printed on the back of the Rules Booklet and referenced from [5.0] Game End.
Ghost Town (Low Bad)
- Railroad: 8 points
- Hotel/Brothel: 1 point
- Church/Gambling Hall: 2 points
- Saloon/Restaurant: 2 points
- Docks: 0 points
Resort (Low Good)
- Railroad: 6 points
- Hotel/Brothel: 10 points
- Church/Gambling Hall: 6 points
- Saloon/Restaurant: 8 points
- Docks: 6 points
Cruise Ship Stop 1 (Medium Bad)
- Railroad: 10 points
- Hotel/Brothel: 8 points
- Church/Gambling Hall: 6 points
- Saloon/Restaurant: 4 points
- Docks: 6 points
Cruise Ship Stop 2 (Medium Good)
- Railroad: 6 points
- Hotel/Brothel: 10 points
- Church/Gambling Hall: 4 points
- Saloon/Restaurant: 6 points
- Docks: 8 points
Tourist Trap (High Bad)
- Railroad: 6 points
- Hotel/Brothel: 2 points
- Church/Gambling Hall: 12 points
- Saloon/Restaurant: 12 points
- Docks: 4 points
Thriving City (High Good)
- Railroad: 12 points
- Hotel/Brothel: 10 points
- Church/Gambling Hall: 10 points
- Saloon/Restaurant: 12 points
- Docks: 8 points
Prestige Buildings
Condition key: B = Bad / N = Neutral / G = Good. VPs are the points scored at the end of the game.
- Opera House: Examine player's Buildings Purchased marker. 6 if B / 13 if N / 18 if G.
- Moulin Rouge: Examine player's Buildings Purchased marker. 18 if B / 13 if N / 6 if G.
- Fashions of Paris: Examine combined results from all players' Buildings Purchased markers. 13 if B / 15 if N / 17 if G.
- Fire Brigade: Examine combined results from all players' Buildings Purchased markers. 17 if B / 15 if N / 13 if G.
- Nuggets Hockey: 20 if combined number of purchased Prestige Buildings is 8 or more. Otherwise, 10. (VPs: 10 / 20)
- Steamboat Docks: 13 plus one more for each unrevealed Railroad counter at end of game. (VPs: 13+)
- Barber: No conditions. (VPs: 14)
- Laundry: No conditions. (VPs: 14)
- Statue: Must own another Prestige Building to purchase. (VPs: 18)
- Ranch: 18 if combined number of purchased Prestige Buildings is 7 or less. Otherwise, 10. (VPs: 10 / 18)