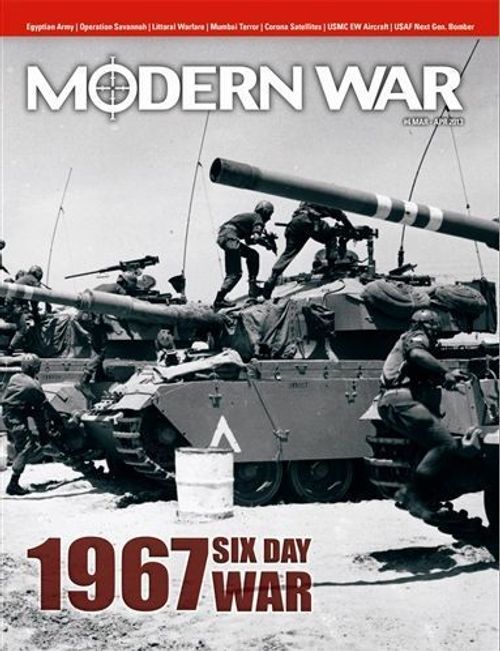
Six Day War: 1967
Six Day War: 1967 Rulebook
Table of Contents
Table of Contents
- 1.0 INTRODUCTION
- 2.0 GAME EQUIPMENT
- 2.1 Map
- 2.2 Sectors
- 2.3 Scale
- 2.4 Game Charts and Tables
- 2.5 The Playing Pieces
- 2.6 How to read the units
- 2.7 Unit Types
- 2.8 Unit Sizes
- 2.9 Unit Designation
- 2.10 Unit colors
- 2.11 Combat Support Markers
- 2.12 Administrative Markers
- 2.13 Unit Abbreviations
- 2.14 Definitions
- 2.15 Game Scale
- 2.16 Inventory
- 3.0 SETTING UP THE GAME
- 4.0 SEQUENCE OF PLAY
- 5.0 THE MAP & SECTORS
- 6.0 ISRAELI RESERVES
- 7.0 REINFORCEMENTS
- 8.0 REPLACEMENTS
- 9.0 RANDOM EVENTS
- 10.0 MOVEMENT
- 11.0 STACKING
- 12.0 ZONES OF CONTROL
- 13.0 COMBAT
- 13.1 Combat Procedure
- 13.2 Attack Limitation
- 13.3 Which Units Attack
- 13.4 Fortifications & Kibbutz
- 13.5 Multi-Unit & Multi-Hex Combat
- 13.6 Diversionary Attacks
- 13.7 Friendlies
- 13.8 Combat Strength Unity
- 13.9 Contingents
- 13.10 Stacking & Combat
- 13.11 Parenthesized Combat Factor Units
- 13.12 Combat Shifts
- 14.0 RETREATING
- 15.0 ADVANCE AFTER COMBAT
- 16.0 AIRPOWER
- 17.0 ISRAELI SPECIAL FORCES
- 18.0 ARAB BARRAGE & TERRORIZATION MARKERS
- 19.0 SPECIAL UNITS
- 20.0 AIRBORNE ASSAULTS
- 21.0 ARAB DISINTEGRATION
- 22.0 FOG OF WAR
- 23.0 VICTORY CONDITIONS
- 24.0 STANDARD SCENARIO SET UP
- 25.0 HISTORICAL SCENARIO SPECIAL RULES
- Random Events Table
- Zahal Reserve Points (ZRP)
- Victory Points Chart
1.0 INTRODUCTION
1.1 In General
Six Day War is a wargame of the Arab-Israeli War of June 1967. There are two players in the game, each commanding a Front of the Israeli Army against various Arab opponents. One commands the Sinai Front; the second commands the Eastern Front. Each player also commands the Arab forces facing the other player. The game is designed in this manner owing to the massive qualitative superiority of Israeli forces in this war. The assumption of the game is that an Israeli victory was generally inevitable, so the intent is to place the players in a situation in which they have to compete with each other on the same and opposite side to win the greatest possible victory on their own Front.
The map is divided into two sectors, one for each Front. Only units of that Front may operate in that sector. There are additional units, called Reserves, which can possibly be assigned to either Front.
The objective of each player is to score the most Victory Points in terms of seizing objectives and destroying enemy units at the lowest possible cost. Meanwhile, the player will be using the Arab forces facing the other player to delay or even stop that Front.
2.0 GAME EQUIPMENT
2.1 Map
The mapsheet shows the part of the Middle East in which the Six Day War took place. A hexagonal grid has been superimposed over the terrain features in the mapsheet in order to regularize movement and positioning of the playing pieces. The hexagons are called "hexes" in the game rules.
Note: On the Ground Attack Table, the results apply to both Arabs and Israelis.
Note: Add a note to the Tracks line of the Terrain Effects Chart that only Israeli units may benefit from Tracks.
Errata: Ignore the sentence "Israeli Airstrikes and SF or" at the top of the Air Superiority Table.
2.2 Sectors
The game map is divided into two sectors, Sinai and Eastern. Generally, units may not cross the boundary line, but see the reserves rule for a special case.
Errata: The “EASTERN SECTOR” boxes printed on the lower left hand corner of the map should be labeled as “SINAI SECTOR” instead.
2.3 Scale
Each hex is approximately five miles (eight kilometers) per hex.
2.4 Game Charts and Tables
The Combat Results Tables (CRT) are used to resolve combat. There are two CRT: the Mobile & Assault CRT. The Reserve Box is where units from the Israeli Reserve are placed initially.
The Terrain Effect Chart is used to provide information about the effects of terrain on movement and combat.
The Turn Record indicates the current game turn. Each game turn represents one day.
The Victory Point Chart gives the value of various objectives for winning the game. Alternatively, players can record victory points using pencil and paper.
2.5 The Playing Pieces
The cardboard pieces represent the military forces that took part in the original campaigns. These playing pieces are referred to as "units" (for military forces) and "markers" (for informational pieces).
2.6 How to read the units
There are two general classes of units: mobile and static. Mobile units can move. Static units, once placed, may not ever move.
Errata: The Israeli “Airborne Move” and “(2)” East static unit should be printed as “Start” on the back, not ‘Reserve’. 2.6.1 Movement Movement allowances are not printed on the units. Movement is variable for mobile units.
Static units have parenthesized combat strengths. This means they may never move, and can only defend and never attack.
2.7 Unit Types
Mobile Static or Militia
2.8 Unit Sizes
Unit sizes are indicated above each unit symbol as follows:
2.9 Unit Designation
The unit’s designation is printed on the front of the counter.
Israel Fronts There are two higher Israeli commands, called fronts: Sinai and Eastern. Each is printed in its own color.
Backprinting Units are backprinted with their national flag and deployment code.
2.10 Unit colors
Israeli Sinai Front: Light blue Eastern Front: Dark blue Reserves: Grey Arab Egyptian: Red icon Jordanian: White icon Syrian: Green icon Iraqi: Black icon PLO: Non-colored icon Arab Volunteers: Non-colored icon Lebanon: Non-colored (green line) icon Optional Egyptians: Orange icon
2.11 Combat Support Markers
These represent forces that are not otherwise deployed on the map.
2.12 Administrative Markers
These are used to indicate various game functions.
Bridge Destroyed. Shows a destroyed bridge (future on-line optional rules).
Control. These are used to indicate captured hexes.
Disintegration. There is one marker for each Front; these indicate that the Arab high command on that Front has disintegrated.
Terrorized. Indicates a target which has been damaged by bombing, artillery or terrorist attacks
Turn. Indicates the current turn.
2.13 Unit Abbreviations
Israeli SF: Special Forces Zahal: Zewa Hagana le Jisrael (Israeli Defense Forces) Arab Abn: Airborne Cdo: Commando HA: Hussein bin Ali KW: Khalid bin al Walid PLA: Palestinian Liberation Army PLO: Palestinian Liberation Organization R: Reserve RG: Royal Guard SAF: Special Armored Force ShSH: Sharm el Sheikh YEF: Yemen Expeditionary Force
2.14 Definitions
Arab Contingent. The Sinai Front Arab contingents include the Egyptian, PLA and any Volunteer units on the Sinai Front. The Eastern Front Arab contingents include the Syrian, Jordanian, Iraqi and any Volunteer units on the Eastern Front, and the Egyptian 33+35 Commando Group. Also, this includes Lebanese units if Lebanon becomes a belligerent.
Combat Strength. Combat Strength is the relative strength of a unit when attacking or defending against enemy units.
Control a Hex. A player controls a hex by either occupying a hex with a friendly unit, or by having had a friendly unit move through the hex, and no enemy unit has entered that hex since. Airstrikes, SF and Barrages cannot control a hex nor dispute control. The presence of an enemy Zone of Control does not dispute control of a hex.
Eastern Front Player. This player controls all Israeli Eastern Front units, as well as all Arab units in the Sinai Front sector.
Line of Communications (LOC). LOC is a path of hexes traced on the map by the Israeli player to provide Reserve Points to units. LOCs are used with the Optional Rules to be posted at a future date. (visit modernwarmagazine.com)
Movement Allowance. Movement Allowance is the basic number of hexes through which a unit may be moved in a single movement phase. This is not printed on the counter, but rather generated via the movement rule.
Occupy a Hex. A player occupies a hex by having a ground unit (mobile or static) physically in it. The Pool. The Pool is an opaque container (such as a coffee mug) into which certain counters are placed. Players then pick counters from the Pool to deploy them on the map. When the rules call for a player to pick units from the Pool, the player picks them at random.
Sector. The two divisions of the map, marked by the Sector Boundary Line (Sinai Front and Eastern Front).
Sinai Front Player. This player controls all Israeli Sinai Front units as well as all Arab units in the Eastern Front sector.
Zahal Reserve Points (ZRP). ZRP are a quantification of Israeli logistical and morale efforts. They are used to enhance various Israeli game functions (Zahal is the term for the Israeli Defense Forces.) The players use pencil and paper to keep track of ZRPs.
2.15 Game Scale
Each turn represents one day of fighting.
2.16 Inventory
A complete game should include the following:
One 22 x 34 inch map (containing one sector for each battle).
One standard rules and scenario exclusive rules.
One set of die cut counters.
Players will also need to provide a six-sided die.
3.0 SETTING UP THE GAME
3.1 The Map
The map should be set up between the players. Players then determine which Israeli Front each will play. Next, they should punch out the counters from the unit counter sheet. Then place the units as per the scenario instructions (at the end of the standard rules.) The deployment information is printed on the reverse of each counter.
3.2 Scenarios
These are at the end of the rules.
4.0 SEQUENCE OF PLAY
Six Day War is played in sequential Game Turns, composed of an interactive structure in which each player conducts operations with units of his own Israeli Front, and then conducts operations with his own Arab units facing the other player’s front. All game actions must be taken within the sequence outlined below.
4.1 The Game Turn
Each Game Turn is divided into Player Turns. Each Player Turn is divided into a series of segments called "phases". The player whose turn is currently in progress is termed the "Phasing Player"; the other player is the "Non-phasing Player".
4.2 SEQUENCE OF PLAY
SINAI FRONT ISRAELI PLAYER TURN
Random Events Phase Check the Random Events Table to determine if any events occur this turn.
Israeli Sinai Front Reinforcement Phase The Sinai player may now do the following, in this order:
- Purchase airstrikes, SF or ground units in the Israeli Reserve box by expending ZRPs.
- Transfer airstrikes or SF in the Eastern Available box by expending ZRPs.
- Replace eliminated units in the Sinai Front Refit box by expending ZRPs.
Israeli Sinai Front Strike Phase The Sinai player may do the following, in this order and for this Front:
- Transfer any airstrikes and SF in the Utilized box for this Front to the Available box.
- Assign airstrikes and SF to Air Superiority and Ground Support Missions.
- Conduct Air Superiority combat (and, in return, is also attacked by Sinai Arab Air Defense fire).
- Conduct Air-Ground attacks.
Israeli Sinai Front Movement Phase The Sinai player may move all, some or none of his Israeli units.
Israeli Sinai Front Combat Phase The Sinai player uses his Israeli units to attack Arab units in his sector.
EASTERN FRONT ARAB PLAYER TURN
1st Arab Reinforcement Phase The Eastern player checks for Arab reinforcements to be placed in the Eastern Sector.
1st Arab Movement Phase The Eastern player may move all, some or none of his Arab units in the Eastern Sector.
1st Arab Barrage Phase The Eastern player executes any Arab Barrage attacks in the Eastern Sector.
1st Arab Combat Phase The Eastern player uses his Arab units to attack Israeli Eastern units.
EASTERN FRONT ISRAELI PLAYER TURN
First Random Events Phase.Check the Random Events Table to determine if any events occur this turn.
Israeli Eastern Front Reinforcement Phase The Eastern player may now do the following, in this order.
- Purchase airstrikes, SF or ground units in the Israeli Reserve box by expending ZRPs.
- Transfers airstrikes or SF in the Sinai Available box by expending ZRPs.
- Replace eliminated units in the Eastern Front Refit box by expending ZRPs.
Israeli Eastern Front Strike Phase The Eastern player may do the following in this order and for this front.
- Transfer any airstrikes and SF in the Utilized box for this Front to the Available box.
- Assign airstrikes and SF to Air Superiority and Ground Support Missions.
- Conduct all Air Superiority combat (and, in return, is attacked by Eastern Arab Air Defense fire).
- Conduct all Air-Ground attacks.
Israeli Eastern Front Movement Phase The Eastern player may move all, some or none of his Israeli units.
Israeli Eastern Front Combat Phase The Eastern player uses his Israeli units to attack Arab units in his sector.
SINAI FRONT ARAB PLAYER TURN
2nd Arab Reinforcement Phase The Sinai player checks for Arab reinforcements to be placed in the Sinai Sector.
2nd Arab Movement Phase The Sinai player may move all, some or none of his Arab units in the Sinai Sector.
2nd Arab Barrage Phase The Sinai player executes any Arab Barrage attacks in the Sinai sector.
2nd Arab Combat Phase The Sinai player may use his Arab units to attack Israeli Sinai units in the Sinai Sector.
GAME TURN INTER-PHASE
Arab Sudden Death Victory Check If Arab units fulfill the conditions for a Sudden Death victory, the game comes to an end, and victory is checked.
Israeli Sudden Death Victory Check If Israeli units fulfill the conditions for a Sudden Death victory, the game comes to an end, and victory is checked.
End of Game If this is the last turn of the scenario, the game comes to an end and victory is determined.
Turn Advancement. If the game did not end, advance the turn marker to the next turn.
5.0 THE MAP & SECTORS
5.1 Explanation
The game map shows Israel and its neighbors as they were June of 1967. Each player commands an Israeli Front. Operations for both Israeli and Arabs forces are restricted by the Front Boundary line on the map.
5.2 Frontal Sectors
The map is divided into two sectors, corresponding to the two Israeli Fronts: Eastern and Sinai.
5.3 Arab movement
Arab units may only enter hexes of the sector in which they were initially placed.
5.4 Israeli Frontal unit Movement
Units which are assigned to one Front may not cross the Front boundary line for any reason, including movement and post combat retreat/advance.
5.5 Israeli Air & SF Strike units
Airstrikes and SF may be used only within the Front to which they are assigned.
5.6 Zones of Control
ZOCs never extend across Front boundaries.
5.7 Combat
Units may not attack across a Front boundary.
5.8 Airstrikes, SF & Barrages
These may be applied only on the Front to which they are assigned (see below).
5.9 Egyptians in the East
The Egyptian 33+35 Commando group, which begins in Jordan, is controlled by the player who controls the East Front Arabs.
6.0 ISRAELI RESERVES
Zahal Reserve Points (ZRPs) are a quantification of logistical support and morale used to enhance the operations of a Front. Only the Eastern Israeli and Sinai Israeli forces use ZRPs, not Arab forces.
6.1 ZRP Limit
Each player may expend up to 50 ZRP in the course of a game. These may be expended on any turns, without restriction, except that a player can never expend more than 50 ZRPs. ZRP totals are always openly displayed.
6.2 Expending ZRP
You may expend ZRP for any of the following functions. The ZRP Table gives the cost.
-
Activating Ground unit Reserves: Activated Ground units are transferred from the Reserve box to the map; see the Reinforcement rule.
-
Activating Airstrike and SF in the Reserve box. Activated airstrikes and SF units are transferred from the Reserve box to the player’s Available or Refit box by expending the listed number of ZRPs. The player then places them in his own Available or Refit box, respectively.
-
Transferring Airstrikes and SF from the other player. You may transfer airstrikes and/or SF in the other player’s Available or Refit box by picking them up and placing them in your own Available or Refit box. The player from whom they were transferred does not regain any ZRP for them.
Note: Yes, this means you can “steal” airstrikes and SF from the other player. The ZRP cost for doing this is intended to mitigate this, not disallow it.
-
Transferring Reserve Brigades from the other player. You may transfer Israeli Reserve Brigades controlled by the other player to your control by moving them to your side of the Front. You must be able to move them in a single move from their side of the Front to your side of the Front. This can be via land movement or airmobile movement (by using your normal airmobile movement capacity.) Additionally, a unit cannot begin or end its movement in an enemy ZOC during the phase it is transferred (if such a move cannot be executed, then no transfer may be made.)
-
Replacements. You may restore eliminated Israeli ground units of your command plus any Reserves you control to the map (see the Replacement rule.) You can also restore airstrikes in your Refit box to your Available box.
-
Forced Marching. You may enhance Israeli ground unit’s movement by expending the listed ZRPs per unit making a Forced March. A particular unit may make only one Forced March per Movement Phase, however. See 10.16.
-
Enhanced Attack. The Israeli player can declare any ground unit attack by Israeli units on his own front as an enhanced attack by paying the cost in ZRPs:
-
That attack receives an additional plus one (+1) shift to the right.
-
If the combat result allows the Israeli force to advance, then the number of hexes of movement is doubled (x 2).
Note: There is no ‘enhanced defense’.
6.3 No Maintenance Cost
Once you have gained control of a Reserve unit, you do not need to expend further ZRPs to maintain control.
6.4 The Reserve Box
Units in the Reserve box have no effect on play while there.
7.0 REINFORCEMENTS
Players may receive additional units in the course of a game, called “reinforcements.” Reinforcements appear in the owning player's Reinforcement Phase on the game turn indicated by the Reinforcement Schedule (below).
7.1 Israeli Reinforcements
Israeli Reinforcements are received by expending ZRPs and then placing the units per below:
7.2 Israeli Ground Units
Ground units are placed on any Israeli controlled city, town or kibbutz that is on the player’s side of the Front. If there are none, then those units cannot be purchased. If the player later regains control of such a hex, the player can purchase them.
7.3 Israeli Air strikes and SF
Transfer the air units from the Reserve box to the Available box for the player, or from the other Israeli player’s Available box. To do so, the player must control at least one Israel city or town.
7.4 Arab Reinforcements
Arab reinforcements may be received as a result of Random Events. If an event calls for a reinforcement but none are available, no additional units are taken. Reinforcements are placed as follows:
Sinai Front: On the west map edge, or in any Arab controlled cities west of the Suez Canal.
Eastern Front: On the east map edge, or in any Arab controlled cities in Jordan or Syria.
Map Edge Placement: Units must be placed on playable hexes. They may not be placed in hexes containing enemy units. They may be in enemy ZOC. They may be overstacked on initial placement, but are subject to stacking penalties after the phase of placement. If all available hexes are blocked, then they are received as reinforcements on the following turn instead. Otherwise, reinforcements must be taken on the turn indicated. Placement takes place in the Reinforcement Phase, and is not considered movement (and note they are placed on hexes; they do not move onto the map from off-map.) Reinforcements perform normally in the turn of placement.
7.5 Barrage Reinforcements
These are placed in the Barrage Markers Available box for the Front.
8.0 REPLACEMENTS
Certain units which are eliminated may be returned to play as Replacements. They are placed on the map during the Reinforcement Phase.
8.1 Which Israeli Units may be Replaced
All mobile types, airstrikes, SF markers.
8.2 Israeli Ground Unit Replacements
For an Israeli unit to be qualified to be a replacement, when it is eliminated it must have been in a hex from which it could trace a line of continuous hexes, no matter how long or convoluted, back to an Israeli city or town. This path of hexes cannot enter enemy units’ hexes, enemy ZOCs, water or territories prohibited to Israeli ground unit movement. If a unit qualifies, then place it in the Refit box. Otherwise, place it in the deadpile.
8.3 Refit
Units in the Refit box may be replaced by expending ZRPs. The cost is listed on the chart.
-
Place replacement ground units on any Israeli controlled city or town in Israel.
-
Place airstrikes in the Available box.
-
You can replace Reserve units that were eliminated on your Front. They are not returned to the Reserve pool when eliminated, but to your Refit pool.
Israeli Air Unit Replacements: Israeli air units that were placed in the Refit box via an Arab air defense fire may be replaced.
The Deadpile. Units in the deadpile can never be replaced.
No Arab Replacements. Arab units when eliminated go in the deadpile. They cannot be replaced normally. However, certain events may allow this; see the Random Events Table.
9.0 RANDOM EVENTS
9.1 Procedure
During his Random Events Phase, the player rolls two dice and adds the results. This will give a number from two to twelve. Cross-index this with the Random Events Table to generate a special event (if any) for the turn.
9.2 Results
Results may be applied to one or both players, depending on the explanations.
9.3 First Turn Exemption
Players never roll for Random Events on the first turn of a game.
10.0 MOVEMENT
10.1 Movement Phase
During the Movement Phase, the phasing player may move as many or as few of his units as he desires. Units may be moved in any direction or combination of directions. Movement Factors are not printed on the units. Rather, they are given by the following rules.
10.2 Israeli Movement
Each Israeli unit has a basic movement factor of six (6) hexes per turn. This may be enhanced via Forced Marching; see 10.16.
10.3 Arab Contingent
The player controlling Arab units on each Front moves them by contingent (see definitions.)
The player can select which contingent will be moved first, then second and so forth. All movement for a contingent must be completed prior to the next continent moving.
10.4 Arab Movement
At the start of each contingent’s move, the player controlling that sector’s Arab units rolls one die. This will be the number of movement factors for all Arab units in that contingent (one to six). Each Arab unit on that Front has this movement.
10.5 Movement Procedure
Units are moved one at a time, tracing a path of contiguous hexes through the hex grid. As each unit enters a hex, the unit pays one or more movement points from its movement allowance. Consult the unit movement and Terrain Effects Chart for further details.
10.6 Movement Restrictions & Prohibitions
Units of a particular Israeli Front or Arab Sector may be moved only during the Movement Phase so designated in the Sequence of Play. Once a unit has been moved and the player’s hand removed, it may not be moved again.
10.7 Movement Points
A unit may expend all, some or none of its movement points in any one game turn. Unused movement points may not be accumulated from turn to turn or transferred to another unit.
10.8 No Minimum Movement
A unit must have sufficient movement points to enter a hex or cross a hexside; unlike many wargames, there is no ‘minimum move’ allowance in this game.
Example: A unit with a movement of one (1) could not cross a river hexside since that costs an additional three (+3) movement points.
10.9 Movement Restrictions
Units may never move directly from one enemy zone of control to another, enter an enemy-occupied hex, enter forbidden terrain or cross a Sector boundary. Units may not leave the map.
10.10 Zones of Control
Units must stop when entering an enemy Zone of Control; see the Zone of Control rule 12.0.
10.11 Advance/Retreat Movement
Advancing and retreating due to combat is not movement per se, and does not consume movement points. See rules 12.0 and 13.0.
10.12 Effects of Terrain
A unit must expend one movement point to enter a clear terrain hex. To enter other types of hexes, a unit must expend more than one movement point. When the terrain effects calls for a movement point expenditure to cross a terrain hexside, this cost is in addition to the terrain cost for entering that hex.
Example: To cross a river hexside into a clear hex would cost a total of four movement points, three for the river, and one for the clear.
10.13 Road and Track movement
Units moving along roads and tracks pay the cost for roads and tracks, respectively. This is defined as moving from one complete road or track hex to another connected one. They then pay the movement costs for roads or tracks, respectively, always regardless of other terrain in hex.
10.14 Bridges
Roads crossing rivers contain bridges; they negate the movement cost for crossing rivers.
10.15 Israeli-only Tracks
Tracks anywhere on the map only benefit Israeli units. Arab units treat them as other terrain in the hex.
10.16 Forced Marching
An Israeli player can declare any unit’s movement as a Forced March. Expend one ZRP for the unit, and roll one die: The number rolled is the number of additional movement points it receives this turn; Only one ZRP may be expended per unit per movement phase.
11.0 STACKING
11.1 Stacking Defined
Having more than one unit in a hex is called Stacking.
11.2 Israeli Stacking Limits
- Three mobile units, plus
- One static unit.
11.3 Arab Stacking Limits
- Two mobile units, plus
- One static unit.
Exception: Mobile units of different Arab contingents may not stack together at the end of a movement or combat phase. A mobile unit can stack with a static unit of any contingent as long as there are no mobile units of different contingents.
11.4 Stacking Enforcement
Stacking limits apply only at the end of the Movement and Combat Phase. At other times they can be ignored.
Example: A Syrian unit could move through a hex containing two Jordanian mobile units as long as it moved off by the end of the phase.
11.5 Over-stacking
At the end of any Movement or Combat Phase (friendly or enemy), check hexes for over-stacking. Excess units are eliminated by the player controlling those units to restore the hex to normal stacking limits.
11.6 Strikes Exemption
Airstrikes, SF and Barrage markers do not count for stacking, but must follow their own stacking restrictions (see below).
Note: Administrative markers (such as “Terrorized”) never count for stacking.
11.7 Restriction
A friendly unit may never enter a hex containing an enemy unit. They may enter hexes containing markers.
11.8 Initial Setup
Units must obey stacking limits during initial setup.
12.0 ZONES OF CONTROL
The six hexes immediately surrounding a unit's hex constitute the unit's Zone of Control (ZOC). ZOCs affect Movement and Combat.
12.1 ZOC Exceptions
All units have a ZOC at all times, regardless of the phase or Player Turn. The presence of a Zones of Control is never negated by other units, enemy or friendly, with the following exceptions:
Front Boundary: ZOCs do not extend across the Front boundary line.
Fortifications: ZOCs do not extend into enemy fortifications and fortified cities, and units in fortification and fortified hexes of their own side are not affected by enemy ZOCs (but they do exert ZOCs normally against the enemy).
Example: Any Arab unit in a Golan Heights fortification could ignore an Israeli ZOC, and thus not have to attack it. Similarly, an Arab unit could retreat into a Golan Heights fortification (even if previously empty) that had an Israeli ZOC exerted on it without penalty.
Kibbbutzes: Arab ZOCs do not extend into Israeli kibbutzes, and Israeli units in kibbutz hexes are not effected by enemy ZOCs. Units in kibbutzes do exert ZOCs normally against the enemy.
12.2 Multiple ZOCs
Both friendly and enemy units may exert ZOCs onto the same hex. There is no additional effect if more than one unit casts its ZOC onto the same hex. Obviously, if a given unit is in an enemy controlled hex, the enemy unit is also in that given unit’s ZOC. The two units are equal and mutually affected (unless in fortifications or kibbutzes).
12.3 Effects on Movement
Units must stop moving when they enter an enemy ZOC. They may move no further during their turn. Units may exit enemy zones of control in one of two ways.
- Due to combat results which allow for retreat or pursuit, or if (obviously) all enemy units that exerted the ZOCs are eliminated.
- Due to Disengagement. See below.
12.4 Disengagement
Disengagement is the act of moving out of an enemy ZOC. To do so, a unit must enter a hex that contains no enemy ZOC. They may enter another ZOC in the same movement phase as long as they have not moved directly from ZOC to ZOC.
12.5 Combat
Attacking is mandatory for units in enemy ZOCs.
12.6 Retreat
Units that retreat into or through an enemy ZOC are eliminated (exception, 12.1).
12.7 Advance After Combat
Units may advance after combat freely through enemy Zones of Control; enemy Zones of Control never block advance after combat.
13.0 COMBAT
Combat is mandatory for ground units in enemy zones of control. The phasing player is termed the attacker; the non-phasing player is the defender, regardless of the overall strategic situation. There are two different combat results tables (CRTs): Mobile and Assault. Each reflects a separate approach to battle, and each has different outcomes.
Note: Combat is mandatory when adjacent because of the confused C2 situation, as well as dealing with the vagaries of players commanding forces on the other guy’s front.
13.1 Combat Procedure
For each combat, the following procedure must be followed.
-
Attack Declaration. The attacker declares which attacking units will be attacking which defending units.
-
Choose the CRT. The attacker selects which CRT will be chosen to resolve combat, within listed restrictions.
-
Determine the Combat Ratio. a) Total the combat strength of all attacking units for this particular combat. b) Total the defense strength of all defending units that are the specific target of the attack. c) Divide the attacker’s strength by the defender’s strength and multiply by 100; This gives a percentile ratio (AS / DS x 100 = %).
-
Shift Determination. Determine the number of “shifts” for the attacker and defender. Subtract the defender’s shifts from the attacker’s shifts. This will give the final net column shift.
-
Combat Execution. Consult the appropriate CRT under the appropriate percentile column. Roll one die. Cross-index it with the selected percentile column. This will give a combat result. Apply the combat result in the order listed under the explanations.
Note: On the first turn of the game, all Israeli attacks are “Shock Attacks”; see 25.5 for Israeli Shock Effects.
13.2 Attack Limitation
Each unit may attack or be attacked a maximum of once per combat phase.
13.3 Which Units Attack
The attacker may resolve all his combats in any order he desires. All attacking units in the ZOC of enemy units must attack, and all enemy units in a friendly ZOC must be attacked, but the attacking player may choose which of his units will attack which defending units. A defending hex may be attacked from as many as six adjacent hexes. Units in a single attacking hex may attack all six surrounding hexes (if occupied by enemy units).
Note: Units stacked in the same hex must attack the same enemy hex (see 13.10).
The attacking player declares which of his units adjacent to enemy units will be attacking which defending units at the beginning of each combat to ensure all adjacent units are, in fact, being attacked.
Remember: Units in friendly fortified hexes are not affected by enemy ZOCs, so they do not have to attack, though they may choose to do so. The converse is not so: units adjacent to enemy occupied fortified hexes must attack them.
13.4 Fortifications & Kibbutz
Units inside of friendly fortifications, and Israeli units in kibbutzes do not have to attack (since they can ignore enemy ZOCs.) The player may have them attack at his option. However, if they do attack, they must attack all adjacent enemy units.
Note that all Kibbutzes are considered fortified, but use the “Kibbutz” line of the Terrain Effects Chart, not the “Fortified City” line, when attacked.
13.5 Multi-Unit & Multi-Hex Combat
If an attacking unit is in the ZOC of more than one enemy unit, it must attack all those enemy units that aren’t engaged by other attacking units.
Units in two or more different hexes may combine their combat strengths and attack a single hex provided all the attacking units are adjacent to all the defending units. Attacks may potentially involve any number of attacking or defending units. For an attack to be resolved as a single combat, however, all of the attacking units must be adjacent to all of the defending units, with the possible further addition of ranged barraging artillery and helicopters.
13.6 Diversionary Attacks
If making a series of attacks, a player may allocate some of his attacking units to conduct poor odds attacks, while other attacks are made at more advantageous differentials. This is called a diversionary attack, but in no case may the phasing (attacking) player ever choose to reduce the odds of any given attack. Note: In some cases on the Assault CRT, it may actually be more beneficial to attack at lower odds owing to the nature of the “Bloodbath” results; but this reduction is not allowed owing to the chaos of combat.
13.7 Friendlies
Units on one Front cannot attack units on the other Front, even if adjacent.
13.8 Combat Strength Unity
A unit’s attack and defense strengths are always unitary. No single unit’s strength may be divided among different combats, neither on attack nor defense.
13.9 Contingents
Units may be combined during an attack, regardless of their contingent.
13.10 Stacking & Combat
Units in the same hex must be combined in a single attack; they may not attack separately into different adjacent enemy occupied hexes. Furthermore, units defending the same hex must be attacked as a single combined total; they may not be attacked separately.
13.11 Parenthesized Combat Factor Units
Units with a parenthesized combat strength may only ever defend. They can never attack, even if adjacent to an enemy unit.
13.12 Combat Shifts
Shifts are changes to the odds column for various reasons and situations. During the shift determination segment of the combat procedure, the total eligible attacking and defending shifts are computed (subtract the defender’s net total shifts from the attacker’s net total shifts; This will give the final shift, either a positive or negative number, or sometimes zero).
Note: The shifts for each category listed below are cumulative, but generally no more than one shift for each category may be taken. For example, an Israeli attack could take a maximum of one a shift for Attack Enhancement, and a second shift for being on commanding terrain.
If an attack is being conducted at the maximum or minimum column, then use that as the base line.
Example: If an attack is being made at 1000 percent, and the defender has one shift, then the use the 600 percent column (the maximum) as the baseline and shift one column to the left to 500 percent.
Combat Shifts Terrain Certain terrain provides shifts to the defenders, either the terrain in the hex, or the hexside of the hex (such as a river.) The defender uses the single best terrain to calculate the combat shift. However, hexsides and terrain in the hex may both be added as shifts. Israeli Shock If this is an Israeli Shock Effect game turn, Israeli attacks shift one to the right on the CRT. I.E.A. If the attack is an Israeli Enhanced Attack, shift one to the right on the CRT. Comm-anding Terrain If at least one friendly attacking unit in a hex occupies a commanding terrain hex, shift one to the right on the CRT.
Note: A force receives the benefit for defending behind a hexside only if all of the attacking units are attacking across the hexside.
13.13 Choice of Combat Results Table
The attacking player may choose which CRT will be used to resolve the combat within the following limits:
If this is an Israeli attack, and the attacking force contains at least one armor, mechanized or recon unit, the player can select either the Mobile or Assault CRT.
Note: Arabs may never use the Mobile CRT.
If any of the defending units are in fortified cities or fortifications, the attacker may not choose the Mobile CRT (in which case, the attacker must use the Assault CRT).
13.14 Combat Resolution
Combat percentage is determined by dividing the attacker’s strength by the defender’s strength, and then multiplying it by 100. Then, use the corresponding column on the CRT when rolling the die.
Example 1: The attacker has 20 combat factors, and the defender 12. 20/12 x 100% = 166%, so the combat is resolved on the 150-199% column.
Example 2: The attacker has 10 combat factors, and the defender 12. 10/12 x 100% = 83%, so the combat is resolved on the 50-99% column.
13.15 Combat Results Explanations
The following combat result codes are explained below:
AA (Attacker Attritioned)
- Eliminate the single weakest attacking unit.
- No Retreat or Advance is permitted.
AD (Attacker Defeated)
- Eliminate the single strongest attacking unit.
- The attacker retreats all surviving attacking units one hex.
- Defending Mobile units may Advance one hex
AE (Attacker Annihilated)
- Eliminate all attacking units.
- Defending Mobile units may Advance one hex.
AP (Attacker Panicked)
- The defender rolls one 6-sided die and retreats all attacking units that number of hexes immediately.
- Defending Mobile units may Advance one hex.
AR (Attacker Retreats)
- The attacker retreats all attacking units one hex.
- Defending Mobile units may Advance one hex.
AZ (Attacker Fiasco)
- Eliminate the single strongest attacking unit.
- The defender rolls one 6-sided die and retreats all surviving attacking units that number of hexes.
- Defending Mobile units may advance two hexes.
BB (Bloodbath)
- Eliminate the single strongest defending unit.
- Eliminate the single strongest attacking unit.
- If the attacker eliminates all defending units, then the attacker can Advance one hex.
DA (Defender Attritioned)
- Eliminate the single weakest defending unit.
- No Retreat or Advance.
DD (Defender Defeated)
- Eliminate the single strongest defending unit.
- The defender retreats all surviving defending units one hex.
- Attacking Mobile units may Advance one hex.
DE (Defender Annihilated)
- Eliminate all defending units.
- Attacking Mobile units may Advance one hex.
DP (Defender Panicked)
- The attacker rolls one 6-sided die and retreats all defending units that number of hexes immediately.
- Attacking Mobile units may Advance two hexes.
DR (Defender Retreats)
- The defender retreats all defending units one hex.
- Attacking Mobile units may Advance one hex.
MD (Delaying Action)
- Eliminate the single weakest attacking unit.
- The defender retreats all defending units one hex.
- Attacking Mobile units may Advance one hex.
OR (Overrun)
- Eliminate the single strongest defending unit.
- The attacker rolls one die and retreats all surviving defending units that number of hexes.
- Attacking Mobile units may Advance three hexes.
13.16 Unit Eliminations
If the result says “single weakest” or “single strongest,” then the player controlling that force removes the unit with the highest or lowest printed combat factor, respectively. If more than one has the same combat strength, the player can choose which one is to be eliminated.
Note: Strike Markers are never affected by combat results.
14.0 RETREATING
14.1 Retreating Units
When a combat result requires a player's units be retreated, the player designated by that result must immediately move those units the indicated number of hexes away from their combat position. Retreat is not normal movement; it is determined in terms of hexes, not movement points, and units may always retreat the number of hexes indicated, regardless of their printed movement allowances (unless otherwise restricted by terrain or enemy units).
14.2 Types of Retreats
There are two general types of Retreat result:
Normal retreat, which is one hex. The player who controls the units moves them.
Panic retreat, in which the player rolls one 6-sided die and must retreat all designated units that number of hexes. The player who does not control the units moves them!
In either case, retreat is subject to the following restrictions (if a unit is unable to retreat within these restrictions, it is eliminated instead).
Units may never retreat into hexes containing enemy units or enemy ZOCs (except per 12.1).
Units may not advance or retreat after combat into terrain or across hexsides it could not normally enter. Units may not retreat across a river unless there is an intact bridge crossing it.
Units may not retreat across a Sector boundary.
Units may retreat into hexes containing friendly units as long as stacking restrictions are met. This does not affect units retreated through. Remember, though, that units must obey stacking restrictions at the end of the combat phase, or the excess is eliminated.
Units may not retreat off the map.
A retreating unit must terminate the retreat the indicated number of hexes away from its former combat position. If it cannot, and can retreat only a portion of the number of the obligated hexes, it is eliminated in the last hex in which it was able to retreat. The retreat path terminates in the hex in which a unit is eliminated.
Units may be retreated together or separately.
In no case may a unit be retreated into a hex that would cause it to be eliminated or over-stacked if other retreat paths are available. This is regardless of who conducts the retreat.
14.3 Static Units
Static units that are forced to retreat are eliminated instead.
Note: Units defending in or attacking out of certain hexes may ignore retreat and panic results. Thus, a static unit defending in a fortified hex could avoid being eliminated by a retreat.
14.4 Fighting Retreat
Units that retreat into a hex that is then attacked will defend normally and contribute their defense strength to the hex.
Note: This would happen only when a unit retreated into a fortified hex, since enemy ZOC do not extend into them (see 12.1, under Fortifications).
14.5 Retreat Negation
Units in a friendly fortified city or a fortification hex, and Israeli units in kibbutzes, may, at the controlling player’s option, ignore retreat and panic results (attacking or defending.) Also, if units retreat or panic into a fortified city or fortification hex, or kibbutz, then they may cease their retreat in that hex, and not have to retreat the full distance. This rule applies to both defending and attacking units. However, if units both inside and outside of a fortified city or fortification hex are involved in the same combat, and a retreat or panic result is rolled, then those units outside of the a fortified hex would have to retreat.
Note: Any kind of retreat or panic is negated per this rule. For example, surviving units in an AD or DD result would not have to retreat.
Since enemy ZOCs do not extend into friendly fortified city, fortification and kibbutz hexes, friendly units can retreat into them regardless of the adjacency of enemy units.
15.0 ADVANCE AFTER COMBAT
Advance is a special form of movement that may occur after combat.
15.1 Advance Procedure
If a combat result calls for a player to conduct an Advance, he may immediately move some, none or all of his Mobile units (only) which were involved in the combat the number of hexes indicated. Generally, this will be one hex. However, certain combat results will allow units to advance two or three hexes when attacking. Static units can never advance after combat.
15.2 Advancing
Advance does not expend movement points. It may only be into hexes into which units could normally enter. Pursuing units may ignore enemy zones of control but may not enter hexes containing enemy units. They may not over-stack.
15.3 Stack Advancing
If an advance is more than one hex, then some units may stop in the first hex, and others in the second hex.
15.4 Rivers
If a unit can advance more than one hex, it must stop the instant that it crosses a river, unless it is bridged.
15.5 Enhanced Attacks
If an Israeli force is making an Enhanced Attack, then it can move up to twice the listed number of hexes if it is eligible to advance.
16.0 AIRPOWER
16.1 Airpower Defined
Airpower is represented asymmetrically for the Israelis and Arabs. Israeli airpower is represented by airstrikes that can conduct air superiority and ground attack missions. Arab airpower is represented by air defense levels, and by the use of Barrage markers.
16.2 Israeli Airpower
If a player has access to Israeli airstrikes, he places those counters in the Air Available box. A player may use available airstrikes for purposes stated below. After an airstrike has been used, place it in the Used box. In the following Strike Phase, transfer it to the Air Available box for that Front. This costs no ZRPs.
16.3 Israeli Air Unit Missions
Air units may conduct two general missions: Air Superiority and Ground Attack. The player must declare these during the Strike Phase.
16.4 Israeli Air Superiority
Air superiority is flown against the general Arab air defense capabilities on that Front (representing interceptors and SAMs) as well as against Arab Barrage markers (which represents offensive Arab airpower, as well as artillery concentrations and terrorist camps). Simply declare which air units are on this mission—they are not placed on the map.
-
Total the number of Israeli airstrikes being used on that Front for Air Superiority.
-
Consult the Air Superiority Table. For each attack, roll one 6-sided die.
-
Cross-index the die roll with the column.
-
Apply the result. This will be in terms of number of Arab airstrikes lost and air defense levels reduced (see 16.12).
16.5 Minimal Commitment
At least one airstrike must be committed for the Israeli player to use the table.
16.6 Arab Air Defense Fire
After any reductions are made to the Arab Air Defense Level, the opposing player on that Front then rolls for Arab Air Defense Fire. Arab Air Defense is also done on the Air Superiority Table. The procedure is as follows.
-
Use the current Arab Air Defense Level.
-
Roll one 6-sided die.
-
Cross-index the die roll with the column.
-
Apply the result. This will be in terms of number of Israeli airstrikes lost (see 16.13).
Israeli airstrikes that are lost are extracted from units flying Air Superiority or Ground Support missions. The choice is up to the Israeli player on that Front. If the result would call for more losses than missions being flown, then there is no further effect.
16.7 Arab Air Defense Level
This will be initially set by the scenario. It is reduced by Israeli Air Superiority combat, but it may not be reduced to less than zero, nor may it be raised if reduced (but see the Random Events Table for special cases.)
Remember: Arab air defenses fire only after the Israeli player has caused any reduction in the level; the fire is not simultaneous.
16.8 Zero Column
This is used when the Front Air Defense Level is reduced to zero. It represents ground unit antiaircraft fire and general wear and tear on Israel aircraft.
16.9 No Fly, No Die
If the Israeli player is flying no air missions on that Front, then there is no Arab air defense fire for it. If the Israeli player conducts only Ground Support missions, then air defense fire would still be conducted and affect the ground support missions.
16.10 Basing
Upon completion of Arab Air Defense fire, the Israeli player places all airstrikes used for this mission into the Used box for his Front.
16.11 Air Superiority Results
These will vary depending on who is firing, as per the table (see below).
16.12 Israeli Firing
The following results of Israeli fire are defined as listed below.
EE: The Israeli player reduces the Arab Air Defense Level for that Front, or eliminates a number of Arab Barrage markers, or any combination, equal to the number of airstrikes/SF used on the attack.
EH: The Israeli player reduces the Arab Air Defense Level for that Front, or eliminates a number of Arab Barrage markers, or any combination, equal to one half (1/2) the number of airstrikes/SF used on the attack.
Note: Round fractions down, if any.
Example: Seven airstrikes are making an air superiority attack and roll an “EH”; the Israeli player could reduce the air defense level by three and eliminate one barrage on that Front.
16.13 Arabs Firing
The following results of Arab fire are defined as listed below.
EH: Israeli player places one airstrike in the Refit box. EE: Israeli player places one airstrike in the deadpile and one in the Refit box.
Priorities: Airstrikes must be placed in the deadpile prior to being placed in the Refit box. If more losses are called for than are present in the attack, there is no additional effect. SF are never effected.
16.14 Israeli Airstrikes against Ground Targets
Israeli players can use airstrikes to conduct Ground Attack missions against Arab units. A player can place airstrikes only in hexes of the same sector. This is done during the Ground Attack phase (during the Strike phase).
Exception: Neither Jerusalem hex may ever be targeted by any Ground Attack, owing to the religious and political significance of Jerusalem to both sides.
16.15 Ground Attack Procedure
The following procedure is used to resolve Ground Attacks:
-
Place all air markers on the map that are to be used for airstrike missions. Up to three markers can be placed per hex.
-
For each such hex, total the number of airstrikes, consult the Strike Attack Table and roll one 6-sided die.
-
Cross-index the die roll and the outcome, then apply the result immediately.
-
Remove the airstrikes, and place them in the Utilized box for that Front.
Note: All Air markers must be placed before any airstrikes are resolved.
16.16 Ground Attack Results
The following results of Ground Attacks are defined as follows.
T1: Targeted Arab unit Panics (apply normal Panic rules).
T2: Targeted Arab unit is eliminated.
16.17 Multiple Targets
If there is more than one enemy unit in a hex, then each unit is attacked by the total airstrike/SF strength, with a separate die roll for each using the full-strength of the attacking markers.
Example: There are two Arab units in a hex. The Israeli attacks them with three airstrikes. Thus, the Israeli player would roll for each unit on the “3” column.
16.18 Multiple Sorties
An Israeli airstrike may be reused each and every turn for either this mission or air superiority, or remain in the Available box. This costs no additional ZRPs.
16.19 Terrain
Do not use terrain modifiers when resolving any Ground Attack. The only terrain effect is if a target unit is in a friendly fortification or fortified city, in which case it simply ignores any retreat result.
16.20 Above it All
Air units otherwise have no other effect on play: i.e., they have no ZOCs, do not count for stacking, do not block the movement of enemy units, etc. Note that the only time that airstrikes will be on the map is during Ground Attack.
16.21 Air Logistics
Air units cannot utilize ZRPs for enhancement.
17.0 ISRAELI SPECIAL FORCES
17.1 SF Markers
Israeli SF markers function similar to Airstrikes. However, the following limitations apply:
They may be used only to conduct Air Superiority missions (not Ground Attack).
They are never affected by Arab Air Defense.
18.0 ARAB BARRAGE & TERRORIZATION MARKERS
18.1 Application
The Arabs have Barrage markers that represent their general ability to execute airstrikes, long range artillery fire, and the occasional terrorist or commando raid. If a player has Arab Barrage markers available, then he places them on the map in the Arab Barrage phase for that Front.
18.2 Procedure
A barrage attack is resolved per the following procedure.
-
Place all Barrage markers on the map that are to be used for strike missions. A maximum of one marker can be placed in each hex.
-
For each such hex, consult the Strike Attack Table, declare if that attack will be made against units in the hex, or any cities, towns, or kibbutzes, and roll one 6-sided die.
-
Cross-index the die roll and the outcome, then apply the result immediately.
-
Remove the Barrage markers from play.
Note: All Barrage markers must be placed before any are resolved.
18.3 Barrage Results
Implement the barrage result as follows.
T1:
- If attacking a city, town or kibbutz target, place a Terrorized marker on it.
- If attacking an Israeli unit, then it must retreat one hex (apply normal retreat rules).
T2:
- If attacking a city, town or kibbutz target, place a Terrorized marker on it.
- If attacking an Israeli unit, then it is eliminated.
18.4 One Shot
Each Arab barrage may be used once per game, then it is placed in the deadpile. Also, Arab barrages may be eliminated and placed In the deadpile owing to Israeli Air Superiority missions. Note also that Barrage markers may not make Air Superiority attacks against Israeli airstrikes and SF.
18.5 Targeting
Arab barrages may be made against units in the hex, or against any Israeli city, town, kibbutz or airbase, but not against both. They may only be executed in the same sector as the owning player.
18.6 Multiple Targets
If there is more than one enemy unit in a hex, then each unit is attacked by the barrage strength, with a separate die roll for each.
18.7 Terrorization Markers
A barrage attack result against a city, town, kibbutz or airbase may generate a terrorized result. In this case, place a Terrorized marker on the hex.
18.8 Effects of Terrorization
Implement the terrorism results as follows.
-
Israeli reserves and replacements may not be placed on terrorized hexes.
-
Each Israeli city, town, airbase or kibbutz with a Terrorized marker gives the Arab player additional Victory Points at the end of the game.
-
Israeli units are not affected by Terrorized markers.
18.9 Terrain
Do not use terrain modifiers. The only terrain effect is if a target unit is in a friendly fortification or fortified city, in which case it simply ignores any retreat result.
18.10 Removal of Terrorized Markers
This is done by expending ZRPs. See the Table.
18.11 Incoming
Barrage markers otherwise have no other effect on play: i.e., they have no ZOCs, do not count for stacking, do not block the movement of enemy units, etc.
19.0 SPECIAL UNITS
19.1 Recon units and Advance
If a force is attacking on the Mobile CRT, and the result calls for an “advance”, then any recon units in that force can advance one additional hex.
19.2 Static Units
Static units are treated as other friendly units, except:
-
they may never move;
-
they never attack, regardless of enemy ZOC;
-
if forced to retreat or panic, they are eliminated instead (however, if in a hex which would otherwise negate a retreat, they remain on the map);
-
if eliminated, static units cannot be replaced.
20.0 AIRBORNE ASSAULTS
20.1 Israeli Airborne
Each player can make up to one airborne assault per Israeli movement phase using Israeli airborne units.
20.2 Airborne Assault Procedure
The unit begins the movement in a hex that is not in an enemy ZOC. The Israeli player picks up the unit and moves it to anywhere on the front.
Units making airborne assaults may land in enemy ZOC. The unit can conduct no other movement in the movement phase, however.
20.2 Airborne Extraction Procedure
This is conducted in the same general manner as an airborne assault, except the airborne unit may (but is not required to) begin in an enemy ZOC, and then is moved to any hex not containing an enemy ZOC.
20.3 Airborne Move Marker
This is used as a mnemonic for the Airborne move. It has no other effect on play. It costs one ZRP to use.
20.4 Arabs
Arab units may not conduct airborne moves
20.5 Airborne Surprise
The first time that any Israeli airborne unit assaults a hex where an enemy fortification is present, the fortification in that hex is nullified during that combat phase. This can only apply once during the game per Front.
21.0 ARAB DISINTEGRATION
21.1 Disintegration Defined
The Disintegration rule represents the historical chaos and panic of the high commands of several of the Arab countries.
21.2 Triggering Disintegration
If the Disintegration event on the Random Events Table is rolled, then each player must do the following.
-
Add up the total number of Israeli controlled Objective hexes on your Front.
-
Subtract from this the number of Arab controlled Israeli cities, towns and kibbutzes on that player’s Front.
-
Roll one 6-sided die. If the result is less than or equal to the number resulting from the above calculation, then Disintegration is triggered for that Front. Otherwise, there is no effect (obviously, if the above number is zero or less, then there is no need to roll as Disintegration could not be triggered).
21.3 Disintegration Effect
Disintegration affects all forces on a Front, regardless of which Objectives are controlled. If disintegration is avoided, it may be triggered again on a subsequent turn if the event is again rolled.
Note: There is only one roll per Front, regardless of the number of Contingents, and that die roll outcome is applied to all Contingents on that Front.
If Disintegration has occurred, the following effects apply immediately, for the remainder of the current game for that Front:
-
Panic Conversion. All Panic results will automatically eliminate affected Arab units. This includes units in terrain that would normally negate a Panic.
-
Retreat Conversion. All Retreats results cause affected Arab units to Panic. This includes units in terrain that would normally negate a Retreat.
Note: These effects apply to Arab units which panic or retreat due to all types of combat.
21.4 Jordanian Immunity
Jordanian units are never affected by Disintegration. However, captured Jordanian Objective hexes contribute to the total for the Disintegration die roll.
21.5 Duration
Once Disintegrated, Arabs in a Front remain Disintegrated for the remainder of the game. Do not check again if Disintegration is already in effect on a Front.
22.0 FOG OF WAR
22.1 Examining Opponent’s Units
The Israeli player on a Front can always examine stacks of Arab units on that Front. He can always examine all Arab units on the other Front. He cannot examine Israeli stacks on the other Front.
23.0 VICTORY CONDITIONS
23.1 Checking for Victory
The victory conditions reflect the relative contribution to victory of each player. The assumption is that unless there is an Arab Sudden Death victory, there is going to be an Israeli victory of some sort; the real question is who will get the credit for it.
Players check for Victory under the following situations:
-
Arab Sudden Victory: During a Sudden Death Victory Phase, if Arab units occupy all city hexes in Israel (regardless of any Israeli occupation of objective hexes in Arab countries), then both players lose the game.
-
Israeli Sudden Victory: During a Sudden Death Victory Phase, if Israeli units occupy all objective hexes in Arab countries on one or both Fronts, and no Arab unit occupies any city, town or kibbutz hex in Israel, then the game ends, and players check for victory.
Player’s Note: This is intended to make players race to grab as many objective hexes as possible in order to end the game and thus presumably claim more victory points. On the other hand, a player may want to protract operations in order to destroy more Arab units and thus gain more points for them.
- At the End of 10 June Turn. In this event, check the victory points.
23.2 Victory Points (VP)
The VP Chart gives the number of points gained for accomplishing various goals. All of the below are for conditions at the end of the game.
Players gain VPs for:
-
Israeli Control of Objective hexes. An Israeli player control an Arab Objective hex per the definition of Control (see VP Chart at the end of these rules).
-
Arab Mobile units eliminated by your Front. An Israeli player gains VP per Arab Mobile unit eliminated by his Front and in the deadpile.
Players lose VPs for the following.
-
Zahal Reserve Points. Subtract the number of ZRPs you have expended from the total VPs gained (see above).
-
Arab Control of Israeli Hexes. Points are lost for Israeli fortified city, town and kibbutz hexes controlled by Arab forces at the end of the game.
-
Terror. Each city, town, kibbutz or airbase with a Terror marker loses VPs.
-
Israeli Mobile units Eliminated on your Front. A player loses VPs per each Israeli Mobile unit of his Front that is in the Refit and deadpile boxes at the end of the game.
-
Arab Air Defense Level. Subtract the total Arab Air Defense Level for the Front (if it is one or more).
23.3 VP Table
Victory Points are listed on the VP Table printed at the end of the rules.
23.4 Levels of Victory
Each player now checks the number of VPs they have attained.
23.5 Disaster
If both players have zero or fewer VPs at the end of the game, then both players lose the game.
23.6 Player Victory
If at least one player has one or more VPs, determine who has won the game by subtracting the VPs of the player with the lower total from that of the higher. Then check the difference as follows:
- 30 or more = Strategic Victory
- 20 – 29 = Regional Victory
- 10 – 19 = Local Victory
- 0 – 9 = Draw
24.0 STANDARD SCENARIO SET UP
24.1 Scenario Set-up
Players set up the scenario in this order:
Place the Turn marker on 5 June.
The Sinai and Eastern Front Israeli players each set their ZRP Index to zero.
The Eastern Front player places the Sinai Front Arab units marked START on the Arab side of the Sinai Front. The static units must go in the named hexes. Units marked “PLA” must be set up in the Gaza Strip. Other Egyptian units can be set up in Egypt or Gaza. At least one mobile unit must be placed in each fortification hex.
The Sinai Front player places all Eastern Front Arab units marked START on the Arab side of the Eastern Front. The static units must go in the named hexes. At least one mobile unit must be placed in each fortification hex. Units must be set up in their home countries, with the following exception: the Egyptian 33+35 Commando and Iraqi Eastern units are set up in Jordan.
The Sinai Front player places the Lebanon unit on any Lebanese town.
The Sinai Front player places the following units in the Arab Reinforcement box: All units marked Eastern Front REINFORCEMENT.
The Eastern Front player places the following units in the Arab Reinforcement box: All units marked Sinai Front REINFORCEMENT.
Arab Units marked OPTIONAL and RESERVE are placed aside. They are deployed only if using the on-line optional rules.
The Sinai Arab Air Defense Level is set at “5” (five).
The Eastern Arab Air Defense Level is set at “3” (three). Place the following units in the Israeli Reserve box: 12 x airstrikes, 2 x special forces (SF), all Israeli ground units marked RESERVE.
The Eastern Front player places all Israeli Eastern units marked START on the Israeli side of the Eastern Front line. Militia units must be placed in city, town or kibbutz hexes.
The Eastern Front player takes one Israeli Airborne Assault marker and places it in the Eastern Sector Available box.
The Sinai Front commander places all Israeli Sinai units marked START on the Israeli side of the Sinai front line. Militia units must be placed in city, town or kibbutz hexes.
The Sinai Front player takes one Israeli Airborne Assault marker and places it in the Available box. Place all Disintegration markers on the “Not Disintegrated” side.
The game is now ready to play. Use the Sequence of Play 4.0.
25.0 HISTORICAL SCENARIO SPECIAL RULES
25.1 Saudi Arabia
Saudi Arabian hexes are defined as hex 2233 to the south along the Gulf of Aqaba coastline. No units may enter these hexes or any part of Saudi Arabia.
25.2 Lebanon
Lebanon starts as a neutral. Neither player’s units or markers may enter Lebanon until the Lebanon Enters War event is rolled on the Events Table. The Lebanon unit may not move, attack, nor have a ZOC as long as it is neutral. At this point, the Israeli Sinai Front player gains control of the Lebanese unit, and all forces may freely enter Lebanon.
25.3 Gaza
This territory is treated as part of Egypt for game purposes.
25.4 Additional Israeli Restrictions
Israeli ground units may not enter:
-
any hexes west of the Suez Canal in Egypt;
-
any Jordanian hexes east of the Jordan river before game turn 4;
-
any Syrian hexes northeast of the Ceasefire Line.
Note: These restrictions do not apply against Israeli airstrikes. Israeli air units may attack into these areas. Also, Israeli ground units adjacent to the above may attack across them, and be attacked by units on the other side. They may not advance or retreat across them. Arab units are not restricted by this.
25.5 Israeli Shock Effect
On the first turn of the game, the following conditions apply.
-
Israeli Air Superiority attacks are shifted one column to the right.
-
Arab Air Defense fires are shifted one column to the left.
-
Arab units may not move in their movement phase of Turn 1. They conduct combat, retreats, advances, and all other game functions normally.
-
All Israeli ground attacks are treated as Enhanced Attacks. This costs no ZRPs (and no enhanced attacks may otherwise be made).
25.6 Israeli Reinforcements
There are no Israeli reinforcements. Players mobilize Reserves normally.
25.7 Arab Reinforcements
These enter play via random events.
Random Events Table
| Die roll | Event |
|---|---|
| 2 | Lebanon Enters War. Lebanon becomes an Arab controlled Belligerent. |
| 3 | Arabs Take to the Streets. Each player picks the weakest mobile ground unit in the Arab deadpile for the Arab Front he controls and receives it as a reinforcement this turn. |
| 4 | USS Liberty attacked/Arab Oil Embargo. Roll one die. Each Israeli player must subtract that number from his ZRP (to a minimum of zero). |
| 5 | All the Way with LBJ. Roll one die. Each Israeli player adds that number to his ZRP (to the maximum). |
| 6 | Israeli Political Crisis. If any Israeli city, town or kibbutz are currently Arab occupied or have a Terrorized marker on them, roll one die. On an even result, each player must immediately return one airstrike or SF marker to the Reserve Pool. On an odd result, first the Eastern Front player and then the Sinai Front selects one unit or marker from the Israeli Reserve Pool (if available) and receives it as a reinforcement at no ZRP cost. |
| 7 | Arab Disintegration Check. See the Disintegration Rule. |
| 8 | Arab Disintegration Check. See the Disintegration Rule. |
| 9 | Arab Volunteers. Each player (Sinai Front first, then Eastern Front) picks at random one Arab Volunteer unit (if available) and places it as a reinforcement this turn. |
Zahal Reserve Points (ZRP)
| Phase | Action | ZRP Cost |
|---|---|---|
| Reinforcement Phase | Purchase one airstrike or SF from the Reserve | 1 |
| Reinforcement Phase | Transfer one airstrike or SF from the other player | 2 |
| Reinforcement Phase | Purchase one ground unit from the Reserve | 2 |
| Movement Phase | Transfer one ground unit from the other player | 4 |
| Reinforcement Phase | Replace one airstrike in the Refit box | 1 |
| Reinforcement Phase | Remove a Terrorized marker from a city, town or kibbutz | 4 |
| Movement Phase | Force March (+ die roll movement) | 1 |
| Movement Phase |
Victory Points Chart
| Condition | Victory Points |
|---|---|
| Add the following: | |
| Control East Jerusalem | +25 |
| Control Sharm El Sheikh or Gaza | +10 |
| Control each other Arab Objective hex | +5 each |
| Arab mobile units in the deadpile which were eliminated by your units | + 1 per unit |
| Subtract the following: | |
| Number of ZRP your Front has expended | Subtract that number |
| Each city and fortified city hex within Israel controlled by Arabs | -20 each |
| Each Town hex within Israel controlled by Arab units | -10 each |
| Each Kibbutz hex within Israel controlled by Arab units | -5 each |