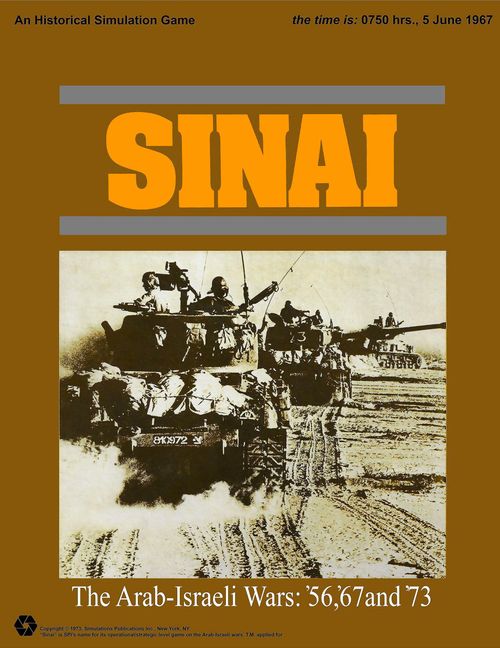
Sinai: The Arab-Israeli Wars – '56, '67 and '73
Sinai: The Arab-Israeli Wars - '56, '67 and '73 Rulebook
Table of Contents
Table of Contents
- 1.0 Introduction
- 2.0 General Course of Play
- 3.0 Game Equipment
- 4.0 Sequence of Play
- 5.0 Movement
- 6.0 Zones of Control
- 7.0 Stacking
- 8.0 Combat
- 9.0 Explanations of Combat Results
- 10.0 Supply
- 11.0 Overrun
- 12.0 Fear
- 13.0 Jordanian Participation
- 14.0 Arab Command Control
- 15.0 Trucks
- 16.0 Air Strikes
- 17.0 Airmobile Battalion
- 18.0 Fortified Settlements and Cities
- 19.0 Reinforcements
- 20.0 How to Set Up
- 21.0 Victory Conditions
- 22.0 The 1967 Scenarios
- 23.0 The 1956 Scenarios
- 24.0 The 1973 Scenarios
- 25.0 The Mid-1970s Scenarios
- 25.1 General Rules Changes
- 25.2 Mid-1970s Hasty Attack Scenario
- 25.3 Full Mobilization Scenario
- 25.4 Improved Arab Logistics Scenario
- 25.5 Soviet Intervention Scenario
- 25.6 Race For The Sinai Scenario
- 25.7 Mid-1970s Full Arab Cooperation Scenario
- 25.8 Mid-1970s Jihad Scenario
- 25.9 Mid-1970s Victory Conditions
- 26.0 Designer's Notes
- Charts and Tables
1.0 Introduction
A. Sinai is a simulation on the brigade/battalion level of the Arab-Israeli Wars of 1956, 1967, 1973, and a possible future war in the mid-1970s. Historically, the wars of 1956 and 1967 ended in quick, total defeat of the Arab armies; but if the Arabs had had more effective leadership and better international cooperation, the results might have been different. In addition to the historical scenarios for each of these wars, there are several "what-if" scenarios which explore what might have happened if the situation and armies had been different.
B. The 1973 war is included as it was fought. Special rules demonstrate the changes in composition, competence and weaponry of the various armies that have taken place since the 1967 war.
C. The mid-1970s scenarios present several situations that might develop in the Middle East if the relative peace following the 1973 war breaks down.
D. The main body of rules and comments that follow apply to the 1967 Historical Scenario. Some of these rules are suspended or modified and some new rules are added when playing the other scenarios. It is recommended to first read and play the 1967 Historical Scenario before reading the special rules for any of the other scenarios.
2.0 General Course of Play
Sinai is basically a two-player game. Each side moves its units and executes attacks on enemy units in turn, attempting to fulfill the conditions of victory. To move from one hex to another, each unit expends a portion of its Movement Allowance (MA). Combat is resolved by comparing the total Combat Strength Points (SPs) of adjacent opposing units and subtracting the defending unit's total from the attacking unit's total, arriving at an Attack Superiority. A die is rolled and the outcome indicated on the Combat Results Table (CRT) is applied to the units involved.
3.0 Game Equipment
3.1 The Map
The 22" x 34" mapsheet portrays the area of the Middle East in which the actual campaigns took place. A hexagonal grid is superimposed upon the mapsheet to regularize the movement and position of the playing pieces. The hexes are numbered to facilitate the setting up of units and by-mail play.
3.2 The Playing Pieces
The differently colored playing pieces represent the various units of the opposing armies available in the campaigns. The opposing forces in each of the varying orders of battle are composed by selecting units from those provided on the unit sheet. It is strongly recommended to sort units by type and color, and keep them segregated in the plastic tray included with the game. This greatly facilitates setting up the game. The playing pieces are distinguished by type, strength, and mobility, as represented by various numbers and symbols printed on their faces.
3.2.1 Sample Unit
(Illustration of a sample counter.)
3.2.2 Summary of Unit Types
(Unit-type symbols are shown graphically in the rulebook.)
- 3.2.2.1 Mechanized Units: Mechanized Infantry, Armor, Mechanized Paratroop, Reconnaissance, Israeli Supply Unit.
- 3.2.2.2 Non-Mechanized Units: Infantry, Paratroop (non-functional), Camel, SAM Site.
- 3.2.2.3 Air-Droppable Units: Paratroop (functional), Airmobile.
3.2.3 Organizational Size Symbols
- II = Battalion
- X = Brigade
3.2.4 Summary of Unit Abbreviations
3.2.4.1 Israel
| Abbr | Meaning |
|---|---|
| Ahrn | Ahaaron |
| Albt | Albert |
| Elhn | Elhanan |
| Elzr | Eleazar |
| Iska | Isska |
| Ktti | Kutti |
| Mnhm | Menahem |
| Mshe | Moshe |
| Mshk | Moshik |
| Mtke | Motke |
| Ntke | Natke |
| Rful | Raful |
| Shml |
3.2.4.2 Jordan: RlGd = Royal Guard
3.2.4.3 Egypt: NG = National Guard; PAL = Palestinian
3.2.5 Other Markers
Entrucked, Air Strike, Destroyed, Fortified, Settlement/City, Israel-Controlled (marker graphics).
3.3 Abbreviations and Definition of Terms
3.3.1 Abbreviations
| Abbr | Meaning |
|---|---|
| ACCT | Arab Command Control Table |
| CRT | Combat Results Table |
| EZOC | Enemy ZOC |
| MA | Movement Allowance |
| MP | Movement Point |
| OOS | Out of Supply |
| SP | Strength Point |
| SU | Supply Unit |
| TEC | Terrain Effects Chart |
| TRT | Turn Record Track |
| VP | Victory Point |
| ZOC | Zone of Control |
3.3.2 Definitions
3.3.2.1 Combat Strength: Combat Strength is the basic attacking and defending power of a unit quantified in SPs.
3.3.2.2 Movement Allowance: Movement Allowance is the basic movement ability of a unit quantified in Movement Points (MPs); a unit expends one or more MPs of its total MA for each hex entered, as summarized on the Terrain Effects Chart (TEC).
3.4 Charts and Tables
Various visual aids are provided to simplify and illustrate certain game functions. These are the Combat Results Table (CRT), the Turn Record Track (TRT), the Terrain Effects Chart (TEC), and the Arab Command Control Table (ACCT). Each of these is fully explained where presented.
3.5 Game Equipment Inventory
A. A complete game of Sinai includes the following:
- One map
- One set of rules
- One set of die-cut counters
- One die
- One box
B. If any parts are missing or damaged, please write: Simulations Publications, Inc., 44 East 23rd Street, New York, N.Y. 10010
C. Questions regarding the rules of the game will be answered if accompanied by a stamped, self-addressed envelope. Questions should be answerable by a simple yes or no, or a single word or phrase.
3.6 Scale
A. Each hex on the map is twelve kilometers across. B. Each unit represents a brigade or battalion. C. Each turn represents twelve hours of real time.
4.0 Sequence of Play
4.1 The Turn
A. Sinai is played in turns called game-turns (referred to as turns). Each turn is composed of two player-turns. Each player-turn is composed of three or more phases. B. The player (or side) whose player-turn is in progress is termed the phasing side (or side). The other player (or side) is the non-phasing side (or side). C. Each turn proceeds as follows:
4.2 Sequence Outline
4.2.1 Israeli Player-Turn
4.2.1.1 Supply Phase: The Israeli side determines which of its units are in supply for movement purposes per the Supply Rules.
4.2.1.2 Movement Phase: The Israeli side may move all of its units in any direction up to the limit of their MA within the restrictions of the Movement and Supply Rules.
4.2.1.3 Combat Phase: The Israeli side may attack adjacent enemy units at its option. Combat is resolved per the combat rules (8.0).
4.2.2 Arab Player-Turn
4.2.2.1 Arab Command Control Phase: The Arab side determines which of its units suffer a loss of command control.
4.2.1.2 Supply Phase: The Arab side determines which of its units are in supply for movement purposes per the supply rules (10.0).
4.2.1.3 Movement Phase: The Arab side may move all of its units in any direction up to the limit of their MA within the restrictions of the movement rules (5.0) and supply rules (10.0).
4.2.1.4 Combat Phase: The Arab side may attack adjacent enemy units at its option. Combat is resolved per the combat rules (8.0).
4.2.1.5. Jordanian Participation Phase: The Arab side determines if Jordan enters the war, if it has not already. This applies only to the first four turns.
4.2.3 Game-Turn Indication Phase
Advance the Game-Turn marker on the TRT to signal the start of the next turn.
4.3 Game Length
Repeat the steps in the Sequence Outline for twelve turns. At the end of the twelfth turn, the game is over, and each side's performance is evaluated in terms of victory conditions (21.0).
5.0 Movement
A. During the Movement Phase, the phasing side may move as many or as few of its units as desired, as long as its MA is not exceeded in that phase. B. Unused MPs may not be accumulated from phase to phase nor transferred from unit to unit. C. Units may be moved individually, or alternatively as a stack of units (if all the units in the stack begin the Movement Phase in the same hex), tracing the path of their movement through the hexagonal grid. D. Once a unit has been moved and the player's hand withdrawn, the unit may not be moved again, nor the path retraced and/or changed during that Movement Phase.
5.1 How to Move Units
5.1.1 Phasing Side Only
During a Movement Phase, only the phasing side may move its units. All, some, or none of its units may be moved. No enemy movement and no combat may occur during a Movement Phase.
5.1.2 Movement Points
Movement is calculated in terms of MPs. Basically, each unit expends one or more MPs of its total MA per hex it enters.
5.1.3 Stack Movement
If units are moving in a stack, the stack may not expend more MPs than the MA of the slowest unit in the stack, or enter terrain forbidden to any unit in the stack.
5.1.4 Movement Modifiers Cumulative
All effects of reducing available MPs and increasing the number of MPs to enter a given hex are cumulative.
5.2 Movement Inhibitions and Prohibitions
5.2.1 Lebanon
No units may ever enter Lebanon.
5.2.2 Israeli Restrictions
A. Israeli units may not cross the Suez Canal. B. Israeli units may not enter Trans-Jordan (all of Jordan east of the Jordan River, east of the Dead Sea, or east of the dotted border line connecting hex 3322 with hex 2937) unless the Jordanians have attacked a fortified settlement or a city hex other than Jerusalem.
5.2.3 Arab Cooperation
Arab units of one nationality may not enter another Arab nation. However, non-Jordanian units that begin the game in Jordan function in all ways as Jordanian units.
5.2.4 Prohibited Terrain
There are several types of terrain that are prohibited to some units and not others, depending on whether the unit is mechanized or non-mechanized and whether the unit is Arab or Israeli.
5.2.5 All-Sea Hexes and Hexsides
Units may never enter all-sea hexes, or move through all-sea hexsides, except for tracing Israeli Airmobile Movement.
5.2.6 Enemy-Occupied Hexes
Units may never enter hexes containing enemy units except to overrun (11.0).
5.2.7 Friendly-Occupied Hexes
A. During the Movement Phase, units may freely enter or move through hexes containing other friendly units, regardless of stacking restrictions, as long as stacking restrictions are obeyed at the end of the Movement Phase. B. There is no additional MP penalty for stacking or unstacking with other friendly units.
5.2.8 Supply Effects
A unit's MA may be decreased by supply considerations, lowering the number of MPs that it may expend in a given Movement Phase.
5.2.9 Lack of MPs
Units which do not have the MPs necessary to enter a hex may not enter that hex. This means that there will be times when a unit may not be able to move at all.
5.3 Terrain Effects on Movement
5.3.1 In General
The number of MPs that a unit must expend to enter a given hex varies with the type of moving unit (mechanized or non-mechanized), the type of terrain in the hex, and the nationality of the unit.
5.3.2 Sand and Rough
A unit in a sand/road-or sand/track hex or a rough/road-or-rough/track hex which is prohibited from entering sand or rough hexes may only exit that hex through a hexside which the road-or track crosses (TEC).
5.3.3 Suez Ferry Point
All units may enter the sand/road hexes along the canal if entering by traversing a Suez ferry point hexside.
6.0 Zones of Control
The six hexes immediately surrounding a hex constitute the zone of control (ZOC) of any units in that hex. Hexes upon which a unit exerts a ZOC are called controlled hexes and inhibit the movement of enemy units. All units exert a ZOC except as noted below.
6.1 Restrictions
A. Entrucked units have no ZOC (15.0). B. ZOCs do not extend across the Israeli-Jordanian border until Jordan enters the war (13.0). C. ZOCs do not extend into enemy city or fortified settlement hexes (unless the city or settlement has been destroyed, 18.1). D. ZOCs do not extend across all-sea hexsides. E. ZOCs do extend across Suez Canal hexsides.
6.2 Movement Effects
A. A unit must cease moving (for the current Movement Phase) upon entering an enemy ZOC (EZOC). B. A unit may not move directly from one enemy-controlled hex to another. Exception: Overrun (11.0). C. There is no penalty for leaving an EZOC. D. For movement purposes, EZOCs do extend into friendly occupied hexes.
6.3 Combat Effects
A. ZOCs do not affect combat. B. Attacking is voluntary and the presence of a unit's ZOC in a friendly occupied hex does not force combat.
6.4 Retreat Effects
Units may not retreat as a result of combat into or through an EZOC unless another friendly unit occupies that hex.
6.5 Supply Effects
Supply lines may not be traced through an EZOC unless another friendly unit occupies that hex.
6.6 Overlapping ZOCs
The presence of a friendly ZOC in a hex never negates the presence of an EZOC.
7.0 Stacking
A. A maximum of three combat units may be stacked in a single hex. B. The stacking limit applies at the end of each friendly Movement Phase and during the Combat Phase.
7.1 Movement Effects
7.1.1 Movement Through Friendly Units
A. Units may freely move through hexes containing friendly units, regardless of the number of units that are transiently in that hex. B. The stacking limit applies only at the end of the friendly Movement Phase.
7.1.2 Movement as a Stack
Units may be moved as a stack if they start the Movement Phase in the same hex (Movement, 5.1.3).
7.2 Combat Effects
A. All units in a hex under attack must be attacked together. Sum their separate Combat Strengths, then the combined strength must be attacked. Units stacked together may not be attacked separately. B. However, if one unit in a stack of units is attacking a given hex, the remaining units are under no compulsion to join the attack. They may attack different hexes, or not at all.
8.0 Combat
A. Combat occurs between adjacent opposing units at the phasing side's discretion. The phasing side is the attacker, and the non-phasing side is the defender, regardless of their overall strategic position. B. Sum the Combat Strengths of all attacking units involved in a specific attack and compare it to the total Combat Strength of all units in the hex under attack. C. Subtract the defender's total from the attacker's total. The difference is the Attack Superiority expressed in points. D. Find the appropriate Attack Superiority column, roll the die and read the result on the appropriate line and column of the CRT. E. Apply the result immediately, before resolving any other attacks being made during that Combat Phase.
8.1 Which Units May Attack
8.1.1 In General
A. During the Combat Phase, the phasing side may attack any and all enemy units adjacent to friendly units. Exception: Supply Effects (10.3). B. Only those friendly units directly adjacent to a given enemy unit may participate in an attack upon that unit.
8.1.2 Voluntary
A. Attacking is completely voluntary; units are never compelled to attack, and not every unit adjacent to an enemy unit need participate in any attack. B. Friendly units in a stack that are not participating in a given attack are never affected by the results of the attack.
8.1.3 Attacking Hexes
An enemy occupied hex may be attacked by as many units as can be brought to bear in the six adjacent hexes.
8.1.4 Restrictions
A. No unit may attack more than once per Combat Phase. B. No enemy unit or enemy-occupied hex may be attacked more than once per Combat Phase.
8.2 Multiple Unit And Multi-Hex Combat
8.2.1 In General
A. All units defending in a given hex must be attacked as a single Strength. B. The defender may not voluntarily withhold any units in a hex under attack. C. The attacker must attack all the units as a whole, thus the strengths of all the units in the hex are summed, and this total strength is attacked. D. Different units in a given hex may not, therefore, be attacked separately.
8.2.2 Choice to Attack
Units in a hex that contains an attacking unit are not required to participate in that same attack or any attack. Thus, when one unit in a stack of three is attacking a given hex, one of the other units could attack a different hex, and the third could refrain from attacking.
8.2.3 Multiple Defending Hexes
A. If one or more units are adjacent to multiple enemy-occupied hexes, they could attack all of them in a single combat. Thus, units in a single hex can attack more than one other hex. B. The only requirement is that all attacking units must be adjacent to all defending units.
8.3 Effects on Combat Strength
Unit combat strengths may be affected by terrain and supply considerations. This is always expressed as an increase in the defender's strength or as the attacker's or defender's strength being halved or doubled.
8.4 Advance After Combat
A. If the defender vacates any of its hexes due to combat, as many as three of the participating attacking units may move into the vacated hex at the attacker's option. B. The advance must take place immediately before resolving any other combat. C. This advance is not considered movement and expends no MPs. D. The advance is not affected by any ZOCs in the hex attacked from or advanced into.
8.5 Arab Non-Cooperation
A. Arab units of different nationalities may not attack the same Israeli unit in the same turn. B. Non-Jordanian units that start in Jordan function as Jordanians.
8.6 Terrain Effects
A. Units may attack into adjacent hexes that they cannot enter (e.g., Israeli units may attack across the Suez Canal). B. Units cannot advance after combat into such a hex. C. Units may not attack across all-sea hexsides.
9.0 Explanations of Combat Results
9.1 Retreats
A. All combat results are expressed as a retreat by the defending units of a given number of hexes. B. All movement restrictions and inhibitions apply except that retreats are not considered movement and do not cost MPs for varying terrain. C. Retreats do not affect subsequent MA. D. A unit unable to retreat the full number of hexes required is eliminated. E. The specific result applies to mechanized units. F. Non-mechanized units always retreat one hex, never more. Exception: Fear (12.0). G. Retreats are blocked by prohibited terrain and enemy controlled hexes. H. Each side moves its own units during retreats.
9.2 Retreat Into Fully-Stacked, Friendly-Occupied Hex
A. A unit that has no other path of retreat may retreat into or through a three-high stack of friendly units. If it must end its retreat in that hex, it displaces (pushes out) one of the units in that hex (owner's choice). B. If there is no hex to displace a unit into (displacement subject to the normal retreat restrictions), the retreating unit is eliminated.
9.3 Retreat Into Subsequently Attacked Hex
A. If a unit retreats or is displaced on top of a unit that is subsequently attacked during that same Combat Phase, the retreated unit does not add its Strength to the defense (following 8.1.4), but it does suffer any result that the attacked unit suffers. B. A hex's Defense Strength may be reduced by this retreat or displacement.
9.4 Retreat Priorities
Retreats are made with the following priorities:
- Not displacing friendly units.
- Ending the retreat the full number of hexes away from the starting hex as called for.
- Taking the path that would cost the fewest MPs (in terms of normal movement).
9.5 Exception to Priority
A unit is required to follow the priority list above, but will not be eliminated if it can in any path accomplish a retreat of the required number of hexes, except that a unit may never enter the same hex twice during a single Combat Phase.
10.0 Supply
Units are either in supply or out of supply (OOS) for the purposes of combat and movement. The conditions for being supplied and the effects of being OOS differ for the Arab and Israeli units.
10.1 Conditions for Supply
10.1.1 Arab Supply
A. An Arab unit is in supply if it can trace a line through clear terrain hexes and/or along roads to a map edge in its home country. This line may be as long and as circuitous as necessary. B. A destroyed bridge can still function as a road for supply purposes. C. The Suez Crossing Points are the only hexes through which supply can be traced across Suez Canal hexsides. D. Only Arab units actually in Israel may trace supply through Israel.
10.1.2 Israeli Supply
A. All Israeli units are automatically in supply for the first six turns. Thereafter, they must be able to trace a line of hexes, no more than eight mechanized MPs in length from the unit to any of the following:
- Any road in Israel that connects to Tel Aviv, Haifa, or Jerusalem.
- Tel Aviv, Haifa, or Jerusalem.
- The Israeli Supply unit (SU). To function as a supply source, the Israeli SU must be able to trace a line of clear terrain and/or road hexes of any length to an Israeli city. The SU may not be entrucked. B. The Israeli city providing supply may not be enemy-occupied. C. Thus, an Israeli unit in an Israeli city is automatically in supply.
10.1.3 Blocking Supply Lines
A. A supply line is blocked by the presence of enemy units and their ZOCs, unless the supply line runs through enemy-controlled hexes occupied by friendly units. B. Supply lines are also blocked by impassable terrain. C. Thus, an Arab unit adjacent to its supply-source-map edge can be cut off from supply by being surrounded on both sides by two Israeli units adjacent to the same map edge.
10.1.4 Passable Requirement
A supply line must be passable by the unit in question. When counting MPs, count from the unit in question to the supply source.
10.1.5 The Israeli Supply Unit and Enemy Action
A. If the Israeli SU is attacked when it is alone in a hex, or forced to retreat when stacked with other units, or if it is unable to function as a supply source due to an EZOC, immediately move it back along the line of hexes it passed through to the nearest hex in which it can function as a supply source. B. The SU cannot be destroyed.
10.2 Determining Supply
10.2.1 For Movement Purposes
A. Supply status is determined at the beginning of each friendly Movement Phase, and its effects remain throughout that phase. Thus, units which are in supply at the beginning of a friendly Movement Phase may freely move OOS. B. Units which begin the Movement Phase OOS do not become supplied by moving within supply range until their following friendly Movement Phase.
10.2.2 For Combat Purposes
Supply status is determined at the instant of combat for both the attacker and the defender. Thus, a unit may have been in supply at the beginning of the current Combat Phase, but due to actions of the enemy, when its combat action is about to be resolved, it might be OOS.
10.3 Supply Effects
A. Units which are not in supply are said to be OOS. B. OOS Arab units cannot attack. They are halved on defense, and their MA is halved. C. OOS Israeli units are halved when attacking, and their MA is halved. They are unaffected when defending. D. If there is more than one OOS unit in a hex, the total strength for attack or defense is halved, not that of each individual unit. E. Whenever halving, drop fractions (e.g., half of five is two). A unit (or units in one hex) never defends or attacks at less than 1 SP or has less than 1 MP.
11.0 Overrun
A. An overrun takes place when a unit or stack of units moves onto an enemy unit or stack of units. B. Overrun functions as movement rather than combat. C. The overrun procedure consists of moving from a hex adjacent to the unit to be overrun (ignoring all EZOCs), moving on top of that unit, and then optionally moving off that unit to any adjacent hex (if the owner wishes and the overrunning unit's MA permits). D. Overrun units are immediately removed from the map. E. A unit that conducts an overrun may conduct regular combat in the Combat Phase.
11.1 Restrictions
11.1.1 Eligibility
A. An overrun is only possible against a unit or stack of units with a combined Combat Strength of one or two (after any terrain and supply modifications). B. Overrunning unit(s) must have a modified strength of at least 5 SPs to overrun a unit of a modified 1 SP. C. Overrunning unit(s) must have a modified strength of at least 9 SPs to overrun one or more units of a modified strength of 2 SPs.
11.1.2 Stacking Requirement
Two or three friendly units may combine their strength to Overrun only if they started that Movement Phase on the same hex.
11.1.3 Terrain and Supply Effects
All terrain and supply effects apply to all units involved in an Overrun. Because Overrun occurs during the Movement Phase, supply for both sides is determined at the beginning of the phase, not the instant of the Overrun.
11.1.4 MP Cost to Overrun
Overrunning costs an extra 3 MPs to enter the defender's hex. It is entirely possible that a unit may have MPs to expend in normal movement (during the same phase that it executes an Overrun).
11.1.5 Entrucked Units
Entrucked units may not overrun.
11.2 Nullified ZOCs
A. Overrunning units can ignore all EZOCs during the actual overrun. B. When engaged in any other movement, the unit is subject to all normal ZOC rules.
(Overrun examples, illustrated in the rulebook: Example 1: Unit A may move in any of the paths indicated, overrunning unit Z in the process. Example 2: Unit B may move in the path indicated, overrunning units X and Y in the process. Example 3: Unit C may move in the path indicated; but if it then entered the ZOC of Unit R, it would have to stop, as it is not overrunning Unit R.)
12.0 Fear
A. The Egyptian and Syrian Armies have demonstrated a great tendency to panic and run whenever a battle was not going their way. If, however, they had no place to run, they fought quite determinedly and viciously, as they had a great fear of being captured. Accordingly, Egyptian and Syrian units always retreat twice as far as indicated on the CRT. Non-mechanized units retreat two hexes. B. If they cannot retreat due to Israeli units or ZOCs or due to prohibited terrain, they defend at twice their basic (printed on the counter) Combat Strength. Disregard the supply state of the defending unit for this purpose. C. For their part, the Israelis did not want to be captured by the Egyptians or Syrians, and so they, too, defend at twice their basic Combat Strength if they cannot retreat.
12.1 Applicability
12.1.1 Excluded Combat
This rule does not apply to Israeli-Jordanian combat. For this purpose, non-Jordanian units starting in Jordan function as Jordanian units.
12.1.2 Overruns
This rule does not apply to overruns.
12.1.3 Requirement
A. This rule is applied when the Combat Strengths are calculated. B. A unit's strength is only increased under this rule if it cannot retreat a single hex. C. A unit that winds up having to retreat farther than it can, is eliminated as any unit would be.
Example: Egyptian Unit A is attacked by Israeli Unit X. There is one hex adjacent to it to which it can retreat. Therefore, it is not doubled. The attack is resolved using a +2 Attack Superiority with a result of a retreat of two hexes. Egyptian infantry must always retreat two hexes if it has to retreat at all. The unit cannot retreat two hexes because of the rough terrain hexes and the ZOCs of Israeli Units X and Y; it is, therefore, eliminated.
12.2 Waiving Israeli ZOCs
A. If an Israeli ZOC, rather than an Israeli unit, is blocking an otherwise possible retreat route, the Israeli side may choose to waive that particular ZOC for retreat purposes only. B. If the zone is waived, the defending unit may retreat through that specified ZOC (only), and combat is calculated on the basis that the unit can retreat. C. The unit still may be eliminated by not being able to retreat the full number of hexes required. D. The Israeli side must declare the waiver of the ZOC before the combat is calculated. E. If the ZOC is being waived, it still blocks supply. F. The waiver refers only to the specific combat designated by the Israeli side.
13.0 Jordanian Participation
The Arab countries are not known for their close cooperation with each other; and despite Mutual Defense Pacts and the like, one country's fighting a war does not necessarily mean another is going to join the war. By June of 1967, Syria had been shelling Israel for months, and Egypt had blockaded Israel's access to the Red Sea, kicked the UN peace keeping force out of the Sinai, and was mobilizing its forces. Israel struck. But Israel did not want to fight Jordan, so informed Jordan's King Hussein. Hussein chose to join the war, but there was a chance he would have stayed out of it.
During each Jordanian Participation Phase, the Arab side rolls the die to determine if Jordan will join the war. On a 1-4, Jordan joins the war.
13.1 Time Limit
The Jordanian Participation Phase is only executed until Jordan joins the war or until the end of Turn 4. If Jordan has not entered the war by the end of Turn 4, Jordan will not enter the war.
13.2 Limitations Prior to Jordanian Entry
A. Israel and Jordan may not attack or advance across each other's borders. B. ZOCs do not extend across those borders. C. Jordanian units may move within Jordan before they enter the war.
13.3 After Jordanian Entry
A. All units may freely cross borders and attack. B. All ZOCs function normally. C. The bridges across the Jordan River are considered destroyed.
14.0 Arab Command Control
The Egyptian and Syrian command was largely unorganized, ill-trained, slow to respond, panicky, and uncommunicative. In addition, a large part of the information that did come across their radios was simply wrong, and probably did them more harm than good. At various times many of their units could not fight effectively and/or retreated without any (imagined) necessity.
A. To simulate this situation, Egyptian and Syrian units are subject to a random loss of command control. B. The Arab side must roll the die each Command Control Phase, consulting the ACCT. C. Invert all units in the hexes whose last digits correspond to the digits in the result. Each of these units must move its full supply-modified MA, within all normal terrain and air strike restrictions directly (i.e., in as straight a path as possible) towards a supply source, preferably toward or along a road. D. These units may not move into an Israeli ZOC, nor may they attack. The units are flipped face-up at the end of the turn.
14.1 Units Not Affected
These units are not subject to loss of command control:
- All units starting the game in Jordan.
- Syrian units in the Syrian fortified positions.
14.2 Movement of Affected Units
A. Units that have lost command control do not stop if they reach the map edge with unexpended MPs. They, instead, exit the map. B. Exited units may not return. They do not count as destroyed units for purposes of calculating Arab loss of command control (14.3). C. Movement dictated by a loss of command control is the only movement an affected unit may execute in that turn. D. If an affected unit cannot move within these restrictions, it does not move at all, but it is still prohibited from attacking.
14.3 How to Use The ACCT
A. The number at the top of the column corresponds to the total number of SPs that the Egyptian forces have lost prior to a given Arab Command Control Phase, including all losses on previous turns. Exclude the units starting in Jordan from this total. B. A given column (and all the columns to the left of it) is used whenever the point losses equal or exceed the number at its top. C. There are three columns with 0 at the top; all are used. D. Syrian units always use the four most leftward columns, regardless of the Syrian point losses. E. Roll a die. The number on the die corresponds to the row (reading left to right) to be used that Arab Command Control Phase. F. All the digits in the row and columns correspond to the last digits of hex numbers on the map. Units on those hexes suffer a loss of command control.
Example: It is Turn 5, and the Egyptians have lost 11 SPs. The die roll is four. Units on hexes ending in 4, 0, 6, 2, and 8 have lost command control for that turn.
(The Arab Command Control Table is given under Charts and Tables at the end of this document.)
15.0 Trucks
A. Trucks are used to speed the movement of infantry. Entrucking takes time, and the combat ability of entrucked units is impaired. B. It takes a full friendly Movement Phase for a non-mechanized unit to entruck, during which turn it may not move. C. Place an entrucked marker on the unit that becomes entrucked at the end of the friendly Movement Phase. It costs 2 MPs (from the entrucked MA) for an entrucked unit to detruck. D. Neither SUs nor SAMs may be entrucked.
15.1 Entrucked Movement
A. While entrucked, the unit moves exactly as if it were a mechanized unit of its country, represented by the truck marker's MA. B. A unit may not move after detrucking in the same player-turn it detrucks. C. Entrucked units may not Overrun. D. Entrucked units stack and unstack normally.
15.2 ZOCs
A. While entrucked, the unit has no ZOC. B. Units may freely entruck and detruck in an EZOC.
15.3 Combat Effects
A. An entrucked unit may not attack. B. An entrucked unit, if attacked, immediately detrucks. When that occurs, detrucking does not expend any MPs. It then defends normally. C. Enemy units may not attack entrucked units if they cannot attack the unit when detrucked (e.g., due to insufficient strength). D. An entrucked unit may detruck in an EZOC and attack during the same player-turn if the unit has sufficient MPs to move adjacent and to detruck.
15.4 Truck Marker Allocation
15.4.1 National Restrictions
A. The Arab side may have only one unit per Arab country (with all units starting the game in Jordan functioning as Jordanian units) entrucked at any one time. B. The Israeli side may entruck up to six units (the number of markers it has).
15.4.2 Truck Markers
A. Truck markers are markers, not units; they have no function by themselves. B. Truck markers cannot be captured or destroyed.
16.0 Air Strikes
Israel destroyed the Arab air forces at the beginning of the war. Israel then made good use of its air force to support ground actions and to disrupt movement of Arab troops. The ground support missions have been factored into the combat system. The disruption missions have been left to the discretion of the Israeli side.
16.1 In General
A. The Israeli side has four Air Strike markers. These are placed anywhere on the map at the end of the Israeli Combat Phase, and removed at the end of the following Arab Combat Phase. B. The Air Strike markers are not available to the Israeli side during Turn 1 as the Israeli Air Force is considered to be busy destroying the Egyptian Air Force. C. An Air Strike marker is not a unit and has none of the attributes of a unit.
16.2 Movement Effects
A. Each Air Strike marker adds 3 MPs to the cost of leaving the hex it is placed on. B. More than one Air Strike marker may be placed on a given hex. The effect is additive; thus, two markers cause a penalty of 6 MPs. C. If leaving a hex would violate a unit's MA, the unit may not leave that hex. D. An Air Strike does not affect units entering a hex. E. Air Strikes never affect Israeli units.
17.0 Airmobile Battalion
The Israelis had one airmobile battalion which in the actual campaign they used against Syria to help break the latter's fortified line.
A. The airmobile battalion has a range of 15 hexes. B. Airmobile movement functions in all ways as normal movement except that it is not affected in any way by any intervening terrain or units.
17.1 Restrictions on Airmobile Movement
A. To use its airmobile capacity, the airmobile battalion must be able to trace a line of hexes (any number in length) free of EZOCs or enemy units to a hex from which a valid supply line may be traced (9.2). This line may not be traced through Trans-Jordan unless Israeli units may enter Trans-Jordan. It may be traced through other impassable terrain. B. The airmobile battalion cannot use its airmobile capacity on the two turns immediately following a turn in which it is used. C. The airmobile battalion may not land in or take off from an EZOC. It may not land in terrain prohibited to Israeli infantry.
17.2 Ground Movement
A. The Airmobile Battalion can move as a normal infantry unit if desired. Its ground MA is one. B. The battalion cannot use ground movement in the same phase it uses its airmobile capacity. It may not use entrucked movement.
17.3 Automatic Supply
The airmobile battalion is automatically supplied the turn it uses its airmobile capacity and the two subsequent turns.
18.0 Fortified Settlements and Cities
Certain Israeli settlements are fortified. These are indicated on the map. They have an intrinsic defense strength and have an inhibiting effect on Arab movement. They function in all ways as terrain, except in that they may be destroyed.
18.1 Fortified Settlements
18.1.1 In General
A. Fortified settlements have a defensive strength of two. A fortified settlement can only be attacked with an Attack Superiority of at least +4, in which case it is automatically destroyed. B. Place a DES marker on any fortified settlement that is destroyed. It then no longer exists for any purpose.
18.1.2 Arab Entry
A. No Arab unit may ever enter an intact Fortified Settlement. This applies to retreats, advances after combat, and overruns, as well as normal movement. B. The attacker may advance after combat into a fortified settlement hex in the Combat Phase it is destroyed.
18.1.3 Israeli Unit on Settlement
A. If there is an Israeli unit on a fortified settlement, the settlement cannot be attacked; only the unit on the settlement. In such a case, do not add the defensive strength of the settlement to the unit. B. The settlement cannot suffer any result from such combat. C. Settlements themselves can only be attacked when unoccupied by Israeli units (18.1.1).
18.2 Cities
A. Cities have an intrinsic defensive strength of four, added to any friendly unit defending in it. However, the city still is not affected by such combat. In all other ways, cities function exactly like fortified settlements. B. This rule applies to Arab cities as well. C. A destroyed Israeli city is no longer a supply source.
18.3 Syrian Forts
A. Syrian forts are not fortified settlements. They have no intrinsic defense strength and they cannot be destroyed. B. Israeli units may enter an unoccupied Syrian fort hex without having to attack the hex itself. C. Syrian 1967 forts in the Golan Heights do not exist in the later scenarios.
19.0 Reinforcements
A. The only reinforcements in the 1967 Scenarios are three Iraqi brigades. They arrive together at hex 3909 or 3915 (Arab side's choice) in Turn 8 at the beginning of the Arab player-turn. B. They may move and fight normally in that player-turn. C. These function in all ways as Jordanian units. D. No reinforcement in any scenario may enter in an EZOC. If its entry hex is enemy-controlled, the unit should enter on the nearest supplied hex which is not in an EZOC. This also applies to units that are scheduled to appear in a specific hex on the map.
20.0 How to Set Up
A. The players agree in any mutually acceptable manner which scenario is to be played and who is to play which side. B. Next, each side places its units on the map according to the appropriate Historical Deployment Chart and/or any other instructions given in the scenario. The game then begins.
20.1 1967 Historical Orders of Battle
20.1.1 Israel
| Hex | Type | Strength-MA | Unit ID |
|---|---|---|---|
| 2321 | arm | 7-8 | Mnhm |
| 2323 | para | 4-1 | Rful |
| 2323 | arm | 9-8 | Iska |
| 2323 | arm | 7-8 | Uri |
| 2420 | arm | 9-8 | Shml |
| 2423 | arm | 2-8 | Ysrl |
| 2423 | recce |
6 x Truck markers; 4 x Air Strike markers
20.1.2 Egypt
| Hex | Type | Strength-MA | Unit ID |
|---|---|---|---|
| 1227 | arm | 5-5 | |
| 1329 | arm | 5-5 | |
| 1430 | mech | 3-5 | |
| 1726 | mech | 3-4 | |
| 1726 | mech | 3-4 | |
| 1726 | arm | 5-5 | 141 |
| 1733 | mech |
20.1.3 Syria
| Hex | Type | Strength-MA | Unit ID |
|---|---|---|---|
| 3502 | inf | 1-1 | 8 |
| 3503 | inf | 1-1 | 90 |
| 3503 | inf | 1-1 | 11 |
| 3504 | inf | 1-1 | 32 |
| 3505 | inf | 1-1 | 19 |
| 3507 | inf | 1-1 | 123 |
| 3603 | arm |
20.1.4 Jordan
| Hex | Type | Strength-MA | Unit ID |
|---|---|---|---|
| 2911 | inf | 3-1 | |
| 2914 | inf | 3-1 | |
| 2915 | inf (Egy) | 1-1 | |
| 3017 | inf | 6-1 | 26 |
| 3109 | inf | 6-1 | 25 |
| 3111 | inf (Egy) | 1-1 | |
| 3116 | inf |
20.2 Israeli Mobilization
(not used in the Historical Scenario)
| Turn | Hex | Type | Strength-MA |
|---|---|---|---|
| At start | Free | arm X | 7-8 |
| At start | Free | arm II | 2-8 |
| At start | Free | arm II | 2-8 |
| At start | Free | arm II | 2-8 |
| At start | Free | recce II | 1-8 |
| At start | Free | inf X | 6-1 |
| At start | Free |
A. All units scheduled to be mobilized after the start of the game are placed facedown on the map at the start of the game. In this non-mobilized state, they cannot move nor attack nor exert a ZOC. B. They are turned faceup and function normally, at the beginning of their turn of mobilization or sooner if an Arab unit attacks or moves adjacent to them. In the latter instance, the unit is immediately mobilized as soon as the Arab unit enters Israel and comes adjacent.
21.0 Victory Conditions
A. The Israeli side wins the game by receiving Victory Points (VPs) for achieving certain goals. B. The Arab side wins by delaying or preventing the Israeli side from achieving its goals or achieving goals of its own.
21.1 Israeli Goals
| VPs | ID | Goal |
|---|---|---|
| 15 | A | Being the last to pass through or occupy all Suez Crossing hexes on the east side of Canal. |
| 5 | B | Clearing all Arab units from the Syrian portion of the map. |
| 10 | C | Clearing all Arab units from the West Bank. |
A. Goal C cannot be achieved unless Jordan enters the war. B. The Israeli side receives additional VPs for each turn before Turn 12 that it accomplishes each goal above at the following rates:
| Goal | Bonus VPs* |
|---|---|
| A | 5 |
| B | 1 |
| C | 2 |
* per turn
21.2 Arab Goals
| VPs | Goal |
|---|---|
| 10 | Destroying and occupying an Israeli city while having no Israeli unit adjacent to it |
| 2 | Destroying Israeli Fortified Settlements |
| 1 | Destroying Israeli combat unit SPs (per SP) |
21.3 Notes on Victory Conditions
A. Units that leave the map may never return. B. All Egyptian units cease all movement and combat when Israeli Goal A is achieved. C. All Jordanian units (and other units starting the game in Jordan) cease all movement and combat when Israeli Goal C is achieved. D. As there is nothing for the Arab side to do after all three Israeli goals are achieved, the game may be ended. The VP totals are still arrived at on the basis of a full twelve turn game, even if all three Israeli goals are achieved before twelve turns have elapsed.
21.4 Determining the Winner
21.4.1 In General
The levels of victory given below are for the purposes of evaluating the players' performance relative to each other. The levels do not reflect real-world victories. The relative competence and strength of the opposing armies taking part in the historical wars dictated a decisive Israeli victory. What the given levels do measure is the speed at which the Israeli victory is actually achieved.
21.4.2 Victory Levels
| Net VPs* | Victory Level |
|---|---|
| 75+ | Decisive Israeli |
| 70-74 | Substantive Israeli |
| 65-69 | Marginal Israeli |
| 55-64 | Draw |
| 45-54 | Marginal Arab |
| 35-44 | Substantive Arab |
| ≤ 34 | Decisive Arab |
* Israeli total minus Arab total
If Jordan does not enter the war, subtract 16 from all the above numbers.
22.0 The 1967 Scenarios
The rules above are complete for the 1967 Historical Scenario. In the other scenarios one or more of these rules may be suspended or modified, and new rules may be added.
22.1 Faster Iraqi Response
The Iraqi units arriving on Game 8 could have arrived sooner had Iraqi-Jordanian cooperation and coordination been better.
The Iraqi Reinforcements arrive on Turn 2.
22.2 Free Setup Scenario
It was possible, though rather unlikely, that Israel would have let the Arabs have an extra day or two to get their units in a better position - through a reluctance to take the first major step in the war (the Arabs had already taken the first minor steps, i.e., everything short of invasion).
This scenario can be played two ways:
- Assume the Israelis still strike first.
- Assume the Arabs strike first.
22.2.1 Israeli First Strike
For the Israeli first strike, retain all rules except setup.
22.2.2 Arab First Strike
A. For Arab first strike, retain all rules except setup. B. The Israeli side may not use Air Strikes until Turn 3. C. The Arab side uses the Arab First Strike Increment on the Command Control Chart.
22.2.3 Setup
A. In either case, the Arab side sets up its units first. B. All units may be set up anywhere in the country they normally start in with the exception that the Palestinian units (Egyptian units designated PAL) must start in the Gaza Strip (2418, 2318, 2320, 2220).
22.3 Increased Arab Cooperation Scenario
One of the major problems of the Arabs was the fact that they did not really like or trust each other much more than they trusted the Israelis. This scenario is to simulate the possible effects of the Arab nations fighting Israel as a unified force.
22.3.1 Jordan
Jordan automatically enters the war at the start.
22.3.2 Arab Cooperation
All Arab forces may enter the territory of any Arab nation, may draw supply from any Arab supply source, and may attack Israeli units in the same combat.
22.3.3 Early End
Jordanian and Egyptian units may function normally through Turn 11, regardless of Israeli Goal (21.3.2, 21.3.3) achievement.
22.4 Better Syrian and Egyptian Officer Corps
The other major problem of the Arabs was the very low quality of the Egyptian and Syrian officers at all levels. While historically this scenario could only have happened with several years preparation on the Arabs' part, it can be used to show what the Israelis might have had to contend with.
22.4.1 Command Control
The Arab Command Control Rule is suspended.
22.4.2 Retreats
The Egyptians and Syrians retreat the same number of hexes as everyone else.
22.5 Israel Napping Scenario
This scenario demonstrates what could have happened in the unlikely event that Israel had not mobilized before the Arabs invaded.
A. The Arab side sets up per the Historical Scenario. B. The Israeli side uses the 1967 Mobilization Chart. The units arrive at the hex indicated on the beginning of the specified Israeli player-turn. C. The Arab side moves first. D. The Israeli side may not use air strikes until Turn 3. E. Use the Arab First Strike Increments on the Command Control Chart.
22.6 Arab Fantasy Scenario
This scenario represents the fondest dreams (and some of the speeches) of the Arab leaders. There was no possibility that anything even remotely resembling this scenario could have occurred. However, some Arab leaders still like to talk as if such a thing were possible.
A. Use the Free Setup Rules (22.2). B. Use the Increased Arab Cooperation Rules (22.3). C. Use the Better Syrian and Egyptian Officer Corps Rules (22.4). D. The Iraqi units all start the game in Jordan. E. The Israeli side may not use air strikes. F. All bridges remain functional.
Jihad Variation: For a really good-old-fashioned Jihad, have the Israeli side use the Israel Napping Rules (22.5) instead of the Free Setup Rules.
22.7 1967 Victory Level Adjustments
The 1967 Historical Victory levels were arrived at by observation of what really happened. The ahistorical scenarios represent political and/or military situations which did not occur, and hence the following modifications of the Victory Levels are of necessity somewhat hypothetical. Modify the VPs for each victory level in 21.4.2 to obtain the levels for each of the 1967 ahistorical scenarios:
| VP Change | Scenario |
|---|---|
| -5 | Faster Iraqi Response (22.1) |
| -15 | Free Set-up: Israeli First Strike (22.2.1) |
| -20 | Free Set-up: Arab First Strike (22.2.2) |
| -10 | Increased Arab Cooperation (22.3) |
| -25 | Better Syrian and Egyptian Officer Corps (22.4) |
| -25 | Israel Napping (22.5) |
| -45 | Arab Fantasy (22.6) |
| -50 | Jihad (22.6) |
23.0 The 1956 Scenarios
The 1956 War was different from the 1967 War in many ways. The armies were smaller, weaker, and less mobile. The immediate cause of the war was the nationalization of the Suez Canal, which also caused the British and French to attack Egypt. Jordan and Syria were not involved, although Jordanian entry was a threat that the Israelis had to be prepared to meet. The Israelis later gave up what they gained in this war because of international pressure.
The rules for the 1956 Scenarios are the same as for the 1967 Historical Scenario except as given below:
23.1 1956 General Rules
A. Israeli Automatic Supply lasts only four turns. B. For Israeli movement and supply purposes, treat any Track/Sand hex as a Sand (only) hex. C. Israeli Brigade 9 is never OOS. D. The Israeli side may have no more than ten brigade and two battalion size units in the Sinai at any time. E. The Israeli side may paradrop the paratroop battalion.
- It may be paradropped a maximum of twice.
- There is no distance restriction on the paradrop. The battalion may take off from any clear terrain hex not in an EZOC. In addition, the takeoff hex must be able to trace a valid supply line (10.1.2).
- The battalion may be dropped anywhere on the map except in enemy occupied or controlled hexes, or in terrain prohibited to Israeli infantry.
- Except as detailed here, the paratroop battalion functions the same as the airmobile battalion of 1967.
- The paratroop brigade may not paradrop. F. Neither side may use air strikes. G. No units may entruck. H. The Arab Command Control Rule is not used until Turn 6; then use the Arab First Strike Increments on the Command Control Chart. Losses incurred before Turn 6 do count. I. Israeli units may not enter any hex adjacent to the Suez Canal. Goal A is now being the last to pass through hexes 0831, 0626 and 0623, plus eliminating the Egyptian unit at Sharm-el-Sheik (2251). Play Note: Use Israeli Controlled markers to indicate fulfilment of the Israeli Goal A Victory Conditions. J. No units may enter Syria. There are no Syrian units. K. The Game lasts 16 turns.
23.2 1956 Historical Scenario
A. Use the 1956 Historical Orders of Battle and Deployment and all 1956 Rules. B. Jordanian and Iraqi units are not used. C. The Egyptian unit at Sharm-el-Sheik (hex 2251) is completely immobile. A retreat combat result causes it to be eliminated.
23.3 Jordanian Intervention Scenario
The Jordanians and the Israelis skirmished about the same time as the Israelis fought the Egyptians, but large-scale fighting was avoided by both sides. The British were meddling in Jordanian affairs at the time and were using some Iraqi forces to push Jordan in the directions they wanted. One of those directions was to attack Israel. This scenario represents what might have happened if the Jordanians followed the British "suggestion."
A. Use the 1956 Historical Orders of Battle and Deployment. The Iraqis are placed at the start. B. Use the Jordanian Participation rule (13.0) instead of the 1956 General Rule (23.1.D). C. Jordan automatically enters on Turn 5 if it has not entered previously. D. Israel may attack and cross the Jordanian border on Turn 5 if it has not done so already.
Variation: Jordan automatically enters on Turn 1.
23.4 Semites Only Scenario
The Egyptians would have had more units to use against the Israelis if they had not had to contend with the Anglo-French force.
A. Use the Optimum Egyptian Order of Battle. B. All units may be deployed anywhere in the home country of the owning side as desired, except the Egyptian 21 battalion must set up at 2251. C. The Arab side sets up first. D. Jordanian and Iraqi units are not used.
23.5 Jihad Scenario
This scenario represents the best possible effort the Arabs could have made in 1956. Unlike the 1967 Jihad Scenario, this scenario does not postulate great improvements in the actual armies of the time, and therefore was historically possible, though still rather unlikely.
A. The Jordanians and Iraqis enter on Turn 1. B. Use the Semites Only Rules (23.5). C. The Arab player-turn is first in all turns.
23.6 1956 Victory Conditions and Levels
The 1956 Historical Scenario is even more one-sided than the 1967 Historical Scenario. Here too, the Victory Levels are based on the speed of the Israeli Victory.
23.6.1 Victory Conditions
A. All Goals are that same as in 1967 except that Israeli Goal B is eliminated. Israeli Goal A is modified per 1956 General Rule 23.1.I. B. The bonus points are awarded for each turn a Goal is achieved prior to Turn 16. C. All Arab Goals remain the same.
23.6.2 Victory Levels
(Reproduced exactly as printed in the source document, including its apparent numeric irregularities.)
| VPs | Victory Level |
|---|---|
| 60+ | Israeli Decisive |
| 22-29 | Israeli Substantive |
| 50-54 | Israeli Marginal |
| 45.49 | Draw |
| 40-44 | Arab Marginal |
| 35-39 | Arab Substantive |
| 30-34 | Arab Decisive |
23.6.3 Scenario Modifications
| VP Change | Scenario |
|---|---|
| 0 | Historical (23.2) |
| +22 | Jordanian Intervention (23.3) |
| +22 | Jordanian Intervention: Variation (23.3) |
| -45 | Semites Only (23.4) |
| -25 | Jihad (23.5) |
23.7 1956 Historical Orders of Battle and Deployment
23.7.1 Israel
| Hex | Type | Strength-MA | ID |
|---|---|---|---|
| 2321 | arm X | 6-8 | 27 |
| 2321 | inf X | 5-1 | |
| 2424 | inf X | 4-1 | 10 |
| 2424 | inf X | 5-1 | 4 |
| 2424 | arm X | 5-8 | 37 |
| 2524 | supply | •-1 | none |
| 2713 | mech X |
23.7.2 Egypt
| Hex | Type | Strength-MA | ID |
|---|---|---|---|
| 0424 | mech X | 4-5 | |
| 0428 | arm X | 6-5 | |
| 0630 | mech X | 2-5 | 2 |
| 1632 | camel II | 1-5 | 2 |
| 1821 | inf II | 2-1 | 4/11+ |
| 1821 | arm II | 1-5 | 3 |
| 1921 | inf II |
* This unit is completely immobile. A retreat combat result causes it to be eliminated.
23.7.3 Jordan
| Hex | Type | Strength-MA | ID |
|---|---|---|---|
| 3017 | inf X | 3-1 | none |
| 3114 | inf X | 3-1 | none |
| 3116 | inf X | 3-1 | none |
| 3212 | inf X | 3-1 | none |
| 3714 | arm II | 2-6 | RlGd |
23.7.4 Iraq
| Hex | Type | Strength-MA | ID |
|---|---|---|---|
| 3211 | 3 x mech X | 3-5 | none |
23.8 1956 Optimum Egyptian Order of Battle
A. Add the following to the Historical Order of Battle:
| Type | Strength-MA | ID |
|---|---|---|
| 1 x mech X | 5-5 | 2 |
| 4 x mech X | 4-5 | none |
B. Remove the following from the Historical Order of Battle:
| Type | Strength-MA | ID |
|---|---|---|
| 1 x mech X | 2-5 | 2 |
24.0 The 1973 Scenarios
The 1973 war was quite different from the previous wars. The Arab leadership had improved somewhat, and the Arab armies benefitted from massive quantities of Soviet Surface-to-Air missiles (SAMs) and antitank rockets and missiles. The quantities and great effectiveness of these weapon systems greatly increased the Arab strength, especially defensively. The 1973 war was not a quick rout. The pace of the war had changed. Accordingly, there are many special rules and several basic changes in the game system.
All 1967 rules apply except as noted or superseded below.
24.1 Political Geography
For all game purposes, Israel now includes the Occupied Territories. These consist of the West Bank (that part of pre-1967 Jordan west of the Jordan River and north and west of the Dead Sea); the Golan Heights (that part of pre-1967 Syria west of the 1970s Fortified Settlements inclusive); and the Sinai.
24.2 Sequence of Play
There is a new Sequence of Play; the phase titles have the same meanings as in 1967. A turn now represents 24 hours.
A. Arab Player-Turn
- First Supply Phase
- First Movement Phase
- Combat Phase
- Jordanian Participation Phase
- Second Supply Phase
- Second Movement Phase B. Israeli Player-Turn
- Repeat the phases above with the Israeli side as the phasing side, omitting the Jordanian Participation Phase. C. Game Turn Indication Phase
24.3 Movement In General
A. Arab units move as Israeli units of the respective type did in 1967, ignoring the parentheses on the TEC. B. Israeli mechanized units may move as infantry in any given Movement Phase at the discretion of the Israeli side. A unit may not, however, move as both mechanized and infantry in the same phase. Israeli infantry (and mechanized moving as infantry) have a MA of 1. Israeli mechanized-type units only have to pay 1 MP to traverse rough terrain/road hexsides in post-1967 Israel. C. Units may voluntarily exit the map or be forced off in a retreat. Such units may never reenter the map.
24.4 Movement Across The Suez Canal
24.4.1 Restrictions
A. Each side may move a maximum of six units across the Suez per turn (not per Movement Phase). B. Only two units per turn may cross a given Suez Canal hexside.
24.4.2 Advancing and Retreating Across the Canal
A. Units that advance after combat or retreat due to combat do not count against the six per turn crossing allowance or the two per hexside limit. B. Only one unit may advance or retreat after combat across the Canal per attacked hex. C. Any unit forced to retreat, but unable to because of this restriction is treated exactly like any other unit that cannot retreat when called for (i.e., it is eliminated).
24.4.3 Israeli Units
Israeli units may move across the Canal.
24.4.4 Movement Costs
A. It costs a total of 4 MPs to cross any canal hexside. B. Ferry Points have no meaning in 1973. C. When entering a sand/road or sand/track hex via a Suez Canal hexside, the movement effect of the Sand is ignored.
24.5 Combat
24.5.1 Arab Unit Basic Defense Strength
A. All Arab units defend at twice the strength printed on their counter. This is their new basic Defensive Strength. B. The basic defensive strength may be modified by supply and terrain and by the proximity of SAMs.
24.5.2 Special Retreat Rule for Israeli Mechanized Units
An Israeli mechanized unit may retreat as an infantry unit one hex into rough terrain only if it is a situation which would cause its elimination if it were to be required to retreat as a mechanized unit.
24.6 Supply
All supply rules (including Israeli automatic supply) are the same as the 1967 Scenario, except as follows:
24.6.1 Israeli Supply
The Israelis have no supply units. Instead, an Israeli unit is supplied if it can trace a supply path of no more than eight mechanized MPs to any road or clear terrain hex connected by a path of unblocked clear terrain or road hexes to an Israeli-held Israeli city.
24.6.2 Arab Supply
Arab units may trace a supply path through track hexsides in addition to road and clear hexsides.
24.6.3 Arab Units Attacking When OOS
When OOS, Arab units may attack at half their basic Strength (drop fractions).
24.6.4 MA of Arab Units OOS in Sand
Arab units in Sand-only hexes are OOS, but are considered to have a modified MA of four.
24.6.5 Israeli Airmobile Units
A. Israeli airmobile units are automatically in supply from the Movement Phase they land through the next two Israeli Movement Phases. B. Each airmobile unit must spend two Movement Phases on the ground between uses of its airmobile capacity.
24.6.6 Tracing Supply Across the Suez Canal
Supply may be traced by any unit through any Suez Canal hexside subject to the normal blocking of supply lines rules. In other words, ignore Suez Canal hexsides when tracing supply lines.
24.7 Fear and Arab Command Control
The Fear and Arab Command Control rules are suspended.
24.8 Jordanian Participation
24.8.1 Jordanian Entry Roll
Once each Jordanian Participation Phase the Arab side rolls a die. A. On a 1, the Arab side must send a Jordanian armored unit into Syria. B. The second time a 1 is rolled, the Arab side must send the second Jordanian armored unit into Syria. C. The third time a 1 is rolled, the Arab side must send a mechanized unit into Syria. D. The fourth time a 1 is rolled, Jordan fully enters the war.
24.8.2 Limits Prior to Entry
A. Before Jordan fully enters the war the restrictions from 13.2 apply. The restrictions are lifted for both the Arabs and Israelis after Jordan fully enters the war. B. Individual units sent to Syria per 24.8.1 are not restricted to the 13.2 limitations while in Syria or on the Syrian-Jordanian border. Such units may not enter or attack into the Golan Heights from Jordan, but they may do so from Syria.
24.8.3 Jordanian Participation Phase
There is no Jordanian Participation Phase until the whole Jordanian army is mobilized (Turn 4).
24.8.4 Arab Units Cleared From Syrian Portion
If and when all Arab units have been cleared from the Syrian portion of the map, all Jordanian units cease to move or have combat and lose their ZOCs if Jordan has not fully entered the war. There is no longer a Jordanian Participation Phase.
24.9 Arab Non-Cooperation, 1973 Style
The following are the only Arab non-cooperation rules that apply to 1973:
A. Syrian, Iraqi, and Egyptian units may not enter Jordan, unless they are forced to retreat into Jordan. They will retreat off the map in preference to retreating into Jordan. B. Once in Jordan all they may do is attempt to get back into the country they were pushed out of (by movement and/or combat). C. Syrian, Iraqi, and Jordanian units may not stack with each other; but they may participate in a joint attack.
Clarification: Non-Jordanian units which begin in Jordan function as Jordanian units and may stack with Jordanian units. Also, Arab units may not retreat into territory of a different Arab nation, i.e., Syrian units cannot retreat into Jordan.
24.10 SAM Units
24.10.1 Increased Basic Defensive Strength
A. All Arab units stacked with or within two hexes of a SAM have a basic defensive strength of four times the strength printed on their counter. B. Arab units three hexes away have a basic Defensive Strength of three times the strength printed on their counter. C. In each case count the hex the non-SAM is on and do not count the hex the SAM is on. D. The three hex range is referred to as the SAM's umbrella. E. Defensive strength adjustments due to terrain or supply effects are made after any adjustments due to a SAM umbrella.
24.10.2 Israeli Air Capability Under SAM Umbrella
A. Israeli airmobile units may not use their airmobile capacity under an SAM umbrella. B. Israeli Air Strike markers may not be placed under a SAM umbrella, except to attack a SAM. C. Israeli Fortified Settlements do not negate any effects of a SAM umbrella.
24.10.3 Attacks on SAMs
A SAM may be attacked as follows:
24.10.3.1 From the Air
A. Up to three Air Strike units may attack a given SAM. For this purpose, each Air Strike unit has a strength of 1, and each SAM has a strength of 1. Resolve combat in the normal manner. B. If a retreat result is achieved, the SAM must retreat the full number of hexes indicated; this is not considered a contradiction of 9.1. The SAM must retreat directly toward the nearest map edge unless blocked by an EZOC. C. If a retreat result is not achieved, remove one Air Strike marker from the game for ten turns. D. The Israeli side may not attack any SAMs if it has the use of fewer than three Air Strike markers left in the game. E. The presence of non-SAM units with the SAM does not affect an air attack. F. When SAMs are attacked from the air, the result is applied at the beginning of the Combat Phase, before the SAM effect on Arab defense is calculated.
Clarification: Israeli Air Strike markers may be used to attack a SAM unit under the umbrella of a second uninvolved SAM unit. Also, a SAM unit's defense strength of 1 is never modified for terrain or supply considerations.
24.10.3.2 From the Ground
A. A SAM alone in a hex has a defensive strength of 1. This strength is constant and is not affected by terrain or supply considerations or the SAM's umbrella. B. If in a hex with a friendly non-SAM unit, it does not add its defensive strength of one to the stack's defense. A SAM does suffer any result suffered by the stack and must retreat as a normal non-mechanized unit, but toward the map edge as given under air attacks. C. SAMs may be overrun in the normal manner.
24.11 SAM Attributes and Restrictions
A. A SAM has no offensive strength. B. A SAM moves as an infantry unit, but it may move only during the Second Movement Phase. C. A SAM may not cross the Suez Canal. D. A SAM may not reenter the map if forced off. E. A SAM must obey normal stacking rules. In addition, a stack may not contain more than one SAM. F. A SAM has no ZOC. G. A SAM cannot be entrucked.
24.12 The Bar Lev Line
24.12.1 Defense Strength and Attacks Against the Line
A. Each Bar Lev Line hex has an intrinsic defensive strength of 15. This strength is added to any Israeli units in the hex. It is not modified if OOS, but any OOS unit is affected by the lack of supply. B. Attacks against the Bar Lev Line hexes are a special case. The attack is resolved in the normal manner, with the following changes:
- On a 1 or 2, then the attack is successful, but the Arab side must remove an Egyptian unit.
- On a 3 or 4, the attack is successful and the Arab side does not have to remove a unit.
- A No Effect result has no effect.
24.12.2 Successful Attacks
A. When a successful attack has been made against a Bar Lev hex, place a DES marker on it, whether or not an Israeli unit was on the hex when it was attacked. B. Advance after combat is allowed. C. A Bar Lev hex with a DES marker is inoperative, and has no effect on anything. D. If an Israeli unit moves onto an inoperative Bar Lev hex, remove the DES marker. The hex functions thereafter as if a successful attack had never been made.
24.12.3 Other Attributes
A. Each Bar Lev hex acts in certain specific ways as if it were an Israeli unit. An Arab unit may not enter an operative Bar Lev hex. B. Each Bar Lev hex exerts a ZOC exactly like an Israeli unit, except that it does not extend across the Canal. C. A Bar Lev hex has the same effects on Arab ZOCs as an Israeli unit. D. It loses these attributes while inoperative.
24.13 Garrisoning
24.13.1 Israel/Jordan
A. One of the 5-8 Israeli mechanized units that start the game in the West Bank must remain in the West Bank through Turn 2. B. Beginning with the end of Turn 3, the Israeli side must cover the Jordan River from the Dead Sea to the Sea of Galilee with brigade sized units or their ZOCs. This requirement continues until Jordan fully joins the war.
24.13.2 Israel/Syria
A. In the same manner, the Israeli side must cover any hex along the Syrian/Golan Heights map edges, and the Syrian/Golan Heights border with Jordan. B. Once one of these hexes is occupied by an Israeli unit or is in an Israeli ZOC, the Israeli side must keep it Israeli-occupied or in an Israeli ZOC, unless Arab units force the Israeli unit(s) away from the map edge or border.
24.14 Reinforcements
A. Reinforcements are placed at the beginning of the Movement Phase they are scheduled to appear. B. Israeli and Jordanian units appear at specific hexes on the map. These units do not pay the entry cost of the hex they appear on. If an enemy unit occupies, or was the last to occupy one of these hexes, the units appear at the closest supplied hex when scheduled. C. Egyptian and Syrian units enter at a map edge of the given country. D. Other Arab units enter at the Egyptian or Syrian map edges as indicated. E. Units that enter on a map edge do pay the cost of the hex they enter.
24.15 Egyptian Reserve Units
A. Nine Egyptian 4-4 mechanized units constitute the Egyptian reserve. These reserve units are not placed on the map until after at least one Israeli unit is on the west side of the Suez for two consecutive Israeli Movement Phases. B. Once activated, they appear as normal reinforcements at the rate of one unit per Arab Movement Phase.
24.16 Ending The Game: Ceasefire
The game ends by a ceasefire procedure that must be requested by either side. There are restrictions as to when a ceasefire may be requested.
24.16.1 Arab Request
A. The Arab side may request a ceasefire when a supplied Israeli brigade-sized unit has been on the western side of the Suez Canal for three consecutive Israeli Movement Phases. B. In games in which Jordan enters the war, the Arab Player may request a ceasefire if there is a supplied Israeli unit adjacent to Amman.
24.16.2 Israeli Request
The Israeli side may request a ceasefire while there is a supplied Egyptian unit east of El Arish (1821) exclusive, or while there is a supplied Arab unit inside of pre-1967 Israel.
24.16.3 Both Sides
Either side may always request a ceasefire after Turn 20. The game may also be ended at any time by mutual consent.
24.16.4 Procedure
A. A ceasefire may only be requested at the start of a turn. The requirements must be met at that time. B. The requesting side rolls a die before the first player-turn begins.
- On a 1-3, the ceasefire is declared by the UN, and the game ends at that point, with both sides' performances evaluated in terms of victory conditions.
- On a 4-6, the UN does not declare a ceasefire, but the requesting side may try again at the start of each subsequent turn, assuming the requirements are met.
24.17 Victory Conditions
24.17.1 Victory Points
A. The object is to score as many VPs as possible. B. Keep track of all units eliminated by each side during the game. Units retreated off a friendly map edge do not count for this total, except for SAMs, which do count. C. Enemy territory is defined as hexes that were enemy-held at the start of the game. Territory can only be captured by units in communication with their supply sources. A unit is in communication with its supply source if it is in supply or if it is linked to a supplied friendly unit by a continuous line of hexes occupied by friendly units or covered by uncontested ZOCs. A ZOC is contested when it is overlapped by an EZOC or an enemy unit. D. Enemy territory is captured when it is occupied by friendly units or covered by their uncontested ZOCs. Enemy hexes are also captured if they are out of communication (above) with a supply source. E. At the end of the game, determine which units are out of communication and remove them from the map. These units are considered as eliminated units for victory purposes. Then, count the number of enemy hexes each side has captured. F. VPs are awarded per the chart below.
| VPs | Side | Event |
|---|---|---|
| 2 | Arab | per eliminated Israeli unit |
| 2 | Arab | per occasion that the Israeli side loses the use of an Air Strike marker |
| 5 | Arab | per captured Israeli hex |
| 1 | Israeli | per eliminated Arab unit |
| 2 | Israeli | per captured Arab hex |
24.17.2 Victory Levels
Subtracting the Arab VPs from the Israeli VPs. Unlike the Victory Levels given for 1967, these levels do reflect real-world military victory levels.
| Net VPs* | Level of Victory |
|---|---|
| 50+ | Decisive Israeli |
| 30 to 49 | Substantive Israeli |
| 15 to 29 | Marginal Israeli |
| 0 to 14 | Draw |
| -15 to -1 | Marginal Arab |
| -16 to -30 | Substantive Arab |
| ≤-31 | Decisive Arab |
* Israeli VPs minus Arab VPs
24.18 How To Set Up and Play the Scenario
24.18.1 In General
Decide in any mutually agreeable manner who is to play which side. Then each side sets up as directed.
24.18.2 Turn 1 Sequence of Play
Turn 1 consists of an Arab Combat Phase followed by an Israeli player-turn complete except for a Combat Phase.
24.18.3 Turn 1 Fortification Strengths
A. On Turn 1, Israeli fortified settlements have an intrinsic Strength of 2, regardless of any terrain effects that would normally apply. B. The Bar Lev hexes each have a defensive strength of only 10, but terrain effects do apply normally.
24.19 1973 Israeli Mobilization
Reinforcements arrive during the Israeli player-turn.
24.19.1 At Start
| Hex | Type | Strength-MA |
|---|---|---|
| 0924 | arm | 9-8 |
| 0931 | mech | 5-8 |
| 1128 | arm | 9-8 |
| 1821 | airm | 2 (15) 1 |
| 2712 | airm | 2 (15) 1 |
| 3015 | airm | 2 (15) 1 |
| 3114 | mech | 5-8 |
| 3114 | mech | 5-8 |
| 3601 | mech para |
Air Strike Markers:
| Qty | Scenario |
|---|---|
| 6 | 1973 |
| 8 | Mid-70s |
24.19.2 Turn 1, 2nd Movement Phase
| Hex | Type | Strength-MA |
|---|---|---|
| 2519 | arm | 9-8 |
| 2519 | mech | 7-8 |
| 2712 | mech | 6-8 |
| 3015 | mech | 6-8 |
| 3206 | mech | 7-8 |
24.19.2 Turn 2, 1st Movement Phase
| Hex | Type | Strength-MA |
|---|---|---|
| 0924 | arm | 9-8 |
| 2519 | arm | 9-8 |
| 2519 | arm | 9-8 |
| 2712 | mech p | 6-8 |
| 3206 | mech p | 6-8 |
| 3015 | mech p | 6-8 |
| 3206 | arm | 9-8 |
24.19.3 Turn 2, 2nd Movement Phase
| Hex | Type | Strength-MA |
|---|---|---|
| 1733 | arm | 9-8 |
| 2519 | arm | 9-8 |
| 2712 | mech | 6-8 |
| 2713 | mech | 7-8 |
| 2713 | mech | 7-8 |
| 3206 | arm | 9-8 |
24.19.4 Turn 3, 1st Movement Phase
| Hex | Type | Strength-MA |
|---|---|---|
| 2712 | mech | 6-8 |
| 2713 | mech | 5-8 |
| 3015 | mech | 5-8 |
| 3015 | mech | 6-8 |
| 3206 | mech | 5-8 |
24.19.5 Mid 1970s Russian Intervention Scenario
Turn 12, 2nd Movement Phase
| Qty | Type | Strength-MA |
|---|---|---|
| 2 | US mar | 5-8 |
24.20 1973 Arab Mobilization: Egyptian Front
A. Reinforcements arrive during the Arab player-turn. B. All units are Egyptian unless otherwise noted.
| Key | Nation |
|---|---|
| K | Kuwaiti |
| L | Libyan |
| T | Tunisian |
| U | Soviet |
24.20.1 At Start
| Hexes | Qty | Type | Strength-MA |
|---|---|---|---|
| 0323, 0325, 0327, 0429, 0531 | 1 each | SAM | (1-1) |
All other at-start units may be deployed anywhere in Egypt.
| Qty | Type | Strength-MA |
|---|---|---|
| 2 | mech para | 4-5 |
| 4 | mech | 4-5 |
| 4 | mech | 5-4 |
| 4 | arm | 5-5 |
| 2 | mech | 4-4 |
| 1 | mech (K) | 2-6 |
24.20.2 Turn 2, 1st Movement Phase
Units appear on the Egyptian map edge.
| Qty | Type | Strength-MA |
|---|---|---|
| 3 | mech | 4-5 |
| 2 | arm | 5-5 |
| 2 | mech | 4-4 |
| 1 | mech | 5-4 |
24.20.3 Turn 2, 2nd Movement Phase
Units appear on the Egyptian map edge.
| Qty | Type | Strength-MA |
|---|---|---|
| 4 | mech | 4-5 |
| 3 | arm | 5-5 |
| 2 | mech | 4-4 |
24.20.4 Turn 5, 1st Movement Phase
| Qty | Type | Strength-MA |
|---|---|---|
| 1 | mech (T) | 4-4 |
24.20.5 Egyptian Reserve Units
See 24.15.
| Qty | Type | Strength-MA |
|---|---|---|
| 9 | mech | 4-4 |
24.20.6 1970s Scenario Reinforcements
24.20.6.1 Turn 4, 1st Movement Phase
| Qty | Type | Strength-MA |
|---|---|---|
| 1 | arm (L) | 4-5 |
| 1 | mech (L) | 3-5 |
24.20.6.2 Turn 11, 1st Movement Phase
| Qty | Type | Strength-MA |
|---|---|---|
| 2 | mech (U) | 6-6 |
| 1 | arm (U) | 7-6 |
| 1 | mar (U) | 3-6 |
24.21 1973 Arab Mobilization: Syrian Front
A. Reinforcements appear during the Arab player-turn. B. All units are Syrian unless otherwise noted. C. Reinforcements appear on Syrian map edge.
| Key | Nation |
|---|---|
| I | Iraqi |
| M | Moroccan |
| S | Saudi |
24.21.1 At Start
| Hex | Qty | Type | Strength-MA |
|---|---|---|---|
| 3803 | 1 | SAM | (1-1) |
All other at-start units may deploy anywhere in Syria.
| Qty | Type | Strength-MA |
|---|---|---|
| 6 | inf | 1-1 |
| 2 | arm | 2-5 |
| 2 | mech | 2-5 |
| 1 | mech (M) | 1-6 |
24.21.2 Turn 2, 1st Movement Phase
| Qty | Type | Strength-MA |
|---|---|---|
| 2 | inf | 1-1 |
| 1 | arm | 2-5 |
| 1 | mech | 2-5 |
1 x Truck marker available
24.21.3 Turn 2, 2nd Movement Phase
| Qty | Type | Strength-MA |
|---|---|---|
| 2 | inf | 1-1 |
| 2 | arm | 2-5 |
24.21.4 Turn 4, 1st Movement Phase
| Qty | Type | Strength-MA |
|---|---|---|
| 2 | arm (I) | 4-5 |
| 1 | mech (I) | 3-5 |
24.21.5 Turn 5, 1st Movement Phase
| Qty | Type | Strength-MA |
|---|---|---|
| 1 | mech (S) | 1-6 |
24.21.6 Mid 1970s Scenarios
| Qty | Type | Strength-MA |
|---|---|---|
| 1 | SAM | (1-1) |
This is in addition to the one given in 1973. See 25.1.B.
24.22 1973 Arab Mobilization: Jordanian Front
Reinforcements appear during the Arab player-turn.
24.22.1 At Start
| Hex | Qty | Type | Strength-MA |
|---|---|---|---|
| 3714 | 1 | mech | 6-6 |
| 3711 | 1 | inf | 5-6 |
| 3714 | 1 | arm | 4-1 |
1 x Truck marker available
24.22.2 Turn 2, 1st Movement Phase
(Printed as "2st Movement Phase" in the source.)
| Hex | Qty | Type | Strength-MA |
|---|---|---|---|
| 3711 | 1 | mech | 5-6 |
| 3714 | 1 | mech | 4-6 |
24.22.3 Turn 2, 2nd Movement Phase
| Hex | Qty | Type | Strength-MA |
|---|---|---|---|
| 3711 | 1 | arm | 6-6 |
24.22.4 Turn 3, 1st Movement Phase
| Hex | Qty | Type | Strength-MA |
|---|---|---|---|
| 3620 | 1 | mech | 5-6 |
| 3714 | 1 | mech | 5-6 |
24.22.5 Turn 3, 2nd Movement Phase
| Hex | Qty | Type | Strength-MA |
|---|---|---|---|
| 3711 | 1 | inf | 4-1 |
24.22.6 Turn 4, 1st Movement Phase
| Hex | Qty | Type | Strength-MA |
|---|---|---|---|
| 3711 | 1 | inf | 4-1 |
| 3714 | 1 | inf | 4-1 |
24.22.7 Mid-1970s Scenarios
| Qty | Type | Strength-MA |
|---|---|---|
| 1 | SAM | (1-1) |
See 25.1.B.
24.23 1973 Full Arab Cooperation Scenario
This Scenario demonstrates what might have happened if King Hussein had fully joined the war due to either a real desire or overwhelming Arab pressure. The Libyan leaders were among the most outspoken opponents of Israel, and their not joining the war was a bit of a surprise, considering all the other somewhat more moderate Arab countries that sent at least token forces. In this scenario we have also included, therefore, the maximum force the Libyans could have added to the effort.
A. The Arab non-cooperation rules are suspended. B. The Jordanian Participation rule is superseded by the following: There is no Jordanian Participation Phase. Jordanian units may freely enter Israel and attack as soon as the entire Jordanian Army is mobilized. C. Israeli units may not enter or attack into Jordan (nor do ZOCs extend across the Israeli-Jordanian border) until Jordanian units enter or attack into post-1967 Israel. D. The two Libyan units appear as reinforcements in Egypt on Turn 4, Movement Phase 2. E. The Jordanian units cease all movement and combat and lose their ZOC if there is a supplied Israeli brigade sized unit adjacent to Amman. Jordanian units outside of Jordan are removed from the map (but not counted as VPs). The Israeli-Jordanian end-game front line is then established. The Israeli side gains 10 VPs above those earned from the front, but can earn no more VPs for occupying more of Jordan. Israeli units may not move in Jordan except on or behind the established front. The only garrisoning requirement is the unit adjacent to Amman must stay there and one other brigade sized unit must remain in Jordan.
25.0 The Mid-1970s Scenarios
The history of the past quarter century seems to indicate that there is no assurance that the 1973 war will be the last war in the Middle East. The scenarios that follow represent a hypothetical war that could occur if any of several possible peace settlements break down. This hypothetical war is set in the 1974-77 period. Further in the future than that, our predictions become too unreliable. For the immediate future the armies involved will probably look much as they did before the 1973 war. The Arabs will probably get better on the offense (learning from the 1973 war and perhaps some additional outside training); and the Israelis will probably get better on the defense (more anti-tank rockets and the like) - effects which would cancel each other out. The Syrians will probably get more SAMs and the Jordanians will probably get some; but the Israelis will probably get more and better ECMs (electronic counter measures); so the individual SAMs would be less effective. The political field has the greatest capacity for change, so we provide several situations.
25.1 General Rules Changes
A. Except as noted in these general rules or in any of the following scenarios, all 1973 rules apply. B. SAMs may be placed anywhere on the owning country except in border hexes. Syria receives two SAMs and Jordan now gets one. C. A SAM umbrella only gives an Arab unit a basic defensive Strength three times the strength printed on their counter anywhere under the umbrella. D. SAMs may cross the Suez Canal. E. All special Turn 1 rules in 24.18.2 are suspended. In scenarios in which one or both sides do not start fully mobilized, the first player-turn does not have a Second Movement Phase, except to place reinforcements on the hex or map edge indicated. F. All Egyptian, Syrian, and Jordanian units appear one movement phase in advance of the 1973 schedule. G. The Jordanian rules 24.23.A and 24.23.E from the 1973 Full Arab Cooperation Scenario are used in all Mid-1970s scenarios.
25.2 Mid-1970s Hasty Attack Scenario
This scenario represents an Arab attempt to do what they tried to do in 1973 in approximately the same manner. It is assumed that the Israelis will not let their guard down on a holiday again, although little else is changed.
A. Use all the general rules for Mid-1970s. B. There are a few additions to the 1973 Mobilization tables for the Mid-1970s given on those tables.
25.3 Full Mobilization Scenario
This scenario represents what might happen if everybody mobilized fully before anybody attacked. This scenario also assumes that there had been no basic political or geographic changes in the region.
A. All units start on the map and may be set up anywhere in their home countries. The SAMs are still restricted by units of countries not on the map (and Saudi Arabia) are set up in the country they deployed in in 1973. (Sentence reproduced as printed in the source.) B. The Libyan units are used. C. The USSR and US units are not used.
Variation: Israeli First Strike. The Israeli player-turn precedes the Arab player-turn.
25.4 Improved Arab Logistics Scenario
In 1973 the Arabs did not demonstrate much improvement in operating in deep sand or in rough terrain. In this scenario the Arab can function as well in regard to terrain as the Israelis.
A. The Arabs use the 1973 Israeli supply rule 24.6. B. Arab mechanized units may move as infantry like the Israelis. See 24.32. C. Use the 1973 Mobilization with the 25.1.F modification.
Variation: Use the Full Mobilization rules instead of 25.4.C.
25.5 Soviet Intervention Scenario
In 1973 the Soviets intervened with supplies and threats (sometimes called diplomacy). In this scenario they also send some troops. In response, the US sends in the Marines a couple of days later.
A. The units are set up as in the Full Mobilization rules. B. The USSR and US units appear as reinforcements when indicated. C. The US units may make an amphibious landing anywhere behind Israeli lines. They may not move on the Movement Phase they land. D. The USSR and US units use the Israeli 1973 Supply rule.
25.6 Race For The Sinai Scenario
One possibility is that the Israelis will give back some of the land taken in 1967 and 1973. There is, of course, no way of knowing just what the Israelis would give back and what they would be granted in return. In this scenario the Israelis have given back the Sinai and the West Bank, except for Old Jerusalem. They have kept the Golan Heights. It is assumed that any of the returned territory would be demilitarized as part of the return agreement. There is no reason to be sure that such a settlement would make everyone happy and this scenario represents the peace breaking down.
A. Use the Full Mobilization rules, except that no units may start in the Sinai or the West Bank. In this scenario Old Jerusalem is considered part of Israel, not the West Bank. B. Units that were initially set up in either of those areas in 1973 may be deployed anywhere in Israel. C. The Arab side deploys first. D. The two reinforcements which appeared in Sinai appear instead at hex 2723. E. The Fortified Settlements in the West Bank, and the Bar Lev fortifications do not exist. F. The 1967 Suez Crossing Points may be used as in 1967. The 1973 Suez Crossing rule may be also used across non-Crossing Point hexsides.
Variation: Soviet Intervention. Add the USSR and US units as in the Soviet Intervention Scenario.
25.7 Mid-1970s Full Arab Cooperation Scenario
It is always possible that the Arabs will reconcile their differences and attack Israel as a truly united front.
A. Use the 1973 Full Arab Cooperation Scenario rules. B. Use the Full Mobilization rules.
25.8 Mid-1970s Jihad Scenario
A. Use the Race for the Sinai rules and the Full Arab Cooperation rules except as noted below. B. Israeli units appear per the 1973 Mobilization rules. C. The Israelis may not use any Air Strike markers. D. Bridges over the Jordan remain functional throughout the game.
25.9 Mid-1970s Victory Conditions
A. In all scenarios in which Israel starts the game with the Sinai, use the 1973 victory conditions and victory levels in 24.17. Players will note that certain scenarios make it easier or harder for each side and should take this into account in evaluating each side's performance. B. In the scenarios in which Israel does not start with the Sinai, the same VPs as in 1973 are awarded for destroying enemy units, but the territorial goals are changed per 25.9.1.
25.9.1 Israeli Territorial Goals
Be the last to pass through or occupy any of the following:
| VPs | Territory |
|---|---|
| 10 | All the 1973 Bar Lev hexes |
| 20 | All the hexes along the west side of the Canal |
| 5 | Port Said* |
| 5 | Suez* |
| 10 | a hex adjacent to Amman** |
* not awarded with VPs for all hexes on west side of Canal ** See special Amman rule (24.23.E)
Clear all Arab units from:
| VPs | Location |
|---|---|
| 10 | West Bank |
| 5 | Syrian portion of the map |
| 15 | Egyptian portion of the map 0533 and north |
25.9.2 Arab Territorial Goals
(Numbered 26.9.2 in the source.) Being the first to pass through or occupy any of the following:
| VPs | Location |
|---|---|
| 15 | Old Jerusalem |
| 15 | New Jerusalem |
| 10 | Haifa |
| 15 | Tel Aviv |
| 10 | Eilat |
| 5 | Having any supplied Arab unit in pre-1967 Israel at end of game |
25.9.3 Victory Levels
(Numbered 26.9.3 in the source.)
| Net VPs* | Level |
|---|---|
| 31+ | Decisive Israeli |
| 21 to 30 | Substantive Israeli |
| 11 to 20 | Marginal Israeli |
| 0 to 10 | Draw |
| -1 to -10 | Marginal Arab |
| -11 to -20 | Substantive Arab |
| ≤ -21 | Decisive Arab |
* Israeli VPs less Arab VPs
26.0 Designer's Notes
For those of you who do not regularly read SPI's publications Strategy & Tactics and MOVES magazines, we'd like to bring you up to date on how Sinai came to be designed. The project was actually begun early in 1973, and up until the 1973 war, the main scenario in the game was the 1967 scenario. Up until October 6th, Sinai consisted of only three scenarios instead of the present four. There was a 1956 scenario, a 1967 scenario and a hypothetical mid-1970s scenario.
To be quite honest, our 1970s scenario wasn't a hundred percent accurate. The one important element that we missed was that the Israelis would not keep up with developments in Egyptian anti-aircraft capabilities. Now we did know about the SAM complex that the Egyptians had constructed. We did know that it consisted of high and low-level antiaircraft missiles. We also knew that the United States Air Force had developed a wide-range ECM (electronic counter measures) which could fairly easily handle whatever electronic and missile anti-aircraft defenses the Arabs could come up with. SAM 6, we had discovered, is becoming somewhat overrated. It's a newer missile than the SAM 3 which it will eventually replace. It's certainly more efficient, but it is not much less susceptible to ECM. The point we are making here is that the Israelis did not bother to get the ECM to defeat the wide-range of Arab electronically guided anti-aircraft missiles. Because the Israelis did not do this, they took quite a beating in the air in the early stages of the war.
Aside from that, we pretty much had figured out what would happen in a hypothetical war, a hypothetical war which became a real war in early October. Our order of battle, with a few modifications, is essentially correct.
There were some things in the October war which we saw as possible, but not very probable, one of which was the fact that the Egyptians could get across the Canal. We had that pretty much always happening in our mid-1970s scenario. This is simply a matter of arithmetic. The Israeli standing army only consisted of about seven brigades. The Egyptian standing army is much stronger. They could get across the Canal. But then, their best strategy was simply to sit there and gain points for having occupied territory previously held by the Israelis.
This tactic was made even more viable with the addition of the improved Arab anti-aircraft defenses. This made the Arabs much stronger in defense because the Israelis could not use their air force fully. But because the Arabs now had a SAM umbrella, they could also strike out and grab even more territory on the east bank of the Canal. They did not do this. Even more surprisingly, they did not even try to do this until the Israelis had defeated the Syrians in the north and were reinforcing their Sinai front with additional units. The best time for the Egyptians to have tried to grab additional east bank terrain was early in the war, within the first week and no later. They did not do this, and this is one of those mystifying things which we can't quite figure out. We have played a number of games of our 1973 scenario, and the Egyptians, if properly handled, can cause considerable damage.
Fortunately, in a perverse way, the 1973 war made Sinai a much better game. The 1967 scenario wasn't all that much of a challenge. It was pretty much an Israeli race against time. There was no doubt that they would get to the Suez Canal. It was simply a matter of how fast. The 1956 scenario was pretty much the same thing. But the 1973 scenario and the new mid-1970s scenarios are much more tense and exciting as a game. They also show, as do all the scenarios, the tactical and strategic positions the Israelis are in. We think the game is quite a success. It's still a bit lopsided, but it has to be if Israel expects to survive.
Charts and Tables
(From the companion file "Sinai Charts and Tables (revised and reformatted)". Terrain symbols are shown graphically in the source; they are named here.)
Terrain Effects Chart
| Terrain | Movement Non-Mech | Movement Mech | Combat |
|---|---|---|---|
| Clear | 1 | 1 | NA |
| Sand | (1) | (4) | NA |
| Sand/Road | 1 | 1 | NA |
| Sand/Track | 1 | (2) | NA |
| Rough | (1) | P | +2 |
| Rough/Road | 1 | 2 | +2 |
| Rough/Track | (1) |
Special Roads and Tracks
| Symbol | 56 | 67 | 73 | Notes |
|---|---|---|---|---|
| Road (brown line with cross ticks) | X | R | R | |
| Road/track (brown line with cross ticks, second form) | T | R | R | |
| Road (teal line) | X | X | R | |
| Track (dashed brown arrow) | T | T | T | May be used as a track only in that direction. Entrucked units may not use it as a track at all. |
X: Does not exist at that time. T: Track. R: Road.
Terrain Explanations
| Item | Explanation |
|---|---|
| Clear | Has no other terrain in the hex. Roads and Tracks in Clear give no movement benefit. |
| Rough | Any hex partially or fully covered with Rough. |
| Sand | Any hex partially or fully covered with Sand. |
| Swamp | Any hex partially or fully covered with Swamp. |
| Sea | Any hex partially or fully covered with Sea. Hexsides have double lines to indicate Sea. |
| NA | Terrain does not affect movement/combat. |
| P | Units may not enter or have combat. |
| Roads/Tracks | Units must enter a hex using the Road/Track to gain the movement benefit. Units allowed in certain terrain when using a Road/Track must enter and exit using the Road/Track. |
| Bridge | Negates river cost. If bridge is destroyed, normal river crossing costs apply, but the hexside is still treated as a Road hexside for movement and supply. |
| Parentheses |
1973 terrain features exist in all 1970s scenarios.
Combat Results Table
Columns are Attack Superiority. Blank means no effect.
| Die Roll | -1 | 0 | +1 | +2 | +3 | +4 | +5 | +6 | +7 | ≥ +8 |
|---|---|---|---|---|---|---|---|---|---|---|
| 1 | 1 | 1 | 2 | 2 | 2 | 3 | 3 | 3 | 3 | 4 |
| 2 | 1 | 1 | 2 | 2 | 2 | 3 | 3 | 3 |
Attacks at less than -1 are not allowed. Result is retreat # hexes (9.0). Blank means no effect.
Arab Command Control Table
Columns are Egyptian Point Losses; numbers in parentheses are First Strike Increments.
| Die Roll | 0 (3) | 0 (6) | 0 (9) | 5 (12) | 10 (15) | 15 (18) |
|---|---|---|---|---|---|---|
| 1 | 1 | 7 | 3 | 9 | 5 | 2 |
| 2 | 2 | 8 | 4 | 0 | 6 | 3 |
| 3 | 3 | 9 | 5 | 1 | 7 | 4 |
| 4 | 4 | 0 | 6 |
Use first four columns for Syria. Numbers in parentheses are First Strike Increments. (The source reads "Use first for columns for Syria", matching 14.3.D: Syrian units always use the four most leftward columns.)
Turn Record Track
Turn spaces numbered 1 to 30 (three rows of ten).