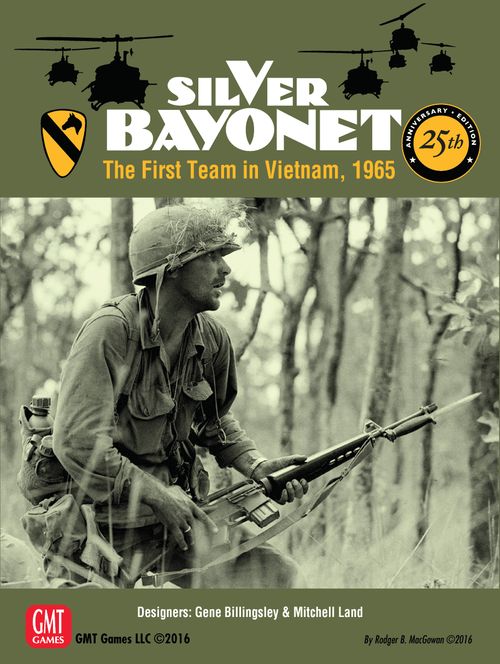
Silver Bayonet: The First Team in Vietnam, 1965
Silver Bayonet Rulebook
Table of Contents
Table of Contents
- 1.0 Introduction
- 2.0 Game Equipment
- 3.0 Game Play
- 4.0 Ground Movement
- 5.0 Zones of Control (ZOCs)
- 6.0 Pre-Combat Actions
- 7.0 Attack Coordination
- 8.0 Maneuver Combat
- 9.0 Assault Combat
- 10.0 Bombardment
- 11.0 Airpower
- 12.0 Special Units
- Campaign Scenario Rules
- 13.0 Aerial Movement
- 14.0 Air Defense Fire
- 15.0 Replacements and Reinforcements
- 16.0 Hidden Movement
- 17.0 Victory
- 18.0 Optional Rules
- Scenarios
- Designer's Notes
- Example of Play
- Initial Phase
- Recovery Phase
- First Player Turn
- First Observation Phase
- Reinforcement Phase & Concealment Phase
- Movement Phase
- Combat Declaration Phase
- Offensive Bombardment Phase
- Combat Reaction Phase
- Combat Resolution Phase
- Maneuver Combat Step
- Assault Combat Step
- Final Observation and Final Concealment Phases
- Second Player Turn
- Reinforcement Phase
- Concealment Phase
- Movement Phase
- Combat Declaration Phase
- Offensive Bombardment Phase
- Combat Reaction Phase
- Combat Phase & Final Concealment Phase
- Game Record Interphase
- Bibliography
1.0 Introduction
Silver Bayonet is a primarily company-level game covering the action between the US 1st Cavalry Division (Airmobile) and the North Vietnamese B-3 Field Front (equivalent to a division) in October and November, 1965.
The strategic situation at the time found the NVA driving from Cambodian base camps across the western II Corps Tactical Zone in an attempt to capture the strategic town of Pleiku. Plans called for a massive assault on the two Special Forces camps guarding the approaches to the town. The fall of Pleiku would open a strategic corridor to Qui Nhon and the sea, allowing the NVA to effectively cut South Vietnam in half and isolate I Corps from the supply bases in the south. US planners, alarmed by the North Vietnamese attacks, had dispatched the newly formed Airmobile Division to the area in late August, 1965. This unit, equipped with over 400 helicopters and trained for rapid deployment of troops and firepower, deployed en masse to a forward base at An Khe on the Pleiku-Qui Nhon road in late September. Within a month of the Cav's arrival, the NVA attacked the under-manned Special Forces camps at Duc Co and Plei Me with two full regiments. The Cav air-lifted troops and supplies to the beleaguered garrisons and battle was joined. For the first time in the Vietnam War, a United States Army division and a North Vietnamese regular army division met in battle. The results of this battle shaped the tactics each side used over the course of the war.
Design Note: The official name of the operation concerning the deployment of the 1st Cav into the Pleiku Campaign was Operation LONG REACH. Each brigade's mission also had its own designation: 1st Brigade – Operation ALL THE WAY, 3rd Brigade – Operation SILVER BAYONET I, 2nd Brigade – Operation SILVER BAYONET II. We have opted to use "Silver Bayonet" for the game as it was during the 3rd Brigade's operation that the pivotal, iconic events of the battles in LZ X-RAY and LZ ALBANY occurred.
Silver Bayonet can be played by one or two players. Seven smaller/shorter scenarios allow players to re-fight the major engagements of the campaign. Three intermediate scenarios allow players to re-fight long stretches of the campaign (mini-campaigns). There are also two grand campaign scenarios giving players control over both divisions for the duration of the campaign. The rules for the Basic scenarios are presented first. Additional rules that apply to the Campaign scenarios are presented separately.
Play Note: Throughout the rules, the North Vietnamese Army (NVA) and Viet Cong (VC) will be referred to as the PAVN (People's Army of Viet Nam). For a variety of reasons, this is as accurate as any other term, but, mostly, it keeps us from having to type NVA/VC a lot. In addition, the United States (US) and Army of the Republic of Viet Nam (ARVN) will be referred to as the FWA (Free World Allies). While this is more of an arbitrary term, it also serves to reduce the typing of US/ARVN. Notwithstanding the above, the appropriate abbreviation (NVA, VC, US, ARVN) will be used when it applies to ONLY those units.
Design Note: The cover photo for both these rules and the game box deserves special mention. It depicts then Lt. Rick Rescorla. His story is exceptional, and I encourage you to find out more. A simple online search will return a plethora of information.
1.1 List of Common Abbreviations/Acronyms
- ADF = Air Defense Fire
- ARVN = Army of the Republic of Vietnam
- CIDG = Civilian Irregular Defense Group
- DRM = Die Roll Modifier
- ER = Efficiency Rating
- FWA = Free World Allies
- HQ = Headquarters
- LZ = Landing Zone
- NVA = North Vietnamese Army
- OT = Other Terrain
- PAC = Player Aid Card
- PAVN = People's Army of Vietnam
- SF = Special Forces, i.e. Green Berets
- SOP = Sequence of Play
- SSR = Scenario Special Rules
- TDV = Terrain Defense Value
- TEC = Terrain Effects Chart
- US = United States
- VC = Viet Cong
2.0 Game Equipment
Your copy of Silver Bayonet should include:
- one 22" x 34" game map
- 1½ counter sheets of playing pieces
- thirteen 8½" x 11" player aid cards
- PAVN PAC
- FWA PAC
- Battle Board
- Standard SOP & Crib Notes
- Campaign SOP & Crib Notes
- Eight scenario cards
- two identical 11"x 17" player aid cards
- two 11"x 17" screens
- one 10-sided die
- one rules booklet (this one)
2.1 The Game Map
The game map has a hexagonal grid superimposed over the terrain in order to regularize movement and the positioning of playing pieces. These hexagons, hereafter called ''hexes", each represent about 0.94 miles (1.5 km) of terrain. Each hex has its own unique four-digit identity number used to identify the hex for various game purposes. Several off-map locations are also depicted and are accessible via movement boxes as noted on the game map and in the off-map rules [4.5].
2.2 Charts And Tables
Various player aids are provided to simplify and illustrate certain game functions. The FWA PAC is used to show Helicopter Basing, the off-map An Khe box, and the US Air Point track. The PAVN PAC is used to hold units concealed by Hidden Movement markers as well as units that are currently in the off-map Cambodia boxes. Both of the above PACs are kept hidden from the opposing player. There is also a PAC for each player containing all of the charts and tables needed for various game functions. In addition, the scenario cards are used to set up and play each scenario. Finally, we have included a Battle Board PAC to help keep track, during an attack, of which units are Maneuvering, which are Assaulting, and which are being withheld.
2.3 The Playing Pieces
The cardboard pieces, which represent units or game markers, should be carefully cut out and sorted by color and type. They represent the actual military units that took part in the historical campaign. The numbers and symbols on the pieces represent the strength, movement capability, and type of unit or game function represented by the piece.
(2.3.1) Combat units: Combat unit counters (US, NVA, VC, and ARVN) show a Unit ID, Unit Symbol, Efficiency Rating, Stacking Points, Attack/Bombardment Strength, Range, Movement Allowance, and Defense Strength.
(2.3.2) Summary of unit sizes: Most combat units in Silver Bayonet are companies or batteries. However, the PAVN mortars are sections and there are five ARVN airborne battalions.
- II = Battalion
- I = Company/Battery
- ••• = Section
(2.3.3) Summary of ground combat unit types:
Infantry types: Infantry, Weapons, Ranger, Airborne, Security (SEC)
Motorized/Armor types: Armor, Mechanized, Motorized, Supply
Artillery types: Headquarters (HQ), Heavy Artillery, Artillery, Mortar
Other: Hospital
Play Note: The ARVN 3rd Armored Cavalry Squadron (HQ/3, 1/3, 2/3) comes in two different configurations. Players can choose to use either the silhouette or NATO symbol versions of the counters.
For game purposes, the term "artillery" refers to all field artillery and mortar units. Artillery units use their bombardment strength to bombard enemy units during the friendly Offensive Bombardment Phase [10.1], to provide Maneuver Combat Support [10.3] during either player's Maneuver Combat Phase, or Defensive Bombardment [10.2] during the opposing player's Assault Combat Phase. Artillery does not have an attack strength and cannot be used when attacking in Maneuver or Assault Combat against an adjacent hex. Exception: Mortars [12.3].
(2.3.4) Ground Unit counter values: Unit ID, No ZOC Outline, Unit Symbol, Stacking Points, Efficiency Rating, Attack/Bombardment Strength, Movement Allowance, Range, Defense Strength.
(2.3.5) Helicopter Unit Values: [Campaign Scenarios] Unit ID, Unit Symbol, Silhouette, Helicopter Type, Bombardment Strength, Transport Capacity.
Helicopters are divided into three types: Observation, Transport, and Gunship. The only Observation Helicopter units are the OH-13Ss. Transport helicopters are either UH-1Ds or CH-47s. Gunships are either UH-1Bs or ARAs (rocket armed UH-1Bs).
Design Note: The helicopters of the 1st Cav, the 227th and 229th Assault Helicopter Battalions (UH-1Ds), and the 228th Assault Support Helicopter Battalion (CH-47s) were the transport workhorses for the division. Combined, they conducted a total of 18,532 sorties during the campaign, lifting the equivalent of 193 infantry companies (roughly 40 infantry battalions) and 67 artillery batteries (roughly 22 artillery battalions). In total, they suffered seven wounded, seven killed, and 28 helos hit by ground fire with only two shot down.
(2.3.6) Patrol markers: [Campaign Scenarios] A Patrol marker shows a Patrol Radius value.
2.4 Explanation of Unit Values:
(2.4.1) Attack Strength: The combat value a unit uses when attacking in Maneuver or Assault Combat. It is expressed in terms of attack strength points.
(2.4.2) Bombardment Strength: The combat value an artillery, helicopter, or mortar unit uses when attacking enemy units by Bombardment or supporting a Maneuver Combat. It is expressed in terms of bombardment strength points.
(2.4.3) Range: For artillery, this indicates the maximum distance in hexes, regardless of terrain, that the unit can fire. For an HQ, this indicates the distance that it can affect an Attack Coordination roll [7.0]. Range is counted from the unit (excluded) to the target hex (included).
(2.4.4) Defense Strength: The value a unit uses when defending in Maneuver or Assault Combat. It is expressed in terms of defense strength points.
(2.4.5) Efficiency Rating: The efficiency rating (ER) of each unit represents that unit's level of training, effectiveness, and cohesion. The higher the ER, the better. An HQ's ER also represents its ability to plan and execute coordinated attacks. Players should note that the reduced side of most, but not all, units shows a reduced efficiency rating. A number of game procedures require a unit to pass an ''Efficiency Check". This is done individually for each affected unit. To conduct an Efficiency Check, the owning player rolls one die and compares the die roll result to the unit's ER. If the die roll result is equal to or less than the unit's ER, the unit passes the Efficiency Check. If the die roll result is greater than the unit's ER, the unit fails the check.
(2.4.6) Stacking Points: The relative amount of space a unit takes in a hex. There are limits as to how many stacking points can be in a hex and operate efficiently [4.3].
(2.4.7) Movement Allowance: Represents the unit's maximum movement capacity during a given Movement Phase, expressed in terms of movement points. Hexes require the expenditure of more or less than one movement point as indicated on the Terrain Effects Chart (TEC). A unit whose Movement Allowance is contained within a circle or an oval is considered Motorized; all others are considered Foot.
(2.4.8) Unit ID: This indicates the organizational identity of the unit as, generally, Company (or Battery)/Battalion/Regiment. Example: C/2/12 is C Company of the 2nd Battalion of the 12th Regiment. Some rules refer to the battalion. In this example, the battalion is the 2/12 which is different from, for instance, the 2/7 battalion.
(2.4.9) Patrol Radius [Campaign Scenarios]: The radius of the patrol in hexes.
2.5 Units and Steps
All units have one or two combat strength levels called "steps". The front side of a counter is full strength; the reverse side, with the stripe, is reduced strength.
Play Note: Steps are NOT the same thing as Stacking Points [2.4.6; 4.3]. This is important for helicopter transport, which uses STEPS for calculating capacity.
(2.5.1) All units, except NVA HQs [12.4.1], that have ratings on both sides of their counters are two-step units. NVA HQs and units with ratings on only one side of their counters are one-step units.
(2.5.2) When a one-step unit takes a step loss, it is eliminated. Remove it from play. When a two-step unit takes a step loss, flip it to its back (reduced) side. If the unit loses another step, it is eliminated.
(2.5.3) In Maneuver Combat, the lead unit must take the first step loss.
(2.5.4) Except in the case above, when assigning step losses, US units cannot be assigned a second step loss, i.e. eliminated, until all other US units in the combat have been reduced. Exception: Brigade HQ [13.2.1].
2.6 Units and Fatigue
Fatigue represents a unit's loss of cohesion. Units become Fatigued due to Offensive Bombardment or combat results during Maneuver Combat.
(2.6.1) When an F# result occurs, the player whose unit(s) is (are) affected extracts any other losses called for by the combat result, then places a Fatigue marker on top of the number of surviving previously non-Fatigued units indicated by the numbered result. The lead unit in a Maneuver Combat must be Fatigued first. If the F# exceeds the number of units available to be Fatigued, the excess is ignored.
(2.6.2) Additional Fatigue: If the lead unit or all units in a hex, prior to the combat result, were already Fatigued, and a Fatigue result is incurred (regardless of the number of Fatigue results), then one unit must take a step loss. Exception: HQs [12.4.3] and Hot Landing Zones [13.1.1.3].
Example: A stack of two US companies, one of which is already Fatigued, receives a D2F2 result in Maneuver Combat. After applying the step loss (TDV is 2, so the D2 causes a step loss), two units must be Fatigued (F2). Only one remains unfatigued, so it gets a Fatigue result and the excess is ignored. However, the result also requires a retreat, but, because the US units are in a Landing Zone and want to hold it, they elect to remain in the hex [8.5.7/13.1.1.2]. As this incurs an additional Fatigue result, and all units are already Fatigued, the US units incur another step loss.
(2.6.3) A Fatigued unit cannot attack. Fatigued artillery/mortar units cannot fire. Fatigued units in a stack do not prevent other non-Fatigued units in that stack from attacking or firing.
(2.6.4) While Fatigued, units defend with their printed defense strength in Maneuver and Assault Combat. Their Fatigued status causes adverse DRMs in both types of combat but does not keep them from being counted for highest efficiency in their stack.
(2.6.5) Apply the appropriate DRMs as listed in the Assault and Maneuver Combat tables when at least one defending unit is Fatigued.
(2.6.6) Fatigued units cannot attempt Defender Reaction, nor can they be used to place or reinforce Patrol markers. They cause a +1 DRM when attempting Combat Refusal.
(2.6.7) Fatigue Recovery: Units may recover from Fatigue during the Recovery Phase of each game turn. The following rules determine when and where such recovery can occur; however, scenario rules may alter this.
(2.6.7.1) FWA units can only recover if they are in the An Khe Off-map Box, US Base (Camp Holloway) hex, the brigade HQ hex, or in a hex with a friendly Leader.
(2.6.7.2) PAVN units can only recover if they are in Cambodia or stacked with a non-Fatigued HQ or Hospital.
(2.6.7.3) Automatically remove fatigue markers from any units in an appropriate location that are not in an enemy ZOC. Units in an appropriate location that are in an enemy ZOC must pass an efficiency check to remove the Fatigue marker.
(2.6.7.4) NVA HQs and the Hospital may automatically recover Fatigue, but only if they are not adjacent to an enemy unit.
2.7 The Die
The game uses a ten-sided die. A "10" is, indeed, a ten.
3.0 Game Play
3.1 Preparing for Play
Refer to the scenario card. Place the units on the cards as indicated. Then, using the setup hexes or instructions, place units on the map in the order specified. Most units begin the game at full strength, though a few, as noted in the setup instructions, can begin at reduced strength.
Once unit placement is complete, begin play according to the sequence listed on the Sequence of Play or as specified in the scenario.
3.2 The Game Turn
Games are played in successive game turns composed of several Phases and Steps within those Phases. There are two Sequences of Play (SOPs). The Standard SOP is used in the Standard Scenarios (1-7) while the Campaign SOP is used in the Campaign Scenarios (8-12). See the Sequence of Play PAC for a fully detailed version.
The Game Turn marker is double-sided to indicate which side is currently the Active Player. In addition, two markers, "Scen Start" and "Scen End" are included to assist players in marking the correct start and end turns for scenarios other than the Grand Campaign.
Important: The player whose player segment is currently in progress is called "the Active Player".
4.0 Ground Movement
During a Movement Phase, the active player may move all his units with a movement allowance greater than zero. The player moves his units through contiguous hexes in any direction or combination of directions. Movement can be affected by Movement Allowance type [2.4.7], Terrain Effects [4.2], and Zones of Control [5.0].
Play Note: During combat, units of either side may be advanced or retreated after combat is resolved. This is not movement and uses no movement points.
4.1 Movement Restrictions
(4.1.1) Move units individually or as a stack from hex to adjacent hex, paying the appropriate movement point cost for the terrain in each hex entered [4.2].
(4.1.2) There is no limit to the number of friendly units that can pass through a single hex in one game turn.
(4.1.3) A unit can be moved only once in a Movement Phase. A unit cannot spend more movement points than its total Movement Allowance in any one Movement Phase. Exception: One-hex Movement [4.1.4]. Units are never forced to move and they may spend less than their full Movement Allowance; however, unused movement points cannot be accumulated or transferred. For instance, if a PAVN unit uses its entire Movement Allowance to move from one Hidden Movement marker [16.1] to another, the second marker cannot then move. If a Hidden Movement marker containing a PAVN unit moves its full Movement Allowance, the PAVN unit cannot then move on its own.
(4.1.4) A unit cannot enter a hex if it does not have sufficient movement points remaining to pay the cost to enter the hex and cross the hex side; however, a unit with a movement allowance of one or more can always be moved at least one hex during a friendly Movement Phase as long as that hex is not normally prohibited to it.
(4.1.5) A friendly unit cannot move into a hex containing an enemy combat unit. It can be moved through friendly-occupied hexes at no extra movement point cost.
(4.1.6) US units cannot cross the border into hexes in Cambodia, but ARVN units may do so.
Design Note: The advisor for the ARVN Airborne at the time, Major Norman Schwarzkopf (who wasn't 'Stormin'' yet), when asked which maps to use, "advised" Col. Truong to use the ARVN maps, which, of course, had the Cambodian border ten klicks further west than the US maps.
(4.1.7) [Campaign Scenarios] A unit with a Movement Allowance of zero may be moved during the game only by helicopter [13.1].
4.2 Effects of Unit Types and Terrain
"With airmobility, the soldier has been freed forever from the tyranny of terrain." – General Kinnard
(4.2.1) Terrain Types: Each hex contains a terrain type. The Terrain Key identifies the terrain and the Terrain Effects Chart (TEC) lists the movement point costs to enter the hex. In addition, the TEC identifies a Terrain Defense Value (TDV), a ZOC indicator, Observation effects, Attacker Combat Effects, and lists the type of Landing Zones (LZ) allowed in that hex. Terrain types with special considerations are listed below.
(4.2.1.1) Rivers: Rivers run along hex sides and have no effect on movement. If every unit is attacking across a river hex side, the attacker incurs an additional +1 DRM in both Maneuver and Assault Combat.
(4.2.1.2) Roads: A unit that moves from one road hex directly into another adjacent road hex through a hex side crossed by the road spends movement points according to that road's rate regardless of the other terrain in the hex.
(4.2.1.3) Special Forces Camps: SF Camps are considered to be within the underlying terrain except:
- SF Camps have a Terrain Defense Value of four, and
- deny ZOC effects in their hex.
They are considered to be Operational LZs [13.1.1.2] any time a FWA unit is present in the hex.
(4.2.1.4) Streams: Streams run within hexes and have no effect on movement or combat.
(4.2.1.5) Unit Type Restrictions for Motorized Unit: Motorized [2.4.7] units can only enter, exit, conduct Assault Combat, Advance or Retreat through Clear, Town, or Tea Plantation hexes, or any hex along a Road. This is marked and noted on the TEC. They can conduct Maneuver Combat into any terrain that allows it.
(4.2.2) Attacker Combat Effects: The TEC lists various combat effects that are defined below:
"No Maneuver" – Attackers cannot declare Maneuver Combat against the hex.
"Assault +X" – The attacker incurs a DRM equal to "X" if conducting Assault combat against the hex.
"Both +X" – The attacker incurs a DRM on his attack roll equal to "X" for both Maneuver and Assault Combat.
"VP FWA Bombardment" – If the FWA conducts any type of Bombardment against such a hex, the PAVN player earns one Victory Point.
(4.2.3) Terrain Defense Value: This value is used when determining losses based on Offensive Bombardment [10.1] or Maneuver Combat results [8.4].
(4.2.4) ZOC Indicator: This indicates whether or not a ZOC [5.0] is projected into the hex.
(4.2.5) Observation Effects: [Campaign Scenarios] This determines the target number required for observing a PAVN Hidden Movement marker in that terrain type by either Aerial Observation [16.5.1] or Patrol [16.5.2]. In some cases, observation is automatic ("Auto") or depends on the other terrain in the hex ("OT").
(4.2.6) LZ Type: [Campaign Scenarios] This indicates the type of Landing Zone the FWA player can utilize in that hex. F = Field Expedient [13.1.1.1] and O = Operational [13.1.1.2]. In addition, it can indicate that both or no LZs can be placed, or that it depends on the other terrain in the hex ("OT").
4.3 Stacking
Stacking refers to the placing of more than one ground unit in a hex. The position of a unit in a stack has no effect on play. Game markers can stack freely without limit.
(4.3.1) Each unit has a stacking point value marked on it. A maximum of four friendly stacking points can occupy the same hex without negative effects. Units can freely enter and pass through stacks of friendly units regardless of stacking limits.
(4.3.2) If at any time a stack of units is found in excess of the restrictions, reduce the efficiency of all units in the hex by one for each stacking point in excess of four. ER cannot be reduced below zero.
In addition, only four stacking points of units can defend in the hex. In an Assault Combat, the same four stacking points worth of units must participate in both rounds of combat. If any are eliminated in the first round, the player cannot add units to the original four stacking points of defenders.
Assaulting out of an over-stacked hex has no effect at all on the assaulting units; however, only four stacking points of units can conduct Maneuver Combat out of an over-stacked hex.
(4.3.3) Units under a Hidden Movement marker [16.1] can never exceed stacking limits.
4.4 Extended Movement
(4.4.1) Foot units [2.4.7] that begin a Movement Phase at least three hexes from an enemy unit may increase their Movement Allowance by two as long as all MPs are spent moving along roads.
(4.4.2) Units moving by Extended Movement cannot move within three hexes of an enemy unit or Hidden Movement marker at any time during the Movement Phase.
(4.4.3) Hidden Movement markers cannot make use of Extended Movement.
4.5 Off-map Boxes
Play Note: The majority of these rules apply only to the PAVN player as his off-map areas are connected. The FWA player can only move his units between the map and the An Khe off-map box using helicopters.
(4.5.1) The PACs contain off-map boxes representing areas of play that are not on the game map. For the FWA, this is the 1st Cavalry Division base at An Khe, and, for the PAVN, several areas in Cambodia.
(4.5.2) Cambodia: These boxes represent areas just across the border. They can only be entered by PAVN units. Map-edge locations on the map will indicate if movement is possible to or from a particular Cambodia off-map box. These are the only areas from which units enter or exit the game map to or from the Cambodia off-map boxes.
(4.5.2.1) Any PAVN unit may move off of the game map into an adjacent off-map box if that unit occupies an eligible map-edge hex and has at least one movement point of its movement allowance remaining. Moving into an off-map box ends the unit's movement.
(4.5.2.2) PAVN units spend all of their movement allowance to move from one off-map box to another, adjacent off-map box. The off-map boxes must be connected to allow this movement.
(4.5.2.3) PAVN units may move from an off-map box onto the game map by paying the normal movement point cost for the map-edge hex of entry. The unit may then continue moving up to the extent of its movement allowance.
(4.5.3) An Khe: This box represents the base camp for the 1st Cavalry Division. It can be entered only by FWA units using helicopter movement or arriving as reinforcements.
5.0 Zones of Control (ZOCs)
Design Note: Zones of Control represent the ability of a unit to exert control over the area surrounding it. It accomplishes this through the use of local patrolling and firepower.
5.1 Exerting a ZOC
Most units in the game exert a Zone of Control into the six hexes adjacent to the hex they occupy. The Terrain Effects Chart lists which hexes do not allow ZOCs.
(5.1.1) The following units do not exert ZOCs:
a. HQ units b. Hospital unit c. Artillery units d. Hidden Movement markers [16.1] e. Patrol markers [16.5.2] f. Fatigued units
For ease of reference, we have marked all such units with a No ZOC outline on the counter.
(5.1.2) Motorized units [2.4.7] only exert a ZOC into any hex containing terrain into which they can move.
5.2 ZOC Effects
(5.2.1) During a Movement Phase, units must cease movement immediately upon entering an enemy ZOC and cannot move further during that phase.
(5.2.2) Any unit starting its Movement Phase in an enemy ZOC may exit the enemy ZOC by moving into a hex not in an enemy ZOC. It can subsequently enter another hex that is in an enemy ZOC during that Movement Phase.
(5.2.3) Any unit with a movement allowance of one or more can move directly from one enemy ZOC to an adjacent hex in an enemy ZOC. Such a move costs the unit's entire movement allowance and may be made only when the unit BEGINS the Movement Phase in an enemy ZOC.
(5.2.4) ZOC Exceptions: PAVN, DELTA, CIDG, and Motorized units [2.4.7] do not have to stop upon entering an enemy ZOC, and they may exit an enemy ZOC or move from ZOC to ZOC by paying an additional Movement Point. The extra Movement Point cost does not apply to a unit's first hex of movement if it exits the enemy ZOC by moving into a hex not in an enemy ZOC. Non-Motorized units cannot combine this with Road Movement. For Non-Motorized units, neither hex can be Clear Terrain.
6.0 Pre-Combat Actions
Combat Resolution is preceded by a series of actions that set the stage for the actual combat. These steps are:
- Combat Declaration [6.1]
- Combat Refusal [6.2]
- Defender Reaction [6.3]
6.1 Combat Declaration
There are two types of ground combat: Maneuver Combat [8.0] and Assault Combat [9.0]. Each attacking unit can perform only one type of combat (either Maneuver or Assault Combat) in a single Combat Phase; however, each defending stack can be the subject of both Maneuver and Assault Combat in the same Combat Phase.
(6.1.1) The active player begins the pre-combat sequence during the Combat Declaration Phase by declaring which enemy hexes he will attack and designating which adjacent friendly units/stacks will attack each enemy hex. No more than one enemy hex can be attacked in any single combat. He then places a Declared Combat marker of the appropriate type, either Maneuver or Assault, on each of his attacking units and/or stacks, with the arrow(s) pointing toward the hex that will be attacked. Once the Declared Combat markers have been placed, the decision to attack is irrevocable, and the enemy hex must be attacked by all units that declare combat, except in the case of an uncoordinated frontal assault [7.4.4].
(6.1.2) The active player may declare combat against each enemy stack with units from any or all adjacent hexes.
(6.1.3) Units belonging to the active player that are stacked together in a hex may be allocated to attack different hexes, and they may use Maneuver or Assault Combat as the player desires.
(6.1.4) Restrictions:
a. Zero-strength units cannot declare combat or resolve attacks unless stacked with other non-zero attack strength units.
b. Non-mortar artillery cannot declare combat or resolve attacks.
c. Fatigued units cannot declare combat or resolve attacks.
d. A unit cannot declare combat into a hex or across a hex side into/through which it could not move.
Exception: Motorized Maneuver Combat.
e. No more than four stacking points of units can be designated to Assault a single defending hex.
f. Maneuver Combat cannot be declared if the initial combat odds are less than 1:3.
Play Note: In the case of less than 1:3 odds against units concealed by a Hidden Movement marker the PAVN player may reveal his units during Combat Declaration to prevent placement of a Maneuver Combat marker.
(6.1.5) The only enemy units that can be attacked during a Combat Phase are those against which attacks are declared during the Combat Declaration Phase.
Design Note: Maneuver Combat represents establishing a base of fire and using maneuver elements to dislodge the enemy indirectly. Assault Combat represents "fixing bayonets" and charging into what would today be called Close Quarters Battle or hand-to-hand, close range combat. At a very basic level, Maneuver Combat is used to leverage an enemy out of a particular hex or to soften the hex up for an assault. Assault Combat is used to close with the enemy and destroy him.
6.2 Combat Refusal
Combat Refusal consists of all units in a hex that is the target of a declared combat retreating before combat. To conduct Combat Refusal, make an Efficiency Check [2.4.5] for the highest efficiency unit in the attacked hex. lf the unit passes the check, retreat the entire stack one hex. Then the active player removes the Combat Declaration marker(s) and has the option to immediately advance up to four stacking points from the attacking forces into the vacated hex. The advancing units cannot participate in further attacks during this player turn.
(6.2.1) PAVN units, unless restricted, may attempt to conduct Combat Refusal, even with Hidden Movement markers [6.2.7]. Subtract the TDV of the hex as a DRM for the Efficiency Check, e.g., if the TDV is 2, the DRM is −2
(6.2.2) US DELTA and ARVN CIDG units, unless restricted, may attempt to conduct Combat Refusal and subtract the TDV of the hex from their roll.
(6.2.3) Other US units, unless restricted, may attempt to conduct Combat Refusal as long as they are not in an Operational Landing Zone, Town, US Base (Camp Holloway), Brigade HQ, or Special Forces Camp hex.
(6.2.4) Non-CIDG ARVN units cannot attempt Combat Refusal unless stacked with the Col. Truong leader counter [12.1.2].
(6.2.5) Units with a movement allowance of zero can never conduct Combat Refusal.
(6.2.6) Restrictions: While both sides can conduct Combat Refusal as described above, there are restrictions as follows:
a. Units that are the target of both Maneuver and Assault Combat cannot conduct Combat Refusal.
Exception: Hidden Movement markers [16.1] may still attempt Combat Refusal; however, they do not receive the TDV DRM.
b. If there are any Fatigued units in the stack (including in a Hidden Movement marker), a +1 DRM is applied to the roll.
c. A unit that conducts Combat Refusal cannot retreat:
- Into a hex that is the target of a declared combat.
- Into an empty hex in an enemy ZOC. Exception: PAVN, DELTA, and CIDG units can move into an enemy ZOC when conducting Combat Refusal if that is the only hex available, i.e., their first choice must be to a non-ZOC hex. Second choice to a ZOC hex occupied by a friendly unit. If no other hex is available, they can enter an empty enemy ZOC hex.
- Into terrain that is prohibited to it for movement.
- Into a friendly-occupied hex in violation of stacking limits.
(6.2.7) Hidden Movement Markers: When these are along in a hex, i.e., without revealed units, apply a −1 DRM. If both Hidden Movement markers and revealed units are in a hex, they roll separately.
6.3 Defender Reaction
(6.3.1) After all Combat Refusal attempts have been resolved, the defender may choose to attempt reaction movement. To do so, for each attacked hex he may choose one non-Fatigued unit in an adjacent hex and make an efficiency check for that unit. If the unit passes the check, reaction succeeds, and the defender moves the reacting unit into the attacked hex. Otherwise, the unit fails to react and remains in its original hex. In either case, no further reaction attempts can be made for that hex or by that particular unit. No more than one reaction attempt can be made per attacked hex.
(6.3.2) Restrictions:
a. Reacting units cannot violate stacking limits.
b. A unit that is the target of a declared combat cannot react into any other target hex.
c. A unit that has refused combat in the immediately preceding Combat Refusal step cannot react.
d. Fatigued units cannot react.
e. A unit can never react into a hex or across a hex side into/through which it could not move.
(6.3.3) The FWA player may attempt to react with a non-adjacent unit that is currently in a Helicopter Base [13.2] using an available transport helicopter. If the unit passes its efficiency check, it can use helicopter transport to react into the combat hex following all the normal rules for helicopter transport.
The transport helicopter along with any escorts, if they survive Air Defense Fire [14.0], may remain in the hex and provide both Defensive Bombardment [10.2] and/or Maneuver Combat Support [10.3] in the ensuing Combat Phase. They must return to the Helicopter Base [13.2] at the end of the Combat Phase.
Play Note: Failing this roll represents an LZ too hot to land in, lack of adequate prep time, or simple dilatoriness on the part of higher headquarters.
7.0 Attack Coordination
Design Note: During battles, coordinating attacks can be difficult. Communication issues, command indecision, and lack of accurate intelligence can hamper the capacity to plan and execute effective attacks. In game terms, we have chosen to portray this by forcing the players, in some cases, to pass a coordination die roll, based on the efficiency rating of their HQs.
After all pre-combat actions, the attacking player conducts the Combat Resolution Phase by resolving his combats one at a time by conducting and completely resolving Attack Coordination, Maneuver Combat, and Assault Combat for each hex.
The first step in this process is to determine the level of coordination for a given attack. This must be done once for each hex that is being attacked. Attack coordination can be affected by the presence or absence of a friendly HQ, as well as a coordination die roll by the attacking player.
7.1 NVA HQ Coordination
"[The North Vietnamese] did not appear to have radios themselves; they controlled their men by shouts, waves, pointing, whistles, and sometimes bugle calls." – Lt. Gen. Hal Moore, We Were Soldiers Once…And Young
(7.1.1) While HQs are combat units like other ground units, they also have a special capacity to coordinate combat. Each HQ's Command Range and Efficiency Rating may affect attack coordination.
(7.1.2) lf any NVA HQ is within command range of all the attacking stacks during the Attack Coordination portion of the friendly Combat Phase, the owning player rolls one die and compares it to the HQ's ER to determine how well that attack is coordinated. If two or more friendly HQs are within command range, only one of them (PAVN player's choice) can be used to attempt coordination.
(7.1.3) Command Range is traced as a path of hexes from the HQ to each attacking hex in a declared combat. Do not count the hex the HQ occupies, but do count the hex of the attacking stacks in determining command range. The path must be free of enemy ZOCs and units; enemy ZOCs are negated by friendly units in a hex for this purpose.
7.2 FWA Coordination
Design Note: Even though there were sometimes issues coordinating between battalions, within a battalion there were rarely any issues. I can't highlight the reasoning behind this rule any better than Lt. Gen Hal Moore does: "Kinnard [1st Cav Division commander] came out of the great Airborne school of thought that authority has to be pushed down to the man on the spot, because you never know where leaders will land when units jump out of airplanes. What was true for parachute operations was likewise true for fast-moving airmobile combat units leapfrogging across difficult terrain."
(7.2.1) US Only Attacks: Attacks by US units from a single battalion are always fully coordinated. If units from two or more battalions are involved, make an efficiency check against the highest ER to determine Attack Coordination. Exception: Lt. Col. Moore [12.1.1].
(7.2.2) ARVN Only Attacks: ARVN only attacks that include units stacked with Col. Truong [12.1.2] are always fully coordinated; otherwise, roll against the nominal command value [7.3].
Play Note: Although the ARVN HQ/3 unit is identified in its ID nomenclature as an HQ, it is not used for coordination as described above for the NVA HQs (as indicated by the lack of a Command Range).
(7.2.3) Combined FWA Attacks: Attacks involving both US and ARVN units make an efficiency check against the LOWEST ER regardless of the presence of leaders.
(7.2.4) DELTA, CIDG & 1/9: Attacks by DELTA, CIDG, and/or 1/9 units only are always coordinated. When attacking with other units, follow those units' coordination rules without regard to DELTA, CIDG, or 1/9 units' presence: pretend they're not present and do not use their ER for coordination.
7.3 Nominal Command Value Coordination
If the attacking units do not qualify for coordination as described above, a Coordination die roll is still made for the combat and compared to the following "out of command" ERs:
ARVN – 5 PAVN – 3
Design Note: After the battle, the PAVN reviewed the campaign and "were disturbed by leadership problems that surfaced during this campaign." All three regimental commanders as well as junior officers were reprimanded or criticized for their handling of the campaign.
7.4 Coordination Results
(7.4.1) Fully Coordinated Attack: lf the Coordination die roll is less than the appropriate ER determined above, the attack is fully coordinated with support. This allows the attacker to attack with all units that declared combat against this hex using Maneuver Combat [8.0], Assault Combat [9.0], or both, and to allocate Maneuver Combat Support [10.3].
(7.4.2) Partially Coordinated: lf the Coordination die roll equals the ER, the attack is coordinated, without support. This result allows the attacker to attack with all units that declared combat against this hex using Maneuver Combat, Assault Combat, or both, but denies him any Maneuver Combat Support fire.
(7.4.3) Uncoordinated Attack: If the Coordination die roll is greater than the ER by one, the attack is uncoordinated. This allows the attacker to attack with all units that declared combat using Maneuver Combat, Assault Combat, or both, but without any Maneuver Combat Support fire. Additionally, the attack in this combat is handicapped as follows:
a. Maneuver Combat: Suffers a 1L column shift
b. Assault Combat: There is a +1 DRM to all attacker die rolls (including efficiency checks). There is a −1 DRM to defender die rolls (including Efficiency Checks [2.4.5] but not Defensive Bombardment [10.2]).
(7.4.4) Uncoordinated Frontal Assault: lf the Coordination die roll is greater than the ER by two or more, the attack is an uncoordinated frontal assault. The defender must choose all units that were marked for combat (either Assault or Maneuver) in only one of the attacking hexes to perform an Assault Combat against the defending hex (even if it was previously marked as Maneuver Combat). Place an Assault marker on eligible units in the chosen hex if one is not already there. If any Maneuver Combat is declared against the hex, remove the marker(s). All units in other hexes that declared combat against this defending stack cannot attack, nor can they attack a different unit/stack. Additionally, the Assault Combat DRMs listed in 7.4.3 apply to the ensuing one-hex Assault Combat.
7.5 Combat Resolution
Within the limits imposed by the Attack Coordination die roll, the attacking player now resolves the combat(s) for the defending hex. Complete both Maneuver and Assault Combat as necessary before moving to the next hex.
All units that declared combat into a defending hex MUST attack the units in that hex, unless the attack coordination result was "uncoordinated frontal assault" [7.4.4].
Important: Regardless of the attack coordination result, the attacker can never assign more than four stacking points of units to Assault Combat.
If, after all Combat Refusal and Reaction attempts, the defenders in the hex have a combined Defense Strength [2.4.4] of zero, they are eliminated and the attacker may advance into the hex [8.6].
8.0 Maneuver Combat
Maneuver Combat occurs between a single defending hex and any adjacent hexes marked for Maneuver Combat. The active player is termed the Attacker; the other player is the Defender regardless of the overall strategic situation. The outcome of each combat may be affected by the terrain occupied by the defender, as well as by other listed DRMs. Maneuver Combat results include fatigue, retreat, step loss, and elimination of units.
8.1 Restrictions
(8.1.1) A unit in an attacking stack that is not participating in a given attack is never affected by the result of that attack.
(8.1.2) No unit can attack or be attacked by Maneuver Combat more than once per Maneuver Combat Step.
(8.1.3) Coordinated Maneuver Combat attacks with units from multiple hexes receive favorable DRMs, as listed on the Maneuver Combat Table. Subject to a player's combat declarations and the coordination die roll result, a defending stack could be attacked from up to six adjacent hexes.
(8.1.4) All units in a hex defend as a single, combined defense strength. The defender cannot withhold a unit in a hex under attack.
(8.1.5) An individual unit's combat strength cannot be divided among different combats or loaned to other units.
8.2 Terrain Effects on Combat
(8.2.1) Defending units, only, benefit from the terrain in the hex they occupy and that hex's perimeter hex sides. Hex side benefits for a river apply only if all attacking units are attacking across river hex sides. Terrain in hexes occupied by attacking units has no effect on combat.
(8.2.2) Consult the Terrain Effects Chart and the Maneuver and Assault Combat Tables for applicable effects.
8.3 Maneuver Combat Resolution
(8.3.1) PROCEDURE:
Step A: The attacking player totals the attack strength of all units attacking using Maneuver Combat.
Step B: The defender totals the defense strength of all units in the defending hex. Divide the total attacking strength by the total defending strength to arrive at a combat odds ratio, that is rounded down (in favor of the defender) to the nearest ratio listed on the Maneuver Combat Table.
Step C: Determine efficiency-based column shifts. Each player chooses one unit in the combat to "lead" the attack or defense. The "lead" units are used to determine column shifts based on their ERs and will also take the first step losses and Fatigue results, if any, in the ensuing combat. Shift the combat odds to reflect any difference, as referenced on the player aid card.
Step D: Apply a column shift of one column to the left if the attack is uncoordinated [7.4.3].
Step E: Both players (attacker first) allocate any support fire within range to the combat, within the limits allowed by the coordination die roll result. Each player rolls on the Bombardment/Support Table. Numbered results are DRMs (positive for the defender, negative for the attacker) to the ensuing Maneuver Combat [10.3].
Step F: Now roll one die and adjust that die roll according to the DRMs listed on the Maneuver Combat Table. Adjustments are cumulative. Cross-index the final numerical result with the odds column on the Maneuver Combat Table. Immediately apply the combat result to the involved units before going on to Assault Combat.
(8.3.2). If column shifts would shift the odds to less than 1:3 or greater than 6:1, the attack is resolved on the 1:3 or 6:1 column, respectively. The attacker cannot voluntarily reduce combat odds.
(8.3.3) Be sure to apply all applicable DRMs to the combat die roll result. These are summarized immediately below the Maneuver Combat Table (see PAC), and include effects of fatigue, combat support, terrain, and special unit effects. Cumulative DRMs for Maneuver Combat can never be greater than +3 or less than −3.
(8.3.4) Apply combat results in this order: combat losses [8.4], Fatigue [2.6], retreat [8.5], loss from No Retreat Option [8.5.7].
8.4 Maneuver Combat Results
The result of the combat will be a series of letters and numbers such as "A1D2F2". See the Explanation of Results on the Maneuver Combat Table.
8.5 Retreats
All "A" and "D" results require retreat unless the defender utilizes the No Retreat Option [8.5.7] or the defender is also being attacked in Assault Combat [9.0]. Results in bold italics indicate a two-hex retreat; other results indicate a one-hex retreat. The retreating player immediately moves the affected unit/stack one or two hexes, as indicated.
(8.5.1) A unit cannot retreat into a prohibited terrain hex, into hexes containing enemy combat units, or off the edge of the map. Exception: PAVN units may retreat off-map to connected Cambodia off-map areas.
(8.5.2) Units in a stack retreat individually, and may end their retreat in different hexes. They must all, however, retreat the number of hexes indicated by the result. A unit cannot end its retreat in violation of stacking limits.
(8.5.3) A unit cannot retreat into or through an enemy ZOC UNLESS that hex contains a friendly combat unit. Exception: Armor and Mechanized units can retreat into and/or through an enemy ZOC.
Design Note: The ability to avoid zones of control by units that can normally do so (PAVN, DELTA, CIDG) is degraded when engaged in combat. On the other hand, armored vehicles can always just button up and "drive on".
(8.5.4) A unit cannot retreat into a hex that is the target of declared combat during this player turn.
(8.5.5) A unit that retreats two hexes must end up two hexes away from the attacked hex.
(8.5.6) If a stack cannot retreat the required distance because of terrain, enemy units, over-stacking, or enemy ZOCs, the units must remain in their original hex. One unit in the stack must take an additional step loss, and one unit must be Fatigued. If all units in the stack are already Fatigued, take another step loss from the stack.
(8.5.7) No Retreat Option: Depending on the TDV of the hex, the defending units may be able to avoid a retreat.
- Units defending in a hex with a TDV of two can voluntarily ignore a retreat result by remaining in place and taking an additional step loss and Fatigue result on the stack.
- Units defending in a hex with a TDV of three or more or FWA units defending in or attacking out of an Operational LZ [13.1.1.2] may ignore a retreat result and remain in place. There is NO additional step loss, but one unit must be Fatigued. This does not cause Additional Fatigue.
(8.5.8) Units that are the object of both Maneuver and Assault Combat in the same player turn cannot be retreated after Maneuver Combat, even if the owning player wishes to do so; those units must stand and accept Assault Combat. They do not, however, lose the extra combat step or suffer Fatigue for not retreating.
8.6 Advance After Combat
Whenever all defending units have been eliminated or retreated as a result of Maneuver Combat or Offensive Bombardment, attacking units may advance into the hex vacated by the defender. Units marked for Maneuver Combat may advance; units marked for Assault Combat must advance. Defenders never advance when attackers retreat. In the event a hex was the target of both a Maneuver and an Assault Combat, and the defenders were eliminated by the Maneuver Combat, the advancing units must come first from those marked as Assault, then those marked as Maneuver. However, advancing units must observe stacking limits, i.e., they cannot over-stack.
Play Note: Advances are useful in cutting off the retreat of enemy units whose combat has not yet been resolved.
(8.6.1) The option to advance must be exercised immediately before any other combat resolution.
(8.6.2) Only attacking units that participated in that Maneuver Combat can advance. Exception: Units marked for Assault Combat against the vacated hex must advance.
(8.6.3) If the defender retreated one hex or was eliminated, the attacker can advance units only into the defender's vacated hex. This is not movement and uses no movement points. Advancing units ignore enemy ZOCs to enter the vacated hex. Units cannot violate stacking limits at the end of an advance after combat.
(8.6.4) If the defender retreated two hexes, the attacker may advance up to four stacking points of units a total of two hexes. The first hex of the advance must be the defender's vacated hex. If this hex is free of enemy ZOCs, a second hex of advance may be made into any hex adjacent to the defender's vacated hex. Advancing units may advance into separate hexes if a two-hex advance is allowed.
9.0 Assault Combat
"When the fight came it was marked by its bitter intensity; first of the hand-to-hand conflict, and later by the sheer weight of the US artillery, aerial rocket and tactical air strikes." – Coleman, "1st Cav After Action Review"
Following (or in the absence of) Maneuver Combat, Assault Combat may occur. Assault Combat is resolved according to the procedure below. Assault Combat results involve only step losses and elimination of units.
9.1 Procedure
Step A: Defensive Bombardment. The defender allocates and resolves Defensive Bombardment [10.2].
Step B: Defender totals the defense strength of his stack, then rolls one die on the Assault Combat Results Table. Attacker applies losses to his force.
Step C: Attacker totals the remaining attack strength of his units and then rolls one die on the Assault Combat Table. Defender applies losses to his force.
Step D: Each player makes an Efficiency Check for their highest ER unit.
Step E: If both sides pass the Efficiency Check, both sides roll a second time on the Assault Combat Table. If only one side passes the check, then only that side is allowed a second Assault die roll. lf neither side passes the check, the Assault Combat is over.
In each step, the owning player may allocate losses as he desires [9.3.1].
9.2 Restrictions
(9.2.1) DRMs cannot exceed +3 or −3 for the attacker or defender.
(9.2.2) The defenders' terrain, both in the hex they occupy and the hex side, may affect the attacker's die roll.
(9.2.3) For the purposes of the DRM for number of hexes assaulting, use the actual number of hexes after Defensive Bombardment, i.e., if the bombardment eliminates all the units in an assaulting hex, that hex no longer counts.
9.3 Assault Combat Resolution
(9.3.1) Losses on the Assault Combat Table are stated in terms of steps lost. Do not adjust losses for TDV as in Maneuver Combat. All losses may be distributed as the owning player chooses; however, the restrictions for US Losses [2.5.4] still apply.
(9.3.2) No more than two rounds of Assault Combat can be fought per declared Assault Combat during the Assault Combat Phase. Before resolving the second round, the forces that are allowed a second round of combat total their strengths again and make whatever adjustments to DRMs are necessary due to losses in the first round.
(9.3.3) If the defender is not eliminated, attacking units cannot occupy the defender's hex.
(9.3.4) If the defender is eliminated as a result of Assault Combat, four stacking points of attacking units (or all surviving attacking units, if the attacker has fewer than four stacking points remaining after the Assault Combat is finished) MUST occupy the former defending hex.
(9.3.5) If DRMs make it impossible to achieve a result, an unmodified roll of "1" always results in one step loss.
10.0 Bombardment
"The advantage the Americans had was an unending supply of firepower potential. Not only was the artillery support plentiful, but the skies were filled with warbirds, ranging from the F4Cs, F-100s and A1Es of the Air Force, to the aerial rocket gunships of the cavalry." – Pleiku: The Dawn of Helicopter Warfare
Design Note: The three sections below detail which units are capable of performing actions in each type of Bombardment. This primarily affects helicopters. Observation and Gunship helicopters are able to conduct all three kinds of Bombardment missions, but Transport helicopters are only allowed to conduct Defensive Bombardment. This is intentional and related to doctrine; the "slicks" are supposed to be transporting troops, and, as part of that mission, might be entering an LZ to deliver ammo, medicine, or more troops, or to take the wounded, but they would hardly ever be used to go out just hunting targets: their transport mission as the lifeline of the grunts on the ground was far too vital.
10.1 Offensive Bombardment
(10.1.1) During his Offensive Bombardment Phase, the active player may use any or all of his available artillery and/or mortar units, any Observation and/or Gunship helicopters, and any number of air points to bombard enemy units. All Offensive Bombardment must be declared before any is resolved. Air Point markers and Artillery Targeting markers are provided to assist in marking this.
Play Note: All Bombardment is declared before being resolved so that Air Defense Fire opportunities are readily apparent.
Example: The FWA player elects to Offensively Bombard a VC unit adjacent to Duc Co. He combines one strength 4 artillery unit, one strength 10 ARA gunship helicopter, and 6 air points to reach a Bombardment Strength of 20.
(10.1.2) Spotting: Offensive Bombardment requires spotters to ensure accuracy. If no friendly unit is adjacent to the target hex, apply a +1 DRM to the Bombardment die roll.
(10.1.3) Bombardment is carried out by totaling the bombardment strength points of all bombarding units or points and finding that total at the top of a column of the Bombardment/Support Table. Roll the die and cross-index the die roll result with the column representing the total bombarding strength points. The result is either blank, meaning there is no effect, or a number from 1 to 6, indicating possible target losses, depending on the terrain the target occupies. To determine target losses, divide the number result by the TDV. Drop all fractions. The result is the number of steps lost by the target force.
(10.1.4) Some of the numbered results on the Bombardment/Support Table include an "F", indicating that one unit in the target hex is Fatigued. The indicated Fatigue result applies to only one unit (owner's choice) in the target hex.
(10.1.5) A hex can only be Bombarded once per Offensive Bombardment Phase.
10.2 Defensive Bombardment
"Once again the enemy found that US defensive fires make assaults very costly affairs. The attack on COLUMBUS was the last enemy offensive effort of any consequence against American positions in the IA DRANG." – Coleman, 1st Cav After Action Review"
(10.2.1) During the Assault Combat Step, the defending player can allocate the combined Bombardment strength of up to two eligible in-range artillery units, any helicopters, and any number of air points to bombard assaulting units. Exception: The FWA player may allocate any number of artillery units in range.
Bombardment is resolved in the same manner as above [10.1.3] except that the TDV for the attackers is always considered to be two. The owner removes losses from his assaulting units immediately before the Assault Combat die rolls are resolved.
Example: The PAVN is Assaulting Duc Co. During the Defensive Bombardment step, the FWA player allocates three artillery units (combined strength of 12), a single UH-1D Transport Helicopter (since any helicopters are allowed to conduct Defensive Bombardment) with a strength of 1, and 3 air points for a total Defensive Bombardment strength of 16.
(10.2.2) Range for Defensive Bombardment is always measured to the defender's hex; the bombardment is considered to be in the defender's hex.
(10.2.3) Ignore any "F" result during Defensive Bombardment.
(10.2.4) If the hex containing the US Brigade HQ is being attacked, any helicopters based there can provide Defensive Bombardment and Maneuver Combat Support for that hex only.
10.3 Maneuver Combat Support
"[The artillery's] was a an odd war. Working feverishly in tree-walled clearings dotted here and there, away from everyone else, their enemy remained unseen, and the measure of their success or failure was a radio call from an aerial observer counting bodies." – Robert Mason, Chickenhawk
(10.3.1) Each player can allocate combat support fire from artillery, observation and/or gunship helicopters, and air points to each declared Maneuver Combat, subject to the restrictions of attack coordination [7.4].
(10.3.2) In order for the attacking player to provide combat support, his attack coordination die roll result must be "Fully Coordinated". With any other coordination result, he cannot provide combat support to that combat.
(10.3.3) The defending player does not have to make an attack coordination die roll. He can always support the combat.
(10.3.4) Each player determines his combat support strength as follows:
Attacking Player (if attack coordination allows):
a. Add the bombardment strengths of any two artillery units in range of the defender's hex that he wants to allocate to combat support. Exception: The FWA player may allocate any number of artillery units in range.
b. Add the bombardment strength of any observation helicopters or gunships and/or air points available that he wants to allocate to combat support and that survive Air Defense fire [14.0].
Defending Player (no coordination die roll necessary):
a. Add the bombardment strength of up to two artillery units in range of the defender's hex that he wants to allocate to combat support. Exception: The FWA player may allocate any number of artillery units in range.
b. Add the bombardment strength of any observation helicopters or gunships and/or air points available that he wants to allocate to combat support and that survive Air Defense fire.
(10.3.5) Each player totals the combat support strength that he has allocated to the combat and resolves the support fire by rolling on the Bombardment/Support Table. Unlike normal bombardment fire, the result is not compared to the TDV of the target hex. Instead, each side's result becomes a DRM for that Maneuver Combat. The attacker's result is a negative DRM, while the defender's result is a positive DRM to the ensuing Maneuver Combat die roll.
(10.3.6) Ignore any "F" result during Maneuver Combat Support.
10.4 Artillery Restrictions
(10.4.1) Artillery units can take two actions in a game turn. They may move once and/or fire up to two times in a game turn. They can't fire more than once in any given Bombardment Phase or Combat Step. When an artillery unit moves or fires, either place a First Fire marker or flip the marker to its Final Fire side.. An artillery unit bearing a Final Fire marker cannot be moved or use its bombardment strength. Any type of movement counts as movement for purposes of this rule. Exception: mortars [12.3.1].
Play Note: Artillery can support in both the Maneuver and Assault Combat Steps of the same Combat Phase, even for the same hex.
(10.4.2) A fatigued artillery unit cannot use its bombardment strength for any purpose.
(10.4.3) Each artillery unit includes a superscript rating for range. Artillery units can fire at any hex within their range. Count range from the firing artillery unit to the target unit by including the target hex but not the artillery unit's hex. Artillery range is not affected by intervening terrain or units.
(10.4.4) Several artillery units can combine their bombardment strengths provided all are within range of the target hex.
(10.4.5) An artillery unit cannot split its fire into more than one hex.
(10.4.6) When the hex that an artillery unit occupies is being attacked by Maneuver or Assault Combat, the artillery unit adds its defense strength to the defense of the hex. It may also perform Maneuver Combat Support [10.3] and/or Defensive Bombardment [10.2] missions during that turn, if eligible, though ONLY in support of its own hex or against units that are attacking its hex.
11.0 Airpower
"The accuracy of the [air] strikes was unnerving to [NVA] regimental cadres...So accurate were the strikes that soon after arrival at ANTA Village, the regimental cadres called a meeting to determine how the Americans could make such repeated, accurate air strikes." – Pleiku: The Dawn of Helicopter Warfare
Air points are assigned for some scenarios, and are rolled for in the Campaign scenarios. Air points can be used during bombardment as well as during Maneuver and Assault Combat. Air points function in the same manner as artillery fire except that they have an unlimited range. Air points may be used against hexes containing unconcealed enemy units anywhere on the map. Air points can be combined with artillery and helicopters in the Offensive Bombardment, and Maneuver and Assault Combat Steps. As air points are used, the counter on the Air Points Track should be moved to indicate a decrease in available air points. In all scenarios, unused air points are lost at the end of the game turn during the Game Record Interphase.
The FWA player is allowed to conceal his Air Points Track. His die rolls for air points received should be made secretly to facilitate this concealment of the actual strength.
Play Note: Markers in various denominations and with varying silhouettes have been provided for players to mark their Bombardments if desired.
Design Note: Air units consisting of USAF F-100s, F-4Cs, A-1Es, B-57s, and F-102s and USN/USMC F-4Bs, A-4Ds, and A-1Hs flew 741 sorties in support of troops on the ground during the campaign, which equates to roughly 1,482 tons of high explosive. Note that this doesn't include the 96 B-52 sorties, each of which carried 51 750-lb bombs (19.125 tons) for a total of 1,836 tons. All told, this means that roughly 3,318 tons of high explosives were dropped on the PAVN during the campaign.
11.1 Air Point Destruction
Unless otherwise directed by scenario rules, if, during play, Air Points are destroyed, the number of destroyed points is subtracted from the number of points generated by the air point roll.
11.2 B-52s
"The 15th also marked the introduction of a new weapon by the American forces and one which struck terror in the hearts of even the most hardened enemy soldier. Shortly after noon a large area in the vicinity of YA8702 suddenly erupted with hundreds of thunderous explosions that moved across the ground like a giant carpet being unrolled. The B-52 bombers had struck. For the next five days the big bombers systematically worked over large areas of the CHU PONG massif." – Coleman, "1st Cav After Action Review"
Some scenarios include rules for using B-52s. Markers are provided for the FWA player to mark the usage of such bombardments. B-52s can only be used in Offensive Bombardment.
B-52 strikes cannot be conducted within five hexes of a US or ARVN unit or Patrol marker.
Design Note: Due to the potential inaccuracy of the strikes, all friendly units had to be clear of a five-mile exclusion zone around the intended strike target.
12.0 Special Units
This section details special rules that affect particular types of units.
12.1 Leaders
There are two leader units provided in the game: Lt. Col. Hal Moore & Lt. Col. Ngo Quang Truong. A leader unit has no stacking value, and it must always be stacked with a unit of its own nationality or in the Off-Map Box.
A leader moves and retreats with any unit with which it is stacked. If all units in a leader's hex are eliminated, the leader is removed from the game. Each leader unit, in addition to the special abilities below, provides the following benefits:
A DRM, either positive or negative (player's choice), equal to his leadership rating to any Maneuver or Assault die roll made by a unit or stack of units with which he is stacked.
A leader stacked with attacking units affects Attack Coordination [7.0].
A leader stacked with units allows Fatigue Recovery [2.6.7].
(12.1.1) Lt. Col. Moore: The Lt. Col. Moore counter must be stacked with a unit from the US 1/7 battalion at all times. If no such unit is in play, remove the leader counter from the game.
This leader counter provides the following special abilities:
a. Once per game, when defending in Combat, Lt. Col. Moore may make a roll on the Broken Arrow Table after the attacker's Coordination roll. This table will generate support points that may be used however the player sees fit for that particular combat step, i.e., Defensive Bombardment or Maneuver Combat Support. After the roll, flip the counter to its Broken Arrow side to indicate that this capability has been used.
b. US units from different battalions are automatically coordinated when he is stacked with one of the attacking units.
(12.1.2) Lt. Col Truong: This leader counter provides the following special abilities:
a. −1 DRM to any Bombardment roll (of any type) involving FWA artillery targeting a hex within 2 hexes of his counter.
b. ARVN units stacked with the counter may attempt Combat Refusal.
c. All Maneuver and Assault Combat attacks involving ARVN units stacked with the counter are always coordinated.
d. Units stacked with the counter at the beginning of the movement phase receive an additional movement point.
12.2 Armored Units
When any number of armor type units are attacking into Clear or Tea Plantation the attacker subtracts one from his die roll result for that Maneuver or Assault Combat.
12.3 Mortar Artillery
(12.3.1) A mortar receives a First or Final Fire marker only when it is used for Offensive or Defensive Bombardment or Maneuver Combat Support, i.e., never when it moves.
(12.3.2) Unlike a regular artillery unit, a mortar can participate directly in Maneuver or Assault Combat as an attacker as long as it is otherwise eligible, i.e. within stacking limits, adjacent, etc. It uses its Bombardment Strength [2.4.2] as its Attack Strength [2.4.1]. The unit cannot, however, conduct Maneuver Combat Support if it is also attacking.
Play Note: Only the PAVN has mortar units.
12.4 Headquarters Units
HQs allow PAVN units to recover from Fatigue [2.6.7] and receive Replacements [15.1]. In addition, they facilitate PAVN Attack Coordination [7.1].
(12.4.1) All HQs have only ONE step. They do, however, have two sides. The original HQ shows it at its best, starting efficiency, while the back represents a replacement HQ with lower efficiency.
(12.4.2) During the Recovery Phase of each game turn, a previously eliminated full-efficiency HQ unit may be reconstituted as a replacement HQ and placed on the map, subject to the following restrictions:
a. An eliminated HQ can re-enter play only once as a replacement HQ.
b. Replacement HQ units are placed during the Recovery Phase of any game turn in any friendly off-map box.
c. Replacement HQs that are eliminated can never be reconstituted.
Play Note: Reduced efficiency HQs can be identified by the stripe on the reverse side.
(12.4.3) HQ units cannot be destroyed by Bombardment. A Bombardment that would eliminate an HQ results in the placement of a Fatigue marker instead. If it is the only unit in a hex, HQs ignore "additional Fatigue" [2.6.2].
(12.4.4) HQs must be the last steps chosen as losses in combat. If HQs and the Hospital are stacked, HQs must be taken as step losses after the Hospital.
(12.4.5) [Campaign Scenarios] See the Hidden Movement Rules [16.0] for special considerations for HQs.
12.5 NVA Hospital
The Hospital allows PAVN units to recover from Fatigue [2.6.7] and receive Replacements [15.1].
(12.5.1) The Hospital cannot be eliminated by Bombardment. A Bombardment that would eliminate the hospital results in the placement of a Fatigue marker instead.
(12.5.2) The Hospital cannot retreat and is eliminated if a retreat result is obtained against it in combat.
(12.5.3) The Hospital must be the last step chosen as a loss in combat unless stacked with an HQ. If HQs and the Hospital are stacked, the Hospital must be taken as a step loss before HQs.
12.6 US 1/9 Cavalry Scouts [Campaign Scenarios]
The US 1/9 units, both ground and helicopter, are treated differently from other US units due to their primary focus on a reconnaissance role. Each 1/9 company has an associated Patrol marker with special rules [16.5.2].
(12.6.1) 1/9 transport helicopters can only be used to transport 1/9 ground units. 1/9 ground units can be helicopter transported into and out of, including retreating, any hex except Mountain Jungle, and they retain their full movement allowance regardless of LZ hex terrain type.
(12.6.2) Only 1/9 units may escort 1/9 observation missions [16.5.1].
12.7 Delta
The DELTA unit (Detachment B-52, 5th SF Group) is a normal unit in most respects; however, it also has an associated Patrol marker with special rules [16.5.2].
(12.7.1) [Campaign Scenarios] DELTA can be helicopter transported into and out of, including retreating, any hex except Mountain Jungle, and it retains its full movement allowance regardless of LZ hex terrain type.
(12.7.2) When conducting Maneuver Combat as the attacker with any units other than CIDG units, DELTA cannot be chosen as the lead unit.
Design Note: Project DELTA was one of three reconnaissance units combining US and ARVN Special Forces teams to conduct operational and strategic intelligence gathering missions.
12.8 CIDG
The Civilian Irregular Defense Group (CIDG) companies are normal units in most respects; however, they have associated Patrol markers with special rules [16.5.2].
(12.8.1) CIDG units can be helicopter transported into and out of, including retreating, any hex except Mountain Jungle, and they retain their full movement allowance regardless of LZ hex terrain type.
(12.8.2) When conducting Maneuver Combat as the attacker with any units other than DELTA, CIDG units cannot be chosen as the lead unit.
Design Note: The CIDG Strikers were Montagnards who were trained by US Special Forces and used primarily in local defense and reconnaissance roles.
12.9 ARVN Supply Unit
The ARVN Supply Unit starts in Pleiku in several scenarios. The FWA player earns Victory Points in certain scenarios for having the Supply Unit enter either Plei Me or Duc Co. Once the Supply Unit enters either hex, remove it from the game.
In some scenarios, if the Supply Unit does not attempt to enter either SF Camp, the PAVN player may be able to claim an Automatic Victory condition. The intent of this rule is that the FWA player must make a valid attempt to get the Supply Unit through to one of the Camps. If both Plei Me and Duc Co are captured by the PAVN, the FWA player may claim Automatic Victory Chit #5 as being fulfilled. Remove the Supply Unit from the game.
Design Note: Unfortunately, this is one of those things which is difficult to write a rule about because the situation on the ground will dictate what a "valid attempt" is. If you can't agree, then use this: the Supply Unit must have made at least one move to the fullest extent of its movement allowance (assuming it's not blocked by enemy presence) AND it must spend at least 5 turns on the map at least 3 hexes from a Pleiku or Camp Holloway hex (except if it's forced to retreat closer or into either one).
12.10 OV-1 Mohawk [Campaign Scenarios]
The OV-1 Mohawk is a special air unit used for aerial observation missions [16.5.1]. The FWA player keeps it on the FWA Player Aid Card unless it is being used for an observation mission. It cannot be escorted nor is it subject to Air Defense Fire.
Design Note: The ASTA (Aerial Surveillance and Target Acquisition) Platoon consisted of six OV-1 Mohawks equipped with either side-looking airborne radar (SLAR), infra-red sensing devices, or aerial photography equipment. They flew a total of 23 IR missions, 50 SLAR missions, and 13 photo missions during the campaign for a total of 4,862 flying hours.
This battery has a minimum range of one hex (cf., mortars and other artillery have a minimum range of zero), and is highlighted on the counter as a reminder. In game terms, this means the unit can't fire in support of its own hex in either Defensive Bombardment or Maneuver Combat Support.
Design Note: Most of the artillery pieces involved in the Ia Drang battles were 105s. This battery, however, was equipped with 155s which could not be easily depressed far enough.
Campaign Scenario Rules
The Campaign Scenarios (8-12) add helicopters, hidden movement, patrols, and other rules to provide a more realistic view of the issues both sides dealt with during the campaign. They also add complexity. The following rules are used with the Campaign Scenarios except where noted.
13.0 Aerial Movement
13.1 Helicopter Movement
"The experimental division authorized to try out [the air assault] concept is stirring up the biggest inter-service controversy in years. There are some doubts about how practical such a helicopter-borne force would be in a real war." – U.S. News & World Report, 20 Apr 1964, as quoted in Chickenhawk
Helicopters can move any distance on the map. They have no movement allowance: their range is unlimited. To move a helicopter unit, remove it from its Helicopter Base and place it anywhere on the map. No path of movement is traced, and, therefore, no Air Defense Fire (ADF) can take place against the helicopter until it is placed in a hex on the map.
Helicopters may conduct one mission per Phase.
No helicopter unit can ever unload a ground unit in the same hex as an enemy unit or Hidden Movement marker.
All helicopter movement must be declared before any ADF is announced.
Play Note: This allows the PAVN player to decide, in the case of multiple ADF possibilities with hidden units, which one(s) he may want to reveal for the shot.
(13.1.1) Landing Zones
There are two types of Landing Zones (LZs) the FWA player can utilize: Field Expedient and Operational. Which type the player uses has effects on movement and combat. For adjacency purposes as described below, only the situation as of the current Movement Phase is relevant. Only one type of LZ can be in a hex during a Movement Phase.
(13.1.1.1) Field Expedient: These are not marked on the map in any way. These LZs can only be used to load or unload a single infantry company in any given Movement Phase. The FWA player moves a single company following the rules for helicopter movement and places it in or removes it from the hex. A Field Expedient LZ can be declared in any type of terrain EXCEPT Mountain Jungle. Field Expedient LZs cannot be adjacent to one another nor can they be adjacent to an Operational LZ.
(13.1.1.2) Operational LZs: These LZs are more robust Landing Zones. The FWA player is provided with a number of LZ markers (containing historical LZ names from the campaign). The FWA player may "open" an Operational LZ by declaring it and placing the LZ marker in any Clear, Broken, Light Jungle, or Tea Plantation hex. (This is also marked on the TEC.) An Operational LZ allows the FWA player to load or unload up to four stacking points of infantry companies and/or artillery batteries at a time in the LZ [See also 13.1.4]. Operational LZs cannot be placed adjacent to each other nor can they be adjacent to a Field Expedient LZ.
For an Operational LZ to remain on the map there must be at least one FWA unit in the LZ hex at the end of a Game Turn. Otherwise, the Operational LZ is "closed". The FWA player may always voluntarily "close" an LZ at the beginning of the Movement Phase. A "closed" LZ is removed from the map, and placed on the Game Information Display five turns ahead. The LZ becomes available again in the Reinforcement Phase of the turn specified.
Design Note: "Open" and "Closed" are the technical terms used to denote whether or not a particular LZ is still in active use.
Special Forces Camps are always considered to be Operational LZs for loading/unloading purposes.
Units in an Operational LZ may claim No Retreat as if they were in a Terrain Defense Value of 3 [8.5.7].
An Operational LZ is "captured" if PAVN units were the last units to enter this hex.
Design Note: The no adjacency provisions and temporary loss of the LZ marker when removed represent several things. Sometimes suitable clearings simply weren't close enough to each other (even at a mile per hex). Other times, suitable clearings were just not seen until later or were later deemed unsuitable. Finally, it prevents players from abusing the rules.
Play Note: There are two Landing Zones printed on the map: LZ X-RAY and LZ ALBANY. These are for historical purposes only, and they are not considered actual LZs unless the player places an LZ marker there or uses them as a Field Expedient LZ.
(13.1.1.3) Hot Landing Zones: A Landing Zone of either type is considered "hot" when, at the time of unloading or loading, there are enemy units adjacent to the LZ. The enemy units must be revealed, i.e., not under a Hidden Movement marker, to effect a Hot Landing Zone; the PAVN player may choose to reveal all units in an adjacent hex at the time of loading/unloading, but doing so requires him to give the FWA player the Hidden Movement marker [16.3]. Each unit unloading or loading in a Hot LZ must undergo an efficiency check. If the unit fails the check, mark it with a Fatigue marker.
Apply a +1 DRM for every two additional adjacent hexes occupied by enemy units beyond the first, i.e., 1-2 hexes is a +0, 3-4 hexes is a +1, and 5-6 hexes is a +2.
A Fatigue result from a Hot Landing Zone cannot cause a step loss due to Additional Fatigue [2.6.2].
"We're inbound on you," Bennet said. "I can't see anything down there but tracers and explosions in a sea of black...Is that you? Over." "Roger," Weitzel replied, "that's us. Set down to the left of where the red tracers are coming from. Over." – radio communication between Captain Ken Weitzel, aviation liaison officer attached to 2nd Battalion, on the ground at Albany, and his CO, C/229, trying to unload to support the beleaguered U.S. troops"
– "Shootout at LZ Albany", Vietnam Magazine, Dec 2015
(13.1.2) Movement Effects on Transported Units:
Regardless of LZ type, units that load or unload in Clear, Broken, Tea Plantation, or Light Jungle use one-half of their movement points to do so. In all other terrain types, units use all movement points on unloading, and a unit loading in such terrain cannot move prior to loading. Exception: 1/9, CIDG, and DELTA units lose no movement in any terrain type when loading or unloading.
(13.1.3) Transport Capacity: The transport capacity rating on the helicopter unit counters represents the number of STEPS (NOT stacking points) of infantry companies or artillery batteries that a helicopter unit can transport. Only heavy transport helicopter units (those with a full strength transport capacity of 4) can transport artillery units. When transporting artillery, the normal number of steps that a helicopter heavy transport unit can carry is halved.
Example: B/227 UH-1D, on its full strength side, can carry a single full strength infantry company. C/228 CH-47, on its full strength side, can carry either two full strength infantry companies or a single full strength artillery battery.
(13.1.4) Mission Limits: A helicopter unit's mission may involve moving to or from more than one hex on the map when transporting ground units. In such a case, indicate each hex where it will load/unload a unit to be transported. In each such hex, the enemy player may, prior to loading or unloading, exercise the option of Air Defense Fire [14.0] if he meets the qualifications; then place the helicopter unit in the appropriate Mission Readiness Box.
A helicopter transport unit can load/unload more than once in a Movement Phase provided that the total, cumulative number of steps transported does not exceed the helicopter's transport capacity. This capacity may be doubled if the helicopter transports a unit from a helicopter base, unloads and loads in the same hex, and immediately returns to a helicopter base. In other words, it can load from the same hex in which it just unloaded as long as that is its only mission.
Example: The FWA player has B/228 (a CH-47 with a transport capacity of 4) in the An Khe Off-Map Ready box. C/2/8 is also in An Khe. During his Movement Phase, the FWA player declares that he is using B/228 to load C/2/8 and drop it off in LZ X-RAY (1925). As this has only used up two of the CH-47s available transport capacity of four, the FWA player also declares that he will load a CIDG unit from Duc Co (1510) and drop it off in Plei Me (3425). This has used all of the helicopter's available transport capacity, so it is placed in the "1 Mission" box on the FWA player aid. Alternatively, the player could have used a UH-1D (transport capacity of 2) to unload C/2/8 in Duc Co and load the CIDG for a return trip to An Khe. If the PAVN player met the qualifications for ADF in any of the loading or unloading hexes, he would have rolled for ADF in each such hex, i.e., up to three times.
(13.1.5) Retreats: Ground units can be retreated by helicopter. Normal helicopter transport rules and considerations apply. Ground units wishing to retreat by helicopter may be loaded by helicopter transport (with helicopters possibly undergoing ADF) in their defending hex or after a one hex retreat. Units that are retreated by helicopter must be transported to the Helicopter Base from which the helicopter originated. Units cannot use helicopter transport to retreat from Dense or Mountain Jungle hexes. Hot Landing Zone [13.1.1.3] can apply. Exception: 1/9, DELTA, and CIDG can retreat from Dense Jungle [12.6.1/ 12.7.1/ 12.8.1].
"From an airmobility standpoint alone, the activities of November 3 resulted in the equivalent of seven company and two battery moves, for a one-way distance of 250 kilometers. The next day, there were twelve company and two battery moves, for a total distance of 325 kilometers. Additionally, there were numerous ground movements of company- and platoon-size elements." – Pleiku: The Dawn of Helicopter Warfare
13.2 Helicopter Bases
There are two places at which helicopters can base: the An Khe off-map box and the on-map Brigade HQ (if placed). Helicopters can only base and fly missions from these two places.
(13.2.1) Brigade HQ:
The FWA player is provided with a US Brigade HQ unit counter. This counter is a single step unit. During his Reinforcement Phase, the FWA player may declare that he is establishing the Brigade HQ. He places the HQ and up to four stacking points of units (using helicopter movement for the units from either Camp Holloway or the off-map An Khe box) in any Clear or Tea Plantation hex on the map that has a road in or adjacent to it. The hex must be nine or more hexes from Camp Holloway (4702) and five or more hexes from a Special Forces camp (Duc Co – 1510, Plei Me – 3425). The ground units cannot move further that turn. The helicopters used to move the units are moved from their Ready box and placed in the 1 Mission box of the Brigade HQ column of the Helicopter Readiness Chart. Additional helicopters may also be moved to the brigade HQ, but no more than six helicopters of any kind can be based there.
Helicopters based at the HQ receive a better recovery roll from the 2 Mission box (as noted on the chart). In addition, US and ARVN units can recover from Fatigue if they are in the Brigade HQ hex [2.6.7].
Helicopters flying from the Brigade HQ can only load units that are currently on the map.
In combat, as an exception to 2.5.4, the Brigade HQ is always the last step loss taken in a hex and it changes the TDV of the hex to 4.
Play Note: In some scenarios, if the FWA player does not place the Brigade HQ, the PAVN player's ability to claim an Automatic Victory [17.2] becomes easier.
(13.2.1.1) Brigade HQ Removal: The FWA player cannot voluntarily remove the counter once it is placed. It is, however, removed if it takes a step loss; if this happens it is considered captured by the PAVN.
If the Brigade HQ is captured by the PAVN, for each helicopter currently in the Ready or 1 Mission or 2 Mission box roll a die on the Air Defense Fire Damage Table as appropriate for the helicopter type. Then immediately move them to the An Khe Box and place them in the 2 Mission box. If the helicopters were Grounded, they are, instead, eliminated.
The PAVN player earns victory points, as listed in the scenario, for destroying helicopter steps and capturing the Brigade HQ.
Design Note: During the campaign, the 1st Cav established a brigade HQ at the Catecka Tea Plantation. The establishment of the HQ allowed helicopters to spend more time in the air and less time shuttling back and forth between the 1st Cav base at An Khe, the forward operating base at Camp Holloway, and the Area of Operations. This is why the placement restrictions exist. Interestingly, the HQ was supported entirely by air via C-123s and other aircraft… including all of the fuel for the helicopters operating out of it.
(13.2.1.2) Changing Bases: Helicopters may use a mission to change Helicopter Bases. This may be combined with any other type of missions. If a helicopter unloads units in a Helicopter Base, they must be placed in the appropriate Mission box at that base.
(13.2.1.3) Combat: Any PAVN ground attack or bombardment of the hex in which helicopters are based entitles the PAVN player to roll once against each Grounded row of the Mission Readiness Box with the following results:
1-5 destroys one helicopter step in the Grounded 2 row 1-3 destroys one step in the Grounded 1 row
This is one step loss per row in total not one step per unit in each row. The PAVN player can resolve these rolls in any order he wishes.
If an Assault and/or Maneuver Combat is declared against such a base, helicopters that are based there may only be used in defense of that base, i.e., for Defensive Bombardment or Maneuver Combat Support.
Play Note: This rule only applies to the US Brigade HQ as An Khe is off-map.
13.3 Escorting Helicopter Units
"It was always an experience for an Air Force pilot to watch a gaggle of Hueys attack a target… In the attack the target is always directly in front of us. Not so with a Huey. To watch four or eight of them at a time maneuvering up and down and laterally and even backward boggles a fighter pilot's mind. Those guys swarm a target like bees over honey." – Capt. Bruce Wallace, We Were Soldiers Once…And Young
Gunships may be used to escort transport or observation missions. Any gunship unit can escort a transport mission, but only 1/9 gunships can escort observation missions. The gunships are moved in a stack along with the helicopter unit(s) being escorted. The bombardment rating of the gunship(s) gives the transporting stack a higher total bombardment rating. This means that the PAVN player will need a larger number of steps in or adjacent to the mission hex in order to fire ADF (unless he has hidden artillery units adjacent that he reveals).
13.4 Helicopter Readiness
Helicopter units are based in either the An Khe Off-Map Box or the US Brigade HQ [13.2.1]. Both of these are considered Helicopter Bases. Helicopters can be in one of several statuses at a particular base.
Helicopter readiness is determined during the FWA player's Initial Phase. Units in the "1 Mission" box or the "Grounded 1" box go to the "Ready" box; units already in the "Ready" box remain there. Units in the "2 Mission" box must roll to see if they are grounded for a turn or if they are moved to the "Ready" box. This roll changes depending on where they are based. If they are in An Khe, then on a result of 1-6, they become Ready; on a result of 7-10, they are moved to the "Grounded 1" box. If they are in the Brigade HQ, then on a result of 1-8, they become ready; on a result of 9 or 10, they are moved to the "Grounded 1" box. Units in the "Grounded-2" box move automatically to the "Grounded 1" box. The only way that a unit can be placed in the "Grounded 2" box is as a result of air defense fire.
Units in the "Ready" box that fly a mission are placed in the "1 Mission" box unless combat results dictate otherwise. Later that turn, if the same unit flies again, then it is returned to the "2 Mission" box unless, again, combat results dictate otherwise. That helicopter unit has then flown its maximum number of missions for that game turn. During the following Initial Phase, the readiness of each unit is then determined as outlined above. In short, a helicopter unit can fly a maximum of two missions per game turn (once per phase); if the unit flies more than one mission, there is a 20% or 40% (depending on where it's based) chance that it will be grounded during the next game turn.
13.5 Helicopter and Air Point Bombardment
"Prior to the Pleiku campaign, the Department of the Army FM 1-100, Army Aviation, barely mentioned armed helicopter employment. After the campaign, FM 1-100 included an entire chapter dedicated to doctrine on the employment of armed helicopters." – Major Kristopher T. Gillet
Helicopter gunships, observation helicopters, and air points may bombard in the same way that artillery bombardment can be used: either defensively or offensively. Helicopters and air points are alike in all respects except that air points may be parceled out one at a time and have no unit counters to represent them. In certain cases, transport helicopters may be used for Defensive Bombardment.
13.6 Air Transport
Once per turn, the FWA player may move a single battalion of infantry using air transport. The unit(s) transported must start and end in one of the following locations: Duc Co (1510), Plei Me (3425), Camp Holloway (4702), An Khe (off-map), or the US Brigade HQ. The unit(s) must all be part of the same battalion, e.g., US 1/5 or ARVN 3/1 Airborne.
Air transport cannot be used to or from Duc Co, Plei Me, or the Brigade HQ if that location has a revealed enemy unit adjacent to it.
Design Note: In addition to helicopters, air transport was also conducted using C-123s and C-130s. The airfields, however, were located outside the perimeter defenses except in the cases of Camp Holloway and An Khe.
14.0 Air Defense Fire
"One of the most agonizing decisions that had to be made was the choice of landing zone. With enemy fire still being placed on the airstrip, that was ruled out. Moreover, the N-V-A force at PLEI ME was well equipped with heavy anti-aircraft machine guns, and had already shot down seven aircraft, including two B-57 fighter-bombers." – Coleman, "1st Cav After Action Review"
(14.1) To use Air Defense Fire (ADF), the PAVN player must have a number of steps of any type in and/or adjacent to the mission hex that is greater than the bombardment strength of the helicopters and/or air points allocated to that hex. Units under a Hidden Movement marker cannot be counted unless they are immediately revealed. No helicopter stack can be fired on more than once per mission hex. It is possible, however, to fire on more than one stack of helicopters with one stack of units if more than one mission hex is adjacent to the units in question.
(14.2) Any hidden artillery unit(s) in or adjacent to one mission hex may immediately reveal themselves for automatic ADF opportunities regardless of the bombardment strength the FWA player has allocated to that hex. Already revealed artillery units are counted as normal steps, i.e., revealed artillery have no special properties other than those normally accruing to them. ADF does not count as "First Fire" or "Final Fire" in either case.
Design Note: The air units/helicopters would avoid and/or suppress known concentrations of anti-air capable units.
"Maintaining unit integrity was becoming increasingly difficult for many elements of the [NVA] 33rd Regiment as Cavalry helicopters seemed to be everywhere, firing into carefully camouflaged positions and causing individuals to either break and run or reveal positions by returning the aircraft fires." – Coleman, "1st Cav After Action Review"
(14.3) ADF attacks are resolved according to the ADF tables. To resolve ADF, roll one die on the Air Defense Fire To Hit table, and, on a modified die roll of 1 or 2, roll a second die on the Air Defense Fire Damage Table against the air points and/or helicopter stacks as appropriate. Each just-revealed artillery unit adjacent to the hex modifies the first die roll by -1. The firing player always chooses the type of helicopter at which he will shoot, or if he will, instead, shoot at air points. He must choose before rolling on the ADF table. Implement any results as specified on the Player Aid Card.
(14.4) Observation helicopters that are "Aborted" by ADF, cannot roll for aerial observation [16.5.1].
15.0 Replacements and Reinforcements
Both sides receive replacement steps and/or reinforcements in most of the scenarios. Such scenarios will list the number and location of replacements and/or reinforcements.
15.1 Replacements
Replacements restore a unit's fighting ability. Losses in the game do not represent, necessarily, actual numbers of men killed and wounded. Rather, they somewhat abstractly reflect the loss of combat effectiveness. In the rugged terrain west of Pleiku, most units couldn't fight effectively for very long. Replacements arrive in the form of steps as specified in the scenario. Replacement points may be accumulated and need not be used on the turn they arrive.
(15.1.1) Using Replacements: Players can use replacements in one of two ways:
They can restore a reduced two-step unit that occupies any indicated replacement location to its two-step (full strength) side.
They make take a unit from the "dead pile" and place it in any indicated replacement location on its one-step side.
A two-step unit cannot be taken from the "dead pile" and also be restored to full strength in the same turn.
Exception: The Grand Campaign scenario will call for particular units to be Withdrawn from the map. Such units cannot receive replacements once they have been Withdrawn.
(15.1.2) Replacement Locations: Unless directed otherwise by scenario rules, replacement locations are as follows:
US – An Khe, Camp Holloway, Brigade HQ ARVN – Camp Holloway PAVN – Cambodia, HQ, or the Hospital
A unit replaced from the "dead pile" placed with a hidden HQ or Hospital is also hidden.
Headquarters [12.4] and the Hospital [12.5] have special rules for Replacement.
(15.1.3) Replacement Costs: Restoring a step or bringing a unit back from the "dead" on the map costs one replacement point. In Cambodia, this costs the PAVN player only ½ point.
15.2 Reinforcements
Most scenarios list reinforcements for one or both sides along with the turn(s) and location(s) of entry. When called for by the scenario, reinforcements enter for that side during their Reinforcement Phase. Place the Reinforcements according to any scenario instructions.
"The real cutting edge for the attack, however, was the newly infiltrated 66th Regiment, fresh from North Vietnam and spoiling for a fight. It would be in the van of the three regimental effort against PLEI ME…." – Coleman, "1st Cav After Action Review"
(15.2.1) NVA 66th Regiment and 20th Artillery Battalion Variable Entry: Some scenarios call for the PAVN player to roll to see if/when the NVA 66th Regiment enters the battle. When a scenario calls for this variable entry, the PAVN player rolls a die in each of his Reinforcement Phases (including the first) and consults the NVA 66th Regiment Variable Entry Table. If the result is within the listed range for the current game turn, then the regiment arrives, and the PAVN player rolls a second die to determine in which Cambodia Off-Map Box the regiment arrives. The NVA 20th Artillery Battalion follows two turns later. The PAVN player is free to deceive the FWA player by always rolling a second die regardless of the outcome of the first die.
(15.2.2) Withdrawal: The Grand Campaign Game scenarios, #11 & #12, call for the withdrawal of certain US units on particular game turns.
During the Reinforcement Phase, the FWA player may use Helicopter Movement [13.1] and/or Air Transport [13.6] to move the Withdrawing units to An Khe. Additionally, if able to do so, units may use ground movement to move to Camp Holloway during the Reinforcement Phase. Once units arrive in either An Khe or Camp Holloway, they are removed from the game. This counts as one mission for any helicopters used. If any units use Air Transport, this uses up that capability for the turn.
In turns during which transport helicopters are arriving as reinforcements, the FWA player may use both withdrawing and arriving helicopters for such movement.
The PAVN player receives 3 VP at the end of each game turn for each such unit that has not yet been Withdrawn.
16.0 Hidden Movement
Design Note: The PAVN were masters of camouflage and painstaking plotters and planners. They either knew or had local guides who knew every inch of the ground over which they operated. They often opted to simply melt away into the jungle rather than face the overwhelming firepower the FWA typically brought into battle. One of the primary issues confronting FWA planners was actually finding an enemy to engage.
"All in all, however, the intelligence picture still was hazy and full of conjecture." – Coleman, "1st Cav After Action Review"
16.1 Hidden Movement Markers
The PAVN player may represent some of his units on the map with Hidden Movement markers. He places his units into boxes on the PAVN Hidden Movement Player Aid Card, and places the corresponding marker onto the map in their place. All regular rules apply to these substitute counters, e.g. movement. The Play Aid should be concealed from the FWA player. He must follow stacking rules within each hidden unit box for the units that are represented by the marker. He is allowed to use some of the Hidden Movement markers as Dummies, or blanks, by substituting no actual combat units if he wishes. He need not conceal any unit that he wishes to leave revealed, nor must he use all of the Hidden Movement markers at any one time. Hidden movement is completely voluntary. Units may move between markers without being revealed provided they have the movement allowance to do so.
A Hidden Movement marker has no ZOC, enables Ambushes [16.6], and can be Bombarded [16.1.2], albeit with an unfavorable DRM (see Bombardment Table); any losses generated will be applied to units, if any, on the Hidden Movement sheet. It has an Efficiency Rating of 6 (upper right).
(16.1.1) During each Concealment Phase of the PAVN player turn, the PAVN player is allowed to remove any "dummy" counters from the map and place new markers on the map. He cannot both pick up and place the same marker in the same Phase.
He may also conceal units on the map by removing them from their hex, placing them in a Hidden Movement box and placing the corresponding marker in the same hex on the map. The PAVN player may also transfer units between markers in the same hex even those just placed.
He cannot place units that are within a Patrol radius or adjacent to an FWA unit under a Hidden Movement marker. Exception: If revealed units are in the same hex as a Hidden Movement marker, they may be moved to the appropriate Hidden Movement box regardless of Patrol radius or adjacent FWA units.
The only restrictions on the placement of these Hidden Movement markers are as follows:
1 – They cannot be placed within a Patrol marker's radius.
2 – They cannot be placed adjacent to an FWA unit.
3 – Dummies must be placed within movement allowance (nine points) of a revealed PAVN unit, another Hidden Movement marker or a map edge adjacent to a Cambodia off-map area.
4 – No more than four markers can ever be in a single hex. Stacking limits for the units that are hidden still apply and cannot be exceeded (an exception to 4.2.3) including any units which may already be revealed. If found to be in violation of this, the Hidden Movement marker is revealed and the units are placed on the map.
(16.1.2) Bombardment Effects: Unless there are revealed units in the same hex, Offensive Bombardment against a Hidden Movement marker suffers a +2 DRM. If casualties are taken in the Bombardment, the PAVN player marks such casualties and/or Fatigue on the Hidden Movement PAC. He may do so even if no units are present in the hex to further deceive the FWA player.
(16.1.3) FWA Movement and Hidden Movement Markers: If FWA units move adjacent to a Hidden Movement marker, and the PAVN cannot or decides not to Ambush [16.6], the FWA units may pay an additional MP to displace the marker one hex (PAVN player's choice) and continue moving. If the marker is on a road when this occurs, it may not displace to another road hex unless that is the only hex available. If the marker can't be displaced, i.e., it's surrounded by FWA units, it is, instead, revealed.
Design Note: If the PAVN doesn't want to engage, then the FWA will have to try and pin them down, or, alternatively, simply keep moving and ignore whatever may be concealed by the Hidden Movement marker. This is just another tool in the PAVN's shell game toolbox.
16.2 Revealing Hidden Units
"The capture of the aid station was a major find for the division and besides the opportunity it provided for destruction of N-V-A forces, it also yielded documents, including one particularly valuable map, that revealed enemy supply and march routes." – Coleman, "1st Cav After Action Review"
There are several ways to reveal hidden PAVN units:
1 – Any time an attack is declared against a hex containing a PAVN Hidden Movement marker and the PAVN player declines or fails combat refusal, the actual unit(s) in the hex, if any, are immediately revealed.
2 – Aerial Observation [16.5.1].
3 – Observation by patrols [16.5.2].
4 – In Campaign Scenarios, whenever the NVA Hospital or an NVA HQ is eliminated, the FWA player chooses ten PAVN Hidden Movement markers on the map that the PAVN player must reveal. The PAVN player immediately places any units hidden by those counters on the map. Five of the markers are placed five Game Turns ahead on the Game Information Display. The other five can no longer be used the PAVN player for the rest of the scenario.
Design Note: This situation is a representation of an event that actually occurred in the campaign – quite accidentally, the 1st Cav overran the NVA hospital, capturing battle plans and documents that showed unit dispositions, strength, movement orders, and so on.
5 – Any time PAVN ground units attack a hex, they must reveal themselves after the Attack Coordination roll. PAVN artillery units that are conducting bombardment or support against a ground hex need not reveal themselves, but PAVN artillery units exercising the option of ADF must reveal themselves.
6 – Any time the PAVN player declares an Ambush.
7 – Any time the PAVN player reveals units in order to cause a Hot Landing Zone or qualify for ADF.
8 – The PAVN player may voluntarily remove a marker at any time.
Play Note: #8 is useful when the PAVN player doesn't want to Ambush the FWA, but it also doesn't want to be displaced from the hex [16.1.3].
Important: If a Hidden Unit marker is revealed by observation from either Aerial observation or a Patrol, and the natural die roll is a "1", place the marker on the Game Information Display 10 game turns ahead. [16.5.3]
16.3 Revealed Hidden Movement Markers
PAVN Hidden Movement markers revealed for any reason are not immediately available for re-use. Non-Ambush markers are placed one turn ahead on the Game Information Display. Hidden Movement markers used in Ambushes [16.6] are not returned for two game turns, i.e., they are placed two game turns ahead. Markers revealed through elimination of the Hospital or an NVA HQ are either placed five turns ahead or kept by the FWA player for the remainder of the scenario [16.2].
Example: During the FWA portion of GT3, Aerial Observation and Patrols reveal three Hidden Movement markers. These markers are placed on GT4 on the Game Information Display, and they will be returned to the PAVN player during the Initial Phase of that turn. During the subsequent Movement Phase of GT3, the PAVN player Ambushes the FWA player and uses two markers to do so. These markers are placed on GT5 on the Game Information Display, and they will be returned to the PAVN player during the Initial Phase of that turn.
16.4 Hidden Movement and HQs
NVA HQs follow most of the Hidden Movement rules normally, but they are treated slightly differently as follows.
(16.4.1) HQs may be placed under a Hidden Movement marker regardless of the presence of Patrol markers unless they are adjacent to FWA units.
(16.4.2) To use a Hidden HQ's ER for Coordination, it must be revealed.
16.5 Observation
"B 1/9 Cav Sqdn… began search operations in the area of the LE THANH District Headquarters… with a Special Forces C-I-D-G "Eagle Flight" attached. The attachment, despite the aerial connotation, actually was a Montagnard ground reconnaissance group consisting of six, 5-man scout squads." – Coleman, "1st Cav After Action Review"
(16.5.1) Aerial Observation Missions: The FWA player can conduct two kinds of aerial observation missions: helicopter and ASTA (Aerial Surveillance and Target Acquisition). Both methods are described below. Only one aerial observation mission can be flown per hex.
(16.5.1.1) Helicopter Observation: During either or both of the Observation Phases, the FWA player may select US 1/9 OH-13S units from either the "Ready" box or the "1 Mission" box for observation missions, moving them directly from their Helicopter Base to the hex where the observation will be attempted. This mission may be escorted [13.3], and, if the observation is successful, the gunship and/or the observation units may conduct Offensive Bombardment against the target hex. This mission may be subject to ADF [14.0].
If there are already revealed units in a hex with a Hidden Movement marker, the observation mission may conduct Offensive Bombardment against the revealed units regardless of the success of the observation roll.
(16.5.1.2) ASTA Observation: During either or both of the Observation Phases, the FWA may use the OV-1 Mohawk counter for one observation mission by moving it directly from the FWA PAC to the hex where the observation will be attempted. This mission cannot be escorted nor is it subject to ADF [14.0].
(16.5.2) FWA Patrols: Patrolling is another way for the FWA player to attempt detection of hidden PAVN units. Certain units (US A, B, C/1/9, US DELTA, and ARVN CIDG) have associated Patrol markers. A marker is only available if the associated unit is available in the scenario.
Design Note: Patrol markers represent various small teams inserted into areas in an attempt to locate the enemy. These include small units of ARVN Special Forces, Project DELTA, CIDG Strikers, and, for the 1st Cav, elements of the 1/9 Cav Scouts.
(16.5.2.1) In the Observation Phases of each FWA game turn, after aerial observation attempts, the FWA player may place these markers on the map.
CIDG markers are placed within non-road movement allowance, i.e. 9 MPs, of any CIDG unit on the map. Each CIDG company can be used to place a single Patrol marker. DELTA and the 1/9 Patrol markers can be placed in any hex.
1/9 Patrol markers can only be placed on the map if the associated company is in An Khe, the Brigade HQ hex, or an SF Camp hex (they can be removed from the map any time). If both the Patrol marker and associated 1/9 company are on the map, the Patrol can only be removed or placed in a hex within six movement points of the associated company.
Patrol markers cannot be stacked, placed adjacent to each other, nor placed in a hex which is enemy occupied.
Play Note: There are only four CIDG Patrol markers, but six CIDG companies. This is intentional.
(16.5.2.2) Patrol markers may either make or assist in one attempt to observe a Hidden Movement marker within their patrol radius. The Patrol's radius is counted in hexes (not including the Patrol's hex). The radius, in hexes, of a Patrol is shown on each marker.
They can attempt to observe a Hidden Movement marker that was the target of a failed helicopter observation attempt earlier in the turn. This observation attempt is made in a similar manner to aerial observation except the roll is compared to the number to the right of the "|". Observed units are immediately revealed. Patrol markers may make another observation attempt in the Final Observation Phase.
A Patrol marker that assists in an observation roll for another Patrol provides a −1 DRM and cannot, itself, attempt an observation.
If there are multiple Hidden Movement markers in a hex, ALL of them are revealed if the observation attempt is successful.
(16.5.2.3) If a Patrol reveals an enemy unit, the FWA player may, unless the associated company is Fatigued, immediately move the company associated with the marker and any of the companies associated with any of the assisting markers into the Patrol marker's hex with the following restrictions:
- DELTA: may use non-road ground movement (if able to reach the hex) or may use helicopter transport regardless of its location on the map, i.e., the helicopter can load it up along the way
- 1/9: may use non-road ground movement (if able to reach the hex) or may move using helicopter transport but only if the unit itself is in An Khe, the Brigade HQ hex, or an SF Camp (in the latter case, the helicopter may come from either An Khe or the Brigade HQ)
- CIDG: must use non-road ground movement and be able to reach the hex
When using ground or helicopter movement, all normal movement rules apply. Remove the Patrol marker from the map if its associated company reinforces it in this manner.
Play Note: It is possible to place a Patrol marker in a hex that can't be reached by helicopter transport. In this case, the FWA player can only react into the hex with ground movement, if able. Be careful.
(16.5.2.4) A Patrol marker is treated as a unit in most respects. PAVN units may not enter its hex, but it can be attacked but not Bombarded. If it is attacked, the FWA player may always attempt to withdraw the marker during the Combat Refusal step. On a die roll of 7 or less, the marker is successfully withdrawn from the map, and the attacking units may advance into the hex.
If the FWA player fails or elects not to roll, he may immediately and automatically react the associated company per 16.5.2.3. The FWA player may remove the marker from the map in this case.
If the FWA player does not withdraw the marker or the associated company is eliminated or forced to retreat, then the marker is placed on the Game Information Track five turns ahead, and the attacking units may advance into the hex. The removed marker returns to play as a Reinforcement on the turn specified.
(16.5.3) Observation Resolution: Refer to the Observation column on the Terrain Effects Chart to resolve observation attempts. Determine the terrain that the Hidden Movement marker occupies, and roll a die, applying any DRMs. Compare the die roll to the number to the left of the "|", i.e., "Aerial", and, if the roll is equal to or less than the listed value for the terrain type, any hidden units are revealed [16.2].
Each adjacent hex occupied by FWA ground combat units to a Hidden Movement marker provides a −1 DRM.
If there are multiple Hidden Movement markers in a hex, ALL of them are revealed if the observation attempt is successful.
If the Observation die roll is a natural "1", the marker(s) are placed 10 Game Turns ahead on the Game Information Display.
Play Note: All of the above can be pretty confusing. Basically, the CIDG Patrols are limited to ground movement distance from a CIDG company for both placement and reinforcement (either because of observation or from being attacked). DELTA is pretty much unlimited and can use ground or helicopter movement to reinforce. The 1/9 units are a little tricky in that they are only limited in placement if their associated company is on the map, and they can use ground movement if already on the map but can only use helicopter movement to reinforce if they start in a Helicopter Base or SF Camp.
(16.5.2.5) If, during an Observation Phase, no CIDG unit is within movement range (irrespective of enemy units or ZOCs, i.e., pretend they aren't there) of a CIDG Patrol marker, the marker must be removed from the map, although it can immediately be placed again within range of another CIDG unit. Similarly, the 1/9 Patrol markers must always remain within six movement points of their associated company when the company is on the map.
(16.5.2.6) Patrol markers are removed and placed during the Observation Phases of each FWA player turn. They can be removed and placed again in the same phase. Removing, placing, or withdrawing markers does not use helicopter assets. A Fatigued unit cannot be used to place a marker.
Play Note: Because the 1/9 marker can't be moved very far (or placed) while the associated company is on the map, it effectively tethers the company. Remove it from the map if you don't need it, but remember you can't place it again until the 1/9 company comes off the map. That's just how they operated.
16.6 Ambushes
Any time FWA units use ground movement and move adjacent to a PAVN Hidden Movement marker concealing units, the PAVN player may declare an Ambush Exception: If the moving stack contains DELTA or a CIDG unit, it cannot be Ambushed. Follow the process below:
-
Stop the moving units; they cannot move further in this Movement Phase.
-
Reveal all units hidden by the Hidden Movement marker.
-
Flip the Hidden Movement marker to its "Ambush" side and place it on the ambushing units.
-
Conduct a single round of Assault Combat with the PAVN player as the attacker. Do not roll for coordination. The sequence is as follows:
a. PAVN rolls on Assault Combat Table (do not take terrain into account for the defender) b. FWA fires Defensive Bombardment (even if eliminated) c. FWA rolls on Assault Combat Table (unless eliminated)
Design Note: The Assault Combat Table lists a DRM for the presence of a PAVN mortar section. The combat support company, i.e., the mortar section and the weapons section, was responsible for laying mines and creating booby traps.
(16.6.1) Additional Hidden Movement Markers: The PAVN player may flip additional Hidden Movement markers (including "Dummies") within 2 hexes to their "Ambush" sides. For each such marker flipped, apply an additional −1 DRM to the PAVN Assault Combat DR. This reveals any units Hidden by the markers. These units are immediately placed on the map, but they cannot participate in the Ambush.
(16.6.2) Hidden Movement Marker Removal: After the Ambush is resolved, the FWA player takes all of the markers on their "Ambush" side. They are placed on the Game Information Track two turns ahead.
Design Note: The Ambush mechanic represents both the assumption on the part of the FWA that the PAVN were everywhere and acknowledgement of the fact that they could be anywhere. The primary purpose of many of the assaults made by the PAVN leadership was, in fact, to draw out a relief force and ambush it. This rule gives the PAVN player the ability to put the FWA player into the historical mindset of the ARVN and US commanders, knowing that there's a high probability of an ambush if they're moving along the ground.
17.0 Victory
17.1 Victory Points
Most scenarios list a victory point (VP) schedule earned through various actions such as destroying/eliminating enemy steps or capturing particular hexes. Markers are provided to track unit step and air point losses. Players should calculate the victory point effect of these at the end of the scenario. Other VPs, such as those for helicopter step losses or capture of a hex (basically, those for which there is no specific marker, should be marked at the time they are earned.
Play Note: The Step Loss marker for the PAVN player is correctly marked; only NVA losses are counted for victory. VC losses are not.
17.2 Automatic Victory Chits
Some of the Campaign Scenarios make use of the Automatic Victory chits to provide variability within the scenarios. As directed by the scenario and before setup, each side randomly draws the specified number of its chits to determine Automatic Victory conditions. These conditions will be identified in each such scenario. The chits are hidden from your opponent. A player may reveal a chit and claim it as fulfilled whenever the conditions are met. Once claimed, it counts as fulfilled regardless of whether or not the conditions change afterwards.
Automatic Victory determination is made during the Initial Phase. If a side has achieved all of its conditions, then the game ends with that side's victory. If both sides achieve their Automatic Victory conditions in the same turn, the game is a draw. If no Automatic Victory occurs by the end of the game, victory points will determine the winner at the end of the scenario.
18.0 Optional Rules
The following rules provide a little more detail on actual operational concerns at the risk of increasing complexity, playtime, and STR ("Stuff" to Remember).
18.1 US Weapons Companies
The "D" company of each US battalion can only unload at an Operational LZ. In addition, if unloaded anywhere other than an SF Camp, An Khe, or Camp Holloway, it can only do so if another US unit is already present in the LZ.
Favors PAVN.
Design Note: The D (Delta) company of each battalion, at this point in the war, was the Weapons Company and generally contained heavier weapons than the line or rifle companies (A, B, C – Alpha, Bravo, Charlie). This is why their combat values tend to be a little higher. However, they were primarily used in defensive roles, and were rarely (as in almost never), the first company into a Landing Zone. Players, however, noting the strength, will almost always want to use them in an ahistorical manner.
18.2 CH-47 Chinook Transport Helicopters
These helicopters cannot load or unload from a Hot Landing Zone [13.1.1.3] unless the condition was created by the PAVN player revealing units. In the latter case, apply an additional -1 DRM to any Air Defense Fire roll [14.0].
Favors PAVN.
Design Note: The Chinooks were considered too big, fat, heavy, and slow to load and unload under fire. And they were…
18.3 Hidden Movement Allowance
Instead of their normal movement allowance of nine, Hidden Movement markers have a movement allowance of six. In addition, units moving between such markers can use only six movement points if they wish to remain hidden. In other words, for units to move their full MA, the PAVN player must reveal them, even if they subsequently enter another Hidden Movement marker. This does not, however, remove the marker.
Favors FWA.
Design Note: The standard rules allow the PAVN to move around the map while hidden with impunity. If the troops were really moving that fast, it's possible they would be far easier to spot.
18.4 Viet Cong Resilience
Instead of removing the unit from the game, an eliminated VC unit is placed on the Game Information Display ten game turns ahead. It returns to play in the PAVN Reinforcement Phase of that turn, and it can be placed in any Cambodia Off-map Box, or with a concealed NVA HQ or Hospital.
Favors PAVN.
Design Note: The locally recruited VC "losses" were mostly from running away as they rarely stayed involved in pitched battles. Their role was more reconnaissance than fighting.
18.5 FWA Patrol Ambush
If the associated company reinforces a Patrol marker's hex when it is attacked, and the FWA player chooses to keep the marker in the hex, then the company has ambushed the attackers. In the subsequent Combat Resolution Phase, apply a +1 DRM to any PAVN Maneuver Combat die roll and a −1 DRM to any FWA die roll in Assault Combat.
Favors FWA.
Design Note: The FWA could Ambush, too…
18.6 Sitting Duck
When conducting ADF against stacks containing Observation Helicopters, apply an additional −1 DRM to the ADF To Hit roll. In addition, if the ADF hits and the PAVN player chooses to target the Observation Helicopters, apply a −2 DRM to the ADF Damage Table roll.
Favors: PAVN
"Theoretically, he [the OH-13 pilot] would fly low and slow, so the VC would shoot at him. Then, if he survived, he could locate them for artillery or gunships. Fourteen of the original twenty pilots of that scout unit would be killed in less than six months." – Robert Mason, Chickenhawk
Scenarios
"For thousands of years men have fought one another in situations where the battle lines are not fixed and words like front and rear lines have little meaning – for the war is everywhere…" – Robert D. Kaplan, as quoted in The Centurions.
Scenario cards are provided that contain all of the information required to play each scenario. The scenarios are divided into two kinds: Standard and Campaign.
Both kinds of scenarios have Special Scenario Rules (SSRs) that apply only to that scenario. In addition, each scenario has its own victory conditions.
Standard Scenarios
Scenarios 1-7 are scenarios focused on smaller, historical actions designed to assist players in learning the core mechanics without being overwhelmed by analysis paralysis or having too much to do and remember.
The scenarios are numbered in chronological order. To play them in an order that gradually adds size and/or complexity, use the following order: 6a, 6b, 3, 5, 4, 1, 2, 7. These scenarios all use the Standard Sequence of Play.
Scenarios 3, 4, 5, 6a & 6b are intended to be played directly on the scenario cards provided.
In general, Standard Scenarios do not use Helicopters, Patrols, Observation, Ambush, or Hidden Movement, although they may use a form of those concepts.
Campaign Scenarios
"He who controls the Central Highlands controls South Vietnam." – Vietnamese military maxim
The Campaign Scenarios are much larger and, generally, longer scenarios. They will use all of the unit types as well as all of the rules. These scenarios use the Campaign Sequence of Play.
Scenario 8 Note: Some of you may notice that Scenario 8, which is the beginning of the campaign, differs somewhat from Scenario 11 (the full campaign) in terms of setup and reinforcements. This is to account for the shorter time frame which Scenario 8 represents in terms of the overall campaign.
Scenario 11 Note: Notwithstanding the above, players will also note that Scenario 2 uses a variable entry for US troops. If players want to use this method rather than the hard start laid out in Scenario 11, then track the GT following the first combat declaration on or by units that start in Pleiku (presumably they'll be escorting the Supply Unit) as the first GT of reinforcements and adjust accordingly. For example, if the combat declaration occurs in GT2, then the first US reinforcements will arrive in GT3 instead of GT5, i.e., everything will be offset by two game turns.
"It was all over. The N-V-A division clearly had left the field and escaped back to the Cambodian sanctuary. There was little left for the Cavalry elements to do but move back to base and wait until the enemy made his next move." – Coleman, "1st Cav After Action Review"
Scenario 12 Grand Campaign (Free Setup)
This free setup scenario allows players to explore the possibilities of a major PAVN infiltration success. With virtually no deployment limitations, the PAVN can attack in force anywhere.
This scenario is identical to the Grand Campaign (Scenario #11) in all respects except for the PAVN setup. All PAVN units listed in that scenario as "Set Up" may set up freely in any hex that is at least two hexes from any enemy unit and/or a Town, Village, or Pleiku hex. This scenario greatly favors the PAVN, and we suggest using the variable reinforcement entry described above.
Designer's Notes
Gene's Designer's Notes:
When Mitch and I set out to create a new version of my first game design, Silver Bayonet, the three big things that I told Mitch I wanted to accomplish/improve were to:
- Create a game map that is much more accurate and reflective of the region's terrain than was the original (the original map was mostly "jungle" hexes)
- Tweak a few of the game mechanics to better reflect the tactics and flow of the campaign
- Update and re-test the scenarios for better balance and interest
Early in the project, I threw myself into the research and creation of the new game map. For those interested in that process, check out the "Anatomy of a Game Map" article that I wrote in our InsideGMT blog last year. The map research and creation of the base test map was my biggest contribution to the project. I want to publicly express my thanks to artist Charlie Kibler, who took my base map and turned it into the best operational Vietnam game map I've ever seen.
While I'm thanking people, first in line should really be my co-designer, Mitch Land, who did almost all of the important work that was necessary to complete objectives 2 and 3, above. In addition to his design work, he ran the test teams and did a lot of tweaking of the scenarios. Without Mitch, this project would not have been completed. For future titles, I am passing the baton for this series to Mitch. I hope that between his interest in this operational series of games and the interest among our players that this game creates, that Mitch will continue to design games on other topics for this series over the coming years.
I feel an overwhelming sense of gratitude as I anticipate seeing this game finished and on game tables all over the world. It's rare to get an opportunity to recreate and improve your first game, so I'm very thankful for that. Most of all, though, I'm just really grateful that, over 25 years later, you guys are still enjoying the games enough that we got an opportunity to create a new and better version of our first game. So thank you for buying and playing this new version of my first design, and so many other of our games over the years. I hope this edition of Silver Bayonet brings you many hours of gaming enjoyment.
Enjoy the games!
Gene Billingsley
Hanford, California
July 2016
Mitch's Designer's Notes:
As always, it has been a privilege to work with Gene on revamping and redesigning this game. From the beginning, we were both dedicated to bringing not only the components but also the game play up to the best standards available to depict this unique campaign while staying as true as possible to the original systems.
The campaign in the Ia Drang Valley and environs is a fascinating one to study. From the time Secretary McNamara announced the creation of the 1st Cavalry Division (Airmobile) until the day that the division assumed responsibility for its AO was a mere 104 days. General Kinnard¹, the commanding officer of the division, noted: "Somewhere in the annals of military organization there may have been outfits activated, organized and moved 12,000 miles to combat, all within the space of 90 days [counting from the date of the General Order], but none comes immediately to mind. That the 1st Cavalry Division (Airmobile) did just that not only is a remarkable achievement, but a tribute to the men of the division who devoted an unbelievable amount of time and effort to accomplish the task."²
This campaign was a collection of firsts including the first time an entirely airmobile operation took place over harsh and rugged terrain as well as the first time a division-sized US Army force maneuvered against, fought against, and defeated large NVA units fighting as a division and under divisional command and control.³
The Ia Drang campaign was the crucible in which the airmobile concept received its baptism of fire, and, by most accounts, it was successful. As Kinnard (Commanding General, 1st Cavalry Division (Airmobile)) says in his Commander's Analysis from the 1st Cav After Action Review⁴, "The PLEIKU Campaign was the first real combat test of the 'First Team' as a unit, and for the airmobile concept. The results clearly indicate that both came through with flying colors." There were a number of reasons for this success, which can be attributed, primarily, to two things: intense training in the airmobile concept and the NVA's utter lack of readiness for the sudden change in tactics.
As part of an overall campaign to cut Vietnam in half with a drive to the coast through the central highlands, the campaign began, as many had before, with an NVA/VC attack on a Special Forces base camp (Plei Me). As before, the primary purpose of the attack was not, necessarily, to take the camp but to draw out the relief column from Pleiku and ambush it along the way (attack and lure). This had been the NVA/VC modus operandi for years, and, in general, it worked every time.
It worked this time, too, except for one crucial change: the ARVN appealed to the US Army for help and assistance. What began as a small reinforcement and reaction operation to assist the ARVN in getting its relief force through to the beleaguered camp became the first airmobile campaign in Vietnam. MACV (Military Assistance Command, Vietnam) had heard rumblings of a projected offensive in the area. This was the primary reason Westmoreland (Commanding General, MACV) placed the 1st Cav at An Khe. So, after rescuing the ARVN, Kinnard sought and gained approval to conduct an aggressive search and destroy mission in a tactical area of operations that spanned nearly 2500 square kilometers: "The division was given the mission of searching out, fixing, and destroying enemy forces that provided a threat to Plei Me, Pleiku, and the entire central highlands."⁵
The enemy the U.S. faced in Vietnam was tough and tenacious:
"The 1st Cavalry troopers had found that the enemy was well trained, aggressive, and was equipped with a preponderance of automatic weapons with plenty of ammunition. He was an expert at camouflage and sought to close in strength to render U. S. fire support less effective and to force us to fight on his terms. He fought to the death. When wounded, he continued fighting and had to be approached with extreme care: Many friendly troops were shot by wounded North Vietnamese Army soldiers."⁶
However, the NVA was unprepared for the velocity at which airmobile operations unfolded. At every turn, it seemed as if the "Sky Soldiers" were descending on them, no matter where they tried to hide.
All that said, trying to wrap all of this into the format of a game, even though I wasn't starting from scratch, was a challenge. A lot of reading went into not only the campaign but about Vietnam to ensure I was in the proper frame of mind. See the bibliography for more detail.
My goal, in making the changes I made, was to highlight the various natural characteristics of each side's tactics, doctrine, and abilities. For the FWA player, this is an ability to bring nearly overwhelming firepower and rapid mobility into play while also having to deal with the inefficiencies of the ARVN. On the flip side, the FWA, despite airmobility, is still somewhat tied to its logistical base, and this is represented, in the Campaign games, with the helicopter recovery mechanics and the delivery of the Supply Unit. For the PAVN player, this is an ability to move without being seen as well as be an elusive, slippery foe when found. In addition, the units tend to recover quickly as shown through a high replacement rate.
The FWA player has to try to find, fix, and destroy the enemy. The PAVN player needs to play a shell game with his hidden units while maneuvering to strike a blow at FWA fixed targets like Plei Me or Duc Co.
One of the things players should remember when playing this game is that this was still early in the war. The NVA hadn't yet adapted its tactics to the new airmobile method of warfare (in fact, they took several months after the campaign to rewrite their entire tactical doctrine), so, while still elusive, they tended to fail to react as quickly as necessary to break contact. In addition, they were unprepared for the American way of war that was predicated on massive amounts of firepower. It was during this time that the NVA began to change tactics to "hug them by the belt" in an attempt to nullify the superior amounts of firepower being delivered via tube artillery, air, and rocket-armed helicopters.
Also, the NVA were facing one of the most thoroughly professional divisions in the US Army. Due to the rigorous airmobile concept training most of them had endured prior to being sent to Vietnam, the vast majority of the troopers were highly motivated, trained soldiers who understood their jobs in ways few other units would achieve.
All of these factors are taken into account in the game through various mechanisms such as high US efficiency ratings, lots of artillery, air points, and helicopters, and airmobility. For the NVA, they can hide, but it can be difficult to achieve and maintain momentum.
This game, celebrating both its 25th anniversary and the 50th anniversary year of the campaign, is dedicated to the memory of those men who accomplished so much so far from home, and, most especially, to the men who gave their last full measure of devotion during the campaign.⁷
Hopefully, you'll enjoy playing the game as much as I did designing/developing it!
Mitchell Land
Footnotes
1 Harry Kinnard, who commanded 1/501 of the 101st Airborne during the Battle of the Bulge. He reportedly encouraged McAuliffe to respond to the German call for surrender with McAuliffe's first response: "Nuts!"
2 Coleman, J.D. Pleiku: The Dawn of Helicopter Warfare. St. Martin Press, 1988. p.63
3 Note, earlier in the year three Marine battalions had tangled with a VC regiment in Operation Starlite (18-24 Aug 1965), and, during Operation Hump (5-9 Nov 1965), a battalion of the 173rd Airborne Brigade (along with the Australians in support) conducted large-scale operations against a large VC opponent.
4 I highly recommend reading the AAR especially the various analyses. See the link in the Bibliography below
5 Ibid., p.93
6 Tolson, John J., Lt. Gen. "Vietnam Studies, Airmobility, 1961-1971", Dept. of the Army, 1999, p.81-82 [Note, this paragraph matches, almost verbatim, Col. Moore's assessment of the PAVN that is found in his AAR of the LZ X-RAY battle and campaign.]
7 All of the names of the fallen from the campaign are engraved on Panel 3-East of the Vietnam Veterans Memorial in Washington, D.C.
Example of Play
This example of play, while not intended to be comprehensive, will cover most aspects of the rules. The decisions which are made and the actions which are taken are not, necessarily, the best ones. They have been chosen to highlight various rules as we follow through the Sequence of Play.
Taking a look at the situation, we can see the PAVN closing in on the garrison of Duc Co (3 x CIDG [1 x Fatigued] and DELTA). Some elements of the ARVN 3rd Armored Cavalry Squadron (HQ/3, 1/3, 2/3 [Fatigued]) are operating to the south of Duc Co along with the Fatigued 6th ARVN Airborne Battalion and Lt. Col. Truong. One CIDG Patrol, from a previous turn is already on the map. Note that several of the units are Fatigued. There are three PAVN battalions lurking in the jungle although the FWA player doesn't know that because they are all under Hidden Movement markers. Those markers could all have units in them or they could all be Dummy markers. Of course, for this example, we know some of them are not Dummy markers.
Initial Phase
Neither side has achieved an Automatic Victory [17.2] by fulfilling all of their randomly chosen Automatic Victory chits (as outlined by the Campaign Game scenarios which use them). The FWA player adjusts his available Air Points [11.0] by rolling one die. He rolls a 5 which grants him 20 Air Points to use throughout the turn. However, in previous turns, two Air Points were destroyed by PAVN Air Defense Fire, so the total available is reduced to 18 Air Points. The FWA player then checks the readiness of his helicopters [13.4] by automatically moving those in "1 Mission" and "Grounded 1" to "Ready", rolling for those in the "2 Missions" box, and moving units from "Grounded 2" to "Grounded 1". We will assume all the helicopters passed their readiness rolls. The FWA player then returns any Hidden Movement markers he has taken for various reasons, including (but not limited to) Observation, PAVN attacks, or PAVN Air Defense Fire, to the PAVN player [16.3].
Recovery Phase
All "First" and "Final" Fire markers from the previous turn's activities are removed from both sides artillery units. Both sides can now Recover Fatigue [2.6.7]. The FWA player can automatically recover the unit stacked with Lt. Col. Truong. If that unit was in an enemy Zone of Control [5.0], it would have to pass an Efficiency Check [2.4.5] to recover. The ARVN 2/3 (next to the CIDG Patrol and other 3rd Armored Cavalry Squadron units) and the CIDG unit in Duc Co cannot recover because they are not in an appropriate location or stacked with a leader. The PAVN player also performs Fatigue Recovery at this time following the same rules. The PAVN player has not lost a Headquarters (HQ) unit, so this step [12.4.2] is skipped. Both sides can now spend any Replacement Points [15.1] to rebuild units either by bringing them up to full strength, i.e., flipping from their reduced strength side, or bringing them back from the eliminated pile. In this case, all of that activity is taking place in other portions of the map.
First Player Turn
The FWA player is specified as the first player for this scenario, so he proceeds to take his turn. Since he is the first player, he conducts his First Observation Phase.
First Observation Phase
The FWA player takes his OV-1 Mohawk and any 1/9 Observation Helicopters (OH-13s) and moves them to any Hidden Movement marker hex [16.5.1]. The OH-13s can be escorted by 1/9 Gunships (UH-1Bs). (The units are shown offset from the marker hex to facilitate this example.) The PAVN player now may choose whether or not to reveal any units for Air Defense Fire (ADF) [14.0]. He must either reveal a single, hidden artillery unit and/or more steps of units than the Bombardment Strength [2.4.2] of the US units. In this case, the PAVN player chooses to reveal an artillery unit from Hidden Movement marker #3 as his only ADF and rolls on the Air Defense Fire To Hit table. He earns an additional -1 DRM for having a revealed artillery unit in or adjacent to the hex. He rolls a 3 which is modified to a 2 and hits the helicopters. He now has to choose which type of helicopter he wishes to shoot at: the Observation helicopter or the Gunship. He chooses to shoot at the Observation helicopter, and rolls on the Air Defense Fire Damage table and rolls a 4. The result is an Abort 2, so the A/1/9 OH-13 is placed on the "Grounded 2" box of the FWA player aid.
The FWA player now makes his Observation rolls [15.5.1.3]. Cross-referencing the terrain type row with the Observation Column on the Terrain Effects Chart (TEC), he uses the number to the left of the "|" symbol as this is Aerial Observation. He would have earned a −1 DRM for his attempt on Hidden Movement marker #3 as there is one adjacent friendly-occupied hex, but, as the OH-13 was Aborted, no Observation roll is made.
In this case, he also fails to reveal markers #1 or #2. He now proceeds to bombard any revealed units. Since the missions against markers #1 and #2 failed, those units simply return to base to the appropriate mission box ("1 Mission" in this case). Even though there was no observation attempt for marker #3, there is now a revealed unit in the hex, and the escorting 1/9 UH-1B Gunship can bombard that hex. The FWA player cross-references his Bombardment Strength of 5 with his die roll of 2 (no DRMs apply as there is no artillery firing and there is a friendly unit adjacent) and obtains a 2F result. The "F" result requires the PAVN player to place a Fatigue marker on a unit in the hex. This can be either the revealed artillery or a unit under the Hidden Movement marker (he chooses the latter). The 2 result is then divided by the Terrain Defense Value (TDV) of the Forested Hill hex, which is 3, with fractions dropped. Any whole number result is the number of steps lost which, in this case, is zero since 2 divided by 3 results in a dropped fraction. The A/1/9 UH-1B is now returned to base.
The FWA player next Places or Moves Patrol markers [16.5.2]. He likes where the CIDG Patrol marker is, so he leaves it in place. As he has other CIDG units in Duc Co, though, he decides to place another one. Each CIDG unit can support one Patrol marker. He places it, within 9 ground, non-road Movement Points of the supporting CIDG unit. He would like to place a third CIDG patrol marker, but a Fatigued unit cannot be used to place a Patrol marker. He also decides to place the DELTA and B/1/9 Patrol markers. He'd like to place the A/1/9 Patrol marker, but its parent unit is already on the map so he cannot. He now rolls for Observation using the markers. He decides that, since he knows there are other units in Hidden Movement marker #3 (the marker would've been removed if the artillery unit had been the only unit there), he'll use the newly placed CIDG marker to attempt to observe it. In addition, he'll use the other CIDG marker to assist which provides a −1 DRM (this also means that supporting CIDG marker cannot make its own Observation roll). As with Aerial Observation, he cross-references the terrain type row with the Observation column, but, this time, he uses the number to the right of the "|" symbol for Patrol Observation. He rolls a 6, modified to a 4 (−1 for support and −1 for adjacent friendly-occupied hex) and just barely observes the marker. The PAVN player reveals that the entire 9/66 Battalion (note the Fatigue which was applied during the earlier bombardment) is in that hex and hands the #3 marker to the FWA player (it will be returned next turn). Next, the DELTA patrol rolls and fails to observe #5. B/1/9, though, gets lucky and rolls a 1. On a natural 1, the marker is placed 10 turns ahead on the Game Information Track and will not be available to the PAVN player until then. The PAVN player reveals that two companies from 8/66 Battalion are in the hex. Since the FWA player found enemy units there, he can automatically deploy the associated parent unit to the Patrol marker's hex. In this case, since it's the 1/9, they can use helicopter transport to do so as long as the parent unit is in an appropriate location [16.5.2.3]. The Patrol marker is removed when the parent unit arrives.
Reinforcement Phase & Concealment Phase
The FWA player doesn't have any reinforcements scheduled to enter this turn, and the Concealment Phase is only conducted during the PAVN player's turn, so both of these are skipped.
Movement Phase
Hoping to eventually move his Fatigued ARVN unit back to Camp Holloway to recover Fatigue, he moves the ARVN 2/3 unit into hex 1211. As he has moved adjacent to a Hidden Movement marker, the PAVN player has the opportunity to announce an Ambush [16.6] if there are units concealed by the marker.
In this case, there are concealed units, and the PAVN player decides to Ambush the moving ARVN unit. He reveals that 7/66 Battalion is in the hex along with the C/66 mortar artillery section. The PAVN player flips the Hidden Movement marker to its "Ambush" side and places it on the now revealed units (offset here for example purposes). He rolls on the Assault Combat Table (there is no Attack Coordination required and Ambush changes the sequence of Assault Combat [9.0]). His total Attack Strength [2.4.1] is 14 as he is including the mortar unit in the ambush. Only four stacking points can attack in an Assault, and, since both D/7/66 and C/66 are ½ Stacking Value, the PAVN player meets this restriction. The PAVN player would like to earn additional DRMs for flipping other Hidden Movement markers to their Ambush side, but none are within two hexes. He does, however, earn a −1 DRM for having a mortar unit as part of the Ambushing units. Terrain DRMs are not applied in Ambush attacks, so the PAVN player's roll of 5, modified to 4, results in 2 step losses. The ARVN unit is eliminated. The FWA player is still allowed to conduct Defensive Bombardment, though, and elects to allocate 10 Air Points. Since the PAVN player does not have more steps than Bombardment Strength allocated, there is no ADF. The FWA player rolls a 3 which is modified by +1 for no friendly units adjacent (the Patrol does not count) to a 4. The result of 3 is divided by a TDV of 2 (all Assaulting units are considered to be in a TDV of 2) and the FWA player, dropping fractions, eliminates a PAVN step. Normally, the FWA player would also roll on the Assault Combat Table, but the 2/3 was eliminated by the Ambush. The Ambush Hidden Movement marker is then placed two game turns ahead and will return during the Initial Phase of that turn.
The FWA player continues moving units already on the map as shown. In addition, seeing the danger three battalions of PAVN represent to Duc Co, the FWA player decides it's time to use his air mobility to intervene. First he establishes an Operational Landing Zone (OLZ), LZ PAR, in 1910, and, using a CH-47 Transport helicopter, moves the B/2/19 artillery battery to the hex. B/2/19 gets a "First Fire" marker for having moved. Transport helicopters can carry up to their Transport Capacity in steps. Note that artillery batteries count double, so, in this case, the only unit the CH-47 can carry is the artillery battery. As there are no enemy units adjacent to the hex, there is no ADF. Next, the FWA player decides to use the C/227 UH-1D to bring an infantry company of the US 2/7 from An Khe into Duc Co (Special Forces Camps are considered to be OLZs). C/227 will also load the Fatigued CIDG unit and take it back to An Khe so it can recover. Although B/2/7 is two steps and took up all the Transport Capacity of C/227, the transport helicopter is allowed to double its capacity if it starts such a mission in a base hex, both unloads and loads in the same hex, and immediately returns to base [13.1.4]. To support Lt. Col. Truong, the FWA player declares that 1612 will serve as a Field Expedient LZ and uses B/227 to move B/1/7 into the hex. Only one company can load/unload in a FLZ. The FWA player opts to escort the transport mission with C/2/20 ARA. This precludes any ADF by the PAVN. However, since the LZ is adjacent to an enemy occupied hex, it is considered a Hot LZ [13.1.1.3], and the FWA player must make an Efficiency Check for the unloading unit with failure causing the unit to be Fatigued. Here, we will assume it passes. Finally, the FWA player decides to establish another OLZ, LZ LADIES, in 1808, and unloads the rest of the US 1/7 along with Lt. Col. Moore. As this movement requires a Transport Capacity of 6, he uses both the A/227 UH-1D and B/228 CH-47. Since the units landed in Light Jungle, he cross-references that terrain type row with the LZ Type column on the TEC and notes that he retains half of his Movement Allowance. Cross-referencing the Forested Hill terrain type row with the Move Cost column, he sees that as it only costs 3 Movement Points to enter, he will move Lt. Col. Moore and his rump battalion into 1707 along with B/1/9. As there are no ADF opportunities, all of the helicopter units are returned to the FWA player card in the "1 Mission" box.
Combat Declaration Phase
In this phase [6.1], the FWA player decides to conduct Maneuver Combat against the units facing Lt. Col. Moore. The PAVN units facing Lt. Col. Truong pose the FWA player with a dilemma. The motorized units may only conduct Maneuver Combat into Forested Hill and are marked accordingly. This is currently a 1:2 attack, so the FWA player decides that the airborne battalion will also Maneuver. The newly landed B/1/7 will conduct an Assault all on its own.
Offensive Bombardment Phase
The FWA player decides to bombard both hexes he will be attacking. For the units in 1512 (below Duc Co), he assigns C/2/20 ARA (this will be its second and final mission for the turn) along with 1 Air Point and the B/2/19 artillery battery (this will cause it be marked with a "Final Fire" marker) for a total Bombardment Strength of 15. For the units in 1607 facing Lt. Col. Moore, he assigns the B/6/14 artillery (outside the shown map area) as well as 3 Air Points for a Bombardment Strength of 11. The PAVN player conducts any ADF. There will be no ADF in 1512 as the combined aerial Bombardment Strength is higher than the number of PAVN steps in or adjacent to the targeted hex. The PAVN player, with 4 revealed steps in 1607, will get to fire ADF. He rolls a 1, which hits, and, with only one choice, targets the Air Points. The subsequent damage roll gives a −1 result which will be subtracted from the total Bombardment Strength reducing it to 10. The FWA player then resolves the Bombardment.
In 1512, his Bombardment Strength is 15 and he earns a -1 DRM as he is using artillery within two hexes of Lt. Col. Truong. He rolls a 4, modified to 3, which results in 4F. The F result is another Fatigue, and, dividing the 4 by the Forested Hill TDV of 3 (and dropping fractions) results in a step loss. The PAVN player applies both results to one of the infantry companies. In 1607, the FWA player rolls a 6 and obtains a 2 result which, divided by the Mountain Jungle's TDV of 4, does nothing.
Combat Reaction Phase
During the Combat Refusal Step [6.2], the PAVN player determines he cannot conduct refusal in 1512 as his units are being attacked by both Maneuver and Assault Combat. In 1607, however, he can attempt to conduct refusal. The PAVN player makes an Efficiency Check against the highest Efficiency Rating (ER) unit in the hex and subtracts the TDV of the hex from the die roll. In this case, the TDV of 4 subtracted from the worst roll possible, 10, is an automatic success. The PAVN units fade away into the jungle to fight again. The FWA player removes the Maneuver Combat marker and chooses to advance into the hex with just the 1/7 units.
During the Defender Reaction step [6.3], the defender can attempt to move units which are adjacent into the hex being attacked. In this case, there are no units eligible to do so, so this step is skipped.
Combat Resolution Phase
In this case, there is only one defending hex remaining, so the FWA player will resolve both the Maneuver and Assault Combats against the hex. He would, if there were other combat hexes, then, in any hex order he chose, fully resolve both Maneuver and/or Assault Combat against them.
The first step for the FWA player is to determine Attack Coordination [7.0]. Normally, attacks with Lt. Col. Truong would be automatically coordinated. However, since this attack involves both US and ARVN units, the FWA player makes an Efficiency Check against the lowest ER involved which, in this instance, is a 5. If he rolls a 1-4, then the attack is Fully Coordinated and goes ahead with no alterations. If he rolls a 5, the attack is Partially Coordinated, and he would continue except that he would not be able to use Maneuver Combat Support. If he rolls a 6, the attack is Uncoordinated, and he would get no Maneuver Combat Support. In addition, his Maneuver Combat would be shifted one column left and he would incur a +1 DRM while the defender would earn a −1 DRM for any Assault Combat. If he rolls a 7-9, the attack would be an Uncoordinated Frontal Assault. All Maneuver Combat against that hex would be canceled, and the defender would get to choose the units from any one hex which had been allocated to the attack to Assault instead. In addition, the attacker would incur a +1 DRM while the defender would earn a -1 DRM for that Assault Combat. In this instance, we will assume the attack is Fully Coordinated.
Maneuver Combat Step
The FWA player determines the initial combat odds. The attacker has an Attack Strength of 12 versus the defender's 11 Defense Strength, so the odds are 12:11 or 1:1. Both sides choose a lead unit [the ARVN choose HQ/3 (ER=5) while the PAVN choose A/9/66 (ER=6)] and compare ERs. The odds shift one column left to 1:2. The FWA player declares he'll use the B/6/14 artillery battery (off the map area) to provide Maneuver Combat Support with its Bombardment Strength (BS) of 8. The PAVN player declares that the B/66 mortar artillery section (in the attacked hex) will fire its BS of 2. Both sides roll on the Bombardment/Support Table to generate a DRM for the combat. The FWA player rolls a result of 3, while the PAVN player rolls a result of 0. This will give the FWA player a -3 DRM. The FWA player also earns a −1 DRM for the defender having more than 0% but less than 50% of his steps Fatigued. Lt. Col. Truong also provides a −2 DRM, while the terrain provides a +2 DRM. Netting out all of the DRMs results in a −4 DRM, which is reset, however, to the maximum DRM of -3 DRM. The FWA player rolls a 7, modified to 4. On the 1:2 column, this is a BF1 result which indicates that both players must Fatigue one unit. In this case, it must be the lead unit chosen above.
Assault Combat Step
The FWA player then immediately resolves the Assault Combat. The defender fires Defensive Bombardment by allocating the B/66 mortar artillery (which is now marked "Final Fire"). He doesn't obtain a result at all, so the US company takes no step loss. The defender then rolls first on the Assault Combat Table using his Defense Strength of 11. The PAVN player incurs a +2 DRM since 50% or more of his steps are Fatigued. He rolls a 5, modified, to 7 which is still enough to cause a step loss to the US unit. The FWA player now rolls on the Assault Combat Table. He has a +2 DRM for terrain and rolls a 5 which misses (he needed a 3 or less with modifiers, i.e., a 1, to hit). Both players then make an Efficiency Check against the best ER unit to determine if they will fire in a second round of combat. Both sides fail their checks and the combat, for that hex, is over.
Final Observation and Final Concealment Phases
The Final Observation Phase is identical to the First Observation Phase. For example purposes, we will assume the FWA player failed to reveal the final Hidden Movement marker (#5). The Final Concealment Phase is only conducted in the PAVN player turn. The situation at the end of the FWA player's turn looks like this.
Second Player Turn
For the most part, the Second Player Turn is identical to the First Player turn with the obvious exceptions of Observation and/or Concealment depending on who is the active player.
Reinforcement Phase
The PAVN player doesn't have any reinforcements scheduled to enter this turn, so this phase is skipped.
Concealment Phase
The PAVN player would like to conceal all of this units again, but they are all either adjacent to enemy units or within a Patrol marker's range. He has no Dummy markers to remove (although the FWA player doesn't know this). He decides to place two new Dummy markers. He must place them within movement range (9 Movement Points) of another Hidden Movement marker or a map edge leading to a Cambodia Off-Map Box and not within Patrol marker range nor adjacent to an enemy unit. In this situation, unfortunately, there are limited places to put them so they end up near the map edge.
Movement Phase
The PAVN player moves his units. The Fatigued units in 1512, wishing to distance themselves from the FWA units and hoping to recover Fatigue in Cambodia move from 1512 to 1412 for 4 Movement Points (MP). Forested Hill normally costs 3 MPs, but the PAVN player can move from ZOC to ZOC and not stop by paying an additional MP. They continue moving to 1312 and into 1212 for another 2MPs each, and, finally, they enter 1211 for 1MP for a total of 9. The other units move adjacent to Duc Co as shown.
Combat Declaration Phase
The PAVN player declares that all of his units will conduct Maneuver Combat.
Offensive Bombardment Phase
The PAVN player declares that C/66 (1411) and another mortar (hidden—but obviously in Hidden Movement marker #5) will fire. Both are marked with "First Fire" markers (the concealed unit is marked on the PAVN player aid). The PAVN player gets no result.
Combat Reaction Phase
The FWA player cannot refuse combat if he's in a Special Forces Camp. He'd like to reinforce the camp with another infantry company from An Khe via helicopter transport, but he cannot do so because the hex is already fully stacked (4 Stacking Points). If it was not fully stacked, and he had a unit in a Helicopter Base with an available Transport Helicopter, he could roll against the unit's ER, and, if it passed, use move it to Duc Co. ADF might be possible, and the unit would be subject to a Hot LZ. Assuming the helicopter survived, it, and any escorts, could remain in the hex and provide both Maneuver Combat Support or Defensive Bombardment.
Combat Phase & Final Concealment Phase
These are identical to the phases explained before and will be skipped for brevity.
Game Record Interphase
At this time, the FWA player removes any "Closed" LZs. In this case, LZ LADIES is considered closed because it does not contain at least one FWA unit. The LZ is removed from the map and placed five Game Turns ahead. It becomes available again in that turn's Reinforcement Phase.
The FWA player moves his Air Points marker to zero if not already there. Air Points are not carried over from turn to turn.
If this was the last turn of the scenario, victory [17.0] would be assessed on the basis of points earned as per scenario instructions.
Bibliography
Cash, John A., Albright, John, and Sandstrum, Allan W. Seven Firefights in Vietnam.
Carland, John M. Combat Operations: Stemming the Tide May 1965 to October 1966.
Coleman, J.D. Pleiku: The Dawn of Helicopter Warfare.
Coleman, J.D. "Combat Operations After Action Report: Pleiku Campaign". http://www.tallcomanche.org/Research_AAR_Pleiku.htm
Gillett, Kristopher T., Major, USA. "Air Mobility and the Development of Attack Aviation During the Vietnam War from 1965-1967".
Gwin, Larry. Baptism: A Vietnam Memoir.
Lanning, Michael Lee, and Cragg, Dan. Inside the VC and the NVA: The Real Story of North Vietnam's Armed Forces.
Mason, Robert. Chickenhawk.
Miller, Robert L. and Wainstock, Dennis. Indochina and Vietnam: The Thirty-Five-Year War 1940-1975.
Moore, Hal, Lt. Gen., and Galloway, Joseph L. We Were Soldiers Once…and Young.
Prados, John, ed. In Country: Remembering the Vietnam War.
Prados, John. Vietnam: The History of an Unwinnable War, 1945-1975.
Pribbenow, Merle L. "The Fog of War: The Vietnamese View of the Ia Drang Battle". Military Review, January-February 2001.
Tolson, John J., Lt. Gen. "Vietnam Studies, Airmobility, 1961-1971". Dept. of the Army, 1999.
Suggested Reading:
Note, the suggestions below don't necessarily have anything to do with the Ia Drang campaign itself. They are offered as further reading for studying the war in Vietnam.
Appy, Christian G. Vietnam: The Definitive Oral History, Told From All Sides.
Hackworth, David H. Steel My Soldiers' Hearts: The Hopeless to Hardcore Transformation of the U.S. Army, 4th Battalion, 39th Infantry, Vietnam.
Keith, Philip. Blackhorse Riders: A Desperate Last Stand, an Extraordinary Rescue Mission, and the Vietnam Battle America Forgot.
Larteguy, Jean. The Centurions.
Larteguy, Jean. The Praetorians.
Marlantes, Karl. Matterhorn.
O'Nan, Stewart, Ed. The Vietnam Reader.
Walker, David P. Cyclops in the Jungle: A One-Eyed LRP in Vietnam.
Wiest, Andrew, ed. Rolling Thunder in a Gentle Land: The Vietnam War Revisited.