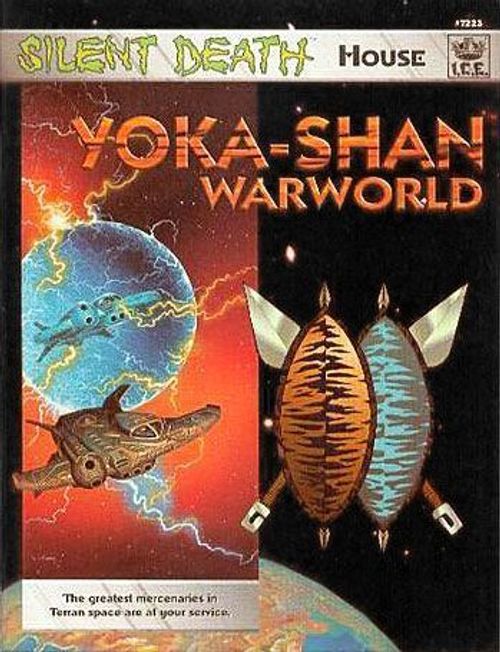
Silent Death House: Yoka-Shan Warworld
Silent Death House: Yoka-Shan Warworld Rulebook
Table of Contents
Table of Contents
Turn Sequence
Warhead Launch Phase
- Entropic Accelerator damage
- Missile/spore mole lock-on attempts
- Launch missiles/spore moles
- Launch torpedoes
- Tractor Beam lock-on
Movement Phase
- Make drive 0 turns
- Move scanner assisted DLT torps targeted on stationary objects
- Roll Initiative for escorts
- Move escorts
- Drift
- Ventors move & detonate
- Roll initiative
- Starcraft movement:
- Mine Layers deploy mines during movement
- Hatchlings deploy drones, attach grappling tubes and tow claws during starcraft movement
- Torpedoes targeted at ships or other torps move after target moves
- Activate drones laid this phase
- Operate drone movers
- Torpedoes fired at drones move
Torpedo Results Phase
- Activate plasma defense system
- Point-defense or dodging attempts
- Resolve torpedo attacks
- Deploy decoy or attempt jamming
Cannon Fire Phase
- Gun Crews fire in skill order
- Gunners/Hatchlings and Pilots with BioLink fire in skill order
- Pilots fire in skill order
Missile/Spore Mole Results Phase
- Point-defense against missiles/spore moles
- Resolve missiles/spore moles
End Turn Phase
- Asteroids drift
- Resolve grap tube usage
- Attempt damage control
- Dispersal: ink clouds (1 on a D6)
- flak (4 on a D4)
- Mines dropped last turn activate
Electronic Warfare Phase
- Designate targets and number of attempts for scanning
- Attempt scanning
Shield Spots
Traditionally, all newly commissioned units were issued all-black (or sometimes red) shields. As they distinguished themselves in battle and became more experienced, white spots would be added to the warriors' shields. Eventually, the oldest and most experienced units would carry shields that were entirely white. This was considered a great honor. The Warworlders practice an updated version of this tradition.
Mutumbe's Code of War and Honor
The Warrior's Duties:
- Preserve the Peace
- Protect the Weak
- Destroy the Enemy
The Warrior's Way:
- An honorable enemy deserves mercy.
- A dishonorable enemy deserves only death.
- A dead warrior cannot fight.
Squadron Shields
All squadrons maintain unit shields. Every newly commissioned squadron begins service with a shield that is entirely black or red. As the squadron distinguishes itself in battle and gains experience, it is awarded white spots which are added to its shield.
This process has been formalized by dividing a traditional Zulu shield into sixteen sections by bisecting it vertically and horizontally and then bisecting again each of the sections created this way. Each time a unit gains a new spot, one of these sections is colored white.
Units also differ in the way they add spots to their shields. The sixteen sections into which a shield is divided are rectangular in shape. Some squadrons add spots that conform exactly to the boundaries of these sections, giving their shields a checkerboard pattern. Others add more natural looking "splotches," which occasionally stray outside the lines, although no squadron would dare claim a spot to which it was not entitled.
Gaining Spots
At the end of each battle, it's necessary to make a "spot check" for each squadron you controlled and see if the squadron is awarded a new spot (or spots). To do this, look on the Spot Check Table below and add up all of the modifiers that apply to the squadron in question.
Once you've done this, roll 1D10. If the die roll is less than or equal to the total from the table, the squadron gains a spot for its shield. If the roll is greater, no spot is awarded this battle. If the total modifiers are greater than 10, the squadron is automatically awarded a spot. Subtract 10 from the total and roll 1D10 against this new number to see if a second spot is awarded.
If the total modifiers should be less than zero, treat it as a positive result and roll 1D10 against this number. If the roll is less than or equal to the number, the squadron loses a spot for its pitiful performance! This is considered a great shame for a Yoka-Shan warrior (and very rarely occurs).
Spot Check Table
| Event | Modifier |
|---|---|
| Each enemy fighter destroyed | +1/fighter |
| Each friendly fighter lost | -1/fighter |
| Each enemy escort destroyed | +3/escort |
| Each friendly escort lost | -3/escort |
| Superior enemy force | +1/50 points difference |
| Inferior enemy force | -1/50 points difference |
Use the same procedure to check for spots for your pilots and gunners, if you wish. Only add the modifiers which directly apply to the pilot in question, i.e. only the fighters that he personally destroyed.
Personal Shields
Each individual pilot also maintains a personal shield. Instead of being awarded medals for outstanding performance in combat, pilots are awarded spots for their shield. Pilots wear small replica shields with the appropriate number of spots pinned over the left pocket of their dress uniforms. Many squadrons also allow their pilots to paint a small version of their personal shield on their fighter just below the cockpit. If a pilot manages to completely fill his shield he is entitled to add a second shield to his uniform. If this is filled, he may add a third, etc.
Upper Level Shields
Shield patterns for unit organizations above the squadron level are based upon the average number of spots of the units which comprise them, rounded down. A fighter wing, for example, which was composed of three squadrons that had 3, 4, and 5 spots, respectively, would have a unit shield with 4 spots.
This section is for those who frequently play campaigns or just like to keep track of their pilots and squadrons between battles. This actually serves a very practical purpose for Yoka-Shan commanders because a unit's shield pattern appears in all official documents concerning the unit. A commander can look at an organizational table and instantly see with a glance which units are his most experienced and which are still dangerously green.
Escorts
Because escort class ships often operate individually or in small groups, each ship maintains its own shield pattern. Escort squadron shield patterns are an average of the shields of the ships assigned to the unit.
New Equipment
Yoka-Shan leaders are determined to maintain their world's influence in the interstellar arena; maintaining that influence requires a strong fleet. Although Yoka-Shan has one of the most powerful fleets among the factions that survived the Grub War, the Warworlders are not content to rest on their laurels. The Warworld has as many enemies as it does allies. Should one of those enemies gain a significant technological advantage the balance of power could shift overnight. To prevent this, the government has invested heavily in research and development.
Warworld scientists have made rapid strides in the area of plasma generation and containment. The application of this new technology has led to the creation of the plasma shell. A plasma shell is a self-contained unit that holds a small amount of deuterium and a bank of high voltage supercapacitors. The capacitors hold sufficient energy to power a laser array capable of igniting a fusion reaction in the stored fuel. Ships equipped with plasma shell weapons can generate plasma without the bulky reaction vessels used by traditional plasma weapons. The trade-off is that the weapon has a finite supply of ammunition.
Plasma Missiles
Plasma missiles are standard missiles equipped with plasma shell warheads. Each warhead contains a plasma shell and laser array. The shell is activated just prior to impact by a proximity fuse. Because of the nature of Plasma Missiles they are much more effective against non armored craft, and fighters that have had their damage reduction abilities compromised.
Plasma shell warheads are almost twice the size of standard warheads. In order to allow their use in conventional missile launchers, the standard missile guidance electronics were replaced with a smaller and less sophisticated system.
Plasma Missile Stats
| Weapon | Cost | Slots | Base Attack Dice | Damage | Ammo | Range |
|---|---|---|---|---|---|---|
| Plasma Missile | 2 | 1 | 1d8/missile | High+1/* | 5 | 10 |
| Plasma Missile | 4 | 2 | 1d8/missile | High+1/* | 10 | 10 |
| Plasma Missile | 6 | 3 | 1d8/missile | High+1/* | 15 | 10 |
| Plasma Missile | 8 | 4 | 1d8/missile | High+1/* | 20 | 10 |
* Damage is High +2/per missile against craft with no remaining damage reduction.
Plasma Shell Cannon
The plasma shell cannon is basically a plazgun minus its plasma generators. In place of the generators, it carries a small magazine of plasma shells. The weapon's reduced size and power requirements allow it to be mounted on fighters that are unable carry conventional plazguns.
The tremendous energy released when a shell is fired sometimes overloads the weapon's cooling system. Whenever a plasma shell cannon's attack dice roll triples (all dice come up the same), the weapon has overheated. The current shot is resolved normally, but the weapon must cool down and may not fire on the following turn.
Plasma Shell Cannon Stats
| Weapon | Cost | Slots | Base Attack Dice | Damage | Ammo |
|---|---|---|---|---|---|
| Single Plaz Shell Cannon | 5 | 2 | 2d6 | All | 4 |
| Twin Plaz Shell Cannon | 10 | 3 | 2d6+1 | All+1 | 4 |
| Triple Plaz Shell Cannon | 15 | 5 | 2d6+2 | All+3 | 4 |
| Quad Plaz Shell Cannon | 20 | 6 | 2d6+3 | All+5 | 4 |
Plasma Shell Cannon Ranges
| Short | Medium | Long | Target Drive |
|---|---|---|---|
| 1-2 | 3-4 | 5-10 | ——— |
Additional Plasma Shell Cannon Ammo
| Weapon | Cost | Slots | Ammo Added | Max Load |
|---|---|---|---|---|
| Single Plaz Shell Cannon | 2 | 1 | 2 | 8 |
| Twin Plaz Shell Cannon | 3 | 1 | 2 | 8 |
| Triple Plaz Shell Cannon | 4 | 2 | 2 | 8 |
| Quad Plaz Shell Cannon | 5 | 3 | 2 | 8 |
Plasma Defense System
Warworld scientists have also developed a way to use the plasma shell technology in a defensive capacity. Ships equipped with this new plasma defense system have a number of plasma shells mounted in recessed cavities around their hulls. The shells are all linked to a fire-control panel on the pilot's console. When detonated, powerful magnetic fields channel the blast away from the ship and toward the incoming weapons.
All plasma defense systems have a rating written as a number followed by blips. The number is the system's defense rating, the blips are the number of charges the system holds. A system with a 6(❍ ❍ ❍) rating, for example, has a defense rating of 6 and holds 3 charges. Once a system has exhausted its charges it may no longer be activated.
Plasma defense systems are activated at the beginning of the Torpedo Results Phase and have the following effects:
- Roll 1D10 against each torpedo that will impact the ship on the current turn. If the result is less than or equal to the defense system's rating the torpedo is destroyed.
- Roll 1D10 against every five missiles that will impact the ship on the current turn. If the result is less than or equal to the defense system's rating, that number of missiles are destroyed.
- All fire at or from the activating ship suffers a -2 penalty to hit in the Cannon Fire Phase of any turn in which the system is used. The plasma halo surrounding the ship plays havoc with everyone's sensors.
- Ships may not Dodge or use Point Defense when using PDS.
- Any alive and unstunned crew may activate PDS on fighters and gunboats. Any live Bridge or Electronics crew may activate PDS on Warhounds and Platforms.
- Ships may Jam or use Decoys when using PDS.
- Ships using PDS do not affect torpedoes targeted at other ships.
- Ships using PDS do not affect the chance for other ships to hit the targets in the same space. (Ex: torpedoes or life pods.)
- Ships using PDS do not affect line of sight for ships firing through the hex they occupy.
- Ships with PDS systems lose them only on specific critical hits.
- PDS systems work against Drones as if they were torpedoes.
- PDS systems have no effect on mine fields.
- Each charge of PDS counts against the maximum number of torpedoes on fighters and gunboats, but does not count against maximum weapon mounts for escorts.
All ships purchase plasma defense systems from the following chart. Fighters and gunboats only require a single system. Escorts must purchase a separate system for each quadrant of the ship, using standard PDS costs/slots for each quadrant. Ships may mount both plasma defense systems and conventional point-defense systems, but they may not use both in the same turn. The blast from a plasma system temporarily blinds the conventional system's sensors.
To purchase a system, find the desired rating and cross-reference it with the number of charges you want. This gives you two numbers separated by a dash. The first number is the point cost of the system. The second number is the number of construction slots the system takes up in the ship's hull.
Plasma Defense System Cost and Slots (cost-slots)
| Rating | 2 Charges | 3 Charges | 4 Charges | 5 Charges | 6 Charges | 7 Charges | 8 Charges |
|---|---|---|---|---|---|---|---|
| 1 | 2-2 | 3-2 | 3-3 | 4-3 | 4-4 | 5-4 | 5-5 |
| 2 | 4-2 | 5-3 | 6-3 | 7-4 | 8-4 | 9-5 | 10-5 |
| 3 | 6-3 | 8-3 | 9-4 | 11-4 | 12-5 | 14-5 | 15-6 |
| 4 | 8-3 | 10-4 | 12-4 | 14-5 | 16-5 | 18-6 | 20-6 |
| 5 | 10-4 | 13-4 | 15-5 | 18-5 | 20-6 | 23-6 | 25-7 |
| 6 | 12-4 | 15-5 | 18-5 | 21-6 | 24-6 | 27-7 | 30-7 |
Each charge of PDS counts against the maximum number of torpedoes on the ship.
Fighter Bay Hit Table
Roll on this table when a fighter bay is hit.
| Roll | Result |
|---|---|
| 2 | O2 explosion! Docked fighter and escort take 15 points of damage. A fire is started as in 3 below. |
| 3 | Bay Fire! Docked fighter and escort take 10 points of damage a turn until fire extinguished. A successful Damage Control roll will put out the fire. |
| 4 | Docked fighter takes 10 points of damage. No effect if bay empty. |
| 5 | Docked fighter takes 5 points of damage. No effect if bay empty. |
| 6 | Automated systems knocked out. Bay may not be used to replenish fighters. |
| 7 | Replenishment points destroyed. Lose 1D4 Replenishment Points. |
| 8 | Bay collapses! Docked fighters are trapped in the bay. Undocked fighters may not enter bay. |
Weapon Specifications
The following specifications are printed on the Yoka-Shan ship record sheets.
Splattergun Specs
- Short Range: 1–2 hexes (+1 To Hit).
- Medium Range: 3–6 hexes.
- Long Range: 7–10 hexes (–1 To Hit).
Meld Laser Specs
- Short Range: 1-6 hex (+1 To Hit).
- Medium Range: 7-18 hexes.
- Long Range: 19-20 hexes (–1 To Hit).
- Target Speed Restriction: Target's Drive value must be ≤12.
Plaz Shell Cannon Specs
- Short Range: 1–2 hexes (+1 To Hit).
- Medium Range: 3–4 hexes.
- Long Range: 5–10 hexes (–1 To Hit).
- Ψ On triples, do damage as normal, but cannon may not fire next turn.
Pulse Laser Specs
- Short Range: 1–3 hexes (+1 To Hit).
- Medium Range: 4–9 hexes.
- Long Range: 10 hexes (–1 To Hit).
Plasma Missile Specs
- Lock-on Range: ≤10.
- To Hit: 5x or 10xD8. (The multiplier glyph is not reproduced in the source text layer; read the record sheet for the exact symbol.)
- Damage: High+1/. If target's Damage Reduction = 0, Damage is High+/. (The damage-modifier glyphs are likewise not reproduced; the Plasma Missile Stats table above gives High+1/ and the footnote gives the +2 case.)*
Fleet Composition
Yoka-Shan Fleet Composition. Each starcraft is listed with its Basic Point Value (BPV) and crew. The three right-hand columns give the point value under the variable-speed, super-maneuverable and combined rules.
| Starcraft | Basic Point Value | Crew | VSPV | SMPV | VSSMPV |
|---|---|---|---|---|---|
| Betafortress | 216 | 5 | 291 | 293 | 295 |
| Betafortress Beta | 220 | 6 | 295 | 297 | 299 |
| Black Widow | 157 | 3 | 177 | 175 | 207 |
| Blizzard | 19 | 1 | 27 | 26 | 39 |
| Death Wind | 60 | 2 | 70 | 74 | 90 |
| Death Wind YS | 63 | 2 | 73 | 77 | 93 |
| Epping Prime | 78 | 4 | 78 | 78 | 78 |
| Epping | 119 | 4 | 125 | 141 | 169 |
| Hell Bender | 32 | 1 | 35 | 37 | 40 |
| Hell Bender II | 33 | 1 | 36 | 44 | 55 |
| Iklwa | 15 | 1 | 15 | 15 | 15 |
| Iklwa II | 16 | 1 | 16 | 16 | 16 |
| Iwisa | 60 | 1 | 70 | 74 | 90 |
| Jii | 46 | 1 | 46 | 46 | 46 |
| Kraal | 302 | 5 | 314 | 421 | 432 |
| Kraal ECM | 250 | 9 | 246 | 355 | 340 |
| Nemesis | 298 | 6 | 318 | 424 | 448 |
| Night Hawk | 47 | 1 | 47 | 47 | 47 |
| Sentry | 80 | 3 | 80 | 80 | 80 |
| Stinger | 18 | 1 | 18 | 32 | 32 |
| Thunder Bird | 25 | 1 | 35 | 36 | 52 |
| Warhounds | |||||
| Aosho | 764 | 42 | 762 | 1034 | 962 |
| Cetshwayo | 575 | 26 | 575 | 575 | 575 |
| Constellation | 806 | 35 | 768 | 1040 | 930 |
| Fletcher | 894 | 37 | 918 | 1038 | 1018 |
| Megafortress | 482 | 22 | 526 | 536 | 606 |
| Narwhal Mk. II | 623 | 27 | 682 | 731 | 828 |
| Stingray | 551 | 25 | 599 | 623 | 699 |
VSPV = Variable Speed Point Value; SMPV = Super Maneuverable Point Value; VSSMPV = Variable Speed Super Maneuverable Point Value.
Master Weapon Tables
The following tables are printed in the book for use with all starcraft weapons.
Alternate Range Effects Table
Range increments give the To Hit modifier for each band.
| Weapon | Point Blank (+2) | Short (+1) | Medium (0) | Long (-1) | Very Long (-2) | Extreme (-4) |
|---|---|---|---|---|---|---|
| Terran Weapons | ||||||
| Mass Driver Cannons | ||||||
| Minigun | 1 | 2 | 3-5 | 6-10 | 11-12 | — |
| Autocannon | 1 | 2-3 | 4-10 | 11-20 | 21-22 | 23-24 |
| Railrepeator | 1 | 2-4 | 5-15 | 16-30 | 31-33 | 34-36 |
| Laser Cannons | ||||||
| Pulse Laser | 1-2 | 3 | 4-8 | 9 | 10 | — |
| Meld Laser | 1 | 2-6 | 7-15 | 16-17 | 18-19 | 20 |
| Turbo Laser | 1 | 2-9 | 10-19 | 20-25 | 26-28 | 29-30 |
| Blast Cannons | ||||||
| Splattergun | 1 | 2 | 3-4 | 5-6 | 7-10 | — |
| Blatgun | 1 | 2-4 | 5-7 | 8-10 | 11-13 | 14-15 |
| Disruptor Cannons | ||||||
| Disruptorgun | — | 1 | 2 | 3-4 | 5-6 | — |
| Disintegrator | — | 1 | 2-3 | 4-6 | 7-12 | — |
| Ion Cannons | ||||||
| Impulsegun | 1 | 2-3 | 4-6 | 7-8 | 9-10 | — |
| Ion Ram | 1 | 2-5 | 6-13 | 14 | 15 | — |
| Plasma Cannons | ||||||
| Plazgun Cannon | 1 | 2 | 3-4 | 5-6 | 7-8 | 9-10 |
| Heavy Plazgun | 1 | 2-4 | 5-8 | 9-10 | 11-12 | 13-15 |
| Plasma Shell Cannons | ||||||
| Plaz Shell Cannon | 1 | 2 | 3-4 | 5-6 | 7-8 | 9-10 |
| Energy Bolt Projectors | ||||||
| Protobolt | — | 5-8 | 9-12 | 13-16 | — | — |
| EMP Cannons | ||||||
| EMP Ray | 1 | 2 | 3-4 | 5-6 | 7 | 8 |
| EMP Beam | 1 | 2-3 | 4-6 | 7-10 | 11-14 | 15 |
| Gaus Field Generators | ||||||
| Mjölnir | 1 | 2-3 | 4-7 | 8 | 9 | 10 |
| Gungnir | 1-2 | 3-5 | 6-10 | 11-13 | 14-15 | 16 |
| Tachyon Conveyers | ||||||
| Tacyon Ram | 1-2 | 3 | 4-11 | 12-13 | 14-15 | 16 |
| Tachyon Cannon | 1-2 | 3-5 | 6-15 | 16-17 | 18 | 19 |
| Hatchling Weapons | ||||||
| Beam Cannons | ||||||
| X-Beam | 1 | 2-3 | 4-14 | 15 | 16 | — |
| Y-Beam | 1 | 2-3 | 4-16 | 17 | 18 | — |
| Z-Beam | 1 | 2-3 | 4-20 | 21 | 22 | — |
| Leech Cannons | ||||||
| Drive Leech | — | 1 | 2 | 3 | 4 | — |
| Plexar Cannons | ||||||
| Plexar Gun | 1 | 3-4 | 5-8 | 9 | 10-11 | 12 |
| Entropy Cannons | ||||||
| Entropic Accelerator | 1 | 3-4 | 5-7 | 8-9 | 10-11 | 12 |
Printed spellings: the source heading for the Gauss weapons reads "Gaus Field Generators" and the Tachyon ram entry reads "Tacyon Ram". Both are reproduced as printed in this table.
Consolidated Master Cannon Table
| Weapon Type | Base Attack Dice | To Hit: Short (+1) | Mid (0) | Long (-1) | Target Speed Restrictions | Damage |
|---|---|---|---|---|---|---|
| Terran Weapons | ||||||
| Mass Driver Cannons | ||||||
| Minigun | 2D6+ADB | 1-2 | 3-5 | 6-12 | None | Low † |
| Autocannon | 2D6+ADB | 1-3 | 4-10 | 11-24 | Drive ≤10 | Medium † |
| Railrepeator | 2D6+ADB | 1-4 | 5-15 | 16-36 | Drive ≤6 | High † |
| Laser Cannons | ||||||
| Pulse Laser | 2D8+ADB | 1-3 | 4-9 | 10 | None | Low |
| Meld Laser | 2D8+ADB | 1-6 | 7-18 | 19-20 | Drive ≤12 | Medium |
| Turbo Laser | 2D8+ADB | 1-9 | 10-25 | 26-30 | Drive ≤8 | High |
| Blast Cannons | ||||||
| Splattergun | 2D6+ADB | 1-2 | 3-6 | 7-10 | None | Medium |
| Blatgun | 2D6+ADB | 1-4 | 5-10 | 11-15 | Drive ≤13 | High |
| Disruptor Cannons | ||||||
| Disruptorgun | 2D8+ADB | 1 | 2 | 3-6 | None | Medium § |
| Disintegrator | 2D8+ADB | 1 | 2-3 | 4-12 | Drive ≤11 | High § |
| Ion Cannons | ||||||
| Impulsegun | 2D8+ADB | 1-3 | 4-8 | 9-10 | None | High |
| Ion Ram | 2D8+ADB | 1-5 | 6-13 | 14-15 | Drive ≤15 | All |
| Plasma Cannons | ||||||
| Plazgun | 2D6+ADB | 1-2 | 3-4 | 5-10 | None | All ¥ |
| Heavy Plazgun | 2D6+ADB | 1-4 | 5-8 | 9-15 | Drive ≤11 | All x 2 ¥ |
| Plasma Shell Cannons | ||||||
| Plaz Shell Cannon | 2D6+ADB | 1-2 | 3-4 | 5-10 | None | All ¥ |
| Heavy Plazgun (as printed) | 2D6+ADB | 1-4 | 5-8 | 9-15 | Drive ≤11 | All x 2 ¥ |
| Energy Bolt Projectors | ||||||
| Protobolt | 2D6+ADB | 5-8 | 9-12 | 13-16 | Drive ≤14 | s.10/m.8/l.6 |
| EMP Cannons | ||||||
| EMP Ray | 2D8+ADB | 1-2 | 3-4 | 5-8 | None | Medium/2 ¤ |
| EMP Beam | 2D8+ADB | 1-3 | 4-6 | 7-15 | Drive ≤14 | High/2 ¤ |
| Tachyon Conveyers | ||||||
| Tachyon Cannon | 2D10+ADB | 1-5 | 6-15 | 16-19 | Drive ≤14 | High |
| Tachyon Ram | 2D10+ADB | 1-3 | 4-11 | 12-17 | Drive ≤15 | All |
| Gauss Field Generators | ||||||
| Mjölnir | 2D8+6+ADB | 1-3 | 4-7 | 8-10 | (none printed) | Low+3 ∂ |
| Gungnir | 2D8+6+ADB | 1-5 | 6-10 | 11-16 | Drive ≤13 | Med+2 ∂ |
| Plexar Cannons | ||||||
| Plexar Gun | 2D10+ADB | 1-4 | 5-10 | 11-12 | Drive ≤14 | High ∞ |
| Entropy Cannons | ||||||
| Entropic Accelerator | 2D8+ADB | 1-4 | 5-7 | 8-12 | Drive ≤12 | High Ω |
| Hatchling Weapons | ||||||
| Beam Cannons | ||||||
| X-Beam | 2D8+ADB | 1-3 | 4-14 | 15-16 | None | Low x 3 |
| Y-Beam | 2D8+ADB | 1-3 | 4-16 | 17-18 | Drive ≤13 | Medium x 2 |
| Z-Beam | 2D8+ADB | 1-3 | 4-20 | 21-22 | Drive ≤10 | High x 2 |
| Leech Cannons | ||||||
| Drive Leech | 2D6+ADB | 1 | 2 | 3-4 | None | Low ‡ |
Notes to the Consolidated Master Cannon Table
- † Whenever two of the attack dice roll doubles, multiply base damage delivered by 2.
- § If target's Defensive Value has not been reduced by a critical hit, add 1 to its Defensive Value. Ignore target's Damage Reduction when resolving a hit.
- ¥ If the attack dice roll triples, the weapon mount overloads and is destroyed. The target is not affected.
- ¤ If the attack dice roll doubles or triples, the target takes an additional critical. Also, completely ignore target's Damage Reduction when resolving a hit.
- * A missile/spore mole target must be within 10/6 hex range only at the beginning of the Missile/Spore Mole Launch Phase.
- ‡ Low damage is distributed only to the target's Drive damage boxes, ignoring Damage Reduction value.
- ∆ Low damage indicates the number of crewman killed in the target vessel. No hits are inflicted on the Damage Track.
- ∂ May hit all torps in one hex targeting one ship, if at short range.
- ∞ If the To Hit roll for the Plexar Gun is triples, the firing ship's Defensive Value is reduced by 2.
- Ω Does 1D6 continuing damage per turn during Warhead Launch Phase, until a 1 is rolled. Damage Reduction applies.
- Ψ If the Attack Dice roll triples, weapon may not fire next turn.
Integrated Escort Weapon Table
| Weapon | Base Attack Dice | To Hit: Short (+1) | Mid (0) | Long (-1) | Target Speed Restrictions | Damage |
|---|---|---|---|---|---|---|
| Ion Weapons | ||||||
| Ion Cannon | 2D8 | 1-8 | 9-16 | 17-30 | Drive ≤ 7 | All x 2 |
| Twin Ion Cannon | 2D8+1 | Drive ≤ 6 | (All+2) x 2 | |||
| Triple Ion Cannon | 2D8+3 | Drive ≤ 5 | (All+4) x 2 | |||
| Quad Ion Cannon | 2D8+5 | Drive ≤ 4 | (All+6) x 2 | |||
| Impulse Cannon | 2D8 | 1-3 | 4-5 | 6-11 | Drive ≤ 9 | High x 2 |
| Twin Impulse Cannon | 2D8+1 | Drive ≤ 8 | (High+2) x 2 | |||
| Triple Impulse Cannon | 2D8+3 | Drive ≤ 7 | (High+4) x 2 | |||
| Quad Impulse Cannon | 2D8+5 | Drive ≤ 6 | (High+6) x 2 | |||
| Blast Weapons | ||||||
| Blast Cannon | 2D6 | 1-8 | 9-20 | 21-25 | Drive ≤ 9 | Medium x 2 |
| Twin Blast Cannon | 2D6+1 | Drive ≤ 8 | (Medium+2) x 2 | |||
| Triple Blast Cannon | 2D6+2 | Drive ≤ 7 | (Medium+4) x 2 | |||
| Quad Blast Cannon | 2D6+3 | Drive ≤ 6 | (Medium+6) x 2 | |||
| Repeating Blaster | 2D6 | 1-3 | 4-8 | 9-15 | None | High x 2 |
| Twin Repeating Blaster | 2D6+1 | (High+2) x 2 | ||||
| Triple Repeating Blaster | 2D6+2 | (High+4) x 2 | ||||
| Quad Repeating Blaster | 2D6+3 | (High+6) x 2 | ||||
| Laser Weapons | ||||||
| Laztube | 2D10 | 1-10 | 11-20 | 21-40 | Drive ≤ 8 | High x 2 |
| Twin Laztube | 2D10+2 | Drive ≤ 7 | (High+1) x 2 | |||
| Triple Laztube | 2D10+4 | Drive ≤ 6 | (High+2) x 2 | |||
| Quad Laztube | 2D10+6 | Drive ≤ 5 | (High+3) x 2 | |||
| Mass Drivers† | ||||||
| Gatling Cannon | 2D6 | 1-4 | 5-8 | 9-16 | Drive ≤15 | Low x 2 = |
| Twin Gatling Cannon | 2D6+1 | Drive ≤15 | (Low+1) x 2 = | |||
| Triple Gatling Cannon | 2D6+3 | Drive ≤15 | (Low+2) x 2 = | |||
| Quad Gatling Cannon | 2D6+5 | Drive ≤15 | (Low+3) x 2 = | |||
| Hyper Cannon | 2D6 | 1-8 | 9-15 | 16-30 | Drive ≤11 | High x 2 = |
| Twin Hyper Cannon | 2D6+1 | Drive ≤10 | (High+1) x 2 = | |||
| Triple Hyper Cannon | 2D6+3 | Drive ≤9 | (High+2) x 2 = | |||
| Quad Hyper Cannon | 2D6+5 | Drive ≤8 | (High+3) x 2 = | |||
| Keel Cannon | 2D8 | 1-10 | 11-15 | 16-20 | None | All x 3 = |
| Plazprojectors | ||||||
| Corvette | XD8 | 1-5 | None | All | ||
| Frigate | XD10 | 1-5 | None | All | ||
| Destroyer | XD12 | 1-5 | None | All | ||
| Gauss Field Generators ∂ | ||||||
| Bifrost Cannon | 2D10 | 1-10 | 11-20 | 21-30 | None | All x 2 |
| Graviton Weapons | ||||||
| Graviton Cannon | 2D8+2 | 6-22 | 23-34 | 35-40 | Drive ≤13* | All x 2 |
* May never fire at targets moving faster than 13.
Yoka-Shan Scenarios
The scenarios in this section use ships from Silent Death: The Next Millennium, Night Brood: First Contact, and Warworld. These scenarios include maps showing the ideal setup for game play. Run the scenarios determining your own initial setup using guidelines provided in the scenarios.
All scenarios should use the following optional rules:
- Damage Control
- Decoys
- Destroyed Starcraft Debris
- Easing Target Speed Restrictions
- Point Defense Anti-Torpedo Weapon System
- Point Defense Weapon System vs. Missiles
- Side Slip
- Time Limit
- Variable Speed Torpedoes
Scenario 1: Here Comes the Cav!
Date: 2:050 AL Location: House Aramae space Situation: A particularly nasty Grub swarm, the Festering Maggots (Swarm 720), erupted in House Aramae space early in AL 2. Aramae forces were quickly overwhelmed and an urgent message was dispatched to the Warworld. Yoka-Shan forces, led by the famed Sorcerers, arrived just in time to support the last beleaguered defenders.
Forces
Elements of Baker Squadron, House Aramae. Setup first anywhere in areas C and D.
- Thunder Bird A: Pilot (Plt 5, Gnr 6)
- Thunder Bird B: Pilot (Plt 5, Gnr 3)
- Thunder Bird C: Pilot (Plt 4, Gnr 4)
Elements of Festering Maggots (Swarm 720). Setup second in areas G and H.
- Larva A: Pilot (Plt 6, Gnr 6)
- Larva B: Pilot (Plt 7, Gnr 6)
- Larva C: Pilot (Plt 5, Gnr 4)
- Larva D: Pilot (Plt 6, Gnr 5)
- Tiger Moth A: Pilot (Plt 9, Gnr 7); Weapon A (Gnr 6); Weapon B (Gnr 7); Weapon C (Gnr 5); Weapon D (Gnr 4); Weapon E (Gnr 6)
Elements of Sorcerer Squadron, Yoka-Shan. Enter map on Turn 3 along edge 4, in areas D and F.
- Death Wind A: Pilot (Plt 8, Gnr 7); Gunner A (Gnr 7)
- Death Wind B: Pilot (Plt 7, Gnr 6); Gunner A (Gnr 8)
- Hell Bender A: Pilot (Plt 9, Gnr 6)
- Hell Bender B: Pilot (Plt 7, Gnr 7)
Special Rules
- The Sorcerers enter the battle on Turn 3. The Yoka-Shan ships may enter the map along edge 4, in areas D and F.
Victory Conditions
The battle ends after 10 game turns. Total the TPV of all ships killed by each side and give the Terrans an extra 10 point[s] for each surviving Thunder Bird. (The source reads "10 point"; the plural is supplied here.) The side with the highest total wins.
Scenario 2: Knowledge is Power
Date: 9:100 AL Location: Near the Grub-infested planet Kosaka Situation: The UNW mounted an operation to recover the Tokugawan planet Kosaka in 9 AL. Prior to the ground assault, it was necessary to determine the strength and locations of the Hatchling defensive batteries. A number of low-level recon runs were made over the planet to obtain this data. As the invasion date neared, the Sorcerers made one of the last runs before the attack and were jumped by the now alerted defenders.
Forces
Elements of the Sorcerer Squadron, Yoka-Shan. Setup first in areas A and B using the long map setup.
- Thunder Bird A: Pilot (Plt 6, Gnr 6)
- Thunder Bird B: Pilot (Plt 7, Gnr 6)
- Thunder Bird C: Pilot (Plt 5, Gnr 5)
- Thunder Bird D: Pilot (Plt 8, Gnr 7)
- Night Hawk A: Pilot (Plt 9, Gnr 7)
- Night Hawk B: Pilot (Plt 7, Gnr 8)
Elements of the Shamblers (Swarm 1201). Setup second within 6 hexes of Edge 3.
- Larva A: Pilot (Plt 5, Gnr 4)
- Larva B: Pilot (Plt 4, Gnr 5)
- Larva C: Pilot (Plt 6, Gnr 3)
- Larva D: Pilot (Plt 3, Gnr 4)
- Shaggai A: Pilot (Plt 6, Gnr 4)
- Shaggai B: Pilot (Plt 6, Gnr 6)
Special Rules
- Long map setup.
- All the Thunder Birds have had their MK 20 torps replaced with recon pods. The pods may be used by moving within 6 hexes of Edge 3 and making a successful lock-on roll.
- The battle takes place just above Kosaka's atmosphere. To reflect this, at the end of each turn the planet's gravity causes all ships, drones, torpedoes, etc. to drift two hexes toward Edge 3. Any object or ship that drifts off the map is considered lost.
- Yoka-Shan ships may exit the map along Edge 1. Once a ship has left the map it may not return to play.
Victory Conditions
The battle ends when all Warworld craft have left the battlefield or been destroyed. Total the TPV of all ships killed by each side. The Yoka-Shan player receives an additional 20 points for each Thunder Bird that successfully used its recon pod and then exited off Edge 1. The player with the highest total wins.
Scenario 3: Training Flight
Date: 9:30 AL Location: Ventnor System, House Moskava space Situation: Late in 8 AL, prospectors discovered significant quantities of heavy metals such as gold and iridium in the asteroid belt of the Ventnor system. Luches Utopia forces, always looking to grab that which is not theirs, entered the system and began a campaign of piracy against the freighters transporting ore from the belt. House Moskava responded by hiring Warworld mercenaries to train its interceptor squadrons and get them up to speed. During one training flight, the Yoka-Shan pilots and their recruits ran into a group of Utopian pirates.
Forces
Elements of the Blue Devils, House Moskava. Setup first in areas C and D.
- Kosmos A: Pilot (Plt 3, Gnr 4)
- Kosmos B: Pilot (Plt 4, Gnr 2)
- Kosmos C: Pilot (Plt 1, Gnr 3)
- Kosmos D: Pilot (Plt 3, Gnr 5)
- Spirit Rider A: Pilot (Plt 5, Gnr 4)
- Spirit Rider B: Pilot (Plt 4, Gnr 3)
Elements of uMbonambi (Evil Omen) Squadron, Yoka-Shan. Setup last in areas A, B, C, and D.
- Iwisa A: Pilot (Plt 9, Gnr 7)
- Iwisa B: Pilot (Plt 8, Gnr 9)
Elements of the Reapers, Luches Utopia. Setup second in areas G and H.
- Sorenson III A: Pilot (Plt 6, Gnr 6); Gunner A (Gnr 5)
- Sorenson III B: Pilot (Plt 5, Gnr 5); Gunner A (Gnr 8)
- Blizzard A: Pilot (Plt 7, Gnr 5)
- Blizzard B: Pilot (Plt 5, Gnr 4)
- Blizzard C: Pilot (Plt 6, Gnr 5)
- Blizzard D: Pilot (Plt 4, Gnr 4)
Special Rules
- The pilots of the House Moskava fighters are fresh out of flight school; none have been in combat before. They may break and run. Whenever one of these ships suffers a critical hit, roll 1D10 against the pilot's skill. If the roll exceeds the skill, the pilot decides to bug out and heads for the nearest map edge. A retreating fighter will only fire on ships between it and the edge it is attempting to exit by. Once a fighter has left the map it may not return.
- Once a Moskavan fighter exhausts its ammo supply it automatically retreats off the map with no chance of returning.
- The Warworld instructors may attempt to stop their recruits from retreating. At the beginning of each turn an instructor may attempt to rally one fleeing trainee. Roll 1D10 against the instructor's Pilot skill. If the roll is equal to or less than the skill, the selected recruit stops retreating. Unfortunately, the attempt, successful or not, requires the instructor's full attention and prevents him from firing any weapons that turn.
Victory Conditions
The battle lasts ten turns. Total the TPV of ships destroyed by each side; Moskavan ships that retreated from battle are counted at half value. The side with the highest total wins.
Scenario 4: Bombs Away!
Date: 9:42 AL Location: MineFac 3, Ventnor System Situation: As the fighting in the Ventnor system escalated, the Luches Utopia commanders decided to destroy one of the largest House Moskava mining facilities. They hoped such a serious loss would demoralize the defenders and make them reconsider their position. They didn't know that the Moskavans had already hired the Evil Omen squadron on in more than an advisory role. (Source wording as printed.)
Forces
Elements of the Evil Omen Squadron, Yoka-Shan. Setup first within 6 hexes of Edge 3.
- Iklwa A: Pilot (Plt 6, Gnr 5)
- Iklwa B: Pilot (Plt 5, Gnr 4)
- Iklwa C: Pilot (Plt 5, Gnr 7)
- Iklwa D: Pilot (Plt 4, Gnr 4)
- Iwisa A: Pilot (Plt 8, Gnr 6)
- Iwisa B: Pilot (Plt 5, Gnr 5)
- Iwisa C: Pilot (Plt 7, Gnr 4)
Elements of the Reapers, Luches Utopia. Sorenson IIIs setup second in areas A and B. The Blizzards enter the map during the Movement Phase of Turn 3.
- Sorenson III A: Pilot (Plt 6, Gnr 6); Gunner A (Gnr 5)
- Sorenson III B: Pilot (Plt 5, Gnr 5); Gunner A (Gnr 8)
- Sorenson III C: Pilot (Plt 6, Gnr 6); Gunner A (Gnr 5)
- Sorenson III D: Pilot (Plt 5, Gnr 5); Gunner A (Gnr 8)
- Blizzard A: Pilot (Plt 7, Gnr 5)
- Blizzard B: Pilot (Plt 5, Gnr 4)
- Blizzard C: Pilot (Plt 6, Gnr 5)
- Blizzard D: Pilot (Plt 4, Gnr 4)
Special Rules
- The battle takes place over the planet of Ventnor Prime. At the end of each turn the planet's gravity causes all objects on the map to drift one hex in the direction of Edge 3. Any object that drifts off the map is considered destroyed, ground munitions excluded.
- MineFac 3 is on the surface of Ventnor Prime. The Blizzards' normal torpedo load has been replaced with special ground munitions designed to withstand the heat of reentry into the planet's atmosphere. The munitions may be dropped during the Warhead Launch Phase. Once launched, the bombs travel in a straight line from the front of the firing craft, moving at the end of Movement Phase. The bombs have Drive 5, DV 7, DR 5, and are destroyed when they take 1 point of damage.
- There is a narrow window in the planet's atmosphere that the bombs must pass through to hit the facility. This is a strip six hexes wide along Edge 3; the strip is centered on the border between areas G and H. Any bombs that leave the playing area through any other edge or any other part of Edge 3 automatically miss the target. Bombs that exit the map through this area hit the mine and do 1D12 All damage. The facility has DR 2 and can take 40 points of damage before being destroyed.
- Luches Utopia ships may exit off Edge 1. Once a ship has left the map it may not return.
Victory Conditions
The battle continues until all Luches Utopia ships have exited the map or been destroyed. Add up the TPV of ships destroyed by each side. The Luches Utopia player also receives 2 points for every point of damage inflicted on the mining facility. The player with the highest total wins.
Scenario 5: Claim Jumpers
Date: 9:50 AL Location: Asteroid belt, Ventnor System Situation: After the failed attack on MineFac 3, the Luches Utopia forces decided to lower their sights and go after some of the small mining outposts scattered in the system's asteroid belt. One of the first attacks of this nature occurred while a joint Yoka-Shan/House Moskava patrol was nearby.
Forces
Elements of the Reapers, Luches Utopia. Setup first within 3 hexes of Edge 2 and at least 10 hexes from Edges 1 and 3.
- Blizzard A: Pilot (Plt 6, Gnr 5)
- Blizzard B: Pilot (Plt 7, Gnr 5)
- Blizzard C: Pilot (Plt 4, Gnr 3)
- Blizzard D: Pilot (Plt 5, Gnr 4)
- Glaive A: Pilot (Plt 6, Gnr 6); Gunner A (Gnr 8)
- Glaive B: Pilot (Plt 5, Gnr 6); Gunner A (Gnr 7)
Elements of the Evil Omen Squadron, Yoka-Shan. Enter the map on Edge 1 during the Movement Phase of Turn 2.
- Iwisa A: Pilot (Plt 7, Gnr 6)
- Iwisa B: Pilot (Plt 5, Gnr 5)
- Iklwa A: Pilot (Plt 9, Gnr 7)
- Iklwa B: Pilot (Plt 6, Gnr 6)
Elements of the Blue Devils Squadron, House Moskava. Setup on Edge 1.
- Kosmos A: Pilot (Plt 4, Gnr 5)
- Kosmos B: Pilot (Plt 6, Gnr 4)
- Kosmos C: Pilot (Plt 5, Gnr 8)
- Kosmos D: Pilot (Plt 4, Gnr 3)
Special Rules
- Place an asteroid field on the map using the standard rules (SDTNM p.79) for placement, but use only 17 asteroid counters.
- Place the three remaining counters in adjacent hexes at the center of the map. These counters represent a single, large asteroid that contains a mining facility. Place a colored marker on each asteroid to represent the facility. Each hex of the mining base has DR 5, can take 30 points of damage, and mounts a twin Splattergun with a 360 degree arc of fire (Gnr 5) Point Defense 1-5 (all). The gun on each section is knocked out when the section has taken 15 points of damage.
- The asteroid field does not drift.
- Luches Utopia ships may exit the map via Edge 3. Once a ship has left the map it may not return.
Victory Conditions
The battle lasts until all Luches Utopia ships have been destroyed or have left the map. Determine the TPV of ships destroyed by each side. The Luches Utopia player also receives 30 points for each hex of the mining facility that was destroyed. The player with the highest total wins.
Advanced Scenarios
The scenarios in this section use the same optional rules as the earlier scenarios, as well as ships from Sunrunners, Warhounds, and Operation Drydock.
Scenario 1: Wolves in the Flock
Date: 10:101 AL Location: Luches Utopia space Situation: As UNW forces entered Utopian space to help combat Swarm 1820, diehard opponents to Utopia membership attempted to sabotage the fragile alliance. Luches Utopia fighters attacked shuttles carrying high-ranking Utopian officers to strategy sessions with their UNW counterparts. Luckily for the officers, they were being escorted by the Warworld Blood Moon squadron.
Forces
Elements of the Blood Moon Squadron, Yoka-Shan. Set up second in areas A and B. (As printed, the four Thunder Bird entries are each labelled "A".)
- Thunder Bird A: Pilot (Plt 8, Gnr 7)
- Thunder Bird A: Pilot (Plt 7, Gnr 6)
- Thunder Bird A: Pilot (Plt 6, Gnr 6)
- Thunder Bird A: Pilot (Plt 5, Gnr 5)
- Kraal ECM A: Pilot (Plt 6, Gnr 5); Gunner A (Gnr 7); Gunner B (Gnr 6); Gunner C (Gnr 6)
Elements of 243rd Transport Wing, Luches Utopia. Set up first in areas A and B.
- Shryak Shuttle A: Pilot (Plt 6, Gnr 4); Gunner A (Gnr 5)
- Shryak Shuttle B: Pilot (Plt 5, Gnr 5); Gunner A (Gnr 6)
Elements of the Bloodthirsters, Luches Utopia. Set up last in areas G and H.
- Pharsii II A: Pilot (Plt 6, Gnr 4); Gunner A (Gnr 5); Gunner B (Gnr 6)
- Pharsii II A: Pilot (Plt 5, Gnr 5); Gunner A (Gnr 6); Gunner B (Gnr 7) (as printed)
- Spirit Rider A: Pilot (Plt 5, Gnr 5)
- Spirit Rider B: Pilot (Plt 5, Gnr 5)
- Spirit Rider C: Pilot (Plt 5, Gnr 5)
- Spirit Rider D: Pilot (Plt 5, Gnr 5)
Special Rules
- The Luches Utopia fighters claim to be an added escort for the shuttles. The Warworld player's ships must move at least 5 hexes each turn toward Edge 3 and may not fire until the Luches Utopia fighters open fire or come within 10 hexes of the shuttles.
Victory Conditions
The battle lasts until both Shryak Shuttles have been destroyed or ten turns have been played. The Luches Utopia player wins immediately if both shuttles are destroyed. If at least one shuttle is still operational at the end of ten turns the Yoka-Shan player wins.
Scenario 2: Surprise Party
Date: 10:123 AL Location: House Carlisle Space Situation: A group of well-organized pirates was preying on merchant ships at the edge of House Carlisle territory. One of the ships destroyed carried Bernard Carlisle, heir to the Carlisle fortune. When house forces were unable to bring the raiders to heel, the Yoka-Shan Warworld was contacted and a squadron was dispatched to take vengeance upon the pirates. Knowing that the raiders would avoid a heavily guarded convoy, the Warworlders disguised some of their fighters as unarmed cargo vessels.
Forces
Elements of the Induna Squadron, Yoka-Shan. Set up first in areas C & D.
- Jii A: Pilot (Plt 6, Gnr 5)
- Jii B: Pilot (Plt 5, Gnr 4)
- Jii C: Pilot (Plt 7, Gnr 5)
- Jii D: Pilot (Plt 5, Gnr 6)
- Death Wind YS A: Pilot (Plt 7, Gnr 5); Gunner A (Gnr 6)
- Death Wind YS B: Pilot (Plt 6, Gnr 5); Gunner A (Gnr 7)
- Death Wind YS C: Pilot (Plt 5, Gnr 4); Gunner A (Gnr 8)
Elements of the Corsairs. Set up second along Edge 3.
- Hell Bender A: Pilot (Plt 6, Gnr 5)
- Hell Bender B: Pilot (Plt 5, Gnr 4)
- Hell Bender C: Pilot (Plt 4, Gnr 7)
- Hell Bender D: Pilot (Plt 5, Gnr 6)
- Salamander A: Pilot (Plt 6, Gnr 4); Gunner A (Gnr 6)
- Salamander B: Pilot (Plt 5, Gnr 8); Gunner A (Gnr 7)
Special Rules
- The Death Winds have fake hull shells bolted to them that make them appear to be medium freighters from long range. While disguised, the fighters have Drive 8, DV 10, DR 6, turn cost 4, and may not fire any weapons. A disguised fighter may blow the explosive bolts holding the shell in place at the beginning of its turn during the Movement Phase. It may move and fire normally from that point on.
- Close range scans will reveal the hidden ships. Any Corsair ship that moves within 2 hexes of a freighter detects the fighter concealed within.
- The pirates want to take the "unarmed" freighters intact. The Corsair player may not fire on a freighter until the fighter inside has been detected.
- The pirate fighters may not leave the map until a Death Wind has been detected. Once a Death Wind has been revealed, the pirate ships may exit via any map edge.
Victory Conditions
The battle lasts until no pirates remain on the map. Add up the TPV of ships killed by each side, counting all ships killed by the Corsairs prior to a Death Wind being revealed at half value. The player with the highest total wins.
Scenario 3: A Worthy Opponent
Date: 9:37 AL Location: Velucci System, The Outer Rim Situation: When some enterprising explorers located a large ghost fleet in the Velucci system, they hired the renowned Whistling Spear squadron to safeguard their claim in exchange for a portion of the future salvage. The Yoka-Shan warriors arrived on the scene to find that the Sunrunners had already staked a claim of their own on the shattered hulks. A hard-fought battle for control of the fleet ensued.
Forces
Elements of the God's Fury Squadron, Sunrunners. Set up first in areas A and B.
- Avenger A: Pilot (Plt 5, Gnr 5); Gunner A (Gnr 6)
- Avenger B: Pilot (Plt 7, Gnr 6); Gunner A (Gnr 6)
- Avenger C: Pilot (Plt 4, Gnr 4); Gunner A (Gnr 5)
- Avenger D: Pilot (Plt 5, Gnr 6); Gunner A (Gnr 9)
- Wind Jammer A: Pilot (Plt 6, Gnr 5)
- Wind Jammer B: Pilot (Plt 2, Gnr 4)
- Wind Jammer C: Pilot (Plt 8, Gnr 6)
- Wind Jammer D: Pilot (Plt 9, Gnr 6)
- Catastrophe A: Pilot (Plt 7, Gnr 6); Gunner A (Gnr 6); Gunner B (Gnr 8); Gunner C (Gnr 5)
Elements of the Whistling Spear Squadron, Yoka-Shan. Set up second in areas G and H.
- Iwisa A: Pilot (Plt 7, Gnr 4)
- Iwisa B: Pilot (Plt 8, Gnr 5)
- Iwisa C: Pilot (Plt 4, Gnr 6)
- Iwisa D: Pilot (Plt 5, Gnr 7)
- Night Hawk A: Pilot (Plt 6, Gnr 2)
- Night Hawk B: Pilot (Plt 9, Gnr 5)
- Night Hawk C: Pilot (Plt 3, Gnr 6)
- Night Hawk D: Pilot (Plt 6, Gnr 6)
- Hell Bender A: Pilot (Plt 7, Gnr 5)
- Hell Bender B: Pilot (Plt 6, Gnr 3)
Special Rules
- Scatter 20 asteroids or unused ships around the map to represent the burnt out ships and debris of the ghost fleet. These ships do not block line of sight for targeting, but do 3d6 Low damage to anything moving through them. They do not drift.
Victory Conditions
The battle lasts 10 turns. At the end of turn ten, add up the TPV of ships killed by each side. The player with the highest total wins.
Scenario 4: Carrier Pigeon
Date: 10:101 AL Location: The border of Yoka-Shan territory Situation: The House Colos gambit in joining the UNW paid off and in 10 AL one of their spies managed to get her hands on schematics for the Warworld's new plasma weapons. She immediately grabbed a shuttle and jumped for the edge of Yoka-Shan space, where a Colosian carrier was waiting for her. A Warworld flotilla gave chase and its fighters caught up to the shuttle minutes before it rendezvoused with the carrier.
Forces
Smuggler Shuttle. Set up first anywhere along the fold at the center of the map.
- Shryak Shuttle A: Pilot (Plt 9, Gnr 5)
Elements of the 292nd Escort Flotilla, House Colos. Set up second anywhere in areas C and D.
- Death Wind II A: Pilot (Plt 7, Gnr 6); Gunner A (Gnr 6)
- Death Wind II B: Pilot (Plt 5, Gnr 6); Gunner A (Gnr 7)
- Death Wind II C: Pilot (Plt 4, Gnr 5); Gunner A (Gnr 6)
- Death Wind II D: Pilot (Plt 8, Gnr 6); Gunner A (Gnr 5)
Aosho A, House Colos. Set up third within three hexes of Edge 3.
- Captain (D6); Pilot (Plt 6)
- Gunner A (Gnr 7); Gunner B (Gnr 6); Gunner C (Gnr 5); Gunner D (Gnr 6); Gunner E (Gnr 6)
- Crew F (Gnr 5); Crew G (Gnr 4)
Elements of the Red Shield Squadron, Yoka-Shan. Set up last within three hexes of Edge 1.
- Iwisa A: Pilot (Plt 9, Gnr 7)
- Iwisa B: Pilot (Plt 8, Gnr 6)
- Iwisa C: Pilot (Plt 7, Gnr 7)
- Iwisa D: Pilot (Plt 6, Gnr 5)
- Hell Bender II A: Pilot (Plt 7, Gnr 6); Gunner (Gnr 7)
- Hell Bender II B: Pilot (Plt 6, Gnr 7); Gunner (Gnr 6)
- Hell Bender II C: Pilot (Plt 6, Gnr 5); Gunner (Gnr 6)
- Hell Bender II D: Pilot (Plt 5, Gnr 4); Gunner (Gnr 5)
Special Rules
- Use the long map setup.
- This scenario uses the lifepod optional rule. Yoka-Shan warriors would not normally dream of firing on a lifepod, but in this case they have been given explicit orders that the Colosians are not to recover anything from the shuttle. If the shuttle is destroyed and its lifepod deploys successfully, Yoka-Shan forces may target it (but not other pods).
- The lifepod may land on the Aosho in the same way as a fighter.
Victory Conditions
Nothing matters in this scenario other than the plasma weapon plans. If the shuttle and its lifepod are destroyed, the Yoka-Shan player wins. If either the shuttle or its lifepod land on the Aosho, the House Colos player wins.
Scenario 5: More Than You Can Chew
Date: 8:50 AL Location: House Moskava territory Situation: While on patrol in House Moskava space, a small group of fighters from the Evil Omen squadron encountered some well-equipped pirates. The Warworlders engaged, and the pirates, easily outnumbering the Yoka-Shan fighters, decided to make it a stand-up fight. They didn't realize that the Yoka-Shan fighters were only the lead element of a much larger force.
Forces
Elements of the Evil Omen Squadron, Yoka-Shan. Set up first in areas E and F.
- Death Wind YS A: Pilot (Plt 6, Gnr 6); Gunner A (Gnr 5)
- Death Wind YS B: Pilot (Plt 5, Gnr 7); Gunner A (Gnr 6)
- Death Wind YS C: Pilot (Plt 7, Gnr 6); Gunner A (Gnr 6)
- Death Wind YS D: Pilot (Plt 4, Gnr 5); Gunner A (Gnr 5)
Elements of the Star Fiends. Set up second in areas A and B.
- Spirit Rider A: Pilot (Plt 5, Gnr 6)
- Spirit Rider B: Pilot (Plt 4, Gnr 4)
- Spirit Rider C: Pilot (Plt 5, Gnr 5)
- Spirit Rider D: Pilot (Plt 2, Gnr 4)
- Salamander A: Pilot (Plt 6, Gnr 4); Gunner A (Gnr 6)
- Salamander B: Pilot (Plt 3, Gnr 5); Gunner A (Gnr 5)
- Megafortress A: Captain (D6); Pilot (Plt 6); Gunner A (Gnr 6); Gunner B (Gnr 5); Gunner C (Gnr 4); Gunner D (Gnr 7); Gunner E (Gnr 5); Crew F (Gnr 6); Crew G (Gnr 4); Crew H (Gnr 5)
Elements of The Swarm, Yoka-Shan. Enter on Edge 4 on turn 4.
- Blizzard A: Pilot (Plt 6, Gnr 7)
- Blizzard B: Pilot (Plt 5, Gnr 6)
- Blizzard C: Pilot (Plt 4, Gnr 5)
- Blizzard D: Pilot (Plt 7, Gnr 5)
- Constellation A: Captain (D10); Pilot (Plt 7); Gunner A (Gnr 6); Gunner B (Gnr 5); Gunner C (Gnr 7); Gunner D (Gnr 6); Crew E (Gnr 8); Crew F (Gnr 5); Crew G (Gnr 4)
Special Rules
- The Swarm ships may move onto the map anywhere along Edge 4 during the Turn 4 Movement Phase.
- The Star Fiends player may exit ships off any map edge once the Yoka-Shan reinforcements arrive.
Victory Conditions
The battle lasts 10 turns or until there are no pirate ships left on the map. Add up the TPV of ships destroyed by each side. The side with the highest total wins.
Mercenary Campaign
The Warworlders' dedication to the art of warfare has made them some of the best warriors in the universe. This section contains rules for recreating a campaign in which Warworld mercenaries played a pivotal role. Each player takes the part of a Yoka-Shan export squadron commander competing for lucrative contracts. As many as four players can play.
The Setting
This campaign recreates a conflict between House Moskava and the Luches Utopia in 8 AL. (The historical narrative that introduces the setting is not reproduced.)
The Contracts
There are six different contracts available. Each is described below and contains the following information:
- Duty: The location and area of responsibility of the contract holder.
- Description: A description of the target.
- Minimum Force: The smallest force needed to fulfill the contract requirements.
- Maximum Payment: The largest weekly payment the Moskavan government will make to the contract holder.
- Combat Bonus: The payment bonus the Moskavan government will pay if the contract holder is engaged in combat.
- Enemy Force: An estimate by House Moskava intelligence of the likely size of an enemy force that engages the target.
Contract One
- Duty: Combat Patrol/Training
- Description: The holder of this contract is responsible for flying combat patrols in the vicinity of Denebola IV and must engage any hostile forces detected. The contract holder's forces will be accompanied on each mission by 2D3 Moskavan fighters for the purpose of tactical instruction in a combat environment (roll for number each weekly turn).
- Minimum Force: 200 points
- Maximum Payment: 400 Credits. If it is impossible for the holder of this contract to intercept, the contract is lost.
- Combat Bonus: 200 credits per surviving Moskavan fighter, plus 10% salvage.
- Enemy Force: 100 + (2D3 x 100) points or as enemy objective.
Contract Two
- Duty: Ring Mining Facility I
- Description: The holder of this contract is responsible for flying combat patrols in the vicinity of Ring Mining Facility I and engaging all hostile forces within the patrol area.
- Minimum Force: 300 points
- Maximum Payment: 600 credits
- Combat Bonus: 200 credits per undamaged ore processor at the facility, plus 20% salvage.
- Enemy Force: 200 + (2D4 x 100) points
Contract Three
- Duty: Ring Mining Facility 2
- Description: The holder of this contract is responsible for flying combat patrols in the vicinity of Ring Mining Facility II and engaging all hostile forces within the patrol area.
- Minimum Force: 400 points
- Maximum Payment: 800 credits
- Combat Bonus: 150 credits per undamaged ore processor at the facility, plus 10% salvage.
- Enemy Force: 300 + (2D4 x 100) points
Contract Four
- Duty: Ghost fleet
- Description: The holder of this contract is responsible for flying combat patrols in the vicinity of the remnants of Task Force Sebring and protecting the salvage operations there from enemy attack.
- Minimum Force: 300 points
- Maximum Payment: 600 credits
- Combat Bonus: 100 credits per surviving salvage ship, plus 10% salvage.
- Enemy Force: 200 + (1D6 x 100) points
Contract Five
- Duty: Convoy escort
- Description: The holder of this contract is responsible for providing a combat escort to all merchant convoys traveling to and from Sebring Station.
- Minimum Force: 300 points
- Maximum Payment: 600 credits
- Combat Bonus: 100 credits per surviving merchant ship, plus 10% salvage.
- Enemy Force: 300 + (1D6 x100) points
Contract Six
- Location: Sebring Station
- Description: The holder of this contract is responsible for flying combat patrols in the vicinity of Sebring Station and engaging all hostile forces that enter the patrol area.
- Minimum Force: 500 points
- Maximum Payment: 1000 credits
- Combat Bonus: 200 credits per operational cargo bay, plus 10% salvage.
- Enemy Force: 300 + (2D4 x100) points
Awarding Contracts
All of the players should look over the contracts and the scenario rules for each one (listed below), and then submit a bid for each contract. Each bid consists of a number of force points and a requested weekly payment. All bids must be valid, i.e. the force points must equal or exceed the minimum force level and the weekly payment may not exceed the max payment listed for each contract. Combat bonuses are non-negotiable and are not part of the bidding process.
Once all the bids are in, place six slips of paper, each marked with a contract number, in a cup. Draw one at random, reveal the bids for the contract drawn, and award the contract to the player with the lowest bid. Repeat this until all contracts have been awarded.
To determine the lowest bidder on each contract, divide each player's weekly payment request by the force level bid (keep fractions). The player with the lowest result gets the contract. In the event of a tie, the player with the highest force level wins. If the result is still even, the tied players may submit revised bids, by increasing their force level or lowering the payment amount. A player may also withdraw his or her bid at this time. Continue this process until one player is awarded the contract.
Example: Jason and Michelle are bidding for the Sebring Station contract. Jason bids 600 points and a 600 credit payment. Michelle bids 500 points and a 500 credit payment. Doing the division gives each a result of 1, a tie. Jason gets the contract because his force level is higher than Michelle's.
House Moskava has never hired mercenaries before and is reluctant to put all of its eggs in one basket. For this reason no player may be awarded more than three contracts (two, if there are three or more players). Once a player has been awarded his or her maximum number of contracts, all of that player's remaining bids are withdrawn.
If you are playing this campaign with more than three players, it may happen that one or more players does not receive a contract. In this case, these players control the Luches Utopia forces as a team and can win by preventing a Warworld victory.
Note: Although historically, all contracts were awarded to Warworld squadrons, there is no reason why a player could not represent another mercenary group such as the Sunrunners if this is mutually agreeable to all players.
The Campaign
Once all contracts have been awarded, each player must use the force points bid on the contracts he or she received to buy ships and crew. These should be recorded on a campaign roster like the one in the center section of the source. The ships for each contract should be recorded on separate rosters.
After everyone has bought their forces, campaign play begins. The campaign is played out in a series of weekly turns until the Luches Utopia gives up or is victorious.
Each campaign turn has the following steps.
1. Determine Targets
Roll 1D6 on the target chart below. Add two to the roll on the first turn of the campaign.
| Roll | Targets |
|---|---|
| 1-2 | 1 target |
| 3-5 | 2 targets |
| 6+ | 3 targets |
Roll 1D6 for each target. The contract location that corresponds to the die roll is a target this turn. Reroll duplicate results; no target may be attacked more than once a turn.
Once the targets have been fixed, consult the contract information and roll the appropriate die to determine the size of the enemy force that is attacking them.
2. Combat Patrol
If the Combat Patrol contract is a target this turn, skip this step. The player with the Combat Patrol contract automatically fights a battle against the forces listed in the contract. It is assumed that the Luches Utopia has launched a fighter sweep to engage them and prevent them from intercepting the other strikes.
If the Combat Patrol is not a target, the player holding this contract must try to intercept any incoming strikes. This requires an interception roll. The difficulty of the roll is equal to 20 minus 1 for every 100 points of enemy forces in the strike. The intercepting player rolls 1D10 plus 1 for every fighter in the combat patrol (escorts count as 5 fighters for this purpose). If the roll is greater than or equal to the difficulty, the combat patrol has detected the incoming strike and is moving to engage. Fight the Combat Patrol scenario against the incoming strike.
When rolling to intercept, the player must roll against the largest strike first, and then the others in descending order. The intercepting player rolls until a strike has been intercepted or all strikes have been rolled against. A player may not refuse to intercept a detected strike.
3. Fight Battles
After the battle between the combat patrol and an incoming strike is resolved (if any), the other battles are fought in any order. Battles are resolved by playing the scenario associated with each contract. The Luches Utopia forces are played by one of the contract holder's opponents or by the Luches Utopia player if there is one.
The player whose contract location is attacked has the forces he bought earlier to defend the area (minus any unreplaced casualties from earlier turns). The Luches Utopia player may buy forces with the points determined at the start of the turn. If the incoming strike was intercepted by the combat patrol, the Utopian player has only the forces that survived that battle.
Record the value of Utopian ships destroyed in a battle in the space provided on the campaign roster.
Players holding a mining facility contract lose the contract if all mining facilities on the map are destroyed.
4. Collect Income
At the conclusion of each battle, the player holding the contract for that location should determine his income for the week and mark it in the income column for that turn on the campaign roster. Salvage income is determined by multiplying the percentage paid by the value of the Utopian ships destroyed (round down).
5. Repairs and Replacements
Once all battles have been resolved, the players can repair or replace damaged and destroyed ships. The Moskavan government will repair up to thirty damage track boxes per contract per week at no charge. Any repairs in excess of this amount must be done at nongovernment facilities and cost BPV divided by # of boxes credits per box repaired. Destroyed fighters cannot be repaired, but they may be replaced by paying credits equal to their TPV.
Once all repairs and replacements have been made, mark the cost (if any) in the expenses column for that turn on the contract roster. Subtract this from the income total for that turn and record the result in the profit/loss column.
House Moskava provides full ammunition reloads for all ships free of charge. All Moskavan facilities recover 2D10 damage boxes per hex during this step.
6. Campaign End
Before beginning another turn, it is necessary to see if the campaign has ended. This happens under the following conditions:
- Mining Facility I & II are both destroyed.
- Sebring Station is destroyed.
- The total value of Luches Utopia ships destroyed in the campaign exceeds 3000 points (this number can be adjusted by mutual consent to adjust the length of the campaign).
If the campaign ends due to either of the first two events, the Luches Utopia wins. If the third event triggers the end of the campaign, the Utopia has given up on acquiring the Denebola system. Now you must determine which of the Warworld squadrons is the winner.
Luches Utopia Ships
The following ships are listed in the source as available to the Luches Utopia player:
- Blizzard, Blizzard II, Dart, Hell Bender, Kosmos, Pit Viper, Pit Viper T, Shark, Spirit Rider, Stinger.
- Glaive, Pharsii, Pharsii II, Salamander II, Shryak Shuttle, Shryak Shuttle II, Sorenson II, Sorenson III.
- Epping Prime.
- Aosho, Constellation, Fletcher, Megafortress, Stingray.
Victory
The winner of the campaign is the squadron that delivered the biggest bang for the buck. To figure who this was, each player should calculate his or her total profit for the campaign (simply add up the totals in the contract roster profit/loss column for each contract). Divide this number by the total value of the forces the squadron deployed on all contracts.
The player with the highest profit-to-force ratio wins.
Example: At the end of the campaign Jason has a profit of 4200 credits and Michelle has a profit of 5000. Jason had a total of 700 force points deployed on his contracts, so dividing his profit by this number gives him a profit-to-force ratio of 6. Michelle deployed 1000 force points. This gives her a profit-to-force ratio of 5. Although Michelle's profit was larger, Jason wins because his squadron was more efficiently run.
Contract Scenarios
Contract Scenario 1: Combat Patrol
Location: Near Denebola IV Situation: You have detected incoming Luches Utopia ships and are moving to intercept them.
Forces
CAP Squadron. Setup first in areas A and B using the standard map setup. You have available your contracted forces and 2D3 Moskavan Kosmos, all pilots are Plt 3, Gnr 2.
Luches Utopia. Setup second in areas G and H. Available forces are determined by target.
Special Rules
- If the Luches Utopia target is something other than the combat patrol, Utopia ships may exit from Edge 1. Ships that exit may not return, but may continue on to their assigned target.
- After ten turns, the defenders may exit from any map edge. Ships that exit may not return to the map.
Victory Conditions
The battle ends when one side no longer has any ships on the map.
Surviving Luches Utopia ships continue on to their intended target. All damage and ammunition expenditure carries over into the next scenario. If the Utopia fleet lost more than 60% of its TPV, it aborts its mission and returns home. Do not fight the mission scenario.
The Yoka-Shan player must have ships on the map at the end of the scenario to claim salvage.
Contract Scenario 2: MineFac I
Location: Near Ring Mining Facility I Situation: Luches Utopia ships are about to attack the facility. You must stop them.
Forces
Mercenary Squadron. The defending forces may set up anywhere within areas C, D, E, and F. You have available your contracted forces.
Place three markers in adjacent hexes at the center of the map to represent the mining facility. Each marker represents one hub of the station.
Luches Utopia. Set up anywhere within 2 hexes of Edges 1 and 3.
Special Rules
- Each of the station's hubs has DR 3 and can take 50 points of damage.
- Each hub is equipped with a Twin Splattergun on a 360 degree mount. The gunner has Gnr 5. The splattergun is knocked out once the hub takes 20 points of damage.
- Each hub has Point Defense of 1-5 (All).
- Each hub contains an ore processor. The processor is knocked out once a hub takes 25 points of damage.
- The Utopian forces begin withdrawing once they have lost 60% of their TPV in casualties or the mining facility is destroyed. All Utopia ships must move as quickly as possible toward the nearest map edge and exit. Once a ship has left the map it may not return.
Victory Conditions
The battle ends when one side no longer has any ships on the map. If there are Luches Utopia forces on the map at the end of the battle, the mining facility is automatically destroyed (if this hasn't already happened). The destruction of the facility ends the contract. The Warworld player receives pay for the battle just fought, but receives no further income from this contract for the remainder of the campaign.
If Yoka-Shan controls the map, this player receives salvage pay plus the listed bonus for each functioning ore processor.
Contract Scenario 3: MineFac II
Location: Near Ring Mining Facility II Situation: Luches Utopia ships are about to attack the facility. You must stop them.
Forces
Mercenary Squadron. The defending forces may set up anywhere within areas C, D, E, and F. You have available your contracted forces.
Place three markers in adjacent hexes at the center of the map to represent the mining facility. Each marker represents one hub of the station.
Luches Utopia. Set up anywhere within 2 hexes of Edges 1 and 3.
Special Rules
- This facility is a more cluttered part of Denebola IV's rings. Place asteroid counters using the normal procedure. Because these asteroids are in the same orbit as the station, they do not drift.
- Each of the station's hubs has DR 3 and can take 50 points of damage.
- Each hub is equipped with a Twin Splattergun on a 360 degree mount. The gunner has Gnr 5. The splattergun is knocked out once the hub takes 15 points of damage. Point Defense 1-5 (All).
- Each hub contains an ore processor. The processor is knocked out once a hub takes 25 points of damage.
- The Utopian forces begin withdrawing once they have lost 60% of their TPV in casualties or the mining facility is destroyed. All Utopia ships must move as quickly as possible toward the nearest map edge and exit. Once a ship has left the map it may not return.
Victory Conditions
The battle ends when one side no longer has any ships on the map. If there are Luches Utopia forces on the map at the end of the battle, the mining facility is automatically destroyed (if this hasn't already happened). The destruction of the facility ends the contract. The Warworld player receives pay for the battle just fought, but receives no further income from this contract for the remainder of the campaign.
If Yoka-Shan controls the map, this player receives salvage pay plus the listed bonus for each functioning ore processor.
Contract Scenario 4: Ghost Fleet
Location: Near the hulks of Task Force Sebring Situation: Luches Utopia ships are trying to disrupt the salvage operations. You must stop them.
Forces
Mercenary Squadron. Place asteroids and freighters first (see below), then the defending forces may set up anywhere within areas C, D, E, and F. You have available your contracted forces and 1d6 Borax Freighters.
Luches Utopia. Set up anywhere within 2 hexes of Edges 1 and 3.
Special Rules
- Place asteroid counters using the standard procedure. These counters represent the ships of the ghost fleet. They do not drift.
- Once the asteroids are placed, take counters equal to the number of freighters present in the scenario and sprinkle these onto the map in the same way. Each counter needs to be paired up with an asteroid. If a counter lands on an asteroid counter place it in an adjacent hex (defender chooses which). If it lands in a hex adjacent to an asteroid, leave it there. If the counter does not land adjacent to an asteroid move it adjacent to the closest one. If two or more are equidistant, the defender chooses. Defender chooses the arc that faces the asteroid. Once the counters are positioned, replace them with the appropriate miniatures.
- The Borax Freighters are the ships of the salvage fleet. Each is tightly tethered to the ship (asteroid counter) it is attempting to salvage. The freighters may not be targeted through the hex containing this counter. The freighters may not move, except for a drive 0 turn.
- The Utopian forces begin withdrawing once they have lost 60% of their TPV in casualties or all salvage ships have been destroyed. All Utopia ships must move as quickly as possible toward the nearest map edge and exit. Once a ship has left the map it may not return.
Victory Conditions
The battle ends when one side no longer has any combatant ships on the map. The freighters do not count toward this.
If there are Luches Utopia forces on the map at the end of the battle, any remaining freighters are automatically destroyed.
If Yoka-Shan controls the map, the player receives salvage pay plus the listed bonus for each remaining freighter.
Contract Scenario 5: Merchant Escort
Location: Merchant route near Sebring Station Situation: Luches Utopia ships are attacking the merchant convoy under your protection. Stop them.
Forces
Mercenary Squadron. Use the long map setup. You have available your contracted forces and 1D4+2 Borax Freighters. You setup first anywhere in areas A and B.
Luches Utopia. Setup second anywhere in areas E and F.
Special Rules
- All freighter pilots have Plt 5.
- The Yoka-Shan player may only exit off Edge 3. Ships that exit here have entered the patrol range of the station's fighters and are safe (for the moment).
- The Utopian forces begin withdrawing once they have lost 60% of their TPV in casualties or once all freighters are destroyed. All Utopia ships must move as quickly as possible toward the nearest map edge (with the exception of Edge 3) and exit. Once a ship has left the map it may not return.
Victory Conditions
The battle ends when one side no longer has any combatant ships on the map. The freighters do not count toward this.
Any freighters still on the map after the last Yoka-Shan fighter is destroyed or leaves the map are considered lost.
The Yoka-Shan player receives the listed bonus for each freighter that exits off Edge 3.
Contract Scenario 6: Sebring Station
Location: The vicinity of Sebring Station Situation: Luches Utopia ships are attempting to destroy the station. Stop them.
Forces
Mercenary Squadron. You have available your contracted forces. You setup first anywhere in areas C, D, E, and F.
Luches Utopia. Setup second anywhere within 2 hexes of Edges 1 and 3.
Special Rules
- Place four markers in adjacent hexes in the center of the map in such a way that each marker is adjacent to at least two others. These represent Sebring Station and its four cargo bays.
- Each cargo bay has DR 4 and can take 100 points of damage. Each is armed with a Twin Splattergun on a 360 degree mount. The gunner for each has Gnr 5. The splatterguns are knocked out once a bay takes 25 points of damage. The cargo bay becomes inoperative once the bay takes 50 points of damage.
- Yoka-Shan fighters may dock with any operational cargo bay as if it were a hangar bay. Because this is not a military station, reloading ammo takes 2+1D6 turns to complete. If a cargo bay becomes inoperative while a fighter is docked, the fighter is trapped and may not launch.
- The Utopian forces begin withdrawing once they have lost 60% of their TPV in casualties or once all four cargo bays are destroyed. All Utopia ships must move as quickly as possible toward the nearest map edge and exit. Once a ship has left the map it may not return.
Victory Conditions
The battle ends when one side no longer has any ships on the map or the station is destroyed.
The Yoka-Shan player receives the listed bonus for each cargo bay still operational at the end of the battle.
Campaign Roster
The printed campaign roster is a blank form with the fields: Unit Name; Insignia; Starcraft; Pilots; Gunners; and the per-week columns for income, expenses and profit/loss. It is not reproduced here.