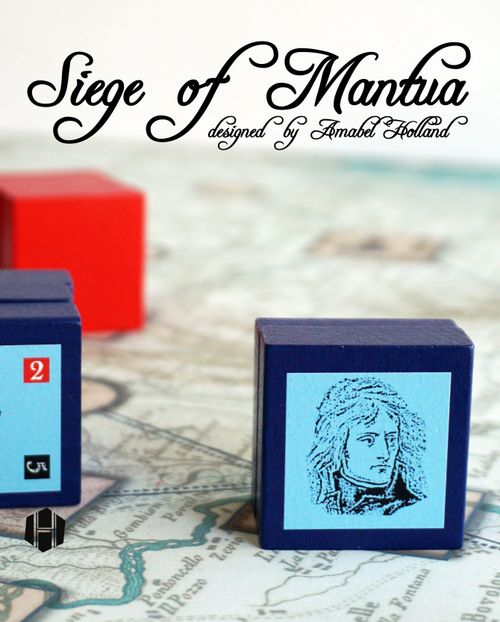
Siege of Mantua
Siege of Mantua Rulebook
Table of Contents
Table of Contents
Overview
Siege of Mantua is a "block game". Forces are represented by wooden blocks which maneuver on the map, standing upright so that their true nature and strength are known only to the owning player.
- The French Player controls the blue blocks.
- The Austrian Player controls the red blocks.
Blocks are maneuvered so as to bring the enemy into set-piece battles, which are fought on a Battle Display using counters. These counters are drawn from a pool, reflecting the uncertain quality and morale of the troops under your command. Battles are fought until either one side is annihilated, or orders a retreat; players can attempt to force a retreat by upping the stakes of the battle via a Doubling Cube. Winning the Battle not only reduces the strength of enemy Blocks but increases the morale of your troops – improving the quality of counters in your pool. Similarly, suffering losses in combat degrades the quality of counters in your pool.
Blocks that lose their last point of strength are Eliminated. Victory is achieved by Eliminating at least five enemy Blocks.
Components
- (10) French Blocks: Bonaparte (Leader), plus nine other French Blocks. Three of the French Blocks are "Dummy" blocks, which move as normal Blocks. If revealed, they are Eliminated.
- (10) Austrian Blocks: Alvinczi (Leader), Wurmser (Leader), plus eight other Austrian Blocks. Some Austrian Blocks are red-striped; these are Tyrolean. This only matters at set-up.
- (28) French Counters. The left number is each counter's Level; the right number is its Morale Value (MV). The asterisk on the Level 4 counters is a reminder of a special ability, which is covered later.
- (28) Austrian Counters. The left number is each counter's Level; the right number is its Morale Value (MV). The asterisk on the Level 4 counters is a reminder of a special ability, which is covered later.
- (3) Discs. These discs are used on tracks on the Battle Display.
- (1) Doubling Cube.
- (2) Dice.
In addition to the above, and this rulebook, the game is played with a mapsheet and a Battle Display.
Maneuver
Named spaces called Cities are connected by Roads. Two Cities that share a Road are adjacent. On the most basic level, a single turn consists of moving one or more of your Blocks from one City to an adjacent City. Blocks that begin your turn in the same City or Point may move together or they may move separately, each to a different destination.
Note that some Roads have smaller spaces between adjacent Cities. These spaces are called Points. If one or more enemy Blocks occupy the City on the other side of the Point, your Blocks must stop moving at that Point. On a subsequent turn, they can move from the Point to a connected City.
Moving into a City or Point occupied by the enemy is called an Attack. At the end of your turn, this will result in a Battle being fought on the Battle Display, unless your opponent is able to Escape.
- If the enemy occupies a Point, they cannot Escape.
- In order to Escape, the enemy needs an Escape Route – an adjacent City that is either vacant or occupied by their own Blocks, connected by a Road that was not used to launch the Attack and whose Point is not occupied by your Blocks.
To attempt to Escape, the opponent makes an Escape Roll, rolling a single die. If the result is equal to or less than the number of Blocks making the Attack, the Escape is successful, and the enemy Blocks are moved as a single group via the Escape Route to an adjacent City. If the result is greater than the number of Blocks, or if the opponent chooses not to attempt Escape, then the Battle is resolved.
Communication
At the beginning of your turn, if you can trace a line along connected Road segments from one Block or set of Blocks to another, and that line is not interrupted by enemy Blocks, those Blocks are considered to be in communication with each other. After moving Blocks from one City or Point, you may on the same turn move any, all, or none of your Blocks that began the turn in communication. Each Block may only move once.
Even when moving multiple Blocks, you are limited to making a single Attack on your turn. However, multiple Blocks or sets of Blocks can participate in that single Attack, so long as each group enters the City or Point from a different direction. When attempting Escape, the enemy makes a separate Escape Roll for each group; if even a single Roll is failed, the Escape attempt is unsuccessful and Battle is resolved.
Special Moves
As an alternative to the normal movement described above, two Blocks can perform one of two Special Moves if they are in communication with each other, and if both occupy Cities (not Points). Any Special Moves are performed at the beginning of your turn, before any normal Moves, and Blocks that perform a Special Move cannot perform a normal Move on that same turn.
Interior Lines Special Move
This allows you to "swap" two Blocks that are in communication with each other. Simply pick up a Block from one City, place it in the other, and then pick up a Block from the second, placing it in the first. For example, if both Verona and Bassano are within your network, you could swap a Block from Verona with one from Bassano.
Reassign Special Move
Reveal a Block to your opponent with a strength of at least "3", then rotate it once in an anticlockwise direction (reducing its strength by 1 point) before placing it upright. Choose a Block with a strength of less than "5" which is in communication with that first Block, and rotate it once in a clockwise direction without revealing it to your opponent.
Edge of the World
Road lines bearing off the map cannot be traversed for any reason, and are only provided for historical interest.
Map Examples
The printed page has no heading for these; the heading is supplied here. The captions are transcribed as printed.
- French Blocks in the first figure can move from Bassano to Friuli. In the second figure, the presence of an Austrian Block in Friuli prevents the full Bassano-Friuli move.
- Austria's only valid Escape Route is Caldiero.
- On Austria's turn, A and B are in communication with each other but not with C or D. The reverse is also true. Austria could move either A and B, or C and D, on their turn.
- French Block E is not in communication with the others. France can either activate the other Blocks, or can move Block E; taking Padova would sever the communication between C and D.
Battles
When an Attack is made on your turn and the enemy does not Escape, a Battle is fought on the Battle Display.
First, your opponent reveals one of their Blocks in the City or Point that was Attacked. Its current strength is the number of Units they draw randomly from their Pool. They may examine these Units without revealing them to you. These Units are deployed face-down into their edge of the Battle Display, divided among the five spaces as they see fit, with the caveat that only three Units may occupy a single space.
Then, you reveal one of the attacking Blocks and do the same with your own Units. Alternate revealing Blocks and deploying Units until both players have no unrevealed Blocks remaining. A player cannot have more than fifteen Units deployed; any excess is lost.
If the French Player reveals a Dummy Block, it is Eliminated (and counts toward the Austrian Player's victory count!).
If a player reveals a Leader (Bonaparte, Alvinczi, or Wurmser), place their Command disc on the "5" space of their Commands track. Otherwise, place their Command disc on the "3" space. If your Leader is revealed and you have no Blocks that contribute Units, you lose the game – not the Battle, but the entire game! – immediately.
After all forces have been deployed, the attacking player rolls two dice and sums them. Find the highest-numbered space on your Time Track that is closest to the result without going over, and place the Time disc on that space. Then, the attacking player has the first Battle Turn.
Commands
Each Battle Turn, you have three or five Commands which are spent to activate groups of Units (called Wings) for Movement or Combat.
- It costs one Command to activate a Wing for Movement.
- It usually costs one, two, or three Commands to activate a Wing for Combat, with the number of Commands being equal to the number of Units in that Wing.
- However, if a Wing is making a Flank Attack, it only costs a single Command to activate it for Combat, regardless of the number of Units that comprise that Wing.
- Each Wing may only take one action – a Movement or a Combat – each Battle Turn.
When you have no more Commands remaining, or have finished spending Commands, play passes to your opponent.
Movement Activation
Each Wing has a Facing. As a default, all Wings begin the Battle facing forward – toward your opponent's Units. Wings may only move in the direction that they are Facing, may only move one space per Battle Turn, and may only move into a vacant space. If your Wing and an enemy's Wing are facing each other, they are mutually Engaged and cannot move.
Upon completion of its Movement, a Wing may (but is not required to) change its Facing by 90°. If it does so, its frontmost Unit is flipped if its MV is hidden. A Wing can "move" without leaving their space in order to change its Facing, but cannot do so if Engaged.
Combat Activation
Your Wings may perform Combat against enemy Wings that they are both Facing and adjacent to. This is done by making a Combat Roll. Roll two dice, sum them, and add the number of Units that comprise the attacking Wing. (For example, a Wing that consists of one Unit adds 1 to the Combat Roll, and a Wing that consists of three, 3.)
Compare this total to the Morale Value (MV) of the frontmost Unit in the enemy Wing, flipping the counter if its MV is hidden. If the Combat Roll is greater than that enemy Unit's MV, it is Broken; remove it from the Battle Display, setting it aside. Then, compare the total to the MV of the next Unit in that Wing (if any). Repeat this process until either (a) all enemy Units in the Wing have been Broken, or (b) until an enemy's MV is equal to or greater than your total.
The exception is if you roll doubles (two ones, two twos, etc.). In that case, the attack is Repulsed. The frontmost Unit in your Wing is Broken as a result, unless:
- Level 4 Units are not Broken when Repulsed; the asterisk next to their MV is a reminder of this.
- Flank Attacks are never Repulsed. Speaking of which…
Flank Attacks
If your Wing is Facing an enemy Wing's sides or rear (i.e., they are not Engaged), then the Combat is resolved as a Flank Attack:
- It costs only a single Command to activate the Wing for Combat, regardless of the number of Units in the Wing.
- Your Combat Roll total is compared to all Units in the enemy Wing simultaneously, Breaking all Units whose MV is less than the total, regardless of their position in the line.
- Your Flank Attack cannot be Repulsed. Treat a roll of doubles like any other roll, comparing the total to the enemy MVs and Breaking Units accordingly.
Time and Doubling
Each time the player whose Attack initiated the Battle completes a Battle Turn, they move the Time disc one space down on their Time Track. When it cannot be moved down any further, it is removed, and two new options are made available to the players.
First, before issuing any Commands on their turn, a player may choose to Order a Retreat, immediately ending the battle in their loss.
Alternatively, a player who is eligible to do so may use the Doubling Cube. When this option first becomes available for a given Battle, both players are considered eligible. To exercise this option, the player takes the Doubling Cube, with its "2" face showing, and passes it to their opponent. That opponent must either:
- Immediately Order a Retreat, ending the battle in their loss at the original stakes (even if it is not their turn).
- Accept the cube, and the doubled stakes.
From that point on, only the player who has possession of the cube is eligible to use it, each time doubling the stakes (for example, the second time it is used in a Battle, it doubles the stakes to "4"; the third time, to "8", and so on).
Consequences of Defeat
You're probably wondering what these "stakes" are that are being Doubled. When you Order a Retreat, you normally must reduce one of your Blocks by one anticlockwise turn. However, if the stakes have been increased via the Doubling Cube, the number of reductions you must suffer is increased – to two, or four, or eight, or so on. You choose which Blocks are reduced and divvy up the hits as you see fit.
If a Block is at a strength of "2" and suffers a reduction, it is Eliminated.
Blocks are again turned upright. The losing side must leave the City or Point in which the Battle took place, and the winning side moves all involved Blocks into the City or Point, taking possession of it. If the attacking player loses, their Blocks always return to the Cities or Points from which they launched the Attack. If the other player loses, their Blocks move as a group to an adjacent City that is either vacant or occupied by their own Blocks, following the same rules for an Escape Route. If no Escape Route is available, all those Blocks are Eliminated.
If all your Units were Broken in the Battle, then you were annihilated: all those Blocks are Eliminated, regardless of the stakes.
If the only Block remaining after suffering reductions is a Leader, you lose the game immediately – so, uh, don't do that!
Adjusting Unit Pools
At the end of a Battle, each player adjusts their Unit Pools, beginning with the player who won the Battle.
First, for each of their Blocks that took part in the Battle (include Leaders, but not Dummies), the winner may Upgrade one of their surviving Units by one level: a Level 1 Unit is replaced with a Level 2 Unit, a Level 2 with a Level 3, or a Level 3 with a Level 4. Place the replacement counter into the Unit Pool, and place the old counter in the Supply.
Then, each of the winner's counters of at least Level 2 that was Broken is Degraded by one level: a Level 4 is replaced by a Level 3, a Level 3 with a Level 2, or a Level 2 with a Level 1. The losing player then Degrades their Broken Units. Finally, all other surviving Units for both sides are also placed in their respective Pools.
The ability to Upgrade or Degrade your counters is limited by the counters available in the Supply. You must make all replacements that you can, and cannot pull any sequencing shenanigans to artificially prevent Units from degrading.
Bringing It All Together
Let's review how a full player turn works step-by-step.
Maneuver
- Determine which Blocks are in communication. Note that different clusters of Blocks might be in communication with other clusters, and that only one such "network" of Blocks is going to act in a single turn.
- Perform any Special Moves.
- Perform any Normal Moves.
- At the end of your turn, if you have launched an Attack, your opponent may attempt to Escape. If they choose not to, or are unable to, a Battle occurs.
Battle
- Reveal Blocks to Deploy Units from your Pool, starting with the player who was attacked.
- Roll to determine the starting position of the Time Disc.
- Alternate Battle Turns starting with the acting player until one side either Orders a Retreat or is Annihilated.
- The losing side suffers reductions to Blocks and retreats.
- Unit Pools are adjusted.
Final Steps
- If your opponent has five or fewer blocks remaining at this stage of your turn, you win the game (even if you also have five or fewer blocks). Otherwise, play passes to your opponent.
Mantova (Mantua)
So, hey, Mantova looks different than other Cities. What the heck is up with that?
Mantova is made up of two spaces. The interior star-shaped space is the Besieged Space. This holds the Austrian garrison trapped in the fortress, represented by the Wurmser Block. No other Blocks may enter this space for any reason, and Wurmser may not be activated while the siege is ongoing.
The exterior space is the Invested Space. This holds French forces keeping the Austrians bottled up. At least one but no more than two French Blocks must occupy the Invested Space until and unless the Siege is Lifted.
If Austrian Blocks make an Attack on the Invested Space, the French Blocks may either accept the Battle or attempt Escape (if a valid Escape Route exists); in this case, the Escape is automatic and no roll is made.
If the Austrian Player wins the resulting Battle, or if the French Blocks choose to Escape, the Siege is Lifted:
- Up to two Austrian Blocks anywhere on the map have their Strength increased by one clockwise turn.
- Wurmser may now Maneuver as any other Block, and is treated as a second Leader for the Austrian Player.
For the remainder of the game, Mantova is treated like any other City, with the following exceptions:
- The French can never enter Mantova.
- Mantova is considered to be Austrian-occupied, even when it is vacant, for the purposes of tracking Coordination and forcing French Blocks to stop at the Point along the Road it shares with several Cities.
Editor's note: the printed rulebook says "tracking Coordination" in this sentence. The surrounding rules define the mechanic as communication (Road lines traced between Blocks), so this is most likely a misprint for "Communication". It is transcribed here as printed.
Whether Mantova is under siege or not, Blocks may never Escape or Retreat into Mantova.
Set-Up
Now that you and your opponent know how to play the game, it's time to set it up and give it a whirl.
Austrian Blocks
- Place Wurmser in Mantova.
- Place the Tyrolean Blocks in Rovereto or Riva, or divide them between the two.
- Place all remaining Blocks in Friuli.
French Blocks
Place two Blocks in each of these five Cities:
- Mantova (Invested)
- Rivoli
- Verona
- Caldiero
- Bassano
Unit Pools
Form a Supply for each player's counters to the side of the map. From this Supply, place sixteen counters in a cup to form your Pool. Both players begin with identical Pools:
- 4 x Level 1
- 6 x Level 2
- 4 x Level 3
- 2 x Level 4
Place the discs and Battle Display to the side for now. The Austrian Player has the first turn of the game.