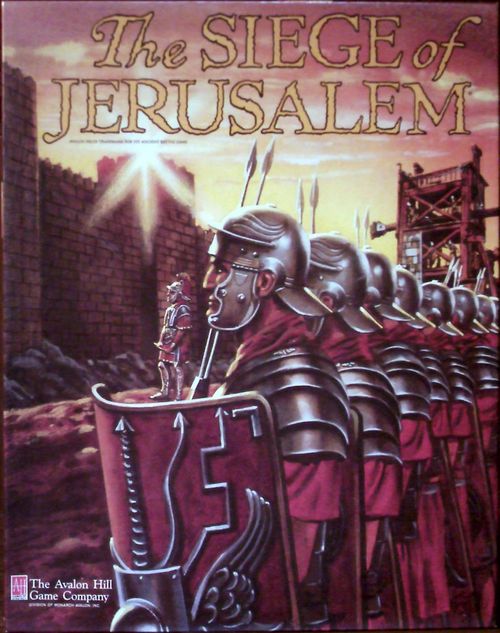
The Siege of Jerusalem (Third Edition)
The Siege of Jerusalem (Third Edition) Rulebook
Table of Contents
Table of Contents
- Historical Background
- 2. Components
- 3. Preparing to Play
- 4. Sequence of Play
- 5. Command Control (CC)
- 6. Stacking & Unit Interaction
- 7. Zones of Control (ZOC)
- 8. Movement
- 9. Artillery and Missile Fire
- 10. Special Fire Attacks
- 11. Melee Combat
- 12. Breach Damage
- 13. Missile Table
- 14. Melee/Missile Combat Results
- 15. Retreats
- 16. Effects of Disruption
- 17. Recovery Phase
- 18. Assault Periods
- 19. Assault Period Interphase
Historical Background
The Roman siege of Jerusalem was the culminating event of the Jewish revolt against the Roman Empire, a catastrophic conflict that lasted from 66 to 72 A.D. The consequences of this war were far-reaching: the concentration of forces under Vespasian's command allowed him to overthrow the Roman emperor Vitellius in 69 and establish the Flavian dynasty, one of Rome's most illustrious. His seizure of the throne put an end to a potentially catastrophic civil war. The results of the war were even more significant in Judea: the destruction of the Temple of Jerusalem and the end of nominal Jewish independence in the land of Israel created a crisis in Judaism. Temple worship ended, but Judaism was revitalized by the establishment of the Academy at Yavneh, founded by Rabbi Johanan ben Zakkai, a refugee from Jerusalem, in 68. The Academy received the greatest scholars of Judea. Over the following 60 years they reorganized Judaism into approximately its present form.
The Great Revolt in the Roman province of Judea, as Israel was then called, resulted from Jewish resentment at the increasingly unjust and rapacious conduct of a succession of Roman procurators, and the inability of Agrippa II, the last of the Edomite line raised to the throne of Judea by the Romans, to influence his Roman allies in favor of his subjects. When Agrippa I died in 44 A.D., leaving only his teenage son Agrippa II, the emperor Claudius placed Judea under the direct rule of Roman procurators. The first, Tiberius Alexander, was honest and understanding, but he was followed by an increasingly despotic and cruel band: Felix, Albinus (62-64), and Gessius Florus (64-66), whose depredations drove Judea to revolt. Albinus was depraved, but far worse was Florus, of whom the Jewish historian Josephus wrote that, by comparison, the Jews considered Albinus just.
The procurators settled Greeks and Romans in various cities of Judea, including Caesarea and Sebaste (Shechem). These people hated the Jews, and in the frequent conflicts between communities the procurators invariably sided with their pagan countrymen. This also helped provoke the revolt.
Another destabilizing factor was the international situation. Rome's great enemy, the Parthian Empire, had just defeated an invasion of the Roman province of Armenia. Parthia had a large Jewish element in its population, including a small kingdom, Adiabene, ruled by a Jewish dynasty, and the patriotic party of Judea hoped that, in the event of rebellion, the Parthians would come to their aid.
Florus's depredations included the massacre of several peaceful delegations from Judea seeking redress for his exactions. His assault on one such delegation in Jerusalem led to a spontaneous uprising there on June 8, 66, which resulted in the expulsion of Florus and the withdrawal of the Roman garrison to the Antonia Fortress. King Agrippa II appealed to the people of Jerusalem for restraint in a speech at the Temple, saying that Rome was invincible, and that only Florus and his followers were the enemies of Judea. He promised to appeal to Rome for the removal and replacement of Florus, thereby forestalling further outrages and a war that Judea could not hope to win. The people began to calm down, but Florus's superior, Cestius Gallus, the equally corrupt governor of Syria, refused to replace him. Recognizing that war was inevitable, Agrippa left Jerusalem.
Most of the people now supported the patriotic party, the Zealots. On June 19, 66 A.D., sacrifices in the Temple for Emperor Nero, and his tribute, were suspended, formally beginning the Revolt.
The Zealots, whom Josephus described as having an "inviolable attitude toward liberty," now assumed leadership of the rebellion. On September 14, 66 A.D. (Tishrei 3 in the Jewish calendar), the Roman garrison of Jerusalem surrendered to the Zealots. At that point, Jerusalem's documents stopped being dated by the reigning year of the Roman emperor and coins were minted with the legend "First Year of the Redemption of Israel." While Florus's troops were being defeated in Jerusalem and other cities of Judea rose against the Romans, Roman soldiers massacred Jewish citizens in the Hellenistic cities of Syria, Egypt, and the Judean coast. Gallus assaulted Jerusalem with the XII Roman Legion from Antioch. His attack on the city's north wall failed, and in the subsequent counterattack and disastrous retreat to the coast, Gallus lost 5,300 infantry, 480 cavalry, and his entire siege train.
A moderate revolutionary government formed in Jerusalem under the leader Eliezer ben Yair and four leaders of different factions. They quickly set about preparing Judea for the inevitable Roman invasion. Emperor Nero sent Vespasian to reconquer Judea. He assembled three of Rome's finest legions from Greece and Egypt — the V Legion Macedonica, the X Legion Fretensis (Julius Caesar's former legion), and the XV Legion Apollinaris. This force subdued northern Judea, Galilee.
In the year 68, Nero was deposed and a period of anarchy followed, during which Galba, Otho, and Vitellius were emperors in rapid succession. Taking part of his army, Vespasian marched on Rome, overthrew Vitellius, and was declared emperor in 69. Vespasian left his capable son, Titus, in command of his forces in Judea. Reinforced by the reconstituted XII Legion Fulminata, Titus marched south against Jerusalem.
At this point, let us discuss the fortifications of Jerusalem. Consult your map.
Jerusalem was founded in the tenth century B.C. by King David of Israel on the hill called Ophel, identified on the map as the City of David. Its powerful Walls were surrounded by the Tyropoeon, Kidron, and Hinnom valleys to the west, east, and south. Steep slopes descended to the east and west.
David's son, King Solomon, built the Temple complex to the north, and successive generations saw the city expand across the Tyropoeon valley to Mount Zion, where the Lower and Upper Cities were built, and the Tyropoeon City above them, an area mainly of warehouses and markets. In Roman times, Jerusalem was surrounded on all sides by high Walls rising above deep ravines, except in the north, where a low Wall enclosed the New City, a series of suburbs lacking natural protection. The Romans reinforced the city's defenses by building the Antonia fortress next to the Temple District. The Temple District was an elevated area, surrounded by powerful Walls and filled in with earth, built by King Solomon. On this elevated ground stood the second Temple, the center of the Jewish religion, built by Ezra, Nehemiah, and Zerubbabel after the First Temple was destroyed by the Babylonians in 530 B.C. The city's seat of government was the Knesset (Assembly), located near the Hasmonean Palace, home to the kings of the Hasmonean (Maccabean) dynasty. At the western end of the city stood the landscaped grounds of Herod's Palace, the luxurious residence of Rome's client kings of Edom. North of this palace stood the formidable fortress complex centered on the Jaffa Gate. The defense of Jerusalem was complicated by the absence of firm, central military leadership, since the Jewish soldiers were divided into factions under their own leaders. Eliezer ben Yair led the general defense as best he could, given the animosity between the rival factions. After the fall of the city, he led some survivors to the fortress of Masada, where they held out against the Romans for more than two years, until they too were finally overrun.
If Titus's siege were divided into five Assault Periods to correspond with the divisions of this game, the siege would have unfolded as follows:
FIRST ASSAULT PERIOD: The Romans overrun the New City after breaching the weak North Wall, and entered the Tyropoeon City, where they were defeated and forced to withdraw.
SECOND ASSAULT PERIOD: The Romans were defeated at the Jaffa Gate, but captured the Tyropoeon City and began building a ramp against the east Wall of the Antonia Fortress and the north Wall of the Temple District.
THIRD ASSAULT PERIOD: The Romans conquered the Antonia Fortress and the Temple Mount with heavy losses on both sides.
FOURTH ASSAULT PERIOD: The Romans invade the Upper and Lower Cities. Isolated Jewish units continued a tenacious defense in various zones.
FIFTH ASSAULT PERIOD: Organized Jewish resistance collapses, although Jewish units still held out in the fortress triangle, the Jaffa Gate, and the City of David. With all hope lost, Eliezer ben Yair and some of his troops broke through the Roman lines and reached Masada, where they continued the war for two more years, resisting 20,000 Roman legionaries. Most of the other survivors of the siege were not so fortunate: they died in Roman slavery or in the Circus, fighting wild animals for the amusement of the Romans.
2. Components
The game consists of the following material:
- One unmounted, full-color 49" x 33" map
- Three die-cut counter sheets
- One 16-page rulebook
- Two 8" x 11" charts
- Two six-sided dice
Consult the Glossary-Index to define any term that is unfamiliar to you. Most terms in capital letters are defined in the Index.
2.1 MAP: Unlike most Avalon Hill games with their mounted map boards, this paper map requires cross-folding to lie flat. Overlaying a sheet of plexiglass (available at most hardware stores) gives the best results. The map represents Jerusalem in 70 A.D. A hexagonal grid is used to regulate movement and combat. Hereafter, these hexagonal cells will be called hexes. Each hex represents a linear distance of approximately 50 meters. A detailed explanation of the map's various features is provided in the Terrain Effects Chart (hereafter TEC), but in general all hexes are of one of the following types:
2.11 ELEVATED HEXES: Fortress, Fort, Bastion, Wall, Gate, and Bridge are Elevated Hexes. Fortresses and Forts are considered identical in all respects except for the greater Breach and Missile Defense strength of Fortresses, and will be referred to collectively hereafter as Fortresses. For purposes of rock attacks, Fortresses are higher than Bastions, and Bastions are higher than Walls.
2.12 GROUND HEXES: Clear, Courtyard, Slope, Ramp, and Breach hexes are Ground hexes.
2.13 BUILT-UP HEXES: Built-up hexes represent terrain with numerous buildings. Such hexes are at ground level, but are not referred to as Ground hexes because the structures on them block LOF and ZOC at ground level. Those built-up hexes that contain larger structures are Buildings and are recognized by the hex's dark gray background. A Building is identical to a Built-up hex for all game purposes except LOF, Razing (18.37), and melee defense. Units may not fire through a Building hex [EXCEPTION: the Temple's main Building, 10.3].
2.14 GRID COORDINATES: An alphanumeric grid system is printed along the edges of the map to make it easy to locate specific hexes. The letters along the north-south edge of the board read horizontally from left to right. For example, the Damascus Gate is in row W. The numbers read diagonally along the hex line. For example, the Damascus Gate is in column 36. Combining these coordinates locates the Damascus Gate at the intersection of row W and column 36, or W36. Other examples are: Jaffa Gate P51, Susa Gate QQ36, Mariamne Tower P55.
2.15 ERRATA: The hexsides of QQ32 should be orange (fort); not blue (bastion).
2.2 COUNTERS: The die-cut counters representing troop formations that fought in the battle are units. Other pieces used only as playing aids are markers.
2.3 FRESH/DISRUPTED: The front (colored side) of a Combat unit is known as its Fresh side. The reverse (white) side of a Combat unit is its Disrupted side.
2.4 CLASS: Units are divided into six classes: Heavy or Light Infantry, Cavalry, HQ, Siege Engines, and Artillery. HQ are considered Infantry for movement [EXCEPTION: ZOC, 7.321] and combat purposes; Roman HQ are Heavy Infantry and Jewish HQ are Light Infantry. All units except Siege Engines (Towers, Rams, and Armored Towers) are considered Combat units. These classes are further subdivided into specialized types.
2.41 HEAVY INFANTRY: There are three types of Heavy Infantry: Veteran, Line, and Recruit. Only the Romans have Heavy Infantry.
2.42 LIGHT INFANTRY: There are six types of Light Infantry: Velites, Foederati, Syrian Archers, Zealots, Regulars, and Militia.
2.43 CAVALRY: Only the Romans have Cavalry.
2.44 HEADQUARTERS (HQ): Both sides have units used to control some or all of their units. Those bearing a Legion or Faction ID are "Leaders," who control only those units bearing the same color-coded identification stripe. Those with no color stripe are the Commanders, who control all of their side's units regardless of color.
2.45 SIEGE ENGINES: The Romans possess three types of Siege Engines: Towers, Rams, and Armored Towers. If a Siege Engine has no Fresh Heavy Infantry or Velites beneath it at the start of its Movement Phase, it may not move or change facing, and this is shown by turning it to its white (Disrupted) side up.
2.46 ARTILLERY: There are four types of Artillery: Ballistae, Onagers, Catapults, and Cauldrons. Roman Artillery may move (without being pushed by other units). Jewish Artillery (except Cauldrons) moves only between Assault Periods (see 18). Roman Artillery must be Fresh (colored side up) to fire, and Disrupted (reverse side up) to move. Melee factors printed inside a white dot may be used only in defense — never to attack.
2.5 UNIT INFORMATION: There are several numerical or symbolic classifications on each unit:
2.51 UNIT ID: The parent legion's identification (hereafter identification) is printed on all Roman units in the upper left in Roman numerals, except for Commanders and Armored Towers. The parent Faction's identification is printed on Jewish Combat units in the upper left corner in letters [EXCEPTION: Eliezer ben Yair, Zealots, and Artillery]. These symbols are color-coded with stripes to aid recognition. The specific identifiers are as follows.
| Stripe | Symbol | Legion/Faction |
|---|---|---|
| Brown | V | Fifth Legion, Legio Macedonica |
| Purple | X | Tenth Legion, Legio Fretensis |
| Yellow | XII | Twelfth Legion, Legio Fulminata |
| Orange | XV | Fifteenth Legion, Legio Apollinaris |
| Light Blue | Y | Yonathan ben Levi Faction |
| Light Green | J | Josef ben Gurion Faction |
| Blue | E | Eliezer ben Shimon Faction |
| Green | S | Shimon ben Giora Faction |
2.52 NON-MELEE ATTACK CAPABILITY: Units capable of attacking targets at a distance of several hexes during the Fire Phase are marked with a white stripe on their front (colored) side. Fire attacks are always limited to the Fire Phase and may only be made by Fresh units. There are three basic types of Fire Phase attack capability:
2.521 BREACH: Crewed Rams and crewed Armored Towers (those showing their Fresh side with an MF displayed) may attack Elevated Hexes (but not the units on them) using the Breach Table.
2.522 MISSILES: All Light Infantry units with a white stripe (Velites, Foederati, Syrian Archers, Jewish Regulars) and Artillery with a white stripe (Ballistae, Onagers, Catapults) possess an inherent missile-attack capability. They may attack Combat units within their respective ranges using the Missile Table. See the Weapons Effects Table.
2.523 ROCKS: Cauldrons, Zealots, and Militia occupying an Elevated Hex may attack units adjacent at a lower elevation (2.11) using the Missile Table (see 10.2).
2.53 MELEE STRENGTH: Melee Strength is used by Combat units to attack or defend during the Melee Phase. The Melee factor of Artillery printed inside a white dot, or of a Disrupted unit, may be used only in defense. Siege Engines have no Melee Strength. The "1" on Rams/Armored Towers is their Breach Attack Factor.
2.54 AVAILABLE MOVEMENT: Each unit's movement capability is measured by Movement Factors (hereafter referred to as MF). Each unit spends a certain number of MF each time it enters a hex. When a unit lacks sufficient remaining MF to enter a desired hex, it may move no further during that Movement Phase (hereafter referred to as "MPh"), although it may advance or retreat during the Melee Phase. Movement costs to enter a hex vary as shown on the TEC, depending on the terrain in the hex entered and the type of unit involved.
2.55 RECOVERY NUMBER: The Recovery Number is printed inside a box in the upper right of a Combat unit's Disrupted side. This is the number that, after any modification, must be rolled ≤ during the Recovery Phase to restore a Disrupted unit to Fresh status, or to reduce Rout/Panic status (see 17.1).
2.6 MARKERS: The following markers are used to record the status of various Combat units or hexes.
2.7 FRACTIONS: Rules requiring factors to be halved do not require rounding up or down unless specified. Otherwise, all fractions are retained and accumulate.
3. Preparing to Play
3.1 SCENARIO: Players select a scenario to play and choose sides. The initial assignment and setup of units is governed by that scenario.
3.2 TURN RECORD TRACK: The Turn marker is placed on the first space of the Turn Record Track with its Roman Eagle side up.
3.3 OFF-BOARD SETUP: If the Roman player decides to start any of his legions off the map at the start of an Assault Period, he must record the Legion number, the turn of its arrival on the board, and the board edge by which it will enter (north, east, west, or south). Once recorded, the Roman player may not change this assignment and must bring those forces on exactly as initially recorded. All units of a Legion may enter the map from a single hex (at no additional cost) or from different hexes along that edge. However, all elements of the Legion must be within ten hexes of its HQ at the end of its first MPh on the board. Off-board units may not attack or be attacked in any way.
3.4 ON-MAP SETUP: Roman Artillery may set up either Fresh or Disrupted (mobile). Infantry may set up in Testudo.
4. Sequence of Play
4.1 ROMAN TURN: Each Roman turn consists of four phases resolved in the following order.
4.11 ROMAN RECOVERY PHASE: The Romans must attempt to recover their Disrupted non-Artillery units by rolling the die once for each Disrupted unit. If the final Recovery roll (after any modification) is ≤ the unit's Recovery Number, it is turned to its Fresh side unless it is in Rout or Panic. A unit in Rout removes its Rout marker but remains Disrupted. A unit in Panic turns its Panic marker to its Rout side.
4.12 FIRE PHASE: Fresh Jewish missile/Artillery/rock units may fire on enemy Combat units using the Missile Table. After all Jewish fire is resolved, the Romans may use Fresh-crewed Rams (including those inherent to Armored Towers) to attack Elevated Hexes using the Breach Table, and Fresh Roman missile/Artillery units may fire on enemy Combat units using the Missile Table.
4.13 ROMAN MOVEMENT PHASE (MPh): Roman units not in Panic may move, subject to Movement, Terrain, and ZOC restrictions. Units in Rout must move toward the Refuge. After all non-Panicked units have completed movement, Roman units in Panic must move toward the Refuge.
4.14 ROMAN MELEE PHASE: Eligible Fresh Roman Combat units may conduct melee against adjacent Jewish units.
4.2 JEWISH TURN: The Turn marker is turned to its Star of David side. Each Jewish turn consists of four phases similar to those of the Roman turn, resolved in the same order. Phases not further explained below are identical to those of the Roman turn.
4.21 JEWISH RECOVERY PHASE (FR): The Jews roll to activate eligible reserves and bring them onto the board. The Jews must then attempt to recover their Disrupted non-Artillery units.
4.22 FIRE PHASE: Same as 4.12 except that the Romans fire and conduct Breach attacks first.
4.23 JEWISH MOVEMENT PHASE (MPh): Jewish units not in Panic may move, subject to movement, terrain, and ZOC restrictions. Units in Rout must move toward the Refuge if possible (17.21). After all non-Panicked units have completed movement, Jewish units in Panic must move toward the Refuge.
4.24 JEWISH MELEE PHASE: Eligible Fresh Jewish Combat units may conduct melee against adjacent Romans.
4.3 TIME TRACK: The Turn marker is turned to its Roman Eagle side and advanced one space on the Time Record. Steps 4.1-4.3 are repeated until the end of the Assault Period.
5. Command Control (CC)
5.1 RANGE: Command Control (hereafter CC) is an HQ's ability to direct subordinate units. CC is possible within ten hexes of each HQ. CC is determined at the start of each phase (but see 11.9). A unit that begins the current phase in CC is not penalized during that phase for moving out of CC.
5.11 REDUCED CC RANGE: An HQ that is not Fresh has its CC reduced by two hexes. A night turn reduces all CC ranges by two hexes. These reductions are cumulative, thus reducing the CC of a Disrupted HQ at night to six hexes.
5.12 RECOVERY: Units do not need to be in CC to recover, but there is a drm +1 penalty to recovery for those not in CC.
5.2 TRACING CC: CC is traced from the HQ (not counting its own hex) to the subordinate unit (counting its hex). CC may only be traced through a hex that the HQ itself could enter if it moved along the traced path.
EXAMPLE: A Jewish unit on a Wall flanked by Roman Combat units in the only adjacent connected Elevated hexes cannot trace CC even one hex. The Romans occupy the only hexes the HQ could enter. The unit cannot move directly from a Wall to the adjacent Clear or Slope hexes, so it cannot trace CC there either.
5.3 PENALTIES: Units that cannot trace CC at the start of the current phase may not enter an enemy ZOC or move adjacent to any enemy unit occupying an Elevated Hex. They may leave an enemy ZOC only if they do not enter another. If they are already adjacent to an enemy unit at the same level, they may conduct melee against it normally (including advance after combat into the ZOC of another enemy unit; see 11.9). During the Fire Phase, units out of CC may attack only adjacent units. Units out of CC may not place Ladders or mount/dismount Testudo, and are subject to an unfavorable drm during the Recovery Phase. They defend normally.
5.4 LEADERS: Leaders control only units of their own Legion/Faction. Each Legion's/Faction's identification markings are color-coded to match those of their immediate Leaders [EXCEPTION: Zealots, Cauldrons, and Artillery may be controlled by any Jewish HQ. Armored Towers may be controlled by any Roman HQ].
5.5 COMMANDERS: The Commanders (Titus, Gallus, Tiberius Alexander, and Eliezer ben Yair) may control any unit of their respective sides. Leaders do not need to trace CC to their Commander.
5.6 AUTOMATIC CC: Jews in any hex of the Temple area (including the outer Walls of the Temple area) or in an unbreached Fortress are automatically in CC regardless of proximity to an HQ. Jewish units on an Elevated Hex that can trace a route free of Roman units (or their ZOC) along unbroken Elevated Hexes to a friendly-controlled Fortress (regardless of distance) are always in CC. Garrisons are always in CC.
6. Stacking & Unit Interaction
Most stacking limits may be temporarily exceeded during the MPh, but must be respected at the end of each phase. The number of units allowed in each hex at the end of a phase is shown on the TEC. Artillery, HQ, and Siege Engines do not count toward these stacking limits, but normally no more than one such stacking-free unit is permitted per hex.
EXAMPLE: A Clear hex may contain three Roman Infantry, one Artillery, and one HQ. A Bastion may contain two Infantry units, one Artillery, and one HQ.
6.1 INFANTRY: Infantry may not enter a hex containing Cavalry or a Testudo, except to join that Testudo. Only Legionaries, Velites, and HQ may join a Testudo. Foederati and Syrian Archers suffer adverse penalties both to themselves and to the Heavy Infantry they are stacked with (see 11.1 and 13.3).
6.2 CAVALRY: Cavalry may never enter Elevated Hexes or a hex occupied by any other type of unit except an HQ [EXCEPTION: Cavalry may pass through Gate/Bridge hexes controlled by other Roman units, but may not stop in one].
6.3 ARTILLERY: Artillery may not enter a hex occupied by a Siege Engine, Testudo, Ladder, Cavalry, or other Artillery [EXCEPTION: A Fortress may contain two Artillery units as long as one (and only one) is a Cauldron. Cauldrons may enter a hex containing Artillery only if it is a Fortress that does not already contain a Cauldron. An Armored Tower may carry a Catapult; 6.43].
6.4 SIEGE ENGINES: All Combat units in a Siege Engine hex must be pushing (or riding) the Siege Engine. All units beneath a Siege Engine are pushing it; all units atop it are riding. Up to two Heavy Infantry and/or Velites units (plus one HQ) may be beneath a Siege Engine. Siege Engines may not enter a hex occupied by any unit [EXCEPTION: Rams may pass through Gate hexes occupied or controlled by the Romans, but may not stop there]. A Siege Engine may not enter an Elevated Hex except when a Ram passes through a Gate. Infantry may enter and pass through a Siege Engine hex only if fewer than two units are currently pushing in that hex. Siege Engines may begin in a city area controlled by the Romans at the start of an Assault Period. The Jews may enter a Siege Engine hex only from Ground level (11.4).
6.41 RAMS: To attack in the Fire Phase, a Ram must have a Fresh pushing unit of the same Legion. Rams may not carry passengers.
6.42 SIEGE TOWERS: Only units of the same Legion as the Tower may push and/or climb an unarmored Siege Tower. Only one Infantry unit plus one HQ may be atop a Siege Tower at a time.
6.43 ARMORED TOWERS: An Armored Tower may also carry a Catapult atop the Tower (so that it can move and fire every turn), provided it began the Assault Period there. The Catapult must remain there for the entire Assault Period. It need not be withdrawn if Disrupted. One Infantry unit and one HQ may also ride the Tower without interfering with the Catapult's fire.
6.5 LADDER: A Fresh Heavy Infantry or Fresh Velites unit may "hold" a Ladder marker during the MPh at a cost of four MF, serving as the "Base" unit (ladder-bearer). Up to two units (plus one HQ) may be atop a Ladder, climbing the Walls. A Ladder may not be placed if a Testudo or units other than Heavy Infantry, Velites, or HQ occupy the hex. If a Ladder hex is full of units holding and climbing the ladder, no additional units may enter the hex. The Jews may never enter a Ladder hex (see also 8.7).
6.6 TESTUDO: A Testudo may be placed atop two or three Fresh Heavy Infantry units during the MPh at a cost of six MF. A "Testudo-with-Velites" marker may be placed atop two Fresh Heavy Infantry units stacked with a Velites marker. An HQ (whether Fresh or not) may stack within a Testudo formation. Units of different Legions may not form a Testudo.
6.61 MOVEMENT: Testudos may not enter a hex occupied by any unit, nor enter an Elevated Hex except to pass through a Gate occupied or controlled by the Romans; they may not stop there. Fresh units may enter a Testudo hex (even in retreat) only if they join the Testudo. Only Velites, Heavy Infantry, and HQ may join a Testudo. Disrupted units may not enter a Testudo hex [EXCEPTION: Disrupted HQ may join a Testudo provided the HQ is not in Panic]. A Testudo may not enter Built-up hexes (even along a road). A Testudo retains four MF regardless of the MF allotment of the Disrupted units within it (see also 8.8).
6.7 FACTION/LEGION INTEGRITY: Units of different Legions/Factions stacked together at the end of any phase are subject to adverse drm penalties in melee [EXCEPTIONS: Zealots, Garrisons, Cauldrons, and Jewish Artillery may stack with any Jewish unit without penalty. Roman Armored Towers may stack with any Roman unit without penalty]. See drm on the Melee Table.
EXAMPLE: Three Jewish Regulars, a Cauldron, Yair, and a Catapult occupy the Tower of Mariamne. An unlimited number of Jewish Infantry and HQ units may pass through the Fortress. In fact, moving Jewish Infantry units may end their movement in the Fortress temporarily, causing overstacking, provided the stacking limits are restored by the end of the MPh by moving units in that hex that have not yet moved. Any Cauldron wishing to pass through the Fortress may not do so, because it would violate rule 6.3. However, if the Cauldron originally occupying the Fortress moves, other Cauldrons may then pass through the hex (see 8.13).
7. Zones of Control (ZOC)
7.1 UNITS WITH ZOC: Some units exert Zones of Control (hereafter ZOC) into certain adjacent hexes, which affect the tracing of CC as well as the movement and retreat of enemy units. Those cases are:
7.11 GROUND: Fresh Infantry or Fresh Cavalry occupying a Ground hex, or Fresh Infantry occupying a Built-up hex, exert a ZOC into all adjacent Ground hexes, except Built-up/Building hexes.
7.12 GATE: Fresh Infantry occupying a Gate exert a ZOC into all connected Elevated Hexes and into the two adjacent Ground hexes connected by Entry hexsides. A "connected" Elevated Hex is one whose elevated terrain feature is traced across a common hexside to the adjacent hex.
7.13 ELEVATED: Fresh Infantry occupying a gateless Elevated Hex exert a ZOC into all connected Elevated Hexes. ZOC is not exerted between a Tower or Ladder/Ramp and any Elevated Hex.
7.2 NO ZOC: The following units do not exert ZOC:
- Disrupted units
- Artillery, Siege Engines, Testudo
- Romans in the same hex as a Siege Engine or Ladder
- All units during night turns
- Ground-level units do not exert ZOC into Elevated hexes and vice versa
No unit exerts a ZOC into a Built-up or Building hex (even along a road).
7.3 EFFECT: ZOC impedes or slows the movement of enemy units.
7.31 RIGID ZOC: Infantry, Artillery, and Siege Engines must stop upon entering an enemy ZOC and may not continue moving during that MPh.
7.311 LEAVING RIGID ZOC: Infantry, Artillery, and Siege Engines that begin an MPh in an enemy ZOC may leave that ZOC, but only if the first hex entered is free of enemy ZOC. They may re-enter an enemy ZOC of the same or a different unit during that same MPh, but must stop as per 7.31 [EXCEPTION: non-HQ Jewish units that begin an MPh in a Heavy Infantry Ground-level ZOC may not move during that MPh].
7.32 SOFT ZOC: Moving Cavalry/HQ are not required to stop upon entering an enemy ZOC. They may continue moving, but must pay three MF to leave that enemy ZOC. Cavalry/HQ may move past enemy units (even between enemy units with overlapping ZOC) if they possess sufficient MF.
7.321 LEAVING SOFT ZOC: HQ/Cavalry that begin an MPh in an enemy ZOC may leave that ZOC without paying extra movement costs if they first move to a hex free of enemy ZOC. However, they may move directly from one enemy ZOC to another (of the same or different units) by paying the extra MF costs described in 7.32.
7.4 OVERLAPPING ZOC: Overlapping enemy ZOC do not increase the cost for HQ or Cavalry moving through them. The extra movement cost is paid once for each hex left, regardless of the number of enemy units or enemy-occupied hexes exerting that ZOC.
7.5 RETREAT EFFECTS: Retreat after combat occurs when units suffer adverse results from enemy melee attacks. Retreating units may not enter an enemy ZOC. If the only path of retreat is into an enemy ZOC (even if friendly units occupy that ZOC), the retreating unit is eliminated.
8. Movement
8.1 MECHANICS: During the MPh of his turn, each player may move as many of his units as he wishes: all, some, or none [EXCEPTIONS: non-HQ Jewish units within a Heavy Infantry Ground-level ZOC may not move. Units in Rout/Panic must move toward the Refuge]. A player may not move his Panicked units until all his other units have completed their movement for that MPh. He must then move his Panicked units toward the Refuge (15.4).
8.11 MF EXPENDITURE: Each unit moves from hex to adjacent hex; a unit may not skip hexes or enter a hex containing an enemy Combat unit. A unit spends a certain number of MF to enter a hex based on the terrain present in the hex entered (see the TEC). A unit may not enter a hex during its MPh if it lacks sufficient remaining MF to spend. Otherwise, a unit may move through any number of hexes up to the limit of its movement capacity, in any direction or combination of directions.
8.12 MF AVAILABILITY: MF may not be transferred from one unit to another, nor may they be accumulated from one turn to the next. A unit's movement allotment may be spent each turn and is renewed for use again in subsequent turns.
8.13 FRIENDLY UNITS: Movement through other friendly units is subject to the stacking restrictions for certain unit types (see 6). In general, however, units may move through a fully-stacked hex at double the normal MF cost of entering that hex, provided the MPh does not end overstacked. A hex containing the maximum permitted amount of Infantry, but into which an HQ or Cauldron could still enter, is not considered "fully stacked" for an entering HQ or Cauldron, but is considered "fully stacked" for other candidates.
8.14 LEAVING THE BOARD: Units may leave the map as if entering a Clear hex. Romans may not return until the following Assault Period. Jewish units that leave the map may never return.
8.2 STOP: A unit's movement for the current MPh is complete as soon as another unit begins to move — even if it has unused MF remaining.
8.3 STACK MOVEMENT: Each Testudo moves by moving all units that are part of the formation at the Testudo's movement rate. Each Siege Engine and its pushing/riding units move as a stack if the Siege Engine begins the MPh with a Fresh Infantry unit of the appropriate type serving as its pushing unit. The Siege Engine, the pushing unit, any accompanying HQ, and any unit atop a Tower all move together at the Siege Engine's movement rate.
8.4 ARTILLERY: Roman Artillery that begins an Assault Period on a Ground hex may not enter an Elevated Hex [EXCEPTION: it may pass through a Gate or Bridge hex, but may not stop there]. Roman Artillery that begins an Assault Period on an Elevated Hex may not enter a Ground hex. Roman Artillery that begins an Assault Period on an Elevated Hex may not move during that Assault Period. Jewish Artillery may occupy only Elevated Hexes.
Except for Cauldrons and Armored Tower Catapults, Fresh Artillery may not move during the MPh. Roman Artillery must be turned to its Disrupted side to move [EXCEPTION: Catapults on Armored Towers, to reflect their greater vulnerability in transit]. Disrupted Artillery that has moved must recover before it may fire. Non-Cauldron Jewish Artillery may not move during an Assault Period. Cauldrons may only move to and from Elevated Hexes. Catapults placed atop Armored Towers may not move off the Tower and therefore need not be withdrawn; if Disrupted, they remain in place on the Armored Tower.
8.5 CAULDRON: Cauldrons may move without a pushing unit, whether Fresh or Disrupted; they may not enter a Ground hex, nor may they enter a non-Fortress hex that contains other Artillery.
8.6 SIEGE ENGINES: Legion Siege Engines require a Heavy Infantry or Velites pushing unit of the same Legion at the start of the MPh in order to move. Armored Towers may be pushed by units of any Legion. Infantry may move onto and through a Tower hex if the hex is not full of pushing units, and may use a Tower to move to Elevated Hexes via its ramp hexside (arrow). There is no cost to change a Siege Engine's facing within its current hex, but it needs a Fresh pushing unit at the start of its MPh to do so.
8.61 SIEGE ENGINE MOVEMENT: Treat Towers as portable Ladders (8.93) with respect to MF costs. When units enter a Tower hex, they pay the MF cost of the remaining terrain in the hex, whether moving atop the Tower or remaining beneath it as pushing units. There is no additional cost to climb the Tower. Infantry units atop the Tower must first move to the adjacent Elevated Hex at a cost of two MF, and only then may additional units move into the Tower hex, paying the normal MF entry cost. Each unit already atop, or moving atop, a Tower (or pushing a Siege Engine) loses two MF for every MF spent by that Siege Engine during that turn, even if the unit was not on the Tower when it moved. Temporarily mark each moved Tower with an appropriate damage-number marker to reflect that Tower's additional MF entry cost, removing the numbered marker at the end of the MPh. Once a unit moves from a Tower to an Elevated Hex, that Tower may not move further or change facing during that MPh.
EXAMPLE: A Tower is pushed through two Clear hexes. A "4" marker is placed on it so that any new unit moving atop that Tower must pay four additional MF plus the normal cost of entering that hex.
8.7 LADDER: Fresh Heavy Infantry or Fresh Velites adjacent to an Elevated Hex may be designated as a "Base" unit at a cost of four MF by placing a Ladder marker on them. Only one Base unit may be designated per hex. Base units may be used as ladder-bearers for other units attempting to scale the Walls during the same or a later MPh. A unit beneath a Ladder may not move. It costs four MF for a Fresh unit to voluntarily withdraw a Ladder, and such withdrawal may be done only if no units currently occupy the top of the Ladder. A Disrupted or eliminated Base unit automatically loses its Ladder. Ladders cannot exist without a Fresh Base unit. Infantry may enter and pass through a Ladder hex if the hex is not full of units above and below the Ladder. Only one Fresh Heavy Infantry or Velites unit (plus one HQ) may be beneath a Ladder. Up to two units (plus one HQ) may move atop a Ladder at a cost of four MF plus any hex-entry cost. Fresh Infantry may use Ladders to move to any adjacent Elevated Hexes at a cost of two MF. Units on a Ladder may not move laterally from Ladder to Ladder. Romans on an Elevated Hex pay two MF to move to an existing Ladder. When they leave the top of the Ladder to go directly to Ground level, or if they are already on a Ladder when forced to retreat, there is no MF cost to leave the Ladder, other than the cost of entering an adjacent hex. No more than two units may use a Ladder per phase. Turn the Ladder marker to its fully-occupied side after two units have used it during a phase, and return it to its front side at the end of the phase.
A Ladder marker and the units on it are assumed to be simultaneously scaling all adjacent Elevated Hexes. For example, two units climbing the same Ladder could attack different Elevated Hexes. Or, a climbing unit could attack one hex, and if it did not advance after combat into that hex, it could advance into another vacant Elevated Hex per 11.6 at the end of the Melee Phase. Likewise, units on a Ladder may be attacked by the Jews from all adjacent Elevated Hexes.
8.8 TESTUDO: Testudos have a movement allowance of four MF. Disrupted units traveling within the formation do not decrease the Testudo's movement capacity. An HQ, Fresh Heavy Infantry, or Fresh Velites may enter a Testudo before or after it moves at a cost of six MF, but if they enter the formation before it moves, the Testudo may not move that MPh. Any unit leaving a Testudo before it disbands must lose half its movement capacity for that turn. Two Fresh Heavy Infantry units may declare a Testudo at a cost of six MF, covering the stack with the appropriate Testudo marker (leaving the Testudo with one MF remaining during that MPh, unless the component units had already used one or two MF before forming the Testudo). Conversely, Testudos that have not yet moved during that MPh may be disbanded at a cost of six MF for their Fresh occupants. Any Disrupted occupant is not penalized.
8.9 SPECIAL TERRAIN EFFECTS: Several terrain features have special rules:
8.91 GATES: Movement entering or leaving through Gates at Ground level is limited to the two Entry hexsides bearing brown rut marks or connecting roads (Example: RR35 and PP37 at the Gate of Susa). Units may enter a Gate at Ground level only if their side controls that Gate, or via the inherent Stairway [EXCEPTION: Sally Counterattack: 11.14]. Ground-level units may not stop in a Gate hex unless they first pay 2 MF to enter the Elevated Hex level via the inherent interior Stairway in that hex. Likewise, units on an Elevated Hex may leave through a Gate to a Ground-level hex via its inherent Stairway only by paying two MF for the change of elevation and moving to an Entry hex. All Gates have an inherent Stairway. A Gate, occupied or not, is closed to all enemy units and may be taken only by entry from an adjacent Elevated Hex, Tower, Ramp, Breach, Ladder, or inherent interior Stairway.
8.92 COURTYARDS: All Clear hexes within the Temple District are Courtyard hexes. Ground-level movement across the western side of the Temple District is blocked by the closeness of the Walls in this area, which prevent the passage of a body of troops.
8.93 STAIRWAY/BREACH: Infantry units may move from Ground level to an Elevated Hex and vice versa via a connected Stairway hexside, or from a Breach, at a cost of two MF. Whenever units change level via a Stairway/Breach, the entry cost for that new level is two MF, rather than the normal MF entry cost for that terrain type.
8.94 ROADS: All roads outside Jerusalem are assumed to have been destroyed by the Jews in preparation for the siege and serve no purpose. Roads within the city may be used by both sides until the Built-up hexes in that area have been leveled through Razing (18.37). Those roads then cease to exist.
8.95 BUILT-UP AREAS: Jewish units have clear advantages in Built-up hexes. The entry cost to a hex is only two MF (versus three MF for the Romans) due to their greater familiarity with the city. Both sides may stack only two units in a Built-up hex. Cavalry and Artillery may enter or leave Built-up hexes only via road hexsides.
8.96 BREACH: Artillery, Testudos, Cavalry, and Siege Engines may enter a Breach only if the Breach is adjacent to another connecting Breach of the same Wall.
9. Artillery and Missile Fire
9.1 FIRE PHASE: During a Fire Phase, each Fresh Artillery/Missile unit may attack using the Missile Table. Each firing unit may fire against only one hex per Fire Phase. All firing units, regardless of type, that fire at the same target must combine their Attack Factors into a single attack. Fire does not affect Siege Engines, but it does affect Combat units in the same hex as a Siege Engine.
9.11 VS TOWERS: If firing against units in a Tower/Armored Tower hex, the firer may designate the pushing units, those atop the tower, or both, as its target. If both are selected, the defender may normally designate which of them suffers losses. If either the upper or lower level alone is selected, units on the other level are immune to losses from that attack, causing DD results against solitary units to cause their elimination. Cauldrons and rock-throwing units may not fire at units riding atop a Tower/Armored Tower, but may fire at any pushing unit.
9.12 VS LADDERS: When a Ladder is attacked by any means, the Base unit is unaffected unless it is the only unit remaining in the hex to absorb the result. A "DD" result against a Ladder with one unit atop and another below may eliminate the upper unit before Disrupting both.
9.13 FIRE THROUGH TOWERS: All fire traced through a hex (not merely along its hexsides) containing a Tower/Armored Tower to another hex is subject to a drm of -1 for each obstructing hex crossed.
9.2 RANGE: The Attack Factors of Artillery and missile units vary with range as shown on the Weapons Effects Table. Range is determined by counting the number of hexes from the firing hex to the target hex (including the target hex, but excluding the firing hex).
9.3 ARTILLERY FIRE RESTRICTIONS: Artillery may never fire from a Built-up or Breach hex. Because of their relative inexperience with these weapons, a drm of -1 applies to all Jewish Artillery attacks against targets beyond their Primary range.
9.31 ERRATIC ATTACKS: Whenever Artillery attacks a target at a higher elevation adjacent to friendly units other than in the firing hex itself, there is a chance the shot will fall on friendly forces. Regardless of the odds of the attack, if the Resolution roll on the Missile Table is a 1 (before applying any modifier), a friendly unit of the defender's choice adjacent to the target hex must be Disrupted in addition to any normal result caused against the target hex. The affected unit may not be a Base unit with climbers occupying the Ladder.
9.4 MISSILE FIRE RESTRICTIONS: Missile units may not fire if they are beneath a Siege Engine or occupying a Ladder hex. Fresh Velites in a Testudo may fire, as may any Missile unit atop a Tower.
9.5 LINE OF FIRE (LOF): For a unit to fire at a particular hex, it must be able to trace an unobstructed Line of Fire (hereafter LOF) from the center of the firing hex to the center of the target hex. If any part of an obstacle hex (excluding its hexsides) is crossed by the LOF, that attack is not possible.
EXAMPLE: Fire is permitted along the hexside of an obstacle hex, but is not permitted along a hexside shared by two obstacle hexes, such as from LL27 to KK29, since both KK28 and LL28 block the LOS. Fire is permitted from LL30 to KK29 along the KK30-LL29 hexside, since only LL29 is an obstacle.
LOF limitations are specified on the LOF Determination Table. An LOF obstacle prevents fire from passing beyond that hex, but fire at the obstacle hex itself is permitted, or the firer may choose another target instead. Ground-level fire from or through (not into) a Breach hex against a Ground-level target is subject to a drm of -1.
EXAMPLE: Fire along the Wall hexside from Fortress DD19 to BB20 is permitted. That same Wall hexside does not block fire to AA21 because it is closer to the firer than to the target. However, if DD19 were a Bastion instead of a Fort, the LOF could be blocked.
9.51 ELEVATED TO GROUND LEVEL: Fire from an Elevated Hex at a Ground-level target is always blocked by any Built-up hex (excluding hexsides) adjacent to the target through which the fire must be traced. Likewise, fire from Ground level to an Elevated Hex is always blocked by any Built-up hex (excluding hexsides) adjacent to the firer through which the LOF must be traced. [EXCEPTION: Temple; 10.3].
9.52 GROUND TO HIGHER GROUND: There are different elevations of "Ground level," as distinguished by Slopes. A Ground-level unit may not fire at another Ground-level unit at a different elevation through/within more than one Clear hex (excluding the firing hex) if the LOF passes through a Slope hex.
EXAMPLE: A missile unit in TT46 cannot see QQ48, but could see RR48 on the crest of the slope, or Elevated Hex QQ49 behind it. A unit in BB69 could see a unit in EE67 because both are at the same elevation.
9.6 CONCENTRATION OF FIRE: When two or more Artillery/Missile units fire at the same hex during the same phase, their Attack Factors must be added together and resolved with a single roll. Once a fire attack has been made against a hex, it may not be attacked again during the same phase on the same table. However, an Elevated Hex attacked on the Breach Table may be attacked in the same phase using the Missile Table, and vice versa.
9.7 MANDATORY TARGETS: A missile/Artillery unit adjacent to an enemy unit may attack only adjacent units during that phase. Adjacent Siege Engines/Artillery are never mandatory targets, although other units in the same hex are. If adjacent to more than one enemy-occupied hex, a missile unit may choose which to attack, provided it does not ignore units exerting a ZOC on it in order to attack units that do not exert a ZOC on it. The firing player may choose to fire only some of his eligible shots, hoping to destroy all enemy units within a mandatory target hex. However, since a target hex may be fired on only once per Fire Phase by missile fire, he risks losing an opportunity with the declined units if a mandatory target hex is attacked, its units are not destroyed, and no other mandatory target hex is available to attack.
9.8 WALL ATTACK BONUS: Units in Wall or Bridge hexes are prime targets for missile attacks from Elevated Hexes along that same Wall. When such units fire directly along the path of a Wall at enemy units occupying Wall or Bridge hexes, the missile Attack Factor is doubled. The LOF from the Elevated Hex must be a straight path of connected Wall or Bridge hexes to the target hex for the bonus to apply. The bonus does not apply to Artillery, Rocks/Oil, Indirect Fire, or to the Temple's outer walls.
9.9 INDIRECT MISSILE FIRE: Ground-level units firing at a target also at Ground level may fire over a hex containing Combat units if that hex could otherwise have been crossed. Similarly, units on Elevated Hexes firing at an Elevated Hex of the same height may fire over an elevated hex containing Combat units if they do not fire through a higher Elevated Hex (2.11). Indirect Fire is subject to a drm of -1, but this drm does not accumulate with the -1 drm for firing through (not merely into) a Breach.
10. Special Fire Attacks
10.1 ROMANS: During each Fire Phase, Armored Towers and Rams pushed by eligible Fresh Infantry may attack adjacent Elevated Hexes using the Breach Table. Attacks against a Gate through an Entry hexside are made with a doubled Attack Factor.
10.11 FACING: Rams/Armored Towers may attack only the Elevated Hex indicated by the Siege Engine's Facing arrow. Similarly, units riding atop a Tower may conduct melee and advance only through the hexside indicated by the Siege Engine's Facing arrow. Changing a Siege Engine's facing within its hex costs no MF, but can be done only during the MPh by a Fresh pushing unit that began that MPh beneath the Siege Engine. Once a unit moves into/out of the Tower to/from an adjacent Elevated Hex, that Tower may not change its facing again during that MPh.
10.2 JEWS: During the Fire Phase, Fresh Zealots, Militia, and Cauldrons occupying Elevated Hexes may attack adjacent Combat units occupying Ground hexes (including units on Ladders, Ramps, and Siege Engine pushing units; 9.11) with rocks and boiling oil using the Missile Table. They may attack alone or in combination with Jewish Missile/Artillery units. Any fire attack that includes a Cauldron is entitled to a drm +1 per Cauldron. Fresh Zealots, Militia, and Cauldrons occupying a Bastion or Fortress may attack adjacent Combat units occupying directly connected lower Elevated Hexes (2.11) in the same way.
10.3 TEMPLE: The Temple was the tallest structure in Jerusalem. Missile units in the central hex of the Temple Building may direct fire through any adjoining Building hexes (whether vacant or occupied) at any target within range — despite the Temple's Walls — and vice versa.
11. Melee Combat
11.1 ELIGIBLE ATTACKERS: Only Fresh units may attack. Combat units may attack adjacent enemy units during their respective Melee Phases only if each attacking unit could conceivably move from its attacking hex to the defender's hex if that hex were unoccupied [EXCEPTIONS: attacking Towers (11.21)/Ladders (11.61) from an Elevated hex]. Therefore, Artillery (with the exception of Cauldrons attacking connected Elevated Hexes) may not attack in melee. Heavy Infantry stacked with Foederati or Syrian Archers may not attack in melee or fire (and vice versa).
11.11 FROM GROUND HEXES: Combat units occupying Ground and Built-up hexes may conduct melee against units in adjacent Ground and Built-up hexes. Infantry occupying Ground and Built-up hexes may conduct melee against adjacent Fortress and Bastion hexes (and vice versa) if the attack is made across an adjacent Stairway hexside shared by the attacking and defending hexes. The total Melee Strength of units attacking across a Stairway hex in either direction is halved.
11.12 FROM ELEVATED HEXES: Combat units occupying an Elevated Hex may conduct melee against an adjacent Ground hex through a Stairway hexside, or a connected Breach hex, at half strength, as if attacking through a Stairway at Ground level (11.11). They may conduct normal melee against units atop adjacent Towers (through the Facing arrows, 10.11), and against Ladders, Ramps, or connected Elevated Hexes.
11.13 FROM BREACH HEXES: Combat units occupying a Breach may conduct melee against adjacent Ground and Built-up hexes at half strength, or against previously connected Elevated Hexes at half strength, as if through a Stairway.
11.14 FROM GATES: Combat units occupying a Gate may conduct melee against adjacent Elevated Hexes normally, or against a connected Breach as if attacking through a Stairway. Units in a Gate may also attack adjacent Ground or Built-up hexes at half strength through the Entry hexside, as if attacking via the inherent Stairway. To attack units outside the Gate, the Gate must be opened to permit a Sally. If the Gate is opened to permit such an attack without forcing the defender out of the Gate's Entry hex, the defender may counterattack from that hex with its own Melee bonus at the end of the current Melee Phase. Unless this counterattack results in enemy occupation of the Gate hex, the Gate is considered closed again. Counterattacks may be made only through the Gate's Entry hexside.
EXAMPLE: Jewish units in the Gate hex can conduct melee against adjacent Romans at Ground level through the Gate's Entry hexside, but the Romans cannot conduct melee against the Gate because they do not control Ground level there. However, if the Jews open the Gate to attack outward and fail to dislodge the Romans from the Entry, the Romans in the Entry hex may counterattack at the end of the Jewish Melee Phase as if it were a Ground hex (although the defenders are still entitled to the Gate's defensive modifications).
11.15 MULTIPLE-HEX DEFENSE, N/A: A unit may not attack two different hexes in the same attack. However, it must attack all units in the hex it attacks [EXCEPTION: against Ladders/Towers; 11.61, 11.21].
11.16 TEMPLE DISTRICT: Jewish units attacking/defending within the Temple (not from its outer walls) are entitled to a +1/-1 favorable adjustment on each Melee die roll.
11.17 CRESTS: Slope hexsides that are dark brown on one side and light on the other are Crest hexsides. Crests are treated as Slopes for all purposes, except that an attacker's Melee Strength is halved if attacking across a Crest hexside against a Ground-level defender in a non-Slope hex.
EXAMPLE: Hex RR8 is one level higher than Slope hex SS8, even though both are "Ground level" hexes. RR8-SS8 is a Crest hexside.
11.18 BASTIONS/FORTS/WALLS: Whenever an Elevated Hex is attacked in melee from a connected Elevated Hex or earthen Ramp, the -1 drm that would otherwise favor the defense is lost.
11.19 BUILT-UP/BUILDING: The defender in a Built-up (non-Building) hex is entitled to a favorable Melee drm. A defender's Melee Strength in a Building hex is doubled, provided the attack is not made from a hex of the same Building.
11.2 TOWERS: Infantry riding atop Towers may conduct melee against adjacent Elevated Hexes at double Melee Strength through the Tower's Ramp hexside (arrow). Whether atop the Tower or pushing beneath it, Romans in a Tower hex may not conduct melee against Ground or Built-up hexes [EXCEPTION: pushing units (only) may Counterattack against Gates with their normal Melee Strength; 11.14]. On the other hand, pushing units do not add to the Melee Strength of an attack from a Tower. Infantry atop a Tower adjacent to a vacant Elevated Hex through the Tower's Ramp hexside may move into that vacant Elevated Hex at the end of the Roman Melee Phase. A Tower may not be attacked from both an Elevated Hex and a Ground hex in a combined attack; each attack must be resolved separately. This is one of only two instances (see Ladder; 11.6) where a hex may be attacked more than once in the same Melee Phase without using a Multiple Attack (11.9) or Continuous Combat (11.87).
11.21 ELEVATED HEX VS TOWER: Jewish Infantry occupying Elevated Hexes may conduct melee against units riding atop an adjacent Tower (or an empty Tower) only through that Tower's Ramp hexside. Both attacker's and defender's Melee Strengths are normal [EXCEPTION: passengers on an Armored Tower defend at double Melee Strength]. Units beneath the Tower (pushing) cannot be affected by this attack, nor do they add to the Melee Strength of units defending atop the Tower. The Tower is destroyed only if there are no pushing units (Fresh or Disrupted) and the melee eliminates all Roman units atop the Tower. The presence of Roman units beneath the Tower is sufficient to prevent its capture. The Jews may not advance into the Tower hex from an Elevated Hex except via a Sally through the Gate (11.14).
11.22 GROUND HEX VS TOWER: Any Fresh Jewish unit with a Melee Strength may automatically destroy a vacant Tower in its hex, but that unit may not move or attack again during that phase. Jewish Combat units occupying Ground, Gate, and Built-up hexes may conduct melee against adjacent Romans occupying a Tower hex. Pushing units defend at their normal Melee Strength. Romans riding atop a Tower are affected by the melee results against the pushing units, but do not add to the Melee Strength defending the Tower. If there are no pushing units, those riding atop defend at half strength. An Armored Tower's doubled defense does not apply against a Ground-level attack.
11.3 RAMS: Romans occupying the same hex as a Ram may not attack in melee [EXCEPTION: Counterattack; 11.14]. Jewish Combat units occupying Ground, Gate, and Built-up hexes may conduct melee against units occupying an adjacent Ram hex.
11.4 BROKEN SIEGE ENGINES: A Siege Engine has no Melee Strength. If not stacked with Combat units, it cannot prevent Jewish units from entering its hex during the MPh. Any Siege Engine without a Roman Combat unit that is attacked in melee through its Ramp hexside from an Elevated Hex, or that a Jewish unit enters, is eliminated and removed, but the hex is marked as a Broken Siege Engine to restrict stacking and affect LOF as if the Siege Engine were still there. The Jews may not move or climb Siege Engines; they may only destroy them.
11.5 TESTUDO: Units in a Testudo may not attack in melee. They defend against melee normally. Jewish Combat units occupying Ground, Gate, or Built-up hexes may attack adjacent Testudos in melee.
11.6 LADDER: Infantry stacked on a Ladder may conduct melee only against adjacent units on Elevated Hexes. The total Melee Strength of all units on a Ladder is halved. Base units may not attack. Ladder units adjacent to a vacant Elevated Hex at the end of the Roman Melee Phase may move into the vacant Elevated Hex. [A Ladder hex may not be attacked from both an Elevated Hex and a Ground hex in a combined attack; each attack must be resolved separately. This is one of only two instances (11.22) where a hex may be attacked more than once in the same Melee Phase without using a Multiple Attack (11.9) or Continuous Combat (11.87)].
11.61 VS LADDER FROM ABOVE: Jewish Combat units on Elevated Hexes may conduct melee against adjacent units on a Ladder, but may not advance after combat. The Melee Strength of units on the Ladder is halved. Roman units beneath a Ladder cannot be attacked in melee from above, nor can they add to the defense of the units on the ladder.
11.62 VS LADDER FROM THE GROUND: Jewish Combat units on Ground, Gate, and Built-up hexes may attack in melee against Romans in an adjacent Ladder hex. Romans atop the Ladder are affected by the combat results before the "Base" unit. However, units atop the Ladder do not add to the defense factor of the Ladder hex. The Base unit's Melee Strength is halved.
11.7 ELEVATED HEX DEFENSE: All defenders on an Elevated Hex have their Melee Strength doubled at all times (tripled if in a Fortress). In addition, a drm of -1 applies to melee against an Elevated Hex unless the attack comes from an Elevated Hex, Breach, earthen Ramp, or Stairway.
11.8 MECHANICS: Each attacking unit may conduct melee against only one hex per phase [EXCEPTION: Advance after combat; 11.86]. The attacker need not attack adjacent enemy units even if they are in its ZOC. However, when a hex is attacked, all defending units in the hex must be fought as a combined force [EXCEPTIONS: Towers and Ladders; 11.2, 11.6].
11.81 RESOLUTION: Add the Melee Strength of all units attacking the defending hex. A hex may not be attacked more than once per Melee Phase unless units advancing from other battles (11.9) participate in subsequent attacks, or a Tower or Ladder is attacked from both Ground and Elevated hexes, or a Melee resolution roll of "≥6" results in Continuous Combat (11.87). Units may have their Melee Strengths reduced or increased due to terrain or other conditions. Add the Melee Strength of all defending units in the attacked hex. Divide both totals by the smaller of the two to obtain an attacker:defender strength ratio, rounding fractions in favor of the defender. This ratio is the attack's "Odds."
EXAMPLE: Sixteen attack factors against nine defense factors is reduced to 1:1. Fourteen attack factors against six defense factors is reduced to 2:1. Six attack factors against eight defense factors is reduced to 1:2.
The attacker then consults the Melee Table and cross-references his attack's Odds with a die roll to determine the result. That result is applied before the next battle is resolved.
11.82 CHOOSING LOSSES: The defender determines which units in the attacked hex suffer results when there are more defending units than units called upon to suffer losses. If the number of units required to suffer losses exceeds the number of defending units in the attacked hex, the most severe losses are satisfied and any excess losses are lost. However, an additional "Advance After Combat" bonus may be gained for excess "E" results (see 11.86).
EXAMPLE: The Jewish player is defending a Fortress with a Zealot, a Regular, and a Militia against a 2-1 attack. The final roll is a "7," which results in "DE," so the Jewish player eliminates the Militia, Disrupts, and (voluntarily) retreats the Regular one hex. The Zealot remains in the defending hex unaffected.
11.83 EXTREME ODDS: Attacks made at odds worse than 1-4 are resolved on the 1-4 column. Attacks made at odds better than 7-1 are resolved on the 7-1 column. There is a die roll modifier (hereafter drm) of +1 for each multiple of odds above 7-1, and a drm of -1 for each multiple of odds below 1-4.
EXAMPLE: A 10-1 attack would require a drm of +3. A 1-6 attack would require a drm of -2.
11.84 MODIFIERS: The attack roll may be increased or decreased by modifiers for conditions listed below the Melee Table. All drm applicable to a single attack are cumulative.
11.841 COHORT INTEGRITY: The Roman player is entitled to a drm +1 for a complete cohort of Fresh Legionaries (i.e., a 7-8, a 6-8, and a 5-8) with the same Cohort and Legion ID attacking from a single hex (or a drm of -1 for defending in melee with a complete Fresh cohort stacked in a single hex). Only one Cohort Integrity drm may be gained per attack, regardless of the number of complete cohorts involved.
11.842 FACTION/LEGION INTEGRITY: The attacker is always subject to a drm of -1 for each Faction/Legion beyond the first participating in a melee attack. Zealots, Garrisons, and Cauldrons are not considered elements of a different Faction.
EXAMPLE: If units from three Factions are attacking a hex containing a complete cohort, the attack is subject to a drm of -4 (-2 for the two additional attacking Factions, -1 for Cohort Integrity, and -1 for attacking Fresh Heavy Infantry).
11.85 FLANK ATTACKS: A Flank Attack occurs whenever all six hexes adjacent to the defender are occupied by any combination of enemy units, impassable hexes, or enemy ZOC. A fully-stacked friendly hex is not "impassable" for purposes of this definition (unless it is in an enemy ZOC) — even if the retreating unit has nowhere else to continue its retreat. The Melee Strength of all units participating in a Flank Attack is doubled during that attack. This is in addition to any other condition affecting Melee Strength. A Tower/Ladder/Ramp/Stairway adjacent to an Elevated Hex can give units on that Elevated Hex an escape route and thus prevent a Flank Attack. The Jews may not use Towers/Ladders to escape a Flank Attack.
EXAMPLE: A unit attacking across a Stairway hexside would have its Melee Strength halved and then doubled (remaining the same; 2.7) if the attack were a Flank Attack.
11.86 ADVANCE AFTER COMBAT: If the number of "E" results exceeds the number of defending units, the melee attackers — after completing occupation of the defender's hex, and subject to that hex's stacking limit for the attacker's side — may advance one additional hex beyond the hex abandoned by the defender for each "E" result that does not eliminate a unit. If choosing to take this bonus to move beyond the hex vacated by the defender, there is no MF cost, but the unit may not enter hexes it could not normally enter (including leaving a Rigid ZOC; 7.311).
11.87 CONTINUOUS COMBAT: A Melee resolution roll of ≥6 (whether before or after applying any modifier) entitles the attacker to immediately attack the same target hex again with the same units. The results of the previous attack are applied and the odds recalculated. There is no limit to the number of times the same attack may be resolved, provided the attacker keeps rolling an "original" or "final" number ≥ "6." However, the option to attack again is lost if any other attack is resolved in between, or the defender abandons the hex. If the defender abandons the hex, the attacker may possibly attack again, but only by advancing after combat as a Multiple Attack (11.9).
11.88 CAVALRY: Cavalry attacking both into and from Clear hexes has its attack factor doubled.
11.9 MULTIPLE ATTACKS: Whenever all defending units are eliminated or forced to retreat, the attacker may advance any of the attacking melee units (up to that player's stacking limit) into the vacated hex (and beyond, if entitled to a multiple advance for excess "E" results) and mark them with an "A" Multiple Attack marker. Enemy ZOC and lack of Command Control have no effect on the advance into the vacated hex, but they do prevent any further advance that would otherwise be possible from excess "E" results. A unit that advances after combat (and chooses Multiple Attack) must attack in melee a unit in its ZOC if such a unit exists. If there are no enemy units in its ZOC, it may conduct melee against any adjacent unit it could normally attack. There is no limit to the number of Multiple Attacks a unit may make in a Melee Phase, provided at least one of the attacking units in each attack bears a Multiple Attack marker.
After its advance, if any victorious unit under an "A" Multiple Attack marker is adjacent to any enemy-occupied hex it could normally attack, it may do so as an "A" Multiple Attack in combination with any other friendly unit adjacent to the same hex and capable of attacking it (even if it has already attacked in the same phase, or if the defender has previously been attacked in that phase). Making an "A" Multiple Attack removes any "A" Multiple Attack marker present on the units participating in that attack, but units that advance after combat as a result of that attack are now eligible for a "B" Multiple Attack marker.
Whenever any attack that does not include at least one unit bearing a Multiple Attack marker is resolved, all Multiple Attack markers must be removed. Likewise, whenever an attack is resolved in which at least one unit bears a "B" Multiple Attack marker, all "A" Multiple Attack markers must be removed. Units that advance after combat as a result of a successful "B" Multiple Attack may be upgraded to a "C" Multiple Attack marker. The chain of possible Multiple Attack advances then begins again with "A" markers if necessary.
12. Breach Damage
12.1 EFFECT: Breach damage occurs as a result of Mining (19.2) or from Siege Engines using the Breach Table. Breach damage is cumulative. When it equals or exceeds the Breach Defense, that hex crumbles and all units occupying that hex at that moment are eliminated.
12.2 DAMAGE ACCUMULATION: When an Elevated Hex receives Breach damage, place a damage marker of the appropriate value on that hex, replacing it with the appropriate marker as damage increases. When damage is ≥ an Elevated Hex's Breach Defense, place a Breach marker on that hex (even on Gate hexes). The Breach Defense of Elevated Hexes is listed below the Breach Table. The only difference between a Fort and a Fortress is the latter's added Breach and Missile defense.
12.3 MULTIPLE WALLS: A hex such as R51 that contains different Walls meeting each other need only be brought down once. Both Wall sections are considered crumbled.
12.4 ROAD EFFECT: When an Elevated Hex suffers damage ≥ half its Breach Defense, units may no longer move through the hex at the road movement rate, and must pay a full MF instead of 1/2 MF.
12.5 MULTIPLE RAMS: Rams/Armored Towers in different hexes may combine their Breach Attack Factors into a single attack. However, when attacking a Gate hex, only those attacking through an Entry hexside may attack with the doubled Attack Factor.
13. Missile Table
13.1 SUMMARY: The Missile Table is used by all eligible Missile and Artillery units, and by Zealots, Militia, and Cauldrons on Elevated Hexes attacking adjacent Romans at lower levels (2.11). Each target hex may be attacked only once per Fire Phase.
13.2 RESOLUTION: The appropriate column to use to resolve the attack is determined by locating the table row that lists the type of hex the defenders occupy. The Attack Factors of all units firing at the same target hex are added together. The Attack Factor value listed for each column is the minimum required to use that column. Units in a hex with a Siege Engine use the appropriate Siege Engine row to resolve any attack against them. If firing at a Ground hex containing both Artillery and Infantry, the attacker must specify which is his Primary Target type and use the appropriate Missile Table row based on that Primary Target type. Whenever the Missile Table yields a multiple result, at least one of the results must be taken against the predesignated Primary Target type in that target hex. The other result may be applied to any target in the hex at the defender's choice (including the non-primary Artillery target, but only if the defender wishes).
EXAMPLE: The Roman moves three legionaries and a ballista onto Clear terrain within the secondary range of two Jewish Onagers (six Attack Factors). The Jew may choose to attack the Heavy Infantry as his Primary Target and fire on the "6" column with a drm of -2 (-1 for firing beyond Primary Range and -1 for Fresh Heavy Infantry), or he may choose the Artillery as his Primary Target and fire on the "2" column with only a drm of -1 (for firing beyond Primary Range). In either case, the Roman must take the first loss from the Primary Target and is free to choose among the hex's other occupants to satisfy any remaining loss caused by that attack. However, if the Jew fires at the Infantry as his Primary Target, he cannot damage the Artillery, which will be immune to all results of the attack unless the Roman voluntarily uses it to absorb additional losses.
13.21 ARTILLERY IN ROUT/PANIC: Fresh Artillery [EXCEPTION: Cauldrons] is not eliminated by a Disruption result inflicted by Fire Strength, because the crew remains in the hex. If an already-Disrupted Artillery unit is Disrupted again, it is marked with a Rout marker instead. If it was already in Rout when Disrupted again, it is marked with a Panic marker. If it already bears a Panic marker when Disrupted again, only then is it eliminated, but an Artillery "Elim" marker takes its place on the map to affect stacking until the end of the Assault Period. If a Fresh Artillery unit suffers a DD result, it becomes Disrupted and is placed in Rout; if it is already Disrupted when hit with a DD, it enters Panic; if it is already in Rout, it is eliminated. An "E" result always eliminates Artillery.
Cauldrons are not treated as Artillery when they suffer Disruption results and are eliminated normally, without leaving "Elim" markers.
13.22 WALL ATTACKS: The Missile Table column to use when attacking units in a Wall hex depends on the type of Wall occupied by the defender. Defenders on the North Wall (all Wall hexes [not Bastions/Fortresses] surrounding the northern perimeter of the New City) must use the "North Wall" row of the Missile Table. [EXCEPTION: The outer Walls of the Temple District are always treated as Bastions for all purposes].
EXAMPLE: There are six factors available to attack a Bastion, so the second column of the Missile Table is used to resolve the attack. To use the third column against that Bastion, the attacker would need 12 factors.
13.3 MODIFIERS: All drm are cumulative. A drm of -1 applies to the roll if a Fresh Heavy Infantry unit is in the defending hex [EXCEPTION: the -1 drm does not apply in a Siege Engine or Testudo/Broken Testudo hex, or if Artillery is the Primary Target, or if a Foederati/Syrian Archer unit is in the defending hex]. A drm +1 applies to an attack roll if any Militia is in the defending hex. There is a drm of +1 per attacking Cauldron. A drm of -1 applies if firing from or through a Breach hex. Because of their inexperience, Jewish Artillery suffers a drm of -1 when firing beyond its Primary Range.
13.4 EXTREME ODDS: A "Multiple Attack" is the number of additional Attack Factors needed to raise the Missile Table attack from "1" to the next column. When firing against a Testudo, the Multiple Attack is "3"; against a Ram, it is "5". For each additional Multiple Attack beyond that needed for a missile attack of strength 7 (i.e., one Attack Factor vs. Clear, two Attack Factors vs. Breach, three Attack Factors vs. Testudo, etc.), the attacker is entitled to a drm of +1.
EXAMPLE: 24 Attack Factors against a Testudo gain a drm +1 on the 7 column; 45 Attack Factors against a Ram gain a drm +2, etc.
13.5 RESULTS: The results of a Missile Attack are identical to those of Melee, except that affected units, when Disrupted, do not retreat; they remain in place. See 14.33 for the definition of "DD."
14. Melee/Missile Combat Results
14.1 SUMMARY: Units are affected by combat differently depending on the hex they occupy and the type of unit. Units in Fortresses, or in hexes with Siege Engines, are less likely to retreat because of the importance of those hexes.
14.2 RETREAT (B): All defending units must retreat one or two hexes (regardless of MF cost), at their choice. If that retreat leaves the unit overstacked, it becomes Disrupted and continues its retreat per 15.3 until it reaches a hex where it can stop, or is eliminated. When two or more defending units retreat from the same attack, those units may retreat one at a time (to avoid possible overstacking penalties), even if they retreat to the same hex. The defender may always choose to substitute a "B" result for a "D" result (against a single unit).
14.21 ROMAN GROUND-LEVEL ZOC: Jewish units at Ground level in a Roman Heavy Infantry ZOC may retreat only one hex when attacked by that Heavy Infantry. If that retreat would be to an overstacked hex, the retreating Jews are eliminated.
14.3 DISRUPT (D): A unit of the defender's choice is Disrupted by turning a Fresh unit to its Disrupted face, or by eliminating a unit that is already Disrupted. Combat units that suffer a Disruption result during Melee are immediately retreated by the defender [EXCEPTION: 14.31]. Units Disrupted by Fire attacks do not retreat.
14.31 RETREAT, N/A: Combat units that are Disrupted in melee while occupying a Fortress, Testudo, or Siege Engine hex become Disrupted but are not required to retreat (although they may do so if their owner wishes). Those that do retreat are subject to all retreat restrictions.
14.32 ARTILLERY: Roman Catapults mounted on an Armored Tower, and Disrupted Jewish Artillery (except Cauldrons), never retreat. They remain in place, Disrupted (13.21).
14.33 DOUBLE DISRUPTION (DD): Two units of the defender's choice in the target hex become Disrupted by turning them to their Disrupted face, and/or are eliminated if already Disrupted. If the target hex contains only one defending unit, it is eliminated instead. A defending unit may not voluntarily suffer all the effects of a DD result if there is more than one eligible target unit in the hex. The non-Primary Artillery Target (13.2), the Base unit on a Ladder (9.12), and undesignated units in a Tower hex (9.11) may be ineligible targets.
14.4 ELIMINATE (E): An eligible Combat unit of the defender's choice (whether Fresh or Disrupted) is eliminated from the target hex for each "E" result, up to the maximum number of units in the attacked hex.
14.5 ELIMINATED EQUIPMENT: Eliminated Artillery (other than Cauldrons) and Siege Engines are replaced with a Wreckage marker on the map. Wreckage affects stacking as if the piece had not been eliminated and blocks movement in the same way for units entering/crossing that hex. Remove Wreckage markers at the end of the Assault Period.
15. Retreats
15.1 PROCEDURE: A defending unit not in a Fortress, Testudo, or Siege Engine hex that is Disrupted during Melee must retreat immediately. It may retreat any number of hexes at its choice, but may not spend more MF during its retreat than its Disrupted movement capacity, and may not retreat to a hex that would place it in Rout, Panic, or cause its elimination if it can satisfy its retreat requirement any other way — even if this means retreating away from the Refuge (see 15.4). Otherwise, each hex of a retreat must be toward the Refuge whenever possible, even if other routes are more advantageous and would ultimately reach the Refuge more quickly. Once a unit has survived a retreat, it is free to move as its owning player wishes on subsequent MPh unless it is in Rout/Panic (see 15.3). If a retreating unit runs out of MF in an overstacked hex, it is eliminated. A retreating unit is eliminated if it cannot retreat without violating any of the following restrictions.
A unit may not retreat into:
- an enemy ZOC (even if also occupied by a friendly unit)
- a hex it could not enter during the MPh (see TEC)
- a hex containing a unit in Panic status
15.2 STACKING: Stacking limits do not apply during retreat, except for applying the penalties noted in 15.3. Infantry may not retreat into or through hexes containing Cavalry, or Siege Engines with two pushing units, and vice versa. Infantry may retreat into a Testudo hex only if it joins that Testudo (6.61) and can pay six MF to do so.
15.3 ROUT/PANIC: Whenever a unit retreats into or through an overstacked hex, it increases its Disruption by one level; that is, a Fresh unit becomes Disrupted, a Disrupted unit goes into Rout, a Routed unit goes into Panic, and a Panicked unit is eliminated. Units in Rout/Panic retain their Disrupted movement rate.
On each subsequent MPh, all units in Rout/Panic, except Garrisons (18.4), must move toward the Refuge up to the limit of their Disrupted movement capacity. Moving through a fully-stacked hex during the MPh while moving toward the Refuge has no additional adverse effect on the moving unit. Once a unit in Rout/Panic reaches an existing road leading to the Refuge that is not blocked by enemy units or their ZOC between it and the Refuge, it must remain on that road during subsequent MPh until it reaches the Refuge. If that road is blocked by enemy units or their ZOC, units in Rout/Panic may leave it, but must continue toward the Refuge. Units in Panic (but not in Rout) may not move during the MPh until all non-Panicked units have completed their movement.
EXAMPLE: If the only retreat route for a Disrupted Jewish Regular on a Wall is a Wall hex containing a Militia and a Cauldron, the retreating Regular will go into Rout for exceeding stacking limits. [The Jew cannot choose to eliminate the Militia unit instead, because it was not a retreating unit. If that Wall hex contained only a Cauldron, the retreating Regular could pass into or through the hex with no effect]. The Routed Regular cannot remain in the Militia's hex because it is overstacked, so it must continue its retreat. The only possible retreat is into a fully "occupied" Bastion, where the Routed Regular will go into Panic. Still overstacked, and with three MF remaining, the Panicked unit must continue its retreat. The Jew would prefer to eliminate the unit outright by continuing the retreat along the fully-stacked Wall, but the unit now has an alternative retreat route available and must go down the stairway toward the Refuge. The Panicked unit may now stop its retreat because it no longer exceeds stacking limits, but the Jewish player does not want it so close to his front lines, so he continues retreating it one more MF toward the Refuge.
15.4 REFUGE: The Jewish Refuge is the Temple District. If that area is Controlled by the Romans, the Jews must retreat to an alternative city refuge area, which must be chosen by the Jewish player as soon as the Temple District is Controlled by the Romans. If the alternative area is lost, another alternative area is then chosen. The Roman refuge is the nearest board edge. Retreating off the board edge is not required, although it is possible if preferred. Units in Rout/Panic must remain within the Refuge until they recover, although they are free to move within the Refuge.
15.5 RETREAT OFF THE BOARD: Roman units that retreat off the board are automatically returned at the start of the following Assault Period. Jewish units that retreat off the board are considered to have escaped Jerusalem (18.92) and may not return.
16. Effects of Disruption
16.1 COMMAND CONTROL (CC): The CC range of a Disrupted HQ is reduced by two hexes.
16.2 ATTACK: Disrupted units may not attack during any phase.
16.3 LADDER PLACEMENT: A Disrupted unit may not place, hold, or climb a Ladder. It may move down from the top of a Ladder or from an Elevated Hex via a Ladder.
16.4 BROKEN TESTUDO: The only Disrupted units with the ability and sufficient MF to form or join a Testudo are HQ and Velites units. Units that become Disrupted while in a Testudo need not retreat from the formation while it remains intact. An HQ and/or Velites may join a Testudo if it is not fully occupied. A Testudo disbands immediately if fewer than two Fresh Heavy Infantry remain in the formation, or if it contains a unit in Panic status. When it disbands involuntarily, the units composing it are marked with a "-6" Broken Testudo marker to represent the loss of six MF for all Fresh units in it. The six-MF penalty does not apply to Disrupted units. Broken Testudo markers must be removed during the next Roman MPh, as each Broken Testudo moves/disbands. Broken Testudos exert a ZOC if they contain Fresh units, and defend against missile fire using a lower target row of the Missile Table.
16.5 MOVEMENT: Disrupted Combat units use the reduced MF printed on their reverse (white) side.
16.51 ZOC: Disrupted units may not enter an enemy ZOC. If already in an enemy ZOC, they may stay or move away [EXCEPTION: Jews in a Roman Heavy Infantry Ground-level ZOC; 7.311].
16.52 SIEGE ENGINES: Disrupted units may not push a Siege Engine or crew it for Breach attacks.
16.6 ZOC: Disrupted units do not exert a ZOC.
17. Recovery Phase
17.1 RECOVERY: Each player must attempt to recover each of his Disrupted/Rout/Panic units during his own Recovery Phase (attempting to recover Artillery is always optional). Roll one die per unit and adjust by any applicable drm listed on the Recovery Table. If the adjusted Recovery roll is ≤ the unit's Recovery Number, it recovers and is turned to its Fresh side if only Disrupted, has its Rout marker removed if in Rout, or has its Panic marker turned to its Rout side if in Panic. The HQ must recover first, but otherwise Recovery resolutions must be made in a progressive, orderly sequence across the board, without skipping certain units to resolve later. The order of resolution proceeds by hex-grid row in alphanumeric order (i.e., all recovery attempts in row A, followed by all recovery attempts in row B, etc.; hex A1 is resolved before A2, etc.).
17.2 ROUT/PANIC: Units in Rout/Panic are treated as Disrupted with additional disadvantages. If the final adjusted roll for a Disrupted unit is 7, it goes into Rout and is marked accordingly. If the final Recovery roll for a Disrupted unit is 8, it enters Panic and is marked with a Panic marker. If the adjusted Recovery roll is 9, it is eliminated. A Panicked unit that rolls a Recovery DR of 7 does not improve to Rout status; it remains in Panic.
17.21 MOVEMENT: A unit in Rout/Panic must move toward the Refuge (15.3) during its MPh, using all available MF. All Panicked units must move only after all non-Panicked units have completed their movement. Any unit entering a hex containing a Panicked unit must stop in that hex and end its MF there. If this causes the hex to become overstacked, the unit that just entered is eliminated. A unit that begins its MPh in the same hex as a Panicked unit may leave that hex only by paying double the hex's normal MF entry cost. A unit in Rout/Panic that cannot move due to enemy ZOC/terrain must remain in place until it can move.
17.22 ATTACK, N/A: No unit may attack in any way from a hex containing a Panicked unit.
17.23 DEFENSIVE EFFECTS: The presence of a Routed unit in the defender's hex adds a drm of +1 to the Melee attack. The presence of a Panicked unit in or adjacent to the defender's hex adds a drm of +2 to the Melee attack.
17.24 RECOVERY DRM: All Recovery drm listed on the Recovery Table are cumulative and apply at the time of each Recovery attempt. The drm +1 for being within range and LOF of Fresh enemy Missile units does not apply to being within range of Artillery, and is not canceled by the presence of another mandatory target between the missile unit and the recovering unit. An elevated unit throwing rocks (2.11) adjacent to it is not a "Missile unit" for Recovery purposes.
17.3 HQ: Disrupted HQ are always in CC but do not favorably modify Recovery attempts. An HQ may not modify its own Recovery roll. If a side's Commander is in Rout/Panic, that +1/+2 Recovery drm applies to all of its units attempting to recover. If a Legion's/Faction's HQ is in Rout/Panic, that +1/+2 drm applies to all units of its Legion/Faction attempting to recover. A Leader's own Recovery roll may be modified by his Commander. Jewish Artillery and Zealots are unaffected by Leaders; only the Commander affects their Recovery roll.
18. Assault Periods
During the siege, fighting was not constant, but instead involved occasional bursts of intense activity amid longer periods of extended preparation. These bursts of activity are called Assault Periods. Between them, the players prepare for the next stage of the game. The Campaign Game consists of five separate Assault Periods.
18.1 DURATION: Each Assault Period has a maximum of seven daylight game turns, but may end earlier at the conclusion of any Jewish Melee Phase if both players agree. The Roman player may unilaterally declare an Assault Period ended after the Jewish Melee Phase, during the turn in which he first Controls (18.3) a city area. The Roman may also choose to extend that Assault Period by up to three turns, but all turns after turn 7 must be night turns.
To prematurely end an extended Assault Period, both players must agree to end it (after any Jewish Melee Phase). Regardless of either player's wishes, the Assault Period ends after the Jewish Melee Phase of turn 10.
18.11 CONCESSION: At the end of any Jewish Melee Phase, the Jew may concede control of any city area containing ten Roman units, even if the Roman has not yet met his Control requirements there. By doing so, the Jew forces the Roman player to decide whether to end the Assault Period at that moment, and may also, at that moment, possibly reach the remaining 25% of Levy capacity needed to trigger a Flight attempt. If he refuses to end the Assault Period at that moment, the Roman loses his unilateral ability to end the Assault Period until he gains control of a city area for the first time again. By conceding, the Jewish player forfeits all future Reserves (18.61) from that area during this Assault Period, and the ability to control it during that Assault Period while a Roman unit remains in it. A Jewish Concession overrides the normal requirements for Roman control.
18.12 RECOVER: All surviving units begin Fresh each Assault Period [EXCEPTION: Roman Artillery may begin Disrupted at its owner's choice].
18.13 BREACH DAMAGE: All Breach damage from previous Assault Periods remains in place, but may be reduced before each new Assault Period due to Jewish repair attempts (see 19.6).
18.2 NIGHT TURNS: Play during a night turn is altered as follows:
18.21 FIRE PHASE: Fire is limited to adjacent targets. Jewish Cauldrons, Militia, and Zealots on Elevated Hexes may still throw rocks (10.2). Breach Attacks may also be made (10.1).
18.22 RECOVERY: The Recovery drm for being within Missile Range and LOF of a Fresh enemy Missile unit applies only if adjacent to Fresh enemy Missile (non-Artillery) units. However, there is a drm +1 to all Recovery attempts during a night turn.
18.23 ZOC: Jewish units may withdraw from a Heavy Infantry Ground-level ZOC.
18.24 CC: The CC range of all HQ is reduced by two hexes.
18.25 MELEE: All Jewish melee attacks at night may receive a drm +1.
18.26 LEVIES: Jewish Reserve Activation rolls (18.611) are modified by +1 at night.
18.3 CONTROL OF WALLS AND CITY AREAS: The city is divided into ten separate areas by Walls within the city. If the Romans do not meet the Control conditions for a Wall or area at the end of each Assault Period, the Jews retain it and may deploy into it again at the start of the following Assault Period. At the end of each Assault Period, each side must withdraw its forces from those areas it does not control [EXCEPTION: Jewish Fortresses, 18.34]. Hex control is defined as being the last occupant of a hex. All hexes within the city in areas not previously controlled by the Romans are considered Jewish-controlled at the start of each Assault Period. The Romans control all hexes outside the city.
18.31 CONTROL OF THE TYROPOEON CITY, NEW CITY, CITY OF DAVID, UPPER AND LOWER CITIES: The Romans control an area if, at the end of any Jewish Melee Phase, they have at least ten Fresh Heavy Infantry units within that area (not including units on its Elevated Hexes) and control at least 15 non-Building Built-up hexes. Control is defined as being the last occupant of a Built-up hex.
18.32 CONTROL OF HEROD'S PALACE, TEMPLE DISTRICT: The Romans need at least ten Fresh Heavy Infantry units within these areas at the end of any Jewish Melee Phase, with Roman control of at least four Building hexes.
18.33 FORTRESS TRIANGLE, JAFFA GATE, ANTONIA FORTRESS COMPLEX: The Romans control these areas by simultaneously occupying all Fortress hexes (even if breached) on their perimeter at the end of any Jewish Melee Phase.
18.34 FORTRESSES: Jewish infiltration through the maze of sewers beneath the city could not be stopped, and allowed the movement of even dismounted Artillery between Assault Periods. At the end of each Assault Period, any Fortress occupied by at least one Jewish unit remains under Jewish control — even if the Romans control the adjacent area and/or adjacent Walls. The Jew may deploy other units into it during deployment for the following Assault Period, or withdraw the units there to city areas he controls. This does not entitle the Jew to occupy Bastions or Walls between the Fortress and his controlled city section — even if the Roman never occupied that particular Wall section during the previous Assault Period.
18.35 WALLS: All hexes (including Fortresses, Bastions, and Gates) of a Wall section adjacent to a Jewish-controlled city section, regardless of stairway orientation, are controlled by the Jewish player at the start of an Assault Period. This may mean the Roman will have to give up Elevated Hexes he occupies at the end of an Assault Period. A Roman-controlled Wall is one whose adjacent city areas are controlled by the Roman player. [EXCEPTION: Fortresses occupied by the Jews; see 18.34].
18.36 RECOVERY OF CONTROL: The Jews may recover control of any area by matching the Roman control requirements for that area if the Romans cannot, except that the Jews may use Light Infantry and cleared Built-up hexes (18.37). Since the Jews will normally control bypassed Fortresses and the inner Wall sections and Gates for sallies in lost areas, the Roman must take care to maintain an adequate garrison to prevent Jewish recapture of already-conquered areas. If the Jews recover control of an area, they will again control that Area's Walls at the start of the following Assault Period, but may not raise Reserves from those Areas.
18.37 RAZING: All Built-up hexes and roads in an area controlled by the Roman are razed between Assault Periods and are thereafter considered Clear terrain [EXCEPTION: Buildings are never razed].
18.36 STAIRWAYS: (printed thus in the source, reusing the 18.36 number) Between Assault Periods, the Jews build new stairways at the outer Entry hexes of Gates between Areas they have lost and those they still control. They may also build a temporary stairway from each Bastion/Fort that would otherwise have no access to Ground level, and mark this stairway with a Ladder. These temporary stairways are treated as normal Stairways in all respects.
EXAMPLE: Entry hexside O58-P58 is considered an inherent Stairway hexside during any Assault Period in which the Jews control Herod's Palace at the outset. If the Romans control Herod's Palace at the outset, P58-Q58 also becomes an inherent Stairway.
18.4 GARRISONS: The Temple District, Herod's Palace (including the Fortress Triangle and the Jaffa Gate complex), and Antonia Fortress also receive permanent Garrison troops, identifiable by their purple stripe and initials, in the following quantities:
| Area | Abbreviation | Regulars | Zealots |
|---|---|---|---|
| Antonia Fortress | AF | 4 | - |
| Herod's Palace | HP | 6 | - |
| Temple District | TQ | 8 | 2 |
Other Jewish forces may enter Garrison areas, but Garrisons may never leave their assigned areas; if forced to retreat outside their assigned areas, they are eliminated. Garrisons are always in CC and may stack with any Faction without penalty, as if they were Zealots. Garrisons in Rout/Panic need not move toward the Refuge. Garrisons are eligible to be drawn as Replacements only if their assigned Area is still under Jewish control. If their assigned Area is controlled by the Romans, they must occupy a Jewish-controlled Fortress in that Area or be permanently removed from the game at the end of the current Assault Period. The Temple District and Antonia Fortress Garrisons share an overlap of four hexes which the Garrisons of both Areas may enter.
18.5 ROMAN REPLACEMENTS: Any Roman Combat unit eliminated during the game counts for Victory Point purposes (18.91). At the end of each Assault Period, a certain percentage of all Combat units eliminated in the dead pile [EXCEPTION: HQ] (fractions rounded down) are drawn at random for use in the following Assault Period (see 19.3). Any remaining eliminated Combat units are set aside and returned to the dead pile for drawing replacements after determining the Casualty Victory Points scored in the current Assault Period.
Because of the tactile difference between units of different sizes, players may substitute eliminated 5/8" units with blank pieces to ensure a purely random draw.
18.51 SIEGE ENGINES: At the start of every Assault Period except the first, the Roman may withdraw a Ram and a Tower to receive an Armored Tower, or vice versa.
18.52 HQ: All HQ except the Commanders are automatically replaced in the following Assault Period and do not count as part of the fractional return of losses. Any eliminated Leader loses one hex of his CC range for the remainder of the game each time he is replaced. Commanders may not be replaced (although if Titus is eliminated, Tiberius Alexander, his second-in-command, enters play in the following Assault Period with a full ten-hex CC range). If Tiberius is also lost, the Romans are left without a politically reliable general to replace him and, as a result, withdraw, giving a Jewish victory.
18.6 JEWISH REPLACEMENTS: All eliminated Jewish units (except HQ and Garrisons from Roman-controlled Areas) are placed in a dead pile from which they will be drawn at random as Replacements before the start of the following Assault Period. Each Jewish Leader is automatically replaced for the following Assault Period at the cost of one hex of his CC range. The Commander Eliezer ben Yair may not be replaced. Non-Artillery units not drawn as Replacements are eligible to be used as Reserves. Units not replaced always remain in the dead pile for possible drawing as Jewish replacements in the following Assault Period. The Jews receive a percentage of units from the dead pile equal to the percentage of the city they still control for Levy purposes (dropping all fractions). Each city area has the following Levy Replacement value:
| Area | Value | Area | Value |
|---|---|---|---|
| Temple District | 30% | New City | 10% |
| Upper City | 15% | City of David | 10% |
| Lower City | 15% | Antonia Fortress | 5% |
| Tyropoeon City | 10% | Herod's Palace | 5% |
EXAMPLE: If the Jews have lost 38 units and the New City during the first Assault Period, they would receive 34 units back (38 x .9 = 34.2) as Replacements to begin the second Assault Period.
18.61 RESERVES: Reserves are Jewish reinforcements drawn from as-yet-unplayed units that remain off the map (inherently present in the Built-up hexes of each Area containing non-Building Built-up hexes) and out of play until activated by Roman attacks against that area. At the start of the Jewish Recovery Phase of any turn in which a Roman unit has occupied or attacked with Melee or Missile fire at least two hexes of an Area (including its walls), or entered an Area containing non-Building built-up hexes, the Jewish player may activate some of his Reserves there. He may continue activating Reserves for that Area once each turn at the start of his Recovery Phase until the Romans control the Area at the end of a Melee Phase.
18.611 RESERVE ACTIVATION: The Jew may roll one die per turn for each Built-up Area containing at least two hexes occupied and/or attacked by Melee or Missile Fire that turn, or two dice per turn for each Area containing non-Building built-up hexes with Romans inside (not merely on) that Area's Elevated Hexes. The die roll(s) equal the number of Jewish Reserves released during that Recovery Phase and are subject to the following modifiers:
| drm | Cause |
|---|---|
| +1 | Night turn |
| +1 | Activating in the Upper and Lower Cities or City of David |
| +1 | The Jews control the Temple District with no Romans inside its outer walls |
| +1 | The New City or Tyropoeon City has not been razed |
| -2 | The Romans control the Temple District |
The Jewish player then makes a number of separate rolls equal to his total Activation roll. Each roll activates one unit in that Area per the following table:
| dr | Unit |
|---|---|
| 1-3 | Militia (2-6) |
| 4-5 | Regular (5-7) |
| 6 | Zealot (7-7) |
Activated units may be of any Faction at the Jew's choice, if available.
18.612 AREA LIMITS: Reserves are limited in number to specific amounts in each Area containing Built-up hexes, as follows:
| Area | Total |
|---|---|
| New City | 24 |
| Tyropoeon | 28 |
| City of David | 35 |
| Lower City | 40 |
| Upper City | 40 |
A written record must be kept on the back of the available Reserves in each Area, adding a mark (/) for that Area each time one of its Reserve units is activated. When the number of marks equals that Area's total Reserve capacity, no more may be drawn from that Area. If no units of a given type remain, the next lower available type may be substituted for the missing unit. If there are not enough unused units in the Reserve Pool to fund that call, they may be taken from the dead unit pile. If there are still not enough unused units, the activation cannot be made and that portion of the turn's activation capacity is lost.
18.613 RESERVE PLACEMENT: The Jews, being more familiar with the city, were able to hide groups and/or infiltrate behind the Romans through the maze of alleys and sewers. Therefore, activated Reserves may be placed, within stacking limits, in any non-Built-up hex in the affected Area that does not contain or lie adjacent to a Roman unit — even if the Romans control the hex.
18.62 JEWISH REINFORCEMENTS: Before deployment for each of the 2nd through 5th Assault Periods, the Jew receives all uncommitted Reserves (18.61) from the Area(s) that fell into Roman hands in the previous Assault Period (including those conceded to the Romans under 18.11). If there are not enough available pieces in the counter mix to accommodate all Jewish reinforcements, the excess is lost.
18.7 EXTERNAL INFLUENCES: The Siege of Jerusalem took place during a period of unrest in Rome and tension along the frontier with the Parthian Empire. A failure by Titus could have provoked a coup against Vespasian or a Parthian invasion. The External Influence Table reflects how these possible external factors could influence the course of the siege, and vice versa. If, at the start of any Assault Period, the Romans do not control at least the required percentage of the city's Levy value for that Assault Period, or if the duration of the entire siege has exceeded 25 weeks (see 19.1), a Civil War or a Parthian invasion causes the siege to be lifted and gives a Jewish victory.
EXTERNAL INFLUENCE TABLE
| Assault Period | Required % of City Replacement Capacity |
|---|---|
| Second | 10% |
| Third | 20% |
| Fourth | 45% |
| Fifth | 70% |
| End of Game | 85% |
18.8 RAMPS: A Ramp is a sloped earthwork running from Ground level to an Elevated Hex, built within a single Ground hex adjacent to the Elevated Hex. A Ramp is entered as if it were a Slope. Entry/exit from a Ramp on one side is permitted only to/from an adjacent Ramp hex. Only Infantry may enter a Ramp hex. Fresh Infantry on a Ramp exerts a Ground-level ZOC only into the adjacent Ground hexes directly behind it (as well as into any adjacent Ramp hex), and vice versa. Units on a Ramp fight in melee at normal Melee Strength. Defenders on Elevated Hexes still retain their doubled or tripled Melee Strength, but not the -1 drm for an attack from a non-Elevated hex. Units on a Ramp may conduct melee against units on any adjacent Elevated Hex (and vice versa).
18.81 CONSTRUCTION: The Roman player may build a Ramp before the placement of Jewish Artillery, in any hex outside the city that is not on or adjacent to a mined hex, or in any controlled Ground hex within a Roman-controlled Area adjacent to an Elevated Hex, so that the ramp points to a Ground hex on one side and an Elevated Hex on the other. Ramps must be built adjacent to each other to combine their sides into a single combined Ramp no larger than five hexes. Ramps cannot be moved once built, and may only be built before an Assault Period (19.4).
18.9 VICTORY POINTS: Assuming the Roman has not lost due to External Influences (18.7) or Mutiny (18.94), the Jewish player can still win by accumulating 1,500 Victory Points. The higher his Victory Point total, the more costly the Siege of Jerusalem becomes for Rome and the Flavians, who need a swift suppression of the revolt to put down Jewish resistance elsewhere and to discourage a Parthian invasion or plots against Vespasian. The Jewish player earns Victory Points for causing Roman casualties (18.91), escaping the city (18.92), and having established Redoubts (18.93) by the end of the game.
18.91 CASUALTIES: The Jewish player earns Victory Points for the elimination of Roman units as follows:
| Points | For |
|---|---|
| 1 | Per Fresh Melee Strength factor of eliminated Infantry/Cavalry (not HQ) |
| 10 | Per Artillery unit |
| 20 | Per Siege Engine |
| 50 | Per Leader |
| 200 | Titus |
Casualty Victory Points may be earned repeatedly for the elimination of the same unit in different Assault Periods. The return of Roman Replacements does not reduce Casualty Victory Points.
18.92 FLIGHT: Once the fall of Jerusalem became inevitable, the Jews sought to escape the besieged city to carry on the resistance elsewhere — of which Masada is only the most famous example. Jewish units become eligible to attempt escape once the Jewish replacement rate reaches 25% or less. Fresh Jewish Infantry attempting to escape may move from Elevated Hexes to adjacent Ground hexes outside the city at a cost of four MF, provided they began the MPh on that Elevated Hex. Roman Cavalry and Foederati units outside the city are freed from CC restrictions when attacking Jews outside the city.
18.921 DURATION: The Romans may not unilaterally declare an Assault Period ended during any turn in which a Flight is underway with a Jewish HQ outside the city Walls or off the map.
18.922 FLEEING: Any Jewish unit that begins and ends its MPh outside a Roman ZOC may move down a Slope hex (away from the crest) at a cost of one MF instead of three. To be entitled to this special movement rate, the Jewish unit must be moving directly toward the nearest Clear hex in the direction opposite the Crest. All units using Flight movement become Disrupted at the end of their MPh.
18.922 FLIGHT POINTS: (printed thus in the source, reusing the 18.922 number) Jewish units that move off the map earn Victory Points equal to double their printed Melee Strength. Any Leader who exits gains a bonus of 100 points. The Commander Eliezer ben Yair gains a bonus of 250 points if he exits. Jewish units that escape are permanently removed from the game and are not eligible to be returned in any way.
18.93 REDOUBT: The Jewish player earns Redoubt Victory Points at the end of the 5th Assault Period for each of the following:
| Points | For |
|---|---|
| 10 | Per occupied Jewish Fortress |
| 50 | If Eliezer ben Yair is still on the map |
18.94 MUTINY: If the Jews achieve 400 Casualty Victory Points (18.91) during any single Assault Period, the Legions mutiny and the Jews win.
19. Assault Period Interphase
19.1 SUMMARY: Before each Assault Period, and before placing Jewish forces on the map, the Roman player decides how many weeks he will use to prepare for that Assault Period. Several factors must be weighed in making this decision. On one hand, the longer he takes to prepare, the greater the percentage of replacements he will receive for his previous losses, and the greater the likelihood of success for engineering activity (which will damage the walls and make them easier to breach). On the other hand, the longer the delay between assaults, the greater the delay to the campaign, with the attendant danger of increased Roman civil unrest or Parthian invasion, as reflected in the awarding of Jewish Victory Points and in rule 18.7. If the campaign exceeds 25 weeks, the Jew wins.
PREPARATION TABLE — WEEKS BEFORE THE ASSAULT
(Columns are numbered by week of preparation, 1 through 9; the week number is confirmed by the worked examples in 19.2, which cross-reference specific columns by week count.)
| Metric | Week 1 | Week 2 | Week 3 | Week 4 | Week 5 | Week 6 | Week 7 | Week 8 | Week 9 |
|---|---|---|---|---|---|---|---|---|---|
| % Roman Replacements | 15 | 20 | 25 | 30 | 35 | 40 | 45 | 50 | 60 |
| Armored Towers ≥7/12 drm | - | - | +1 | +2 | +3 | +4 | +5 | +6 | +7 |
| Jewish Victory Points |
19.2 MINING: If the Roman decides to wait at least two weeks before attacking, he may devote himself to mining. After the Jew has secretly pre-recorded his Artillery locations, the Roman specifies the number of weeks he will wait before the next Assault Period. He then makes a Mining roll and consults the Preparation Table for the appropriate Mining drm.
The Mining roll is modified by the Mining drm shown on the Preparation Table for the current week of preparation. If the result is a positive number, that is the number of mine shafts (up to a maximum of four) eligible to undermine and collapse Elevated Hexes during this Assault Period.
The Roman then rolls to determine the damage caused by each completed shaft per 19.21-.22 — eliminating any Artillery placed in a collapsed hex. If fewer than four shafts are completed, the Roman may postpone his assault and move to the next week on the Preparation Table, making a new Mining roll with his more favorable drm in hopes of obtaining additional results. To improve his situation, he must obtain more shafts than his last mining roll produced, since he must subtract the number of shafts already completed from this new Mining roll when determining whether he has new shafts. He may continue postponing an assault until he obtains a result he is willing to attack with. However, postponing an assault not only increases Jewish Victory Points by the amount shown in the next column of the Preparation Table, it also gives the Jew an extra Repair roll (19.6) for each additional week of delay after completion of the first shaft, and an opportunity to reposition any Artillery that survived the resolution of any newly revealed shaft.
The Jews may relocate their surviving Artillery to any unbreached Elevated Hex in response to exposed mining activity before resolving the next Mining roll of a delayed assault.
Failing to make an eligible Mining roll in one Assault Period does not entitle the Roman to any extra week of preparation in the following Assault Period.
19.2.1 SHAFT TARGETS: After having dug one or more complete shafts, the Roman must now decide the location of each completed shaft dug, just before the start of the current Assault Period. Each shaft dug in the current Assault Period must be within 11 hexes of a specific Roman HQ and of all that Legion's existing Artillery at the start of the Assault Period, and at least six hexes away. Each Legion HQ may be the origin of only a single shaft. Units deployed off the map must still be kept within 11 hexes of the target hex, counting the range from their entry hex when they enter play. The eleven-hex path may not be traced through any standing Elevated Hex, but it need not be part of the same city area occupied by the Legions doing the tunneling. The Roman then makes an engineering roll for each shaft to determine the number of Elevated Hexes affected. The announced target hex and the two adjacent Elevated Hexes are always affected. One additional hex in each direction along the wall may be affected with a roll of 4, 5, or 6. Thus, each successful shaft will affect either three or five Elevated Hexes. If the shaft affects only three hexes, the subsequent Damage die roll for each hex is modified by an amount equal to the Engineering roll.
| Engineering Roll | Hexes Affected | Damage drm |
|---|---|---|
| 1 | 3 | +1 |
| 2 | 3 | +2 |
| 3 | 3 | +3 |
| 4-6 | 5 | - |
19.22 ELEVATED HEX DAMAGE: The Roman rolls two dice for each undermined hex to determine the extent of the damage. A die roll ≥ the hex's Breach Defense (minus any damage already inflicted) results in a Breach in that hex. Those that do not collapse are marked with a damage marker equal to the damage die roll, to reflect their weakened state. An already-crumbled hex cannot be damaged further, but still counts as one of the hexes affected by damage for an Engineering roll (19.21).
EXAMPLE: It is the start of a Campaign Game and the Roman is reluctant to attack without first securing a Breach in the Jew's Walls, so he devotes himself to mining them. After three weeks of digging, he makes a Mining roll of "4," which is modified by the drm of -4, giving "0." There is no effect, so he continues digging into the fourth week. (If he had rolled a "5," the final result would have been "1" and he would have completed a shaft). His fourth-week roll is a "4," modified by -3, giving "1," so he must now resolve the damage effects of his completed shaft. He identifies the location of his completed shaft as QQ36 — the Gate of Susa. The Engineering roll for QQ36 is a "1," resulting in damage to QQ36 and the two adjacent Wall hexes due to the minimum three-hex effect. Dice are now rolled for each undermined hex: rolls of "7," "8," and "9" for hexes QQ37, QQ36, and QQ35 respectively are modified by +1, resulting in the collapse of the last while damaging the first two. A Breach marker is placed on QQ35, and "8" and "9" damage markers are placed on QQ37 and QQ36 respectively.
The Roman decides to wait one more week, although this allows the Jew to make a repair roll to repair his damaged Walls. However, his patience is rewarded with a Mining roll of "4," modified by -2, giving "2," which gives him one more completed shaft, which he locates at Fort DD19. The Engineering roll for the DD19 shaft is a "4," undermining hexes DD19, CC20, EE19, BB21, and FF18. There is no damage drm. The damage roll for FF18 is a "3," resulting in the placement of a "3" damage marker. EE19 rolls a "6," causing its collapse and the placement of a Breach. Fort DD19 rolls a "9," placing nine damage points on the Fort. CC20 rolls a "7," causing its collapse. BB21 rolls a "4," placing a "4" damage marker.
19.3 ROMAN REPLACEMENTS: The percentage of Roman forces "eliminated" in previous Assault Periods that return to service in the current one will vary as determined by the Preparation Table. If five weeks elapse before the next Assault Period, the Romans will receive 35% of their unit losses at random. They may make this random draw before deciding whether to launch the assault. If they decide to postpone the assault, in later weeks they may draw an additional percentage of replacements equal only to the difference in Replacement rates between the two weeks. They may not draw the full amount.
19.4 RAMPS: The Roman may build Ramps only once per game. The maximum number of Ramp hexes he may build is five. The maximum he may build in a single Assault Period is determined by the Preparation Table and rule 18.81.
19.5 ARMORED TOWERS: The Roman is entitled to make one Construction roll per Assault Period to build Towers to add to his forces. He makes this roll after announcing the week of his assault and forgoing any further delay. If the Construction roll plus the indicated drm is ≥7, he may add one new Armored Tower for use in this and subsequent Assault Periods. If the final modified roll is ≥12, he may add two Armored Towers. Before this Construction roll, the Roman may specify that he wishes to substitute three new Siege Towers and/or Rams (solely to replace previous losses) for one Armored Tower, if his Construction roll succeeds.
19.6 REPAIRS: Just before the opening of each Assault Period except the first, and before Roman deployment, the Jewish player may make a Repair roll (two dice). The result is the total number of previous damage points he may remove from Elevated Hexes under his control. He may not repair a Breach, nor an isolated Fortress in a Wall section the Jews do not control, nor may he repair more than half the damage on any Elevated Hex at any one time. The Repair die roll is subject to modifiers based on the length of preparation for the current Assault Period.
If the Roman delays his Assault after resolving the damage from a completed shaft, the Jew may make an additional Repair roll for each week of delay to determine the number of damage points he may remove from controlled hexes — including those just damaged by any newly revealed shaft. The same repair restrictions apply, although a hex already repaired to its maximum extent (half its damage) before may be repaired again up to half its existing damage during each additional week of delay.
19.7 CLEARING ELEVATED HEXES: In addition to the razing of Built-up hexes (18.37) within a newly controlled area, the Roman may open a Breach in one Elevated Hex per week between Assault Periods along any Wall he controls. The Breach hex must not be within two hexes of a Jewish-controlled Elevated Hex (including bypassed Forts).
Recommended reading: THE GENERAL is recommended reading for any wargamer, but volume 26, number 4 (August 1990) should be of special interest to SIEGE OF JERUSALEM players, as it will present the game with an in-depth analysis, including Designer's Notes, Series Replay, strategy and tactics advice for both sides, a contest, a questions mailbag, and new scenarios. For ordering information, send a SASE to TAHGC, 4517 Harford Rd., Baltimore, MD 21214, or call 1-800-999-3222 to order with any credit card.