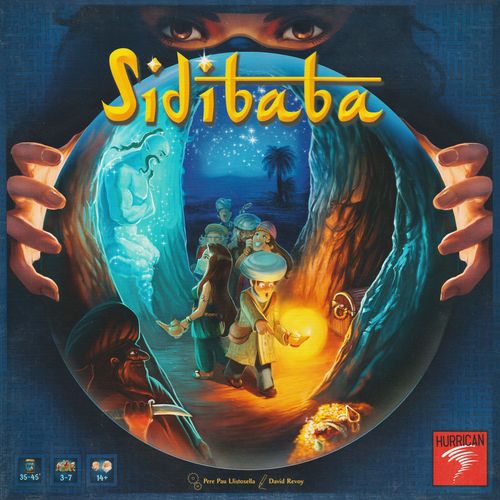
Sidibaba
Sidibaba Rulebook
Table of Contents
Table of Contents
Materials
- 1 Screen allowing the Leader of the Thieves to hide the maze
- 10 3D views representing what the Adventurers see in the labyrinth
- 2 two-sided boards with four different mazes
- 1 corridor that allows the Adventurers to indicate the order of the characters in the maze
- 1 Orientation Tile to indicate to the Leader of the Thieves the direction that the Adventurers wish to take
- 6 Adventurers represented by an identification token and a silhouette (before the first game, put these on the bases provided for this purpose)
- 61 Jewel and Genie tokens
- 5 Curse tokens
- 20 Event Tokens
- 12 Oil lamp tokens with a duration of three minutes each
- 1 Leader of the Thieves Token
- 1 Treasure token
- 5 Chest tokens
- 1 red triangle embodying the Adventurers and their direction in the maze
- 1 3 minute timer
- 1 Bag and 1 Die
A Few Words About the Game
Sidi Baba is a game, a little different, which offers players a unique experience.
The game takes place in real time. A group of players, Sidi Baba and his companions, referred to throughout these rules by the term, Adventurers, face a single opponent, the Leader of the Thieves.
Each camp has its own objectives and its own mode of operation.
For Sidi Baba and his companions, it is to enter a dark and mysterious labyrinth, navigate as best they can to discover the Treasure, share it and then get out of the maze. All decisions are taken jointly and the time to take them can be very costly. But be careful about sharing the jewels, as it's every man for himself and only the richest will be the winner.
For the Leader of the Thieves, it is a question of doing everything possible to delay Sidi Baba and his companions so that they forever remain prisoners of the darkness.
Before starting the game, you should decide who will be the Leader of the Thieves. This role is probably a little harder to play, so it is advisable for an experienced player to take on the role for the first game.
The Leader of the Thieves will be in effect:
- The timekeeper: he monitors and manipulates the hourglass.
- The guardian of Events: he triggers them when and how he wants.
- The guardian of the labyrinth: he displays the 3D view to the Adventurers based on their movement choices. The 3D view shows what they see in front of them in the maze.
- The guardian of the unity of the Adventurers: In the case of disagreement among the Adventurers, the Leader of the Thieves organizes a vote.
The Leader of the Thieves is above all HONEST! While he obviously seeks to win the game by preventing the Adventurers from finding the exit, he must always give the right information based on their movement and always give the right answers to questions that the Adventurers will ask with the help of the Genies.
Set Up and Preparation of the Game
Adventurers
- Place the corridor and orientation tile facing the screen as shown in the illustration.
- Each Adventurer chooses a character and takes the corresponding identification token and places it in front of him.
- Together, the Adventurers choose the order in which they will enter the maze and put their silhouettes on the corridor in front of the screen that shows the entrance to the cave. Being in the lead provides many advantages, but sometimes some disadvantages too.
- Each adventurer receives three Jewels of value 1 which he places face down in front of him.
- The adventurers then distribute the twelve oil lamps between them. Depending on the number of Adventurers, the distribution will not necessarily be equal. Yes, sometimes life is unfair!
Leader of the Thieves
- Place the screen facing the Adventurers.
- Choose a maze and place it behind the screen well out of sight.
- Place the Treasure in the maze on the site of your choice, closed Treasure side visible.
- Place the five chests in the maze on the locations of your choice, closed side visible.
- Place the triangle representing the Adventurers outside the maze facing the entrance of your choice. The tip of the triangle always indicates the direction in which the Adventurers are moving and thus the direction in which they are looking.
- Put the Leader of the Thieves next to the maze.
- Stack the ten 3D Views so that the tabs are all on the same side. These tabs allow easy tracking of the 3D view to use.
Tip: you will have to manipulate these 3D views very frequently for the rest of the game. There is no need to put them in order. Simply return the last used 3D view behind the others, well aligned. Thus, the tab is still visible and the 3D view is easy to find.
- Shuffle the Jewels, Genies and Curses and put them in the bag.
- Shuffle the Events face down, form a stack and place it in front of the screen, then take the first event from the stack and place it face up behind your screen safe from prying eyes.
- Place the timer in front of the screen, such that it is well visible to all the Adventurers and easily accessible for you.
You are now ready to wait for the Adventurers, who have come to make off with your wealth.
Now, the Adventure Can Begin!
1. Once the set up is complete, the adventurer in the lead cries: Open Sesame!!!!
The adventurer who took the lead must immediately put a lamp next to his silhouette. Each lamp lasts three minutes.
Warning! Keep in mind that when the group's last lamp goes out, you will be lost forever in the darkness.
2. The rock that blocked the cave entrance moves, revealing the entrance to the maze.
Immediately, the Leader of the Thieves:
- Reads the number in the maze, located in front of the triangle representing the Adventurers, takes the corresponding 3D view and places it next to the screen facing the Adventurers.
- Turns over the hourglass timer.
3. The Adventurers collectively decide their movement and the direction they will take. Once the decision is taken, the first in line moves their silhouette onto the symbol corresponding to the desired movement on the Orientation tile.
There are six different possible movements:
- A. Turn in place towards the left
- B. Rotate on the spot to face backwards
- C. Turn in place towards the right
- D. Move forward one square and turn in place towards the left
- E. Advance one step
- F. Advance one step and turn in place towards the right
In the example above, the Adventurers have decided to take one step forward and turn to the left.
4. .... and the Leader of the Thieves places a new 3D view facing the Adventurers. For this, he must:
- Move the triangle representing the Adventurers in the maze while respecting their instructions.
- Place the new 3D view corresponding to the new situation next to the screen. It's possible this may not change.
- Inform the Adventurers if something special is on the square in front of them, such as:
- Open or closed chest
- Open or closed Treasure.
- Landslide.
- Leader of the Thieves
- Arrow drawn on the ground with its color and direction.
Example: The adventurers have decided to advance a step and turn on the spot to the left.
- The triangle now points to the number 3. As quickly as possible, the Leader of the Thieves takes the 3D view «number 3» and places it next to the screen, replacing the previous one.
- And then he indicates verbally to the adventurers: «In front of you, you see a closed wooden chest».
5. The Adventurers must then make a new decision.
It's a safe bet, in this example, that the Adventurers will move toward the chest in order to share its contents!
6. As soon as he receives their decision, the Leader of the Thieves places the new 3D view in front of the screen.
AND SO ON!
Mapping the Maze
The information supplied by the Leader of the Thieves about the presence of Chests, Landslides or Treasure allows the adventurers to work out where they are by identifying the places they have already passed.
This information is very important because, during the adventure, taking notes is strictly prohibited ...
What Happens When the Timer Runs Out?
The Adventurers collectively decide who will take the head of the line. The designated Adventurer places his character in the lead and puts a new lamp next to it.
This is the perfect time to completely reorganize the order in which the Adventurers advance into the maze.
But beware! The Leader of the Thieves has already turned the timer, time is running out!
If the timer runs out and the Adventurers have no further lamps, they are lost forever in the darkness of the labyrinth and the Leader of the Thieves is the winner!
MOUAH AH AH AH AH AH !!!
Decision Management
The Adventurers are moving collectively
The Adventurers decide together which direction is to be taken.
What happens if there is a disagreement?
Depending on the memories and interests of each, it is common that not everybody wants to go in the same direction. In this case, there is a show of hands. Voting is conducted by the Leader of the Thieves. If there is no majority, the Adventurer at the front of the line decides.
Time Management
Sidi Baba is a game that takes place in real time.
Each time a timer has completely run out, a lamp goes out. The Leader of the Thieves takes the lamp next to the silhouette of the first adventurer in the line and places it behind his screen. Then he immediately turns the timer over.
As soon as a lamp goes out, the Adventurers must decide who will be at the head of the line. There is no requirement to change Adventurer. But it's always the adventurer at the front of the line who must put a new lamp next to his silhouette.
Warning! The Leader of the Thieves does not wait for the Adventurers to decide who is to be at the head of the line to restart the timer.
THE LEADER OF THE THIEVES IS THE TIMEKEEPER AND ONLY HE KEEPS AN EYE ON THE TIMER AND MANIPULATES IT ...
Tip for the Leader of the Thieves - Stop time: If the Leader of the Thieves needs to (e.g., to check a rule, to reorganize his equipment or for whatever other reason), he may choose to set the timer horizontally on the table momentarily. Time is thus stopped and does not penalize the Adventurers. Once everything is back to normal, he returns the timer to its original position, and time takes its course. Attention, it is therefore important to remember which way up the timer was before it was set on its side.
And What Do We Find in the Treasure and the Chests?
When the Adventurers find one of the five chests, the Leader of the Thieves draws ONE token from the bag for each Adventurer and places them on the table. The Jewels are placed face up while the Genies are placed face down.
He then turns the Chest token in the labyrinth over to show the open side.
When the Adventurers find the Treasure, the Leader of the Thieves draws TWO tokens from the bag for each Adventurer and places them on the table. The Jewels are placed face up while the Genies are placed face down.
Then he turns the Treasure token over in the labyrinth to show its open side.
The Treasure is the ultimate goal of the Adventurers, they cannot get out of the maze if they have not found it.
Jewels
A Gold Coin, Two Gold Coins, Carafe, Daggers: Each token above earns the number of points indicated for their owner at the end of the game.
Set, Bag of Precious Stones, Emerald: Each token above earns a single point at the end of the game for its owner if he only has one. However, if he can get a pair, the value increases considerably, 6, 8 or 10 points for the pair, as shown on each token.
Genie
It is sometimes possible to find Genies in the Treasure or the Chests. Their effect is shown on the back and is only known by the adventurer who takes it.
These Genies are valuable because they can enable you to get out of dangerous situations. But the Genies are also sometimes very interested in wealth and, in some cases, their advice is more useful if they receive a little money.
Curses
When one or more Curses appear during sharing, a powerful burst of wind escapes when they are opened.
- The character in the lead is immediately thrown to the back of the line. All other characters are shifted one square forward, the number 2 moves into the lead, etc..
- Before you start sharing, an adventurer MUST discard a lamp in his possession. It is not possible to discard the lamp currently being used to light the way.
Finally, note that because of these curses, there will not be enough Jewels for everyone. The last characters in the line will receive nothing! A good reason to try to find the best place in the line ...
The Lamp and the Curse are removed from the game.
So, These Genies, How Can They Be Used Then?
Warning! The Adventurers can only use one Genie during a given 3 minute timer segment. It is therefore very important for the Adventurers to work together so that they use them at the right time.
When an Adventurer wishes to use a Genie, he states this out loud, reveals its nature to the other Adventurers and applies its effect immediately. Then the Adventurer gives it to the Leader of the Thieves who puts it behind his screen.
The adventurer who used his Genie then draws three new tokens from the bag (Jewels or Genies), examines them secretly and chooses one which he adds to his stash. The other two tokens are returned to the bag.
Tip: Take care not to keep the Genies in reserve for too long: you may come out of the maze without having converted them to Jewels, which would be a shame.
Description of the Genies
LET THERE BE LIGHT! The Adventurer who uses this Genie gets back two lamps from the Leader of the Thieves. Six extra minutes to get out of the maze!
WE'VE ALREADY BEEN PAST HERE! The Adventurer gives the token to the Leader of the Thieves. The latter places it on the square in the maze currently occupied by the Adventurers, pointing the arrow in the direction chosen by the Adventurer. Every time the Adventurers have this square in front of them, the Leader of the Thieves will inform them of the presence of the arrow and its color and direction. There is a blue arrow and red arrow. A good way to get one's bearings a little.
WHICH WAY TO THE TREASURE? Under the pressure of the Genie, the Leader of the Thieves is required to indicate the first movement that the Adventurers must make in order to move towards the Treasure. By collectively handing over jewels worth at least three points to the Genie, the latter will be happy to oblige the Leader of the Thieves to indicate the first TWO movements to the Adventurers. All the jewels, even superfluous, are discarded and removed from the game
WHICH WAY TO THE EXIT? Under the pressure of the Genie, the Leader of the Thieves must tell the Adventurers the first movement they must make in order to move towards the nearest exit. By collectively handing over jewels worth at least three points to the Genie, the latter will be happy to oblige the Leader of the Thieves to indicate the first TWO movements to the Adventurers. All the jewels, even superfluous, are discarded and removed from the game
WHICH WAY TO THE LOOT? Under the pressure of the Genie, the Leader of the Thieves is required to indicate the first movement the Adventurers must make in order to move towards the nearest Chest or the Treasure, without indicating the nature of the loot. By collectively handing over jewels worth at least three points to the Genie, the latter will be happy to oblige the Leader of the Thieves to indicate the first TWO movements to the Adventurers. All the jewels, even superfluous, are discarded and removed from the game
It's up to the Leader of the Thieves to ensure that the Adventurers only use the effects of a Genie once per timer.
In addition, although he is trying to win the game, the Leader of the Thieves must remain honest and must ALWAYS give the right answers when asked a question by a Genie.
So, These Events Then, How Can They Be Used?
Reminder: The Leader of the Thieves receives an event early in the game and one at the end of each timer.
Every time the Adventurers move onto a new square in the maze, the Leader of the Thieves may, if desired, use ONE event among those he has. He announces this to the Adventurers and informs them of its effect. Its effect is immediate.
Some effects can only be used when the Adventurers move onto a square where there is a Chest or the Treasure.
After use, the Event is discarded and removed from the game using an Event costs the Adventurers time, so fair play is a must!
MOVEMENT
The Leader of the Thieves can move the Leader of the Thieves token a number of squares equal to the number of arrows shown on the Event. To make him enter the maze, use the entrance of your choice.
If the Leader of the Thieves and the Adventurers end up on the same square, regardless of whether this is the result of the Adventurers moving or the Leader of the Thieves, the current movement immediately stops and:
- The Leader of the Thieves steals two tokens of his choice from the Adventurer in the lead and one token of his choice from all the others. He can choose to take a Jewel or a Genie, but cannot examine it beforehand.
- The Adventurers MUST discard an unused lamp to force the Leader of the Thieves out of the labyrinth.
- The Leader of the Thieves takes the lamp and places it behind his screen.
- The Leader of the Thieves places his token outside the labyrinth. As soon as the Adventurers have moved onto a new square and if he has the appropriate Event in his possession, the Leader of the Thieves can again enter the maze.
ILLUSION
Your choice:
- Either you use this event to move the Leader of the Thieves two squares.
- Or you decide that the chest found at that moment by the Adventurers is an illusion. The Chest that the Adventurers have just discovered doesn't exist, remove it from the maze.
SMALL PADLOCK
Your choice:
- Either you use this event to move the Leader of the Thieves two squares.
- Or you decide that the chest just discovered by the Adventurers has a small padlock. Each Adventurer in turn (in the line order) must roll the die to try to open the lock. The first to roll a six opens it. He draws a token from the bag per Adventurer. If Curses are drawn, they are returned to the bag and replaced with other tokens. Then he distributes them as he wishes, one token (Jewels or Genie) to each Adventurer.
ENCOUNTER WITH A BANDIT
The Leader of the Thieves steals a token of his choice from the first two Adventurers in the line. He can choose to take a Jewel or a Genie, but cannot examine it beforehand.
COMBINATION LOCK
Your choice:
- Either you use this event to move the Leader of the Thieves two squares.
- Or you decide that the Chest or the Treasure just discovered by the Adventurers has a secret combination. Each Adventurer in turn (in the line order) must roll the die to try to open the lock. They must roll a four, a five and a six to open it. When all three values have been rolled, in any order, the Chest opens.
The sharing of the contents is carried out normally.
TELEPORTATION
Your choice:
- Either you use this event to move the Leader of the Thieves two squares.
- Or you immediately teleport the Adventurers by moving them three squares, while maintaining the orientation of the triangle and without crossing a wall.
LANDSLIDE
Your choice:
- Either you use this event to move the Leader of the Thieves two squares.
- Or you cause a landslide. Block a square of your choice with the landslide token.
Note: when you place the landslide token, you must always make sure to:
- leave at least one free path to the Treasure AND
- leave at least one free path to an exit.
ENCOUNTER WITH SCHEHERAZADE
In line order, each adventurer rolls the die once in turn:
- If it's from one to four, he succumbs to the charms of the beautiful lady and gives her a token of his choice which he places in the center of the table. The Adventurer must give a Jewel to the beautiful Scheherazade if possible. She loves shiny, expensive objects. If he does not have any, the Adventurer gives her a Genie. It's better than nothing!
- If it's five or six: It's Scheherazade who succumbs to the charm of the Adventurer and she gives him all the tokens that were previously placed in the centre of the table by the other adventurers.
Any remaining tokens on the table are returned to the bag.
ENCOUNTER WITH THE MERCHANT
The Leader of the Thieves takes a token of his choice from each adventurer. He can choose to take a Jewel or a Genie, but cannot examine it beforehand. He then puts all the tokens in the center of the table and reveals them. Then, in line order, each adventurer takes a token and places it in his stash.
End of the Game
The game ends if the adventurers succeed in leaving the labyrinth AFTER having found, opened, and shared the Treasure and BEFORE their last lamp goes out.
They can leave the labyrinth via any exit. They do not have to go out the way they came in.
In this situation, each of the Adventurers can rightfully be proud to have managed to get out of the maze while avoiding all the dangers ...
However, only one Adventurer can win the game ... The richest!
Each adventurer therefore adds up their fortune. Remember that outside of the maze the Genies are worth nothing ...
Example: 3 Gold Coins = 3 points; 1 Carafe = 3 points; 1 Pair of Jewels = 6 points; 1 Jewel = 1 point; 1 Emerald = 1 point; 2 Genies = 0 point. Total = 14 points.
The game can also end in the following circumstances:
- If the last of the Adventurers' lamps goes out while they are still in the labyrinth.
- If the Leader of the Thieves is on the same square as the Adventurers and they no longer have any Lamps available to discard to force him to run away.
In both cases, the Leader of the Thieves wins the game…