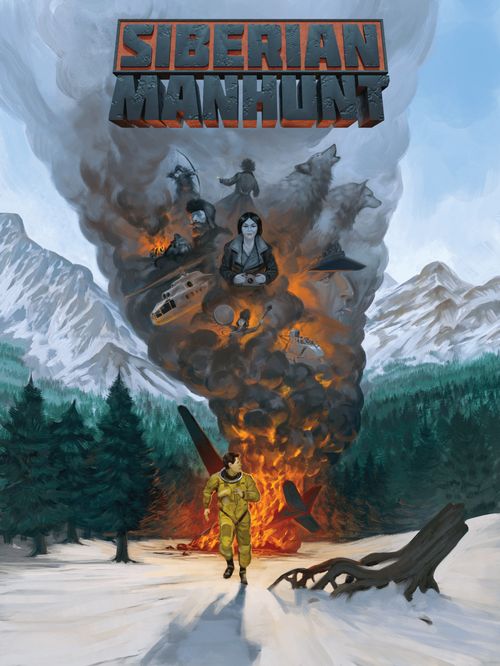
Siberian Manhunt
Siberian Manhunt Rulebook
Table of Contents
Table of Contents
Game Components
- Map Board (1)
- Fugitive Board (1)
- Fugitive Extension (1)
- Campsite (1)
- Gov. Extension (1)
- Government Board (1)
- Encounter Deck (30 cards)
- Urban Deck (36 cards)
- Wilderness Deck (45 cards)
- Gov. Assistance Deck (36 cards)
- Crafting Deck (10 cards)
- Character Deck (6 cards)
- Silent Citizens (20)
- Loyal Communists (20)
- Red Army Tokens (5)
- Tracker/? Tokens (15)
- Blocker/✓ Tokens (12)
- Storm Token (1)
- Canned Food (8)
- Raw/Cooked Meat (10)
- Berries (8)
- Fugitive Player Shield/Mini Map (1)
- Secret Route Pad (1)
- KGB Officers (5)
- Yakut Trackers (2)
- Season Counter (1)
- Hidden Movement Counter (1)
- Fugitive Energy Counter (1)
- Gov. Energy Counter (1)
- Meal Counter (1)
- 6-Sided Dice (10)
- Aerial Search Accessory (1)
- Manhunt Bag (1)
- Fugitive Action/Crafting Guide (1)
- Gov. Action Guide (1)
Our Story So Far...
Siberian Manhunt takes place in 1962, and imagines the US Air Force launching a series of U-2 flights over Siberia. Learning from the Gary Powers incident, they select a region of the Soviet Union where, according to intelligence reports, less sophisticated radar systems have been deployed. Flying out of South Korea, the U-2s first travel northward over Vladivostok before looping back west over the Baikal Region.
During one of these flights, pilot Jack MacKenzie experiences an engine flameout and is forced down west of Lake Baikal. He survives the crash, but knows that the Soviets will have detected his plane as it lost altitude. Scrambling out of the cockpit, he grabs his service pistol and races towards the forest. His only chance now is to make it across the border into China before he is captured - or lose himself in the wilderness until the Government gives up pursuit.
Meanwhile, in the nearby town of Kansk, Ayta Timirovna Onosova, a native Sakha reporter for a local newspaper, witnesses the plane crash. The first to arrive on the scene, she examines the wreckage and realizes it is an American spy plane. Using her knife, she pries open the main camera bay and takes the undeveloped film canister she finds within. Already a suspected political dissident, she decides to take a risk and defect to America with the film as a bargaining chip for her freedom.
Maj. Mackenzie is considered armed and dangerous but will be easily identified; Onosova will be hard to detect. Recommend you hire Yakut trackers.
Game Overview
Siberian Manhunt is an asymmetrical hidden movement game where one player takes the role of "the Fugitive," either Jack MacKenzie or Ayta Onosova, who is racing across Siberia towards the border with China. The Fugitive wins the game if they either 1) escape across the border or 2) reach the end of the hidden movement track, at which point the Soviet government gives up the manhunt.
The other player represents a Soviet general ("the Government") attempting to track The Fugitive down. The Government wins the game if they either 1) capture or 2) kill the Fugitive.
A game round consists of one Fugitive player's turn followed by one Government player's turn. Each player has a certain amount of energy to spend on actions during their turn. The Fugitive's movement is hidden: whenever they move, they secretly record where they have traveled on the Secret Routes notepad and openly record how far they have traveled on the Hidden Movement Track. The Government agents (red KGB pawns and black Yakut pawns) move openly on the map. At the end of the Government's turn as the seasons advance, the Fugitive player checks that they aren't starving or suffering hypothermia, and the next round begins. The game is played over multiple rounds until one player wins.
Set Up
Main Board
Place the Map board in the center of the table ①. Most of the game's action will take place here. Both players should sit on the same side of the table, with the Fugitive player on the right and the Government player on the left.
Place a red KGB pawn just off the upper left corner of the Map board ②. At the beginning of the Government's first turn, this pawn will be moved to the crash site. Place the green season tracker pawn in the top green sector of the Seasons Rondal ③. Place the blue Hidden Movement tracker pawn at 0 on the hidden movement track ④.
Fugitive Set Up
Place the Fugitive board to the right of the map board ⑤ and the Fugitive Extension board beneath it. Add a Blocker token to each inventory slot on the Extention board ⑥. Select a Fugitive character card and place it in the character slot on the board ⑦.
Find the Fugitive's starting items and place them in the inventory slots of the Fugitive board ⑧. (Note: Jack starts with a pistol, found in the Urban deck, while Ayta starts with a knife from the Urban deck and the U-2 Film Canister from the Crafting deck). Place the Meal tracker at 0 on the Meal track and the Fugitive Energy tracker at 3 on the Energy track ⑨.
Extract the parasite cards from the Encounter deck and set them aside ⑩. Separately shuffle the Encounter deck, the Wilderness deck, and the Urban deck and place them face-down, side-by-side ⑪. Place the Crafting deck next to them. Finally, place the Campsite board nearby ⑫. All cards drawn by the Fugitive are initially placed here.
Government Set Up
Place the Government board to the left of the Map board ⑬ with the Government extension board directly beneath it ⑭. Place the Yakut Tracker card adjacent to the green stripe on the Government board ⑮ and the KGB Officer card adjacent to red stripe ⑯. Select one of the Soviet generals and place it adjacent to the blue stripe ⑰. Place the Government Energy tracker at 1 on the Energy track ⑱.
To build the Government Assistance deck ⑲, first extract the 6 Recruit cards from the deck and set them aside. Shuffle the remaining cards and deal 5 cards face-down onto each of the 6 slots on the Government board. Next add 1 Recruit card to the top of each pile. Shuffle each pile individually and then stack the piles on top of one another to form the Government assistance deck. Do not re-shuffle this deck during the game! Finally, deal 1 card from the deck face up onto each open slot on the Government board, starting from the top row.
As a final step, add 6 Silent Citizen and 4 Loyal Communist tokens to the Manhunt Bag ⑳.
First Turn
The Fugitive's starting location is the U-2 crash site (in the upper left corner of the map). On their first turn they do not recover energy or draw an Encouter card: they jump straight to their actions (usually movement; it's highly recommend they move directly to a town to equip themselves!). On the Government's first turn, they place their KGB pawn at the crash site and play their turn normally.
General Concepts
The Landscape. All numbered locations on the map are in the wilderness; all named locations with building icons are towns. The red locations are a demilitarized zone: the Red Army tokens may not be placed here. The green locations are in China: the Fugitive is trying to reach these and the Government cannot place any units here. All locations are connected by roads. The red road crossing the map is the main highway through the Baikal region. The Fugitive can only use their hitch-hike action along the highway and the KGB officers can only use their drive action here. The dotted blue lines denote water crossings.
Hidden Movement. The Fugitive's movement is hidden. The specific locations they pass through are secretly recorded on the Secret Route Pad, and the distance is publicly recorded on the Hidden Movement track. If the Fugitive's location is ever discovered, they declare their specific location and the Hidden Movement tracker drops to zero.
Open Information. Aside from the locations the Fugitive moves through during their hidden movement, all other information in the game is open to both players: cards are always played face up, actions are always declared by both players, the number and type of movement are announced, etc.
The Manhunt Bag. This represents the local population's opinion of the Fugitive and Government. Both players will have the opportunity to add tokens to the bag through various actions in the game, influencing the likelihood that the population will either protect the Fugitive or inform the Government of their whereabouts. Once a token is drawn from the bag, return it to the general supply - do not put it back in the bag. If the Manhunt Bag should ever run out of tokens, re-set it with 5 Silent Citizens and 5 Loyal Communists.
The Fugitive
During deployment overseas, the situation may arise where you are trapped behind enemy lines. As a Fugitive in a hostile territory, you will be forced to rely on your wits, your resourcefulness and, above all, your training. This guide will prepare you to survive, thrive, and ultimately return to duty.
Fugitive Turn Summary
A game round consists of the Fugitive's turn followed by the Government's turn. The Fugitive's turn has the following steps:
- Recover energy: +1 energy if in the wilderness, full energy if in town.
- Draw and resolve an Encounter card (if in the wilderness).
- Spend energy on actions.
- Record movement, adjust Hidden Movement track.
Fugitive Turn Details
Step 1: Recover Energy. If the Fugitive begins their turn in the wilderness, they recover a baseline of +1 energy at the start of their turn. This value can be increased by certain items (e.g. winter clothes, a tent, a fire, etc.). The effects of these items are cumulative. For example, if the Fugitive is carrying a tent (+1 energy) and lit a fire on their previous turn (+1 energy), they will recover +3 energy at the start of their next turn. If the Fugitive begins their turn in a town, they recover all their energy at the start of their turn. The Fugitive may choose to exhaust themselves during their turn by dropping to -1 energy. In this case, they must immediately take 1 HP of damage. If they begin their next turn in a town, they will still recover all of their energy. They may not exhaust themselves if they have only 1 HP!
Important: The Fugitive may save unused energy between consecutive turns.
Eating: At any time during their turn, the Fugitive can also recover energy by eating food. Eating food is not an action, requires no energy, and can be performed at any time during the Fugitive's turn. When a food card is drawn, discard it and instead add the food tokens to your inventory: 1 token per space. Hunting animals will give the Fugitive access to raw meat, which restores +1 energy per unit eaten, but carries the risk of parasites. For each meal containing raw meat, the Fugitive player must shuffle one Parasite Card into the Encounter deck. Cooking the meat with a fire will convert raw meat into cooked meat (flip the tokens over), which restores +2 energy per unit eaten. Cooking meat is a free action (requires no energy): all you need is a fire and your entire supply of raw meat automatically converts to cooked meat. Canned food from the Urban deck will also restore +2 energy per unit eaten. Berries and mushrooms will restore +1 energy per unit eaten.
The Fugitive is limited to two Daily Meals, tracked on the Fugitive board. A meal consists of any number of food items consumed at the same time. Food which is provided by encounter cards (e.g. the Farmer) counts as a meal. The Fugitive must eat one meal per quarter (i.e. every two rounds) or else they begin to starve and lose 1 Health Point (HP). See the Season Rondel section for more details.
Step 2: Encounter Card. If the Fugitive is in the wilderness, they draw a single Encounter card and resolve it. Unless explicitly stated on the card, resolving an Encounter card does not require any energy, even if there is combat involved.
For every encounter, the Fugitive always has three choices:
a. Follow the prompts of the Encounter card. b. Ignore the encounter and discard the card. This may require the Fugitive to escape if the encounter is aggressive. c. Attack the person/animal depicted on the card. This will result in combat. If the Fugitive wins the combat, they kill their opponent, take the manhunt penalty/bonus, and may collect the encounter's items.
Human Encounter Card Anatomy
-
Health Points (HP). This value represents the health of the character. During combat, this may be reduced. If it ever reaches zero, the character is defeated. Track HP by placing a die (1d6) on this value.
-
Flavour Text. This little snippet of text explains the character's motivation and the encounter prompt.
-
Encounter prompt. These are the instructions for the encounter.
-
Items Available. If the Fugitive defeats this encounter in combat (or if the encounter wishes to give something to or trade with the Fugitive), these are the items which the Fugitive can take.
-
Manhunt Bonus/Penalty. If the Fugitive kills a dastardly character or a powerful predator, they will earn the respect of the local population and one or more Silent Citizen tokens will be added to the Manhunt Bag. Conversely if the Fugitive kills an upstanding citizen, the locals will be angered and one or more Loyal Communists will be added to the manhunt bag.
-
Keywords. Each human Encounter card has a set of keywords under the title which determines the person's behavior towards the Fugitive. The first word determines whether the person will fight, stand their ground, or flee the Fugitive:
- Aggressive. This person is willing to attack the Fugitive and will continue to attack if the Fugitive fails an escape attempt or chooses to walk away.
- Neutral. This person will defend themselves if attacked by the Fugitive but will not initiate an attack. If combat begins and then the Fugitive attempts to escape and fails, a neutral opponent will continue to attack the Fugitive.
- Timid. If attacked, a timid encounter will automatically flee. This means the Fugitive has one opportunity to attack before the person disappears.
The second word determines whether the character will reveal the Fugitive's location if the Fugitive should attempt to leave (either by escaping or simply walking away). This word is not triggered if the Fugitive follows the instructions of the encounter prompt.
- Loyal. If the Fugitive leaves/escapes this person will immediately reveal the Fugitive's current location.
- Questionable. If the Fugitive leaves/escapes the Government player draws a token from the manhunt bag to determine this person's behavior. If a loyal communist is drawn, they reveal the Fugitive's location; if a silent citizen is drawn, nothing happens.
- Silent. If the Fugitive leaves/escapes this person will not report their location to the Government.
-
Attack Value. The indicated number is added to the person/animal's attack roll during combat.
-
Defense Value. When the person/animal is attacked, their defense value is subtracted from the attacker's roll. The remainder of the attack, if any, is then subtracted from the defender's HP as damage.
-
Pursuit Value. (see Combat / Escape sections for how this value is used.)
Animal Encounters
Rather than keywords, animals in the Encounter deck (predators) and the Wilderness deck (prey) have an Encounter Strip beneath their names. The Fugitive rolls 1d6 to check the animal's behavior.
For example:
- 1-3: The animal flees. Discard the Encounter card.
- 4-5: Distant encounter. For predators, the Fugitive gets a free attack before normal combat begins; for prey, it is a normal attack. The Fugitive must use a ranged weapon.
- 6: Close encounter. For predators, normal combat begins with the Fugitive attacking first. For prey, it is a normal attack. The Fugitive may use a ranged or melee weapon.
- Pursuit Value. When the Fugitive attempts to escape from combat, they roll 1d6 and add to it the Escape Value on their Fugitive character card. To successfully escape, the sum must be greater than their opponent's Pursuit Value.
Combat
Combat will occur if 1) the Fugitive chooses to attack the person on the Encounter card, or 2) if the person has the keyword "Aggressive" and attacks the Fugitive, which does not flee, or 3) it is a preditory animal which does not flee.
Combat is straightforward: the attacker rolls 1d6 and adds to it their attack value (for the Fugitive, this is the value of their weapons; for everyone else, its the attack value on their encounter card). If the resulting sum is greater than the defender's defense value, the defender takes the difference in damage. For example, if the attacker has an attack value of +2 and rolls a 3, they attack for 5. If the defender has a defense value of 4, then the attack will do 5-4=1 damage - which is subtracted from the defender's health points.
Encounter Combat Example
The Fugitive draws the Mad Trapper as an encounter and chooses to follow the instructions on the card, rather than immediately escaping or attacking. The Fugitive rolls a 4, which means the Mad Trapper attacks rather than stealing an item. Because the card doesn't say otherwise, the Fugitive attacks first. They use a knife (+2 attack).
- Fugitive attack. The Fugitive rolls a 2, and adds to that +2 from their knife for a total attack of 4. The Mad Trapper has a defense of 3, so he takes 1 damage. The 1d6 tracking his health points gets adjusted from 3 down to 2.
- Mad Trapper attack. The Government player rolls for the Mad Trapper. They roll a 3 and adds the Mad Trapper's attack value of +4 for a total of 7. The Fugitive has a defense of 4, so the Fugitive takes 3 damage.
- Fugitive escape. Rather than attack again, the Fugitive attempts to escape. They roll a 4 and add their escape value of +1 for a total escape of 5. This is greater than the Mad Trapper's pursuit value of 4, so the escape succeeds and the encounter ends.
Step 3: Fugitive Actions
The Fugitive then decides which actions to execute during their turn. Each action costs a certain amount of energy. Energy can be refreshed at any time during the turn by eating food, thus allowing the Fugitive to potentially string together many series of actions. Once the Fugitive has exhausted their energy or completed their desired actions, their turn is over. The actions are:
Action: Movement
a) Basic Movement. Move to a new location on the map along any road. The cost is 1 energy per space in the summer months, and 2 energy per space in the winter. The Fugitive may not move onto a space occupied by a Government Agent or the Red Army. However, there is no restriction to the Fugitive's movement if a Government Agent moves onto the Fugitive's location. If the Fugitive moves into a town, they must stop their movement for that turn and the Government immediately draws a token from the Manhunt Bag - the Fugitive has been spotted in town! If the token is a Silent Citizen, nothing happens; the person did not report the Fugitive. If the token is a Loyal Communist, the Fugitive immediately declares their location (e.g. "I am in Kansk") and drops the Hidden Movement tracker back to 0.
b) Water Crossings. Move to a new location on the map along the blue dotted lines. The cost is 3 energy per space in the summer months (since the Fugitive is swimming), and 2 energy per space in the winter (since the Fugitive is walking on snow-covered ice). Vehicles can be used for water crossings during the winter only.
c) Hitch-Hike. If the Fugitive is on the highway and their Hidden Movement tracker is at 5 or above, they may pay 2 energy to move immediately to the next town along the highway. As always when the Fugitive enters a town, they must stop their movement, then the Government player draws 1 token from the Manhunt Bag and resolves it. Each Hitch-Hike action counts as 1 hidden movement. The Fugitive does not record the locations skipped over during a Hitch-Hike and does not have to declare those locations if the Government player searches there. Hitch-hiking can be blocked by an Agent pawn on the highway or in the arrival town, however.
d) Bush-Whack. For 4 energy, the Fugitive can travel across the empty space between contiguous roads to any location on the closed loop. Bush-whacking is not allowed if there is no closed loop between the starting and ending locations. In addition, no bush-whack around/across water or ice. No movement discounts (e.g. vehicles, skis, etc.) can be applied to the bush-whack action.
Example: The Fugitive is currently at location 311. If they spend 4 energy, they can bush-whack to any location around the perimeter of the closed region on the left, including the town of Mogocha. They may not bush-whack to locations 310 or 321, because these are not part of a closed loop. If the Fugitive were on a location straddling multiple closed circuits, they could bush-whack to locations on any of them.
e) Sneak. Pay 1 extra energy to move into a town. The Government draws 2 tokens from the Manhunt Bag. If either is a Silent Citizen, the Fugitive does not reveal their location.
Action: Rest
The Fugitive performs no other actions on their turn. If they are in town, they regain all their energy and all their HPs. If they are in the wilderness, they regain 2 energy (instead of the usual 1 energy) and 1 HP. They regain this energy and HP immediately, although the energy cannot be used until their next turn. When starting their turn in the wilderness, the Fugitive player still resolves an Encounter card before resting.
Action: Search
a) Wilderness Search. If the Fugitive is in the wilderness, they can spend 1 energy to draw 3 Wilderness cards to their Campsite board. They may keep any cards they draw, provided they have space in their inventory. They can draw any number of cards to their campsite (and use them if they have the necessary energy). However, as soon as they move, anything not in their inventory gets discarded. If there are multiple animals drawn during a wilderness search action, the Fugitive can only choose to hunt 1 animal - the others are discarded. Important: the Wilderness Search action may only be performed once per turn.
Item Card Anatomy
Wilderness and Urban item cards show: the energy cost to use the item, the number of uses, the number of inventory slots the item occupies, the card effect (which may differ between summer and winter), and a detection check value.
Crafting item cards show the same information on their front (once crafted), plus crafting instructions and the necessary components on their back (before crafting): components are spent to craft the item, then the card is flipped to reveal the finished item.
b) Urban Search (A.K.A. Breaking-and-entering). If the Fugitive is in a town, they can spend 1 energy to draw 1 Urban card to their campsite. As above, you can have any number of cards in their campsite but must discard anything not in their inventory when they move on.
Action: Using & Crafting Items
a) Using Items. An item from the Fugitive's inventory or campsite may be used by spending the energy cost listed on the card. For example, it takes 2 energy to use a First Aid Kit. Exception: cooking and eating food are always free actions (although building a fire is a crafting action).
Certain items have a detection check value printed at the bottom of the card next to the symbol. Using these items may attract the attention of local Siberians: motorcycles and guns make noise that carries over large distances; fires produce smoke that can be seen for miles. When the Fugitive uses a card with a detection check, they must roll 1d6 once (even if, for example, they fire multiple shots from a gun). If the value is at or below the number listed, no one saw or heard them. If the value is above the number listed, then they were seen or heard. In this case, the Government player draws from the Manhunt Bag to determine if anyone reports their sighting. If the card is a Loyal Communist, then the Fugitive must declare their position and reset their Hidden Movement to 0.
Vehicles drawn from the Urban deck can be used directly from the campsite; they never enter the Fugitive's inventory. Each vehicle can only be used once per turn, but if the Fugitive also has a fuel item, they may refuel the vehicle and reuse it on their next turn. A detection check for the vehicle is made each time it is used, and if a loyal communist token is drawn, then the final location of the vehicle movement is declared.
b) Crafting Items. Components from the Fugitive's inventory or campsite can be combined into the items listed on the Crafting List. The energy cost for crafting is always 1. When crafting an item, the used components are placed in the discard pile while the crafted item is found in the Crafting deck and placed in the Fugitive's campsite or inventory.
Example: When crafting a fire, the component card (small sticks, large stick, fuel, dry grasses, etc.) is discarded, the 1d6 tracking the number of matches is reduced by 1 (if matches are used), and a single detection check is made. The fire token stays active at the campsite until the Fugitive moves on.
Some Crafting and Wilderness cards will have a pickaxe icon in their upper left corner instead of an energy cost. This indicates the item can only be used as a crafting component.
Inventory (not an action!)
The Fugitive starts the game with 4 inventory slots open on the Fugitive Board; these are the Fugitive's "pockets". Additional inventory slots can be unlocked on the Fugitive Expansion Board by finding or crafting items: the canvas bag unlocks 2 slots; the satchel unlocks 3 slots; and the backpack unlocks 4. The item card is placed in the "Gear" slot on the Fugitive board. The Fugitive may only ever have a single Gear item at a time (e.g. 1 canvas bag OR 1 satchel OR 1 backpack). The maximum the Fugitive can ever carry is 8 slots worth of items.
Other items that can be worn also get placed in the appropriate slots at the top of the Fugitive board (e.g. skis, snow shoes, winter clothes, etc.). Important: items that can only be worn during the winter must be placed back in the inventory during the summer or discarded.
Each item specifies how many inventory slots it occupies: 1 or 2. When carrying an item that occupies 2 slots, mark the additional slot with one of the Occupied Tokens (the reverse side of the Blocker Tokens) to show that it is occupied.
Note: Food is always 1 inventory slot per portion, regardless of how much energy that portion restores. Use the appropriate food token to represent each portion of food in the inventory.
Action: Attack
For 1 energy, the Fugitive may attack a Government agent if they occupy the same location on the Map board. This will only happen if a Government pawn moves onto the same location as the Fugitive (since the Fugitive cannot move onto the same location as a Government agent). In any Fugitive vs. Government combat, only the attacker pays energy: the defender engages in combat for free. The energy cost of an attack only needs to be paid once, regardless of how many dice rolls are required to resolve the combat. The attacker rolls first.
If the agent kills the Fugitive, the Government wins the game. If the Fugitive kills the agent, KGB Officers respawn in Kansk (or Irkutsk if combat took place in Kansk) and Yakut Trackers respawn in the town where they were recruited (or any alternative Yakut town if combat took place in the town where they were recruited).
Note: If the Fugitive successfully escapes during combat with an agent, combat ends but the Fugitive's pawn does not change location.
Action: Good Deeds
If the Fugitive is in a town, they may spend 2 energy to help the local Soviets and add a Silent Citizen token to the Manhunt Bag. This is a good option if the Fugitive is trapped in town by a Road Blocks card and already has all the items they need.
Step 4: Hidden Movement
The Fugitive's movement is hidden. Each time the Fugitive takes a Move action, they secretly record the specific map location numbers they pass through and town names (the first three letters) they stop at on the Secret Route notepad. Then they record the number of moves they take on the Hidden Movement track (e.g. moving 3 locations will increase the Hidden Movement track by 3). Keep in mind the following important points about movement:
- The bush-whack and hitch-hike movement options only count as 1 hidden movement apiece.
- If the Fugitive enters a town, they declare it and must stay there for the rest of their turn - no further movement is allowed.
- The Fugitive cannot move onto the same location as a Government agent or the Red Army.
Important: The Fugitive can win the game by reaching the end of the hidden movement Track. When the Hidden Movement tracker arrives at 15 (Government Dissatisfied) it stops, even if the Fugitive moves further during their turn. On their next turn, if the Fugitive moves any number of spaces, the hidden movement counter moves to the box marked by an X (Search Canceled). The Government player has one last chance to find the Fugitive at this point. If the Hidden Movement tracker is on the X at the start of the Fugitive's turn, the Fugitive wins the game.
The Hidden Movement will reset to 0 if the location of the Fugitive is ever discovered. The Fugitive player must declare their exact location during the following circumstances:
- A Government Agent performs a search on the Fugitive's exact location.
- The Fugitive's current location is discovered by an aerial search action.
- A Loyal Communist token is drawn from the Manhunt Bag.
- The Fugitive meets a character in the Encounter deck with the keyword "Loyal" and that person reveals their location.
- The Red Army attempts to deploy to the same location as the Fugitive.
If a Government agent searches a location that the Fugitive has already visited (but does not currently occupy), the Fugitive player may be obliged to admit that, yes indeed, they have been to that location (see Government Actions, Move and Search).
If the Fugitive moves into a town, they must declare it (e.g. "I have moved 3 times, and now I'm in a town"). The Government then immediately draws 1 token from the Manhunt Bag. If the token is a Silent Citizen, nothing happens. If it is a Loyal Communist, then the Fugitive reveals their location on the map and resets their Hidden Movement to 0. As noted above, moving into a town stops the Fugitive's movement for that turn; they may still perform actions in that town, but they cannot move again until the next turn.
Once the Fugitive has completed their actions, recorded their hidden movement, and adjusted the hidden movement track, their turn is over.
The Government
The Supreme Soviet has issued clear orders: the wreckage of the American spy plane must be secured and the pilot captured immediately. The KGB will lead the manhunt, but the Red Army and local Yakut trackers may be called upon as required. More resources will be allocated over time. Failure is not acceptable.
Government Turn Summary
The Government's turn has the following steps:
- Recover energy: +1 energy for every Government agent on the board.
- Spend energy on actions.
- Replenish Government Assistance cards, adjust Seasons Rondel.
Government Turn Details
Step 1: Recover Energy. The maximum energy the Government can have is equal to the number of agent pawns (i.e. KGB and Yakut) on the map. The Government recovers their energy up to this limit at the start of their turn. Unspent energy from the turn before is not carried over to their next turn. The Government's energy is capped at 5: they may have more than 5 agents in play, but never more than 5 energy.
Step 2: Government Actions. The Government then decides which actions to execute during their turn. Each action costs a certain amount of energy. Once the Government has exhausted their energy or completed their desired actions, their turn is over and the round ends. The actions are:
Hunting the Fugitive
a) Move and/or Search. For 1 energy, the Government may move 1 Government agent 0, 1, or 2 spaces and has the option to search for the Fugitive at their end location. The Fugitive's trail quickly grows cold, so KGB Officers can only detect the trail on the last 4 locations the Fugitive has visited (including the Fugitive's current location), while the Yakut can detect the trail on the last 6 locations.
Example: The Fugitive is at location 142, and they arrived there using the route indicated by the blue arrow. Any Government agent searching 142 would find the Fugitive. A KGB Officer searching 144, 145, and 108 would find evidence of the Fugitive's trail. A Yakut would also find evidence at these locations, as well as at locations 107 and 85.
If the Fugitive is currently at the location searched, they must admit this and set the Hidden Movement counter to zero. If the searched location is within the detectable range, the agent finds evidence of the Fugitive and the Fugitive simply admits "I was there" without referencing how far they have traveled since.
The Government player may place a tracking marker at any location where they discover evidence of the Fugitive. They may use the opposite side of the tracking markers to cover possible locations of the Fugitive.
Each KGB Officer can only move once per turn (whether that is through the Move and Search action, via the Drive action, or via the "Helicopter Transport" card). The Yakut pawns, however, can move multiple times, paying the energy cost for each separate movement. They can only declare "Search" during their last movement, however! The Move and Search action always costs 1 energy for 0-2 moves, even for water-crossings or during the winter. Remember: no Government pawns can cross the border into China.
b) Attack. For 1 energy, a Government agent may attack the Fugitive if they occupy the same location on the Map board. The Government player does not need to know for certain that the Fugitive is there: they may simply declare an attack on that location. If the Fugitive is not there, nothing happens. If the Fugitive is there, then the Hidden Movement counter goes to 0 and combat begins with the Government player rolling first. Players take turns rolling their attacks until one player is defeated or the Fugitive successfully escapes.
If the Fugitive is killed, the Government wins the game. If the Government agent is defeated, the KGB officers respawn in the KGB outpost in Kansk (or in Irkutsk if the combat took place in Kansk) and Yakut respawn in the town where they were recruited (or in any other Yakut town if the combat took place in the town where they were originally recruited).
Combat between the Fugitive and a Government agent is mechanically the same as combat between the Fugitive and an encounter (see the encounter example on the previous page).
Note: the Yakut Trackers have a special move and attack ability (see below) so generally only the KGB officers need to pay the energy cost of an attack.
c) Capture. The cost to capture the Fugitive is 1 energy. If two Government agents are at the same location, the Government player may declare "capture". They do not need to know for certain if the Fugitive is currently at that location to declare a capture. If the Fugitive is at the same location as the agents, then they are captured and the Government player wins the game. If the Fugitive is not there, nothing happens.
d) Interrogate a Local. The basic cost to interrogate a local is 3 energy. In addition, it costs +1 energy for each previously successful interrogation (track this by adding a blocker token for each successful interrogation to the Government reference sheet on the interrogate action space). To perform the action, the Government simply draws 1 token from the Manhunt Bag.
- If the token is a Loyal Communist, the Fugitive must reveal a location within their last 3 locations (e.g. their current location, the location they passed through before that, or the one before that). The Hidden Movement counter is then moved to 3. Finally, 1 Silent Citizen token is added to the Manhunt Bag and a Blocker Token is added to the Government Reference Sheet to track the successful interrogation.
- If the token is a Silent Citizen, nothing happens. However, 1 Loyal Communist token is added to the Manhunt Bag.
Politburo
a) Government Assistance. The Government player may purchase a card from the Government Assistance Board. Cards in the bottom row cost 1 energy to purchase; cards in the middle row are 2 energy; cards in the top row are 3 energy. Most cards are beneficial - and some are essential for the Government winning the game! In particular, the "Recruit" card allows the Government to add another red KGB Officer pawn to any town on the map and increase their available energy. (Note: These new agents may only take their first moves - and increase the Government's available energy - during the next turn). If the necessary conditions of a purchased card are not met, or the card cannot be used this turn, then the card is discarded with no effect.
Purchased cards are placed in one of three locations on the Government Extension Board:
- Reserve. If the Government wants to hold a card in reserve to be used during a future turn, they place it in Reserve. They must pay 2 additional energy to use a card held in reserve. Only one card may occupy the reserve location at a time.
- Discard. If the card is activated immediately (or discarded with no effect), then it is placed on Discard. Most cards are used immediately and will be placed here.
- Temporarily Active. If a card has a lasting or delayed effect (e.g. Weather Forecast or Checkpoints), place the card on Temporarily Active. In addition, place a token (either the storm token for Weather Forecast or a Blocker Token for Checkpoints) on the seasons rondel to indicate when the effect expires.
At the end of the Government's turn, the remaining cards on the Government assistance board are shifted down to fill any empty slots. Once the cards are slid down, any empty slots on the top of the board are filled with new cards drawn from the Government Assistance Deck.
Red Cards. Certain red-colored cards within the Government Assistence Deck have a negative effect on the Government - these represent the fickleness of the Soviet bureaucracy. Normally, if the Government does not purchase any cards from the Government Assistance Board, the cards remain on the board where they are. However, if a red card is present on the board then it will automatically move down one space at the end of the Government's turn, pushing any unpurchased cards ahead of it. Any regular Government Assistance card that is pushed off the board in this manner is discarded with no effect. However, once a red card moves off the board, it activates. If there are two red cards that will move off the board on the same turn, the left card activates first and the right card activates second. Red cards may not be purchased in advance by the Government.
Government Assistance Example
- The Government pays 2 energy to purchase a "Recruit" card from the middle row and places a KGB pawn on the board.
- At the end of the turn, the card from the top row is shifted down to fill the empty slot.
- The red card moves 1 space down, pushing the bottom card in that column off the board. This card is discarded with no effect.
- Finally, two new cards are drawn from the Government assistance deck to replenish the board.
b) Upgrade an Agent. To recruit a Yakut tracker, the Government player will need to upgrade a KGB Officer by spending 4 energy. Remove any KGB Officer's pawn from the Map board and place a Yakut pawn in any one of the four designated towns on the map with a black label. The Yakut may take their first actions on the Government's next turn.
Example: Hatgal, one of the towns where Yakut trackers can be recruited.
c) The Red Army. The Government places a single Red Army token at a location on the map. Once a Red Army token is placed, it remains at that location for the rest of the game. These locations are permanently blocked to the Fugitive. Only 1 Red Army token may be placed on the map each turn. There are only 5 Red Army tokens available to the Government, so use them wisely! Note: the Red Army is not an agent and cannot participate in the capture of the Fugitive.
Placing a Red Army token counts as either a "deployment" or a "maneuver":
- If the new token is not adjacent to another Red Army token, then it is considered a "deployment" and costs 3 energy.
- If the new token is placed adjacent to another Red Army token, then it is considered a "maneuver" and costs 1 energy.
Restrictions:
- The Red Army may never be deployed onto the location of the Fugitive. If an attempt occurs, the Fugitive must declare their location and drop the Hidden Movement Tracker to 0. The Government then places the Red Army in a neighboring location. However, the Red Army may maneuver onto a location occupied by the Fugitive on a subsequent turn, whereupon the Fugitive is immediately killed and the Government player wins the game.
- The Red Army may never be deployed or maneuvered to the red de-militarized zone locations along the Chinese border.
- The Red Army may never be deployed or maneuvered to the green locations within China.
Special Actions
a) Drive (KGB Officers only). If a KGB Officer is on the highway, they may spend 1 energy to immediately travel to the next town on the road. Remember: KGB Officers can only move once per turn, and the Drive action counts as a move.
b) Move Multiple then Search or Attack (Yakut Trackers only). Yakut Trackers may move multiple times during their turn (0-2 spaces with each move, spending 1 energy per move), and then may either Search or Attack for free at the end of their last move.
Step 3: Replenish Gov. Assistance Cards, Adjust Seasons Rondel
At the end of their turn, the Government refills the Government Assistance Board with cards, following the previous example, and then advances the Season Tracker one space clockwise around the Seasons Rondel on the Map board. The seasons rondel is divided in half, summer (green) and winter (blue), and then further into quarters and eighths ("sectors"). Each turn is played out on a single sector.
Starvation & Hypothermia. Throughout the year, the Fugitive must eat at least 1 meal per quarter or else suffer -1 HP in damage. Use blocker tokens on the designated spaces (X) to track that the conditions have been met. Furthermore, in the winter the Fugitive must either wear warm clothes or have a fire during each quarter or suffer an additional -1 HP in damage. The damage occurs when the Season Tracker advances past the quarter (i.e. at the end of the Government's turn) and that quarter's respective conditions have not been met. In the image to the right, the Fugitive will take 1 damage at each ① if they have not eaten within the last 2 turns; they will take 1 damage at each ② if they have not worn warm clothes or made fire within the last 2 turns.
Finally, when the season counter moves from winter to summer, add 2 Silent Citizen tokens to the Manhunt Bag. This represents the population's growing scorn for their government's inability to capture the Fugitive.
Death to the Fugitive! Only the Government agents or the Red Army may kill the Fugitive. If the Fugitive reaches 0 HP through starvation, hypothermia, or an encounter, they are "severely wounded" but do not lose the game. First, the Fugitive's turn is over (if it is currently their turn). Next, their starved/frozen/bloodied body is found by local Siberians and they are taken to the nearest town. If there is more than 1 town within an equal distance, the Fugitive player may choose which one they are taken to.
- If the nearest town is occupied by a Government Agent or the Red Army, the Fugitive is taken to the next-nearest town.
- If the card "Checkpoints" is in play when the Fugitive is severely wounded, ignore it.
- If the Fugitive is already in a town and only has 1 HP, they can ignore the starvation and hypothermia penalties.
Once in the town, the Government player draws from the Manhunt Bag as usual. Then the locals steal 1 item from the Fugitive's inventory as payment for their good deed; the Government player chooses which item the Fugitive will lose. The Government player cannot choose Gear, as this could result in the Fugitive losing much more than 1 item. On their next turn, the Fugitive will begin in the town with full energy but only 1 HP... then the game continues normally.
Final Advice
Optional Rules
-
No Generals. For a Fugitive's first game, the Government should play without using a general. When the generals are introduced, note that General Ivanov is easier (for the Fugitive) and general Zakharov is harder.
-
3-Year Limit. It is recommended that you limit your game to 3 complete cycles of the seasons rondel. If the Fugitive has not won by this point, they defect to the Soviet Union and lose the game.
-
Maximum Effort. If the Fugitive wishes to mitigate their unlucky dice rolls, they may re-roll any 1d6 by spending 1 energy. Not applicable to combat with the Government!
Strategies
In a real-world manhunt, a fugitive and their pursuers could have, at any given moment, a wide range of options in front of them. Should the fugitive risk entering a town and seeking help, or would they be better off hiding in the wilderness? Should they stick to roads or cut cross-country in an effort to throw off their pursuers? How should they deal with the cold, their hunger, and encounters with local people and wildlife? On the other hand, should the pursuers spend their limited resources marshaling local forces to help them or attempt to track the fugitive directly? How wide should they cast their net?
Siberian Manhunt tries to stay true to its theme and give players the freedom to play their respective sides as they see fit. This can result in players finding new, winning strategies, but it also means there's no guard rails for preventing bad choices. The Fugitive player is especially vulnerable; one or two bad decisions could, for example, see their character freezing to death in the Siberian wilderness, facing down an angry predator with no bullets in their gun, or being cornered by the KGB when exhausted. While fortunately these bad decisions won't prove fatal to the player, they could still lead to a negative gaming experience. To avoid this, here is a list of tips and suggested play styles which are intended to guide players in their first couple of games:
Fugitive Tips
1) Play Styles. There are effectively two major play styles for the fugitive: town-hopping and wilderness survival.
- Town-hopping is easier: you simply rush from town to town on the map as quickly as possible, ignoring the risk of detection. Unless the government has some "Helicopter Transport" or "Checkpoint" cards standing by, this can be an effective early game strategy. However, it is also a bit risky if you do not have enough time to equip yourself from the Urban deck, and your forward rush could become derailed by newly recruited KGB Officers or certain Government Assistance cards. Being forced to survive in the wilderness mid-game without adequate equipment can be extremely challenging!
- Wilderness survival is harder to master and potentially slower, but it makes you much harder to find and could potentially lead to a win on the Hidden Movement Track. A couple stops in town early in the game to obtain some critical gear (e.g. a knife, matches, a backpack) will make surviving in the wilderness easier. You will need to perform frequent searches of the Wilderness deck (especially in summer), and you should attempt to craft the other equipment you need. A mixture of town-hopping (when the government is not threatening) and wilderness survival (when they are) is often the best strategy.
2) Visiting Towns. You will always need to weigh the risk/benefit of visiting a town. Unless you are desperate, it is not worth visiting a town late game when the Government may have added many loyal communists to the Manhunt Bag. Early in the game, however, it is critical to visit a few towns to gear up before facing the wilds during winter. If you are in a town and undetected (or detected, but the Government agents are too far away to reach you), it makes sense to spend a couple of turns in a town using all your energy to draw 5 Urban cards. Try to leave a town with full energy to maximize movement. Remember: you can always sneak into a town to minimize your risk of detection!
3) Winter. Prioritize getting footwear (skis from the Urban deck or snowshoes from the Crafting deck) to allow extra movement during winter. Try to craft yourself winter clothes, as this item grants a +1 energy bonus during winter (a tent does this in all seasons, but occupies 2 inventory slots and is harder to craft). If you have snowshoes, winter clothes, and a snowmobile, you can disappear into the Siberian wilderness like a ghost.
4) Backtracking. Trying to backtrack (or travel westward) may seem like a good strategy for throwing the Government off your trail, but it can come at a steep price. The game is balanced such that, at the start, the Government is quite weak with few pawns on the board and little energy to purchase Government Assistance cards. Towards the end of the game, the Government will have many pawns in play (including the dangerous Yakut Trackers) with 4 or 5 energy to spend every turn. Backtracking slows your eastern progress and may mean you are not near the border when the Government reaches maximum strength-thus making it very difficult to win the game. But there is always the Hidden Movement Track...
Government Tips
1) Play Styles. There are also two main play styles for the Government: hot pursuit and the long game.
- Hot pursuit means your pawns are constantly moving and searching, always on the trail of the Fugitive, never giving them a moment's rest. You will need at least 2 KGB Officers to make this play style effective (and to have a chance of capturing the Fugitive). You will need to get a little lucky with the Government Assistance cards: "Search Parties", "Aerial Search", "Motorcycles"/"Snowmobiles", and "Helicopter Transport" are all critical tools for this strategy. Be careful, however, as it is possible for the Fugitive to suddenly speed ahead and disappear if they gain a vehicle or a large amount of food.
- Playing the long game means you aren't tracking the Fugitive closely, but relying on recruiting KGB Officers and Yakut ahead of the Fugitive to snare them as they travel eastward. Here you'll need to depend on "Aerial Search" cards and Interrogate actions to keep the Hidden Movement Track in check. "Propaganda" cards are important to stack the Manhunt Bag in your favor when interrogating. A stacked Manhunt Bag also forces the Fugitive to remain in the wilderness or reveal themselves when they enter a town.
2) Recruitment. Unless you are 1-2 moves from cornering the Fugitive, always prioritize recruiting new KGB Officers. You'll often want to recruit them in towns either where you suspect the Fugitive to be, or where you think they are going. Be careful when recruiting KGB Officers far away from the central highway: they can help out when the Fugitive is nearby, but when the Fugitive moves on they are often left in the dust, unable to extract themselves from the wilderness without a helicopter.
3) Upgrading. It is a good idea to upgrade a KGB Officer to a Yakut Tracker as soon as you have 4 energy available. Yakuts are often recruited far away from the action, but because they can move multiple times per turn, they can potentially rush across a third of the board in a single turn. Two Yakuts working in tandem are particularly deadly.
4) Red Army. The Red Army is sometimes neglected, but it can be a potent force when used properly. They are effective when deployed at choke points on the map (e.g. the southern end of Lake Baikal or in Aginskoe). They can also be deployed to locations where you can't deploy on top of the Fugitive to be: because you can't deploy on top of the Fugitive, they will have to declare their location, drop the Hidden Movement Track to 0, and then you deploy the Red Army onto a neighboring location. And finally, if you know where the Fugitive is, you can corner the Red Army and possibly even kill them by moving the Red Army onto their location. The fact that there are only 5 Red Army tokens in the game often makes people reluctant to use them - and then they end up forgetting to use them entirely. Remember: in communist Russia, you don't serve Red Army; Red Army serves you!
5) Possible Fugitive Locations. On the opposite side of each Tracking Token is a question mark. Use these tokens (in conjunction with the Hidden Movement Track) to identify possible locations that the Fugitive may have moved to. This is very helpful to keep track of things when you're in hot pursuit of the Fugitive.