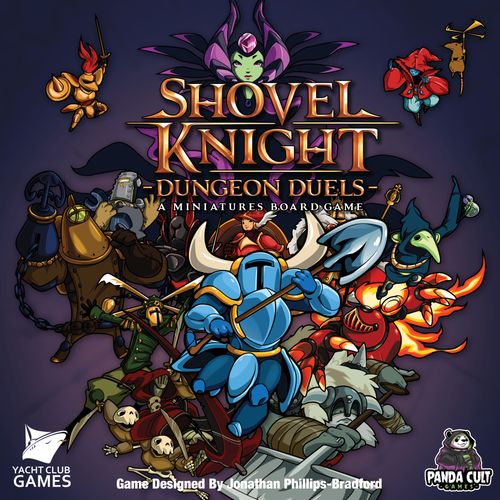
Shovel Knight: Dungeon Duels
Shovel Knight: Dungeon Duels Rulebook
Table of Contents
Table of Contents
Components
Models
- Four (4) Shovel Knights (Red, Blue, Green, Yellow)
- Eight (8) Boneclangs
- Eight (8) Propeller Rats
- Eight (8) Wizzems
- Eight (8) Goldarmors
- Four (4) Liquid Samurais
- Four (4) Hoverhafts
- One (1) King Knight
- One (1) Specter Knight
- One (1) Plague Knight
- One (1) Enchantress
- One (1) Polar Knight
- One (1) Mole Knight
- One (1) Treasure Knight
- One (1) Propeller Knight
- One (1) Tinker Knight
Tiles
- One (1) Start Tile
- Four (4) Double Sided Planes of Passage Tiles
- Five (5) Double Sided Pridemoor Keep (King Knight) / Explodatorium (Plague Knight) Tiles
- Five (5) Double Sided The Lich Yard (Specter Knight) / Tower of Fate (Enchantress) Tiles
- Five (5) Double Sided Stranded Ship (Polar Knight) / Lost City (Mole Knight) Tiles
- Five (5) Double Sided Sunken Ship (Treasure Knight) / Flying Machine (Propeller Knight) Tiles
- Five (5) Clockwork Tower (Tinker Knight)
- One (1) Double Sided Boss Room Tile
- One (1) Tile Track
Tokens
- Twenty (20) Dirt Mound Tokens
- Forty (40) Coin Tokens
- Thirty Nine (39) Heart Tokens
- One (1) First Player Token
- One (1) Tinker Mech Punchout
Cards
- Thirty Seven (37) Environment Cards
- Eight (8) Order of No Quarter Boss+Hero Stat Cards
- Four (4) Shovel Knight Hero Cards
- One (1) Enchantress Boss Stat Card
- Ten (10) Boss AI Decks (Including Order of No Quarter, Enchantress, and Shovel Knight)
- Two (2) Enemy Stat Card
- Twenty Seven (27) Equipment Cards
- Eleven (11) Relic Loot Cards
- Eleven (11) Curio Loot Cards
- Ten (10) Heirloom Loot Cards
- Nine (9) Arcana Loot Cards
- Twenty (20) Spawn Cards
- One (1) Shovel Knight Wander Hero Card
- One (1) Shovel Knight Wander Weapon Card
- One Shovel Knight Wander Initiative Card
Plastic
- Twelve (12) Game Dice
- Two (2) Plastic Tracker Clips
Knights
Each player selects a different colored Shovel Knight that will be represented by these models. A player may also choose to play as one (1) of the Knights of the Order of No Quarter, as long as the chosen Knight hasn't already been selected as the Boss at the end of the Dungeon. Knight is used as a keyword to represent player models on the board.
Knight Hero Card
Each Knight comes with their own Knight Hero Card. This card contains all the stats and abilities of the Knight.
- Knight Name
- Knight Portrait
- Max Health (HP): Health represents the number of Wounds the Knight can take before being defeated. Read more about taking Wounds in the Enemy Activation section on page 25.
- Attack (Atk): The Attack Stat represents the number of dice the player rolls when performing an Attack Action. Read more about Attack Actions in the Hero Turn section on page 17.
- Defense (Def): The Defense Stat represents the number of dice the player rolls to defend against incoming attacks. Read more about defending attacks on page 25.
- Jump: The Jump Stat represents the number of dice the player rolls when performing a Jump Action. Read more about Jump Actions in the Hero Turn section on page 19.
- Special Move: Knights have a special move that allows them to perform great feats. Read more about special abilities (like Shovel Knight's "Strike The Earth Ability") in the Special Actions section on page 24.
- Accessory Slot: Placement for Accessory and Powder Equipment Cards. Read more about Equipment Cards on page 23.
- Armor Slot: Placement for Armor and Cloak Equipment Cards. Read more about Equipment Cards on page 23.
Basic Enemy
The basic enemies being fought throughout the game include Boneclangs, Propeller Rats, Wizzems, Goldarmors, Hoverhafts, and Liquid Samurai.
Enemy Stat Sheet
The Enemy Stat Sheet displays the stats, special abilities, and coin value earned when you defeat a basic enemy during the game.
Enemy Stat Card breakdown:
- Enemy Name
- Enemy Health
- Enemy Attack
- Enemy Defense
- Enemy Coin Value
- Enemy Attack Type and Special Rules
Bosses
The Bosses are members of the dastardly Order of No Quarter, foes sent by the evil Enchantress to do anything they can to stop our Knights!
Boss Stat Card
Each Boss has a card for players to keep track of their stats. The card also shows their special end-of-round attack. The cards feature a health (HP) tracker for players to keep track of a boss's health (HP) throughout the fight.
Boss Stat Card breakdown:
- Boss Portrait
- Boss Name
- Health: The total number of Wounds needed to defeat the Boss
- Attack: The amount of damage a Boss hits for
- Defense: The number of Hits the boss automatically blocks from Knight Attack Actions
- End-Of-Round Ability: A Boss's unique ability performed at the end of a round
- Boss Health Tracker: This is used to keep track of the Boss's current Health using the plastic tracker clip
Boss Artificial Intelligence (AI) Cards
Each Boss comes with its own AI Deck. These eight (8) card decks show players how Bosses attack each round, as well as where the Boss moves to. Read more about Boss Fights on page 29.
Boss AI Card breakdown:
- Name of Attack
- Boss Attack Description: This grid of the Boss Tile shows which spaces the Boss's attack hits (marked by red spaces), which spaces are safe (marked by white spaces), and the space the Boss model moves to (represented by their pixel portrait). Sometimes this will describe an attack rather than show it.
Tiles
Throughout the game, the tiles are constantly being shifted from right to left to represent the side scrolling dungeon the Knights are traveling through to reach the Boss of the dungeon. There are Planes of Passage Tiles, as well as Dungeon Tiles that are specific to each Boss's stage. Read more about how to use tiles on page 27.
Play Area Tile Track
During the game, the tiles are slid onto and off of the Tile Track. The Tile Track acts as a guide allowing the tiles to slide from right to left smoothly. Read more about using the Tile Track along with the Tiles on page 27.
Spawn Cards
The Spawn Cards indicate which enemies show up on Spawn Points. Read more information on spawning enemies on page 13.
Environment Cards
Certain Dungeon Tiles require Environment Cards to be used when they appear on the board or when a space on those tiles is interacted with. Each Dungeon Tile set has their own unique rules, and some have special Environment Cards of their own. Read more about Dungeon Tiles section, starting on page 31.
Equipment Cards
Equipment Cards are pieces of gear purchased from Chester that modify a Knight's stats or gameplay. Read more about Equipment Cards, how to purchase them, and how to equip them on page 22.
Treasure Mound Tokens
Treasure Mound Tokens represent dirt mounds that may be dug up by players to earn Coins and Loot cards. The tokens are placed onto the board during the setup stage, as well as when a new tile is placed onto the Tile Track at the end of a round. Read more about placing and picking up Treasure Mound Tokens in the Setup section on page 13.
Loot Cards
If a Knight ever finds a Treasure Chest from a Treasure Mound or a Knight is defeated, then that Knight instantly draws one (1) Loot Card from one (1) of the four (4) Loot Decks. There are four (4) different types of Loot cards: Relics, Arcana, Curios, and Heirlooms. Read more on page 21.
Coin Tokens
During the game, players are competing against each other to defeat the boss and collect Coin Tokens. The Player with the most Coin Tokens at the end of the game wins! Players collect Coin Tokens by either defeating enemies or digging up Treasure Mound Tokens. Coin Tokens are also used as a resource for some Loot cards and Hero Special Abilities.
Heart Tokens
Heart Tokens represent the number of Wounds a Knight or Enemy has received. If a Knight receives any Wounds, place Heart Tokens equal to the number of Wounds they have received on their Knight card. When an Enemy is Wounded, place Heart Tokens equal to the number of Wounds it has received next to the Enemy Model on the tile. If an Enemy moves, be sure to move their Heart Tokens with them. When a Knight or Enemy has taken Wounds equal to their overall health, they are Defeated. If an Enemy is Defeated, remove any Heart Tokens tied to them from the board. Read more on page 17.
First Player Token
The Player with this token gets to go first in the game round. At the end of each round, the First Player Token passes to the player on the left.
Dice
Dice are rolled to determine the success of actions taken by the Knights. There are three (3) different symbols on the dice: Shovel, Armor, Jump.
- Shovel: Each Shovel symbol represents one (1) successful Hit when performing an Attack Roll.
- Armor: Each Armor symbol represents one (1) successful block when performing a Defense Roll.
- Jump: Each Jump symbol represents one (1) success when performing a Jump Roll.
Game Setup
Here is a step by step guide on how to initially set up a game of "Shovel Knight: Dungeon Duels":
- Set the Tile Track in the middle of the play area.
- Each Player chooses one (1) Knight and their matching Knight Hero Card, and three (3) Coin Tokens. Set these on the play area in front of each player.
- The player that most recently played the Shovel Knight video game or has most recently used a shovel is set as the First Player and receives the First Player Token.
- The First Player decides which Boss the Knights will fight. (If this is your first time playing "Shovel Knight: Dungeon Duels", we recommend starting off against King Knight.) Set the Boss's Model off to the side.
- Shuffle the chosen Boss's Artificial Intelligence (AI) Deck and take it and the Boss's Stat Card and place them next to the Play Area face down.
- Shuffle the Spawn Deck and place it off to the side, face down.
- Shuffle the Equipment Deck and place it off to the side, face down. Then reveal three cards face up next to the deck to create the Equipment Shop.
- Shuffle the individual Loot Decks and place them off to the side, face down.
- Place all the Dice, Coin and Heart Tokens to the side.
- Find the Start Tile from the Plains of Passage Tile set, and place it onto the left side of the Tile Track.
- Find the chosen Boss's specific Dungeon Tiles and shuffle them together so that all tiles have the same dungeon side facing the same way. Place the tiles so that the side of the tiles showing the chosen dungeon is face down to the right side of the Tile Track.
- Shuffle the four (4) Planes of Passage Tiles, and place them face down on top of the stack of Dungeon Tiles.
- Draw three (3) Tiles from the top of the tile stack that was just created and place them face up onto the Tile Track next to the Start Dungeon Tile one at a time. Ensure all arrows at the top of the Tiles are pointing up.
- Shuffle the Treasure Mound Tokens face down, then place them onto the board in a Checkerboard pattern starting on the tile next to the Start Tile in the top space on that tile. Treasure Mound Tokens may also be placed onto spike pits.
By the end of setup, your board should look like the example below. You are now ready to fight for Shovelry!
Gameplay
A normal game round has three phases: the Hero Phase, the Enemy Phase, and the End-of-Round Phase. Boss fights follow the same phases as normal game play, but with minor changes to the Enemy Phase and End-of-Round Phase.
Hero Phase
Starting with the Knight with the first player token, each Knight can take three (3) actions during their turn.
Hero Actions - On a Knight's turn, they may choose to either Move, Attack, Jump, Stand Up from being Knocked Down, Purchase Equipment, use Loot Cards, or use their Knight's Special Action. Knights may perform these actions multiple times, in any order.
Move Action
When a Knight performs a Move Action, they may move their Knight one (1) space up, down, left, or right. Diagonal moves are not permitted, as Shovel Knight is already dealing with more dimensions than he is used to! Knights may not be moved into full Spaces that contain four (4) models or move through walls, unless a card or an ability states otherwise. Knights may not be pushed or move off of the board.
One exception to this is when there are no remaining tiles left in the tile stack, Knights may move off the board to the right side of the Play Area during their turn. Once a Knight moves off the board, they are safe from Enemies and other Knights and will enter the game again during the Boss Fight. Read more about Bosses on page 29.
Ex. 1: The Knight may move to an adjacent space, NOT a diagonal space.
Ex. 2: The Knight may move up or down, but not to the right due to the four Goldarmors since they fill up the space.
Using a move action allows a Knight to pick up Coin and Treasure Mound Tokens on the board.
Coin Tokens and Treasure Mound Tokens - When a Knight moves onto or through a space containing Coin Tokens or Treasure Mound Tokens, the Knight picks up those tokens for free. If it's a Coin Token, add it to your personal coin pile. When the Knight picks up a Treasure Mound Token, flip it over to reveal one of the types of treasure:
-
Gem: If the Treasure Mound Token reveals a gem with a number on it, the Knight is instantly rewarded with Coin Tokens equal to the number on the gem. Sometimes you will get lucky and find the rare Music Scroll, which awards five (5) Coins!
Ex. 1: Shovel Knight moves into a space with a Treasure Mound Token. The Knight flips over the token and it's a gem worth three (3) coins! The Knight then adds three (3) coins to their coin pile, and discards the Treasure Mound Token.
-
Treasure Chest: If the Treasure Mound Token reveals a Treasure Chest, the Knight is instantly rewarded with a Loot Card. Draw one (1) Loot Card from any of the four (4) Loot Decks, and place it near your Hero Card. You are only allowed to hold three (3) Loot Cards at a time, but you can discard a Loot Card without using its ability from your hand to acquire a new one. Read more about Loot Cards on page 21.
Ex. 2: Shovel Knight moves into a space with a Treasure Mound Token. The Knight flips over the token and it reveals a Treasure Chest. The Knight may then draw a Loot Card from the top of any Loot Card Deck, and they discard the Treasure Mound Token.
Attack Action
Whether a Knight wants to attack an Enemy or knock a rival Knight out of their way, their Knight must perform an Attack Action to do so.
How to attack an Enemy: You can either choose to attack an Enemy, a Boss, or a Rival Knight. When attacking an Enemy or Boss, a Knight is trying to Wound them and gain Coin Tokens. When attacking a Rival Knight, a Knight is attempting to push them into a space of their choosing. It is against the code of Shovelry to Wound other Knights.
- A Knight must declare which Enemy they want to attack. If it's a MELEE attack, they need to be in the same space as the enemy. If it's a RANGED attack, the enemy must be in the same space or in a space along a straight line to the attacking Knight. (more info on attack types below.)
- The Knight then gathers dice equal to their Knight's Attack Stat (listed on the Hero Card) plus any bonuses from Loot cards or Equipment cards.
- The Knight then rolls the dice and counts the number of Shovel symbols. Each Shovel symbol represents one (1) Hit.
- Subtract the number on the Enemy's Defense Stat from the total number of Shovel symbols rolled. Each Shovel symbol not blocked by the Enemy's Defense Stat deals one (1) Wound to the Enemy.
- Place Heart Tokens equal to the amount of Wounds dealt to the Enemy next to the Enemy Model. If the number of Shovel symbols remaining is equal to or more than the Enemy's Health Stat (HP), the Enemy is Defeated and removed from the game.
- The Knight earns Coin Tokens equal to the Enemy's Coin Value listed on the enemy stat card.
Ex.: Here is an example of a melee Attack. Shovel Knight moves into the space of the Goldarmor. He rolls his attack, which is three (3) dice. The results of the roll are a Double Shovel, Single Shovel, and an Armor+Jump. Since he needs Shovels for successes, he has three (3) Hits on this roll. The Goldarmor has a defense of one (1), so he blocks one (1) of Shovel Knight's three (3) Hits. The difference is two (2) Hits, and since it wasn't blocked by the Goldarmor, he suffers one (1) Wound.
How to attack a Rival Knight:
- Declare which Knight you want to Attack.
- Gather dice equal to your Knight's Attack Stat (listed on the Knight Card) plus any bonuses from Loot cards or Equipment cards.
- Roll the dice and count the number of Shovel Symbols rolled.
- The Rival Knight gets a chance to perform a Defense Roll to defend themselves against the attack. Gather dice equal to their Knight's Defense Stat (listed on the Hero Card) plus any bonuses for Loot Cards or Equipment Cards.
- Based on the results of the Defense Roll, there can be two outcomes:
- If the defending Knight rolls less Armor than the attacking Knight's Shovels, then the defending Knight will be Pushed one (1) space into any adjacent space of the attacking Knight's choosing.
- If the defending Knight rolls equal to or more Armor than the attacking Knight's Shovels, then they are NOT Pushed at all and remain in their space.
Ex.: Shovel Knight moves into the space of the Rival Knight. He rolls his attack, which is three (3) dice. The results of the roll are a Double Shovel, Armor+Jump, and Single Shovel. Since he needs Shovels for successes, he has three (3) Hits on this roll. The Rival Knight rolls two (2) dice for his defense, and the results are a Double Armor and a Single Shovel. This means he has rolled two (2) defense successes. Shovel Knight has more hits than the Rival Knight could defend against, so now Shovel Knight pushes his rival one (1) space away in any direction he chooses!
There are three (3) different types of attack:
- MELEE: A MELEE attack is the most basic form of attack in the game. You must be in the same space as your target to perform a melee attack.
- RANGED: A RANGED attack can hit the same space your Knight is in, or any space away from your knight in a straight non-diagonal line.
- CASCADING: A CASCADING attack is a special "bouncing" attack. When you perform this attack and you successfully wound the target, you may continue the CASCADING by rolling an additional attack at -1 attack die on a target in the same space. This may continue until the attack fails or you run out of dice. If you fail to wound a target, you suffer Knock Down, unless it is a RANGED CASCADING attack.
More on Defending against Enemy Attack on page 25.
Ex.: Here is Shovel Knight's ability he can use as his Special Action: "Strike The Earth!" - Perform a Cascading Attack on a target model in your space. If you successfully Wound the target, you may continue the Cascading Attack on a target in your space, or move one (1) space and continue the Cascading Attack on a target in the new space. If you fail to Wound a target, your attack ends and you suffer Knock Down.
Jump Action
During the game, Knights may find themselves next to a Spike Pit or other Hazards and need to perform a Jump action to get across to avoid being Defeated. Knights may jump over multiple spaces in a single Jump Action, and they can either jump in a straight line or potentially in an "L" shape based on the path they chose.
How to perform a Jump Action:
- First, a Knight must be in a space next to a Hazard, which includes: Spike Pits, Potion Vats, Lava Spaces, Ice Spaces, and Water Spaces.
- The Knight must choose a space that is across from the Hazard they wish to jump to.
- The number of Spaces away from the Knight Model is the number of Jump symbols needed to successfully jump across the Hazard.
- The Knight then gathers dice equal to the Knight's Jump Stat, plus any bonuses from Loot cards and or Equipment cards.
- The Knight then rolls the dice and counts the number of Jump symbols. If the roll contains at least as many jump symbols as the number of spaces away from the declared Space, then the Knight has successfully made the Jump and may move their model to the declared space.
- If a Knight does not roll enough Jump symbols to successfully jump, then the Jump Action failed and the Knight falls into the Spike Pit and is instantly Defeated. Read more about other Hazards in the Boss & Dungeon tile section starting on page 31.
Ex. 1: Shovel Knight wants to jump over the Spike Pit next to him. He rolls two (2) dice based off his Jump Stat, and the results are a Shovel+Jump, and an Armor+Jump. This means he has two successes, and can successfully jump over the Spike Pit.
Ex. 2: Shovel Knight can also take an "L" shaped path when he attempts a Jump Action.
You automatically pick up all Treasure Mound Tokens and Coin Tokens that are located on Spike Pits while jumping over them!
Ex. 3: Shovel Knight successfully jumps over a pit with a Coin Token (most likely left there by an unlucky rival Knight!) and a Treasure Mound Token. Shovel Knight then flips over the one (1) Treasure Mound Token to reveal it's worth one (1) Coin, and he also picks up the additional one (1) Coin Token on that space. The Knight adds two (2) Coin Tokens to their stash!
If a Knight fails to jump over a Spike Pit, the Knight falls into the first Spiked Pit and is Defeated. When a Knight is Defeated, the model is removed from the board. Half of that Knight's Coin Tokens (rounded down) are left on the space where they were Defeated. Anytime a Knight is defeated, the Knight gets to draw one (1) Loot Card from a deck of their choice. On their turn, they may respawn back onto the board on any non-Hazard space on the left-most tile. If there are no safe spaces on the left-most tile, spawn on the next tile that has safe spaces.
Stand Up Action
A Knight suffering Knock Down must spend one (1) Action to stand back up, and may not take any other action until they do so.
Using a Loot Card
Unlike Actions, Knights may use any amount of Loot Cards during their turn as "Free Actions". Some Loot Cards can be used after a Knight has been attacked by an Enemy or a rival Knight. Loot Cards are only affected by Equipment Cards that allow rerolls. To use a Loot Card, read the text at the bottom and follow its directions. A Knight can hold up to 3 Loot Cards.
Ex.: The "Flare Wand" Loot Card reads: "RANGED: ATK 4. Hit all models in one space. All Knights Hit are pushed." Since this Loot Card uses the Keyword "Ranged", you can attack enemies in a space an unlimited range away in a straight line. You roll four (4) dice, and every Hit is applied to all the enemies in that space.
If a Rival Knight is hit, that Knight can defend against the attack. If they succeed in defending, nothing happens to them. If they fail to defend the attack, they are pushed one (1) space away in the direction of the attacking player's choosing.
There are four (4) different types of Loot Cards to choose from: Relics, Arcana, Curios, and Heirlooms. The main difference between them is they all have a unique alternative ability listed on the back of their cards. A Knight may choose to use the special ability on the front of the card or discard the card for the ability on the back. They must choose which ability to use.
- Relic: Discard a Relic to gain two (2) automatic successes on your next dice roll. This must be done before you roll the dice and does not affect Special Hero Actions, like Shovel Knight's "Strike the Earth".
- Arcana: Discard an Arcana to re-roll your last dice roll.
- Curio: Discard a Curio to force another Knight to reroll their last dice roll.
- Heirloom: If you keep an Heirloom in your hand at the end of the game, you gain +5 coins per Heirloom.
Here's an example of how to discard a relic in a fight with an enemy:
Ex.: On Shovel Knight's turn during the Hero Phase, he gets into a fight with a Goldarmor. He discards a Relic Loot Card for +2 successes on his next dice roll. He rolls his normal attack of three (3) dice, and rolls a Double Shovel, Single Shovel, and an Armor+Jump. This means he rolled three (3) successes. He then adds two (2) successes to his attack from discarding the Relic Loot Card, combining together for an impressive five (5) successes overall! The Goldarmor has no chance to block against this barrage of shovels from our favorite blue Knight!
After using a Loot Card, the card is then discarded next to the Loot Card Deck it came from. If a Loot Card deck is ever empty, shuffle the cards from the appropriate discard pile and place those cards face down to form a new deck.
Purchasing and Slotting Equipment Cards
Your Knight will have the chance to purchase equipment from Chester to get an advantage against their fellow Rival Knights. Equipment cards grant Knights permanent upgrades that are never lost when defeated.
Purchasing Equipment Cards: If a Knight is in the same space as Chester, the Knight can use an action and spend Coins to purchase an Equipment Card from the Equipment Shop. Each additional Equipment Card purchase requires the use of one (1) additional Action.
Ex.: Shovel Knight moves into a space containing Chester. He then spends one (1) action and one (1) Coin to purchase his first piece of equipment. He will need to spend another action and two Coins to buy another piece of equipment, if he wants.
The Equipment Card's Coin price is based on how many Equipment Cards your Knight currently has: If your Knight doesn't have any Equipment Cards, it costs one (1) Coin for your first card. If your Knight has one (1) Equipment Card, it costs two (2) Coins for your next card. Every Equipment card purchased after the first two Equipment Cards costs three (3) coins.
Once you have purchased an equipment card, you immediately reveal a new equipment card to be added to the shop.
You may replace old Equipment Cards with newly purchased cards by discarding the unwanted Equipment Card.
Slotting Equipment Cards: After purchasing an Equipment Card, you can place it into its appropriate slot on your Knight's Hero Card. Its placement on the card depends on what type of Equipment Card it is. Equipment cards will either have a simple ability that is explained on the card or it will give your Knight a bonus to their stats. As an example, if an Accessory says "+1 Attack", that means the next time you attack, you roll an extra die on every attack!
There are 4 types of Equipment Cards: Accessories, Powders, Armor, and Cloaks:
Ex.: Plague Knight spends two (2) actions to buy two (2) Equipment Cards from Chester, the first costing one (1) Coin and the second costing two (2) Coins. He receives a Charge Handle (an Accessory) and Dynamo Mail (an Armor). They are then placed on his corresponding Accessory and Armor Card slots on his Knight Hero Card.
- Accessories: Your Knight can equip a maximum of two Accessories at a time. These items can permanently upgrade your abilities.
- Powder: A Powder may be equipped in an accessory slot or on top of another Accessory card. If a Powder is equipped on top of an Accessory, the Knight gains the bonuses of both cards. You can only have one (1) Powder equipped to each Accessory slot.
- Armor: Your Knight can only equip one (1) Armor at a time. Armor isn't just for defense, it can give a wide variety of bonuses.
- Cloaks: A Cloak may be equipped on the Armor slot or on top of an Armor card, and gains the bonuses of both cards. Like Armor cards, you can only have one (1) Cloak equipped to your Knight.
Special Actions
All Knights have a Special Action listed on their Hero Card. All Special Actions have a Coin cost that is required to be spent to perform the Action.
Ex.: Here is Shovel Knight's ability he can use as his Special Action: "Strike The Earth!". He spends one (1) coin and uses this ability on his turn as one of his standard actions.
At the end of a Knight's turn, the Knight to the left activates next. This repeats until you reach the Knight holding the First Player Token, which marks the end of the Hero Phase and the beginning of the Enemy Phase.
Enemy Phase
After all Knights have taken their turns, the Enemies on the board activate. During the Enemy Phase, all Enemy models move first, then attempt to attack a Knight.
Enemy Movement - All Enemies with a MELEE attack move one (1) adjacent Space towards the closest Knight model, while Enemies with a RANGED attack move one (1) space to get into attack range of the most accessible Knight. Enemies do not move if they are already within attack range of a Knight. If there is a tie for which model is the closest, the enemy moves towards the Knight with the most Coins. If the tie remains, the enemy moves towards the Knight that is higher in the turn order.
The Enemy order of movement is:
- Liquid Samurai
- Hoverhafts
- Goldarmors
- Wizzems
- Boneclangs
- Propeller Rats
Enemy Attack - Once Enemies have moved, those in attack range of a Knight will attack. Attack range for melee Enemies is in the same space as the Knight they wish to attack. Attack range for ranged Enemies, such as the Wizzem, is an unlimited amount of spaces in a straight line from the Wizzem.
Unlike Knight attacks, you do not roll for an Enemy's attack. Instead, they automatically hit a Knight for the amount of their Attack Stat, which can be found on the Enemy Stat Card. Knights will then make a defense roll against the incoming Hits. All Enemies attack at the same time, so plan your moves carefully.
Defending Against Attacks - To defend against an Enemy Attack, roll the number of dice equal to your Knight's Defense Stat plus any modifiers granted by Equipment and Loot cards. Each Armor symbol rolled blocks one (1) incoming Hit. Any Hits not blocked deal one (1) Wound to your Knight. Place Heart Tokens onto your Knight Card equal to the amount of Wounds received. If your Knight receives Wounds, the Knight is pushed one (1) Space to the left. This is to replicate the effect of taking damage from the Shovel Knight video game.
Ex.: During the Enemy Phase, a Goldarmor moves one (1) space towards the closest Knight, which is Shovel Knight, to get into Melee attack range. It attacks Shovel Knight for two (2) Hits. Shovel Knight rolls his defense of two (2) against the Goldarmor's attack. The results of the roll are a Shield+Jump, and a Single Shovel. This is not enough to stop the Goldarmor's attack! The Hit that made it through Shovel Knight's defense turns into a Wound, and Shovel Knight is pushed back one (1) space to the left.
If you are already on the leftmost tile on the Tile Track and take a Wound, then you are Knocked Down instead of being pushed left. When a Knight suffers Knock Down, the Knight's model is placed on its side. A Knight suffering Knock Down must spend one (1) Action to stand back up, and may not take any other action until they do so.
If a Knight has Heart Tokens equal to the Knight's HP, the Knight is Defeated. Read more about Defeated on page 20.
Enemy Special Rules
- Propeller Rats and Hoverhafts are flying enemies and can stand on all Hazards.
- Hoverhafts push all Knights that are in a straight line to the left of it left one space before the enemy phase.
- Liquid Samurai may move past all Hazards but cannot end their move on Spike Pits.
After all the enemies have moved and attacked, the Enemy Phase is over, and the End-Of-Round Phase begins.
End-of-Round Phase
When all the Enemies have completed their turn, the End-of-Round Phase begins.
- The leftmost Tile is removed from the Tile Track. Any Knight or Enemy on that Tile is instantly defeated. Any Coin or Treasure Tokens remaining are discarded.
- Shift the remaining three (3) Tiles to the left on the Tile Track to fill in the space, then flip one (1) Tile from the top of the Tile Stack face up on the furthest right side of the Tile Track. The arrow at the top of the Tile should be pointing towards the top of the Tile Track.
- Place Treasure Mound Tokens face down onto the new Tile, continuing the "checkerboard" pattern from the previous Tiles. The checkerboard pattern can be seen on page 13.
- If there are any Spawn Point symbols on the new Tile, draw one (1) Spawn Card for each new Spawn Point space starting with the top Space.
- The Round is now over. The Knight holding the First Player Token passes the token to the Knight to their left.
- Start a new Round with the Hero Phase.
How Tiles Affect Gameplay
Throughout the game, the tiles are constantly being shifted from right to left to represent the side scrolling dungeon the Knights are traveling through to reach the Boss of the dungeon: a member of the Order of No Quarter or the nefarious Enchantress. Each tile is double sided to add variety to the game. There are two types of tiles: Plains of Passage Tiles and Dungeon Tiles. Tiles must be placed with the arrow side pointing up to the top side of the Tile Track.
- Start Tile - this tile is used at the beginning of every session of "Shovel Knight: Dungeon Duels.", and can be seen at the left side of the example.
- Plains of Passage Tiles - Plains of Passage Tiles are double-sided tiles and are used in each session of "Shovel Knight: Dungeon Duels." Here's the breakdown of these Tiles:
- Spaces - each tile contains four (4) spaces that can hold four (4) models.
- Spike Pits - the Spike Pits are dangerous Hazards the Knights must jump over to continue playing otherwise they are instantly defeated.
- Spawn Points - Enemies are spawned on the space containing a spawn symbol.
- Chester - a Knight in this space may spend Coins to buy new Equipment Cards from Chester.
- Dungeon Tiles - Dungeon tiles are a set of five (5) tiles unique to each Boss. These tiles are double-sided and represent a different stage that lead to specific Bosses in the game while having their own unique rules. Below are some examples of the different stages you'll be battling your way through to prove you are the best Knight of them all, which includes Pridemoor Keep, the Lich Yard, the Explodatorium, and the Tower of Fate. Read more about each specific Boss as well as their dungeon tiles starting after the Boss Setup section, on page 31. (King Knight's Pridemoor Keep, Specter Knight's Lich Yard, Plague Knight's Explodatorium, The Enchantress's Tower of Fate.)
When there are no remaining tiles left in the tile stack, Knights can move off the board to the right side of the Play Area during their turn. Once a Knight moves off the board, they are waiting in the Boss Room safe from Enemies and other Knights and will enter the game again during the Boss Fight.
Boss Fights
Before a Boss Fight can begin, you must first use all the Tiles from the Tile stack. Then, all Knights must exit to the right of the Tile Track. Now, it's time to face off against one of the infamous Knights from the Order of No Quarter!
Boss Fight Setup
- After all Dungeon Tiles have been shuffled off the board, or all Knights have left the play area, place the large sized Boss Room Tile onto the Play Area. Only the Enchantress boss fight takes place on the side with the Illusion Spike Pits.
- Place the Boss Stat Card next to the Play Area for all Players to see.
- Place the Boss Model in the spot shown in the diagram.
- Place your Knight model in any of the left most spaces. Up to four (4) Knights may start in the same space.
Attacking Bosses
Attacking a Boss works the same way as attacking a basic Enemy, except that when a Knight Wounds a Boss they receive two (2) Coin Tokens for each Wound dealt to the Boss.
Boss Activation
Bosses don't activate like enemies, but instead, they follow their Boss AI Deck which allows them to attack the Knights in unique and often devastating ways!
After each Knight's turn, draw one (1) Boss AI Card from the Boss AI Card Deck. The Boss AI Card shows an image of the Boss Tile in full. The spaces highlighted in red are attacked while spaces highlighted in white are safe. The Boss will move to the space shown on the card. If a Knight is standing in a red square when a Boss's AI Card is pulled, that Knight gets attacked by the Boss!
Knights must roll their defense against the attack. If a Knight receives a Wound, they must additionally drop one (1) Coin for each Wound received in that space, and they are pushed one (1) space to the left. If they are on the left-most side of the board, they are knocked down instead of being pushed one (1) space to the left. If a Knight is standing in a white square, that Knight is safe from being attacked by the Boss.
Ex.: In image #1, a Boss AI Card for King Knight reveals where he is attacking, which spaces are safe, and which space King Knight will be located in after his attack. In image #2, we see how the AI card affects the Boss Tile.
- Shows which spaces are being attacked
- Shows which spaces are safe from the attack
- Shows where King Knight will move to according to the AI card.
Any Knight caught in a space being attacked must roll their defense against the boss's attack, which can be found on their Boss Stat Card.
Once the Boss completes its turn, discard the AI card into a pile. If you run through the deck of Boss AI Cards, flip the discarded Boss AI Card deck over. Do not shuffle the deck. The Boss AI Card Deck can only be used like this three (3) times before the Boss Fight times out.
After the last Knight completes their turn for the round, the Boss performs the Special Action listed on the Boss Stat Card instead of pulling another Boss AI Card. The Special Action is unique to each Boss. If a Boss causes Enemies to spawn, they will activate after all Player Knights have gone but before the Boss resolves his end of round ability.
Winning the Game
The final Wound dealt to the boss is worth five (5) coins. Once the Boss has been defeated, or the Boss Fight timed out, the Knights add up their total Coins, plus their Heirloom Loot Cards, and the Knight with the most Coins is the winner!
If there is a tie, each Knight rolls three (3) dice. Whoever gets the most shovel symbols wins!
Special Boss and Dungeon Tile Rules
Each Boss and their set of Dungeon Tiles have their own unique rules. In the following pages, we'll cover all of these rules for each Boss and their stages.
King Knight - Pridemoor Keep
King Knight isn't a king, he is a king-themed knight. But that doesn't stop him from making decrees! As the lord defender of Pridemoor Keep, he commands a formidable army of minions. King Knight is a master of single combat. And because he's dressed to the nines at almost all times, he's always ready for a brutal coronation!
Tile Rules - Pridemoor Keep has walls that can make these tiles a dangerous maze! Enemies and Knights may not move through walls unless they have a Loot Card or special ability that states otherwise.
Ex.1: Shovel Knight's path is blocked in step #1 by walls. In step #2, he successfully jumps over the Spike Pit. In step #3, he uses the rest of his actions to move around the wall.
Specter Knight - Lich Yard
In life, Specter Knight was a cruel and cunning warrior. And although his blood is now icy cold, he is no less formidable as a phantasm. The most begrudgingly loyal knight of the Order, Specter Knight follows the Enchantress only because she is capable of magically extending his undeath. Clutching a grim Scythe in his shriveled claws, Specter Knight commands his weapon with uncommon cunning... and his next target is Shovel Knight.
Tile Rules - The Lich Yard tiles have special spaces called Lantern Spaces. The Knights will need to jump into these spaces with one (1) Jump Roll success, instead of treating it like a Hazard. If a Knight successfully jumps onto a Lantern Space, they must immediately jump onto an adjacent space, which can be another Lantern Space. This may continue until you land on a safe space. The additional jumps are all considered part of the same action.
After a player has jumped out of a Lantern Space, the Lantern in that space is considered broken, and a Spike Pit Tile Card must be placed on top of the Lantern Space.
If you fail to successfully jump onto or out of a Lantern Space, you treat it like a Spike Pit. Your hero falls in, and is defeated.
Ex.2: In step #1, Shovel Knight jumps onto a "Lantern Space", using a Jump Action and rolling one (1) Jump Success. In #2 he jumps up to another "Lantern Space" continuing the same action by rolling another one (1) Jump. In #3 he finishes his action by finally jumping to a safe space with a jump of one (1).
Ex.3: In step #4, Spike Pit Tiles are placed onto the Lantern Spaces that the blue Shovel Knight successfully jumped across once he completed his action. He's made it more difficult for his rival Knight to cross now!
Boss AI Rules - Specter Knight's AI Cards occasionally summon Boneclang enemies onto the board. Simply place a Boneclang in the same space as their sprite appears on the AI Card when it is pulled. Boneclangs will go at the end of the round, after the Player Knights go but before Specter Knight's end of round ability.
Ex.4: One of Specter Knight's Boss AI cards is pulled that shows two (2) Boneclangs that need to be spawned onto the board. Place them onto the board where the card indicates, which in this example is in the second row/second column, and third row/third column.
Plague Knight - Explodatorium
Sometimes, the bomb is mightier than the sword. Deep in the recesses of his alchemical lab, Plague Knight perfects concoctions both poisonous and explosive. Even his comrades give Plague Knight a wide berth, because he spreads more than just the common cold. With an array of mysterious and magical bottles at his side, Plague Knight could be considered the black sheep of The Order of No Quarter.
Tile Rules - Plague Knight's tiles sometimes include a Potion Vat Symbol in the upper right corner of a space. When a tile with a Potion Vat Symbol comes onto the board, place one Potion Vat Card onto the space with the symbol on it. This is considered a Hazard.
Potion Vats are explosive! If a Knight attacks a Potion Vat with one (1) or more successes, it explodes and causes one (1) automatic Wound to all Close models (Close affects the same space as the effect taking place as well as all adjacent spaces) and pushes them all one (1) space to the left. If the model is in the same space as the Potion Vat when it explodes, they are Knocked Down instead of being pushed one (1) space to the left.
This explosion can also cause an adjacent Potion Vat to explode, causing a chain reaction! Deal with the Wounds of each Potion Vat explosion as well as the effects of being pushed by that explosion individually per Potion Vat. If a Vat explodes and chains to two (2) other Vats at the same time, the attacking Knight decides which Vat explodes next.
Potion Vats are considered taller than the base level of the tiles. If a Potion Vat blocks your way, you may attempt to jump onto them with a Jump Action and one (1) Jump success. If a Knight wants to jump across a single Spike Pit onto a Potion Vat on the other side, the required number of successes would be three (3) instead of the normal two (2), due to the Vat's increased height.
Placing Potion Vats example: When placing a Potion Vat Card as shown in Ex. 2, one of its spaces has a Potion Vat Symbol in the corner. As shown in Ex. 3, Knights need to place a Potion Vat Card onto that space immediately after the tile is slid onto the board. (Ex.1 shows a Potion Vat Symbol and a Potion Vat Card.)
Attacking Potion Vats example: In Ex.4, Blue Shovel Knight attacks Potion Vat #1 that he is standing on. In Ex.5, it explodes and causes one (1) Wound to Blue, Yellow, and Red, while Knocking Down Blue and Pushing Red and Yellow left one (1) space. Vat #1 exploding causes Vat #2 to explode (since it's in an adjacent space), causing another Wound to Red and knocking him another space to the left. Finally, Vat #2 causes Vat #3 to explode, but since all Knights have been pushed away from the explosion, no damage occurs.
Jumping on/to Potion Vats example:
- Ex.6: To jump onto a Potion Vat, Shovel Knight only needs to roll one (1) Jump success.
- Ex.7: To jump from a Potion Vat onto another Vat, Shovel Knight treats it like a normal Jump Action, since both vats are at the same height.
- Ex.8: To jump from the base tile onto a Potion Vat, Shovel Knight needs to roll one (1) additional success, since the Vat is considered higher ground.
A Knight may move with a Move Action from one Potion Vat to an adjacent Potion Vat since they are at the same height.
Boss AI Rules - Plague Knight's AI Cards occasionally summon Potion Vats onto the board. Simply check the AI card, and place a Potion Vat Card onto the Boss Tile where the AI card shows (see Ex.9).
- If a Potion Vat is spawned onto a space with a Knight in it, the Knight moves one (1) space of that Knight's choosing that does not contain a Potion Vat. If all adjacent spaces contain Potion Vats, then the Knight moves to the closest open space.
- If a Potion Vat is to be spawned where there already is a Potion Vat, then no additional Potion Vat is spawned.
Treasure Knight - The Iron Whale
Treasure Knight is greedy, so his campaign will be about coming to the surface in search of treasure, where he is drawn into the conflict. Expect him to explain the reasons for his self-imposed exile. Treasure Knight's Whale shaped submarine was used around the Valley's sea to plunder sunken wrecks.
Tile Rules - The Iron Whale tiles are flooded with Water Spaces, a Hazard that slows down the Knight's movement. A Knight in a Water Space must spend two (2) Move Actions to move out of the Water Space. Water Spaces may be Jumped over like other Hazards.
Ex.1: Shovel Knight moves into a water space for one (1) Move Action. It takes him two (2) Move Actions to move out of a Water Space. He's spent his whole turn trying to move through! Make sure to plan your path so you don't get stuck.
Boss AI Rules - Treasure Knight spawns Spike Pits onto the board during his Boss fight, as well as automatically Pushes Knights around with the power of water.
When the Boss AI Card shows a Spike Pit, you lay the Spike Pit on its corresponding space on the board.
If a Spike Pit is placed onto the same space as a Knight, the Knight gets a chance to jump to a safe space.
Ex.2: The Boss AI card pulled shows two (2) Spike Pits on it. Place the Spike Pit Cards on the Boss Tile in their corresponding spaces.
When Treasure Knight automatically Pushes Knights with water, move the Knights one (1) space in the direction of the arrow on the Boss AI Card. Push the Knights first, then resolve Hits done by the Boss.
Ex.3: Treasure Knight pushes all Knights that are in spaces with a light blue arrow down one (1) space. This includes Green and Yellow Shovel Knight. Yellow is knocked into the side of the board, and since there is nowhere to go he hits a wall and is Knocked Down. Green is pushed into the attack zone, and will be attacked for two (2) along with Blue and Red.
Ex.4: Green, Blue, and Red failed their Defense Rolls against the Hits. They all take two (2) Wounds, and drop two (2) Coins in the space they suffered the damage (if they have enough Coins in their pool).
Polar Knight - Stranded Ship
Titanic and terrible, Polar Knight guards the stranded ship in the frozen south. A silent giant wielding a two-handled snow shovel, he is the largest and most brutish of the Order of No Quarter. Some time in the past, Shovel Knight and Polar Knight have crossed Shovels before.
Tile Rules - The Stranded Ship is covered in slippery Ice Spaces.
When a Knight moves onto an Ice Space, they must continue moving in the direction they entered the space from until they are no longer on an Ice Space or hit a Wall or board edge. Walls here function the same way as they do on the Pridemoor Keep Tiles. A Knight may not stop on an Ice Space from a move action.
Ex.1: Shovel Knight moves to the right onto an Ice Space. He continues sliding to the next adjacent space to the right as part of the same Movement Action. It can be fun...unless you slide into DANGER!
Ex.2: Shovel Knight moves onto the Ice Space in #1. He then slides over two (2) Ice Spaces directly into a Wall in #2. He hits the wall and is Knocked Down in #3.
If a Knight jumps onto an Ice Space, or lands there due to Flying from a Loot Card, they will not slide.
Ex.3: Shovel Knight jumps over the Spike Pit, and lands on an Ice Space. He lands there firmly and does not slide.
Boss AI Rules - Polar Knight will occasionally place Spike Pits and Ice Spaces onto the board during his Boss fight. The AI card will show where to place both onto the board. These are not permanent, as they are removed from the board at the end of the round, after the Boss goes.
Ex.4: The drawn Boss AI Card needs both Spike Pit and Ice Space cards to be placed onto the Boss Tile. Simply place the corresponding tiles onto the board, matching the AI card.
If an AI card would place a Spike Pit or Ice Tile onto an existing Hazard, the new Hazard replaces the old one. If Polar Knight lands onto a Spike Pit, replace the Spike Pit with an Ice Tile.
Mole Knight - The Lost City
The shovel may rule the confines of man-made gardens, but in the wild, the titan of tunneling is the mole! Mole Knight embraces this truth wholeheartedly. With his modified drop-forged armored claws, he mockingly tears through the earth with brute strength! Mole Knight calls the subterranean Lost City his home... an ancient abandoned metropolis. Shovel Knight must pass through the Lost City, but chances are slim he won't be challenged to see who is truly the master of digging.
Tile Rules - The Lost City has three (3) different types of special spaces that Knights will have to deal with: Lava Spaces, Slime Spaces, and Big Bohto Spaces.
Lava Spaces - These spaces function exactly the same as Spike Pits. If a Knight or enemy falls into it, they are defeated.
Slime Spaces - If a Knight moves into or lands on this space, they must immediately take a free jump action to a new space with their roll counting as having +1 additional success.
Big Bohto Spaces - These tiles also have a unique moving element called the Big Bohto, who is a huge beetle that moves back and forth, left to right on the spaces with its symbol on it.
The Big Bohto functions like a moving Slime Space. If a Knight jumps onto the Big Bohto, they must immediately perform a free Jump Action to a new space with their roll counting as having +1 additional success.
If you fail jumping onto the Big Bohto or jumping from it, your hero will fall into the Lava and be defeated.
When the first Lost City Tile is set on the Tile Track, set the Big Bohto Card on the space with the Big Bohto Symbol on it with Big Bohto Card facing to the right.
Once there is a second Lost City Tile placed onto the Play Area, the Big Bohto starts moving one (1) space to an adjacent Big Bohto Space after each Knight's turn.
If the Big Bohto reaches the edge of the Play Area or a non-Big Bohto Space, then the Big Bohto card is flipped to face the opposite direction instead of moving.
If the Big Bohto Card moves onto a space containing Treasure Mounds or Coin Tokens, the Big Bohto picks up the tokens and they are placed onto the card and will continue to move with the Big Bohto.
Ex.1: Shovel Knight jumps onto the Big Bohto from a Plains of Passage tile. He bounces off the Bohto, performing a Free Jump Action with +1 Success to the roll. He rolls one (1) Jump Success, and with +1 from using the Big Bohto, it's more than enough successes to jump one space up.
Ex.2: A new Lost City tile has been shuffled onto the Play Area, and Shovel Knight is adjacent to a Lava Space with a Big Bohto symbol on it. Knights will set a Big Bohto Card in the space with the Big Bohto Symbol on it.
Ex.3: A new Lost City tile is placed onto the Play Area.
Ex.4: Red Shovel Knight goes first this round, and finishes his turn by moving into Blue's space. This triggers the Big Bohto to move one (1) adjacent space towards the new tile.
Ex.5/6: The Big Bohto moves to the edge of the Play Area. This forces him to turn around, and head back in Ex.6!
Boss AI Rules - If one of Mole Knight's AI Cards shows a Lava Space, place a Lava Space card onto the designated space shown on the card.
Ex.8: The Boss AI Card shows two Lava Spaces that need to be placed onto their corresponding spots on the Boss Tile.
Mole Knight will also Push Knights around with his Boss AI Cards. For an example on how to handle one of these cards, see Ex. 3 in Treasure Knight's Boss AI Card section above.
Special End-of-Round Ability Rules - At the end of the round, Mole Knight will spawn a Lava Card in the space of the Knight with the highest treasure, and then "hide" himself (by players moving his model off of the Boss Tile) and place one of four (4) Dirt Space Cards in the corners of the Boss Tile. Make sure to shuffle these Dirt Space Cards without looking at them before placing them into the corners.
If a Knight is in a corner space when Mole Knight's end-of-round ability is triggered, they must immediately make a free Move or Jump Action to move to a safe space.
Mole Knight will not activate again until a Knight finds him by "digging up" a Dirt Space Card, which they do by simply moving into a space containing one of these four cards. Once a Knight does this, flip the Dirt Space Card over; if a Lava Card is revealed, that Knight must immediately attempt a free Jump Action to a safe space. If the Lava Space Card with Mole Knight in it is revealed, remove all Lava Space Cards and Dirt Space Cards from the Boss Tile and place the Mole Knight model onto the space where you found him.
Ex.9: This is how the Boss Tile should look when Mole Knight's End-Of-Round ability is triggered, with Mole Knight being removed from the board in #1, and the Dirt Space Cards placed in the corners in #2, and a Lava Space being placed under Blue Shovel Knight in #3, who is currently in the lead. Blue Shovel Knight would immediately get a chance to jump to a safe space.
Propeller Knight - The Flying Machine
This aerodynamic ace commands the Enchantress' flying machine with the cocksure attitude of a sky pirate! With his Heli-Helmet, he can zoom short distances with ease. Shovel Knight encounters Propeller Knight on top of the aircraft as it zooms through the sky; earth fights against air in a true battle of elements!
Tile Rules - There are three (3) different elements you will deal with during your time on the Flying Machine: Open Air Pits, Cloud Spaces, and Flying Platforms.
Open Air Pits - Instead of Spike Pits, The Flying Machine Tiles have Open Air Pits which function exactly the same as Spike Pit Hazards.
Cloud Spaces - Cloud Spaces are temporary platforms that a Knight can stand on. When a tile contains spaces with the Cloud Space Symbol on it, place a Cloud Space Card onto that space. Once a Knight moves off of a Cloud Space Card, the card is removed from the tile.
If an enemy is caught when you remove the card, they fall to the world below and count as being defeated by the Knight who moved off the card. Any Knights that are standing on a Cloud Card when it is removed must immediately make a jump action to a new safe space.
Ex.1/2: Blue Shovel Knight moves through a Cloud Space that is occupied by Red and a Boneclang. As soon as he moves out of that space, it vanishes. Red now has to attempt a free Jump Action to see if he can survive, which he luckily rolls one (1) success and makes it safely to the platform! The Boneclang is less lucky, and falls to its doom and is counted as defeated by Blue, who gains two (2) Coins for his efforts!
Ex.3/4: Blue Shovel Knight uses all three (3) of his actions to move to the other platform. This causes the Cloud Space Cards to disappear, removing a safe path for Red to take!
Flying Platforms - The Flying Ship Tiles feature spaces with a Flying Platform symbol on them.
When a Tile with this Symbol on it enters the Play Area, place a Flying Platform Card on the bottom space of the tile so that the flying platform is pointing up. (See Ex.5.)
After each Knight's turn, the Flying Platform Card moves one (1) space vertically in the direction it is facing. When a Flying Platform Card reaches the edge of the board, remove all elements and flip the card so the arrows point the opposite direction it was going, then replace all the elements in their respective spots. This works similarly to the Big Bohto Card from Mole Knight's Lost City Tiles, the exception being that these move vertically instead of horizontally.
If a Flying Platform Card moves onto a space containing Treasure Mounds or Coin Tokens, the Flying Platform picks up the tokens and they are placed onto the card and will continue to move with the Flying Platform Card.
Ex.6-8: Blue moves onto the platform with all three (3) of his actions. Once his turn is done, the platform moves up one (1) space in Ex.7. In Ex.8, since it hit the top of the Play Area, it flips and starts going down.
Ex.9-11: The Flying Platform Card is moving up, and a Treasure Mound Token is in its path. In Ex.10, it picks up the Treasure Mound Token, and in Ex.11 it now carries it on the card in the space it picked it up, waiting for a Knight to dig up that treasure! The Flying Platform Card would then flip to point downwards after its movement as seen in Ex.8.
Boss Fight Rules - Propeller Knight's Boss Fight is staged differently than other Bosses, in that you bring Flying Machine tiles into the Boss Fight!
Find the two Flying Machine tiles that have the Flying Platform symbols on them, and place them in the center two lanes on the Boss Tile, with a Flying Platform Card facing up on the first tile starting from the bottom space, and a Flying Platform Card facing down on the next tile starting from the top space. (See Ex.12.)
The Flying Platform Cards move as they normally would, moving one (1) space in the direction they are facing after each Knight ends their turn, but before Propeller Knight activates. Cards will flip to head in the other direction after they hit the edge of the Play Area.
Boss AI Rules - Propeller Knight's AI Cards will sometimes push players left, right, or down, much like some of Treasure Knight's AI Boss Cards. The biggest difference is one of Propeller Knight's Cards will automatically push players two (2) spaces instead of just one (1)!
Ex.13: Propeller Knight's Boss AI Card will automatically Push Knights two (2) spaces down, based on the direction and number of arrows in each space on the Boss AI Card. Blue and Yellow are only Pushed two (2) spaces, which is lucky for them. Red is pushed into the edge of the Play Area, which acts like a wall and Red gets Knocked Down. Green is pushed off the platform and falls into an Open Sky Space, and is defeated in the process!
Tinker Knight - The Clockwork Tower
Some knights love rushing into the glory of battle, ready to crush the skulls of their enemies! Tinker Knight is not one of those knights. He does his fighting before the battle begins, laboring on diabolical devices that do his work for him.
Tile Rules - The Clockwork Tower is full of Conveyor Belt Spaces, that will move all models one (1) space in the direction the space's arrow is pointing at the end of the Hero Phase. If this pushes a non-flying enemy into a Spike Pit, the coin value of that enemy will be placed into the pit. Flying enemies are immune to conveyor belts.
Ex.1/2: Shovel Knight uses all his actions to move three (3) spaces, and ends his turn on a Conveyor Belt Space. In Ex.2, he will be moved one (1) space down automatically due to being on a Conveyor Belt Space at the end of the Hero Phase. He moves down because the Conveyor Belt Direction Symbol space points down.
Boss Fight Rules - Tinker Knight has a very unique boss fight with two stages; first you will face Tinker Knight as he is, and then after enough damage he'll jump in his Tinker Tank!
Phase One: Tinker Knight - In this phase, you'll be facing Tinker Knight outside of his mech, the Tinker Tank. For setup, collect the 2 "Wrench Throw" AI Cards and the 2 "Raining Wrenches" AI Cards from his Boss AI Deck and shuffle them together. This is Tinker Knight's AI Deck for the first phase; place the other AI cards to the side. (See Ex.3 for a reference to how the setup should look.)
This phase is easy and predictable as far as Boss Fights go, and he only has one (1) Defense. During the first phase of the Boss Fight, Tinker Knight does not use his End-Of-The-Round Ability "Homing Missile".
During this phase Tinker Knight can only take a maximum of five (5) Wounds. Once Tinker Knight receives his fifth (5) Wound, automatically move onto the next phase. It's now time for him to bring out the big guns and jump into his massive mech, the Tinker Tank!
Phase Two: Tinker Tank Mech - Place the Tinker Tank with Tinker Knight sitting on top of it in whichever space Tinker Knight took his fifth (5) Wound in. Then, take the four (4) Boss AI Cards used in Phase one and shuffle them with the remaining eight (8) Boss AI Cards. This will be Tinker Knight's AI Deck for the rest of the Boss Fight. Tinker Knight now has two (2) Defense and will begin performing his End-Of-Round ability.
Ex.4 shows how to set up the boss fight for Phase Two.
The Tinker Tank takes up a full space by itself, so to perform a Melee attack against Tinker Knight, your Knight will have to jump onto the Tinker Tank from an adjacent space for one (1) Jump Success to deal any damage. Alternatively, Special Abilities or Loot Cards may allow you to Fly on top of the Tinker Tank. A Knight may also attack Tinker Knight with a Ranged Attack from a Special Ability or Loot Card. (The Tinker Tank is made of assembled and punched-out cardboard.)
Ex.5: Shovel Knight jumps onto the Tinker Tank. Now he's got the chance to inflict some Melee damage!
Any time a Boss AI Card is pulled during Phase Two, any Knights on top of the Tinker Tank will automatically be attacked BEFORE the Tinker Tank moves to its new location. If a Knight successfully defends against the attack while on the Tinker Tank, then that Knight continues to stay on the Tinker Tank and moves to the new location with it.
Ex.6: Shovel Knight uses the Flare Wand to attack Tinker Knight on the Tinker Tank at Range from the ground.
Ex.7: A new Boss AI Card is pulled in Tinker Knight's Phase Two, as can be seen in graphic #1. In #2, Blue and Red Shovel Knight (who are standing on top of the Tinker Tank with Tinker Knight) now deal with the results of being attacked for two (2) Hits. Red blocks the attack in full, while Blue only blocks one Hit, taking one (1) Wound. He loses one (1) health and one (1) Coin Token. Then he is Pushed one (1) space left, as can be seen in graphic #3. Finally, the Tinker Tank moves to its new location on the Boss Tile according to the Boss AI Card, along with Red and Blue's dropped coin!
The Enchantress - Tower of Fate
Of all the monsters roaming Shovel Knight's world, none are as dangerous as the Enchantress. Cold, brilliant, and pulsing with vile power, the Enchantress is a preternatural force. Her Order of No Quarter carries out her will with ruthless might, although her origins remain shrouded in mystery. With a loyal army under her command, she is more than a match for a solitary knight with a lowly shovel... or so she assumes!
Tile Rules - Unlike normal Spike Pits, The Tower of Fate tiles include Illusion Spike Pit traps. These are marked by the Illusion symbol in the top right corner of a space.
Knights may move onto these spaces, but as soon as they leave the space they must put down a Spike Pit Card onto the Illusion space they left. If more than one player is on the Illusion Spike Pit, and one of the Knights moves off the space, the remaining Knights on that space must immediately make a Jump Roll to jump to a new safe space, even when it is not their turn.
Any enemy that falls into a Spike Pit as a result of a Knight's actions are considered defeated by that Knight, who gains the defeated enemy's coins.
Ex.1/2: Blue Shovel Knight moves through two (2) Illusion Spike Pit traps. As soon as he moves over them, Spike Pit cards are placed onto the spaces as shown in Ex.2, making the path far more dangerous for Red!
Ex.3/4: Blue Shovel Knight moves through an Illusion Spike Pit trap that already has a Boneclang and Rival Knight standing on it. This causes the space to turn into a Spike Pit in Ex.4, forcing Red to perform a Jump Roll to get to safety, and causing the Boneclang to fall to its demise. Blue gains two (2) coins for his efforts, since the Boneclang falling into the Spike Pit was caused by him.
Boss Fight Rules - As she is the Final Boss of the game, battling the Enchantress has a unique twist: Using the back side of the Boss Tile, every space has an Illusion Spike Pit trap symbol! Her End-Of-Round Ability will clear all the existing tiles that have been turned into Spike Pits.
Wandering Travelers (Add-On Expansion)
The Wandering Traveler's Pack is an add-on expansion that is purchased separately. The Wandering Travelers may be played as Knights, as an alternative to a normal Boss, or as a Wandering Traveler Boss.
Wandering Travelers as Normal Bosses - Wandering Travelers may be chosen as an alternative boss, using any alternate boss's Dungeon Tiles as a stand in for their "level". An example would be fighting against the Phantom Striker on King Knight's Pridemoor Keep tiles.
Wandering Traveler Boss - These Boss Fights function differently than normal Boss fights and are unique to only the Wandering Travelers! These battles do not replace the Boss Fight at the end of the stage, but instead will have one of the Wandering Travelers of choice spawn in the middle of the side scrolling Dungeon Tile via the Spawn Deck.
Set-up is very simple for a Wandering Traveler Fight, with a graphic to give additional help:
- Choose one of the four Wandering Travelers to fight against this game, and shuffle their corresponding Spawn Card into the Spawn Deck.
- Shuffle the AI Cards of the chosen Wandering Traveler and place them next to the play area.
- When you pull a Spawn Card with an image of the Wandering Traveler on it, place their model in the Spawn Point that the normal enemy would have spawned into.
Just like normal Boss Fights, a Wandering Traveler activates after each Hero's turn by drawing an AI card, as well as performing their End-Of-Round Ability at the end of the Hero Phase, but before the Enemy Phase. Just like normal Boss Fights, Knights earn two (2) Coins per Wound done to the Wandering Traveler and five (5) Coins for the final Wound, though Wandering Traveler Bosses have only 10 health instead of the normal 15, which can clearly be seen in the example:
Ex.2: We are looking at Reize's Boss Card. #1 shows his normal amount of health during a standard Boss fight (which can be seen at #3 on the Health Tracker), while #2 shows his health during a Wandering Traveler Fight (which can be seen at #4 on the Health Tracker).
Tile Rules - These rules only apply if you are participating in a Wandering Traveler Boss Fight.
If the Wandering Traveler Boss is caught on the left most tile during the End Phase, then the Wandering Traveler is defeated and no one earns the rewards from it.
If a Wandering Traveler's AI Card would have them land onto a Spike Pit, then place the model onto the same space as the Knight who is highest in the turn order that is on the board, starting with the player who has the First Player Token.
Once the stack of Dungeon Tiles is empty, Knights may leave the right side of the Play Area without having to defeat the Wandering Traveler.
Keywords
Here is a convenient list of all the common Keywords in the game.
- +1 ATK/DEF/JUMP - A Knight will add one (1) die to the roll associated with that stat.
- +1 Success - Add a bonus success to the result of a die roll.
- +1 Range - This allows your Knight to perform an Attack Action from one (1) space away. This may stack on top of other Knight abilities allowing them to attack from multiple spaces away.
- Cascading - A CASCADING attack is a special "bouncing" attack. When you perform this attack and you successfully wound the target, you may continue the CASCADING by rolling an additional attack at -1 attack on a target in the same space. This may continue until the attack fails or you run out of dice. If you fail to wound a target, you are Knocked Down, unless it is a RANGED CASCADING attack. See page 18 for more information.
- Close - A model is considered Close if it is in the same space or any adjacent orthogonal spaces.
- Fly - Many Loot Cards and abilities allow the model to Fly. When Flying, a Knight may freely pass over Hazards. You cannot Fly over a Wall unless otherwise specified. A Knight still collects all the Coin and Treasure Tokens it Flies over.
- Hazard - A Hazard represents an object or trap that stands in the player's way. These traps can be deadly or merely an inconvenience. A Knight that is adjacent to or potentially standing on top of a Hazard may use a Jump Action to jump over/through/on top of it safely.
- Hit - Hits are points of damage incoming to a Knight or Enemy that can be defended against. Any Hits that are not defended against deal Wounds to the target.
- Knock Down - When a model suffers Knock Down, place the model onto its side. When a Knight is Knocked Down it must spend one (1) Move Action to stand up before being allowed to perform any other actions. When an Enemy model is Knocked Down, it spends its entire turn during the Enemy Phase to stand up. Bosses may not be Knocked Down.
Rules Variants
2 Player Rules Variant - Team Battle
When playing Shovel Knight: Dungeon Duels with two (2) Players, we recommend that both players play against each other as a team of two (2) each. When playing a Team Battle variant, alter the normal game setup in the following ways:
- Each player chooses two (2) Knights to play as.
- Each Team starts with 6 Coins.
- All Coins collected by both Knights are put into one (1) shared Coin pile.
- The Player with the First Player Marker gets to decide which one of their Knights activates first. After the First Player takes their turn with one (1) Knight, it is now the other player's turn to take their turn with one (1) of their Knights. One (1) Knight may not be activated twice in the same game round. The Hero Phase does not end until all of the Knights have activated. In the last step of the End-of-Round Phase, give the First Player Token to the opposing player.
- Whenever either Knight of a team is defeated that team loses half (rounded in their favor) of their team's Coins into the space they were defeated in.
- Loot Cards and Equipment Cards are still owned by each individual Knight.
- Each Knight can hold a maximum of three (3) Loot cards.
- During the Enemy Phase, if two (2) Knights on the same team are tied for closest target to the enemy model, then it is up to the targeted player which of their Knights is targeted by the Enemy.
- During Boss Fights, if a Boss is targeting the Knight with the most Coins, then the Boss will attack whichever Knight on the team is closest. If it is still a tie then it is up to the targeted player to decide which Knight is attacked by the boss.
- Whichever player's team has the most Coins at the end of the game is declared the winner!
4 Player Rules Variant - Team Battle
The rules are nearly identical to the 2 Player Team Battle, except that the four players will split into two (2) teams of two (2) with each Player playing as one (1) Knight. When a team has the First Player Token, the team chooses amongst themselves who will go first.
Single Player Challenge Mode
It's time to steel thy shovel and prove you are the one true Shovel Knight to take on the Order of No Quarter!
Setup: Remove all Spawn Cards with two (2) enemies listed on it and any cards with one (1) Hoverhaft or Liquid Samurai.
When playing solo, the player has a limited amount of lives to make it through the dungeon and take out the Boss. The entire goal is to survive the challenge and to see how many Coins you can collect while staying alive. The Knight starts the game with two (2) Extra Lives represented by the Heart Tokens that you will place off to the side of Knight's Hero Card. Anytime a Knight is defeated, they discard half of their total Coins (rounded up in the player's favor) back into the Coin pile next to the play area instead of placing it onto the board. A player must also discard one (1) of their Extra Life Heart tokens when they are defeated. If the Knight is defeated and the Knight does not have any more Extra Life tokens to discard then it is GAME OVER! When a Knight is on a Chester Space, they may spend an action to purchase additional Extra Lives for 5 Coins.
During a Boss Fight, when a Knight is Wounded by a Boss the Knight will discard one (1) Coin Token to the side of the play area per Wound taken.
If you defeat the Boss before the AI deck has been drawn three (3) full times, then you are victorious! Compare your total Coins below to see how well you did.
- 0-9 Coin: Propeller Rat
- 10-19 Coin: Boneclang
- 20-29 Coin: Goldarmor
- 30+ Coin: Shovel Knight!