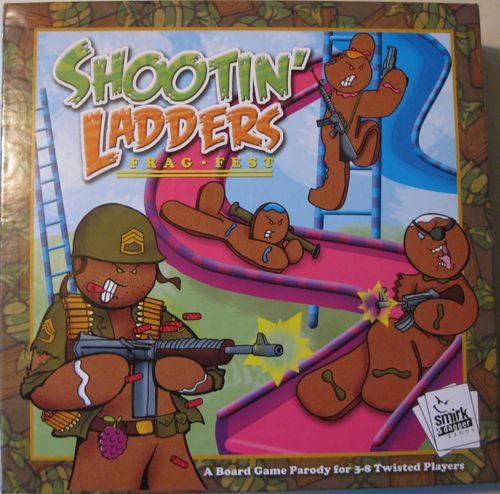
Shootin' Ladders: Frag Fest
Shootin' Ladders: Frag Fest Rulebook
Table of Contents
Table of Contents
Game Components
- Gameboard
- 8 Gingerbread tokens and 8 plastic stands (4 Blue, 4 Red)
- 8 Gingerbread Character Reference Cards
- 32 Candy Corn markers, 4 Rockett Popp counters, 3 C4reo counters
- 2 Flag tokens, 2 Flag stands (1 Blue, 1 Red) and 2 Flag markers
- 90 Game cards: 40 Weapons Cards, 28 Gear Cards, 22 Ammo Cards
- 12 Candyman Dice (blanks with stickers to apply)
- 50 Gingerbread Status Sheets (more can be reproduced from this rules sheet or downloaded and printed from our website at www.smirkanddagger.com)
Assembly
The 12 dice in this game must be assembled before you play. Carefully apply the stickers for each die, making sure that only one of each number/candy icon appears on any one die.
Object
Move your Gingerbread Man around the board, collecting Gear, Weapons and Ammo, while blasting opponents to crumbs in order to fulfill the scenario's specific mission goals to WIN!
Set Up
Place the board in the middle of the table. Separate and shuffle all three Game card decks (Weapons, Gear, and Ammo) and place each face down in easy reach of all players. Then set the stickered dice on the table.
Have each player choose their favorite Gingerbread character and give them the matching Gingerbread Character Reference Card and movement token. Place the token in a plastic stand to stand it up. (In a team scenario, choose a color stand indicating your team affiliation, either Red or Blue.) Give players a Gingerbread Status Sheet to track their damage and lastly, give each player three Candy Corn ammo markers.
(On the Character Reference Card, the side that is up for the basic game is the one shown in the component illustration, labelled "This side up for basic game".)
Choose a Scenario
SHOOTIN' LADDERS is a scenario-based game featuring multiple modes of play with both Individual 'Free-For-All' and Team play scenarios included.
Before you begin, choose a scenario and read the Mission Goals aloud to all players. This will outline the winning conditions of the scenario. Each scenario also details additional rules and set-up instructions particular to that specific scenario.
For purposes of learning the rules, we will start with the quickest-playing scenario, SHOOTIN' LADDERS: The Quick and the Crumbed. See the SCENARIOS section for other modes of play later in the rule book.
The Quick and the Crumbed
- Game Mode: Free-For-All
- Mission Goal: Be the first to collect three limbs by shooting them off the other players!
- Rules: In this rapid-fire skirmish, you need to aim true and be quick to claim three "Trophies", which are the cookie parts you will tear off your opponent's status sheets! As soon as you claim your third cookie part, you WIN!
- Starting Hand: Deal 1 Weapon Card and 1 Gear Card to each player.
- Damage Boxes: Endurance (6 boxes per cookie part)
- Respawns: Unlimited - but you probably won't need to.
- Starting Positions: The highest rolling player places his movement token on any Respawn Point. Then, in clockwise order around the table, the rest of the players place their token on an unoccupied Respawn Point. The highest rolling player will take their Turn first. Play will then pass in a clockwise direction around the table. This order will be maintained throughout the game.
(You may use this Starting Position on all Free-For-All scenarios.)
Turn Sequence Overview
- Respawn (if applicable)
- Roll 2 dice for movement OR declare that you are not moving this Turn before taking other actions.
- ACTIVE PHASE: This is the core of your turn and you can do many things in any order you choose. Performing actions are possible before and after movement, as well as between die rolls. Your Turn ends when you run out of Attacks, have moved your full amount, performed all other actions you wish and declare you are done with your turn.
- Announce you are done. Play passes clockwise to the next player.
Respawn (if applicable)
A cookie who loses all his parts during combat is CRUMBED (Fragged). If your cookie was CRUMBED last Turn - and you are playing a scenario with Respawn, you will reenter play with a new, fully healed Gingerbread Status Sheet. Roll a die and Respawn your cookie token onto the appropriate numbered Respawn Point on the board. If someone is already there, take 1 die of damage and roll again. Respawning takes your entire Turn. No other actions may be taken until your following Turn.
Roll for Movement
A player need not move on his Turn and can choose to stand in place. Otherwise, Gingerbread men roll two dice for movement on their Turn (referencing the number on the die, not the candy icon). This is done prior to any other action the player may wish to make. You will find it helpful to place the dice to one side so you can recall what you rolled for movement during the course of your Turn.
Active Phase
Moving across the board, drawing and playing new cards, attacking players - all happen in the Active Phase and can be done in any order.
Movement
When rolling your two dice for movement, treat each die roll as a separate move (ie a move of '3' and a separate move of '5', not a combined movement roll of '8'). A player must move their full roll for each die - but the die rolls can be taken in either order and the second die of movement can be in the reverse direction. In addition, certain Gear cards can modify the number of spaces moved.
Players may move through a space occupied by another Gingerbread man and can even end their Turn on the same square.
A player may take actions before and after movement, as well as between the two die rolls.
Some actions and board elements must be landed on by exact count to activate (Slides & ladders, Stars for drawing cards, etc.).
Board Elements & Movement
Each square on the game board is numbered from 1 to 100, making a serpentine path back and forth across the board. Players may move along the path left or right onto squares that have values either one higher or one lower than the number they are on - and may change direction on their second die of movement if they wish. A player may NOT move onto a square a level up, down or diagonally, with the following exceptions:
- Some squares on the left and right sides of the board have small silver access hatches leading up and down. These hatches can be used for vertical moves one level up or down. (You will notice that the numbers of the squares have values one higher or lower than the space on the next level. The hatch is just a visual cue.)
- Certain Gear cards may allow a vertical or diagonal move.
- Ladders and Slides allow for unorthodox movement. If you land on a slide or ladder's entry point by exact count on the roll of either die, you must immediately move to the square connected by the other end of the slide or ladder.
(The board diagrams in the rulebook show the START square with "Yes" and "No" arrows indicating which adjacent squares, hatches and diagonal moves are legal, and a slide/ladder panel labelled "Land Here..." / "Climb Here." / "Slide Here.")
The Cards
The game cards come in three separate types: Weapons (Red), Ammo (Green) and Gear (Purple). Keep a separate discard pile for each deck. When a deck runs out of cards, reshuffle the discards.
Cards in your hand are kept hidden from other players. There is no limit to how many cards of any type you may have in your hand.
During your Turn, you can play these cards on yourself or on another player as appropriate. Some Gear cards can also be played during another player's Turn as outlined on the card itself. A 'played' card no longer counts as a 'card in your hand'.
Weapon Cards: These are all the high caliber candy weapons you utilize to blow the limbs off other cookies. A Gingerbread man may have no more than 3 Weapon cards 'in play' at a given time and must immediately discard extra weapons if he exceeds that limit. (The Dessert Eagle pistol on your Character Reference card is not counted against this limit and is always available with unlimited ammo.)
You may reveal a Weapon card any time on your Turn and may use it immediately. Weapon cards may also be left in your hand, to avoid losing them if you are CRUMBED.
Most Weapons have the following information on them: Range, Damage (expressed as D#, representing the number of dice rolled when used) and Ammo, as well as a description of special rules for the weapon. On the bottom edge of the card is an Ammo Track. When you play a Weapon card, place a Candy Corn Marker on the highest number shown on the Ammo track, showing that the weapon has a full clip.
As you fire the weapon, you will move the marker down one for each shot. Some weapons allow multiple shots in a single attack. Spend an Ammo for each shot. When a Weapon card depletes the ammo listed on the card, it may not be used again - but you need not discard it, as the weapon may be reloaded.
(The example card shown is the MGM16: Range 10, 3D damage, 6 ammo. "You may fire two bursts at a time if you wish, using two ammo but still counting as one attack on the target." Its Ammo Track reads OUT, 1, 2, 3, 4, 5, 6.)
A full description of how weapons work is found in the COMBAT section.
Ammo Cards: Ammo cards are played from your hand to refill a single weapon and allow it to be used again. Move the Ammo token on that weapon to maximum. 'Standard' Ammo (Nibbs, Nibbs 2-Pak) simply reload a weapon, but others are labeled 'Special' and enhance the weapon it loads until the ammo runs out. You may leave the Ammo Card next to the weapon to remind you of any special rules that ammo may have. Discard when the ammo is exhausted. (You may 'reload' a weapon early, to gain the benefit of special ammo, but the current ammo in the weapon is lost.)
Gear Cards: Gear cards include special items, enhancements, armor, special moves and more. Most Gear cards play from your hand for an element of surprise and many make exceptions to the rules. Where the abilities of these or other cards conflict with the base rules, follow the exception allowed by the card.
Starting Hands
Most scenarios give players a starting hand of cards (for example, 1 Weapon Card and 1 Ammo Card), which are dealt at random before the game begins.
Alternatively, players may opt as a group to use the Alternate Starting Hand listed on the reverse of their Character Reference Card. This provides each character a unique and character-appropriate assortment of cards to begin the game, replacing the scenario's starting hand. Admittedly, some may provide a slight edge given a particular scenario, but in the end, players will be drawing enough cards that it shouldn't overly influence the outcome of the game.
Drawing Cards
On the board you will see many squares printed with a colored star. If you land on a star by exact count (for either or both dice of movement), you may draw one card matching the color of that star. If a Star has two colors, a player may choose which of the color card decks to draw from.
Combat
Attacking
You may attack as many targets as you legally can each Turn, but only one attack per player per Turn.
Melee Weapons are the exception to the rule. They allow ONE additional attack upon a player per Turn and can be used as you pass through the same square as the target (Range 0). You need not land on that square by exact count. Melee Weapons never get a bonus for Point Blank range (below).
Each weapon has a Range listed. Range is calculated by counting the squares between you and the target, not including the square you occupy. Range is counted on orthogonal squares, not diagonally. Additionally, a player must be in Line of Sight (LOS) to the target. To determine if you are in LOS to a target, draw a straight line between the center of your square to the center of the target's square. If it is free of obstruction and you are in range, you are clear to fire.
There are two types of obstructions on the game board, floors and doors (both are silver gray in color). These features block Line Of Sight to a target, making it impossible to hit a target beyond. Only the dark line of an obstacle should be considered when drawing a line between targets (as indicated below).
Note: The two doors only block LOS and provide no obstacle to movement.
Other players do not block LOS.
(The board diagram in the rulebook labels a FLOOR and a DOOR, and shows four example positions: "Shooter", "In LOS Standard Range", "Long Range -1 Die", and two "No LOS to Target" positions.)
Range/Damage Modifiers
Point Blank Range: If you are in the same square as an opponent, you may add one die to your attack before rolling. (Does not apply to Melee weapons.)
Long Range: If you are more than one level away from the target player or target square you are firing into, subtract 1 die from your attack before rolling. (Note: each row of squares is a 'level'.)
Performing an Attack
For each attack -
- declare the weapon you will be using
- the player you are targeting
- and how many Ammo you will spend (only necessary for those weapons that allow more than one ammo to be used per attack)
The weapon may be your standard weapon (Dessert Eagle: Range 6, 2D damage, unlimited ammo), a Weapon card you already have 'in play' or a Weapon card you put into play from your hand as you declare your attack.
If you are in range and have LOS, roll the number of dice listed on the Weapon card to attack (for example: the weapon stat '3D Damage' means you roll 3 dice per ammo spent on an attack). The Candy Icons on the dice are used to determine where - and if - a cookie is hit.
Hitting / Damaging a Target
Each player has a Character Status Sheet which tracks their health. Each limb is identified with a different Candy Icon and has three white damage boxes (Standard) and three additional grey damage boxes (Endurance). The number of damage boxes used in a game is determined by the scenario you are playing.
Match the Candy Icons you rolled in the attack to the limbs of your target and mark off one damage box of the corresponding limb on the defender's sheet. (Example: A roll of a Peppermint Swirl is one hit to the head.)
You will note that an undamaged cookie is a pretty easy target. In fact, you are almost assured a hit. But as cookies take more damage and lose limbs, many of your attacks will target areas that they no longer have and 'miss'.
When all the damage boxes of a given limb have been marked off, tear the limb off the sheet. It is gone. Hand it to the attacker as a "Trophy". Keep these trophies as proof of your prowess in battle. Some scenarios use them for scoring - but all use them for bragging rights.
(It is customary for the other players to primal chant 'Rip-It-Off, Rip-It-Off...' as the player tears off a body part. Heads are particularly exciting - with the victor holding aloft his trophy and proclaiming to all "The Head of my Enemy!!")
As mentioned above, any dice with Candy Icons matching limbs that have already been torn off are 'misses' and ignored. Attack dice that 'HIT' a limb will assign themselves to Armor protecting that limb first, before marking off any of the target's damage boxes. Excess damage above and beyond the protection offered by the Armor is applied to the body part normally.
If you lose all your body parts, you are CRUMBED. If not playing a scenario with Respawns, you are out of the game.
If you are playing a scenario with Respawns, on your next Turn, you will reenter play with a new, fully healed character sheet. Roll a die to see which Respawn point you arrive in. (See 'Respawn', at the beginning of the rules.)
A Respawned cookie loses all the items they have 'in play'. Discard the items into the appropriate discard piles. Other players may not claim the items lost in this way.
CRUMBED cookies do NOT discard any cards from their hand. These they may keep and use when they re-enter the game.
Winning the Game
When a player or team meets the Mission Goals of the scenario played, they WIN and gloat accordingly.
Scenarios
Team Matches
Team Matches, unless otherwise agreed upon or outlined in the scenario, should have equal numbers of players on each side. Select teams at random or choose them yourself, then give each team member the same colored base for their movement token.
Place your team's Gingerbread men in the starting location called for in the scenario. Typically, this is a Home Base on spaces #1 and #100, the two spaces farthest apart from each other in normal movement.
Have one member of each team roll a die. The highest roll has the option to go first or allow the other team to do so. Play will alternate back and forth between teams until all players have had a Turn. A team may decide which of their team members to activate next in a Turn, so long as they have not previously been activated this Turn. You may find it helpful to show that player has acted by placing a Candy Corn token on your Character Card (there is an area marked 'READY' for those who have not yet acted and 'DEPLOYED' for those who have taken their Turn already). When all players have had a Turn, a new Round of battle begins and the teams roll a die again to see which team will start the new Round.
Additional Scenarios
(More scenarios are listed on the reverse of the rules sheet.)
Head Hunter
- Game Mode: Team Play
- Mission Goal: Collect the heads of the opposing team before they collect all yours!
- Rules: Choose teams and mark your character's movement token with a matching colored stand (Red or Blue). Players may not Respawn in this scenario, but may continue playing even without a head, per normal. The game ends immediately upon the removal of the last head on one of the teams.
(NOTE: You are still considered to have a head if you graft an opponent's head to your body through the use of a Gear card.)
- Starting Hand: Deal 1 Weapon card and 1 Gear card to all players.
- Damage Boxes: Endurance (6 boxes per cookie part)
- Respawns: None
- Starting Positions: Red Team begins on square #1. Blue Team begins on square #100.
The Guns of Tobleronne
- Game Mode: Team Play
- Mission Goal: Score three Frags on the other team!
- Rules: Choose teams and mark your character's movement token with a matching colored stand (Red or Blue). This scenario requires unlimited Respawns, until one team scores their third Frag. You may, of course, adjust the number of Frags needed to win. It is also fun to keep track of the number of Frags and Trophies earned by each player to earn a 'Rank' on your team.
- Starting Hand: Deal 1 Weapon Card and 1 Ammo Card to each player.
- Damage Boxes: Standard (3 boxes per cookie part)
- Respawns: Unlimited
- Starting Positions: Red Team begins on square #1. Blue Team begins on square #100.
Trophy Room
- Game Mode: Free-For-All
- Mission Goal: Collect the most Trophies!
- Rules: This is the 'no-holds-barred' big brother of TRIPLE STRIKE. It doesn't matter who shoots fast or who shoots last, but who shoots best! The winner is the cookie who collected the most Trophies during the game! The game ends when only one player remains. And yes, you can win even if you can no longer Respawn and are out of the game!
- Starting Hand: Deal 1 Weapon Card and 1 Gear Card to each player.
- Damage Boxes: Standard (3 boxes per cookie part)
- Respawns: 1 (Variable, adjust for different length games)
- Starting Positions: The highest rolling player places his movement token on any Respawn Point. Then, in clockwise order around the table, the rest of the players place their token on an unoccupied Respawn Point. The highest rolling player will take their Turn first. Play will then pass in a clockwise direction around the table. This order will be maintained throughout the game.
Crumble Zone
- Game Mode: Free-For-All
- Mission Goal: Be the last man standing!
- Rules: "Many Cookies Enter, 1 Cookie Leaves." Go it alone and leave a good-looking pile of crumbs. The last player remaining wins.
- Starting Hand: None
- Damage Boxes: Endurance (6 boxes per cookie part)
- Respawns: None (Variable, adjust for different length games)
- Starting Positions: The highest rolling player places his movement token on any Respawn Point. Then, in clockwise order, the rest of the players place their token on an unoccupied Respawn Point. The highest rolling player will take their Turn first. Play will then pass in a clockwise direction around the table. This order will be maintained throughout the game.
Candyman Flag Capture
- Game Mode: Team Play
- Mission Goal: Grab their flag and get it to your base before they get your flag to theirs!
- Rules: Choose teams and mark your character's movement token with a matching colored stand (Red or Blue). Place a Flag Token of the team's color on their home base. In this scenario, place the Red flag on square #6 and the Blue flag on square #95. To remove a flag from the opponent's home base, you must land on it by exact count on one of your two die rolls. You MAY NOT pick up your own flag while it is resting on your base.
Otherwise, a player may pick up a flag any time they move through a space containing a flag that is not currently in the possession of another player. Carried flags move with that player's movement token. When a player picks up a flag, they must place a matching color Flag Marker on a specific body part of their character sheet. Once assigned, it cannot be moved to a different body part.
If the body part holding the flag is destroyed, the flag will drop. Roll a die. On a roll of 5 or 6, the flag remains in the same square. On a roll of 1 through 4, the flag will fall into a square on a diagonal as shown in the diagram. The player who dropped it may not pick it up again until their next turn.
(Dropped Flag Dispersal Pattern diagram: squares 1 and 2 sit in the top row, squares 3 and 4 in the bottom row, and the middle square is labelled 5/6.)
If two teammates land by exact count on the same square, the player in possession of the flag may pass it to the other and it may be assigned to any body part the other team member wishes.
If an opponent lands in the same square as a flag carrier by exact count, that player may attempt to steal the flag. The two players each roll a die. The higher roll gets the flag. If the roll is a tie, compare the damage of the body part holding the flag to the same body part of the character attempting to steal the flag. The healthiest body part takes or keeps the flag. (If that is a tie, the flag drops and neither can grab it until their next turn. Roll a die and reference the diagram above for flag placement.)
To place an opponent's flag on your home base, you must land on your base by exact count and declare that you are dropping the flag. The game ends when an opponent's flag rests on your home base - for a full round. In other words, until the player who placed the opponent's flag on their base begins their next turn.
In the unlikely event that both flags are captured in the same Round of play, the team who can first reclaim their flag wins - immediately upon moving the flag off the enemy base.
- Starting Hand: Deal 1 Weapon Card and 1 Ammo Card to each player.
- Damage Boxes: Special. All players begin the game with Endurance (6 boxes per cookie part). All Respawns enter with Standard (3 boxes per cookie part).
- Respawns: Unlimited
- Starting Positions: Red Team begins on square #6. Blue Team begins on square #95.
The Dirty Half Dozen
- Game Mode: Team Play
- Mission Goal: Crumb the Sniper / Wipe out the Squad!
- Rules: It's all versus One. One of the players, a volunteer or randomly determined player, is the sniper and places his token anywhere on the top level (91-100). The rest of the players form the squad and begin on the Home Base at the bottom (square #1). The squad will go first - and may choose which players take their Turn in what order every Turn.
The sniper player arms himself with the 'Ginger Snipe Rifle' Weapon Card and may, in this scenario, ignore one (and only one) obstruction to LOS between he and his target. When out of ammo, he may automatically reload the weapon, on his following Turn, by setting the ammo track to maximum. He may not access other Ammo, Weapons or Gear Cards.
The squad begins only with their standard issue Dessert Eagles - but may draw cards normally. Fight until one side stands victorious.
- Starting Hand: Sniper - 'Ginger Snipe Rifle' Card / Squad - None. (Alternate Starting Hands are not recommended for this scenario.)
- Respawns: None
- Starting Positions: (Above)
- Damage Boxes: Special
- Squad: 1 damage box per body part.
- Sniper:
- vs 7 opponents: 7 boxes per body part (draw an additional box).
- vs 6 opponents: 6 boxes per body part.
- vs 5 opponents: 5 boxes per body part.
- vs 4 opponents: 4 boxes per body part.
- vs 3 opponents: 3 boxes per body part.
- vs 2 opponents: 2 boxes per body part.
If not terribly apparent yet, the scenarios are all easily customizable. We encourage you to tweak to taste and also to create your own. Share your variants with us at Smirkanddagger.com.