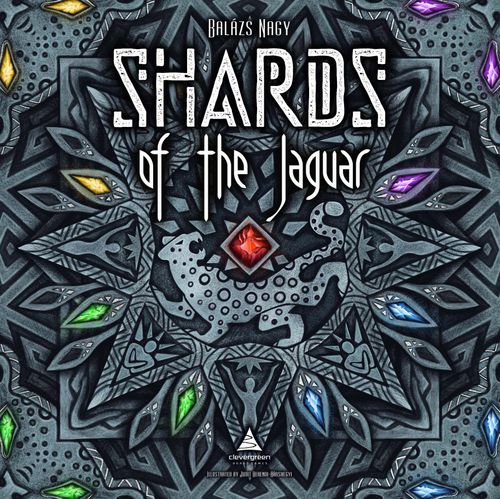
Shards of the Jaguar
Shards of the Jaguar Rulebook
Table of Contents
Table of Contents
A few notes regarding the use of this Rulebook
The game has two versions, the Basic game and the Full game. If you are playing the game for the first time, we strongly recommend you start with the Basic game, as it is meant to ease the learning of the core rules. Later on, you can try the Full game for the complete experience. You can always return to the Basic version if you want to have a more lighthearted gaming experience.
In the rulebook you will find purple (Basic game) and orange (Full game) highlights. Depending on the version you play, only read the correspondingly colored highlight, and skip the other one.
Anatomy of the boards
Character board: Health and Curse Track, Crystal bag, Starting amulet, III. level slot, II. level slot, Incorporated crystals pool, I. level slot, Curse bonus slot, Pouch, Trap token space.
Temple board: Order track, Glory track, Round track, Jaguar area, Column markers, Objective domes, Bonus crystal dome.
Trap board: Effect field, Amulet space, Activator space, Available Trap tokens, Trap slot.
Components
- 4 double-sided Game board tiles (cut into 2 pieces)
- 6 Trap boards
- 1 Temple board (cut into 3 pieces)
- 1 double-sided Heart wall board
- 8 Objectives
- 12 Trap tokens
- 12 Map pieces
- 4 Character boards
- 1 Shield token
- 4 Curse tokens
- 12 Amulet chests
- 1 Jaguar pawn
- 14 Minor rituals
- 5 Major rituals
- 8 Level-up tokens
- 4 Initiate pawns (in 4 colors)
- 8 Health and Curse markers
- 7 Escape rewards
- 48 Amulets (in 6 colors)
- 4 Heart of the Jaguar shards
- 12 Objective markers (in 4 colors)
- 4 Glory markers (in 4 colors)
- 12 Trap activators (in 4 colors)
- 60 Crystal shards (in 4 colors)
- 8 Secret door markers (in 4 colors)
- Solo round marker
- 8 Jaguar movement tokens (solo mode)
- 8 Taming tokens (solo mode)
Setup
Assembling the Game board
- Assemble the 4 game board tiles: connect the board parts with the same symbol on their 3x5 side.
- Place the game board tiles randomly next to each other as shown. Use the appropriate sides for your player count: 2-3p: 3x5 spaces | 4p: 3x6 spaces. The #1 game board tile cannot have 2 walls on its left side. Going forward, these will be referred to as the #1/2/3/4 game board tiles, from left to right.
- Place the Heart wall between the #3 and the #4 game boards.
- Place the Temple board above the game board tiles (assembling it from the 3 separate pieces).
- Lay the 4 "harming" Traps (Earthquake/Poisonous gas/Darts/Guards - see page 7.) next to each other in a random order below the game board.
- Place the Secret door onto the 5th and the Flood onto the 6th positions.
- Place the Trap tokens below their corresponding Traps.
Setting up your character
- Choose your character randomly and place their Character board and Initiate pawn in front of you. (Optionally, everyone can choose which character they wish to play.)
- Place a Health marker onto the starting value depending on the number of players (4p: 22 | 3p: 18 | 2p: 15) and a Curse marker onto the '5' value of the Health and Curse track.
- (Full game) Take the character's starting amulet plus an additional amulet depending on the number of players (4p: green | 3p: yellow | 2p: nothing).
- Place a Level-up token into the curse bonus slot. (Basic game) Place a green amulet into the curse bonus slot.
Filling the Temple board
- Place a Glory marker in each player's color onto the starting space of the Glory track. (onto the space indicated by the icon in a 3-player game)
- Place the Jaguar pawn onto the '1' section of the Round track.
- Place one of the player's Trap activators onto the Order track in a random order.
- Place 4 different crystals onto the Bonus crystal dome.
- Choose 3 Objectives randomly and place one onto each dome with the sign of a temple icon. Put the leftover Objectives back into the box.
- Place the Heart of the Jaguar shards onto the Jaguar area, one piece into each space (4p: 4 pcs, 1-3p: 3 pcs). Place a yellow crystal into the first space and a purple crystal into the second.
- Place a green and a blue crystal onto the '16' value of the Glory track.
Filling the game board
- Take the number of crystals according to the number of players, shuffle them, and randomly place one onto each pedestal symbol on the #1-3 game boards. Then, take the necessary amount of crystals for the #4 game board tile, shuffle them, and place 1 randomly onto each pedestal and 2 onto each major pedestal. In a 2-player game, don't fill the "3-player pedestals". You can see in the chart below the number of crystals for each player count.
| Game board tiles | Purple crystal #1-3 | Purple crystal #4 | Yellow crystal #1-3 | Yellow crystal #4 | Blue crystal #1-3 | Blue crystal #4 | Green crystal #1-3 | Green crystal #4 |
|---|---|---|---|---|---|---|---|---|
| 4-player game | 8 | 4 | 6 | 4 | 7 | 4 | 9 | 4 |
| 3-player game | 6 | 3 | 4 | 3 | 6 | 3 | 8 | 3 |
| 2-player game | 5 | 2 | 3 | 3 | 4 | 2 | 6 | 3 |
For example, in a 4-player game, you should take 8 purple, 6 yellow, 7 blue, and 9 green crystals, shuffle them, and then place one randomly onto each pedestal of the #1-3 game boards. Then, you take 4 purple, 4 yellow, 4 blue, and 4 green crystals, shuffle them, and place them randomly onto the #4 game board's pedestals and major pedestals.
- Randomly select the necessary amount of map pieces in each type (dots/triangles) and place them randomly, face up, onto the major pedestals of the #1-3 game board tiles.
- 2-3-player game: 3 dots, 3 triangles
- 4-player game: 4 dots, 4 triangles
In a 4-player game, leave the middle major pedestal of the #3 game board tile empty.
- Take all the Minor rituals and lay them randomly, face up, onto the diamond symbols of the #2-3 game board tiles. Then, lay 1 Minor ritual next to each space of the #1 game board tile (which does not have any walls next to it). Put the leftover rituals back into the box.
- Take the Major rituals and lay them randomly onto the diamond symbols of the #4 game board tile. Put the leftover rituals back into the box.
- (Full game) Lay the Amulet chests randomly, face down, onto the square symbols. Take black and red amulets into your hand (4p: 5 red, 5 black | 2-3p: 4 red, 4 black), and place them, at random, onto the square symbols.
- (Full game) Take 1 Amulet in each color and place it at random next to each ritual next to the #1 game board tile. Put all the leftover Amulets into the supply.
- (Full game) Randomly select 1 Escape reward token to place next to each row of the #4 game board tile. Put the remaining Escape reward tokens back to the box.
- Create a supply close to the board and place in it the Secret door markers, the unused Trap activators, the Shield token, and the remaining Amulets and Crystals.
Gameplay
At the beginning of the game
In the reverse order of the Order track, each player chooses a starting position on the left side of the #1 game board tile, and places their Initiate pawn onto it. Each starting position can only be chosen by one player, and only starting positions with a ritual may be chosen.
(Full game) Take the ritual and amulet from your chosen starting position and place them into your character's pouch. Put any Minor rituals and amulets from spaces that are not chosen back into the supply.
(Basic game) Take the Minor ritual from your chosen starting position and place it into your character's pouch. Put any rituals from spaces that were not chosen back into the supply.
The game has 8 rounds, each round consists of 4 phases:
- Refresh phase
- Trap setting phase (Each player sets a trap secretly.)
- Action phase (Each player spends their action points exploring the Temple.)
- Trap activation phase (Each trap that was set is activated.)
(Full game) There is an additional phase after the 8th Round, which is the Escape Phase.
1. Refresh phase (skip the refresh phase in the first round)
1.a. Determining Trap setting order
Place the players' Trap activators onto the Order Track in the following order:
- The player who is the closest to the entrance (whose Initiate pawn is in the closest column) goes first. Then, the second closest, and so on...
- If multiple players are standing in the same column, then the player with the least glory goes first.
- If there is still a tie, the player whose trap activator comes first from left to right on the traps comes first.
In this example, the blue player will be the first player in the trap setting order, as blue stands in the rearmost column. As the yellow and the green player pawns are in the same column, you must check who has the least glory. As they have the same amount on the glory track (it is still tied) you have to check whose Trap activator is the leftmost on the traps. As it is the green player's, they will go second, and the yellow player will go third in this round.
1.b. Trap refresh: Put all Trap tokens face down back on the trap slot.
1.c. Round marker movement: move the Jaguar pawn to the next space on the right.
Special rules: At the beginning of the 7th round, remove the Heart wall from its original place, slide the #4 game board tile next to the #3 game board tile, and then place the Heart wall next to the right side of the #4 game board tile. Next, each player may place one of their Objective markers onto one of the Objectives.
The symbol between the 6th and 7th round will remind you to move the Heart wall and to place your Objective markers.
2. Trap setting phase
In the trap setting order (determined by the order track), each player chooses and sets a trap.
- Place your Trap Activator token onto the chosen trap's activator space.
- Secretly, choose one of the Trap tokens and place it face down onto your character board's Trap token space. (If you chose the Secret door, or the Flood, skip this step)
Traps
You can choose from 6 possible traps during the trap setting phase. Of these 6 traps, listed below, the first 4 are "harming" traps, and the last two (Secret door and Flood) work a bit differently.
Poisonous gas
Poisonous gas floods out and harms the initiates standing on the indicated floor type.
The spaces on the game board have three different colors (blue/yellow/red). By setting the Poisonous gas, you can decide which colored spaces will be affected.
After activating the trap (later in the trap activation phase), each space on the game board with the chosen color will be affected, and each player whose Initiate pawn is on a space of that color will suffer the trap's effect.
Effect: 1 damage + 2 curse
To indicate this effect (and the later ones similarly), take 1 health from the affected character's health track by moving the Health marker one space to the right, and moving the Curse marker 2 spaces to the left.
Darts
Darts shoot out from the walls, hurting all initiates standing next to the indicated wall type.
There are three different colored walls (blue/red/yellow). When setting the Darts, you decide which color of wall the Darts will shoot from.
After activating the trap (later in the trap activation phase), each space directly next to the wall of the chosen color will be affected, and each player whose Initiate pawn is standing on that space will suffer the trap's effect.
Rarely, there are spaces with two walls of the same color. If these were activated, they will still only deal one hit.
Effect: 3 damage + 1 curse
Guards
The guard statues attack initiates next to them if they do not return a crystal.
The guards stand between spaces, and they have three different colored claws (gold/silver/bronze). By setting the Guards' trap, you can decide which color of claws will be activated.
After activating the trap (later in the trap activation phase), each space on the game board next to a chosen color of claw will be affected. Each player whose Initiate pawn is standing on that space will suffer the trap's effect.
Effect: The affected player chooses: -1 crystal (discard a not incorporated crystal) OR 4 damage
Earthquake
An earthquake shakes the ground and hurts initiates in the indicated columns.
Each game board has 3 columns, indicated by the symbols of the Column markers, which you can find at the bottom of the Temple board. By setting the Earthquake, you can decide which column the Earthquake will strike.
After activating the trap (later in the trap activation phase), each space in the chosen column will be affected, and each player whose Initiate pawn is in that column will suffer the trap's effect.
Effect: The effected player chooses: -1 action for the next round (lay down your Initiate pawn to indicate this) OR 4 damage. If it is the last round, you must choose to take the damage.
Secret door
You can open secret doors in the temple for yourself to make your movement much quicker and to reach spaces which are otherwise difficult to access.
In the trap activation phase place the two Secret door markers of your color onto two different spaces of the game board, a maximum of 4 spaces away from each other. (When counting the 4 spaces, ignore walls.) Whilst the Secret door is open you may go through it for a cost of 1 action point. Other players cannot use your secret doors.
If you are standing on the space where the Secret door is placed you may go through the door, for no action points, as soon as it is placed.
Your door remains open until you open another Secret door, but moving through it further will cost you one action.
You can place your Secret door markers onto the #4 game board tile before the Heart wall is open, but you may not move through it until the 7th round.
Example of using the secret door and counting the 4 spaces.
Flood
Water rushes through the corridors and washes away the initiates.
If you choose to set the Flood, then, in the trap activation phase, you can choose a direction (up/down/left/right), and the water will move each player two spaces in that direction. A wall will stop the movement.
Players can prevent the whole movement from the Flood by spending 2 health, or by spending a blue amulet (Page 10.).
Bonus for the Activator: You – as the activator – can decide to move only 1 space with the water (instead of 2), and then make a free "Take" action on that space. You get this bonus even if the Flood did not move you because of a wall.
Note: After being moved by the Flood, already activated Traps do not hurt players again.
Example: The blue player activated the Flood, and she decides to choose the "up" direction. The Flood moves red 2 spaces upwards. Green decides to suffer 2 damage to not be moved. Yellow is not moved, as the wall stops the movement. Blue – as she is the activator – decides to move only one space, and, as a bonus, she takes the yellow crystal.
3. Action phase
Each player spends their action points in the action order. This is determined by the order of the chosen traps from left to right.
Sometimes, it is possible for a player to choose more than one trap. In that case, the action order is determined by that player's leftmost Trap activator.
Example: the green player is the first in the action order, as the green's Trap activator is the leftmost. Then comes blue, and lastly yellow.
Tip: Before you start your actions, always check the Trap token you chose in the previous phase to be sure you are not running into your own trap!
In the first 6 rounds, each player has 4 action points. In rounds 7 and 8, each player has 5 action points. You can spend these action points on movement/healing/taking in any order and amount, or you can choose to run.
A) Movement:
You can move your Initiate pawn to an adjacent space on the game board for one action point (diagonal movement is not allowed). You cannot move through a wall unless an effect states that it allows this. It is possible to have multiple Initiate pawns on the same space.
There are two restrictions:
- At the beginning of the game, as a first action, you must move into the temple, and you cannot move back.
- During Rounds #1-6, you cannot go to the #4 game board tile, as it is separated by the Heart wall.
B) Heal:
You gain health points according to the number of action points you spend for healing:
- 1 action: 1 health point
- 2 actions: 4 health points
- 3 actions: 8 health points
- 4 actions: 12 health points
If you spend more than 4 actions for Healing, then you will repeat the cycle. For example, for 6 actions, you will heal 16 Health (12 Health for 4 actions + 4 Health for 2 actions.)
C) Take:
You take an item (crystal/chest/map tile/ritual token/Heart of the Jaguar shard) from the space where your Initiate pawn stands, and place it onto the corresponding space on your character board.
C.1. Take a crystal: Take the crystal from the pedestal and place it into the crystal bag.
There are spaces, where the pedestals are blessed. This is indicated by a white halo around the pedestal. If you took a crystal from a blessed pedestal, you may get rid of 1 curse immediately.
(Full game) C.2. Take an Amulet chest: Flip the chest over and choose 2 of the 3 possible Amulets you found. Take them from the supply and place them into your pouch. Put the chest face up next to your character board.
(Basic game) C.2. Take an Amulet: Take the black or red amulet from the space and place it into your pouch.
C.3. Take a Map piece: Take the piece and place it face up into your pouch.
C.4. Performing a ritual
To perform a ritual, you have to fulfill the ritual's conditions, which is usually to have the indicated crystals in your crystal bag. If you have them, you may perform the ritual for one action point. First, you must place the required crystals from your crystal bag into the incorporated crystals pool. Then, flip the ritual token face down and place it into the lowest free level slot of your character board.
Example: to perform this ritual you need to have a yellow and a purple crystal in your crystal bag.
Special rule: You can perform your starting ritual on any space. You only need to have the necessary crystals, and for one action point you can perform your starting ritual.
The ritual token's reverse side shows you the benefits you receive for performing it.
The Minor rituals (with 2 crystals) give you a level-up, and are worth 10 honor points at the end of the game.
The Major rituals (with 3 crystals) give you a level-up, and the option to place your Objective marker onto one of the Objectives.
The incorporated crystals are still worth points at the end of the game, but - as you have already incorporated their power - you cannot use them for further rituals.
(Basic game) In the Basic game you do not use character abilities, so there is no actual level-up. Any time an effect would give you a level-up, you receive a green amulet instead. You still store the ritual tokens in your character's level slots.
(Full game) Level-up: place the Level-up/ritual token into the lowest free level slot of your character board, and take the bonuses it grants. The first two levels of each character grant a one-time bonus and the third level is always an unlocked constant ability. You will find more information about the character abilities on page 14-15.
After you have reached the third level, it is still possible to level-up. Any additional tokens are placed into the first level slot and you will repeat the first level reward.
Example: Nerys reached her first level, and as a reward, she can choose one from the two different amulets (blue or black).
C.5. Taking the Heart of the Jaguar
The most precious treasures of the temple are the Heart of the Jaguar shards, and they are hidden somewhere on the #4 game board tile. The location is determined by the Map pieces you gather from the #1-3 game board tiles.
To find a Heart of the Jaguar shard, you need to own both types of Map pieces. One determines the vertical (dots), and the other the horizontal (triangles) coordinate of the space where the shard is hidden.
You must stand on the indicated coordinate, and, for one action point, you may take the Heart of the Jaguar shard. To do so, take the contents of the leftmost filled slot of the Jaguar area. After taking the Heart of the Jaguar shard, place the used Map pieces next to your character board.
A player may collect more than one Heart of the Jaguar shard, but to do so, the player needs an additional Map piece pair.
Note: the "rows" often match two rows, which means that the coordinates will determine two possible spaces.
Example: Let's say you have a pair of Map pieces: one piece belongs to the 2. row, and the other to the third column. You can take the crystal if your pawn stands on one of the indicated two spaces.
D) Run:
You can choose to run, but it works differently than the previous action possibilities. If you run, you cannot do anything else in your turn except move on the game board. You can move up to the number of action points you have, + 3 spaces. This means, if you have 4 action points, you can move up to 7 spaces. If you use a green amulet for +1 action whilst running, you may only use it for additional movement.
4. Trap activation phase
From left to right the chosen Traps will be triggered and will hit anybody who is in their reach. Starting from the leftmost trap, flip each activated trap's Trap token over, one at a time, and perform the traps' effects. After you are finished with the first 4 traps, activate the Secret door and then the flood (if any of these were chosen).
If a trap hit you, suffer the effects indicated on the trap's effect field immediately. The player who activated the trap gains 1 glory on the glory track for each player who was hit.
Note: In the 2-player game you gain 2 glory per hit instead of 1.
Important: If you hit yourself with your own trap, you will not only suffer the effect, but you will also not receive any glory for hits against other players with that trap this round.
The glory track gives you honor points at the end of the game depending on the space you reached. Additionally, there are rewards on the glory track, and whenever your Glory marker passes them, you receive a reward.
- When you pass the first checkpoint, you may take a Level-up token/green amulet. Additionally, the first player to do so can take the green or blue crystal placed on the '16' value. The second player to reach this checkpoint takes the remaining crystal.
- At the second checkpoint, you can place one of your Objective markers onto one of the Objectives.
- At the third checkpoint, you can choose a crystal from the crystal dome indicated with a circle.
Being cursed
If your Curse marker is on the same space or on a higher space than your Health marker, then you are cursed.
(Basic game) As soon as you are cursed, lay your character pawn down to indicate that you will have 1 less action point for the next round. There are no further effects of being cursed and you can be cursed only once during the whole game. If you got cursed in the last round, or if you already have -1 actions due to the Earthquake, nothing happens.
(Full game) To indicate that you are cursed, place the Curse token onto your character's illustration. Remove it when your health reaches a higher value then your Curse marker.
Whilst you are cursed, you cannot use your character's ability, and you do not get the rewards of your first two level-ups.
If you would level-up whilst cursed, place the level-up/ritual token face up (instead of face down) into the level slot of the character board to indicate that you did not get the level-up rewards of your character. When you are no longer cursed, flip the token, and take the benefits as normal. Flipped or unflipped, the rituals are still worth points at the end of the game.
If you performed a major ritual whilst cursed, you may still choose an Objective.
What if your health or curse reaches 0?
Your character cannot die, so if your health reaches the "0" value, you are severely injured, but not dead. (Don't forget, you are from the same tribe, so you are here for a "competition", not for an execution...) Anytime you would suffer damage, and you cannot deduct it from your actual health (as it is at 0), you lose one glory for each health point you cannot lose. If your glory total reaches the 0 value, there is no further negative effect.
When your curse reaches 0 for the first time:
(Full game) Take the Level-up token from the Curse bonus slot and place it into the next free level-up slot of your Character board as a level-up.
(Basic game) Take the green amulet and place it into your pouch.
The order of game events and effects
Whenever more than one player has to decide the outcome of an event (for example, deciding if you want to get moved by the Flood), the deciding order is the action order according to the placed Trap activators. The player whose Trap activator is on the leftmost Trap decides first, then the second leftmost, and so on...
Amulets
(Full game) Amulets are typically found by opening Amulet chests, and taking 2 of the indicated 3 options.
(Basic game) In the Basic game you can have only red/black/green Amulets.
You can use each Amulet only once, after you have used it, return it to the supply. It does not use up an action. There are 6 different amulets:
| Amulet | Effects | Used | Notes |
|---|---|---|---|
| Green | +1 Action | In your turn in the Action/Escape phase | You can use only one per turn |
| Red | +3 Health | Anytime | |
| Black | -2 Curse | Anytime | |
| White | You can go through a wall | In your turn in the Action/Escape phase | You still need to spend an action for the movement. You cannot use it to move through the Heart wall. |
| Yellow | +1 Glory if your trap scores at least 1 hit | Trap Setting phase | Place it onto your trap's amulet space, and if that trap hits at least 1 other player, you get +1 glory. You cannot use more than 1 per trap. |
| Blue | One more activation of the flood for only you, OR prevent the effect of the flood | Trap Activation phase | If you activated the flood, you can activate its effect again by spending this amulet. This 2nd activation moves only you. OR You can prevent the flood's effect for you (even your own). You cannot use more than one in the same phase. |
Example of a round
In the trap setting phase Nerys comes first as she is the first on the order track. She chooses to set the Poisonous gas. She places her trap activator onto the activator space and secretly chooses a trap token and places it onto her character board. Keela is the second, she sets the Earthquake with the same method. Then comes Akhel who chooses the Secret door and finally Fenn chooses the Guards, as he wants to come first in the action phase.
Now comes the action phase, the initiates will spend their 4 action points according to the order of their traps.
Fenn comes first, as he chose the leftmost trap. He spends 2 action points on taking a map piece and a green crystal, and then moves 2 spaces up with their other 2 action points.
As Nerys' trap is the second, she comes next. She moves two spaces up and takes a map piece and a blue crystal.
Keela is the third. She moves one space, takes a yellow crystal, and then moves two more spaces.
Finally Akhel moves one space, takes the map piece and the purple crystal, and then moves one more space.
Next comes the trap activation phase. We start it with the Guards, as that is the leftmost trap.
It is Fenn's trap, so he reveals the trap token he chose: golden claws. As Keela is standing next to one, she gets hit by it. Keela has to choose between suffering 4 damage, or discarding a crystal (which is the effect of the Guards). As Fenn hit 1 player with his trap, he gets 1 glory on the glory track.
Nerys reveals her trap token belonging to the Poisonous gas: yellow spaces. As Fenn is standing on a yellow space, he gets a hit, suffering 1 damage and 2 curses. Nerys gets 1 glory on the glory track.
Keela reveals her trap token belonging to the Earthquake: second column. As both Akhel and Nerys are standing in the second column, both of them get hit by the Earthquake. They each have to decide between losing 1 action for the next round, or losing 4 health. As Keela hit 2 players, she moves forward 2 steps on the glory track.
Finally Akhel activates the Secret door and places the two door markers with 4 spaces distance. As he placed one of the door markers on the space he is standing, he can immediately move through the Secret door for free.
Escape phase
(only after the 8th round)
(Basic game) If you are playing the Basic game, skip this section!
The Initiation ceremony ends, it is time to escape the temple, you are no longer welcome here!
In the escape phase you try to escape from the temple through one of the exits on the edge of the #4 game board. These exits open at the beginning of this phase by removing the Heart wall.
During the escape phase, you receive movement points according to your current health. The health and curse track is divided into 7 sections (each is one row in your character board), and each section indicates a movement amount on the right side. You have this many steps to reach one of the exits.
Each exit has an Escape reward, which gives you the indicated reward (a crystal, a glory, or -2 curses). After taking the reward from the supply, leave the token there, as other players can escape through the same exit and, each player who does, will take the same reward.
If you could not get out from the Temple, you get 1 curse for each step you are short of reaching an exit, and you don't receive any exit reward.
Important: You cannot do anything else in this phase, just move.
Amulets can be used in this phase too, so, if you have a green amulet left, you can move 1 more space, or, if you have a white amulet, you can go through a wall.
Example: Keela has 3 steps for the Escape phase. As she has several options to go out (she can reach 3 different exits with her 3 steps), she decides to step out by the yellow crystal reward, and takes a yellow crystal from the supply. Nerys has 3 steps, but as the closest exit is 5 steps away from her, she cannot escape. As she is missing 2 steps, she gets 2 curses, and doesn't get any reward. Fenn has only 1 step, but as he has a white amulet too, he can go through a wall, which means, he can get out and take the '1 glory' reward.
Scoring
(Full game) The game ends after the escape phase.
(Basic game) The game ends after the 8th round.
Complete scoring as indicated below. The player who has gathered the most honor points wins the game.
Point sources:
1. Crystals
| Crystal | Points |
|---|---|
| Purple crystal | 3 points |
| Yellow crystal | 8 points |
| Blue crystal | 1 point per crystal: 3-4 players: the player who has the most gets +30 points, second most (but at least 1 piece) gets +12 points (1st place tie: (30+12)/number of tied players; 2nd place tie: 12/number of tied players, if necessary, rounded down); 1-2 players: +18 points and there is no 2nd place. |
| Green crystal | Depending on the number of green crystals you have, you get points as indicated: 1 – 1 point, 2 – 4 points, 3 – 9 points, 4 – 16 points, 5 – 25 points, 6 – 36 points, 7 – 49 points, 8 – 64 points, 9 – 81 points, 10 – 100 points |
| Heart of the Jaguar | 30 points |
2. Health and Curses
The Health and Curse track on your character board is divided into 7 sections (each in a different row). Each section has its own point value, and you gain honor points according to the section where your Health and Curse markers are at the end of the game. The values on the left show the minus points for your curses, and the values on the right of the track show the points you earn for your health.
3. Glory
Depending on your final glory value, you earn the number of Honor points indicated on the Glory track. Occasionally you may surpass the 71 points space. If you do, count +5 points for each further step.
4. Rituals
The Minor rituals are worth honor points, you can find the value earned on the token's reverse side.
5. Objectives
There are 8 different Objectives, and you use 3 from them for each game. These give you points for various achievements, but only if your Objective marker is on them.
As a reminder: you can place an Objective marker onto an Objective:
- at the beginning of the 7th round,
- if you performed a major ritual,
- if you reached the second checkpoint on the glory track.
Possible Objectives:
- 1 point for each health point.
- 8 points, +1 point for each glory.
- 24 points, minus 3 points for each curse.
- 4 points, +4 points for each chest.
- 4 points +4 points for each map piece. It does not matter if you've already used them.
- 4 points for each level you reached. (It is possible to have more than 3 levels, if you level up more.)
- 4 points +2 points for each purple or yellow crystal. These can be in your bag or incorporated.
- 4 points, +2 points for each taken blue or green crystal. These can be in your bag or incorporated.
Special rules for various player counts
3 player game
Gameplay
In the first 6 rounds, one player will activate not 1, but 2 traps (by using an additional Trap activator in their own color). In the first round, the 2nd player in the player order will start with the extra Trap activator. In the subsequent rounds, this bonus moves around the table to the left.
The order of using the extra Trap activator: each player chooses 1 trap as normal, and then the player with the extra activator token chooses one more. To indicate order, in the Refresh phase place the second activator onto the 4th space of the order track in the refresh phase.
2 player game
Setup
- Take 2 Trap activators in your own color.
- Decide randomly the player order, and place the Trap activators onto the order track like in the illustration above, starting with the first player's Trap activator.
Gameplay
In the refresh phase, when you set the new turn order, place the first player's activator onto the first spot, then comes both Trap activators of the other player, and, finally, place the first player's second activator onto the last space.
Each round, each player sets 2 traps in the order determined above.
Each time you hit your opponent with one of your traps, you move 2 steps on the glory track, instead of 1.
Notes and advice
- First-time players should start the game with an additional red amulet.
- Shards of the Jaguar is not a memory game. Anytime you don't remember the Trap token you've chosen, feel free to check it.
- Always watch the other players' movement! Knowing where they finished their turn makes it easier to avoid their traps, as they share some information with their landing space. If somebody chose the darts, and finished their movement next to a red and blue wall, you can expect the chosen trap is yellow (as normally no one would hurt themselves...).
Characters
(Basic game) If you play the Basic game, skip this chapter!
There are 4 different characters in the game, each with their own special abilities. Each character starts with a different amulet, this is indicated above the illustration of the character.
On the first two level-ups, each character gets a one-time bonus, which can be various rewards like amulets, crystals, healing, or glory. The levels are usually divided into 2 sections, and you have to choose which one you take.
Akhel
Akhel never had to suffer diseases and never feared pain. Even as a little kid he wrestled disciples twice his age.
Although he wasn't always victorious, he quickly gained size and expertise upon his opponents, and now he is one of the toughest and most skilled young fighters in the tribe.
As a tried warrior he faced many perils and dangerous creatures, and through all that harshness he strengthened himself against dark forces.
3rd level – Shield:
You get the Shield token from the supply. From now on, each round, during your action phase, you can defend against a harming trap activated by another player (place the Shield onto it). This means that you will not suffer the trap's effect if it hits you.
Important: The player who activated that trap still gets the glory as if you were hit.
2nd level:
A: Take an extra Trap activator token. B: Take a purple crystal, heal 1 and lose 1 curse.
1st level:
A: Take a black amulet. B: Take a red amulet.
Nerys
Nerys is the member of a family which gathers precious resources for the tribe in the deepest waters of the belly of the mountain.
The cave entrances are close to the center of the tribe's camp, but the divers still need a few days to reach the cavern lakes because their level is so far beneath the ground. The cave system's corridors are often flooded and full of lurking dangers.
But Nerys and her kin are up to the task as they move quickly through the water, and if necessary, move the water itself...
3rd level – Wave:
Once per round, at the end of the round, after all traps are activated, you may spend a blue amulet to activate the Flood for yourself. This means that you can move your pawn 2 spaces, or you can move 1 space and take 1 item from the space where you are standing after the movement. Additionally, as a one time bonus, you earn a blue amulet when you reach this level.
2nd level:
A: Take an extra Trap activator token. B: Take a blue amulet and heal 2.
1st level:
A: Take a black amulet. B: Take a blue amulet.
On each character's 2nd level there is the possibility to choose an extra Trap activator for the next round. If you chose this, take one Trap activator in your color from the supply and place it onto the 5th space of the order track (Or onto the 6th if the 5th is already occupied. If both the 5th and the 6th spaces are occupied, you cannot choose the Trap activator as a reward for your level-up.). On the next round, you can activate another trap (with the normal rules).
If you reached the 3rd level, the character has reached their full potential and turns on a constant ability.
Keela
Keela is quite used to the dangers of the wild as she was raised in a family that often finds its members battling the most vicious predators.
They have a highly prestigious place in the tribe as it is their duty to clear the nearby sites of creatures that can harm the tribe, and to trap the necessary sacrifices for the shaman's most demanding rituals.
When the thrill of the hunt boils through her veins, Keela feels invincible against any prey that comes in her way.
3rd level – Hunt:
You can decide in the refresh phase to use one of your yellow amulets as a Trap activator. To do so, place it onto the first free space of the Order track. If there isn't a free space, you cannot use this ability in this round. After the players selected their traps, place that yellow amulet onto one of the free harming traps, and set it as normal. If there is no more harming traps left, take back the amulet. Additionally, as a one time bonus, you get 2 yellow amulets when you reach this level.
2nd level:
A: Take an extra Trap activator token. B: Get 1 glory, heal 1.
1st level:
A: Take a yellow amulet. B: Take a white amulet.
Fenn
Fenn is unafraid of great heights or of making dangerous leaps. He has moved through any type of terrain with skillful ease since he was a youngling. No wonder he quickly found himself in the company of veteran scouts and was honored to go with them to explore the highest cliffs and darkest paths.
His uncanny agility, and the fact that he can get through the tightest spots, started the rumor that he can shift his shape to his advantage if he wills so.
3rd level – Jump:
By spending a green amulet you can move Fenn 2 spaces in one direction. You cannot go through a wall with this ability, even if you have a white amulet. This effect does not count in the limit of the use of a green amulet. Additionally, as a one time bonus, you get a green amulet when you reach this level.
2nd level:
A: Take an extra Trap activator token. B: Take a white or a green amulet, then heal 2.
1st level:
Take a green amulet.
Solo rules
In this version you have to take part in a unique challenge against the Jaguar itself! Its spirit is still present in the Temple, and it will harm you if you let it too close to you. On the other hand, it will reward you if you can tame it!
If you don't see a change to a rule here, use the rules of the full game!
Before starting the game, you have to decide which difficulty level you wish to play. For the first time, we recommend you start with the 1st level, but later on you can increase the challenge by playing the higher difficulties.
Setup
-
Choose your character, take 1 of its Trap activators, and place the Health and Curse markers onto the corresponding values of the health and curse track, depending on the difficulty level:
I.: health: 15 and curse: 6 II.: health: 12 and curse: 7 III.: health: 10 and curse: 7
-
Set up the game board as if you were playing a 2-player game.
-
Use the Objectives' reverse side where there is only space for one Objective marker.
-
Create a face down pile from the Jaguar movement tokens, shuffling only the movement tokens with 2/3/4/5 values. Place the remaining tokens onto the 3rd space of the round track.
-
Shuffle the Taming tokens and create a face down pile from them.
-
If you are playing the 1st difficulty level, place your Glory marker onto the '3' point value spot on the glory track, otherwise place it onto the starting space.
-
Place the Solo round marker onto the round track's first place.
-
Place the Jaguar meeple onto its starting position. It is several steps away from the middle space of the first column. The distance depends on the difficulty level:
I.: 8 steps II.: 7 steps III.: 6 steps
Determining the starting position of the Jaguar
Depending on the difficulty level you play, place the Jaguar 8/7/6 steps away from the middle space of the first column. To find the right position, you have to start counting the steps from there, staying in the middle row if possible. If a wall prevents you from staying in the middle row, you must go around it by the shortest way possible which leads you back to the middle row. If there are multiple starting positions which meet the rules above, you can decide which position you use.
Example: Let's say you are playing on the I. difficulty level, so you have to place the Jaguar 8 steps away from the middle space of the first column (orange X on the illustration).
You must count the steps on the middle row until it is no longer possible. As there is a wall after the 3rd step, you have to go around it by the shortest route. After you get back to the middle row (with the 6th step), you stay on it until it is no longer possible. As you can see, for the 8th step, you have to go around another wall. As it is possible to go around it with the same number of steps from above and below, you can decide which position you choose (white X).
Gameplay
You play the game through 8 rounds, just as in the normal version, but your goals are different. You must fulfill all of the goals below to win the game:
-
Reach the 3rd level of your character.
-
Take the Heart of the Jaguar.
-
Fulfill the necessary number of Objectives depending on the difficulty level:
I.: 1 Objective II.: 2 Objectives III.: 3 Objectives
To fulfill an Objective, you have to earn at least as many honor points with it, as the Objective states. But remember, to have a chance to gather points with an Objective, you have to have your Objective marker on it.
Example: Here you have to gather at least 20 points from this Objective to fulfill it. This means that you have to gather at least 5 level-ups during the game.
- Stay alive. (In contrast to the normal version, if your health reaches 0, the game is over.)
- Escape the Temple.
If you won the game, count your points – just as in the normal game – and, depending on the points you gathered, you can evaluate your success:
- Below 200 points – Well done!
- 200-249 points – Amazing!
- 250+ points – Speechless...
At the beginning of the game
- Choose your starting position and take the matching Amulet and Minor ritual.
- Set traps with the following method.
- Randomly place 2 Trap tokens of the leftmost trap below the Trap board, and one into its slot. Then flip all of them face up.
- Randomly place 2 Trap tokens of the second trap from the left below the Trap board, and one into its slot. Then flip one of the Trap tokens below the Trap board.
- Randomly place 2 Trap tokens of the second trap from the left below the Trap board, and one into its slot, face down.
Structure of a round
- Refresh phase
- Move the Round marker
- Refresh traps
- Reveal Jaguar movement tokens
- Action phase
- Spend your actions
- Set your trap(s)
- Trap activation phase
- Activate the traps of the Temple
- Move the Jaguar
- Taming check
- Activate your trap(s)
After the 8th round comes the Escape Phase (just as in the normal game).
1. Refresh phase
a) Move the Round marker one space on the round track. (skip this step in the first round)
b) Refresh traps
In the Solo version, all harming traps are set by the Temple each round. To do so, follow the subsequent method for each trap:
If all Trap tokens of the trap are face up, flip them all face down, shuffle, place one of them randomly into the trap slot, and the others below the trap.
If a trap has face down tokens left, you must choose randomly which one to activate. If there is only one face down token left, that will be the active trap for that round (and you can flip it face up).
Finally, take back your Trap activator.
c) Flip the Jaguar movement tokens
Take the upper 2 Jaguar movement tokens from the pile, flip them face up, and place them near the game board. These will be the potential movements of the Jaguar for this round.
At the beginning of the 3rd round you have to create a new pile. To do so, take the remaining Jaguar movement tokens from the round track, and shuffle them with the original 4.
At the beginning of the 7th round, you have to create a new pile again, but use only the following cards:
- 2 steps,
- 2 steps with "move through walls",
- 3 steps,
- 4 steps.
Additionally, place the Jaguar into the middle space of the last column (see illustration on the right).
2. Action phase
a) Spending your actions
You have 5 actions for the first 6 rounds, and 6 for the last 2 rounds. In addition to your normal action possibilities, for 1 action, you may flip face up the active Trap token of one of the traps. It still remains the active token, but from now on you have information about it.
The run action works slightly differently: you get only +1 movement if you chose to run. Additionally, if you choose to run (which means you don't spend actions on anything else, only for movement) you can move through a space with the Jaguar on it without being harmed by it.
b) Setting your trap(s)
Just as in the normal game, you can set your own trap (choosing from the 6 possibilities) by placing your Trap activator onto the trap's activator space and by choosing a Trap token.
If you chose a harming trap, then, regardless of how many Trap tokens are face up, take all Trap tokens, choose one which will be the active one, and place it into the trap slot. Then, shuffle the remaining two tokens and place them face down below the trap. For this round this trap is considered as your trap, and it is possible for you to hit the Jaguar with it.
The Secret door works the same as in the normal game, but the Jaguar can also move through it with one step.
The Flood moves the Jaguar too, but it does not trigger the negative effects of it (it doesn't harm you, if you end up on the same space with the Jaguar, and it doesn't take any items from the board during the movement).
3. Trap activation phase
a) Activation of the traps of the Temple
From the left to right, activate all traps set by the Temple. To do this, flip each Trap token in the trap slots face up (if they weren't already face up), and suffer the effects if applicable. If a trap hits you, you lose one glory. If you cannot lose more glory, as you are standing on the starting space, you suffer 2 damage for each glory you could not deduct.
The Temple's traps do not affect the Jaguar.
b) Moving the Jaguar
The Jaguar always moves by the shortest route in your direction, and tries to finish its movement on the closest space to your position. If there are multiple of these, it chooses the way which has more items to take. If it is still tied, you decide which road it takes.
The Jaguar takes all the items on the route it travels, except the rituals. Take these items off the board and return them to the supply as soon as the Jaguar steps on them. If it took a blue crystal, place it onto one of the free slots of the Jaguar area (and place the further ones also there). When scoring you have to take into account the number of blue crystals the Jaguar has gathered.
The actual movement of the Jaguar depends on the Jaguar movement tokens you flipped at the beginning of the round, and on whether a trap hit you.
- If none of the traps hit you, the Jaguar moves according to the Jaguar movement token with the fewest steps.
- If at least one trap hit you, it moves according to the token with the most steps.
Some of the movement tokens have an additional symbol (see illustration), which means that the Jaguar moves through all walls.
If the two tokens have the same value, the one with a "move through walls" ability is considered to be the highest.
If the Jaguar reaches your space, it stops its movement, and you suffer 6 damage.
The Jaguar also damages you if you move through its space in the Action phase (except whilst running).
After you moved the Jaguar, place the 2nd flipped movement token aside.
c) Taming check
You can tame the Jaguar and gain a reward if you let it come close to you, but not too close. This means that if the Jaguar stopped its movement exactly 1 space away from you, then you can reveal the upper 2 Taming tokens and choose one of them as a reward. Place the chosen token next to your character board and the other face up to the side.
If it shows you an item type which is on the game board (crystal, amulet chest, map pieces, ritual), then you have to take it from the game board. In the first 6 rounds you cannot take anything from the #4 Game board tile.
If you took a ritual, you have to place it into your pouch. Later on, for one action, you can perform it (just like your starting ritual).
If you took the '2 steps' token, it means that you can move up to 2 steps. You can use the white amulet during this movement.
If you took the Flood, you can use it with the normal rules. You can use also a blue amulet to it.
If the taming pile runs out, shuffle the set aside tokens and create a new pile.
d) Activation of your trap(s)
Activate your trap and check if you hit the Jaguar. If you did, you earn 2 steps on the glory track. If you hit yourself too, you don't earn any glory.
Further rules
Blue crystals
When counting the points for the blue crystals, you have to compare the number of blue crystals you gathered with the number of blue crystals the Jaguar took off the board. If you have more than the Jaguar, you get +18 points, if you have the same number, you get +9 points, and if you have less than the Jaguar, you get no additional points.
Character abilities
It is possible to choose the +1 Trap activator on your character's 2nd level, but the time when you can use it depends on when you got it.
If you reached your 2nd level in the Trap activation phase, then you have to use the token in the next round.
If you reached your 2nd level in your own turn, then you have to use the +1 Trap activator in this round.
Symbols
- Health, Curse, Action
- Glory, Honor point, Level-up
- Movement, Take, Run
- Shield, Trap activator, Round
- Objective, Place, Escape
- Amulet chest location, Ritual location
- Pedestal, Major pedestal, Blessed pedestal
Setup Guide for the game boards
4 players
| Game boards | #1 | #2 | #3 | #4 |
|---|---|---|---|---|
| Crystals | Purple 8, Yellow 6, Blue 7, Green 9 (pedestals) | Purple 4, Yellow 4, Blue 4, Green 4 (pedestals + major pedestals) | ||
| Amulet chests | 1 | |||
| Amulets | 1 different Amulet next to each row of the #1 Game board + each player gets a green Amulet | Red 5 pcs, Black 5 pcs | ||
| Map pieces (4 pcs from each type) | 3 pcs | 3 pcs | 2 pcs | |
| Minor rituals | 6 pcs next to each row of the #1 Game board | 4 pcs | 4 pcs | |
| Major rituals | 4 pcs |
3 players
| Game boards | #1 | #2 | #3 | #4 |
|---|---|---|---|---|
| Crystals | Purple 6, Yellow 4, Blue 6, Green 8 (pedestals) | Purple 3, Yellow 3, Blue 3, Green 3 (pedestals + major pedestals) | ||
| Amulet chests | 1 | |||
| Amulets | 1 different Amulet next to each row of the #1 Game board + each player gets a yellow Amulet | Red 4 pcs, Black 4 pcs | ||
| Map pieces (3 pcs from each type) | 2 pcs | 2 pcs | 2 pcs | |
| Minor rituals | 6 pcs next to each row of the #1 Game board | 3 pcs | 3 pcs | |
| Major rituals | 3 pcs |
2 players
| Game boards | #1 | #2 | #3 | #4 |
|---|---|---|---|---|
| Crystals | Purple 5, Yellow 3, Blue 4, Green 6 (pedestals) | Purple 2, Yellow 2, Blue 2, Green 2 (pedestals + major pedestals) | ||
| Amulet chests | 1 | |||
| Amulets | 1 different Amulet next to each row of the #1 Game board | Red 4 pcs, Black 4 pcs | ||
| Map pieces (3 pcs from each type) | 2 pcs | 2 pcs | 2 pcs | |
| Minor rituals | 6 pcs next to each row of the #1 Game board | 3 pcs | 3 pcs | |
| Major rituals | 3 pcs |