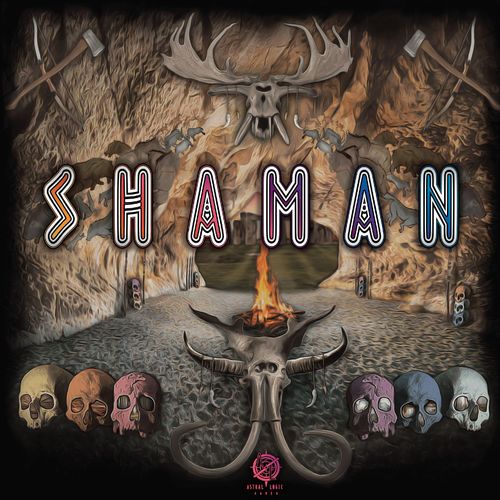
Shaman
Shaman Rulebook
Table of Contents
Table of Contents
About the Game
You are the shaman leader of your specific tribe. Each shaman has a collection of skulls in which they may commune with the spirit world. You must use these skulls to take actions, or harness a beast spirit, or even create and collect totems for bounties at your life's end. The actions you choose will tell your tribe to move, engage, grow, or worship, each having its own set of choices. In doing so, you will collect resources from the land to feed your tribe, to develop technologies, to build structures, make offerings to the great spirits, activate skulls and more. As the shaman you must be wary of impending catastrophes known only to you and the other shaman of the world.
The shaman whose tribe has the largest population is the winner.
Objective
The shaman whose tribe has the largest population is the winner. A tribe's total end game population consists of their total token dial amounts (rovers, warriors, villages), their totem bonus amounts, and any end game bonus population. The population represented by the dials on your playerboards which correspond to your tokens on the board will be the main portion of your score.
Components
Printed components:
- 1 x game board
- 6 x player boards
- 1 x enemy feast value bag
- 12 x great spirit tiles
- 10 x end game bonus tiles
- 24 x wild beast tiles
- 2 x (21 x in-round bonus tiles)
- 6 x catastrophe tiles
- 36 x action cover tiles
- 1 x round track marker
- 54 x technology tiles
- 9 x (25 x resource tiles)
- 9 x (5 x five-value resource tiles)
- 9 x (5 x enemy feast value tiles)
Wooden components:
- 6 x (1 x shaman token)
- 6 x (1 x fire token)
- 6 x (3 x village tokens)
- 6 x (4 x warrior tokens)
- 6 x (5 x rover tokens)
- 6 x (1 x shrine token)
- 6 x (1 x stash token)
- 6 x (1 x bunker token)
- 6 x (10 x skull tokens) and 7 x neutral skull tokens
- 6 x (1 x temple token)
- 6 x (1 x silo token)
- 6 x (1 x fort token)
- 6 x (13 x stat cubes)
- 2 x mammoth tokens
- 2 x mastodon tokens
- 2 x rhino tokens
- 2 x bison tokens
- 2 x sivathere tokens
- 2 x camelops tokens
- 2 x irish elk tokens
- 2 x wild horse tokens
- 2 x auroch tokens
- 2 x shortfaced bear tokens
- 2 x cave bear tokens
- 2 x cave lion tokens
- 2 x smilodon tokens
- 2 x direwolf tokens
Key Aspects
Tokens, Dials and Gaining / Losing Population
The main concept of the game is to gain population on your dials. You will begin with just 25 on your starting village. When you gain, lose or spawn new tokens, you will turn your dials accordingly. Be mindful of dial capacities as indicated on each stat chart on your player board.
Stat Charts
Players' tokens have many different abilities that are indicated by the charts on their player board. Those tokens on their player board have:
- Dial capacity
- Attack range
- Feast value quantity
- Base strength
- Collection amount
- Movement amount
Players may increase or even decrease these stats throughout the game.
Spirits, Technologies, Structures and Beasts
Players will have an abundance of choices to make throughout the game, as technologies, Great Spirits, structures, and harnessed beast spirits can all give abilities, boosts, discounts and other benefits.
Skulls and Uses
Skulls are very important in Shaman as they are your action selection mechanism. Each turn you will place one on the main board (action) or on your player board (sacrifice action). However, they may also be used to harness a beast spirit, or to create a totem. You will begin with only three, but may worship to gain more from your player board. Beware: enemy tribes may attack you to gain an unlocked skull of yours, as enemy skulls are the basis of totem creation.
Hunting, Combat and Feast Values
One of the actions, Engage, allows players to combat enemy players or to hunt beasts of the wild. In this game there are no combat cards or dice. Rather, a player may use resources on their player board (up to as many as their feast value stat allows) which have specific combat values indicated by the player board. Players will simultaneously place face down and then flip these resources and calculate combat value.
Action Covers and In-Round Bonuses
The amount of actions available in the game will increase at a variable rate, depending on how often bonus tiles are triggered. Most action spaces begin covered, but as players trigger bonuses, covers will be removed to open up a new action space. Covers will also come off at the ends of rounds.
Sacrifice Actions
Along with the main actions available on the board, there are 3 different sacrifice actions on your own board, which allow players to sacrifice some items in order to gain a different item. When players perform this action they also sacrifice their place on the turn track, by placing their fire token on an empty action space on the main board. The fire token will return when they take that action or at the end of the round.
Main Board Set-Up
- Place the round track marker on the first space on the track.
- Shuffle and place one bonus tile face up for each appropriate round.
- Shuffle and place the six catastrophe tiles face up.
- Shuffle and place one of the ten end game bonus tiles face up.
- Shuffle and place the action covers face down. Leave uncovered X + 1 Move, X Engage, X - 1 Grow, X Worship, where X is the player amount.
- Place all technology tiles on the appropriate spaces.
- Shuffle and place X + 2 great spirit tiles face up, where X is the player amount.
- Place the seven neutral skulls, one on each of the appropriate spaces shown.
- Shuffle the beast tiles and place one face up on each of the appropriate spaces shown, and place the appropriate beast token on top.
- Fill the beast spaces with the remaining beast tiles and their appropriate tokens.
- Determine turn order and place the fire token and shaman token: fire = top, shaman = bottom.
- Place starting villages and place analog warriors on empty starting villages.
Playerboard Set-Up
- Place three skulls in the active skulls box.
- Fill skull spaces with skulls.
- Fill rover spaces with rover tokens in the center of the dial, matching tokens with dials.
- Fill warrior spaces with warrior tokens in the center of the dial, matching tokens with dials.
- Fill village spaces with village tokens in the center of the dial, matching tokens with dials.
- Fill structure spaces with the appropriate structures.
- Place the six rover stat cubes, one in the first box of each category.
- Place the six warrior stat cubes, one in the first box of each category.
- Place the last stat cube in the first box of the village capacity.
- Choose the bottom or middle village to be your starting village, place it on the main board starting village space, and turn its dial to 27 or 28.
Playerboard key: A: sacrifice actions. B: feeding costs, surplus bonuses. C: resource spaces and feast values. D: tech spaces and costs. E: totems. F: catastrophe effects. G: village settlement costs. H: structure costs and abilities. I: locked tokens, outlined in gold, which must be empty below to be unlocked.
Variants
Hidden info vs. perfect info: Players may agree to modulate which tiles placed are hidden information, from all hidden to all shown.
Skill difficulty: Players may agree to use expert bonus tiles (B). For even more added difficulty, players can feed per 50 rounded up instead of rounded down.
Game length: Players may play a supershort version using only odd rounds. Players may also play a short version using all rounds except the first, beginning in round two.
Flow of Play
The game is played over 7 years, each year with 4 phases:
- Catastrophes
- Actions
- Feeding, Surplus, Spirits
- Clean-up
Catastrophes
Before each round, except the first, a catastrophe occurs. The effect of the catastrophe is determined by each player's playerboard. For some, a catastrophe may be a boon; for another, a tragedy. The effect of the catastrophe only lasts for the ensuing round. Catastrophes are usually not hidden, so plan ahead.
Actions
This is the main phase of the game. Players will in turn order place one skull each turn, either onto the main board actions, or onto their playerboard sacrifice actions. When a player has no skulls remaining, their action phase ends by passing their turn.
The main actions are in four categories: Move, Engage, Grow, and Worship. Each action allows players to choose one of three subactions.
The sacrifice actions are in three categories, each allowing the player to choose one of two possible subactions. In performing a sacrifice action, a player will affect their turn order, and also possibly save an action space for themselves later in the phase.
Feeding, Surplus, Spirits
After the action phase has concluded, players will move to the feeding phase, each spending the necessary amount to feed their tribe, as shown on their playerboards. If a player is unable to feed their tribe, they may place an active skull back in the skull reserves, or else lose 5 population per missing item.
After feeding, players may choose to spend any extra resources to increase their population, adding the population to one dial. If that dial fills to capacity, another dial can then be filled, and so on.
Players may then, in turn order, utilize any Great Spirit abilities if able.
Clean-up
- Return skulls.
- Remove the appropriate action cover(s).
- Reset turn tracks: finalize the next round track, reset the current round track accordingly.
- Replace beasts in the specific rounds shown.
- Move any analog warriors present one hex: odd rounds counterclockwise, even rounds towards the center.
Actions
Move
When a player selects the Move action, they may choose one of the following:
- Gather: Move a token on the main board and collect the appropriate amount.
- Spawn (and Gather): Take a token from the playerboard and perform the Gather action.
- Advance: Move the fire token on the next turn track forward or backward, gaining the amounts shown.
Gather
A player may choose to gather by moving one token up to the number of spaces allowed by their token's movement stat (i.e. if moving a rover, use the rover stat chart). Once they have reached the desired hex they may collect the appropriate amount as defined by the collection stat (and possibly technologies, structures, Great Spirits and beast spirits). Those resources are taken from the bank and placed on your playerboard for use later.
Spawn (and Gather)
A player may choose to spawn a new token if possible (not exceeding the token limit and not decreasing village population under 12). To spawn, a player chooses an available rover or warrior token, giving it an amount of population not exceeding its capacity, subtracting that amount from the village it spawned from. Tokens must be spawned from villages. When removing tokens from the playerboard, the player gains an immediate bonus shown in the token's circle. Once the player has spawned a new token, they may then use that token to immediately perform the Gather action.
Advance
A player may choose instead to advance their fire token on the next round turn track. Fire token movement is defined by your position on the track; notably, you can always move to whichever turn space you desire. When advancing you may choose instead to move backwards. Regardless of direction, the player always gains some amount of resources and/or population as shown on the track. Also notable is the fact that next round turn order may change due to sacrifice actions throughout the round, and may modulate the status of the track at any given moment.
Engage
When a player selects the Engage action, they may choose one of the following:
- Trade
- Combat
- Hunt
Trade
A player may trade for resources by simply paying one of the resources shown on the hex where one of your tokens currently resides, thereby gaining all of one resource shown on a hex up to your range stat points away. If a token's range is zero it may still trade with adjacent hexes. Beyond range, the trade subaction does not take into account the token's collection stat points, nor a tribe's technologies, structures, spirits etc.
Combat
A player may engage in combat using only one token (unless paired with a beast spirit), waging combat against one enemy token. An enemy must be within your token's range stat points in order to engage. For each range stat point an enemy is "lacking" they lose 1 feast value tile, with a minimum of one.
Combat is calculated by simply multiplying a token's (population x strength). Population is denoted by the dials and strength by stat points. However, players will usually augment their combat value by using resources as "feast value tiles," using up to the allotted amount as defined by feast value stat points, technologies, Great Spirits and beast spirits. The value of each resource is defined underneath its space on your playerboard. Players will simultaneously choose and place face down their feast value tiles and then simultaneously flip them and calculate their total combat value by adding feast value amounts to population and strength before calculating total value. The player with the higher value wins. (See Combat, p. 14.)
The winner gains either:
- 1/5 of the loser's total resources, choosing each
- 1/2 of the losing token's population, rounded down
- 1 reserve skull (after round 4)
The loser gains the feast value tiles used by the winner.
When combating an analog warrior, the analog warrior is defined by the box top left of the main board. The analog warriors use the enemy feast value bag. Defeating an analog warrior will only yield population or a skull. When defeated by an analog warrior you still gain the feast values used, except gain them from the bank and replace enemy feast tiles in the bag and shake the bag well.
Villages may not engage in combat, nor be attacked.
Hunt
A player may hunt a beast of the wild, utilizing all the same rules as combat mentioned above. Beasts have stats like the analog warriors, as defined by their own box on the top right of the main board. If the hunt is successful, the player may move their token to the hex the beast is on, and then down it by turning the token on its side. Once downed, a player must decide to immediately slaughter it for meat, gaining the amount shown for the appropriate round, or may wait to use a worship action to harness a beast spirit, by gaining and placing a skull on the downed beast, thereby permanently pairing it with the token that defeated it, giving only that token a super special ability.
Grow
When a player selects the Grow action, they may choose one of the following:
- Develop
- Build
- Settle
Develop
A player may develop a new technology by paying the cost shown (each technology has a unique cost for each player; furthermore, each level of technology increases in cost), subtracting any discounts granted by empty token spaces, or by Great Spirits, or even by technologies themselves, and then placing the technology on your playerboard. A player must have the necessary prerequisite technology to develop the next level.
- Each level one technology is available to 3 players.
- Each level two technology is available to 2 players.
- Each level three technology is available to only one player.
Build
A player may build a structure by paying the cost shown in the box above their structure tokens on their playerboard. The structure must be placed on a hex where one of your tokens resides. In order to build a larger structure, its smaller counterpart must already be built. You do not replace the structures when doing so. Specifically, in order to build a temple, a shrine must already be constructed on another hex. Importantly, only one structure can exist on each hex, regardless of player. When placing the structure a player gains an immediate bonus shown underneath the token on your playerboard. The structure, moreover, grants an ongoing ability as shown in the structure box. Structures cannot be removed or destroyed. However, they may be moved on the board with the Dwelling (Hut) technology.
Settle
A player may settle a new village by replacing a warrior or rover token already on the board with a population of at least 12, as well as paying the settlement cost shown in the bottom of the village stat point box, immediately gaining the bonus shown underneath the token on the playerboard. Doing so will also allow the recently placed rover or warrior to again grant a bonus again later if and when they are spawned onto the board.
If a player replaces a rover or warrior token linked with a beast token, that beast is transferred to the nearest available token. If none are available, the beast token is placed next to the playerboard until a new rover or warrior spawns. It is then linked to that newly spawned token being placed with it on the main board.
Worship
When a player selects the Worship action, they may choose one of the following:
- Wild
- Gain Skull
- Gain Great Spirit
Wild
Often in the game, a player will wish to use a specific action, but it will not be available. If any Worship actions are available, a player may choose to use it as a wild instead, choosing any of the main board actions. However, this is at the cost of 1 resource per round, so a wild action in round three would cost 3 resources. The player then carries out the other action chosen.
Gain Skull
A player may gain a new skull from their reserve skulls on their playerboard or a neutral/enemy skull on the main board by paying the cost underneath the specific skull. A player may take their skulls in any order, aside from the top "golden ringed" skull, which must be the final skull. Players must immediately decide how to use the skull:
- It may be activated and placed in the active skull space, likely granting another action.
- It may be placed on a downed beast tile, to harness that beast's spirit, pairing it with the conquering token. (Animal tile and skull placed next to the playerboard; animal token now in tandem with the conquering token.)
- It may be placed on top of or next to two foreign skulls to create a tri-skull totem, granting you and only you a specific end game bonus, corresponding to the totem's specific colors as shown on the left side of your playerboard.
It is important to note that your token limit equals the number of active skulls. Also noteworthy is the fact that a player can gain (or lose) skulls through sacrifice actions.
Gain Great Spirit
A player may acquire the help of a Great Spirit by using a Worship action when on one of four meadow hexes, or on a hex with a shrine or temple (regardless of ownership). No payment cost is necessary at this time. A player simply chooses one of the available Great Spirit tiles on the left side of the main board. A player may usually have only one Great Spirit at a time (unless the player owns the Oral History ritual technology tile). After acquiring the spirit, the player may choose to activate the spirit by paying an offering cost on any of their turns in order to gain the Great Spirit's abilities during the round as well as abilities between rounds. Each new round a spirit must be reactivated. (More on spirits, p. 17.)
Sacrifice Actions
A player may use a sacrifice action by placing an active skull on one sacrifice action space and choosing one of the two options shown. The player will also remove their fire token from the next round track (sliding any fire tokens forward to fill the empty spaces) and place it on any open action space on the main board (in effect blocking other players and possibly saving it for yourself on your following turns). When the covered action is chosen, the player must choose the covered space if choosing that action category.
Each player board has 3 sacrifice actions available. The player will choose one of the three by placing a skull on that space, and then will choose one of two actions.
- Sacrifice Action 1: Sacrifice resources to gain population, or sacrifice population to gain resources.
- Sacrifice Action 2: Sacrifice resources to gain stat points, or sacrifice population to gain stat points.
- Sacrifice Action 3: Sacrifice resources, stat points or population to gain a skull, or sacrifice a skull to gain resources, stat points or population.
Gaining and Losing Population
In Shaman, population is often gained, lost or transferred from one token to another. Players will do so by simply turning their dial of the appropriate token and adding the necessary value. However, players must be mindful of their token's population capacity. A player's token's capacity is found on the top of each stat chart (rover, warrior, village).
A player may only add population to one token at a time.
If a player is adding population and a dial hits its capacity, but the player still has population to gain, they may then put the population onto another token's dial. If that dial fills, the player may add it to another dial, and so on.
If a player loses population through combat, the population always comes from the specific losing token. If a token is at 1 population and loses combat, the 1 population may not be taken.
If a player loses population during feeding, they may choose one token to lose the necessary amount. If that token's population decreases beyond its minimum, the token must go back to your playerboard. If this was performed with a village, the player may then choose to replace the removed village with a rover or warrior with the remaining amount of population. (For instance, if a player loses 10 population and that player's village decreases from 16 to 6, beyond the minimum of 12, the player must remove the village and replace it with a 6 population rover or warrior token. If they have no tokens available they will be unable to do so.)
If a player loses population from a sacrifice action, all of the same rules apply.
Combat
Combat occurs when any player chooses either the Hunt or Combat subaction of the Engage action.
In order for a player to engage in combat they must be within range as according to their range stat points for the token waging combat. A zero range means players must be on the same hex. A one range means adjacent, and so on.
If the token being attacked is lacking in range stat points, they may still wage combat, but they lose 1 feast value tile availability per range stat point missing, with a minimum of one. (For instance, if player A with a range of 3 attacks player B with a range of 2 from 3 hexes away, and player B's feast value stat points are at 4, player B will now have a temporary feast value stat amount of 3, because one must be subtracted for the one missing range stat point.)
It does not matter if the player being attacked has greater range than the attacker.
Players will wage combat by simultaneously (and secretly, using combat screens if necessary) choosing resources from their playerboard to be added to their combat value, called feast value tiles. The value of each tile is depicted underneath the resource. These values are added to the token's population and strength, which are then multiplied to find final combat value. The player with the higher value wins.
Example:
- A's warrior has a population of 10 and strength of 5.
- B's warrior has a population of 12 and strength of 4.
- A's feast value tiles add 3 population and 1 strength.
- B's feast value tiles add 2 population and 1 strength.
- A's total combat value = 13 x 6 = 78.
- B's total combat value = 14 x 5 = 70.
- Player A wins.
Some feast value tiles allow players to subtract opponents' feast value tiles or allow players to play an extra tile. In this situation the attacker resolves all -1 FV tiles, then the defender, then the attacker resolves all +1 FV tiles, then the defender, then calculate combat values.
The winning player collects their winnings directly from the losing player, but the losing player gets to keep the feast value tiles as resources that the winning player used (Salves technology reduces this). The winnings may be one of the following: 1/5 of total resources, 1/2 of the losing token's population, or 1 reserve skull after round 4.
All of the same rules apply for hunting beasts. Beasts and "analog" warriors will use the enemy feast value bag. Players should never use these tiles as resources. These tiles should always be replaced in the bag and shaken up after each combat. If players lose to the beasts or analog warriors, they will still gain the feast values used, just selecting from the bank the matching resource.
Feeding
Feeding begins as soon as the action phase ends. Players may in turn order (or simultaneously) pay the resources necessary to feed their population. Feeding requires a certain amount, usually between 3 and 5 resources, per 50 population, rounding down. Meaning, if player A's tribe's population is 166, they must pay to feed 3 times (166 = 50 + 50 + 50 + 16, rounded to 0). In the expert variant, players must feed per 50 rounded up, so the same example would mean feeding 4 times instead of 3.
To be clear, this means early in the game (in the normal version) players may not have to feed for up to several rounds, so long as their population has not reached 50.
In the event a player cannot feed their population, the player loses 5 population for each resource missing, or may forgo losing population altogether by losing 1 active skull permanently from the game, replacing it in the box.
Bear in mind that a player's amount of active skulls equals a player's token limit, so losing an active skull could also necessitate removing a token from the board, effectively losing all of that token's population.
Surplus
After players have fed, they may choose to use extra resources to increase their population, following all the necessary rules of adding population to dials. These resources are returned to the bank as with any other cost. Each additional surplus trade may be added to a separate dial.
Using the Great Spirit Abilities
Each Great Spirit grants an ability during the action phase as well as an ability during the following phase, this phase. In turn order players may, if possible, use a Great Spirit's ability applying to this phase. If any players have owned a Great Spirit since the preceding round but have not activated them, they may choose to activate them now to gain its ability. If those players choose to not activate the spirit, they will lose the Great Spirit tile, replacing it on the main board. To be clear, if the Great Spirit tile was only just obtained in the previous action phase and not from the round prior, the player does not have to activate the spirit to keep it, but will have to in the following round.
Technologies
Each technology has an ability and, where printed, a bonus gained when the technology is placed.
Navigation
- Tracking: Ability: after feeding gain 2 aux. food resources of choice.
- Mapping: Ability: gain 2 population when entering a new terrain.
- Calendar: Ability: gain X population per round where X = round number.
Agriculture
- Sowing: Ability: gain 1 food resource of choice when gathering.
- Herding: Ability: gain 2 meat when gathering.
- Cycling: Ability: gain 3 population when gathering in home terrain.
Preservation
- Drying: Ability: feeding cost requires 1 less resource per 50.
- Curing: Ability: gain 1 extra population for each surplus bonus.
- Fermenting: Ability: feed cost for entire tribe instead of per 50.
Clothing
- Poncho: Ability: collection is boosted by one (no stat raising necessary). Gain 2 population.
- Boots: Ability: movement is boosted by one (no stat raising necessary). Gain 5 population.
- Pants: Ability: capacity is boosted by three (no stat raising necessary). Gain 9 population.
Dwelling
- Lean-To: Ability: all structure costs reduced by one.
- Hut: Ability: may move 1 structure, once per round.
- Longhouse: Ability: may not be attacked if on or adjacent to structure.
Weaponry
- Spears: Ability: strength is boosted by one (no stat raising necessary). Gain 1 population after combat.
- Axes: Ability: feast value is boosted by one (no stat raising necessary). Gain 3 meat after combat.
- Bows and Arrows: Ability: range and strength is boosted by one (no stat raising necessary). May attack longhouses.
Medicine
- Potions: Ability: gain 1 resource of choice before combat.
- Salves: Ability: keep 1 resource of choice spent as a feast value.
- Surgery: Ability: skulls and population cannot be lost in combat; any resources lost, from bank instead.
Ritual
- Meditation: Ability: Great Spirit activation costs reduced by one.
- Funeral Rites: Ability: place 2 reserve tokens of choice next to playerboard; gain bonuses immediately.
- Oral History: Ability: may have two Great Spirits.
Art
- Painting: Ability: all technology costs reduced by one.
- Sculpting: Ability: gain 2 population when developing technology.
- Dyeing: Ability: gain 3 population when any player develops technology.
Great Spirits
- Mother of Earth: Ability: collect double of one resource when gathering. Bonus: may build one structure using any resources instead of specific cost (same amount).
- Father of War: Ability: gain 1 extra feast value at random from bank in combat; may attack longhouses. Bonus: gain 3 population; gain 1 range or 1 capacity; gain 1 strength or 1 feast value.
- Ancient Hunter: Ability: steal permanently 3 population from beast before hunt. Bonus: gain 1 meat, 1 fish, 1 water; may move and/or replace 1 beast on board.
- Shadow of the Sea: Ability: gain 1 water and 1 fish when gathering; gain 2 water instead of catastrophe effects. Bonus: steal 2 resources from each player; each player then takes 1 water.
- Lightbringer: Ability: gain 1 population anytime another player uses Grow action. Bonus: gain 3 population and become first player on next round track.
- Star Rover: Ability: may pay 4 of same resource to use 2 subactions of an action. Bonus: gain Astronomy tech for next round only.
- Spirit of Life: Ability: may trade with bank as extra action at 2:1 ratio, meaning give 2, take 1. Bonus: raise each capacity chart by 1 stat point.
- Soul of the Lost: Ability: collect double of one resource when gathering. Bonus: may build one structure using any resources instead of specific cost (same amount).
- Windwalker: Ability: movement amount is unlimited for your rovers and warriors. Bonus: gain 5 population; gain 1 movement stat point; gain 1 collection stat point.
- Harbinger of Change: Ability: each turn may reconfigure skulls on action boards. Bonus: may choose from game box next round's bonus, also gaining one action cover from action spaces.
Structures
Structures, along with having immediate bonuses, also grant on-going abilities as follows:
- Shrine: Once the shrine is built, any Great Spirit activation is discounted by 1 resource.
- Stash: When collecting on a hex with a stash, gain 1 extra resource that hex provides.
- Bunker: When combatting on a hex with a bunker, gain 1 extra feast value tile.
- Temple: Once the temple is built, any Great Spirit activation is discounted by 2 resources.
- Silo: When collecting on or adjacent to a hex with a silo, gain 3 extra resources that hex provides.
- Fort: When combatting on or adjacent to a hex with a fort, gain 5 extra temporary population.
Beasts
When a beast spirit is harnessed, the paired token gains the following ability, also shown on the main board:
- Direwolf: Token's population counts double in combat.
- Shortfaced Bear: (When defending) token's strength is doubled.
- Smilodon: (When attacking) token gains double amount of feast value tiles.
- Camelops: Token collects double amount of collection limit.
- Wild Horse: Token may move up to double movement amount.
- Sivathere: Gain Great Spirit with combat victory with token.
- Cave Lion: (When attacking) token's strength is doubled.
- Bison: Token gains double value for each feast value tile.
- Irish Elk: Token's range is doubled.
- Cave Bear: (When defending) token gains double amount of feast value tiles.
- Auroch: Gain free technology with combat victory with token.
- Rhino: Gain free reserve skull with combat victory with token.
- Mastodon: Token dial capacity is doubled.
Totems
Totems give players end game bonuses. Each specific set of colors grants a different bonus as follows:
- Totem 1: 1 population per stat point.
- Totem 2: 2 population per active skull.
- Totem 3: 3 population per token.
- Totem 4: 4 population per tech tile.
- Totem 5: 5 population per structure.
- Totem 6: 6 population per last space empty.
- Totem 7: 7 population per max capacity (per chart, not dial).
- Totem 8: 8 population per action cover.
- Totem 9: 9 population per beast spirit.
- Totem 10: 10 population per totem.
Scoring
After the feeding phase, players may construct one final totem, paying for the skull worship cost. Then players move to scoring by adding up these amounts:
- Total rover population
- Total warrior population
- Total village population
- Totem bonus amounts
- End game bonus amounts
Totem and end game bonus amounts do not need to be represented by the dials and are not limited by any stat points.
The player with the highest total is the winner. In the rare event of a tie, the player with the most skulls is the winner. If still tied, the player with the highest technology value (counting their levels as the value for each tile) is the winner. If still tied, the player with the most resources remaining is the winner. If still tied, maybe an epic rematch.
Highlighted Rules
- Token limit: The number of tokens cannot exceed the number of active skulls, not counting structures.
- Hex capacity: The number of tokens on a hex cannot exceed two, not counting beasts. A player may only have one token on each hex.
- Combat prowess: Population x strength (players add any feast value boosts and multiply).
- Spawning from starting village: May only move laterally from starting space.
- Great Spirit limit: May only have 1 Great Spirit tile at a time, unless the player owns the Oral History tech tile.
- Sacrificing skulls: May not sacrifice skulls if doing so makes token amount exceed token limit.
- Acquiring foreign skulls: Must acquire 1 skull of each color before acquiring a 2nd of the same color.
- Fire tokens with sacrifice actions: Fire token must be removed from turn track and placed on an open action space.
Icons
The icons are printed as images. Their labels, as printed in the rulebook's icon key, are:
- Food resources: mushroom, fruit, grain
- Build resources: clay, stone, wood
- Aux. food resources: fish, water, meat
- Other icons: beast, skull, Great Spirit, structure, resource tile, feast value, strength, range, population, movement, collection amount, dial capacity, cannot move through, next turn (round track), totem, action cover, last space empty, token, stat point, player
Solo Mode
There are three modes to solo play:
- Training mode: Meant to mimic a normal game with less tension and more freedom to explore, experiment, and tinker with the vast combination of strategies and decisions.
- Survival mode: The solo player is not necessarily concerned with their tribe thriving and expanding. Instead the solo player will be worried about their tribe surviving at all, as the Great Cataclysm will come at the game's end. The solo player's tribe must reach a certain carrying capacity before the end of your shaman's lifetime, at the end of 7 rounds, or else your tribe will be doomed, being too small in number to endure the hardships during and after the cataclysm.
- Apocalypse mode: The solo player will play as a tribe trying to rebuild after the Great Cataclysm (this mode essentially acts as a sequel to Survival mode). The solo player will be limited to being able to only have as many rovers/warriors on the main board as their number of villages plus one.
Solo Set-Up
Each solo mode has its own set-up:
- Training mode: Set up the board like a normal two-player game, except with 5 analog warriors instead of 4. Also, place 9 action covers on each action category (leaving between 0 and 3 spaces uncovered on each). In the 4 farthest meadows and middle space meadow, underneath the usual neutral skulls, place one of each foreign skull.
- Survival mode: Set up like Training mode, except without any neutral or foreign skulls.
- Apocalypse mode: Set up like Survival mode, except your starting village will instead be a warrior with only 10 population.
Training Mode
The Training mode allows the solo player to play the game as they would normally, with more freedom to learn the game and hone their skills as a shaman. The solo player may play as tightly or loosely as desired and may choose to score at the end or may choose not to.
Set-up by difficulty:
- Easy: Begin with 4 skulls and 4 stat points of choice.
- Normal: Begin with 3 skulls and no stat points.
- Expert: Begin with only 2 skulls and a warrior with a population of 15 instead of a village of 25.
The solo player may also use objective bonuses as a means of modulating difficulty; they may also use the normal game's expert variant when feeding.
The only unique rule to Training mode is that a player may place two skulls on a space covered by an action cover, thereby uncovering and using that action space, gaining the action cover's reward.
Combat occurs as usual, as analog warriors and wild beasts usually do.
Any Great Spirits that interact with other players may still do so using the bank for resources.
During each clean-up phase, the solo player chooses 1 action cover to remove and gains the rewards shown, instead of following the normal action cover removal chart.
The solo player may attempt a high score and may still create and score totems as usual.
Survival Mode
Survival mode, unlike Training mode, has a specific unique objective for the solo player to accomplish by game's end:
The shaman before you has foretold of the Great Cataclysm. You have seen it in your dreams and know it will come at the end of your life. If your tribe is not strong in number, body and spirit, the Great Cataclysm will erase it. You must grow your tribe to a certain carrying capacity in order to survive.
Carrying capacity objective by difficulty:
- Easy: Population of 150
- Normal: Population of 225
- Expert: Population of 300
Set-up by difficulty:
- Easy: Begin with 4 skulls and 4 stat points of choice.
- Normal: Begin with 3 skulls and no stat points.
- Expert: Begin with only 2 skulls and a warrior with a population of 15 instead of a village of 25.
The solo player may also use objective bonuses as a means of modulating difficulty; they may also use the normal game's expert variant when feeding.
Combat occurs as usual, as analog warriors and wild beasts usually do. The solo player may still create and score totems as usual.
Any Great Spirits that interact with other players may still do so using the bank for resources.
During each clean-up phase, the solo player chooses 1 action cover to remove and gains the rewards shown, instead of following the normal action cover removal chart.
The solo player has successfully survived the cataclysm when they have fed a population as large or larger than the carrying capacity needed. If successful, the solo player may attempt a high score.
Apocalypse Mode
Apocalypse mode, unlike Training mode but similar to Survival mode, has a specific unique objective for the solo player to accomplish by game's end:
The shaman before you has told great tales of the disaster that has befallen man: the Great Cataclysm. You, as the new young shaman, must rebuild your tribe from its current feeble state to the former power it once was in the age before the Great Cataclysm, by building all 3 villages with a population of 12 or more and spawning all 4 warriors with a population of 10 or more before or by game's end.
Set-up by difficulty:
- Easy: Begin with 4 skulls, 4 stat points of choice, and a normal starting village of 25+ population.
- Normal: Begin with 3 skulls and a warrior with a population of 15 instead of a village of 25.
- Expert: Begin with only 2 skulls and a warrior with a population of 10 instead of a village of 25.
The solo player may also use objective bonuses as a means of modulating difficulty; they may also use the normal game's expert variant when feeding.
Combat occurs as usual, as analog warriors and wild beasts usually do. The solo player may still create and score totems as usual. Any Great Spirits that interact with other players may still do so using the bank for resources.
During each clean-up phase, the solo player chooses 1 action cover to remove and gains the rewards shown, instead of following the normal action cover removal chart. Also during clean-up phase, when moving the analog warriors, if an analog warrior moves into a hex you occupy or a hex adjacent to one you occupy, the analog warrior will initiate combat. This includes your villages, which may be attacked and destroyed in this mode only, requiring a combat prowess to damage its population by a certain amount:
- Easy: 300 combat prowess, 5 population
- Normal: 200 combat prowess, 10 population
- Expert: 100 combat prowess, 20 population
If an analog warrior is adjacent to both your warrior or rover and your village, it must fight your warrior or rover and not the village.
The solo player has successfully rebuilt and rejuvenated their tribe in the post-apocalyptic madness that is the world when they have fed a population with 3 villages of population 12 or more and 4 warriors of a population 10 or more. If successful, the solo player may attempt a high score.