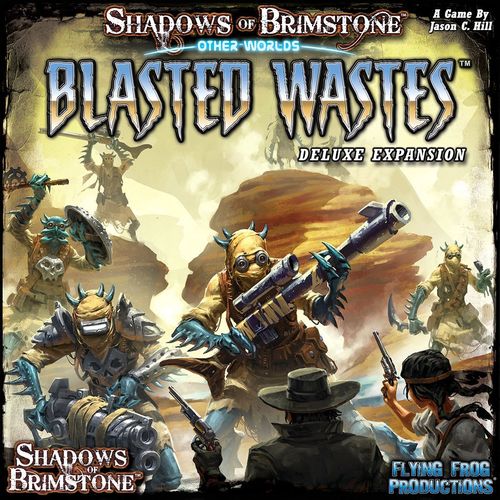
Shadows of Brimstone: Other Worlds – Blasted Wastes
Rulebook PDF: Flying Frog Productions · PDF
Shadows of Brimstone: Other Worlds – Blasted Wastes Rulebook
Table of Contents
Table of Contents
- Game Contents
- Overview
- Components and Markers
- The Canyons
- The Blasted Wastes
- The Sun Track
- Wasteland Scavengers
- Scavenger Heavies
- Wasteland Warlords and Warmasters
- Wasteland Barter Town
- Camp Site Hazards and Town Events
- Barter Town Locations
- New Side Bag Tokens
- Scrap Armor and Junk Bomb Satchel Cards
- Interior Map Tiles
- New Missions
- Mission 1: Missing Patrol
- Mission 2: Ghosts in the Dark
- Mission 3: Across the Desert Dunes
- Mission 4: Starfall
- Mission 5: Water of Life
- Mission 6: Warmaster's Fury
- Enemy Overview
- FAQ and Clarifications
- Wasteland Travel Hazard Chart
- Enemy Record Sheets: Stranglers and Tentacles
- Side Bag Token Effects
Game Contents
- 1 Full-Color 24 page Adventure Book
- 6 Plastic Wasteland Scavenger Enemies (30mm Bases)
- 6 Plastic Ghost Warrior Enemies (30mm Bases)
- 3 Plastic Wasteland Warlord/Heavy Enemies (30mm Bases)
- 3 Plastic Sand Crab Enemies (40mm Bases)
- 1 Entrance Map Tile
- 8 Unique Room Map Tiles
- 4 Standard Room Map Tiles
- 6 Passage Map Tiles
- 18 End Cap Map Tiles
- 6 Gate End Cap Map Tiles
- 6 Mine Exit/Entrance 'Gate' Map Tiles
- 8 double-sided Extra Large Barter Town Reference Cards
- 4 Double-Sided Enemy Record Sheets
- 4 Darkness Cards
- 3 Mine Artifact Cards
- 3 Mine Encounter Cards
- 12 Card Blasted Wastes OtherWorld Threat Deck
- 13 Threat/Epic Threat Cards
- 6 Card Wasteland Warband Deck
- 5 Card Wasteland Warmaster Deck
- 20 Card Blasted Wastes Encounter Deck
- 15 Card Blasted Wastes Artifact Deck
- 18 Card Blasted Wastes Map Deck
- 18 Card Canyons Encounter Deck
- 15 Card Canyons Artifact Deck
- 18 Card Canyons Map Deck
- 16 Card Wasteland Loot Deck
- 2 World Cards
- 10 Reference Cards
- A large assortment of Die-cut Counters
Overview
The Blasted Wastes Deluxe OtherWorld Expansion offers a lot of new material, not only for exploring and fighting your way across the new OtherWorld of the Blasted Wastes, but also for all new adventures on the frontier, with the Canyons!
Two New Worlds
With this set, gateways have opened up leading to the corrosive alien desert world of the Blasted Wastes - full of perilous, environmental hazards and vicious warbands of alien Scavengers that rove the desert dunes, stealing supplies and resources from any that cross their path. Also included is a brand new Old West themed world... the Canyons! It is fully realized as an additional World with a full set of cards, Map Tiles, and even some Missions to bring your Heroes into the dusty valleys and rocky gulches of the Old West!
New Map Tiles
The Blasted Wastes Expansion includes an entire set of 18 brand new, double-sided Map Tiles. This gives you a full set of Map Tiles for the new Blasted Wastes OtherWorld on one side, and a full set of Map Tiles for the brand new Canyons world on the other side, including 8 Unique Rooms, 4 new Standard Rooms, and a set of 6 Passages!
New Cards
Also included are all of the new card decks for use while in the corrosive desert world of the Blasted Wastes and the Old West Canyons - Encounters, Artifacts, Map Cards, OtherWorld Threats, and the World Cards, as well as a host of other new cards!
New Town
The Blasted Wastes is also home to a new type of alien Town you can visit... the wasteland Barter Town.
New Missions
There are 6 new Missions in the Blasted Wastes Expansion, each themed around different aspects of the new Map Tiles, Cards, Enemies, and new Worlds.
New Enemies
This Deluxe OtherWorld Expansion includes a host of dangerous new Enemies to encounter, including: 6 Wasteland Scavengers - Ruthless alien nomads that travel the Blasted Wastes in search of supplies and resources to steal; 3 large Sand Crabs - bestial creatures with thick, armored shells that live beneath the desert sands. 6 Ghost Warriors - Indian braves that have been possessed by the Darkness, flickering in and out of reality as they descend from the canyon cliffs to attack travelers. 2 Scavenger Heavies - Wasteland Scavengers that wield powerful, rapid fire Scrap Cannons. And 1 Wasteland Warlord - A vicious and terrifying leader of the Scavengers.
Note that the models used to build the Wasteland Warlord and the Scavenger Heavies use the same body, with different heads, arms and weapons. When building the models, you should build 1 Wasteland Warlord and 2 Scavenger Heavies with the parts provided.
Components and Markers
Scrap and Tech Tokens
There are 2 new types of currency that can be found in the Blasted Wastes - Scrap and Tech. These can be sold in any Town, or used to build Items and Upgrades in the wasteland Barter Town.
Stunned Markers
Stunned markers are used to show that a model is shaken and has reduced Defense.
Bleeding Markers
These markers represent the ongoing effect of being badly injured and bleeding. They are placed on a model, reducing its total Health by 3, until removed by spending a Grit.
Snap Fire Markers
Wasteland Scavengers have a Standard Ability called Snap Fire that dictates their behavior for making Ranged Attacks. These markers are used for targeting the Heroes.
Side Bag Tokens
There are 4 new Side Bag Tokens - Nectar, Junk Bomb, Flash, and Spice.
Barter Town Locations
These markers are used for building a random Barter Town, and represent the various Locations that can be found.
Barter Town Event Track Marker
This marker is used on the Barter Town map to track Days that have passed since the last Town Event.
Sun Track and Sun Marker
The Sun Track is used in the Blasted Wastes to show the current time of Day (or Night). Acid Pools on the Map Tiles create toxic mist at Night, and some Encounters and Enemies gain special bonuses during particular times of day.
Additional Counters
Several additional counters have been provided for mission specific uses and/or to create house rule missions or future official content.
The Canyons
Like all Worlds, the Canyons has a set of unique Encounters, Artifacts, and Map Cards, as well as a couple of Global Rules that make adventuring there more distinct. The Global Rules are listed on the World Card included in this expansion.
World and Threat Decks
Though the Canyons is a different 'World' from the Mines, it is still on Earth, rather than being an alien environment. Because of this, the Canyons are not considered to be an 'OtherWorld' per se (for cards, abilities, etc that have special effects in an 'OtherWorld'). Also, as the Canyons is a normal World (like the Mines), it uses the normal Low, Med, and High Threat Decks for Enemies found there, rather than a specific OtherWorld Threat Deck (though you may custom build your Threat Decks just for the Canyons, if you like).
Global Rules
The Canyons have high cliff walls on either side of the deep gulch, and are filled with boulders, rocky outcroppings, and cacti, making it an ideal place for an ambush! To represent this advantage, Enemies are +1 Defense on the first turn that they Ambush Attack the Heroes.
While traveling through the Canyons, Heroes are always on their toes, keeping an eye open for any sign of movement in the cliffs. At the start of every Fight in the Canyons, each Hero may Recover a Grit on the D6 roll of 4+.
Barriers
Some spaces on the board have one or more edges with a thick, white line. These are called Barriers and usually represent elevation changes or obstacles that prevent movement but can be seen through, such as cliffs or low walls.
Only models that have an ability allowing them to 'Move through other models' may cross these Barrier space edges during their move. This usually includes models that can fly, such as HellBats, models that have the ability to leap or climb over obstacles, such as Ghost Warriors, or XL-sized Enemies that can smash through them.
When a Barrier extends slightly beyond the cross point of multiple spaces (as shown here), it prevents normal diagonal movement that would cross this extended end of the Barrier as well.
Barriers have NO EFFECT on Line of Sight for Ranged Attacks, adjacency for Escape tests, or Melee Attacks; they ONLY affect movement. Dynamite may be thrown over a Barrier, just like any Ranged Attack, and may Bounce through Barriers as well.
The Blasted Wastes
Mine 'Exit' and 'Entrance' End Caps
One exciting aspect of having the Canyons as an additional Old West themed World your Heroes can Adventure in, is the ability to seamlessly connect it with the Mines. There are now Encounters in both the Canyons and the Mines that add Mine 'Entrance' and Mine 'Exit' Gate End Caps to the board.
These 'Gates' work just like OtherWorld Gates in every way (seeing and moving through them, etc), but no World card is drawn to see what is on the other side. Mine 'Exit' Gates always lead to the Canyons (starting with a Mine 'Entrance' Gate and a Map Tile on the other side), and vice versa.
Note that although these Mine 'Exit' and 'Entrance' connectors work just like OtherWorld Gates, they are not actually considered to be a 'Gate' for cards, abilities, etc. and may still be used in Missions that do not allow normal Gates.
Overview of the Blasted Wastes
Like all OtherWorlds, the Blasted Wastes has a set of unique Encounters, Artifacts, Map Cards, and OtherWorld Threat cards that make adventuring there more distinct. Also included are a couple of Global Rules that make the world distinct. The Global Rules are listed on the World Card included in this expansion.
While exploring the Blasted Wastes, Heroes will encounter all manner of environmental hazards, from Dark Stone dust storms, to toxic gases being released from the sulfur acid pools that dot the landscape, to sinking sand that threatens to pull the Heroes down below the surface! The twin suns of the Blasted Wastes can also play a big part in the environment, as the suns shift from Day to Dusk, and into Night. The desert wasteland is a dangerous place, and not to be traveled lightly.
Global Rules
A wind-swept wasteland filled with terrifying creatures and corrosive storms, the Blasted Wastes is a sea of sand and death! Any time the Heroes roll a natural 7 on the Hold Back the Darkness roll (before any modifiers that might affect the dice result), every Hero immediately takes 1 Corruption Hit from the pulverized Dark Stone dust in the very air they are breathing!
Though the hostile environment can be deadly to traverse, the desert dunes are also filled with wreckage from crashed ships, half-buried in the sinking sands, and pockets of supplies and scrap amongst the bones of their previous owners. Any time a Hero draws one or more Loot cards in the Blasted Wastes, they get to draw one additional Loot card as well (this even counts if Loot is drawn while visiting a Barter Town between Adventures). Also, while in the Blasted Wastes, Heroes do not draw from the normal Loot Deck, but instead always draw from the Wasteland Loot Deck.
Wasteland Loot
This special Loot Deck is unique to the Blasted Wastes and contains 16 cards instead of the normal 12. It represents the special things that Heroes may find while in the Blasted Wastes, including Scrap and Tech that have been pulled from the wreckage of crashed spacecraft in the sprawling ship graveyards strewn across the wastes.
Scrap and Tech Tokens
A large part of the Loot that the Heroes will find in the Blasted Wastes comes in the form of bits of Scrap and Tech. These are two new forms of currency in the wasteland that can be sold in any Town (either a Barter Town or an Old West Frontier Town). Additionally, Scrap and Tech Tokens can be used in wasteland Barter Towns to purchase special Items and Upgrades from the various Locations there (most notably, the Wasteland Workshop).
Scrap Tokens can be sold for $25 each and every full 12 Scrap that a Hero carries counts as 1 Weight.
Tech is harder to come by and a bit more valuable. Tech Tokens can be sold for D6x$50 each and have no weight.
Stunned Markers
Sometimes a model will be stunned by an attack, putting them off-balance. A Stunned marker is placed on a model to show that they have been shaken. A model that has one or more Stunned markers on them is -1 Defense (regardless of how many Stunned markers they have). At the start of each of that model's Activations, they may roll a D6. On the roll of 4+, remove 1 Stunned marker. A Hero removes all Stunned markers when KO'd, or at the end of the Adventure.
Bleeding Markers
A Bleeding marker is placed on a model to show that they have sustained a nasty wound that cannot be easily healed. A model is -3 to its Health for each Bleeding marker it currently has.
Note that as this actually reduces the model's Health stat, it is not Wound markers that can be Healed. If this reduces the model's Health to 0, they are immediately KO'd (or killed if an Enemy). A Hero may use 1 Grit at any time to remove a Bleeding marker from themselves. All Bleeding markers are removed when KO'd, or at the end of the Adventure. Models that are Keyword Undead are immune to Bleeding markers.
Desert Stranglers and Corrosive Tentacles
Two of the new OtherWorld Enemies that can be encountered in the Blasted Wastes are Desert Stranglers and Corrosive Tentacles. Both of these Enemies are alternate OtherWorld versions of Enemies found in the City of the Ancients Core Set. You do not, however, need to have that Core Set to use this Expansion.
For players that do not yet have the City of the Ancients Core Set, we have included simple tokens that can be used to represent these Enemies on the board (in place of miniatures), as well as the basic Enemy Record Sheets for both Stranglers and Tentacles, which can be found at the end of this rulebook.
The Sun Track
The Sun Track is used while in the Blasted Wastes to track what time of day it is throughout the Adventure. This can have an effect on toxic gases being released from the blue, sulfur acid pools marked on the Map Tiles, but can also affect certain Items, abilities, and Enemies (as noted on the individual cards or record sheets for them).
There are 4 positions on the Sun Track - Day, Dusk, Night, and Dawn.
Rolling for Time of Day
The first time that a Blasted Wastes Map Tile is placed during the game, the Heroes must also set up the Sun Track and roll a D8 to see what position the Sun Marker (the light colored, circular donut) begins in on the track. Each position on the track is marked with a number set that corresponds with the die roll.
Dawn (Day) is 7-8, Day is 1-2, Dusk (Night) is 3-4, and Night is 5-6.
For Missions that start in the Blasted Wastes, the Heroes may choose what position the Sun Track begins the game in.
Once the Sun Track is set up, it is not rolled for again or re-set for the duration of this Adventure (even if the Heroes find a different Gate that also leads to the Blasted Wastes).
Day and Night
Often times game effects will be based on if it is currently Day or Night in the Blasted Wastes. As noted on the Sun Track itself, both the Day and Dawn positions count as Day, while both the Night and Dusk positions count as Night.
Advancing the Sun Track
Whenever the players are called on to Advance the Sun Track, move the Sun Marker one position forward (clockwise) on the Sun Track. The Sun Marker will therefore progress from Dawn to Day to Dusk to Night and back to Dawn, and so forth.
Note that it is possible for the Sun Track to Advance many times during a single Adventure, or not at all. This can be ascribed to the unusual orbit the planet has around its twin stars, as well as the shifting time that plays tricks on your mind under the intense heat of the blistering suns.
Night Mist
At night, the sulfur acid pools that pepper the Blasted Wastes begin to bubble and boil, releasing a toxic Night Mist into the air, choking and burning those nearby.
While the Sun Track is in the Night position (or Dusk, which also counts as Night), the following effect applies:
At the start of a Hero's Activation each turn, if that Hero is on a Map Tile that includes a blue Acid Pool, they immediately take 2 Hits that are Keyword Poison (or just 1 Hit if it is currently Dusk).
This effect applies to any Hero that is on a Blasted Wastes Map Tile that includes one or more blue Acid Pools as part of the art on that tile (including Heroes that are on a puzzle-cut half space of a Map Tile with these Acid Pools). Note that there is no additional effect for a Hero that is on two different Map Tiles that both have Acid Pools (on a puzzle-cut half space between the two tiles) - a Hero is either affected, or not.
Wasteland Scavengers
The ruthless Scavenger Warbands that roam the Blasted Wastes are constantly hunting for their next score, and fresh prey to attack! Striking without warning, they raid local settlements and overwhelm travelers in the dune seas and rocky valleys, stealing supplies and valuable resources for themselves.
The Blasted Wastes Expansion includes 3 new Scavenger Enemy types - Wasteland Scavengers, Scavenger Heavies, and Scavenger Warlords. Each of these plays a different role during an Attack and creates a different challenge for the Heroes.
Wasteland Warbands
The various tribes and warbands of the Blasted Wastes are represented by Wasteland Warband cards. Each Warband card has information about that group of Scavengers as well as any bonuses or additional XP that Scavenger Enemies of that Warband gain (note that any bonus XP listed is added to the base XP 'per Wounding Hit' for tougher Enemies that grant XP as they are wounded).
Whenever a Wasteland Scavenger or Wasteland Warlord Enemy Group enters play (including Scavenger Heavies, which are always part of a Wasteland Scavenger Enemy Group), immediately draw a Wasteland Warband card to see which Warband they are from.
This one Warband card applies to all Wasteland Scavengers and Wasteland Warlords for the duration of the current Fight, and is then discarded.
The next time Scavengers are encountered like this, shuffle the Wasteland Warband deck and draw a new Warband for the new Fight.
Generally there is a limit of one Wasteland Warband in play at a time, and that card affects all of the Scavengers currently in play.
Snap Fire
Wasteland Scavengers are vicious hand-to-hand fighters that carry jagged and rusty blades, as well as long-barrelled Scrap Rifles used for sniping across the desert landscape, and hit and run attacks at closer range. To represent this, some Enemies have the Standard Ability Snap Fire. The rules for Snap Fire are summarized on the Snap Fire Reference card, but are also covered here in greater detail.
Ambushing
When a group of Enemies with the Snap Fire Standard Ability needs to be placed in Ambush, they are not placed adjacent to the Heroes like other Enemies. Instead, select a Random Hero and place all of the Snap Fire Enemies from that group on the selected Hero's Map Tile, as far from any Heroes as possible. This usually allows them to sneak in from a side passage or get placed at the end of a hall or room, maybe even behind the Heroes. If there are not enough empty spaces on that Map Tile, any remaining Enemies are placed as far from the Heroes as possible on any Map Tiles adjacent to the selected Hero.
Free Ranged Attack
At the start of the Enemy's Activation, if there are no Heroes adjacent to it, it makes a 'Free' Ranged Attack (using the Ranged Attack described in the Enemy's Abilities list), at a Hero that is currently within Range and Line of Sight to that Enemy model. Note that this is before the Enemy makes any movement for the turn.
Snap Fire Markers
Snap Fire markers are used to denote which Heroes have been targeted, and by how many Enemy Ranged Attacks. Snap Fire markers are a simple way to keep track of which Heroes have already been targeted, and by how many of the Enemies.
Targeting and Rolling Ranged Attacks
When making their Free Ranged Attacks, the Snap Fire Enemies that are not adjacent to a Hero will each find a Target. Step through the Snap Fire Enemies, one by one, completing the following procedure for each of them:
Select a Random Hero that is currently within Range and Line of Sight, and that does not already have a Snap Fire marker on him yet (or that has the fewest Snap Fire markers if all Heroes already have one). Place a Snap Fire marker on that Target.
Once all of the Enemy Group has placed their Snap Fire markers (one for each Enemy model firing), roll the Ranged Attacks from the Enemies against each Hero, equal to the number of Snap Fire markers on that Hero. Then, remove all of the Snap Fire markers.
Charge!
After completing any 'Free' Ranged Attacks for the Enemy Group, each of the Snap Fire Enemies will select a new Target, move, and make a Melee Attack, as normal.
Hit and Run
Once all of the Enemy Group's Melee Attacks are complete, roll a D6 for each of the Enemies that is currently adjacent to one or more Heroes. On the roll of 3+, that Enemy immediately makes a 'Free' Move along the shortest distance to no longer be adjacent to any Heroes. This Free Move is outside of the normal turn sequence, and is used to gain some distance so that the Enemy might get another Free Attack at the start of its next Activation (if no Heroes have closed the distance to become adjacent again).
Wasteland Scavenger Initiative
The main fighting force of any Warband, the Scavengers are a motley crew of criminals, cutthroats, and raiders!
Wasteland Scavengers have a Peril Die icon for their Initiative. This means that a Peril Die is rolled at the start of each turn to determine what the Enemy Group's Initiative is for the turn.
Scavenger Heavies
The toughest and meanest of a Wasteland Scavenger warband often carry heavy Scrap Fire Cannons into battle to terrorize their enemies and riddle them with deadly, rapid fire bolts of scrap!
A Scavenger Heavy is a normal Wasteland Scavenger Enemy model, but with the following changes to its stats and abilities:
- Scavenger Heavies are always placed first amongst the Wasteland Scavenger Enemy Group they are part of. They also always move first and attack first in their Enemy Group.
- The Wasteland Scrap Rifle is replaced with a Scrap Fire Cannon.
- Scavenger Heavies have Double the base Health and Combat Damage of a Wasteland Scavenger (doubled before any bonuses are added).
- Tough (immune to Critical Hits).
- XP Value changes to: XP 10 +5 Each.
Scrap Fire Cannon - Ranged Attack. Range 14, Shots 5, Damage 3. Targets every Hero within Range and Line of Sight.
Wasteland Warlords and Warmasters
The most skilled warriors of their tribe, Wasteland Warlords are ruthless and powerful leaders that don't just want to survive in the barren and lawless wastes, but rather to thrive there! Some Warlords gain a fearsome reputation and high level of infamy from their savage exploits. These most feared Warlords are known as Wasteland Warmasters!
Whenever a Threat card calls for a Wasteland Warmaster (usually as part of an Epic Threat), draw a Wasteland Warmaster card to see which of these infamous Enemies the Heroes must face!
A Wasteland Warmaster is a Wasteland Warlord Enemy, but with modified stats, abilities, and XP, as noted on the Wasteland Warmaster card that is drawn for them.
Each Wasteland Warmaster has a specific Warband that they lead, listed on the card. When a Warmaster is drawn, it automatically makes all other Wasteland Scavenger Enemies belong to the Wasteland Warband listed on the Warmaster's card (rather than drawing a Random Wasteland Warband for this Fight).
Wasteland Barter Town
Wasteland Barter Towns are not uncommon to find in the protected valleys and underground caverns of the Blasted Wastes. Though generally small settlements, Barter Towns have a variety of different locations that can be present for the Heroes to visit, trading goods at the Desert Marketplace, witnessing the barbaric fights at a Gladiator Arena, or having your hard-earned Scrap and Tech forged into powerful items and upgrades at the Wasteland Workshop.
When Can You Visit a Barter Town
Any time the Heroes complete an Adventure while in the Blasted Wastes OtherWorld, they have the choice to either return home and visit a normal Town, or stay in the Blasted Wastes and visit a wasteland Barter Town instead. There are also some Encounters that allow the Heroes to visit a Barter Town, even if the current Adventure does not end in the Wastes.
Wasteland Travel Hazard Chart
When visiting a wasteland Barter Town between Adventures, each Hero adds one Travel Hazard to the journey, but instead of rolling on the normal Travel Hazard Table, they must roll on the Wasteland Travel Hazard Table (found at the back of this Adventure book).
Constructing the Barter Town
To construct the Barter Town that the Heroes have arrived at, place the Barter Town Map on the table where all of the players can reach it. Then shuffle up the 6 Barter Town Location Building Tokens and place one Random token, face up in each of the 4 empty Building Slots on the Barter Town Map. These are the Locations that may be visited during the Heroes' Town Stay (in addition to the Camp Site, which is printed on the Map). Place the remaining Building Tokens off to the side as they will not be used.
Note that there is no Hotel in a Barter Town. The Heroes have no choice but to stay in the Camp Site each day, taking their chances with the locals.
Destroyed Building Slots
When a Building is Destroyed during the Town Stay, simply flip that Building Token over in its Slot (with the plain, black side up) to show that it has been Destroyed and may no longer be visited.
When one or more Buildings is Destroyed from the beginning of the Town Stay (due to failing a Mission, a Travel Hazard, etc), Construct the Town as normal, and then roll for which Random Building Slots are Destroyed, flipping those Building Tokens facedown in the Slot as above.
Camp Site Hazards and Town Events
Though the wasteland Barter Town is on an alien world, Heroes should still use the Camp Site Hazard chart and Town Event chart for the normal Town. The 'Days Since Last Event' track, at the bottom of the Barter Town Map, also works the same as for a normal Town, and a gear-shaped Town Event Track marker has been included for this.
Barter Town Locations
There are six Barter Town Locations that can be found in a Barter Town, including - the Wasteland Workshop, Scavenger Doc, Gladiator Arena, Mining Operation, Desert Marketplace, and Temple. Each of these Locations has a large reference card showing the Location Event Chart as well as all of the things that a Hero can do and buy when visiting that Location.
Note that the Barter Town Locations are completely separate from the normal Town Locations, and should not be mixed.
The Temple
One Barter Town Location that works a little different from the others is the Temple. The first time this Location is visited during a Town Stay, roll a D6 to determine what Idol is being worshipped in this Barter Town. The chart of Idols, and the rules for rolling for an Idol, are listed at the top of the Temple reference card, just above the Location Event chart.
A Temple will only ever have one Idol at a time, and the same Idol is used for the duration of the current Town Stay.
The Temple Location has two large reference cards to represent it, instead of just one. The first reference card is the basic Temple, with the Location Event chart on the front and the first two Idols on the back, while the second reference card has the final four Idols; two on the front and two on the back.
Each Idol has its own half-page section of the Temple reference cards, and only the Idol section rolled for this Town's Temple may be used (ignore the other Idol sections on the cards).
You'll note that each Idol has background information on the worshippers there, some unique activities and Items that can be purchased, and a couple of unique Location Event results (pointed to by the main Temple Location Event Chart, results number 4 and 10).
New Side Bag Tokens
There are 4 new Side Bag Tokens in this Expansion - Nectar, Junk Bomb, Flash, and Spice. What these Side Bag Tokens do can be found on the reference cards included, as well as on the back cover of this Adventure book.
Scrap Armor and Junk Bomb Satchel Cards
The Scrap Armor and Junk Bomb Satchel are both Items that can be found in the wasteland Barter Town. This expansion includes a few Town Item cards for these items, as they both allow particular tokens to be stacked on the card for a game effect.
Interior Map Tiles
There are several potentially deadly Storm and Weather effects that can be encountered in the Blasted Wastes, and some of these make reference to not affecting Heroes that are on an Interior Map Tile. A Map Tile that is considered to be Interior is listed as such on its Map Card.
New Missions
The Blasted Wastes Expansion has 6 new Missions to challenge your Heroes. These can be played in order as a narrative, or simply mixed in to your new or current campaign.
| D6 Roll | Blasted Wastes Mission |
|---|---|
| 1 | Missing Patrol |
| 2 | Ghosts in the Dark |
| 3 | Across the Desert Dunes |
| 4 | Starfall |
| 5 | Water of Life |
| 6 | Warmaster's Fury |
Mission 1: Missing Patrol
(Flavour text omitted.)
Set Up
This Mission starts on the Canyon Entrance Map Tile. Other than beginning the game in the Canyons, all Heroes start on the Entrance Map Tile as normal.
Remove All 'Attack' and 'Ambush Attack' Exploration Tokens from the stack for this Mission.
Mission Goal
The Heroes must find 4 Clues to discover the ultimate fate of the 12th Cavalry's missing patrol, either bringing back survivors or putting an end to the Enemies that wiped them out.
Special Rules
All Attacks are Ambushes. During this Mission, all Attacks count as Ambush Attacks.
Objectives
Finding a Clue. Each time the Heroes find a Clue Icon, after resolving any Encounters there, place a 12th Cavalry Body marker anywhere on the Map Tile (this marker has no impact on movement or attacks) and roll a D6 (Grit may not be used for this roll). If the roll is equal to or less than the total number of 12th Cavalry Body markers found so far during the mission, Ambush Attack! - Draw a Threat card. Otherwise, draw a Growing Dread card and add it to the stack.
Finding the Fourth Clue. When the Heroes find the Fourth and final Clue, after completing all Encounters there, place a 12th Cavalry Body marker on the Map Tile and roll a D6 as normal. If this roll causes an Ambush Attack!, the missing patrol has been wiped out and you have found the location of their last stand! Ignore any Door/Gate Icons on the token, as the Room has no exits, and resolve all Growing Dread cards currently in the stack. The Enemies for this Ambush Attack are 1 Threat Level higher than normal.
Once all of the Enemies on the board have been defeated, the Mission is successfully completed.
If no Ambush Attack was rolled, you have instead found the remaining survivors of the patrol, taking shelter here. Discard all Growing Dread cards from the stack and each Hero may make a Cunning 5+ test. For each 5+ rolled, you help one survivor back to town, gaining $200 or 20XP for each survivor you help, and the mission is successfully completed.
Reward
If the missing patrol was wiped out, each Hero may roll a D6. On the roll of 1-3 draw a Gear card, on the roll of 4-6 draw a Canyon Artifact card, recovered from the site of the massacre.
If there were survivors, instead, each Hero gains the bonus $200 or 20 XP for each Survivor they helped (as noted above) and may Recover Grit up to their Max Grit for Traveling/Town (instead of only 1 Grit). Also, each Hero adds 1 less Travel Hazard when Traveling to the next Town.
Failure
If the Mission is failed, the Heroes run to escape the same fate as the massacred missing patrol! Every Hero must discard one Item that has a Weight icon (hourglass), dropped during the mad dash to get away!
Mission 2: Ghosts in the Dark
(Flavour text omitted.)
Set Up
This Mission starts on the Canyon Entrance Map Tile. Other than beginning the game in the Canyons, all Heroes start on the Entrance Map Tile as normal.
Mission Goal
The Heroes must find 2 Old Mines that the Ghost Warriors are using to strike out from, and clear them out!
Special Rules
Old Mine Entrances. While in the Canyons, any time a Map Tile has more than 1 open Doorway (for example, from multiple Door Icons on the Exploration Token or a T-Junction or Cross Path Passage), one of those Doorways (chosen Randomly) is automatically a 'Mine Entrance' End Cap, leading down into the Mines.
Clues in the Canyons Add Extra Doors. Clues found while in the Canyons add an extra Door Icon to the Exploration token.
No Gates. For this Adventure, all Gates count as normal Doors.
Objective Dread. For this Mission, any Growing Dread cards currently in the stack are resolved and then discarded when each of the 'Dread Objectives' below are discovered.
Objectives
Finding the Old Mines. Whenever the Heroes find one of the 'Mine Entrance' End Caps, they have discovered the entrance to one of the 2 Old Mines that the Ghost Warriors are hiding out in.
Each of these Old Mines is a small, abandoned mine shaft that the Ghost Warriors are using as a hideout. Every Map Tile in an Old Mine has exactly one Open Doorway (all other exits on that Map Tile are blocked off).
Clearing out a Ghost Warrior Lair (Dread Objectives). The first Clue Icon found in each Old Mine represents the location of one of the Ghost Warrior Lairs as a Dread Objective.
When you find a Lair Map Tile, ignore any Door/Gate Icons on the token, as the Room has no exits, and resolve all Growing Dread cards currently in the stack. In addition to the normal Encounters or Attack on the Exploration Token, this Lair Map Tile also includes an extra Attack with the following:
| Heroes | Enemies |
|---|---|
| 1-2 Heroes | D3+1 Ghost Warriors |
| 3-4 Heroes | one Ghost Warrior per Hero ([P icon]) |
| 5-6 Heroes | 6 Ghost Warriors |
Once all of the Enemies on the board have been defeated, the Heroes have cleared this Old Mine and must return to the surface Canyons to find and clear the second Old Mine.
Once both Old Mines have been cleared, the Mission is successfully completed.
Reward
Each Hero gains D6 x $50 as payment from the local town for driving off the marauding Ghost Warriors. Each Hero may also roll a number of dice equal to their Spirit. For each roll of 5+ (Grit may NOT be used for this roll), that Hero gains 1 Sanity.
Failure
If the Mission is failed, the Heroes are tormented by the possessed tribal Ghost Warriors. Each Hero must roll a number of dice equal to their Spirit. For every roll of 1, 2 or 3, that Hero loses 1 Sanity permanently (Grit may be used for this roll, as normal). Also, D3 buildings in Town are Destroyed by the raiding Ghost Warriors.
Mission 3: Across the Desert Dunes
(Flavour text omitted.)
Set Up
This Mission uses the standard set up and all Heroes start on the Mine Entrance Map Tile as normal.
Mission Goal
Find a Gate that leads to the scorched deserts of the Blasted Wastes and explore the dunes and rusted wreckage. Once in the Blasted Wastes, the Heroes must find 2 Clue Icons to have explored the area and successfully completed the Mission.
Special Rules
All Gates Lead to the Blasted Wastes. All Gates in this Adventure lead to the Blasted Wastes, even Gates found in the Blasted Wastes (they lead to a different part of the world).
Mine Clues add a Gate. Any Clue Icon the Heroes find in the Mines automatically has a Gate in that Room, in addition to any other doors (place this Gate before other Doors).
Objectives
The Second Clue in the Blasted Wastes. When the Heroes find the second Clue Icon in the Blasted Wastes, they have reached the Objective for exploring this Other World. Ignore any Attacks or Encounters listed on the final Exploration Token. Also, ignore any Door/Gate Icons on the token, as the Objective Room has no exits.
Reveal all Growing Dread cards in the stack as normal and then the Heroes must face an Epic Threat. Remember, that any time a normal Threat card (Low, Med, or High) would be drawn in an Other World, an Other World Threat card is drawn instead. Once all Enemies have been defeated, the Heroes have successfully completed the Mission!
Reward
Each Hero gains 25 XP and, if visiting a Wasteland Barter Town (instead of a normal Frontier Town), each Hero may use a Grit to cancel a Travel Hazard on the D6 roll of 4+ (before any tests are rolled for that Hazard).
Failure
Lost in the shifting sands, under the searing suns of the Blasted Wastes, you are burnt by the unforgiving desert. Every Hero takes D8 Wounds, ignoring Defense (these carry over to your Town stay and the next Adventure, if not healed).
Mission 4: Starfall
(Flavour text omitted.)
Set Up
This Mission has a Fixed Map Layout, as shown in the diagram on the Mission's map page (see Map Tiles below). The entire board should be constructed during Set Up. There are four open-ended Enemy Entry Points on the board, marked on the diagram with red and purple arrows; these are the possible entry points for Enemies to arrive from throughout the game.
You will also need 2 Lantern markers and several markers for Enemies Approaching (you can use face down markers with the Shadows of Brimstone logo on the back for these). The Heroes should place the Lantern markers as described in the Placed Lanterns Special Rule below. For this Mission, there is no Old Lantern card. The Lantern markers are used instead. Elect one Hero to roll for Hold Back the Darkness each turn.
Each Hero may start anywhere they choose on the board.
After Heroes are placed, draw a Low Blasted Wastes OtherWorld Threat card for each of the 2 Blasted Wastes Entry Points (the 2 marked with red arrows). Place those Enemies just off the board near the Entry Point. These Enemies will move onto the board and attack at their Initiative level during the first turn of the game (as detailed in the Enemy Entry Points Special Rule below).
Also, place an Enemies Approaching marker at each of the 2 Wrecked Ship Entry Points (the 2 marked with purple arrows).
Mission Goal
Survive! The Heroes must defeat enough Enemies to break the assault, and then kill any remaining Enemies.
Special Rules
Fixed Map. This Mission uses a Fixed Map as shown in the Map diagram. A list of all of the Map Tiles used is provided for easier identification. Map Cards can be used as reference to determine the names of each Map Tile.
Placed Lanterns (2). At the start of the game, the Heroes may place a number of Lantern markers onto individual Map Tiles. These Lantern markers cannot be interacted with in any way, and are not considered to be in any particular space; a Lantern marker is on an entire Map Tile. Each Lantern marker lights up the Map Tile it is placed on as well as every adjacent Map Tile, just like the Old Lantern card.
Desperation. The Heroes are truly desperate. Any Hero that has no Enemies on their Map Tile may give up their Attack to do one of the following Actions instead:
- Scavenge
- Recover a Grit
- Ready a 'Once per Fight' Item
- Catch Your Breath (Heal D3)
Unlimited Scavenging. Each Map Tile on the board may be Scavenged any number of times (not just once per Map Tile).
Immediate Dread. For this Mission, Growing Dread cards are revealed immediately when drawn rather than being placed on the stack.
Enemy Entry Points Extreme. There are a number of open-ended Enemy Entry Points on the board, marked on the diagram with red and purple arrows. These are not Doors/Gates, and may not be looked through by a Hero.
At the end of each turn, roll a D6 for each Entry Point. If a 1, 2, or 3 is rolled (or only on a 1 or 2 if there is a Hero on the same Map Tile with the Entry Point), place an Enemies Approaching marker by that Entry Point. You can see Enemies coming, but can't tell what they are yet!
If there is already an Enemies Approaching marker at that Entry Point, instead, remove the marker and draw a Low Threat (from the Blasted Wastes or an OtherWorld as detailed below). The Enemies on that card are placed just off the board near that Entry Point, as they have arrived and are ready to move onto the board (note that Enemies that have 0 Move, such as Corpse Piles, will not take part because they cannot move to enter the board. If 0 Move Enemies are the only ones listed on the Threat card, re-draw).
Enemies that are not on the board yet may not be targeted or attacked in any way. These Enemies will Activate as normal when it comes to their Initiative in the turn order, and will simply move onto the board from the Entry Point (starting their move on one of the puzzle-cut half-spaces/puzzle-cut Gate spaces).
Blasted Wastes Entry Points. Two of the Entry Points (marked with red arrows in the diagram) are Blasted Wastes Entry Points. These represent Scavengers and local creatures being attracted to the site of the crashed ship. Threats drawn for these Entry Points are always from the Blasted Wastes OtherWorld Threat Deck.
Wrecked Ship Entry Points. Two of the Entry Points (marked with purple arrows in the diagram) are Wrecked Ship 'Gate' Entry Points. These represent holes torn into the side of the crashed ship. The first time during the Mission that a Threat card would be drawn for Enemies arriving at one of these Wrecked Ship 'Gate' Entry Points, draw a World card first to see what type of Enemies were aboard the crashed ship. For the rest of the game, whenever drawing a Threat card for Enemies at one of these Entry Points, draw a Threat card from that same World.
Number of Heroes. For this Mission, if you are using 1 or 2 Heroes, at the start of the game, Threat cards are only drawn for each Entry Point on the D6 roll of 1, 2 or 3 (instead of automatically).
If you are using 5 or 6 Heroes, all Threat cards drawn are Med Threats instead of Low Threats.
Objectives
Depth Track - Defeat Enough Enemies. Because there is no Exploration in this Mission, the Hero Posse marker on the Depth Track is used a bit differently than normal. Instead of marking how deep into the mine the Heroes have traveled, it marks how much of the Enemy assault the Heroes have defeated.
The Hero Posse marker starts the game on the Mine Entrance space as normal. For every 3 Enemies the Heroes kill, move the Hero Posse marker down 1 step on the track. For each Large or bigger Enemy the Heroes kill, instead move the Hero Posse marker 2 steps on the track.
When the Heroes make the Hold Back the Darkness test each turn, if the roll is equal to or higher than the current position of the Hero Posse marker on the Depth Track, the assault is broken! All Enemy Approaching markers are removed, and no more Enemies will arrive at the Entry Points. The Heroes must now kill all remaining Enemies on the board to successfully complete the Mission (including any that might still show up through Darkness cards, etc.).
The Darkness marker on the Depth Track works as normal in this Mission. If the Darkness escapes, the Mission is Failed.
Reward
If the Heroes successfully break the assault and defeat the Enemies, each Hero may draw 6 Loot cards (this includes the extra Loot Card for the Blasted Wastes World effect). This is instead of getting a Loot card for each grouping of Enemies individually. Shuffle the Loot Deck before each Hero's draw.
Any Heroes that are not KO'd at the end of the Mission also gain D6x$50 each, found amongst the wreckage.
Failure
All KO'd Heroes must roll on the Injury/Madness table as normal. If the Darkness Escapes, any Heroes not KO'd must still roll on the Injury/Madness table (Hero's choice).
Mission 4 Map Tiles
Blasted Wastes Map Tiles: Valley of Death; Sinking Hulk; Broken Freighter; Wrecked Airlock; Bleached Boneyard; Underground Lift; A Desert Valley; Mid Passage; Short Passage; T-Junction Passage; Wrecked Ship 'Gate' x 2; End-Cap x 2.
Mission 5: Water of Life
(Flavour text omitted.)
Set Up
This Mission starts with the Blasted Wastes Entrance Map Tile leading directly to the Wrecked Airlock Blasted Wastes Map Tile. Other than beginning the game in the Blasted Wastes, all Heroes start on the Entrance Map Tile as normal.
Remove the Wrecked Airlock Map Card from the Blasted Wastes Map Deck. Note that the Hero Posse marker is not moved forward a step on the Depth Track for this Wrecked Airlock and no Exploration Token is placed on the Wrecked Airlock room.
The Blasted Wastes Sun Track should start at Dawn, as the Heroes have one full day to complete the Mission.
Mission Goal
The Heroes are searching for enough Life Water out in the desert wastes to heal the sickness of the entire settlement, before it's too late!
There are three variations for this Mission and the Heroes must choose before the Mission begins which Mission Length they want to embark on.
| Mission Length | Objective |
|---|---|
| Small Settlement | One Life Water |
| Medium Settlement | Two Life Waters |
| Large Settlement | Three Life Waters |
For each Life Water, leave one Random exit of the Wrecked Airlock Map Tile open as a Doorway. Any other exits on this Map Tile should be blocked off with End Caps. These open Doorways will each have a special stack of Exploration Tokens as listed below.
Special Rules
Limited Exploration Stacks (Set Up). Divide all of the Exploration Tokens into one pile that have Clue Icons and another pile that do not have Clue Icons. Then take 1 Random Clue Icon Token and 2 Random non-Clue Icon Tokens and shuffle them together without looking to form a face down stack of 3 Exploration Tokens. Place one of these stacks next to each open Doorway on the board at the start of the Adventure.
Anything that causes a Token to be discarded and re-drawn, will draw the next Token in that stack. If the last Token in a stack is re-drawn, it always counts as having a Clue Icon.
No Gates. For this Adventure, all Gates count as normal Doors.
Immediate Dread. For this Mission, Growing Dread cards are revealed immediately when drawn rather than being placed on the stack.
Race Against the Setting Suns. Whenever the Darkness reaches a Blood Spatter or Growing Dread space on the Depth Track, place a Wound marker by the Sun Track (or D3 Wound markers if a Growing Dread Space). At the end of any turn in which there are 4 or more Wound markers by the Sun Track, remove 4 of the markers (leaving any extra) and Advance the Sun Track once.
If the Sun Track Advances enough times to reach Dawn again, the Mission is immediately failed.
During this Mission, any time the Sun Track would Advance, the Heroes may spend a total number of Grit equal to the number of Heroes in the Posse, to prevent the Sun Track from Advancing on the D6 roll of 3+.
Objectives
Finding a Life Water. Each time the Heroes find a Clue Icon, they have discovered a cache of Life Water being guarded by a group of Enemies. Ignore any Attacks or Encounters listed on the Exploration Token. Also, ignore any Door/Gate Icons on the token, as the Room has no exits. Roll a D6 to see what kind of Enemies are guarding the Life Water:
| D6 | Result |
|---|---|
| 1 | No Enemies |
| 2-3 | 1 Threat |
| 4-5 | 1 Threat (one higher Threat Level than normal) |
| 6 | 1 Epic Threat |
When all Enemies on the board have been defeated, you collect the Life Water they were guarding.
Once all of the Life Water needed to complete the objective have been collected, the Mission is successfully completed.
Reward
The Reward gained is based on the Mission Length chosen before the Mission began. Each Hero may draw D3 Loot cards for each Life Water in the Mission (shuffle the Loot deck between each Hero's draw - On these draws, No extra Loot card is drawn for the Blasted Wastes World effect). Also, if the Large Settlement Mission Length was played, every Hero gains D3 Health/Sanity (your choice) for saving so many lives.
Failure
If the Mission is failed, each Hero loses 1 Sanity, permanently, and immediately gains a Mutation. If the Large Settlement Mission Length was played, lose D3 Sanity instead of only 1, and the sickness has spread to other nearby settlements - if you visit a Barter Town after this Mission, D3+1 Buildings there have been destroyed (shut down by the sickness).
Mission 6: Warmaster's Fury
(Flavour text omitted.)
Set Up
This Mission starts on the Blasted Wastes Entrance Map Tile. Other than beginning the game in the Blasted Wastes, all Heroes start on the Entrance Map Tile as normal.
At the beginning of the game, draw one Wasteland Warmaster card to see which Warmaster is terrorizing the region! The Wasteland Warband listed on the Warmaster's card is in effect for the duration of the Adventure, and any time a Warband would normally be drawn, use the Warmaster's Warband instead of drawing.
Also, roll a D6 to determine the Warmaster's Objective:
| D6 | Result |
|---|---|
| 1-2 | Kidnapping 'New Recruits' |
| 3-4 | Rampage |
| 5-6 | Supply Raid |
Mission Goal
The Heroes must search for Clues to hunt down the Wasteland Warmaster and defeat him!
Special Rules
No Gates. For this Adventure, all Gates count as normal Doors.
Common Enemies: Wasteland Scavengers. Whenever a Threat card would be drawn, roll a D6. On the roll of 4+, instead of drawing a Threat card, the Heroes are attacked by Wasteland Scavengers.
| Heroes | Enemies |
|---|---|
| 1-2 Heroes | D3+1 Wasteland Scavengers |
| 3-4 Heroes | one Wasteland Scavenger per Hero ([P icon]) |
| 5-6 Heroes | 6 Wasteland Scavengers and 1 Scavenger Heavy |
These Fights generate Loot for the Heroes as normal.
Warmaster's Objective. The Warmaster's Objective, rolled for at the start of the Adventure, determines a special rule for the Mission as follows:
- Kidnapping 'New Recruits'. Any time a 5 or lower is rolled for the Hold Back the Darkness roll, add a Growing Dread card to the stack.
- Rampage. Whenever a group of Wasteland Scavengers are encountered, they always come into play with 1 extra Scavenger Heavy as well.
- Supply Raid. Whenever a Darkness card would be drawn, draw 2 Darkness cards instead.
Objectives
Find 3 Clues to Hunt Down the Warmaster. When the Heroes find the third Clue Icon, they have reached the Objective and found the Warmaster himself! Ignore any Attacks or Encounters listed on the final Exploration Token. Also, ignore any Door/Gate Icons on the token, as the Objective Room has no exits.
Reveal all Growing Dread cards in the stack as normal and then the Heroes must face an Epic Threat, selected from only those that include a Wasteland Warmaster. Use the Wasteland Warmaster drawn at the beginning of the adventure for the Warmaster in this Fight.
Once the Wasteland Warmaster and all other Enemies have been defeated, the Heroes have successfully completed the Mission!
Reward
Each Hero gains the following reward based on which Warmaster's Objective was being used:
- Kidnapping 'New Recruits' - Gain 1 Sanity and 25 XP.
- Rampage - Gain D6x$100 and 25 XP.
- Supply Raid - Draw 2 Loot cards (no extra for the World effect).
Failure
If the Mission is failed, the Warmaster escapes! D3 Buildings in Town are Destroyed and each Hero starts the next Adventure with D3 Bleeding markers due to their lasting wounds from the epic struggle.
Enemy Overview
Wasteland Scavengers. Trapped on this inhospitable, desert world, the Scavengers that roam the Blasted Wastes are a collection of various aliens that have either had their ships pulled into the planet's gravity well and wrecked on the surface, or been intentionally marooned here as a death sentence; punishment for their unspeakable crimes. Those that survive the burning suns, toxic Night Mist, and Dark Stone sand storms, often form nomadic warbands that hunt the desert dunes in search of scrap, tech, and fresh supplies to keep them alive.
These vicious Wasteland Warbands use hit and run attacks to prey on newly crashed ships and to raid Barter Town settlements that have built up in the desert canyons, underground caverns, and old hulks of wrecked ships, half-buried in the sinking sands.
Wasteland Warlords and Heavies. The strongest and most cutthroat Scavengers become tribal leaders amongst their warbands. Rising to the level of Warlord, these brutal warriors are terrifying fighters and cunning strategists, inspiring their horde of Scavengers with the promise of wealth and power, taken by force.
Though most Scavengers in a Warband use some form of Scrap Rifle in addition to their makeshift blades, there are those that have been able to build larger, more deadly rapid fire Scrap Cannons from bits of tech and scrap. The warriors that carry these weapons are known as Heavies, belying their larger, more brutish nature.
Warband Names. The Warband cards are named Death Claw Raiders, The Kraken-Born, Night Runners, The Sons of Drakoth, and Flesh Eaters.
Sand Crabs. The sulfur deserts of the wasteland are home to many exotic alien creatures, but few are more fearsome than the deadly Sand Crabs! These fiends have thick, armored shells, and large snapping claws, burrowing through the sandy ground to ambush their prey from below.
Tribal Ghost Warriors. Tribal Ghost Warriors are demon possessed Indian Braves that were once human, living in villages on the outskirts of Brimstone when it blew. As the creatures and demons that could take physical form terrorized the inhabitants of the town itself, the formless spirits and demons released swept through the native camps and villages throughout the nearby countryside, taking possession of whole tribes. Now they paint their bodies a ghastly white, roaming the cliffs and canyons, jittering in and out of reality as they stalk unwary travelers and strike out from the shadows of the void to attack!
FAQ and Clarifications
Q: Ghost Warrior Enemies' Phase Jitter ability says that "Hero Ranged Attacks will only Hit them on To Hit rolls of 5+". What does this mean?
A: When a Hero makes a Ranged Attack, only dice that rolled 5 or higher To Hit may be assigned to a Ghost Warrior Enemy. If only Ghost Warriors are adjacent to the Hero, as normal, Hits may NOT be assigned to other Enemies that are non-adjacent (those 'Hits' that rolled 4 or less are wasted).
Q: The Night Runners Wasteland Warband ability Nocturnal gives them a bonus at Night. Does this include Dusk?
A: Yes. As noted on the Sun Track, Dusk also counts as Night and Dawn also counts as Day.
Q: If a Hero is standing on the puzzle cut space between 2 Map Tiles that both have an Acid Pool on them at Night, does he take twice the Hits from the Night Mist?
A: No. A Hero is either affected by Night Mist or not.
Q: If I have the expanded Frontier Town Expansion, can I use the Town Daily Events deck and Specialty Town Types with the wasteland Barter Town?
A: Not really. Those elements are not intended to be used in conjunction with any Towns other than the Old West Frontier Town.
Q: The Scavenger Warparty Epic Threat card references a 'Scavenger Warlord' and a 'Scavenger Warmaster'. Are these the same as the Wasteland Warlord/Warmaster?
A: Yes. They are the same thing.
Q: Does a Scavenger Heavy still use Snap Fire?
A: Yes.
Q: If you are called on to place more Scavenger Heavies than you have models, does this add an Elite ability to just the Heavies or all of the normal Scavengers as well?
A: It adds an Elite ability to all of the Scavengers Enemy Group, including the Heavies. Note that only 1 extra Elite ability is added, even if you are short on models for both normal Scavengers and Heavies.
Q: In the Water of Life Mission, can I use a Life Water Artifact card to count as one of the Mission Objectives?
A: Yes. At the start of any turn, if there are no Enemies on the board, you may complete the Mission by discarding Life Water Artifact cards equal to the number that still need to be 'found' for the Mission Objective.
Q: With the Canyon Encounter River Crossing, what if there are no Map Cards remaining with 'Water' in the title? Is it possible to go back once you have crossed?
A: If there are no Map Cards with 'Water' in the title left to be drawn, the Heroes may not cross. Once crossed, the Heroes may not go back to the other side.
Q: Are Heroes that get too far from the Lantern in the Canyons still affected by Voices in the Dark, even though it is outdoors and light out?
A: Yes. There are always dark caves and shadows nearby to whisper into the Heroes' minds.
Q: If the Canyons is a World, but not an OtherWorld, does this mean that the Loot cards What's This?! and This Should Come in Handy just work the same as in the Mines?
A: Yes.
Wasteland Travel Hazard Chart
(Used instead of the normal Travel Hazard Table when a Hero travels to or from a wasteland Barter Town; see Wasteland Barter Town above.)
D36 Traveling Hazard. To roll a D36, roll two dice of different colors, where one of them is the '10's digit and the other is the '1's digit. For example, if you rolled 3 and 5 the result on the chart would be 35.
11 - Geldonian Crawler. Churning sand with its massive wheels, the gigantic rust crawler of the Geldonian Enclave belches black fumes from its exhaust ports. Sifting through the desert sands, it trundles slowly along, mining for spices and Life Water buried beneath the surface to sell to the highest bidder at the market ports of Cantarra Reach.
Make a Lore 5+ test. If successful, cancel the next Travel Hazard without rolling for it. If failed, add an extra Travel Hazard to your journey.
12 - Ion Lightning. Lighting arcs down from the sky as ripples of intense heat rise from the burning dunes.
Each Hero must roll a D6 for every Tech Token and Item they have. For each roll of 1, that Hero is struck by an electric discharge and must either discard a Tech Token or Item of their choice or roll once on the Injury Table.
13 - Alien Oasis. In the distance, you see a shimmering pool of cool water under a rocky overhang offering tempting shade.
Each Hero may Recover 1 Grit and Heal D6 Wounds/Sanity Damage (any mix).
14 - Dust River. A deep river of dust and sand flows through the canyon here, swept forward on a current of heated air.
Each Hero must make a Luck 4+ test to ford the dust river without losing their footing. If failed, you are swept away and separated from the group! You are not affected by the remaining Travel Hazards rolled by the Posse. Instead, you must roll D3 more Travel Hazards that affect only you, as you continue traveling on your own to meet up with the rest of the group when you reach Town.
15 - Rock Mites. With a sickening chitter, a swarm of large, hard-shelled creatures scurry up from beneath the rocks to surround you!
Each Hero must make a Strength 5+ test to overcome the Rock Mites. If successful, gain 15 XP and you escape to safety. If failed, they latch themselves onto you, and begin feeding! Take D6 Wounds, ignoring Defense, and make this test again until successful or KO'd.
16 - Dying Scavenger. Slumped against a chunk of wreckage, a dying scavenger tells you the location of his supply stash for the promise of a proper burial.
You may add 2 extra Travel Hazards to your journey to go out to the location of his stash on the way to Town. If you do, after completing the next 2 Travel Hazards, each Hero may choose one of the following to gain - Bandages, Whiskey, Spice, or D6 Scrap Tokens.
21 - Void Twister. A Void Twister sweeps across the desert landscape, creating a swirling storm of chaos all around you, and threatening to pull you off your feet!
Every Hero must make a Luck 5+ test. If successful, gain 10 XP and take 1 Corruption Hit. If failed, you are swept up in the twister and dashed on the jagged wreckage nearby! Take 2D6 Wounds, ignoring Defense and D3 Corruption Hits.
Also, once you arrive in Town, 1 Random Building has been Destroyed by the Void Twister.
22 - Dark Stone Dust Storm. Without warning, a massive Dark Stone dust storm sweeps up over the dunes, engulfing you in its biting fury! Purple lightning arcs all around and it takes all of your strength to push through the abrasive onslaught and find shelter among some nearby wreckage.
Every Hero must make a Strength 5+ test to push their way through the storm. If successful, gain 20 XP and take D3 Corruption Hits. If failed, take D6 Hits and D6 Corruption Hits as you are battered by the Void-energized sandstorm.
23 - Dune Quake. The shifting sands open up into a gaping chasm before you as the ground all around trembles and collapses!
Every Hero must make an Agility 4+ test. If failed, you lose your footing and drop something into the chasm as you scramble away from the edge. You must discard 1 Item with a Weight icon.
24 - Sinking Sand. Patches of sand here seem unstable, with no solid footing to be found. If you are not careful, you could find yourself pulled under in the sinking sand.
Every Hero may make a Cunning 5+ test. If successful, your keen eye spots something of value previously lost to the sinking sand. Draw a Loot card. If failed, you stumble into an unstable patch and are pulled under! After a few moments, you claw your way back to the surface, but have lost something in the struggle. You must discard 1 Dark Stone, Tech, Scrap, Side Bag Token, or Item of your choice.
25 - Fire in the Sky. A blazing trail streaks across the sky in the distance as another ship is pulled down to the planet's surface!
Every Hero may make a Lore 5+ test. If successful, gain 10 XP and Recover a Grit.
26 - Valley of Bones. Crossing into a rocky valley, you discover that the cliff walls are lined with the bones of the dead, bleached white from years under the beating suns! Dark feelings of dread creep into your mind as you press forward.
Every Hero must make a Spirit 5+ test. If successful, gain 15 XP and you may heal D6 Sanity Damage. If failed, the angry spirits of the dead seem to close in all around you! Take 2D6 Horror Hits.
31 - Nest of Eggs. You've stumbled into a massive nest of large, reptilian looking eggs nestled into a rock formation. Chittering can be heard coming from a nearby cave.
Each Hero must choose to either get out before you are noticed (make an Agility 4+ test) or grab an egg and run (make a Strength 6+ test)! If successful, gain 10 XP. If you grabbed an egg, take 1 Corruption Hit and you may sell the egg in Town for D6x$100. If failed, you are too slow and discovered in the nest! Ravaged by a massive Harkon Beast, take 3D6 Hits.
32 - Scavenger Trap. Stepping on a pressure plate beneath the sand, a series of junk bombs explode all around you!
Each Hero takes D6 Wounds, ignoring Defense.
33 - Hive Town Raiders. Climbing a steep dune, you are nearly knocked over as two scrap wagons hurtle over the ridge, belching black smoke and showering you with sand as they spin circles around your posse!
Each Hero is attacked by 4 Raiders from the Scrap Wagons. Make a Skill 4+ test (your choice of Skill) to overcome them. For each success, you defeat 1 Raider and gain 10 XP. For each Raider you do not defeat, discard one Side Bag Token, Dark Stone, or Item, stolen in the skirmish.
34 - Karn'uto Stampede. The ground shakes and the thunderous onslaught is deafening as a massive herd of wild Karn'uto stampede across the dunes around you!
Each Hero must make a Strength 4+ test to keep their footing. If passed, gain 15 XP as you stare down the unruly herd. If failed, you are overrun and trampled! Roll once on the Injury chart, using 3D6 and discarding the lowest single die roll.
35 - Traitor's Road. Following a desert trail, you descend into a rocky valley. The cliff face here, on either side, is adorned with the hanging bodies of dead Scavengers, strung up to bake in the blistering sun. As you push forward, the bodies only grow in number.
Each Hero must make a Spirit 6+ test. If successful, gain 25 XP. If failed, draw a Growing Dread card and immediately play it (ignore all references to Enemies, the Depth Track, and any other game elements that are only used during an Adventure - note that this means some cards may have no effect at all).
36 - Nomad Merchant. Trekking through the desert wastes with a group of Karn'uto pack animals, a nomad merchant crosses your path and offers you the opportunity to view his wares. "What are ya' buyin'?" he asks, in a raspy alien dialect.
Draw 2 Blasted Wastes Artifact cards and 1 other Artifact card from a Random World. The Heroes may purchase any of these Artifacts for the listed value + D3x$100. If an Artifact has no listed value, treat its listed value as $0.
Only one of each item is available, and if multiple Heroes want to purchase the same item, the Hero with the highest Lore gets first choice.
41 - Settlement Ruins. You come across the smoking ruins of a small settlement. It looks as though it was raided in the last few days. From the carnage here, there were no survivors.
Each Hero loses 1 Grit. If you do not have a Grit to lose, instead take D3 Sanity Damage, ignoring Willpower.
42 - Mutant Warriors. Surrounded by a group of mutant scavengers, you have no choice but to give them what they want.
Each Hero must discard D3 of the following (any mix) - Grit, Dark Stone, Scrap, Tech, or Side Bag Token, offered up to pay off the mutants.
43 - Polished Bones. The sand here is full of bones, bleached by the desert suns and polished to a sheen by the abrasive sand storms.
Each Hero may draw a Scavenge card. Any Darkness or Growing Dread cards called for are drawn at the beginning of the next Adventure instead of immediately.
44 - Wrecked Scrap Wagons. You have stumbled onto the site of what must have been a high-speed skirmish between several Scrap Wagon mounted Warbands. Debris and bodies litter the area, still billowing oily black smoke and fumes.
Each Hero can decide to pass it by without getting too close, or to sift through the aftermath to look for anything useful. If you search the wreckage, make a Luck 5+ test. If failed, lose 1 Health permanently, as you breathe in a lung full of toxic fumes that burn in your chest. If successful, roll a D6 to see what you find.
| D6 Roll | Result |
|---|---|
| 1-3 | Salvage - You are able to pull [P icon] Tech Tokens from the wreckage. |
| 4-5 | Artifact - Perhaps this is what they were fighting over! Draw a Blasted Wastes Artifact card. |
| 6 | Survivor! - You find someone alive in the wreckage. They look to have been kidnapped by the raiders. Cutting their bonds, you bring them with you to the next Town. Gain +1 Max Grit. |
45 - Watchtower. A Rust Fort watchtower overlooks the valley ahead and you can see from the bodies strung up on posts surrounding it that they don't seem very friendly. You'll have to find another way around.
This adds an extra D3 Travel Hazards to your journey. If another Watchtower is rolled, instead every Hero loses all Grit they currently have as they sneak by undetected.
46 - Sleeping Under the Stars. As you drift off to sleep under the starry sky, your thoughts turn to the vastness of time and space, and all the horrors and wonders you have seen on your journeys.
Each Hero may make a Lore 6+ test. For each 6+ rolled, gain +1 Health or +1 Sanity.
51 - Pit of Kar-Suul. A gaping pit stretches out before you in the desert floor, rings of teeth protruding from the rocky looking, circular rings that line its interior. Is this a natural formation of some sort, or a massive creature?!?
Every Hero must roll a D6 for each Corruption Point and Mutation they have. On the roll of 1 or 2, take an additional Corruption Point, ignoring Willpower.
52 - The Black Wall. Rising high up out of the desert dunes, this featureless black wall extends off as far as the eye can see in both directions. You'll have to go a different way.
Add one extra Travel Hazard to the journey for each Hero in the Posse. If The Black Wall is rolled a second time during the journey to Town, there is no way through, and the Heroes must proceed to the next Adventure without a Town visit.
53 - Fungus Farmers. You encounter a small group of Fungus Farmers on their way to a neighboring settlement to sell their wares.
Each Hero may spend $50 to Heal D6 Health/Sanity (any mix). Also, when you arrive at the Barter Town that you are Traveling to, it automatically has a Mining Operation as one of its Locations.
54 - Buried Warden. Tripping over something hard, you look back to see a cascade of sand pouring away from the massive form of a Mk V Warden robot, rising up from under the dune! Its eyes flicker to life as it looks down at you with cold hate!
Each Hero must choose to do one of the following:
Make an Agility 5+ test to run and hide! If successful, you take no damage as you hold and wait for the Warden to pass. If failed, take 2D6 Hits as you are blasted by the Warden's Pacifier Cannon.
or
Make a Strength 5+ test to try and overpower the Warden as a group. If the total number of successes (rolls of 5+) from Heroes making this test is equal to or greater than the total number of Heroes in the Posse, you overpower the Warden and shut it down. Each Hero that made this test gains 25 XP. If failed, each Hero that made this test takes D6 Wounds, ignoring Defense, as they are tossed around by the angry robot!
55 - Hydro-Collector. You come across a tall, ramshackle machine, with large wind turbines rooted in a rocky outcropping. It seems to be pulling moisture from the air and condensing it into a reservoir inside. There's no sign of who built or maintains it though.
Each Hero may take a refreshing drink from the collected water, Recovering 1 Grit. If you do, you also take 1 Corruption Point, ignoring Willpower, on the D6 roll of 1 (Grit may not be used for this roll).
56 - Shimmering Mirage. The heat coming off the sand shimmers in the distance, and shapes of far off places and things begin to take form in the light. Is there really something there?
Choose a number between 1 and 6, then roll 3 dice. For each die that rolled your chosen number, you may draw a Loot card (no extra Loot for the World effect). If none of the dice rolled your number, you shake off the illusion and begin to realize just how dehydrated you really are! Take D6 Wounds and D6 Sanity Damage, ignoring Defense/Willpower and Armor.
61 - Acid River. The twin suns are low on the horizon as you pass through the rocky cliffs and sandy canyons. With night setting in, the boiling acid river at the base of the valley begins to churn and release toxic mist into the air, filling the region with a deadly fume.
Every Hero immediately takes 2 Hits that do 2 Wounds each. For the rest of this Traveling journey, every Hero takes 1 Hit that does 2 Wounds before each remaining Travel Hazard rolled.
62 - Void Hound Attack. A pack of vicious Void Hounds have been tracking your posse for days and have found the opportunity to strike!
Each Hero must make a Cunning 5+ test to outwit the Hounds or a Strength 5+ test to overpower them. If passed, gain 25 XP. If failed, you are ravaged by the creatures! Roll a D6 for every Clothing Item you have (not including your Personal Item). On the roll of 1 or 2 it is torn apart and destroyed by the savage attack.
63 - Blinking Beacon. A blinking light buried in the sand draws your attention, and you hear a rumbling roar in the distance.
You must make a Cunning 5+ test to find and shut off the beacon before it attracts something terrible from beneath the sand. If successful, gain 20 XP. If failed, you're too late! A massive desert Burrower erupts beneath you, scattering the posse and attacking your mounts! Every Hero must roll a D6 for any Transport they have. On the roll of 1 or 2, it is devoured by the beast (discarded)!
64 - Offering to the Great Kraken. On a rocky outcropping atop the cliff wall, an alien woman stands, tied to a rusty post; her tattered and flowing clothes blowing in the wind! She seems to be captive, placed as a sacrificial offering of some sort. In the distance, you hear a savage roar as the ground trembles!
Each Hero must decide to push on (no effect) or climb the cliff to try and free the captive! If you climb the cliff, make an Agility 6+ test. If the total number of successes for all Heroes is 3 or more, you reach the captive and free her! Each Hero that made the test may draw 2 Loot cards (no extra for the World ability), found as offerings at the base of the post! If not, a nightmarishly massive Sand Kraken emerges and eats the captive, knocking the Heroes off the cliff! Each Hero that made the test must roll once on the Injury Table.
65 - Refugee Camp. Tattered tents and malnourished Karn'uto beasts fill the small valley as you pick your way through a refugee camp of survivors from a Barter Town overrun by raiders.
Each Hero may discard any number of Side Bag or Tech Tokens to remove 1 Corruption Point each.
66 - Desert Traveler. Late at night, while the others are sleeping, a shadowy figure approaches your camp site. In a hushed whisper, he speaks to you from the shadows.
You may either wake the others (no further effect as he disappears into the night), or listen to what he has to say. Make a Spirit 6+ test. If successful, gain +1 Sanity. If failed, take D6 Corruption Points, ignoring Willpower.
Enemy Record Sheets: Stranglers and Tentacles
These are the Enemy record sheets printed on page 22 of the Adventure Book, for the two OtherWorld Enemies introduced in this expansion (see Desert Stranglers and Corrosive Tentacles above).
Stranglers
Type: Demon. Size: Medium. Initiative: 4. Move: 6. Escape: 6+.
Abilities: Ensnare - Strangler To Hit rolls of 6 count as 3 Hits each.
To Hit: Range - / Melee 3+. Combat: 4. Damage: 1. Defense: 2. Health: 3. XP: 25.
Elite Chart (Roll a D6 for Elite Ability):
- Dark Stone Hunger - +2 Combat while attacking any Hero with 1 or more Dark Stone on them.
- Snapping Jaws - Any Hero that starts their Activation adjacent to one or more Stranglers must pass an Agility 5+ test or take D6 Hits.
- Scramble - +1 Initiative.
- Lashing Arms - +2 Combat.
- Regeneration (2) - Heals 2 Wounds at the start of each turn.
- Writhing Form - +3 Health.
Tentacles
Type: Void. Size: Medium. Initiative: 2. Move: 6. Escape: 4+.
Abilities: Smash - Tentacle To Hit rolls of 6 ignore a Hero's Defense.
To Hit: Range - / Melee 4+. Combat: 3. Damage: 3. Defense: 2. Health: 4. XP: 30.
Elite Chart (Roll a D6 for Elite Ability):
- Entangle - Any Hero wounded by a Tentacle may not move during their next Activation.
- Eruption - Tentacles move through other models and change targets each turn.
- Writhing - +2 Defense.
- Biting Suckers - Tentacle Melee Hits are now Damage +2.
- Lashing Strike - +1 Combat.
- Swift - +2 Initiative.
Side Bag Token Effects
(Reference from the back cover of the Adventure Book.)
- Nectar - Discard to Recover D3 Grit.
- Junk Bomb - (Free Attack) Discard to Throw and Bounce, just like Dynamite. All models in the same and adjacent spaces take 2D6-5 Wounds, ignoring Defense.
- Spice - Discard to add D3 Damage to a single one of your Hits. You also take 1 Wound, ignoring Defense.
- Flash - Discard to make all Enemies -2 Initiative until the end of the turn.
Stunned - A model with 1 or more Stunned markers is -1 Defense. Roll a D6 at the start of its Activations. On 4+, remove 1 Stunned marker.
Bleeding - A model is -3 Health for each Bleeding marker it has. Remove all Bleeding markers when KO'd, or at the end of the Adventure. Use 1 Grit to remove a Bleeding marker at any time.