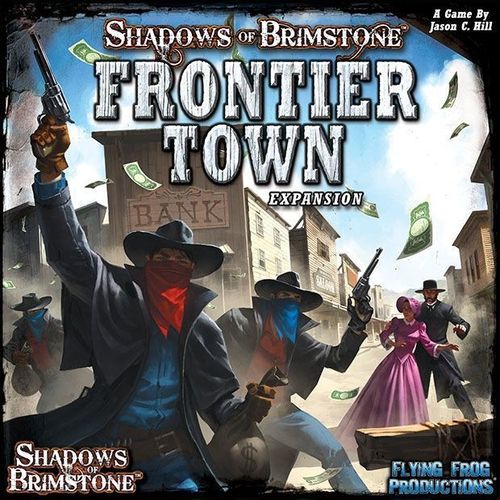
Shadows of Brimstone: Frontier Town Expansion
Shadows of Brimstone: Frontier Town Expansion Rulebook
Table of Contents
Table of Contents
Overview
New Town Maps
There are 3 new Town Maps included, giving Heroes the option of traveling to a Small, Medium, or Large size Town. These new Town Maps do not have the specific Building Locations printed on them, but rather have a number of empty Location Slots that are filled with Random Town Location Building Tokens each time the Heroes arrive in a new Town.
Town Adventure Board
A large, folding Town Adventure Board has also been included, allowing Heroes to play Missions within the Town itself!
New Cards
Also included are a new deck of Daily Event cards for use in Town, some new Gear cards, Threat cards for the new Bandit Enemies, and a set of Infamous Bandit Gang cards for encountering tougher, well-known and wanted Bandits in the region.
New Town Locations and Specialty Towns
There are 6 new large Town Location cards to represent the new Locations the Heroes may find in Town, as well as 8 double-sided Specialty Town cards, each covering a different Type of Town the Heroes can find in their travels.
New Enemies - Bandits
A common sight in any Town on the frontier is Bandits! These rustlers and outlaws are a featured part of the Frontier Town Expansion, giving a new Enemy that can be encountered in the Mines, but also an Earthly foe that the Heroes can battle in Town during Missions on the Town Adventure Board.
New Missions
There are 6 new Missions in the Frontier Town Expansion, all using the new Town Adventure Board.
Game Contents
- 1 Full-Color 24 page Adventure Book
- 6 Plastic Bandit Enemies with 30mm Bases
- 1 Double-Sided Enemy Record Sheet
- 8 Double-Sided Large Specialty Town Type Reference Cards
- 6 Double-Sided Extra Large New Town Location Reference Cards
- 3 Double-Sided Extra Large Town Reference Cards (including 3 new Town Maps)
- 1 Extra Large Folding Town Adventure Board
- 16 Daily Event Cards
- 9 Threat Cards
- 7 Gear Cards
- 5 Infamous Bandit Gang Cards
- 3 'Wanted!' Cards
- 5 Reference Cards
- A large assortment of Die-cut Counters
Expanded Town Components
Unwanted Attention Markers
Sometimes Heroes will find that they have attracted the attention of an unsavory element in Town. This could be from bearing too many Mutations or from being a high-roller in the Saloon or Gambling Hall. These markers track a Hero's level of Unwanted Attention.
Town Location Building Tokens
Each Town Location is now represented by a Building Token (the 4 Core Set Town Locations as well as the new Town Locations). These Building Tokens are used to construct the Town.
Shootout Markers
These markers are used for Enemies that focus on Ranged Attacks and have the Shootout Standardized Ability, such as Bandits.
Townsfolk
These markers are used to represent Townsfolk during some of the Town Adventure Missions.
New Side Bag Tokens
There are several new Side Bag Tokens available in Town for the Heroes to acquire, each with a new set of markers to represent them.
The Devil's Wheel
The Devil's Wheel token is used for playing the Devil's Wheel mini-game found at the Gambling Hall Town Location.
Prisoner
This marker is used for the Town Adventure Jail Break Mission and is double-sided, with the Jailed Prisoner on the front and the Escaping Prisoner on the back.
Money Bags
These markers are used for the Town Adventure Bank Robbery Mission.
Gallows
This large marker is used for the Town Adventure Hanging High Mission.
Additional Counters
Several additional counters have been provided. These are not needed for the main game but can be used for house rules and Missions, as well as future official content.
Expanded Town
The expanded Town material in this expansion greatly increases the variety your Heroes will find each time they finish an Adventure and Travel to Town. It is designed to have several different parts that all work together to build an exciting and different Town experience each time.
Small, Medium, and Large Towns
After an Adventure is complete and the Heroes are ready to Travel to Town, the first thing they must now do is decide what Size of Town they would like to visit - Small Town (4 Locations), Medium Town (6 Locations), or Large Town (8 Locations).
Each Size of Town has a different Town Map with a number of open Town Location Slots on it. These Slots will be filled with Random Town Location Buildings once the Heroes arrive, meaning that you can never be certain of exactly which Locations will be available to you when you reach Town - the larger the Town, the more likely it will have a particular Location you may be hoping to visit.
The Size of Town the Heroes decide to Travel to also determines how many Travel Hazards the Heroes may face along the way.
Expanded Travel Chart
A new Expanded Travel Chart is included at the back of this rulebook, more than doubling the possible Hazards and Events that the Heroes can encounter when traveling to Town. This new chart uses a D36 (rolling two dice, with one as the '10's' digit and one as the '1's' digit) rather than the previous 3D6 roll.
The number of Travel Hazards that the Heroes will encounter has also changed, and is now based on the size of Town the Heroes are trying to reach.
| Town Size | Travel Hazards |
|---|---|
| Small Town | Each Hero adds a Travel Hazard on the D6 roll of 1, 2, or 3 |
| Medium Town | Each Hero automatically adds a Travel Hazard. |
| Large Town | Each Hero automatically adds a Travel Hazard, and rolls a D6. On the roll of 1, 2, or 3, the Hero adds an additional Travel Hazard. |
Specialty Town Types
Once the Heroes have completed their Traveling and have reached Town, they should roll to see what Type of Town they have found. On average, the Heroes will find a normal Frontier Town without any special rules associated. On occasion though, the Heroes will instead find that the Town they have reached is a Specialty Type of Town, using one of the large Specialty Town cards.
| 2D6 Roll | Type of Town Found |
|---|---|
| 2 | Town Ruins |
| 3 | Haunted Town |
| 4 | Plague Town |
| 5 | Rail Town |
| 6, 7, 8 | Standard Frontier Town |
| 9 | Mining Town |
| 10 | River Town |
| 11 | Mutant Town |
| 12 | Outlaw Town |
Constructing the Town
To construct the Town that the Heroes have arrived at, place the appropriate Size Town Map (Small, Medium, or Large) on the table where all of the players can reach it. Then shuffle up all of the Town Location Building Tokens and place one Random token, face up in each of the empty Building Slots on the Town Map. These are the Locations that may be visited during the Heroes' Town Stay (in addition to the Hotel and Camp Site, which are printed on the Map).
Note that several of the Specialty Town Types will 'always' or 'never' include certain Locations in a Town of that Type. When this is the case, those Location Tokens that are always present should be placed first, and then any that are never present should be removed before filling the rest of the Building Slots with Random Locations.
Destroyed Building Slots
When a Building is Destroyed during the Town Stay, simply flip that Building Token over in its Slot (with the plain, black side up) to show that it has been Destroyed and may no longer be visited.
When one or more Buildings is Destroyed from the beginning of the Town Stay (due to failing a Mission, a Travel Hazard, etc), Construct the Town as normal, and then roll for which Random Building Slots are Destroyed, flipping those Building Tokens facedown in the Slot as above.
New Town Locations
There are six new Town Locations available as part of the Frontier Town Expansion, including - the Sheriff's Office, Smuggler's Den, Indian Trading Post, Mutant Quarter, Gambling Hall, and Street Market. Each of these Locations has a large reference card showing the Location Event Chart as well as all of the things that a Hero can do and buy when visiting that Location.
It is important to note that a couple of these Locations (Sheriff's Office and Smuggler's Den) have restrictions on who can and cannot visit them. These restrictions are listed on the Location's reference card, just above the Location Event Chart.
Visiting the Camp Site as a Location
One additional option now available while in Town is that Heroes may spend their Day visiting the Camp Site as a Town Location. One of the large reference cards has the Camp Site Location on it, including the Location Event Chart and the things that a Hero may do and buy while there. The main benefit of visiting the Camp Site is that it has a Doc's Tent and a Church Tent which can be used to attempt to Heal Injuries, Mutations, Madness, etc., even if the Doc's Office or Church Buildings are not available or have been Destroyed.
Note that there is no Building Token for the Camp Site as it is always included as part of the Town Map. Also, note that the Camp Site is not a numbered Building Slot, and so will never be Destroyed as a 'Random Building' (it can still be Destroyed by any effect that specifically targets the Camp Site however).
Daily Event Deck
The Daily Event Deck adds a new element to your Town Stay, as minor events that crop up at the start of each Day in Town. When constructing the Town, shuffle the Daily Event Deck and place it near the Town Map.
At the start of each Day in Town (before Heroes decide to stay at the Hotel or Camp Site), draw one Daily Event card and read it aloud to all players. This card applies to all Heroes in Town and will either have an immediate effect or a continuing effect during the current Day. At the end of the current Day in Town, discard this Daily Event.
Just Another Day on the Frontier
One common Daily Event card that has several copies in the deck is Just Another Day on the Frontier. This card indicates that it is just a normal day on the frontier and has no positive or negative effect on the current Day in Town. However, while in a Specialty Town Type, there are no 'normal' Days. As noted on the card, this instead triggers a special event rolled on the Daily Event Chart printed on the large Specialty Town card for the Type of Town the Heroes are currently in.
Unwanted Attention
Unwanted Attention markers represent the Hero attracting the attention of a shady element in Town. This could be a drunk gambler that feels cheated or a swarthy cutthroat that doesn't like the way you look.
Gaining Unwanted Attention
There are two main ways to gain Unwanted Attention markers in Town:
- Too Many Mutations - When a Hero enters Town, they gain 1 Unwanted Attention marker for every Mutation they have over 3 (Ex. 4 Mutations = 1 marker).
- Gaining Gold at the Saloon / Gambling Hall - At the end of any Location Visit to the Saloon or Gambling Hall in which a Hero gains any amount of Gold, for any reason, they also gain 1 Unwanted Attention marker.
When Trouble Comes a Callin'
While a Hero has 1 or more Unwanted Attention markers, any time they roll a 7 on a Location Event Chart, they must roll to see if they are attacked! Roll a D6. If the roll is equal to or less than the number of Unwanted Attention markers they have, the Hero is attacked from behind by a cowardly but dangerous individual, with murder on the mind!
The Hero must immediately make a Luck 5+ test to move aside at the last minute. If successful, the would-be assassin runs off into a back alley. If failed, the Hero is shot in the back, taking D6 x Hero Level Wounds, ignoring Defense and Armor. If this KO's the Hero, they are killed!
All Unwanted Attention markers are removed at the end of a Hero's Town Stay.
Expanded Bounty
As the Darkness spreads and more demons and creatures flood into the area, the Frontier Outposts across the region begin to post more varied Bounties based on the current 'Most Wanted' monsters.
When determining the Bounty at the Frontier Outpost Location in Town, the Hero may either roll on the existing chart as normal, or choose to draw a Low Threat card instead. If they choose to draw a card, the new Bounty covers every Enemy listed on that Threat card, and the Gold value is equal to $10 x the Health of that Enemy. If the Enemy has a normal XP value, the Hero that kills that Enemy gains the Bounty. If the Enemy has a variable XP value (XP +5 per Wound), then ALL Heroes gain the Bounty when that Enemy is defeated.
Note that the Sheriff's Office Location also has a Sheriff's Bounty available, which is a little different. This is separate from the normal Frontier Outpost Bounty and it is possible to have both of these Bounties at the same time (imagine it thematically as the Frontier Outpost Bounty is for the whole region while the Sheriff's Bounty is paid out by that particular Town).
Specialty Town Types
The large Specialty Town cards allow the Heroes to find more specific Types of Towns, each with its own feel and inherent benefits and drawbacks. When one of these Specialty Towns is discovered by the Heroes, use the large card for that Type of Town to find the Special Rules, Daily Event Chart, and Extra Options that the Heroes have during their Town Stay.
Special Rules
Each Specialty Town Type has a list of Special Rules that are in effect as long as the Heroes are at that Type of Town. These Special Rules add extra theme and flavor specific to being in the listed Type of Town.
Daily Events
Each Specialty Town card also has a chart of Daily Events that are themed for that Type of Town. These Daily Events do not happen every Day in Town, but rather they are triggered by the Daily Event card Just Another Day on the Frontier, as previously noted in the Daily Event Deck section.
Extra Options
The Extra Options section of a Specialty Town card lists additional activities and Items the Heroes may find while in that Type of Town. If there is a specific Location that a Hero needs to be at to purchase these items or take part in an activity, it will be listed in that entry. Otherwise, the Hero may use the Extra Option regardless of the Location they visit during their Day in Town.
'Wanted!'
While visiting Town, it is now possible for a Hero to find that they have become 'Wanted!' by the local authorities. This is usually the result of engaging in illegal activities in Town, or being in the wrong place at the wrong time for certain Location Events. When a Hero becomes 'Wanted!', they take one of the 'Wanted!' reference cards that lists the effects of their new status. If a Hero is already 'Wanted!' and they would gain the 'Wanted!' status again, they instead become 'Most Wanted!'; the effects of which are listed on the back of the normal 'Wanted' reference card.
This 'Wanted!' status continues to affect a Hero until it is removed. A Hero may visit the Sheriff's Office Location in any Town to Pay Off Your Warrants and remove their 'Wanted!' status, as detailed on the Sheriff's Office Location card.
The Devil's Wheel
The Devil's Wheel is a mini-game that can be played by Heroes that are visiting the Gambling Hall Town Location, and can be found on the Location Chart for the Gambling Hall.
Setting Up
To set up The Devil's Wheel, take the Frontier Town Expansion Box Top and lay it face down on a flat surface. Then take 3 Random Mine Artifact cards (without looking at them) and lay them face down in the Box Top in a triangle pattern in the center of the box. Lastly, place the Devil's Head token at the center of the box, overlapping the 3 Mine Artifact cards, with the small dice icons each 'pointing to' an Artifact.
Playing The Devil's Wheel
To play a round of The Devil's Wheel, roll 3 dice into the Box Top. These dice must bounce off of at least one inner wall of the Box Top. The dice are scored based on where they land in the box.
Any die that lands partially on the Mine Artifact cards is worth Points equal to the number rolled on that die.
Any die that is entirely on the Mine Artifact cards and/or the Devil's Head token is worth double the value rolled on the die.
All other dice are worth no Points.
After the first roll, any number of the dice (player's choice) may be picked up and rolled a second time. After the second roll, any number of the dice (again, player's choice) may be picked up and rolled for a third and final time. Note that for each of these rolls, the dice must always bounce off of at least one inner wall of the box and any dice not Re-rolled during the second or third roll are left in the box and may be moved or changed if hit by the new rolls.
Once the rolling is complete, total the number of Points for the dice in the box to see your final score!
Note that you may NOT use Grit (or any other Items or abilities) to Re-roll any of the dice rolled while playing The Devil's Wheel.
Scoring
The Hero is paid winnings based on how many Points they earned for their final score at the end of the round. This can be found on the Location Chart for the Gambling Hall Town Location.
The Devil's Head Jackpot
Once the round is complete and points have been totaled, for each die that sits at least partially on the Devil's Head token, the Hero may press their luck and try for a Devil's Head Jackpot!
Roll the die. On a 1, 2, or 3, the Hero is bitten by the Devil and gains that many Corruption Points, ignoring Willpower! On the roll of 4, 5, or 6, the Hero wins the Jackpot and may take the Mine Artifact card 'pointed to' by that number on the token. (Immediately replace any Artifacts won with new ones from the Artifact deck to re-set for the next Round).
In addition, any time an Artifact is collected from The Devil's Wheel like this, it also triggers a Jackpot for the whole room! This gives D6 x $25 to every other Hero currently at the Gambling Hall Location with you.
Bandits
Bandits are a new Enemy Type introduced in the Frontier Town Expansion. There are 6 Bandit models included. Cattle rustlers, horse thieves, and bank robbers; Bandits are rough and rowdy outlaws. They are not terribly tough, but can pack a serious punch with the hail of bullets from their six-shootin' pistols or rooftop rifles!
Shootout
Bandits prefer a running gun fight rather than closing in to get their hands dirty. Because their main focus is making Ranged Attacks, they will generally attempt to stay back, away from the Heroes, and attack them from a distance. To represent this, Bandits have the Standard Ability Shootout. The rules for Shootout are summarized on the Shootout Reference card, but are also covered here in greater detail.
Ambushing
When a group of Enemies with the Shootout Standard Ability needs to be placed in Ambush, they are not placed adjacent to the Heroes like other Enemies. Instead, select a Random Hero and place all of the Shootout Enemies from that group on the selected Hero's Map Tile, as far from any Heroes as possible. This usually allows them to sneak in from a side passage or get placed at the end of a hall or room, maybe even behind the Heroes. If there are not enough empty spaces on that Map Tile, any remaining Enemies are placed as far from the Heroes as possible on any Map Tiles adjacent to the selected Hero.
Retreat
When an Enemy with Shootout starts its Activation adjacent to one or more Heroes, it will usually try to move away. Roll a D6 for the Enemy model. On the roll of 4, 5, or 6, the Enemy immediately makes a Free Move along the shortest distance to no longer be adjacent to any Heroes. This Free Move is outside of the Enemy's normal Move and does not count against its Movement allowance for the turn.
Melee Attacks
Any Shootout Enemy that failed to Retreat (or was stuck adjacent to a Hero, and could not move away), will make a normal Combat Attack against a Random adjacent Hero this turn, instead of their Ranged Attack.
Shootout Markers
Shootout markers are used to denote which Heroes have been targeted, and by how many Enemy Ranged Attacks. Any suitable markers can be used for this. Shootout markers are a simple way to keep track of which Heroes have already been targeted, and by how many of the Enemies.
Targeting
After any Retreat moves, the Shootout Enemies that are not adjacent to a Hero, will each find a Target for their Ranged Attacks. Step through the Shootout Enemies, one by one, completing the following procedure for each of them.
Select a Random Hero that does not have a Shootout marker on him yet (or that has the fewest Shootout markers if all Heroes already have one) and move the shortest distance to get within Range and Line Of Sight to that Target. The Enemy may not end its Move adjacent to any Heroes. The Enemy MAY move through other Enemies from its group during this movement, as they make way for one another.
At the end of this Move, if the selected Target is within Range and Line Of Sight, place a Shootout marker on that Target. If not, select a new Random Hero that is currently within Range and Line Of Sight to the Enemy (prioritizing those with the fewest Shootout markers) and place a Shootout marker on him instead.
Then proceed to the next Enemy in the group.
Making Ranged Attacks
Once all of the Enemy Group has moved and placed their Shootout markers, roll Ranged Attacks from the Enemies against each Hero equal to the number of Shootout markers on that Hero. Then, remove all of the Shootout markers.
Rooftop Bandits with Rifles
Sometimes during a Mission, one or more Bandits will be placed onto a Building Rooftop. When this happens, the Bandit comes into play with a Bandit Rifle Ranged Attack instead of his normal Bandit Pistols. This is covered more in the Rooftops section below, as well as in the specific Mission itself. It is important to note that Rooftop Bandits will never leave the Rooftop, making it easy to remember that if a Bandit is on a Rooftop, he has a Bandit Rifle.
Infamous Bandit Gangs
Some Bandits aren't ordinary outlaws, but rather an Infamous Bandit Gang, wanted throughout the land for their dirty deeds. When this occurs (usually called for by a Threat card), draw an Infamous Bandit Gang card to see which Gang the Heroes have encountered. Infamous Bandits use the same models and Enemy Record Sheet for normal Bandits, but with some special rules and abilities listed on the card.
Only 1 Infamous Bandit Gang card may be in play at a time, and all Bandits are part of that Gang while the card is in play (discard it at the end of the Fight it was drawn for).
Infamous Bandit Gang cards include the name, story, and special rules/Abilities for members of that Gang, as well as the bonus XP and Gold (Bounty) a Hero gets for killing a member of that Gang!
Town Adventure Board
The Town Adventure Board allows the Heroes to have Adventures in the Town itself! There are 6 Missions included in this Adventure Book for use with this new game board.
Using the Town Adventure Board
Missions that use the Town Adventure Board will list it in the Set Up section of the Mission itself. Unfold the board and place it in the center of the table where all players can reach it.
There is no Exploration on the Town Adventure Board as it is a fixed-map. Also, it is assumed that the entire Town is well lit and the Heroes do not need to worry about the Lantern's Light or Voices in the Dark during Missions on the Town Adventure Board. One Hero should still have the Old Lantern to make Hold Back the Darkness rolls. The Town Depth Event Chart can be found on one of the large Town Reference cards included. Unless noted otherwise in the Mission, Heroes may NOT Scavenge on the Town Adventure Board and any time a Growing Dread card would need to be drawn, it is revealed and played immediately.
The Town Adventure Board is split into 8 individual Buildings and 1 large Street Area (all of the outdoor spaces not within a Building). Each of these counts as its own Map Tile for game effects.
The Street Area
All of the spaces on the board that are not inside of a Building are considered part of the Street Area. This Street Area counts as 1 large Map Tile.
Buildings
There are 8 different Buildings on the board, and each is numbered in the corner. These Building numbers are used to reference particular Buildings during an Adventure (usually during Set Up) and are also used when the Players need to roll a Random Building. Simply roll the D8 and find that numbered Building on the board.
As noted above, each Building (as well as the Street Area) counts as a distinct Map Tile for all game effects. This means that if an Enemy in the Street Area causes Terror, a Hero may run inside of a Building to no longer be on the monster's 'Map Tile', thus avoiding the Horror Hits. It is also commonly used for one Hero to drag another Hero that is KO'd into a Building that has no Enemies inside so that he may help that Hero to Recover and get back into the action.
Walls
Each Building is enclosed in a thick, black line that represents the Walls. Walls block movement and Line of Sight (just like the Walls on the outer edges of a Mine Map Tile). Unless there is a Window or Door between two spaces, a Wall between two spaces means that those two spaces DO NOT count as being adjacent to each other for game effects (such as needing an Escape test to move away from an Enemy on the other side of the Wall, using a Saloon Girl's Comforting Presence, etc). Walls also block things such as Dynamite from Bouncing through them. Any model that is XL or larger may ignore Walls completely during its movement (smashing through them).
Doors
Doors are open sections of a Wall (between two spaces) that allow models to move through that Wall. A model may move straight through a Door during their movement, but may NOT move diagonally through a Door.
Unless a model is standing in one of the two spaces touching a Door, the Door blocks Line of Sight, just like a Wall (it is assumed the Door is shut).
A model standing on one side of a Door may see out and be seen through the Line of Sight Arc of that Door (shown in the diagram below). This model counts as being in Cover from any Attacks made from the other side of the Door (as detailed below).
Windows
The Windows of a Building are marked as light blue sections of Wall. Like Doors, a model standing on one side of a Window may see out and be seen through the Line of Sight Arc of that Window (shown in the diagram below). This model counts as being in Cover from any Attacks made from the other side of the Window (as detailed below).
In this way, for Line of Sight, Windows work just like Doors. Unlike Doors, models may not normally move through Windows. However, during a Hero's Move, they are allowed to spend 1 Grit to jump through a Window and continue moving. This does not cost any additional movement points, it simply allows them to move through a Window just like it was a Door.
Diagonal Doors
There are two Buildings on the board that have a special Diagonal Door facing out into the street intersection. These two Diagonal Doors work slightly differently than the rest of the Doors on the map, as the Diagonal Door is in a single space rather than being between two spaces, like a normal Door.
A Diagonal Door space counts as both inside the Building as well as out in the Street Area, similar to a puzzle-cut connection space between Map Tiles down in the Mines (it counts as being on both 'Map Tiles'). A model in a Diagonal Door space must choose to either be facing into the Building or from the Streets (as detailed below). Face the model accordingly to represent this. A model in a Diagonal Door space counts as being in Cover against any Attacks made from the direction they are facing - either from inside the Building or from the Streets (as detailed below). The Line of Sight Arc and movement options from a Diagonal Door are shown in the diagram below.
Cover
When a model is in Cover, it gains some protection from attacks, getting a special Cover Save against all incoming Hits.
Cover Save
A model that is in Cover is allowed to make a special Cover roll any time they are Hit by an Attack. Roll a D6 for each Hit the model just took. On the roll of 4, 5, or 6, ignore that Hit entirely. Cover saves like this are made before any normal Defense rolls. Note that Cover has no effect on Horror Hits or Corruption Hits, only regular Hits.
A model does NOT get a Cover save against an Attack made from an adjacent space, as it is assumed that the attacker and target are close enough to attack each other around the Cover. Hits from Dynamite, or markers placed in a model's space (such as Hellfire markers), also ignore Cover.
Enemies Using Cover
When an Enemy with Shootout (such as a Bandit) selects its target to Attack, roll a D6. On the roll of 1, 2, or 3, that Enemy model will attempt to take Cover before attacking. If the Enemy model has a place that it could move into Cover and still be within Line of Sight and Range to its selected target, it will (if there are multiple options for Cover, the Enemy moves to the Cover closest to its current position to still be in Range and Line of Sight). On the roll of 4, 5, or 6, the Enemy will ignore any Cover and move to Attack as normal for Shootout.
If an Enemy with Shootout starts its Activation already in Cover, it will select a target only from those that are already in Line of Sight and Range from its current position (in other words, if an Enemy is already in Cover, it will always try and stay there until it has to move away to be able to Attack).
Leaning Around Corners and Doors
Another way that a model may take Cover is to Lean Around a Corner or Lean Out of a Doorway.
Any model that is in a space at the outside corner of a Building Wall, may spend 1 movement point to move onto the line between the space they are in and the space in front of them. This is called 'splitting the space' and represents the model Leaning Around the Corner to make Ranged Attacks. The model counts as being in both spaces at once for all purposes. Count Range to or from the model from either of the spaces they are in. Face the model in the direction they are Leaning Around the Corner in. A model Leaning Around a Corner counts as being in Cover against any Attacks made from the direction they are facing (imagine a line extending out from the Building Wall - the model has Cover against any Attacks coming from the other side of that line).
Likewise, a model that is in a space touching a Door may spend 1 Movement Point to Lean In or Out of that Doorway. Move the model to the line the Doorway is on to 'split the space' and face the model either into the Building or out into the Street Area. The model counts as being in both spaces that are touching the Door at once and gains Cover from any Attacks made from the direction they are facing (either from inside the Building or from the Streets).
Rooftops
All of the Buildings on the Town Adventure Board also have a Rooftop that is accessible to models, allowing them to climb up high to get a better vantage point on the Town. Buildings 1, 2, 5, and 6 are all individual Rooftops, while Buildings 3 and 4 share a single Rooftop that includes the footprint of both Buildings combined. Similarly, Buildings 7 and 8 also share a single Rooftop.
When a model is on a Rooftop, it is represented by creating a stack of 10 or so large counters (such as the 5-piece Sanity or Wound markers) and placing the model on top of the stack to show that they are now high above the ground.
A model on a Rooftop is no longer in any particular space, but is rather on the entire Rooftop as a whole. All models on the same Rooftop count as being adjacent to one another, and any number of models may be on the same Rooftop.
A model on any Rooftop counts as being in the Street Area 'Map Tile'.
Any model on a Rooftop counts as being in Cover from all attacks, except those from other models on the same Rooftop.
Rooftops and Line of Sight
Line of Sight to and from a model on a Rooftop is counted from the Building space closest to the target/attacker.
A model on a Rooftop always has Line of Sight to all other Rooftops on the Board, but may NOT draw Line of Sight through other Building Walls to see a target on the ground.
A model on a Rooftop does NOT have Line of Sight to or from any space within the Building below, or to any spaces directly adjacent to that Building (touching one of its Walls).
Moving to and from a Rooftop
A Hero that starts his Activation inside of a Building, may give up his movement for the turn to move up to the Rooftop. Place the Hero model on a high stack of large counters (as noted above) and move the model to be centrally located in the Building to show that they are now on the Rooftop. A Hero that is already on a Rooftop may give up their movement to move back down into the Building. Remove the stack of counters from under the model and place the model in any space of the Building (or in any space of either Building if it is a shared Rooftop).
Enemies will only move up to the Rooftop of a Building if a Hero they are targeting is already up there and they need to move to be adjacent for a Melee Attack. If the Enemy ends its Move in the Building, it is automatically moved to the Rooftop with its target, but loses its Attack for this Activation.
Enemies with the Shootout Standard Ability (such as Bandits) will not Retreat from a Hero on the same Rooftop, but instead will stay and always Melee Attack that Hero. A Hero on a Rooftop with one or more Enemies must make an Escape test to leave that Rooftop.
Bandits on Rooftops
In several of the Town Adventure Missions, some Bandits will enter play on Rooftops. These Bandits come into play with a Bandit Rifle instead of their Bandit Pistols (the details for these can be found in the Shootout in the Streets Mission). These Rooftop Bandits will never leave their Rooftop throughout the game.
All Rooftop Bandits in play should Activate and make their Shootout Attacks as a group before Activating any other Bandits that are on the ground. This helps to keep the Bandit Rifle Attacks separate from the Bandit Pistol Attacks.
Falling Off of a Rooftop
Whenever an Enemy on a Rooftop is killed by a Hero, roll a D6. On the roll of 1, 2, or 3, the Enemy falls from the Rooftop screaming and the Hero may Recover 1 Grit.
Whenever a Hero on a Rooftop takes 1 or more Wounds from an Attack, roll a D6. On the roll of 1, 2, or 3, the Hero falls from the Rooftop! Place the Hero in any ground space adjacent to the Building and the Hero takes D6 Wounds ignoring Defense.
Flying Models and Buildings
Any model that has a Flight ability may move over Buildings during its movement (ignoring Walls as it goes) to reach a target on the other side or on the Rooftop (if on the Rooftop, place the model on a stack of counters at the end of its move to show that it is now on the Rooftop as well). Unlike normal Enemies moving to Rooftops, Flying Enemies do NOT lose their Attack the turn they move to the Rooftop. To reach a target inside a Building, the model must still move through a Door to get inside.
Dynamite and Buildings
Dynamite may NOT be thrown or Bounce through Walls, except where there is a Door or Window, and then it may only be targeted at the space directly on the other side of that Door/Window (just like Line of Sight for Doors/Windows with normal Ranged Attacks). Dynamite that goes off next to a Wall WILL still hit every adjacent space, even through a Wall. Dynamite that goes off in/near a Building will not affect models on the Rooftop.
Dynamite MAY be thrown onto a Rooftop. When thrown, declare that the Rooftop is the target and place the Dynamite on any space of the Building within Range (as it is lobbed upward). As long as the Dynamite does not Bounce out of a space of that Building, it will go off, hitting every model on that Rooftop. If the Dynamite Bounces outside of a Building space, then it will land on the ground in whatever space it ends up in, ignoring models on the Rooftop and hitting models on the ground level instead.
Entry Areas
Along each of the 4 board edges there is a marked Entry Area (A, B, C, and D), highlighted in blue. Each of these Entry Areas covers 3 spaces.
Entry Areas are often used for models to enter or exit the board. When new enemies are placed at an Entry Area, they always get placed in the center space of that Entry Area first, then the two adjacent spaces of the Entry Area. It is also common for models to move onto or off of the board at an Entry Area. When this happens, simply count the movement of that model, starting in any of the 3 Entry Area spaces. When a model moves off the board (generally only as part of a specific Mission rule), the model moves into any of the Entry Area spaces, and then moves 1 more space to move off the Board.
New Missions
The Frontier Town Expansion has 6 new Missions to challenge your Heroes. These can be played as special Missions triggered by in-Town events or simply mixed in to your new or current campaign to expand your Adventures into the Town itself.
| D6 Roll | Frontier Town Mission |
|---|---|
| 1 | Shootout in the Streets |
| 2 | Hanging High |
| 3 | Bank Robbery |
| 4 | Jail Break |
| 5 | Town Overrun |
| 6 | High Noon Duel (Solo) - Random Hero plays Duel, then roll another Mission. |
Playing a Mission in Town
Missions in Town work just like Missions down in the Mines; Heroes start the Adventure with 1 Grit as normal (and any Damage they might have from their previous Travel/Town Stay), one Hero takes the Old Lantern and makes Hold Back the Darkness tests, etc. To make any Town Mission more challenging, you may draw an Infamous Bandit Gang card at the start of the game and apply it to all Bandits in that Mission.
After Completing a Mission in Town
At the end of a Mission in Town, Heroes do all of the normal things for completing a Mission; rolling for Dark Stone Corruption, Fully Heal Health and Sanity, return to 1 Grit, etc.
One difference is that as long as the Heroes did not Fail the Mission, they have the option to stay in the current Town instead of Traveling to a new Town. If the Heroes decide to stay in the same Town, this new Town Stay will be in the same Size and Specific Town Type that the Heroes visited most recently. Everything else for the Town should still be set up fresh (Random Town Locations, etc). If the Heroes did Fail the Town Mission, they must travel to a new Town.
Frontier Town Mission 1: Shootout in the Streets
"It's time to settle this, once and for all!" A local gang of bandits has called out your Hero Posse. They've come into town this morning, looking for a fight...I suggest you give them one.
Set Up
This Mission uses the Town Adventure Board. The Heroes start at the Entry Area marked 'B', and may start in any of the three Entry Area spaces or any of the three spaces directly in front of the Entry Area. Place 3 Bandit models at the Entry Area marked 'D' on the far side of the board.
Mission Goal
Defeat all of the Bandits that have come into Town looking for trouble!
Special Rules
Bandit Reinforcements. Each turn, immediately after rolling to Hold Back the Darkness, D3 new Bandits will enter play (or D6 if there are no Bandits currently on the board). Roll a D6 for each Bandit to see where he enters from.
- 1 = Entry Point C
- 2 = Entry Point D
- 3 = Entry Point A
- 4-6 = A Random Building's Rooftop
Bandits on Rooftops have Bandit Rifles instead of Bandit Pistols, as follows:
Bandit Rifles - Range 12, Shots 2, Damage 4 (or Shots 3 if Brutal).
These new Bandits will Activate this turn, as normal.
Any time a new Bandit cannot be placed (for instance if all Bandit models are already in play), instead move the Darkness marker 1 space forward on the Depth Track for each Bandit that cannot be placed (or 2 spaces forward each if there are 5 or 6 Heroes in the Posse).
Objectives
Depth Track - Defeat Enough Bandits. Because there is no Exploration in this Mission, the Hero Posse marker on the Depth Track is used a bit differently than normal. Instead of marking how deep into the mine the Heroes have traveled, it marks how many of the Bandits the Heroes have defeated.
The Hero Posse marker starts the game on the Mine Entrance space as normal. For each Bandit killed, move the Hero Posse marker down 1 step on the track (or 2 steps if only 1 or 2 Heroes in the Posse). When the Heroes make the Hold Back the Darkness test each turn, if the roll is higher than the current position of the Hero Posse marker on the Depth Track, the Bandit assault is broken! No more new Bandit Reinforcements will be placed and the Heroes must kill all remaining Bandits on the board to successfully complete the Mission.
Blood Spatter and Growing Dread Spaces on the Depth Track. The Darkness marker on the Depth Track works as normal in this Mission, however, the Blood Spatter and Growing Dread spaces on the track have a different effect than normal (they do not draw Darkness/Growing Dread cards).
Whenever the Darkness marker reaches a Blood Spatter space on the track, all Bandits on Rooftops immediately get a free Attack outside of the normal turn sequence. If there are no Bandits on Rooftops currently, immediately place D3 new Bandit Reinforcements onto Random Rooftops instead.
Whenever the Darkness reaches a Growing Dread space on the track, the Bandits immediately gain a new Elite ability from their Enemy Record Sheet. This new ability affects all Bandits, and lasts for the remainder of the game.
Reward
Every Hero gains 50 XP and $100.
Failure
Each Hero loses D6 x $50. Also, the Heroes may not visit Town, but must begin the next Adventure directly.
Frontier Town Mission 2: Hanging High
"Looks like a good day for a' hangin'!" A group of corrupt US Marshals have taken an innocent townsperson into custody, blaming him for their own nefarious crimes. As the morning of his public hanging arrives, the rest of the town looks on in despair. If only someone would stand up to these dirty law men, and bring justice back to this town!
Set Up
This Mission uses the Town Adventure Board. Place the Gallows token as well as 4 Bandit models, and 10 Townsfolk markers on the board, as shown in the diagram below.
In addition, if there are 3 or more Heroes in the Posse, place 2 more Bandits on Random Building Rooftops. Bandits on Rooftops have Bandit Rifles instead of Bandit Pistols, as described in the Shootout in the Streets Mission.
The Heroes may start in any of the spaces along the length of the entire Board Edge with the Entry Area marked 'C' on it.
Mission Goal
The Corrupt Marshals are set to hang the innocent prisoner in a public execution! You can't let that happen! The Heroes must either kill all of the Corrupt Marshals or free the prisoner from the noose and help him to escape.
Special Rules
Corrupt Marshals. This Adventure uses the Bandit Enemies to represent the Corrupt Marshals. Corrupt Marshals use the Brutal side of the Enemy Record Sheet for Bandits (or the Brutal side plus ALL Elite Abilities if the Hero Posse is level 5 or higher), and gain an extra bonus based on the number of Heroes in the Hero Posse.
| # of Heroes | Bandit Bonus |
|---|---|
| 1-2 | 2x Health and Immune to Critical Hits |
| 3-4 | 2x Health and Immune to Critical Hits, also 2x Rooftop Bandits (noted above) |
| 5-6 | 3x Health and Immune to Critical Hits, also 2x Rooftop Bandits (noted above) |
Alerting the Corrupt Marshals. The Corrupt Marshals are standing guard and watching the crowds. They will not Activate until the turn after they have been Alerted to the Heroes' presence.
The Marshals will all become Alerted as soon as any Hero makes an Attack.
Also, at the end of any Hero's Move, if they are within 3 spaces and within Line of Sight to any Corrupt Marshal (including those on the Rooftops), roll a D6. On the roll of 1 or 2, the Marshals all become Alerted.
The Gallows and Townsfolk Crowds
The Gallows marker takes up a 3x3 space area and blocks movement and Line of Sight passing through any of those spaces.
The 10 Townsfolk markers represent the crowds gathered to watch the hanging. These Townsfolk also block movement and Line of Sight from passing through their space, though they do not block Line of Sight to or from the Gallows or Rooftops. Models may Move and trace Line of Sight diagonally between two Townsfolk Crowds that are touching corners. This allows Heroes to sneak up amongst the crowds to get close, without Alerting the Corrupt Marshals.
These Townsfolk Crowds will start to scatter once the shooting starts. After any model finishes making an Attack, any Townsfolk Crowd markers adjacent to it will immediately Scatter (Bounce) 1 space in a Random Direction - use the Dynamite Bounce chart for this. If the marker cannot move in that direction (because of another model or wall, etc), the Townsfolk marker simply stays where it is.
Townsfolk markers may not be attacked or targeted in any way. If a Townsfolk is in the Area of Effect of an Attack (for example, in the same or adjacent space to Dynamite or if a Hellfire marker is placed in their space), the Townsfolk marker is instantly removed and the model that made the Attack immediately gains D6 Corruption Points, ignoring Willpower, for each Townsfolk removed in this way.
The Countdown
This Mission does not use the Depth Track at all. Instead, at the start of the Adventure, take the number counters marked 1-8 and set them at the top of the board, stacked face up in order, with 1 at the bottom and 8 showing at the top of the stack. This is the Countdown Stack that marks how much time is left until the lever is pulled and the Prisoner is hanged!
At the end of each turn, remove the top counter from the stack.
Also, the Heroes should still roll a Hold Back the Darkness test each turn (still getting Depth Events on doubles), needing to roll 7+ for the duration of the Adventure. Any time the Hold Back the Darkness roll is failed, remove the top counter from the Countdown Stack as well.
When the last counter is removed from the Countdown Stack, the rope drops and the Prisoner is hung! At this point, the Heroes have one last chance to save the Prisoner by shooting out the rope and setting him free!
Shooting the Rope
When the last Countdown marker is removed from the stack, the Heroes have one last chance to save the Prisoner from hanging. One Hero within Range and Line of Sight to the Gallows may take a single Shot with a Ranged Weapon outside of the normal turn sequence. Roll To Hit and for Damage as if normal. The rope has no Defense, but the Hit must do 6 Wounds to successfully snap the rope.
If failed, the Prisoner is hung and the Mission is failed. If successful, the rope is severed and the Prisoner is freed! Place the Escaped Prisoner marker in any empty space adjacent to the Gallows.
Prisoner on the Run
If the Prisoner is set free by the Heroes shooting out the rope, the Escaped Prisoner marker is placed on the board. At the start of each turn (not including the turn he was set free), the Escaped Prisoner will move [P] spaces along the shortest path toward the Entry Point marked 'C', to move off the board edge and get away.
The Escaped Prisoner blocks movement, but not Line of Sight, and will not Attack, as he is running for his life. He does not need to make Escape rolls to move past Enemies.
Once in play, the Escaped Prisoner is added as a potential target for the Corrupt Marshals (when rolling for a Random Hero, include the Escaped Prisoner).
If Attacked, he has Defense 4+ and 5 Health.
Any Hero on the board may use Grit to allow the Escaped Prisoner to Re-roll his Defense rolls.
Objectives
Defeat the Corrupt Marshals. If ALL of the Corrupt Marshals are killed, or if the Prisoner is set free and is able to get away by moving off of the board at the Entry Area marked 'C', the Mission is successfully completed.
Corrupt Marshal Victory. The Mission is failed if the innocent Prisoner is hung, or if he escapes the Gallows, but is killed trying to get away.
Reward
Every Hero gains 100 XP and may draw a Gear card. If all of the Corrupt Marshals were killed, also gain D6x$100.
Failure
The Heroes may not visit Town, but must begin the next Adventure directly. All Heroes gain D3 Corruption Points, ignoring Willpower, from the guilt of their failure.
Optional Rules: Using this Mission to Rescue a Hero
Sometimes a Hero in Town will be arrested (usually trying to rob the bank), and set to hang! Any time a Hero in Town would be killed by hanging, the rest of the Hero's Posse may play this Mission to try and rescue him. During Set Up, place the captive Hero model on the center space of the Gallows token. He takes no part in the game until set free.
The Mission works exactly as written above, except that if the Rope is shot out and the Prisoner is freed, the captive Hero is immediately placed in any space adjacent to the Gallows instead of the Escaped Prisoner marker. The captive Hero does not have any of his Items or Side Bag Tokens (except those that cannot be discarded or sold, such as Parasites). Instead, he starts with 1 Grit and a simple Starting Gear Pistol tossed to him by someone in the crowd.
Starting in the turn after he is released, the captive Hero may Activate at his Initiative as normal. The Mission is failed if the captive Hero is KO'd (also, if KO'd, the captive Hero may only roll a single D6 on the Injury Chart). The Mission is won if the captive Hero moves off the board edge at the Entry Area marked 'C', or if all of the Corrupt Marshals are killed.
Either way, the captive Hero regains all of his Items and Tokens at the end of the Adventure.
Frontier Town Mission 5: Town Overrun
The Town is under attack from all sides! Creatures and Demons are pouring in, sweeping through the streets and carrying townspeople off into the night! Someone needs to stand against this darkness, or this Town will be lost!
Set Up
This Mission uses the Town Adventure Board. The 4 Entry Areas marked 'A', 'B', 'C', and 'D' are all Enemy Entry Points used by the Enemies to arrive at throughout the game.
You will need several markers to use for Enemies Approaching (you can use face down markers with the Shadows of Brimstone logo on the back for these).
Place [P] Townsfolk markers on the board, each in a Random Building. Then place [P] more Townsfolk markers on the board, in any non-building spaces you like. Note that Townsfolk markers may not be placed on Building Rooftops.
Each Hero may start anywhere they choose on the board, including Building Rooftops. Heroes start the Adventure with Grit equal to their Max Grit.
After Heroes are placed, roll a D6 for each of the 4 Enemy Entry Points on the board. On the roll of 1, 2, or 3, draw a Low Threat card and place those Enemies just off the board near the Entry Point. These Enemies will move onto the board and attack at their Initiative level during the first turn of the game (as detailed in the Enemy Entry Points Special Rule below).
Mission Goal
Save the Town! The Heroes must defeat enough Enemies to break the assault, and then kill any remaining Enemies.
Special Rules
Townsfolk. In this Mission, the Townsfolk markers represent all of the people of the Town running in terror from the creatures that are attacking! Townsfolk markers block movement, but do not block Line of Sight for Ranged Attacks.
Each turn, immediately after the Hold Back the Darkness roll is made, the Townsfolk are allowed to move around the board in an attempt to escape their fate! All of the Townsfolk markers collectively get a single pool of Movement Points equal to whatever the Hold Back the Darkness roll was for this turn. The Heroes may spend this pool of Movement Points, divided as they see fit between the Townsfolk markers to move them around the board. Townsfolk may not move off the board.
Townsfolk markers do not need to make Escape Rolls to move away from Enemies and may NOT move to Rooftops.
Whenever a Random Hero is rolled for (for example, when Enemies are selecting their targets to attack), include all of the Townsfolk markers as a single 'extra Hero' for that roll.
For example, an Enemy choosing a target to attack has 2 Heroes and 3 Townsfolk markers within its Move distance. It selects a target randomly by rolling a D6: 1-2 = Hero A, 3-4 = Hero B, and 5-6 = a Townsfolk marker.
When a Townsfolk marker is selected like this, always use the closest Townsfolk marker to the Enemy. As long as there are any Townsfolk markers without one of the Enemies targeting them within range, the Townsfolk should still be included in the Random Hero roll.
Townsfolk have 1 Health and Defense 4+. They are immune to Sanity Damage, as they are already running in terror. Whenever a Townsfolk marker takes one or more Hits, any Hero adjacent to that Townsfolk may take those Hits on themselves instead. This must be done before Defense rolls are made for the Townsfolk.
Desperation. The Heroes are truly desperate. Any Hero that has no Enemies on their Map Tile (in the same building or in the streets with them) may give up their Attack to do one of the following Actions instead:
- Scavenge
- Recover a Grit
- Ready a 'Once per Eight' Item
- Catch Your Breath (Heal D3)
Unlimited Scavenging. During this Mission, Heroes are allowed to Scavenge (as noted above), and there is no limit to the number of times this may be done on the Town Adventure Board.
Enemy Entry Points
As noted above, the 4 Entry Areas on the board edges are Enemy Entry Points during this Mission.
At the end of each turn, roll a D6 for each Entry Point. If a 1 or 2 is rolled (or only on a 1 if there is a Hero within 3 spaces of the Entry Area), place an Enemies Approaching marker by that Entry Point. You can see Enemies coming, but can't tell what they are yet!
If there is already an Enemies Approaching marker at that Entry Point, instead, remove the marker and draw a Low Threat card. The Enemies on that card are placed just off the board near that Entry Point, as they have arrived and are ready to move onto the board (note that Enemies that have 0 Move, such as Corpse Piles, will not take part because they cannot move to enter the board).
Enemies that are not on the board yet may not be targeted or attacked in any way. These Enemies will Activate as normal when it comes to their Initiative in the turn order, and will simply move onto the board from the Entry Point (starting their move on any of the Entry Area spaces).
Enemies with the Shootout ability (such as Bandits), must move onto the board to be able to fire their Ranged Attacks (they cannot see to Attack from off the board edge).
May Not Flee
Once the Adventure begins, the Heroes may not Flee; they are trapped, and must see the Mission through to the end.
Immediate Dread
Growing Dread cards are revealed immediately when drawn, rather than being placed on the stack.
Ambushing Enemies
Whenever a group of Enemies Ambush Attacks on the Town Adventure Board, roll a Random Hero (including the Townsfolk as noted above). Place all of those Enemies on the same Map Tile (the same building or street area) as the Hero, adjacent to Heroes as normal for an Ambush in the Mines. If the Townsfolk were rolled as the Random Hero, the Heroes may choose which Townsfolk marker is the focus of the Ambush. These Enemies gain +2 Initiative on their first turn as normal.
Number of Heroes
For this Mission, if you are using 1 or 2 Heroes, at the start of the game, Threat cards are only drawn for each Entry Point on the D6 roll of 1 (instead of 1, 2, or 3).
If you are using 5 or 6 Heroes, all Threat cards drawn are Med Threats instead of Low Threats.
Objectives
Depth Track - Defeat Enough Enemies. Because there is no Exploration in this Mission, the Hero Posse marker on the Depth Track is used a bit differently than normal. Instead of marking how deep into the mine the Heroes have traveled, it marks how much of the Enemy assault the Heroes have defeated.
The Hero Posse marker starts the game on the Mine Entrance space as normal. For every full 3 Enemies the Heroes kill, move the Hero Posse marker down 1 step on the track. For each Large or bigger Enemy the Heroes kill, instead move the Hero Posse marker 2 steps on the track.
When the Heroes make the Hold Back the Darkness test each turn, if the roll is equal to or higher than the current position of the Hero Posse marker on the Depth Track, the assault is broken! All Enemies Approaching markers are removed, and no more Enemies will arrive at the Entry Points. The Heroes must now kill all remaining Enemies on the board to successfully complete the Mission (including any that might still show up through Darkness cards, etc.).
The Darkness marker on the Depth Track works as normal in this Mission.
Reward
If successful, every Hero gains D6 x 10 XP or D6 x $25 for each Townsfolk marker still alive at the end of the game (each Hero may choose their own reward for each of the Townsfolk markers). Every Hero may also draw 2 Loot cards to represent the Loot pulled from the Enemies that were defeated.
Failure
All KO'd Heroes must roll on the Injury/Madness table as normal. If the Darkness Escapes, any Heroes not KO'd must still roll on the Injury/Madness table (Hero's choice). Also, the Town is destroyed so the Heroes may not visit Town, but must begin the next Adventure directly.
Frontier Town Mission 6: High Noon Duel (Solo)
The sun is high in the sky and there's a stillness in the air. Challenged to a duel in the street by one of the locals, you face off a few paces from one another, townsfolk watching from windows and doorways, fingers twitching over holstered weapons. The church bell rings...it's time.
Set Up
This is a Solo Mission (for just a single Hero) that uses the Town Adventure Board. Place your Hero and 1 Bandit figure in the center of the street, 5 spaces apart.
Mission Goal
One of the local frontier folk has challenged you to a duel in the streets at high noon! It's one-on-one, you or him. You must out-shoot and out-fight your opponent to survive!
Special Rules
Locked Buildings. Models may not enter Buildings during this Mission.
One-on-One Duel. This Mission is for one Hero against one Enemy. There is no roll to Hold Back the Darkness and no Fleeing. The entire Mission counts as a single Fight, but there is no Loot card draw, Catching Your Breath, or Corruption Hits for Dark Stone.
Once the Adventure is complete, the Hero is restored to full Health and Sanity, returned to 1 Grit, and may continue their Town Stay or begin the next Adventure, depending on what caused the Duel.
Variable Initiative. At the start of each turn, the Hero and the Enemy each roll a D6 and add it to their Initiative for the turn.
"Draw!" In the very first turn of the Mission, models may not Move. The Hero may still roll for Move to see if they get a Grit. This represents the initial drawing and firing of the duel.
Dueling Opponent. The Bandit model represents your opponent for the duel. He uses the stats found on the Enemy Record Sheet for the Bandit (including any Elite abilities or Brutal stats based on the Hero's Level) and has his Health and Damage for all Attacks multiplied by the Hero's Level (if the Hero is only Level 1, double the Bandit's Health and Attack Damage instead).
Objectives
Defeat Your Opponent. To successfully complete the High Noon Duel (and the Mission), the Hero must defeat their opponent.
Reward
The Hero gains 25 XP x their Hero Level.
Failure
Roll for Injury as normal for being KO'd. The Hero then starts the next Adventure with no Grit.
Expanded Travel Hazard Chart
D36 - Traveling Hazard. To roll a D36, roll two dice of different colors, where one of them is the '10's digit and the other is the '1's digit. For example, if you rolled 3 and 5 the result on the chart would be 35.
Italic flavour text on the chart has been omitted; the mechanical effects are transcribed below.
11 - Possession
The Hero that rolled this result immediately loses 1 Sanity permanently, and must roll a D6. On the roll of 1, 2, or 3, he must also roll once on the Madness chart as a result of this horrific experience.
12 - Bleached Bones
Each Hero must make an Agility 5+ test to avoid getting caught up in the shifting sands. If passed, gain 10 XP. If failed, your Side Bag is torn on a jagged rib cage as you struggle to get free of the sand's grip. Until you get it repaired by paying $500 at a Blacksmith in Town, your Side Bag Capacity is reduced by 2.
13 - Dark Dreams
Each Hero must make a Spirit 6+ test. If passed gain 10 XP and you may Recover 1 Grit. If failed, you take D6 Sanity Damage, ignoring Willpower, that carry over to the next Adventure.
14 - Shooting Star
The Hero that rolled this result may make a Lore 6+ test. If passed, Recover D3 Grit.
15 - Devil's Fork
Every Hero must roll a D6 for each Corruption Point and Mutation they have. On the roll of 1 or 2, take an additional Corruption Point, ignoring Willpower.
16 - Shadows Out of Time
The Hero that rolled this Travel Hazard must make a Cunning 6+ test. If passed, the Posse gains an extra Revive Token for use during the next Adventure. For every 1 rolled during this test, the Hero loses 1 Sanity permanently as their mind begins to crumble under the weight of forbidden knowledge.
21 - Mimic Beast
One Random Hero must discard any Transport they have. Also, one other Random Hero is missing! Following the trail of gore, you find the missing Hero tied up and savagely beaten in a ramshackle lair. That Hero rejoins the Posse, but takes D6 Wounds, ignoring Defense, that carry over to the next Adventure, and loses D6 x 25 XP.
22 - Blighted Desert
Each Hero loses 1 Grit. If you do not have a Grit to lose, instead take D3 Wounds, ignoring Defense, that carry over to the next Adventure.
23 - Living Hills
Each Hero must make an Agility 5+ test to avoid the maw! If passed, gain 15 XP and you escape the trap. If failed, you leap aside at the last moment. Any Transport you were riding is devoured by the beast (discarded) and you lose 1 Sanity permanently at the horrific sight of the creature!
24 - Dark Stone Convoy
During your Town Stay, any Dark Stone shards sold by the Heroes are worth an extra +$25 each.
25 - Blood Moon
Until the end of the next Adventure, all Heroes are +1 Spirit and any Depth Event rolled while Holding Back the Darkness adds a Growing Dread card to the stack instead of its normal result.
26 - Void Storm
When you arrive in Town, 2 Random Buildings have been Destroyed by the Void Storm and cannot be visited during this Town Stay. Also, every Hero gains 1 Corruption Point, ignoring Willpower, for passing through the residual energy of the storm.
31 - March of the Lost Army
Each Hero must make a Luck 5+ test. If passed gain 20 XP. If failed, the Lost Army is alerted to your presence and the Hero must make a run for it, riding as fast as possible to get away! In your haste to escape, the Hero loses 1 Item of their choice, pulled away by the clawing hands of the spectral cavalry sent to give chase!
32 - Plague Church
Each Hero must decide to turn away and keep on the road, or ride out to help this cursed group. Each Hero that decides to help must spend 1 Grit or take D6 Corruption Hits as they are ravaged by the plague, then make a Spirit 5+ test. If successful, gain 25 XP. If at least 5 successes are rolled (dice that roll 5+) between all Heroes helping, the plague is warded off and the grateful Church gives the Heroes its prized Artifact for coming to their aid. Draw a Mine Artifact that one of the Heroes that helped gets to keep (if you cannot decide who will get it, roll off).
33 - Harried by HellBats
Each Hero must roll a D6 for every Dark Stone they are carrying (including Items with a Dark Stone Icon and Items with Dark Stone Upgrades on them). On the roll of 1, that Dark Stone shard/Item is snatched away by a HellBat and carried off into the night (discarded).
34 - Burning Farmstead
Each Hero may decide to turn away or brave the burning building to look for survivors. If you enter the building make a Strength 5+ test to move through the flaming debris.
If failed, you are singed by the fire and must flee the building, coughing from the thick smoke. Take D6 Wounds, ignoring Defense, that carry over to the next Adventure. If passed gain 25 XP and roll a D6 to see what you find in the fire.
| D6 Roll | Result |
|---|---|
| 1 | Trick - A shiny demon has lured you into the blaze, only to disappear as a section of roof comes down on your head. Roll once on the Injury chart. |
| 2-5 | Survivor - You find a survivor and pull them from the burning building. Gain D6x10 XP. |
| 6 | Hero of the Day - You find a small child and carry them through the flaming rubble safely. Gain D6x25 XP as well as 1 Health and 1 Sanity. |
35 - Ruined Fort
Each Hero loses 1 Grit. If you do not have a Grit to lose, instead take D3 Sanity Damage, ignoring Willpower, that carry over to the next Adventure.
36 - Mutant Warlord
Each Hero must either pay D6 x $50 or make a Lore 6+ test to overcome the Mutant Warlord and his gang. If passed, gain D6 Dark Stone as you steal from the Warlord's Tomb Chest and escape. If failed, you are pulled from your horse and dragged behind the Warlord's beast before being rolled over a cliff and plummeting to the icy river below. Lose D3 Health permanently.
41 - Stampede
Each Hero must make a Strength 4+ test to keep control of their mount. If passed, gain 15 XP as you stare down the unruly herd. If failed, your horse panics at the chaos and throws you! Roll once on the Injury chart, using 3D6 and discarding the lowest single die roll.
42 - Raging River
The Heroes must either give up their destination and go back to the tiny roadside town they passed a few miles back (changing to a Small Town and immediately ending their Travel), or attempt to ford the deadly river and press on. Each Hero must make a Strength 5+ test to get across. If failed, roll a D6 for every Item you have with one or more [black hourglass icon]. On the roll of 1, discard it as the river sweeps it away.
43 - Flash Flood
Each Hero must make a Luck 4+ test to avoid being swept away by the rushing waters. If failed, roll a D6 for each Token in your Side Bag. On the roll of 1, 2, or 3, it is swept away in the torrent of water.
44 - Rail Line Construction
Each Hero may Heal 2D6 Wounds/Sanity (any mix). Also, each Hero may Recover 1 Grit for each Mutation he has (as the Mutant rail workers cheer all the louder for champions of Mutant-kind).
45 - Bridge Destroyed
When you get to Town, the Heroes can spend no more than 2 days for their Town Stay before starting the next Adventure.
46 - Wrecked Train
Each Hero can decide to pass it by without giving it a second thought, or to climb down into the wreckage to look for anything useful. If you search the wrecked train, make a Cunning 5+ test. If failed, you exhaust yourself trying to find a way inside without any luck. Discard any Grit you have. If passed, roll a D6 to see what you find inside the train.
| D6 Roll | Result |
|---|---|
| 1 | No Accident - This train was destroyed by the conductor in an effort to stop the evil that came aboard! An evil that you just released! Roll once on the Madness Table. |
| 2-5 | Something Shiny - You find a few bits of Gold in the wreck. Gain D6 x $50. |
| 6 | Precious Find - You find a skeleton clutching something in its hands... something it deemed more valuable than its life. Draw a World card and then an Artifact from that World's Artifact Deck. |
51 - Sleeping Under the Stars
Each Hero may make a Lore 6+ test. For each 6+ rolled, gain +1 Health or +1 Sanity.
52 - Bandits!
The Bandits surround each Hero individually. There are 5 Bandits per Hero and each Hero must roll a D6 to see how many of those Bandits they defeat. For every Bandit you defeat, gain 10 XP. For each of your 5 Bandits you do not defeat, lose $25, 1 Dark Stone, or 1 Gear or Artifact of your choice.
53 - Circling Vultures
Every Hero must make a Spirit 5+ test. If passed, gain 10 XP and Heal D3 Sanity. If failed, take D3 Sanity Damage, ignoring Willpower, that carry over to the next Adventure.
54 - Army Convoy
When the Heroes reach Town, any rolls on the Camp Site Hazard chart or the Town Event Chart are +1 to the roll.
55 - Massacred Wagon Train
Each Hero can decide to pass it by without looking too close, or to sift through the gore to look for anything useful. If you search the massacre, make a Luck 5+ test. If failed, lose 1 Sanity permanently, as you are scarred by the horror of the things you find. If passed, roll a D6 to see what you find.
| D6 Roll | Result |
|---|---|
| 1-4 | Gear - You find something of value. Draw a Gear card. |
| 5 | Artifact - Perhaps this is why the creatures attacked them! Draw an Artifact card from the Mines. |
| 6 | Survivor! - You find someone still alive in the wreckage. Packing them on your saddle, you race back to Town. Gain +1 Max Grit for your heroic efforts. |
56 - Void Hound Attack
Each Hero must make a Cunning 5+ test to outwit the Hounds or a Strength 5+ test to overpower them. If passed, gain 25 XP. If failed, you are pulled from your saddle and ravaged by the creatures! Roll a D6 for every Clothing Item you have (not including your Personal Item). On the roll of 1 or 2 it is torn apart and destroyed by the savage attack.
61 - Indian Curse
Every Hero immediately takes 3 Horror Hits for each Mutation, Corruption, and Dark Stone they currently have, as they are terrorized by the vengeful spirits of the dead!
62 - Dying Marshal
When the Heroes reach their destination, every Hero gains D3 Unwanted Attention markers as the prisoner is on the lookout for anyone following him. While in Town, any Hero that rolls a double on a Location Event chart spots the prisoner and may ignore the result on the chart and the rest of that Location Visit to call him out and start a High Noon Duel Town Adventure against him! If more than one Hero spots him on the same Day, either may engage him in the Duel (roll off if you can't decide which).
If the Duel is won, the Hero gains an extra D6x$200 as a Bounty for the prisoner. If the Duel is failed, the Hero rolls his Injury on only a single D6, as the prisoner fights dirty. Once a Duel has been fought, the prisoner is either dead or escaped and may not be fought again.
63 - Snake Oil Salesman
Each Hero must make a Cunning 5+ test. If passed, you recognize a scam when you see one and pass on the deal.
If failed, you eagerly buy some of the elixirs only to discover that they are little more than flavored water and pungent herbs as the dust cloud from the salesman's cart disappears in the distance. Lose D6x$25 and roll a D6. On the roll of 6, one of the elixirs is actually worthwhile. Gain a Tonic Token.
64 - Search Party
Each Hero may decide to press on to their destination or to stop and help in the search for the missing child. Any Hero that decides to help must make a Spirit 6+ test. If at least 3 successes are rolled (dice that roll 6+) between all Heroes helping, the Child is found and rescued from the clutches of the vile beast! Each Hero helping gains D6 x $100 as reward and may remove D3 Corruption Points. Otherwise, the child is lost for good and every Hero that helped loses 1 Sanity permanently.
65 - Gulch Ambush
Each Hero must make an Agility 5+ or Lore 5+ test. If passed, gain 25 XP and you are able to evade the worst of the attack, escaping into the hills to meet up with the rest of the posse.
If failed, you are knocked to the ground as the Black Fang scavenge your belongings for Dark Stone. Lose D3 Dark Stone, or one item with a Dark Stone Icon. Also, due to your bumps and bruises, you lose all Grit.
66 - Traveler on the Road
This result may NOT be Re-rolled or canceled. Roll once on the chart below to see what type of stranger you have run into (rolling on this chart also may NOT be Re-rolled).
| D6 Roll | Result |
|---|---|
| 1-2 | The Scarlet Shadow - Before you see it coming, the stranger draws on you and you see his face is covered in a red bandana! Any Hero in the Posse that is Keyword Outlaw or that has 4 or more Corruption Points, immediately loses D6x$50 as The Scarlet Shadow robs from the corrupt to give to those in need! If none of the Heroes lose Gold like this, all Heroes may Recover up to their Max Grit. |
| 3-5 | Traveling Missionary - All Heroes may fully heal their Sanity and remove D3 Corruption Points. |
| 6 | Shadowy Traveler - You meet a dark stranger on the road one night while the rest of the posse is asleep. With a slippery voice he introduces himself as Mr. Scratch and makes you an offer that could be hard to refuse. The Hero who rolled this result may either take the deal, gaining D6x100 XP and D6x$100, but if they ever roll this result again, Mr. Scratch has returned to collect his end of the bargain and takes your Hero off into the night never to be heard from again. If you refuse the deal, make a Spirit 6+ or Cunning 6+ test to find a way out of it. If passed, gain 50 XP. If failed, gain D6+1 Corruption Points, ignoring Willpower, as Mr. Scratch disappears into the dark night. |
New Side Bag Tokens
There are several new Side Bag Tokens available in Town for the Heroes to acquire.
- Spice - Discard to add D3 Damage to a single one of your Hits. You also take 1 Wound, ignoring Defense.
- Potion - Discard to add +2 to one of your Skills (Agility, Lore, etc) until the end of the turn.
- Hatchet - Discard to throw as a Ranged Free Attack. Range: Strength+3, Shots 1, +2 Damage. Uses Melee To Hit.
- Lantern Oil - Discard to Re-roll one of the dice for a Hold Back the Darkness roll.
- Exotic Herbs - Discard to remove D3 Corruption Points.
- Tequila - Discard to Heal 2D6 Sanity Damage.
- Fine Cigar - Discard to gain Armor 3+ until the end of the turn.
FAQ and Clarifications
Q) Can a model move Diagonally around the corner of a Building Wall? A) Yes.
Q) Can a Melee Attack be made through a Wall? A) No. Unless there is a Door or Window that the Attacker can see his target through, directly on the other side.
Q) A model can only move straight through a Door, not diagonally through. How does this affect Diagonal Doors? A) A model in a Diagonal Door space may not move diagonally out, around the angled corner of the Wall. Also, a model may not Lean out of a Diagonal Door (splitting the space), as the Door itself is within a single space.
Q) Does a model that is splitting a space (ie - Leaning around a Corner) block movement through both spaces? Can they Melee Attack or be Attacked from either space? A) Yes, Yes, and Yes.
Q) If an Enemy such as Bandits have a Bounty on them, does this also count modified versions of that Enemy (ie - Infamous Bandits, or OtherWorld versions of an Enemy)? A) Yes. A Bounty includes any Enemy that uses that Enemy Record Sheet.
Q) Infamous Bandits already have a Bounty on their card. Does this stack with a Bounty from the Frontier Outpost or Sheriff's Office? A) Yes. Just add the Bounties together for each model.
Q) The Hitchcock Gang Infamous Bandits throw Dynamite. What is the Range? A) The Range for their Dynamite is the same as the Range for their normal Ranged Attack, 6 spaces if armed with a Bandit Pistol, 12 if armed with a Bandit Rifle - this keeps things simple and it is assumed that because the Bandit with a Rifle is on a Rooftop, he is trained to lob the Dynamite further.
Q) What happens if the Artifact cards or Devil's Head token are accidentally moved playing The Devil's Wheel? A) Leave them in their new position and count the points as normal for dice partially on or fully on. Then re-set everything before the next round is played.
Q) What if a Law Hero becomes 'Wanted!' in Town? A) While a Hero has the 'Wanted!' status, they gain the Keyword Outlaw. This temporarily replaces their Keyword Law until the 'Wanted!' status is removed.
Frontier Town Mission 3: Bank Robbery
"There's a hold-up goin' on over at the bank! It's a bunch of armed gunmen that have blown the safe, and I think they've taken hostages! The local law men aren't equipped to handle this big a gang of bank robbers. It looks like they might need some help!"
Set Up
This Mission uses the Town Adventure Board. The building marked number 7 represents the Bank. Place the stack of 8 Money Bag markers, 3 Townsfolk markers, and 1 Bandit Enemy model in the Bank (the exact spaces for these don't matter as they are all considered to be in the building as a whole). Each Hero starts in a Random Building (except in the Bank) and may be placed in any space of that building. The four Entry Areas (marked A, B, C, and D) are Bank Robber Escape Exits for this Mission.
During this Mission, Heroes may NOT enter the Bank.
Mission Goal
Defeat enough of the Bank Robbers to break their gang and force them to give up on their bank heist! Once enough Bank Robbers have been killed, the Mission is completed.
Special Rules
Bank Robbers. This Adventure uses the Bandit Enemies to represent Bank Robbers. Bank Robbers use the Enemy Record Sheet for normal Bandits, but gain an extra bonus based on the number of Heroes in the Hero Posse.
| # of Heroes | Bandit Bonus |
|---|---|
| 1-2 | +1 Shot/Combat |
| 3-4 | 2x Health and +1 Shot/Combat |
| 5-6 | 3x Health and +2 Shots/Combat |
The Bank Robbers also ignore the normal movement and targeting for their Shootout ability, and instead will always move [P] spaces along the shortest route to the Escape Exit they are headed toward (see below) and move off the edge of the board.
After all Bank Robbers have moved each turn, they will make their Ranged Attacks at Heroes within Range and Line of Sight (prioritizing Heroes that are not already being targeted yet as normal - you may find it helpful to use the Shootout markers for this). Bank Robbers that ended their Move adjacent to one or more Heroes will make a Melee Attack against a Random adjacent Hero instead of their Ranged Attack.
Bandits in the Bank. As noted above, 1 of the 6 Bandit models is placed inside the Bank and remains there throughout the Mission. This Bandit inside the Bank represents the Bank Robbers that are firing out of the windows and doors.
At the start of the Bank Robbers' Activation each turn, the Bank Robbers inside the Bank will make a free Ranged Attack at every Hero that is within Range and Line of Sight from any Door or Window of the Bank.
In addition, Heroes may target any Door or Window space of the Bank with Ranged Attacks to shoot at the Bandit model inside the Bank (Cover applies as normal). Killing this Bank Robber does not remove the model (as a new one just immediately takes his place), but it does move the Hero Posse marker on the Depth Track as detailed below.
Spawning New Bank Robbers. After the Bank Robbers inside the Bank have fired each turn (if they have targets), D3 new Bank Robbers will spawn at the Corner Door space of the Bank building and each will move toward a Random Escape Exit (spawn and move them one at a time). As they move, point the Bandit figure in the direction of the Escape Exit he is headed toward to keep track of the direction he is running.
For each Bank Robber that cannot be placed (if they are all already in play), move the Darkness 1 space forward on the Depth Track.
Money Bags. Whenever a Bank Robber is killed outside of the Bank, place a Random Money Bag marker in his space (from the stack of markers in the Bank). Any Hero that ends their Move in a space with one or more Money Bags may pick them up (returning it to the stack in the Bank). Flip over the Money Bag marker and gain $20 x the number printed on the bottom side of the marker.
Townsfolk Hostages. The 3 Townsfolk markers within the Bank represent the Hostages the Robbers have taken captive. Any time the Darkness marker on the Depth Track reaches a Blood Spatter or Growing Dread space, one Townsfolk Hostage marker is killed (removed).
Objectives
Depth Track - Defeat Enough Bank Robbers. Because there is no Exploration in this Mission, the Hero Posse marker on the Depth Track is used a bit differently than normal. Instead of marking how deep into the mine the Heroes have traveled, it marks how successful the Heroes have been at thwarting the Bank Robbers.
The Hero Posse marker starts the game on the Mine Entrance space as normal. Every time the Heroes kill a Bank Robber or pick up a Money Bag, move the Hero Posse marker forward 1 space on the track.
When the Heroes make the Hold Back the Darkness test each turn, if the roll is equal to or higher than the current position of the Hero Posse marker on the Depth Track, the Bank Robbers give up and the Mission is completed.
Bank Robber Victory. The Darkness marker on the Depth Track works as normal in this Mission, however, the Blood Spatter and Growing Dread spaces do not trigger Darkness/Growing Dread cards, but have the alternate Townsfolk Hostages effect listed above.
Every time a Bank Robber Escapes off the board, move the Darkness 2 spaces forward on the Depth Track. If all of the Townsfolk Hostages are killed, the Bandits have gotten away with their heist and the Mission is failed.
Reward
Every Hero gains D6x$50, as well as 25 XP for each Hostage Townsfolk still alive at the end.
Failure
The Heroes may not visit Town, but must begin the next Adventure directly. All Heroes start the next Adventure with 1 less Grit than normal.
Frontier Town Mission 4: Jail Break
"They're comin'! They're comin' for him! His gang is comin' to break him out!" The high-profile prisoner, locked in the sheriff's jail, smiles at you with a wink, "Now you boys are in for it!"
Set Up
This Mission uses the Town Adventure Board. The building marked number 5 represents the Sheriff's Office. Place the Prisoner marker in the corner space of the building that has the printed number 5 in it. Also place 2 Dynamite tokens in the outdoor space just on the other side of the wall from the Prisoner, as shown here.
At the center of Town, place 3 Horse markers and 3 Bandits as shown below.
Each Hero starts in a Random Building (any Law Heroes always start in the Sheriff's Office) and may be placed in any space of that building that is not touching a Door or Window.
Mission Goal
Defeat all of the Bandits that have come to break out the Prisoner before he escapes off the board!
Special Rules
Bandit Reinforcements. At the end of each turn, D3 new Bandits will enter play (or D6 if there are no Bandits currently on the board). Roll a D6 for each Bandit to see where he enters from.
- 1 = Entry Point A
- 2 = Entry Point B
- 3 = Entry Point C
- 4 = Entry Point D
- 5-6 = A Random Building's Rooftop
Bandits on Rooftops have Bandit Rifles instead of Bandit Pistols, as described in the Shootout in the Streets Mission.
Dynamite and the Escaped Prisoner. At the end of each turn, remove 1 of the Dynamite tokens from the space outside of the jail cell (as the fuse burns down). When the last Dynamite marker is removed, an explosion tears through the wall, freeing the Prisoner! Flip over the Prisoner marker to his Escaped Prisoner side.
Once the Prisoner has flipped over to his Escaped Prisoner side, at the end of each turn, he will move [P] spaces through the hole in the wall and along the shortest distance to reach a space with one of the Horse markers in it.
The Escaped Prisoner may move through other models and may not be interacted with or attacked in any way.
Once the Escaped Prisoner moves into the same space as one of the Horse markers, he stops and gets on the Horse. From that point forward, when the Escaped Prisoner moves at the end of each turn, he will instead move 2D6 spaces directly toward the Entry Point marked 'B', until he moves off the board.
The Horses. The 3 Horse markers take up 2 spaces each and block movement, but do not block Line of Sight for attacks. The Horses may not be attacked or interacted with in any way, other than by the Escaped Prisoner. If either space of the Horse marker moves off the board, the Escaped Prisoner is considered to have gotten away!
Objectives
Depth Track - Remaining Bandits. The Depth Track is used differently than normal in this Mission as it tracks the number of Bandits that still need to be defeated. The Hero Posse marker is not used, but instead, the Darkness marker is placed in the middle of the track and marks how many Bandits are remaining. This marker will likely move up and down on the track throughout the game (ignoring Blood Spatter/Growing Dread spaces moved over).
The starting space of the Darkness marker on the track is based on the number of Heroes in the Posse. 1-2 Heroes = the space marked 5 on the track, 3-4 Heroes = space 8, and 5-6 Heroes = space 11.
The Hold Back the Darkness roll always needs 7+ while the Prisoner is still in his jail cell, and 8+ once the Dynamite has gone off and he has flipped to his Escaped Prisoner side.
Every time a Bandit is killed, move the Darkness marker down 1 space on the track (toward the Darkness Start space). Whenever the Hold Back the Darkness roll is failed (or if a Bandit would need to be placed, but cannot be), move the Darkness marker up 1 space on the track (toward the Mine Entrance space). When the Darkness marker reaches the Darkness Start space, no more new Bandit Reinforcements will be placed and the Heroes must kill all remaining Bandits on the board to complete the Mission (at this point, the Heroes no longer need to make the Hold Back the Darkness roll).
If the Prisoner Gets Away. If the Escaped Prisoner gets away by moving off the board at the 'B' Entry Area, or if the Darkness marker ever reaches the Mine Entrance space on the track, the Mission is failed.
Reward
Every Hero gains 25 XP and D6x$50.
Failure
The Heroes may not visit Town, but must begin the next Adventure directly. At the start of the next Adventure, add 1 Growing Dread card to the stack.