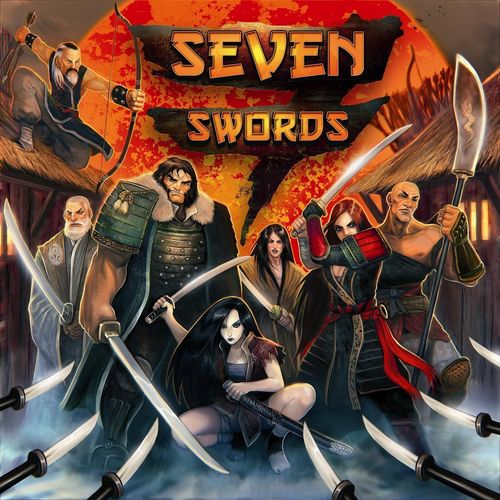
Seven Swords
Seven Swords Rulebook
Table of Contents
Table of Contents
- Components
- Game Board
- Dice and Stands
- Action Area Cards (Bandit Player)
- Samurai Cards
- Combat, Movement and Leadership Action Tokens
- Turn Counter
- Samurai Action Tiles
- Action Tokens and Pieces
- Setting Up the Game
- Objective and End of the Game
- Duration of the Game
- Bandit Player Phase
- Bandits
- Palisades
- 6th, 11th, 15th and 18th Turns
- Samurai Player Phase
- End of the Game and Victory Points
Components
- 1 Reversible game board
- 6 Six sided dice
- 7 Samurai cards
- 7 Samurai cardboard stands
- 7 Action area cards (Bandit player)
- 5 Samurai action tiles
- 7 Combat action tokens
- 7 Leadership action tokens
- 7 Movement action tokens
- 6 Palisade tokens
- 1 Turn counter
- 14 Bow tokens
- 8 Bandit tokens
- 4 Veteran bandit tokens
- 6 Archer bandit tokens
- 3 Veteran archer bandit tokens
- 6 Mounted bandit tokens
- 3 Veteran mounted bandit tokens
- 5 Supply tokens
- 5 Equipment Storehouse tokens
- 5 Villager's houses tokens
- 1 Action counter (Bandit player)
Note: the Spanish component list in the same PDF gives 5 dice ("5 Dados de 6 caras"); the English list above is transcribed as printed.
Game Board
Bandits cost
The numbers in these spaces show the cost of actions that the player must pay to put in the game a bandit token.
Reminder of actions from discard area
At the beginning of each turn, the bandit player discards 1 or 2 action area cards depending on the turn (see below). He gets as many actions as indicated by the value of the discarded cards.
Turn tracker
This is used to control the number of turns. A space must be advanced each time the samurai player ends his turn.
Bandit deployment space
When the bandit player uses his actions to play one bandit, he must place it in one of these spaces. There are 6 groups of 3 spaces each.
Sector designation
The village has 7 areas: A, B, C, D, E, F and G.
Village space
These spaces in the village are used to move the samurai and bandit tiles. They must move one by one and only if the spaces are together.
Villager's houses space
There are 5 spaces for villager's houses. Here is where the villagers are hidden with sticks and spears to help the samurais.
Equipment storehouse space
There are 5 spaces for equipment storehouses; these buildings are where the villagers keep their valuables.
Supplies area
There are 5 supplies spaces. Here, the villagers keep the rice and supplies.
Bows square
There are 7 bows squares, one in each area of the village. They are used by the samurais to hide bows for the battle.
Palisade square
There are 6 squares for palisades. These are the bandits points of entry into the village.
Dice and Stands
Dice
Seven Swords use normal 6 sided dice to resolve the combats.
Samurai cardboard stands
They are used on the game board to know in which space the samurai is.
Action Area Cards (Bandit Player)
Action area cards have two sides:
The A side indicates the number of action the bandit player can play if he discards it at the beginning of his turn. This is the side show to the samurai player.
The B side indicates with a letter which is the area of the card. This side must be hidden from the samurai player, only the bandit can see this side.
Samurai Cards
These cards have the value of the skills of each samurai.
- Name: The samurai name.
- Illustration: This is the picture of the samurai.
- Combat skill: This value is the samurai skill to kill the bandits.
- Movement skill: This number indicates the maximun number of spaces a samurai can move per turn, if he chooses to play the movement action.
- Leadership skill: This number indicates the maximun number of spaces between a samurai and a villager's house or palisades, for the samurai to be able to order an attack from the house or palisades.
- Area for actions per turn: These areas are used to place the different action tokens by the samurai player to know what kind of actions he has played in the current turn.
- Defence: This number indicates the minimun damage pointsa bandit needs to injure a samurai.
- Back of samurai cards: When a samurai is injured, the samurai player can choose to put an action token in the area of action per turn on the samurai card, or turn the samurai card to the red side.
Combat, Movement and Leadership Action Tokens
The samurai player uses these tokens when he plays an action with his samurais.
Turn Counter
This counter is used to know what the current turn is. At the end of the samurai player turn, this counter is advanced one space and the Bandit player turn starts.
Samurai Action Tiles
There are 5 different kinds of samurai action tiles. Each one of them has 2 sides. At the beginning of the game, samurai player must set them in from of him with the A side up.
The number on the tiles indicates how many actions the Samurai player has (seven, three or one) if he plays that tile in his turn. When he plays one tile he must turn it upside down and he cannot play that side again, until he chooses it one more time and turns it over again. He must play with the number on the side face up.
If samurai player chooses a samurai action tile with an icon of combat, movement or leadership action, he removes all tokens of that kind from samurai cards and he has as many actions as the number of the tile. It is 3 in all of them except for the golden tile.
Action Tokens and Pieces
Villager's houses tokens
The villager's houses tokens are the buildings where the armed villagers are to defend the village. They cannot be removed from game. They have a combat skill value for samurai attack's orders.
Bandit tokens
There are 3 basic kinds of bandit tokens: bandits, archers and mounted bandits. Each one has 3 skills: combat, defence and movement. Belowmore, each kind has its veteran version.
Palisade tokens
The palisade tokens are the gates that villagers have prepared to stop the bandits and the villager crew that guard them. They have 2 sides: one, with the palisade icon; and the other, with the skills it has, which are: combat, defence and crossing difficulty.
Bow tokens
The bow tokens are to keep count of the bows used by the samurais.
Supply tokens
The supply tokens are rice and food from villagers. They have a value from 3 to 7. These are the victory points that the controller of these tokens wins at the end of the game.
Equipment storehouse tokens
The equipment storehouse tokens are the buildings where the villagers hide their valuables. They have a value from 1 to 5. These are the victory points that the controller of these tokens wins at the end of the game.
Action counter (bandit player)
The action counter has numbers from 1 to 40 and it is used to control how many actions the bandit player has. The bandit player has to reduce its value when he uses actions.
Setting Up the Game
Before to start the game players choose who plays as the samurai or as the bandit. Samurai player plays with the 7 samurais and the villagers; bandit player leads the bandits.
The bandit player takes:
- 7 action area cards
- Bandit tokens
The Samurai player takes:
- 7 samurai cards
- 7 samurai cardboard miniatures
- 5 samurai action tiles
- 14 bow tokens
- 6 palisade tokens
- 7 combat action tokens
- 7 movement action tokens
- 7 leadership action tokens
- 5 supply tokens
- 5 villager's houses tokens
- 5 equipment storehouse tokens
The Samurai player puts in front of him the 7 samurai cards with the normal side face up. He puts also, in front of him, the 5 samurai action tiles with the A side face up.
The bandit player has the 7 action area cards in his hand in a way that the samurai player only can see the A side of them and keeping for himself only the B side.
To end, the turn counter is placed on the icon of 1st turn to control the turns played.
Village set up
Once the players have all their components the samurai player distributes the following tokens in this way:
- He places each supply tokens in a different supply space. The victory points side should be hided so the bandit player does not know how many victory points each token has.
- He places the equipment storehouse tokens in the same way as he did with supply tokens, one per asquare and with the victory points side hidden so the bandit player cannot see the number.
- He places the tokens of villager's houses as he did with supplies tokens and equipment storehouse tokens.
- He places the palisade tokens, with its value skill side down so bandit player cannot see those skills.
- He places all bow tokens in its areas as he wants. He can leave areas without any token. These tokens can be used only for the area they were placed.
- To finish, he places the samurai cardboard stands in the game board. He must put one stand per sector.
First games deployment
Samurai player can put supply tokens, equipment storehouse tokens, villager's houses tokens and a palisade tokens, at random; two bow tokens in each space for bows; and one samurai cardboard stand at random too, in the second village space from the palisade. When they play several times they will be able to play following their own ideas and tactics.
Objective and End of the Game
The game ends:
- At the end the 18th turn, or if
- All samurais are killed.
If the game is finished at the end of the 18th turn, both players count their victory points. The player with more of them is the winner of the game. (See victory points section)
If all samurais are killed, the winner of the game is the bandit player.
Duration of the Game
The game lasts for 18 turns. (Except if all samurais are killed before. See previous section). Each turn has two phases: the bandit phase and the samurai phase. In all turns, bandit player is the first to play his actions, and when he ends, samurai player plays his actions. When samurai player phase ends, a new turn starts.
Bandit Player Phase
The bandit player discards an action area card from his hand and he gets as many actions as indicated by the number of the discarded card. He places that card in a visible but apart area with the A side up so the samurai player cannot see the area of that card.
Example: The bandit player discards the G area card and he gets 5 actions. Samurai player must not know that is the G area card. He only knows that since the card has the number 5 on it, it must be the A, G or F area card.
The bandit player adds to the actions he got from discarding the card, as many actions as the number of action tokens placed in the samurai cards and the actions not used by the samurai player in the previous turn (See below).
At the 1st, 7th, 12th and 16th turns bandit player discards two cards instead of one adding both their values to the total actions for that turn. The turn tracker on the game board is marked in these spaces to remind this special discarding.
In the 6th, 11th, 15th and 18th turns bandit player can discard a card to kill a samurai. (See below)
Example: In the 1st turn, bandit player discards the G area card (5 actions) and the E area card (6 actions). He gets 11 actions for his turn.
Example: The samurai player used 7 actions in his turn, (see below) so there are 7 tokens on his samurai cards. In the next turn, in the bandit player phase, he discards the E area card (6 actions), so he gets 13 actions to play his phase, (7 from the tokens on the samurai cards and 6 from his discarding)
After calculating how many actions the bandit player has for his turn, he can use as many actions as he wants, but never more. Not used actions are not carried on to following turns.
Bandit player actions
The bandit player can:
- Use 1 action to bring to play 1 bandit token.
- Use 2 actions to bring to play 1 archer bandit token.
- Use 3 actions to bring to play 1 mounted bandit token.
- Use 5 actions to bring to play 1 veteran bandit token.
- Use 6 actions to bring to play 1 veteran archer bandit token.
- Use 7 actions to bring to play 1 veteran mounted bandit token.
- Use 1 action to move any bandit token.
- Use 1 action to attack with any bandit token.
- Use 1 action to take control of a revealed supply token with any bandit token. (See below)
The bandit player can do these actions in the order he wants, but he cannot do a new action until he finishes the previous one, (except for joint attacks or moving through palisades or samurais)
Example: Bandit player has 8 actions. He uses 1 action to move a bandit token, 3 actions to put in the game a mounted bandit token, and 1 action to move the bandit token again. He has 3 actions left.
Bandits
When the bandit player puts in the game bandit tokens, he must put them in any empty deployment space with the value skills side up. There are 3 deployment spaces near each palisade.
Each deployment space is like the closest space to the palisade even if they are not beside it. So, for moving or shooting a bow (see below) from any deployment space, the bandit player must not count any additional spaces in order to calculate the distance.
The number of bandits token is limited, so if all of a type are in play the bandit player can not bring more of that type until one of them is eliminated or removed from the game board.
Veteran bandits
Veteran bandits cost one less action to put in the game per each bandit token of its kind in the game board. (No matter if they are in the village or in the deployment spaces) Their cost can't go below 1 action.
Example: The bandit player puts in the game a veteran bandit token, (it costs 5 actions). He has in the game board 3 bandit tokens. So, the veteran bandit token has a cost of 2 actions (5 actions from its value, less 3 because there are 3 bandit tokens on game, makes 2). In case there are 4 or more bandit tokens in the game board, the veteran bandit token costs only 1 action to put in the game.
Bandit movement
A bandit token moves as many spaces as its movement skill per action. The bandit player can use several move actions with the same token. Once a token attacks it cannot move anymore, (see combat section)
Example: The bandit player using only 1 action can move a bandit token 2 spaces, or a mounted bandit token 3 spaces, or a veteran bandit token 4 spaces.
A bandit token cannot stop its movement action in a space occupied by another bandit token or samurai stand, but it can pass an occupied space through. Passing through a bandit token has not additional cost. Passing through a samurai token has an additional cost equal to the samurai combat skill value.
Example: A bandit token (2 movement points per action) is beside Akemi (combat skill value of 3). If the bandit player wants to pass his bandit token through Akemi he needs to use 5 movement points (1 per the 1st space –where Akemi is-; +3 per Akemi's combat skill value; +1 per the next space) Since a bandit token moves 2 spaces per action the bandit player must use 3 movement actions. In this way he gets 6 movement points, so that he could use his remaining point and move forward a space more.
To pass through a palisade, a bandit token must use as many additional movement points as its crossing difficulty value, (see palisade section)
Example: A mounted bandit token (3 movement points per action) wants to pass a palisade through with a crossing difficulty value of 3. So that, the bandit player must use 4 movement points (1 to reach the village space; +3 because of the palisade's crossing difficulty value) He needs to use 2 movement actions to get 6 movement points. He has 2 remaining movement points, so he can move again if he wants.
Attack of bandits
To attack with any bandit token costs 1 action. When a bandit token attacks it is turned over to indicate it is attacking. Once a bandit token attacks, it cannot do anymore actions until the next bandit phase. The bandit player can do joint attacks with several bandit tokens against the same target.
One or several bandit tokens can attack:
- A samurai
- An equipment storehouse
- A supply token
- A palisade.
The attacking bandit tokens must be beside the target, except the archer bandit tokens which can attack at distance (see below). The bandit player must turn over all the attacking tokens. He takes 1D6 per each attacking token and throws all dice at a time. The sum of the dice's result, plus the sum of all combat skill values from the attacking bandit tokens is the value of that joint attack.
Example: The bandit player attacks with a bandit token (combat skill value of -2) and with a mounted bandit token (combat skill value of -1). Since he is attacking with two tokens he throws 2D6 and subtracts 3 to the dice's result.
Example: The bandit player attacks with 2 bandit tokens and an veteran mounted bandit token. He throws 3D6 and subtracts 4 to the dice's result, (-2 from each bandit token and 0 from the veteran mounted bandit token)
Bandit attack targets
If the target is a samurai: Add the dice plus the attacking combat skill values if it is equal or higher than the samurai's defence skill value, the samurai is damaged. Then, the samurai player must choose between putting an action token on the samurai card that he doesn't already have; or to turn over the samurai card, putting its red side up. If a samurai card has all its action tokens and is damaged, the samurai player must turn its card. If a samurai card is in its red side (turned over), and is damaged, it dies, -even if it doesn't have all the action tokens on it. His card is removed from game, as well a all action tokens on it and its cardboard stand.
If the target is an equipment storehouse token: The attack must be resolved as an attack against a samurai but, the equipment storehouse token can be attacked only from spaces with the arrow marks. Each area of equipment storehouse has a different defence value. If the attack value is equal or higher than that defence value, the equipment storehouse is stolen. The bandit player takes the equipment storehouse token and puts it in his game area to count its victory points at the end of the game. If the attack value is lower than the defence, nothing happens.
If the target is a palisade token: For palisade tokens is the same, but in this case, palisade tokens are not removed from the game. It must be placed beside its area to indicate it is destroyed. If a palisade is destroyed it has not an additional cost to pass it through. The 3 deployment spaces near the palisade count as adjacent to the palisade, so the bandit player can attack the palisade token with 3 bandit tokens if he has them there.
If the target is a supply token: The attack to a supply token is the same than the attack to an equipment storehouse token but in this case the bandit player does not take the supply token. It is turned over, with its victory points value icon side up to indicate it has been revealed. Once a supply token is revealed it cannot be turned over again.
A bandit token in an adjacent space to revealed supply token can use one action to pick it up. A bandit token with a supply token on it, needs 2 movement actions to move, that will allow to move as many space as his movement skill. It cannot use only 1 movement it needs to use 2 movement actions every time it moves while it has a supply token on it.
Example: The bandit player has 6 actions. There is a revealed supply token in the game board and a mounted bandit token is adjacent it. He uses 1 action and takes the revealed supply token with the mounted bandit token. He remains 5 actions. The mounted bandit token has a movement value of 3 movement points per action. If the bandit player wants to move it 6 spaces, he must use 4 actions, since it costs 2 actions to move 3 spaces.
If a bandit token reaches a deployment space with a supply token on it, this bandit token is removed form game board. The bandit player can use it later to put in the game like any other bandit token. He keeps the supply token to count its victory points at the end of the game.
Example: A mounted bandit has a supply token on it. Akemi is in its way. If the bandit player wants to pass her through he must use 5 movement points (1 per the space where Akemi is; +3 because of the Akemi's combat skill value; +1 per the next space). Since he must use 2 movement actions instead of one, he must use 4 movement actions to get 6 movement points. There is 1 movement point remainder.
If a bandit token is destroyed with a supply token on it the supply token remains in the space where the bandit token was. It can be taken by another bandit token normally. A samurai tile cannot move or carry a supply token. A supply token in a village space does not hinder movement and any samurai stand or bandit token can be in a village space with a supply token on it.
Archer bandit attacks
The archer bandit tokens can attack from distance. When an archer bandit attacks, the bandit player must count the number of spaces between the archer bandit token and the target. That number is subtracted to the combat skill of the archer bandit. The area of supplies and areas of equipment storehouses are like village spaces for the count when the bandit player is calculating the distance. (These areas cannot be occupied by any bandit token or samurai tile). An archer bandit can attack any target, even if there are another bandit tokens or samurai tiles in its way.
Example: The archer bandit token from the picture, attempts to attack Akemi. There are 2 spaces between them. The bandit player throws 1D6 and adds to its result +0 (because of its combat skill) and subtracts -2 (because of distance). Since Akemi's defence skill value is 6, the archer bandit token cannot damage her, (whatever the result of the die).
Example: The bandit archer attempts to attack an equipment storehouse token with a mounted bandit token (combat skill value of -1), a bandit token (combat skill value of -2) and an archer bandit token (combat skill value of 0) and at distance of 2 spaces. The value of the joint attack is: 3D6 – 5 (-1 per the mounted bandit; -2 per the bandit token; -2 per the archer bandit token, -because of the distance until its target plus its combat skill value. -2 + 0 = -2-). If the bandit player gets a joint attack value equal or higher then 12, he "steals" the equipment storehouse token.
The bandit tokens can attack from deployment spaces, fighting hand to hand if there is a samurai tile beside the deployment space or shooting with archers, in both cases, on condition that the palisade is destroyed.
Palisades
Palisades have 3 skills: combat, defence and crossing difficulty.
At the beginning of the game the palisades are put in the game board with its icon skill face down and armed (in the space for palisade). When a palisade attacks (see samurai section), is under attack or bandit token attempts to pass through it, the palisade token is turned over and remains in that way during the game. While armed a palisade prevents bandit attacks through it and hinders bandits movement.
When the samurai player attempts to attack with a palisade, the combat skill of that palisade is the value of the attack. A palisade can attempt to attack only if it is armed and only, to bandits in deployment spaces. A palisade attack is like a samurai attack, (see attack of samurai section).
The palisade space doesn't count as a village space when moving, but when they are armed and a bandit wants to pass it through he must use as many movement points as the crossing difficulty skill of the palisade, the same way as passing through a village space with a samurai in it.
Example: The bandit player wants to pass through an armed palisade. The space of the palisade does not count for moving, so to move forward the 1st village space, he must use 3 movement points (1 to reach the 1st space; +2 because of the palisade's crossing difficulty). Since the bandit player gets 2 movement points per action, he must use 2 movement actions. He has 1 movement point remaining, so that if he wants, he can move until the 2nd village space.
The bandit player can attack a palisade to disarm it. The attack is the same as with a samurai: the attack value must be equal or higher than the palisade's defence. If the bandit wins, the palisade is disarmed and put beside its space to indicate it is disarmed. While the palisade is disarmed, the bandit tokens don't use any additional movement points to pass through its space; can attack adjacent spaces and the archer bandit tokens can shoot beyond.
As stated before, the 3 deployment spaces near the palisade are considered adjacent to it for movement and attack purposes. So that for moving or shooting a bow from any deployment space, the bandit player must not count any additional spaces in order to calculate the distance. Because of that, when a samurai tile attempts to attack bandits in deployment spaces, the samurai tile attacks every bandit in those deployment spaces, (see below).
When a palisade attacks (see below) its attack is like the bandit's attack. The samurai player throws 1D6 and adds its result to the combat skill of the palisade to get the attack value. The samurai player destroys bandit tokens whose total defence value is equal or lower than the attack value. The samurai player chooses which bandit tokens he destroys. The attack points not used get lost.
Example: The samurai player attacks with the palisade, so that he throws 1D6 and adds 0 to its result, because 0 is the combat skill of the palisade. If he gets 5 or more as attack value, he can destroy both bandit players [sic], since the mounted bandit token has a defence value of 3 and the bandit token has a defence of 2. If he gets a 4 as attack value, he must choose to destroy the mounted bandit token and loses 1 attack point or to destroy the bandit token and loses 2 attack points. He cannot to destroy also the mounted bandit token since it has a defence value of 3.
6th, 11th, 15th and 18th Turns
In the 6th, 11th, 15th and 18th turns, the bandit player chooses and discards an action area card. He reveals it face up to show the letter of the area of designation. If there is a samurai in that area it is destroyed automatically, no matter how many action tokens it has or if he is injured. A samurai destroyed this way does not give any victory points (see below). The samurai player removes from the game board its samurai cardboard miniature and its samurai card, and all action tokens on it. If there are more than one samurai in that area, the samurai player chooses which samurai is destroyed.
After this, the bandit player counts his action for his phase but he doesn't get any actions from the discarded card, he only gets actions from the action tokens on samurai cards and/or the actions not used by the samurai player in his phase (see below). Then the bandit player puts back all his action area cards into his hand So at the beginning of turns: 7th, 12th and 16th he will have the 7 action area cards in his hand.
When the bandit phase ends, the bandit player must turn over if it is necessary his tokens on the game board and puts them face up the side with the icon of the skill's values to indicate they can do actions again.
Samurai Player Phase
At the beginning of the samurai player phase, he chooses a samurai action tile to get as many actions for his turn as the number on the tile, and turns it over. If the action tile has a combat, movement or leadership icon on it, the samurai player removes all the action tokens of that icon from his samurai cards and gets so many actions as the number on the tile as usual.
Example: The samurai player chooses the A action tile, so that he gets 7 actions for his turn. He turns it over. If later, in another turn, he chooses again the A action tile, he removes all the combat action tokens from his samurai cards and gets 3 actions. If later, in another turn he chooses again the A action tile he gets 7 actions and so on.
The action tile with a 2, instead the icon of combat, movement or leadership icon works in a different way. When the samurai player chooses this tile by that side, he removes two tokens (combat, movement or leadership) from any samurai cards and gets 3 actions for his turn.
Example: The samurai player chooses the action tile with a 2 on it. He removes 1 combat token form one samurai card and 1 movement token from another samurai card. He could remove both tokens from the same samurai card.
When the samurai player chooses the action tile with 3 icons of combat, movement and leadership, by its B side, he removes all tokens from his samurai cards. He does not get any action to play in his turn.
Actions for samurai player
The samurai player can spend his action points doing the following actions:
- Attack an adjacent a bandit token. He uses a combat action token.
- Attack with a bow. He uses a combat action token.
- Move a samurai. He uses the movement token.
- Use the leadership of a samurai to order a palisade to attack. He uses the leadership token.
- Use the leadership of a samurai to order a villager's house to attack. He uses the leadership token.
- Use the leadership of a samurai to attempt to arm a disarmed palisade. He uses the leadership token.
When the samurai player does an action with a samurai, he puts in its "area of actions per turn" of its card a token of the action its does (combat, movement or leadership). A samurai card cannot have two tokens of the same kind on it, (no in the area of actions per turn, or in the card itself).
So that if there is a combat token on it, the samurai player cannot do any combat actions until that token is removed.
When the samurai player finishes doing actions in his turn he moves all the action tokens from the area of actions per turn to the illustration area of the card.
The area of actions per turn helps to know how many actions has the samurai player already done in a phase.
Example: The samurai player chooses an action tile with a 7 on it, so that he gets 7 actions to play for his turn. He chooses samurais to do actions and puts on their cards the corresponding action tokens. In the example, the samurai player has used 4 actions: 1 leadership action with Kento; 1 combat action with Akane; and 1 combat action and 1 movement action with Akemi. He remains 3 available actions for his turn still. Akemi has the leadership token of a previous turn so that it is not possible to do a leadership action with her until that leadership token is removed.
The actions of samurais must be realized one by one. A new action can't be started until the previous one is finished. The samurai player can choose the order of his actions. One samurai can do more than one action per phase and these actions don't need to be consecutive. He can do one action with one samurai, then he uses another one, and after he uses the first one again. Actions not used by the samurai in his turn are added to next turn bandit player actions.
Example: The samurai player chooses an action tile which gives him 7 actions for his turn. He uses only 5. Because of that, the bandit player gets 2 extra actions for his turn, which adds to the actions he gets by discarding an area card and the number of action tokens on the samurai cards.
Samurai attack
A samurai tile can attack any bandit tokens if they are in adjacent spaces to him. To attack, the samurai player throws 1D6 and adds its result to the combat skill value of the attacking samurai tile. The result is the attack value. The samurai player destroys bandit tokens whose total defence value is equal or lower than the attack value. The samurai player chooses which bandit tokens he destroys. The attack points not used get lost. The destroyed bandit tokens are removed from the game board. The bandit player can bring them back into play in the usual ways
Example: Akemi, (combat value of 3) throws 1D6 and gets a 2, so that she gets an attack value of 5 (3+2). The samurai player can kill the mounted bandit token (defence of 3) and with the remaining 2 attack points he can kill the bandit token or the archer bandit token, since they have a defence value of 2. He can choose also to kill the bandit token and the archer bandit token, but he loses 1 attack point. If she had rolled 4 or more, she could have killed the 3 bandits.
A samurai cannot attack a bandit in a deployment space unless he uses a bow (see below).
Bow attack
A samurai can attack with a bow instead of his normal attack. The rules are the same than an archer bandit but in this case, every time a samurai uses this attack, he must remove 1 bow token form the area where his stand is.
If there are not any bow tokens in the area where the samurai is, he cannot attack with bows. A samurai can shoot to another area and also to deployment spaces. Remember than the 3 deployment spaces are like the same space, so that if a samurai shoots a bow against a deployment space with several bandit tokens in there, he can kill several bandits with only one shot.
If the samurai shoots a bandit in a village space can only kill the bandit in that space.
Example: The samurai in the picture has a combat skill's value of 1. He shoots a bow. The samurai player must remove 1 bow token from the area D. He throws a die. If he attacks to the bandit token, the attack value is: 1D6 +1 – 2 (+1 because of the combat skill of the samurai; -2 because of the distance). So that he must get a 3 or more in the die to kill the bandit token. If he wants to attempt an attack against the furthest bandits, his attack value is: 1D6 +1 – 3. The attack value must be equal or higher than the defence from the archer bandits to kill them.
Samurai movement
A samurai stand can move a number of village spaces up to his movement skill value. A samurai stand can pass through a village space with a samurai in it but he cannot stay there. A samurai stand cannot pass through a village space if there is a bandit token in it. A samurai stand cannot move to a deployment space. Movement can't pass or end in villager's houses, equipment storehouse nor supplies spaces.
Order a palisade to attack
A samurai tile must be at a distance to the palisade, equal or lower than its leadership skill value to order the palisade to attack. To calculate the distance it counts the village space between the palisade and the samurai tile. If the samurai tile is close enough, the palisade attacks. To know its attack value see the palisade section (see above).
Order a villager's house attack
A samurai tile can order a villager's house to attack if it is at a distance equal or lower than his leadership skill value. To calculate the distance it counts the village spaces between the samurai tile and the villager's house.
Example: The samurai A is at a distance of 3 village spaces from the villager's house. The samurai B is at a distance of 1 village space.
When a village's house is ordered to attack, it is turn over to reveal its combat value. The samurai player must choose the direction of the attack, if the village's house is in a area with several arrows. The attack is similar to a samurai attacking with a bow, except a villager's house cannot attack a bandit in a deployment space and it is not necessary to remove a bow token. A villager's house cannot be attacked or destroyed.
Example: The samurai tile orders the villager's house to attack. If the target is the mounted bandit the attack value is 1D6+0+0, so that if the die's result is a 3 or more, the mounted bandit is destroyed. If the target is the bandit token, the attack value is 1D6+0-3, so that the die's result must be a 5 or more to destroy it. If the target is the archer bandit, the attack value is 1D6+0-1. So the result of the die must be a 3 or more.
Villager's houses and palisades can be ordered to attack as many times as the samurai player wants spending a leadership action for each attack.
Rearm a palisade
A samurai tile can attempt to rearm a palisade if it is at a distance equal or lower than its leadership skill value. The samurai player throws 1D6. If the result is equal or higher than the distance between the samurai tile and the palisade, it is armed. The samurai player puts the palisade token in its area, so that the palisade is armed again.
Example: The samurai player wants to arm the palisade which was disarmed by the bandits. A samurai tile is at a distance of 2 village spaces. Since its leadership skill value is 3 it is able to attempt to arm the palisade. He throws 1D6. He must get a die's result of 2 or more (2 is the distance between the samurai tile and the palisade)
End of the Game and Victory Points
The game ends if all samurais are killed or at the end of the 18th turn.
If all samurai are killed, even if it is before the end of the 18th turn, the winner is the bandit player. If at the end of the 18th turn, the samurai player has at least 1 samurai alive, players must count their victory points.
Players get points for:
- Supply tokens under control (both players)
- Equipment storehouse tokens, -destroyed or not- (both players)
- Samurais killed in combat (bandit player)
- Village's areas without any bandit tokens on it (samurai player)
Each player counts the victory points of the supply tokens they have. The samurai player controls all supply tokens in the game board. No matter if they are on a bandit token. The bandit player controls all supply tokens removed from the game board.
The samurai player counts the victory points of the non destroyed equipment storehouses. The bandit player counts the victory points of the destroyed equipment storehouses.
The bandit player counts the samurais he killed in combat. He counts only the samurais which were killed by the attack of bandit tokens, not the ones which were killed by discarding an area card.
The samurai player gets as many additional points as the number of village's areas without any bandit token.