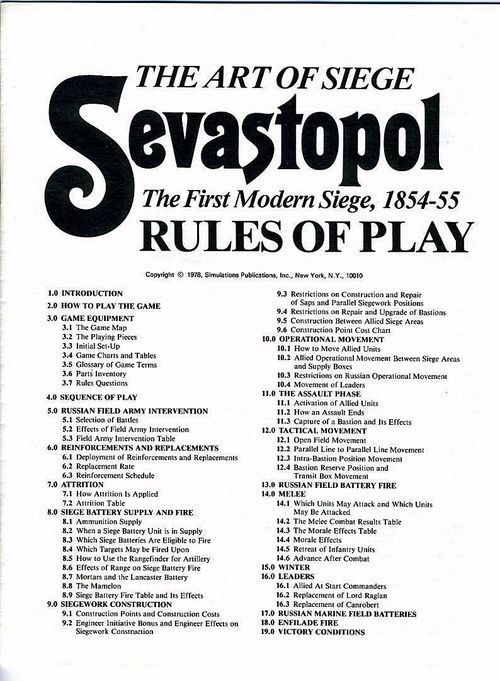
Sevastopol: The First Modern Siege, 1854-55
Sevastopol: The First Modern Siege, 1854-55 Rulebook
Table of Contents
Table of Contents
- 1.0 Introduction
- 2.0 How to Play the Game
- 3.0 Game Equipment
- 4.0 Sequence of Play
- 5.0 Russian Field Army Intervention
- 6.0 Reinforcements and Replacements
- 7.0 Attrition
- 8.0 Siege Battery Supply and Fire
- 9.0 Siegework Construction
- 10.0 Operational Movement
- 11.0 The Assault Phase
- 12.0 Tactical Movement
- 13.0 Russian Field Battery Fire
- 14.0 Melee
- 15.0 Winter
- 16.0 Leaders
- 17.0 Russian Marine Field Batteries
- 18.0 Enfilade Fire
- 19.0 Victory Conditions
- Errata and Addenda (Art of Siege Warfare Addenda, October 1979)
1.0 Introduction
Siege of Sevastopol is a regimental level simulation of the British/French siege of the Russian city of Sevastopol during the Crimean War of 1854-1855. Sevastopol remained the focus of the Allied war effort throughout this conflict as it was Russia's major naval arsenal and fortress on the Black Sea. Neutralization and eventual capture of Sevastopol prevented the Russian Black Sea Fleet from assisting in any combined operations with the Russian Army against Turkey.
2.0 How to Play the Game
The Players Set-up their Units. After it has been decided who will play the Russians and who will play the Allies, the Players set-up the pieces ("counters") representing their infantry and artillery units on the map. Russian units are deployed within Sevastopol; Allied units are set-up outside the city behind the Allied Start Line. At the start of the game, none of the one-inch long siegework counters are deployed on the map.
The Players Resolve Siege Battery Fire. Both Players possess a number of siege battery units. From Turn to Turn, each Player must keep track of his available ammunition, measured in "rounds". Each turn, after the Planning Phase, each Player may have his siege battery units fire up to the limit of his available rounds. Generally, the Allied Player will use siege battery fire to weaken the strength of bastions that he intends to assault and to eliminate Russian units deployed in bastions. The Russian Player will use siege battery fire to damage key sections of the Allied siegework system and to eliminate Allied units involved in its construction or repair. Since siege battery-caused damage can be repaired, Players will occasionally find it useful to save up ammunition for a concentrated effect.
The Allied Player Executes Siegework Construction and Repair. The Allied Player must devise a strategem that permits him to successfully assault two bastions within the Russian fortifications. Because of the effectiveness of Russian field artillery, he cannot simply launch an assault from one of the Allied Start Lines; his troops would be annihilated prior to reaching the walls. Allied troops are less vulnerable to artillery fire when in the siegeworks, and so the Allied Player must build a siegework system that reduces the open ground that must be traversed during an assault.
The Allied Player builds a siegework system composed of zig-zag approaches (saps) and wide trenches parallel to the enemy fortifications (parallels). When doing so he uses Construction Points which are available to the Players at an historical rate. Experience had shown that siegeworks had to be built according to strict precepts if the besieger wished to avoid excessive casualties. The axioms and theorems of the "art of fortification" are reflected in the rules regulating how siegework counters are arranged for the purposes of play. The Allied Player may both construct new siegeworks and repair any damaged Russian siege battery fire.
The Allied Player Conducts Operational Movement. "Operational Movement" consists of troop movements within the limits of the siegework systems (movement network). The Allied "movement network" consists of the Allied Start Line, the Supply Boxes, and any siegework counters that are connected to it, either directly, or indirectly by means of other intervening siegework counters. In conducting operational movement, the Allied Player redeploys any units within his movement network as he pleases. Operational movement may be used to deploy artillery units at a closer range to Sevastopol and to deploy infantry units in positions from which an assault is possible.
The Allied Player May Conduct Assaults. Assaults are rare, because it takes a long time for the Allied Player to construct a siegework system close enough to the city to make success likely. Eventually, however, the Allied Player must assault; siege battery fire alone would never lead to the capture of the city. In this game, the dynamics of assault are simulated in a series of "turns-within-a-turn". In any turn in which the Allied Player determines he is ready, he announces an assault. The normal course of the Turn is interrupted and the Allied assault is resolved on a tactical level. The Allied Player initiates an assault by moving units out of the parallels and, with the aid of the Range Finder, through "open terrain," towards the Russian fortifications. The Russian Player responds by attempting to destroy or rout Allied units through his Field Battery artillery fire. Allied units that have succeeded in reaching an Assault Position immediately adjacent to a Russian bastion may be used to conduct Melee attacks against Russian units in that bastion. Successful attacks allow the Allied Player to advance his units into the bastion. The Russian Player may then conduct Melee attacks against Allied units. In turn, each Player has five opportunities to conduct Melee attacks, after which the assault is considered to have ended and its success or failure is determined.
The Russian Player Conducts Operational Movement. The Russian Player re-deploys his infantry and/or field battery units anywhere within his movement network. The Russian movement network consists of all bastions, "in-transit" Boxes, and Reserve Boxes within Sevastopol plus the Russian Supply Box and the Mamelon bastion.
The Russian Player Executes Siegework Construction and Repair. The Russian Player must strive to keep his bastions sufficiently fit to repel any Allied storming attempts. With the aid of his engineer, the Russian Player can repair damage from Allied siege guns and even upgrade a bastion's capacity to resist an assault beyond its original strength. He also uses Construction Points which are available according to an historically determined rate.
The Game-Turn Ends. The actions described above constitute a complete Game-Turn. The Players proceed to conduct as many more Game-Turns as required until either Player wins.
3.0 Game Equipment
3.1 The Game Map
The 22" x 34" mapsheet displays a detailed period engraving of Sevastopol and the surrounding areas at the time of the siege. The map has been re-produced to the scale of 150 yards to the inch. The following features have been added to the original map to regulate play of Siege of Sevastopol.
Allied Start Line: This line portrays the original siege lines which were constructed prior to the "active" siege of Sevastopol. Allied units are placed behind this line at the beginning of the game.
Allied Start Line Activation Date: Printed on the Map behind the French Right Siege Areas are activation dates. Allied units may not be moved to or placed in these Siege Areas before the Date printed on the map.
Assault Position: An Assault Position is a dot outside a bastion which is connected to a Bastion Position within a Bastion.
Bastion Position: A Bastion Position is a dot within a Bastion.
Bastions: The defensive perimeter of Sevastopol comprises a number of bastions. Each bastion is made up of interconnecting dots (bastion positions), Assault Positions outside the bastion for assaulting Allied units, and a Bastion Reserve Box for placing units in reserve "under-cover" and for transporting Russian units to and from other bastions.
Mamelon In-Transit and Reserve Boxes: These boxes are a normal part of the movement network. However, they are located within Sevastopol so that they do not interfere with the map around the outer position of the Mamelon.
Supply Boxes: There are three Supply Boxes: the Kameitch Supply Box for the French; the Balaclava Supply Box for the British; and the North Shore Supply Box for the Russians. Units must be deployed in these boxes to insure the supply of ammunition.
Major Terrain Types: The terrain types are indicated by color (see Terrain Key on map). Their effect on play is shown on the Terrain Effects Chart (see Chart Sheet).
Siege Areas: The Allies have three Siege Areas behind the Allied Start Lines: the French Left Siege Area; the British Center Siege Area; and the French Right Siege Area. The Russian has two Siege Areas within Sevastopol: Siege Area 1 to the east of the Baie du Sud; and Siege Area 2 to the west of the Baie du Sud. Note that the French Right Siege Area is not "activated" at the start of play.
In Transit Boxes: In Transit Boxes connect distant Bastion Reserve Boxes with one another.
Range Points: Each bastion has one Range Point. The Range Point is used when firing artillery from the bastion or at the bastion.
Firing Boxes: Firing Boxes for mortars and the Lancaster battery are located behind the Allied Start Line. For each Russian bastion there is a firing position for a siege gun and a mortar. Once placed in a firing position, an artillery counter may not be moved.
3.2 The Playing Pieces
The playing pieces (or units) represent the infantry battalions and regiments, the artillery batteries, and the historically important leaders who participated in the siege. The numbers and symbols on the pieces are the Strength, Morale Level and type of unit represented by the piece. These playing pieces are referred to as units. There are also several informational markers such as Bastion Strength Markers, Ammunition Supply markers, and double-sized Siege Construction Markers.
3.21 How to Read the Units. ALLIED UNIT (Front): Historical Designation; Brigade Number; Combat Strength; Morale Level. ALLIED UNIT (Back): Construction.
RUSSIAN UNIT (Front): Historical Designation; Morale Level; Combat Strength; Game-Turn of Entry. RUSSIAN UNIT (Back): Construction.
COMMANDER-IN-CHIEF (Front): Name; Initiative. COMMANDER-IN-CHIEF (no back).
ENGINEER OFFICER (Front): Name; Bonus Point; Die Range (1-4). ENGINEER OFFICER (no back).
Unit designations are the actual historical names or numbers of each unit. Russian unit designations are the regimental names. Allied unit designations show the division, brigade, and regiment that the unit represents. Composite units and artillery units are merely numbered.
3.22 Unit Values
Combat Strength: The relative value of a unit when attacking or defending.
Morale Level: The relative ability of a unit to withstand the rigors of combat, taking into account both training and elan. "A" level units are guards or the equivalent; "B" are elite line units; "C" are ordinary line units or huge untrained, unequipped, Russian units of great mass; "D" class units are the second rate line units.
3.23 Sample Units
Sample unit counters are shown for: Siege Battery; Mortar Battery; Field Battery; and Field Battery (Marine). Each has a front (the unit symbol) and a back (the Construction symbol).
3.3 Initial Set-Up
At the start of play, all Russian at-start combat units and field battery units are placed anywhere on the map within the Russian Movement Network. Bastion Strength Level 3 markers are placed next to each Bastion. For the Allies, the French at-start combat units and siege guns are placed on the map behind the French Left Siege Area Start Line, and the British at-start combat units and siege guns are placed behind the British Siege Area Start Line. The Russian Player then places his mortar and siege gun units in a Russian Firing Box (labeled M or S) of the appropriate nationality. The Allied Player then places his mortar and Lancaster battery unit in Allied Firing Boxes. Finally, both Players place their Engineer Officers and the Allied Commander in Chief's (behind the Start Line or within Sevastopol) in the Siege Area of their choice. All units which are not noted on the counter as reinforcements are placed on the map; the following is included for reference purposes.
3.31 British At-Start Set-Up
Gren/GD/1 (Grenadier Guards), SF/GD/1 (Scots Fusiliers), CS/GD/1 (Coldstream Guards), 42/HD/1 (Blackwatch), 79/HD/1 (Cameron), 93/HD/1 (Sutherland), 41/R/2, 47/R/2, 49/R/2, 30/L/2, 55/L/2, 95/L/2 (Derbyshire), 1/R/3, 4/R/3, 28/R/3, 38/R/3, 44/L/3, 50/L/3, 60/L/3, 68/L/3, 20/R/4, 21/R/4, 63/R/4, 46/L/4, 56/L/4, 1RF/L/4 (1st Rifle), 7/R/LT (Royal Fusiliers), 23/R/LT (Royal Welsh Fusiliers), 33/R/LT (Duke of Wellington), 19/L/LT (Green Nowards), 77/L/LT (Second-Middlesex), 88/L/LT (Connaught Rangers), Naval 1, Naval 2, Siege Batt 1, Mortar 1, Batt. Lanc., Commander-in-chief Lord Raglan, Engineer Officer Burgoyne.
3.32 French At-Start Set-Up
7/1/1, 1ZOV/1/1, LEG/1/1, 20/2/1, 27/2/1, 50/1/2, 3ZOV/1/2, 1TIR/1/2, 7LEG/2/2, 6/2/2, 2ZOV/1/3, 3MAR/1/3, 20LEG/2/3, 22LEG/2/3, 19/1/4, 26/1/4, 39/2/4, 74/2/4, Siege Batt. 1, Mortar 1, Commander-in-Chief Canrobert, Engineer Officer Bizot.
3.33 Russian At-Start Set-Up
Marine batt 1, Marine batt 2, Marine batt 3, Marine batt 4, Marines 1, Marines 2, Marines 3, Marines 4, Gar 1, Gar 2, Gar 3, Gar 4, Siege Batt. 1, Siege Batt. 2, Siege Batt. 3, Siege Batt. 4, Mortar 1, Field Batt. 1, Field Batt. 2, Field Batt. 3, Field Batt. 4, Engineer Officer Todleben.
3.4 Game Charts and Tables
Various visual aids are provided to simplify and illustrate certain game functions. These aids include the Russian Field Army Intervention Table, Ammunition Determination Chart, Ammunition Supply Track, Siege Battery Fire Table, Terrain Effects Chart, Melee Combat Results Table, Morale Effects Table, and Impulse and Game-Turn Record Tracks.
3.5 Glossary of Game Terms
Allied Movement Network: The Allied Movement Network consists of the off-map Supply Boxes and any portion of the game map which is behind an activated Allied Start Line. In addition, the Allied Movement Network extends out from any activated Allied Start-Line through contiguous siegework counters which are constructed by the Allied Player.
Parallel Line: A Parallel Line is one parallel counter or more which has been placed "in line" with front corners touching and adjacent to one another.
Repair Upgrade: If a Russian Bastion is constructed to a higher Bastion Strength Level than 3, it is considered Upgraded. If a Russian Bastion is damaged and is rebuilt up to and including a Bastion Strength Level of 3, it is considered Repaired.
Russian Movement Network: The Russian Movement Network consists of the Bastion Positions within each Bastion, the Bastion Reserve Boxes that are connected to each Bastion, the In-Transit Boxes which connect some Bastion Reserve Boxes to one another, and the Russian Supply Box.
Rangefinder: The Rangefinder is used for calculating ranges for Artillery fire. The Rangefinder is printed on the base of the counter sheet and must be cut out before play.
Siege Battery: Siege Battery is a term which is used to refer to mortar, siege gun, and Lancaster gun artillery units as a group.
Siegework Position: Siegework Position is a term which is used to refer to saps and parallel counters.
Limbered and Unlimbered: Allied siege gun units may be fired if in supply and unlimbered (face up). If an Allied siege gun is moved, it is inverted to show that it is limbered and unable to fire. If a limbered siege gun remains in place during the Allied Operational Movement Phase, it may be unlimbered.
3.6 Parts Inventory
A complete game of Sevastopol contains: One rules booklet; One 22" x 34" game map; 200 die-cut single-size and 100 die-cut double-size counters; One sheet charts and tables; One plastic die; One game box assembly. If any of the above parts are damaged or missing, contact the publisher's customer service.
3.7 Rules Questions
Questions concerning the rules for Siege of Sevastopol will be answered if phrased in such a way that a simple yes or no reply will suffice and if the questions are accompanied by a stamped, self-addressed envelope. Mark the envelope "Rules Questions: Siege of Sevastopol."
4.0 Sequence of Play
General Rule: Siege of Sevastopol is played in sequenced Turns called Game-Turns, each of which represents a period of two or four weeks. There are 18 Game-Turns in a complete game. Each Game-Turn is composed of six separate Phases. Each of these Phases is broken down into a number of Segments. All action must take place in the following sequence of Phases and Segments.
Sequence Outline
-
Planning Phase
- A. Russian Field Army Intervention Segment: During certain Game-Turns, the Russian Player has the option of announcing an attempt to relieve Sevastopol. Refer to Field Army Intervention (Section 5.0).
- B. Reinforcement/Replacement Segment: Both Players determine what Reinforcements and/or Replacements (if any) are available and place them on the map (Section 6.0).
- C. Attrition Segment: During certain Game-Turns (as indicated on the Game-Turn Record/Reinforcement Track), each Player must roll the die to determine losses from weather and disease, as outlined in the Attrition Rules (Section 7.0).
-
Siege Battery Phase
- A. Ammunition Supply Segment: Both Players determine how much ammunition is available for their siege gun, mortar, and Lancaster gun units.
- B. Siege Battery Fire Segment: The Players may now fire their siege batteries (Section 8.0).
-
Allied Siege Construction and Operational Movement Phase
- A. Allied Siege Construction Segment: First, the Allied Player "flips" any of his units which were used for construction during the previous Game-Turn. Then the Allied Player may have his units construct or repair any number of saps or parallels up to the limit of his available Construction Points (Section 9.0).
- B. Allied Operational Movement Segment: The Allied Player may move all, some, or none of his units utilizing operational movement, providing that each unit moved was not used to construct or repair siege works in the preceding Segment. He may either move or unlimber any siege gun unit (Section 10.0).
The Assault Phase occurs only if the Allied Player wishes to conduct assaults during the current Game-Turn. If he does not wish to do so, the Assault Phase is omitted. An Assault Phase consists of up to five assault impulses, each of which may be considered a "turn within a turn."
Assault Impulse Outline
A. Initiative Segment: The Allied Player determines the number of French and British units which may assault by determining the initiative of each Allied commander-in-chief (Section 11.0).
B. Allied Tactical Movement Segment: Utilizing Tactical Movement assaulting units in the forward parallels may be advanced out of the trenches. Units in open terrain may be moved forward. (Section 12.0)
C. Russian Field Battery Segment: The Russian Player resolves field artillery attacks against the assaulting units (Section 13.0).
D. Allied Melee Segment: Allied units deployed in Bastion and/or assault Positions may melee (attack) Russian units in adjacent Bastion Positions. Melee assault results are applied immediately (Section 14.0).
E. Russian Tactical Movement Segment: The Russian Player may now move his units.
F. Russian Melee Phase: Russian units may melee (attack) adjacent units. Results are applied immediately.
The Players execute Segments "A" through "F" once and then Segments "B" through "F" up to four more times; each time through constitutes one Assault Impulse.
- Russian Operational Movement and Siege Construction Phase
A. Russian Operational Movement Segment: The Russian Player may move all, some, or none of his units.
B. Russian Siege Construction Segment: The Russian Player may have his units construct or repair bastions up to the limit of his available Construction Points (see Section 9.0).
- Game-Turn Indication Phase
The Game-Turn Marker is advanced one space on the Game-Turn Record Track to signal the passage of one Game-Turn, unless the Allied Player has fulfilled his victory criteria, in which case the game is over.
5.0 Russian Field Army Intervention
Commentary: The Russian field army attacked the flanks of the Allied siege lines and their supply lines three times during the Crimean Campaign. The basic aim of all these battles (Balaclava, Inkerman, and Tchernaya) was to break the Allied siege of Sevastopol. Though all these attacks were ultimately unsuccessful, they succeeded in applying constant pressure upon the Allied command.
General Rule: During the Russian Field Army Intervention Segment, the Russian Player has the option to initiate intervention by his off-map field armies. He may do so a maximum of three times per game. Russian success in any of these off-map battles can either render direct aid to the Russian Player or hinder the Allied Player.
Procedure: When the Russian Player announces his decision to resolve a field army intervention attempt during the current Game-Turn, the Field Army Intervention Table (5.3) is consulted, and the Russian Player selects any one of the three battles that he has not chosen earlier in the game. He then rolls the die and cross indexes the result with the column on the Field Army Intervention Table corresponding to the selected battle to determine the results.
Cases:
5.1 Selection of Battles
5.11 The Russian Player may select each of the three battles once, opting for field army intervention a maximum of three times.
5.12 The Russian Player is free to select the three battles in any order, so long as no more than one battle is selected in any one Game-Turn. Exception: The battle of Tchernaya may not be selected prior to the March 1855 Game-Turn.
5.13 Field army intervention may not occur during Game-Turns indicated as winter on the Game-Turn Record Track.
5.14 The Russian Player may not opt for field army intervention on two consecutive Game-Turns.
5.2 Effects of Field Army Intervention
5.21 If the Russians are successful at Balaclava, British supply lines are interdicted, and the supply of English artillery ammunition is affected.
5.22 If the Russians are successful at Inkerman, Allied troops must be diverted from the siege effort to counter the Russian advance.
5.23 If the Russians are successful at Tchernaya, a Russian corridor to Sevastopol from the outside is created and the flow of Russian replacements into the city is increased (the specific effects of each battle are listed on the Russian Field Army Intervention Table, 5.3).
5.3 Russian Field Army Intervention Table (chart sheet, [5.3])
| Die | Balaclava | Inkerman | Tchernaya |
|---|---|---|---|
| 1 | 3 | 14 | 1 |
| 2 | 2 | 12 | 1 |
| 3 | 1 | 10 | – |
| 4 | – | 8 | – |
| 5 | – | 6 | – |
| 6 | – | 4 | – |
- Balaclava: # = number of Game-Turns during which British receive no artillery rounds.
- Inkerman: # = number of Allied infantry units removed from map for one Game-Turn. Units must be taken from British and/or French Right Siege Areas.
- Tchernaya: # = number of additional replacement units per Game-Turn Russian Player receives for remainder of game.
- – = No effect.
6.0 Reinforcements and Replacements
General Rule: During the game, both Players receive additional infantry and/or artillery units as reinforcements as noted on the Game-Turn Record Track. A reinforcing unit's Game-Turn of arrival is listed on the counter. Both Players are allotted, by nationality, a number of replacement units each Game-Turn. For each allotted replacement unit, a Player may return to play one infantry unit which, in a previous Game-Turn, was destroyed either by combat or attrition. The number of replacement units allotted each nationality depends on that nationality's replacement rate.
Procedure: During each Reinforcement/Replacement Segment, the Players determine what reinforcements and/or replacements are due and deploy all such units either on the map or in an off-map Supply Box.
Cases:
6.1 Deployment of Reinforcements and Replacements
6.11 Allied reinforcements and replacements are placed behind the appropriate section of the Allied Start Line according to nationality (exception, see Case 6.12). Alternatively, British units may be placed in the Balaclava Supply Box and French units in the Kameitch Supply Box. Mortar units must be placed directly in Mortar Firing boxes. Once deployed, mortar units may never be moved.
6.12 French reinforcements/replacements may be placed in the French Right Siege Area only if it has been previously occupied by French units.
6.13 Russian reinforcements/replacements may be placed anywhere within the Russian movement network except within an Enemy-occupied bastion or its Bastion Reserve Box. Alternatively, Russian units may be placed in the North Shore Supply Box. Russian mortar and siege gun units must be placed in a Firing Box.
6.14 Reinforcements must appear on the Game-Turn they are due to appear.
6.15 Only destroyed infantry units of the appropriate nationality can be utilized as replacements. Russian marines can never be replaced once destroyed. Replacements are not transferable between the British and French armies.
6.2 Replacement Rate
Each nationality's replacement rate indicates the number of infantry units of that nationality which may be replaced per Game-Turn.
6.21 At the start of the game, the Russian Player receives one replacement unit each Game-Turn. The Russian replacement rate may be increased (see 5.3, Field Army Intervention Table).
6.22 The Allied Player receives one French replacement unit each Game-Turn.
6.23 Beginning with the March 1855 Game-Turn and continuing thereafter each Game-Turn, the Allied Player receives one British replacement unit.
6.24 If there are no eliminated units of a given nationality available as replacements, those replacements are lost (they may not be accumulated from Game-Turn to Game-Turn).
6.3 Reinforcement Schedule
6.31 British Reinforcements
MARCH: Siege Gun Batt. 2
6.32 French Reinforcements
OCT II: 21/1/5, 41/1/5, 5LEG/2/5, 4ZOV/2/5, 4/LEG/BZ, 2/LEG/BZ, Siege Gun Batt. 2
DEC: 1/1/6, 2/1/6, 1/2/6, 2/2/6
JAN: 1/1/7, 1/2/7, 2/1/7, 2/2/7
FEB: 1/1/8, 2/1/8, 1/2/8, 2/2/8
APRIL I: 1/GREN/GD, 2/GREN/GD, 1/VOLT/GD, 2/VOLT/GD, 1/ZOUVE/GD, Mortar 2
JULY I: Siege Gun Batt. 3
6.33 Russian Reinforcements
OCT II: Res 1, Res 2, Res 3, Azov, Dnieper, Ch. Ukr., Coss Ft.
MARCH II: Grand Duke Michael
APRIL I: Tobolski, Ouglitch, Tchernigov, Vilno, Vinmanstrand, Vladimir, Tomsk, Volhynia, Minsk, Bialystok, Suzdal, Kamchatka, Ekaterinburg, Klunsk, Okhotsk
MAY I: North Shore, Alexopol, Kremenchoug, 11/Engineer
JUNE: Mouromsk, Penov, Praqa, Zemescz
JULY I: Poltava, Lunblin, Zeblinski
7.0 Attrition
Commentary: The Crimean War made Florence Nightingale famous, and not without reason. Poor logistical support combined with the generally hostile environment to render disease as deadly as siege guns.
General Rule: During the Attrition Segment of Game-Turns 5, 6, 7, 8 and 13, infantry units may be lost through attrition, which reflects the combined effects of disease and seasonally inclement weather.
Procedure: During the Attrition Segment, the die must be rolled once for each nationality, and the result cross referenced with the appropriate column on the Attrition Table (7.2). Results are applied immediately.
Cases:
7.1 How Attrition Is Applied
7.11 The die is rolled separately for each nationality to resolve attrition, and any resulting losses are applied immediately against units of that nationality (only).
7.12 The owning Player selects which particular units are to be eliminated from among any infantry units of the appropriate nationality currently deployed on the game-map or in a Supply Box. Note: Only infantry units may be eliminated by attrition.
7.13 During Winter Game-Turns, 1 is added to all Attrition die roll results.
7.14 For Game-Turns 8 and 13, 1 is subtracted from the British attrition die roll results. (Florence Nightingale had set-up a field hospital in Turkey). (Addenda correction: "For Game-Turns 8 and 13" should read "Game-Turns 8 through 18".)
7.15 For Game-Turn 13, 1 is added to the French die roll result.
7.2 Attrition Table (chart sheet, [7.2]). Number of units lost.
| Die | British | French | Russian |
|---|---|---|---|
| 0 | 1 | 1 | 0 |
| 1 | 1 | 1 | 1 |
| 2 | 1 | 1 | 1 |
| 3 | 2 | 1 | 1 |
| 4 | 2 | 1 | 1 |
| 5 | 2 | 2 | 1 |
| 6 | 3 | 2 |
Attrition Die Roll Modifiers:
- Add 1 during Winter Game-Turns.
- Add 1 to the French die roll during June 1855.
- Subtract 1 from the British die roll beginning with 1 March 1855.
8.0 Siege Battery Supply and Fire
Commentary: At Sevastopol, artillery dictated the pace and nature of the struggle. To counter the cannon, shovels were more effective weapons than rifles. Cannon determined that men would be forced to live in the parallels and saps for months. If not for severe artillery ammunition supply limitations, the siege would not have continued a bloody stalemate for years.
General Rule: There are three types of siege battery units: siege guns, mortars, and the Lancaster Battery. Each Game-Turn the players have the opportunity to stockpile a certain number of additional rounds of ammunition (as listed on the Ammunition Determination Chart, 8.18) for each type of siege battery unit. Any and all siege battery units which are in supply and deployed in firing position are eligible to fire. Targets must be in range (1200 yards) as measured by the range finder (exception: see Case 8.71). Generally, the shorter the range, the more effective the fire. Siege battery fire reduces the strength of bastions and damages siegeworks; siege battery fire may also destroy infantry units deployed in bastions and bastion reserve positions and in siegeworks. Such fire may also disrupt Allied artillery units deployed in siegeworks. Note: Field artillery units may not be fired during the Siege Battery Fire Segment.
Procedure: During the Ammunition Supply Segment, both Players check the Ammunition Supply Chart to determine whether sufficient units are deployed in their respective Supply Boxes to enable additional ammunition to be received (if any is due). Both Players' markers on the Ammunition Supply Track (8.19) are then adjusted to reflect any additional ammunition received. During the Siege Battery Fire Segment, both Players may fire all, some, or none of their eligible siege battery units. The Allied Player first has any of his eligible units fire rounds until he chooses to cease fire (or runs out of ammunition). Then the Russian Player has any of his eligible units fire rounds. The procedure for each individual round is as follows:
Step 1: The firing Player selects an eligible siege battery unit to fire and a target, using the Range Finder to determine the range.
Step 2: The firing Player rolls the die and modifies the result to account for range considerations.
Step 3: On the Siege Battery Fire Table (8.99) the horizontal line corresponding to the modified die roll result is cross referenced with the vertical column corresponding to the target's Siegework Strength Level to find the result (if any) of that round. Note: The horizontal line corresponding to a particular die roll on the Siege Fire Table varies depending on the type of the firing unit.
Step 4: All results are applied immediately.
Step 5: The firing Player adjusts the marker on his Ammunition Supply Track to reflect the expenditure of one round of ammunition.
Cases:
8.1 Ammunition Supply
Ammunition Supply is measured in rounds and is kept track of separately by nationality for siege guns, mortars, and the Lancaster Battery. A round is expended each time a siege battery unit is fired; the number of currently available rounds is displayed on the Ammunition Supply Track.
8.11 The Russian Player may receive additional siege battery unit ammunition during the Ammunition Supply Segment if and only if sufficient Russian units are deployed in the North Shore Supply Box. The number of additional rounds available as well as the number of Russian units which must have been deployed (during the preceding Russian Operational Movement Segment) to receive the ammunition are listed on the Ammunition Supply Chart.
8.12 The Allied Player may receive additional French and British siege battery unit ammunition if and only if sufficient units are deployed in the Kameitch and Balaclava Supply Boxes, respectively. See the Ammunition Supply Chart.
8.13 If sufficient units are deployed in the Supply Box corresponding to a particular nationality, the markers on the Ammunition Supply Track are adjusted to reflect the addition of the indicated number of rounds (by type) for that nationality.
8.14 If insufficient units are deployed in the Supply Box corresponding to a particular nationality, any additional ammunition scheduled to become available that Game-Turn is lost instead.
8.15 A maximum of two French units may be deployed in the Balaclava Supply Box to help the British to satisfy the requirements of Case 8.12. British units may never be deployed in the Kameitch Supply Box.
8.16 A siege battery unit may not fire unless one or more rounds are available (as displayed on the Ammunition Supply Track). Only rounds of the appropriate type and nationality may be fired (e.g., a British mortar unit may not fire if no British mortar rounds are available, regardless of French mortar round availability).
8.17 Unused rounds may be accumulated from Game-Turn to Game-Turn indefinitely.
8.18 Ammunition Determination Chart (chart sheet, [8.18]). Numbers represent the number of rounds available to unit types of the specified nationalities.
| Game-Turn | British Units | British Siege Guns | British Mortars & Lanc. | French Units | French Siege Guns | French Mortars | Russian Units | Russian Siege Guns | Russian Mortars |
|---|---|---|---|---|---|---|---|---|---|
| Oct I | 5 | 2 | 1 | 2 | 3 | 1 | 2 | 3 | 2 |
| Oct II | 5 | 2 | – | 3 | 3 | 1 | 2 | 3 | 1 |
| Nov I |
Column headed "Units" refers to the number of units that must occupy the Supply Box of the appropriate nationality in order for ammunition for that Game-Turn to be made available. Note: the Allied Player receives the indicated number of both mortar and Lancaster battery rounds. – = No rounds due that Game-Turn.
Scan note: the figures were read from a 150 dpi scan of the chart sheet.
8.19 Ammunition Supply Track (see map)
8.2 When a Siege Battery Unit Is in Supply
8.21 A French or British siege gun unit is in supply if one or more French (or British) siege gun rounds are available and if a path of contiguous siegework counters (which are not damaged) can be traced between the parallel in which the siege gun unit is deployed and the Allied Start Line (or the siege gun itself is behind the Start Line).
8.22 French (or British) mortar units, the Lancaster Battery, Russian siege gun units, and Russian mortar units are in supply if (respectively) one or more French (or British) mortar rounds, Lancaster Battery rounds, Russian siege gun rounds, and Russian mortar rounds are available.
8.3 Which Siege Batteries Are Eligible to Fire
8.31 Russian siege gun and mortar units must be deployed in the Mortar or Siege Gun Box of a bastion in order to fire.
8.32 Only unlimbered (Case 3.5) Allied siege gun units which are deployed in parallels or behind the Start Line, are capable of firing.
8.33 Allied mortar units and the Lancaster Battery unit may fire only if they are deployed respectively in Mortar Firing Boxes or the Lancaster Battery Firing Box.
8.34 Only siege battery units that are in supply (see Case 8.2) may fire. Note: There is no limit on the number of available rounds any one siege battery unit may fire in any one Game-Turn.
8.4 Which Targets May Be Fired Upon
8.41 Supplied Russian siege guns and mortar units may fire at Allied siegeworks (parallels and saps) which are within range.
8.42 Supplied Allied siege guns, mortars, and the Lancaster Battery may fire at Russian bastions which are within range.
8.43 Infantry units, artillery units, and leaders per se may never be fired upon by siege battery units. Only siegeworks, bastions, and Bastion Reserve Boxes may be fired upon. Note, however, that infantry and artillery units may be affected by siege battery fire (see Case 8.9, Siege Battery Fire Table and its effects).
8.5 How to Use the Rangefinder for Artillery
The edge of the Rangefinder is placed against the map such that it touches both the Range Point of the sighting unit and the Range Point of the target. The "0 yards" indication is lined up with the Range Point of the firing unit. Players determine the point along the Rangefinder on which the target lies. The range is the next highest indicated value on the Rangefinder. Printed on the Rangefinder are segments which delineate the effects of Range on Artillery Fire (Siege and Field). These effects are represented in terms of modifications to die roll results. For example, any die roll result for a siege battery fire resolution at a range of 450 yards would be decreased by 1.
8.51 When firing a siege gun or mortar unit deployed in a Firing Box of a Bastion, the Russian Player calculates the range from the Range Point of that bastion to the Range point of the target siegework counter.
8.52 When firing a siege or mortar unit deployed in a parallel or Firing Box, the Allied Player calculates the range from the center of the firing siege battery unit to the Range Point of the target bastion.
8.6 Effects of Range on Siege Battery Fire
8.61 The range of the Lancaster Battery is unlimited. Range never affects the fire of the Lancaster Battery.
8.62 The range of mortar units is unlimited. However, mortars are subject to the range considerations. If a mortar is firing at a range above 1200 yards, the range modifier used is the same as for 1200 yards.
8.63 The maximum range of siege guns is 1200 yards, with the effectiveness of the fire decreasing as the range is increased.
8.7 Mortars and the Lancaster Battery
8.71 There is no absolute range limitation on the fire of mortars or the Lancaster Battery. However, the effectiveness of mortar fire may be affected by range (see Case 8.6). The effectiveness of the Lancaster Battery is never affected by range.
8.72 If no Russian infantry units are deployed in the Bastion Positions of a bastion which is fired upon by an Allied mortar or Lancaster Battery, Russian infantry units in the Bastion's Reserve Box are used to satisfy losses inflicted by that fire.
8.8 The Mamelon
The Mamelon was a forward Russian position anchored by the Kamachaka Redoubt which was situated on the hill of the same name. The position was known as a "barbicon" — a "breakwater" — upon which the advancing tide of the Allied assault would spend much energy.
8.81 The Siegework Strength Level of the Mamelon is always two higher than its actual Strength for purposes of resolving siege battery fire. Thus, the Siegework Strength level of the Mamelon may never be reduced below 2 for purposes of siege battery fire resolution.
8.82 Should the Mamelon be captured, the bastion may be considered to be a free six parallel start line for purposes of French siegework construction. That is, two saps may be constructed out from the Mamelon.
8.83 The Mamelon In-Transit and Reserve Boxes are located within Sevastopol to conserve space on the mapsheet. The two Bastion Positions of the Mamelon closest to Sevastopol are considered to be connected to the Mamelon Bastion Reserve Box for all purposes.
8.9 Siege Battery Fire Table and Its Effects
Each result on the Siege Battery Fire Table is composed of three numbers. The first number indicates damage to the siegeworks, expressed in terms Siegework Strength levels destroyed (if the fire is directed at an Allied siegework counter, a "D" result may occur indicating that it is damaged). The current Construction Strength of each bastion is always indicated with a Siegework Strength Level marker (see Case 9.4). The second number indicates how many infantry units have been destroyed.
8.91 The Strength level of a Russian bastion may be reduced only by Allied fire directed at that bastion. Russian infantry units deployed in a Bastion Position (dots) may be destroyed by artillery fire only if it is directed at that bastion. The level of a bastion may never be reduced below zero.
8.92 Russian units deployed in Bastion Reserve Boxes may be destroyed by fire directed at the bastion by Allied mortar units or the Lancaster Battery. If and only if the Siegework Strength level of a Russian bastion is zero, all Russian infantry units currently deployed in the corresponding Bastion Reserve Box are considered to be in the bastion for purposes of siege battery fire resolution. Consequently such units may be destroyed by siege gun fire directed at the corresponding bastion only if the Bastion Strength is zero.
8.93 Leaders, engineers, and Russian artillery units are never affected by Allied siege battery fire.
8.94 Only Allied units deployed in siegework positions may be destroyed by Russian siege battery fire.
8.95 Allied siegeworks may be damaged by Russian siege battery fire. The counter representing the damaged siegework position is inverted in place on the map to indicate this status. Such siegeworks must be repaired before any new construction can take place within that Siege Area (see Case 9.3). No unit may be moved through a damaged Allied siegework position during Allied operational movement. Allied units may not be deployed in a parallel during operational movement if that parallel has been repaired during the preceding Allied Construction Segment. (A parallel which has been repaired during the preceding Allied Construction Segment is evidenced by the presence of an inverted unit.)
8.96 Any Allied artillery unit deployed in a parallel which is subsequently damaged is considered limbered and is placed behind the Allied Start Line. Allied artillery units can never be destroyed by Russian siege battery fire.
8.97 Surviving Allied infantry units deployed in a siegework position damaged by siege battery fire must be placed in the nearest Allied siegework position that satisfies the following two conditions:
- unoccupied by any Allied units
- nearer to the Allied Start Line than the damaged siegework position.
Should no such siegework position exist, the units are placed behind the corresponding sector of the Allied Start Line.
8.98 Certain results on the Siege Battery Fire Table indicate an ammunition dump explosion. If this occurs, the firing Player may destroy two of his rounds (any type). (Addenda correction: "May destroy" should read "must destroy".) The destroyed ammunition must correspond in nationality to the firing siege battery unit.
8.99 Siege Battery Fire Results Table (chart sheet, [8.99]). Target columns are Parallel or Sap, and Bastion Strength of 8-7, 6-5, 4-3, 2-1, and 0. Siege battery and mortar die results are read from the two die-roll rows.
| Die (Siege Batteries / Mortars) | Parallel or Sap | 8-7 | 6-5 | 4-3 | 2-1 | 0 |
|---|---|---|---|---|---|---|
| Mortars -2 | -/- | -/- | -/- | -/- | -/- | -/1 |
| -2 / -1 | -/- | -/- | -/- | -/- | -/- | -/1 |
| -1 / 0 | -/- | -/- | -/- | -/- | -/- | -/1 |
| 0 / 1 | -/- | -/- |
#/# = Bastion Strength losses / infantry unit losses; * = chance of ammunition dump explosion (see Case 8.98); D = Damaged. Note: Lancaster battery uses mortar die roll column.
Scan note: this table is the densest chart on the sheet. The die-value labels in the first two columns and the final row's cell count were hard to read at scan resolution; they are reproduced as the scan shows them and should be checked against the physical chart before relying on the final row. (Addenda clarification: after "Asterisk =" delete the words "chance of".)
9.0 Siegework Construction
Commentary: Siegeworks construction represents the actual digging of siegeworks and sapping toward the Russian defense positions. Siegeworks are constructed in order to move combat units and artillery closer to the Russian bastions so that the casualties taken by the assaulting troops is reduced as the distance between the "jump off" position and the Enemy defense position is reduced. Artillery was moved closer to be more effective in blasting breaches for Friendly assault troops to enter. Siege construction also represents the interlocking defense bastions by engineers and the strengthening of those bastions against Enemy attacks.
General Rule: Both Players have the capacity to construct and repair siegeworks. This capacity is measured in terms of Construction Points. The Allied Player expends Construction Points to build saps and parallels and to repair those that have been damaged. The Russian Player seeks to repair and upgrade the strength of his bastions. Construction, upgrade, and repair require the presence of troops (to do the digging) as well as Construction Points. Construction and upgrade (but not repair) requires the presence of an engineer. Engineers may provide "bonus" Construction Points. Allied construction is limited by the requirements that systematize the construction of siegeworks, and also by terrain considerations.
Procedure: During the Allied Siege Construction Segment, the Allied Player first "flips to the front side" any infantry unit counters which were utilized for construction during the previous Game-Turn. He then consults the Game-Turn Record Track (see game-map) to determine how many British and French Construction Points he is due. He then rolls the die for each nationality to determine if his Construction Points are augmented by that nationality's engineer officer's Initiative Bonus. He then expends each nationality's Construction Points as he chooses to repair any destroyed parallels or saps, and in Siege Areas in which an engineer is present, he may expend Construction Points of the corresponding nationality to construct new saps and/or parallels in accord with the restrictions of Case 9.3. As each new sap or parallel counter is placed on the map, the Allied Player must deploy two infantry units on the counter and flip them to their backside to indicate that they are engaged in construction. Units engaged in construction and repair (inverted to their backside) may not engage in operational movement or assault during that Game-Turn.
During the Russian Siege Construction Segment, the Russian Player determines how many Construction Points he is due. He then rolls the die to determine if his Construction Points are augmented by his engineer officer's engineer Initiative Bonus. He may expend Construction Points to "repair" (up to a siegework strength value of 3) any bastions. In addition, in the Siege Area in which the Russian engineer is deployed, the Russian Player may expend Construction Points to "upgrade" the siegework strength of a bastion with a strength of 3 or greater. The Russian Player then changes the strength level number for any bastions that have been repaired or upgraded to reflect the increased strength level. Note: The Russian Player may not move any units during the Russian Siege Construction Segment.
Cases:
9.1 Construction Points and Construction Costs
9.11 The expenditure of Construction Points is always optional. A Player is never required to expend Construction Points. However, unused Construction Points may not be accumulated from Game-Turn to Game-Turn.
9.12 Each Game-Turn, Players are limited to the number of Construction Points listed on the Game-Turn Record Track (plus any engineer Initiative Bonus; see 9.2). A Player may never expend more Construction Points in any Game-Turn than are available to him.
9.13 British Construction Points may not be used to execute French siegework repair or construction, and French Construction Points may not be used to execute British construction or repair.
9.14 The basic cost to construct a sap or parallel siegework position is 2 Construction Points. The basic cost may be increased, depending upon the terrain (see case 9.6, Terrain Effects Chart). If any part of a siegework counter is placed in a terrain type other than "flat" the construction rates for the less advantageous terrain are used. There is a 1 Construction Point cost to repair a sap or parallel, regardless of terrain.
9.15 Repair of a bastion costs 1 Construction Point per siegework Strength Level. Only bastions with a siegework Strength Level of between zero and 2 may be repaired, and only up to a level of 3.
9.16 Upgrade of a bastion costs 2 Construction Points per siegework Strength Level. Only bastions with a Siegework Strength Level of between 3 and 7 may be upgraded, and only up to a level of 8.
9.17 Construction Points may never be expended during winter Game-Turns.
9.2 Engineer Initiative Bonus and Engineer's Effects on Siegework Construction
The Russian Player has one engineer; the Allied Player has two (one French and one British). Each Game-Turn, the Players roll a die once for each engineer to try to obtain the engineer's "Initiative Bonus" of 2 Construction Points. An engineer must be present in a Siege Area for any construction or upgrading (not repair) to occur.
9.21 On a die roll of 1 through 4, the Russian Player may use the Russian Engineer's 2 bonus Construction Points in the Siege Area in which the engineer is deployed (only). On a roll of 5 or 6, the bonus Construction Points may not be used.
9.22 On a die roll of 1 or 2 the Allied Player may use the British engineer's 2 bonus Construction Points in the British Siege Area. On a die roll of 1 through 3, the Allied Player may use the French engineer's 2 bonus Construction Points in the Siege Area in which the engineer is deployed (only).
9.23 As indicated on the Game-Turn Record Track, on certain Game-Turns, the engineer Initiative Bonus (if obtained) for a particular engineer is 4 Construction Points.
9.24 An engineer must be deployed in a Siege Area for construction or upgrading to be executed (but not for repair).
9.25 French construction requires the presence of the French engineer in the corresponding Siege Area. British construction requires the presence of the British engineer.
9.3 Restrictions on Construction and Repair of Saps and Parallel Siegework Positions
Allied siegework positions are constructed in a series of lines of parallels joined to one another by perpendicular saps. A parallel line consists of one or more contiguous parallel counters. A sap consists of one sap counter. Only the Allied Player may expend Construction Points to construct saps and/or parallels. Before any new Allied construction may take place in a given siege area during the Allied Siege Construction Segment, all damaged siegework positions in that siege area must be repaired.
9.31 Any number of saps may be constructed from activated sections of Allied Start Line (see Case 3.1). Saps may not be constructed from sections of the Allied Start Line that have not been activated. One end of each sap counter is placed parallel to the Start Line, such that the counter juts out from it at a 90 degree angle.
(Diagrams on the sheet show a sap placed correctly at a right angle to the Start Line, and incorrect placements at other angles or lengths; see Example Below.)
9.32 A sap may also be constructed from a line of three or more parallel counters, provided that there is a continuous path of undamaged siegework counters between the line and the Allied Start Line. However, see Case 9.35.
See Example Below.
9.33 One or two parallels may be constructed at the end of a sap counter. The parallel counter(s) is placed adjacent and at right angles to the sap counter.
9.34 A parallel may be constructed adjacent to another parallel counter. At least one front corner (furthest from the Allied Start Line) of each counter must touch the front corner of the adjacent counter. The counters may not be placed so that a front angle is less than 90 degrees. However, see Case 9.36. See Example Below.
9.35 Only one sap may be constructed from a given line for every three parallel counters in that line at the time of construction. That is, a minimum of three parallels must be constructed in one line before a sap can be constructed from that line; a line must consist of at least six parallels to allow the construction of two saps, and so forth. No more than three parallel counters may be constructed from any one sap. That is, for a line to consist of more than three parallels, it must be connected to at least two saps. All such "supporting" saps must be closer to the Allied Start Line than the line is. Note above example.
9.36 A parallel may not be constructed from (or adjacent to) the Allied Start Line. A sap may not be constructed adjacent to another sap counter (exception, see Section 9.5).
9.37 In each siegework position (sap and parallel) constructed during the Allied Siege Construction Segment, the Allied Player must deploy two infantry units (the unit counters inverted on the siegework counters). In each siegework position repaired, one infantry must be deployed inverted. Only French units may be deployed in French-constructed siegeworks. Only British units may be deployed in British-constructed siegeworks (see Case 9.39).
9.38 Any Allied infantry unit on the map (of the proper nationality) may be deployed to satisfy the requirements of Case 9.37 except units in either Supply Box, the British and French guards division, and the British 1st Division. No unit used for construction and/or repair (inverted on a siegework counter) may be moved during the Operational or Tactical Movement Segments.
9.39 A siegework is "British" if it is within the British Siege Area. A siegework is "French" if it is within a French Siege Area.
Note: The Allied Player may utilize Siegework Positions newly constructed or repaired in a given Game-Turn to "build on" to the contiguous line which he must trace to the Allied Start Line (see Case 9.32). In other words, a Siegework counter may be built connecting to a Siegework counter which has just been placed on the Game-map during that turn, and in turn another Siegework counter may be connected to that Siegework counter once it is placed on the map.
9.4 Restrictions on Repair and Upgrade of Bastions
Only the Russian Player may expend Construction Points to repair and/or upgrade bastions. The current siegework Strength Level of each bastion is indicated with a Strength Level marker, which is placed on the game map next to that Bastion.
9.41 All bastions begin the game with a siegework Strength Level of 3. This is indicated by placing a 3 Siegework marker next to each Bastion.
9.42 For each Construction Point expended on the repair or upgrading of a bastion in a Game-Turn, the Russian Player must have deployed one infantry unit in that bastion during a preceding Operational Movement Segment (see Cases 9.15 and 9.16).
9.43 Any Russian infantry unit that has been moved into a bastion during a previous Operational or Tactical Movement Segment may be used to satisfy the requirements of Case 9.42 for that bastion only. Such units' movement in subsequent Russian Tactical or Operational Movement Segments is never restricted.
9.44 No bastion may have a siegework Strength Level greater than 8.
9.5 Construction Between Allied Siege Areas
The Allied Start Line is divided into three distinct sections delineating Siege Areas (see Case 3.1). This division is due to the presence of major ravines. The British center is considered to be one Siege Area, even though it is separated by a minor ravine. The different sections may be connected by the construction of saps. (This facilitates operational movement; see Case 10.1).
9.51 Sap counters are required to connect the French Left Siege Area with the British Siege Area. Either British or French units and Construction Points may be used to construct these saps, at the Allied Player's option.
9.52 Sap counters are required to connect the British Siege Area with the French Right Siege Area. Only British troops and Construction Points may be utilized to construct these saps.
9.53 Saps constructed between sections of the Allied Start Line are placed end-to-end between the ends of the sections of the line, linking them. This type of construction is the sole exception to Case 9.36.
9.6 Construction Point Cost Chart (chart sheet, [9.6])
| Terrain | Parallels | Saps |
|---|---|---|
| Flat or Hill | 2 | 2 |
| Depression | 4 | 4 |
| Ravine | Prohibited | 4 |
| Ravine | Prohibited | 4 (see 9.5) |
| Allied Start Line | Prohibited | 2 |
Construction of parallels and saps is prohibited in water, Sevastopol, parallels, saps, Assault Positions and Bastion Positions. (The printed chart lists "Ravine" on two rows; both are reproduced as printed.)
10.0 Operational Movement
General Rule: The Players may utilize Operational Movement to move infantry (for the Allies), siege guns, and (for the Russians) field gun units anywhere within their respective movement networks (see Case 3.5). Operational Movement occurs during the Operational Movement Segments (only) and is limited to the movement network — see Section 12.0, Tactical Movement, for an explanation of movement outside the network. Terrain has no effect. There are limits to the number of units that may be deployed in any one bastion or siegework. Once deployed, mortars, the Lancaster battery, and Russian siege batteries may never be moved.
Procedure: At the start of his Operational Movement Segment, the Allied Player flips any limbered siege gun counters over to indicate they are unlimbered. During his Operational Movement Segment, each Player may move all, some, or none of his units deployed on the map that are eligible to move within his movement network. Unit by unit, he picks up each counter and replaces it on the map in the desired location. All siege gun units moved are considered limbered.
10.1 How to Move Allied Units
10.11 The Allied Player may move any infantry units deployed in either of his Supply Boxes, behind the Allied Start Line, or deployed in any siegework position. Exception: Any infantry unit used to construct or repair siegeworks during the current Game-Turn (inverted) may not be moved.
10.12 The Allied Player may move any siege gun units deployed behind the Allied Start Line or in any siegework position. All siege gun units moved are considered limbered (see Case 3.5).
10.13 No more than two infantry units or one infantry and one siege gun unit may be deployed in any one parallel. It is possible to deploy only one siege gun or one infantry unit (or no units whatsoever) in a parallel.
10.14 No unit may be deployed in a completed sap. (Note that units constructing saps may not be moved and therefore must remain there during the Game-Turn the sap is constructed).
10.15 The Allied Player must move units so that it is possible to trace a line of contiguous siegework counters and/or the Allied Start Line between the initial position of the unit (at the start of the Operational Movement Segment) and its new position. A unit cannot be moved to positions to which it is impossible to trace a line from the unit's initial position. Exceptions: See Cases 10.21 and 10.22.
10.16 French units may be moved through but not deployed in a British siegework and vice versa (see Case 9.39).
10.2 Allied Operational Movement Between Siege Areas and Supply Boxes
French units may be moved to and from the Allied Supply Boxes and the French Left and Right Siege Areas (once the French Right Siege Area is activated — see Case 3.1). British units may be moved to and from the British Supply Box.
10.21 French units behind the Allied Start Line or deployed in siegework positions (to which a line of contiguous siegework counters may be traced from the start line) may be moved to either Allied Supply Box and vice versa. Exception: If saps connecting the French Left and Right Siege Areas with the British Siege Areas have not been constructed (see Case 9.5), only French units deployed in the French Left Siege Area at the beginning of the Operational Movement Segment may be moved to a Supply Box and vice versa.
10.22 British units behind the Allied Start Line or deployed in siegework positions (to which a line of contiguous siegework counters may be traced from the Start Line) may be moved to the British Supply Box, and vice versa.
10.23 There is no limit to the number of units which may be placed in a Supply Box (see Case 8.1).
10.24 If and only if saps connect the French Left and Right Siege Areas with the British Siege Area, French units may be moved between those areas during the Operational Movement Segment in accordance with Case 10.15.
10.25 If saps connecting only one French Siege Area with the British Siege Area have not been constructed, French units may be moved between the French Siege Areas, but such movement takes a full Game-Turn to complete. Any unit so moved is removed from the game-map for one Operational Movement Segment and returned and deployed in its destination Siege Area during the next Game-Turn's Operational Movement Segment. Note: If a unit is so moved to the French Right Siege Area, it must be deployed behind the Allied Start Line in its Turn of arrival. This restriction does not apply to units moved to the French Left Siege Area.
10.26 If neither French Siege Area is connected to the British Siege Area, movement of French units between the French Siege Areas takes two full Game-Turns. Units so moved to the French Right Siege Area must be deployed behind the Start Line on the Turn they arrive. For example, if the Allied Player decided to move a French unit from the French Left Siege Area to the Right Siege Area during the Operational Movement Segment of Game-Turn 7, he would remove the unit from the map, and in the Allied Operational Movement Segment of Game-Turn 9, he would return the unit to the map and could deploy it behind the Start Line in the French Right Siege Area. The Allied Player should note the destination and Game-Turn of arrival of any French units being moved between Siege Areas to avoid confusion.
10.27 No French units may be moved to the French Right Siege Area under any circumstances until it has been activated (see Case 3.5).
10.3 Restrictions on Russian Operational Movement
Russian units deployed on the Game-Map may be moved through Operational Movement to any bastion, Reserve Box, In-Transit Box, Bastion Position, or to the Russian Supply Box, providing that:
- A. Any bastion or bastion reserve box moved to has not been captured (see Case 11.2), and
- B. It is possible to trace a path of connected In-Transit Boxes and Bastion Reserve Boxes and/or Bastion Positions from the unit (at the start of the Operational Movement Segment) to its new position which does not include a captured Reserve Box.
10.31 There is no limit to the number of Russian infantry and/or field artillery units that may be placed in the Russian Supply Box, any In-Transit Box, or any Bastion Reserve Box. Exception: Only two units maximum may be deployed in the Mamelon In-Transit Box.
10.32 Only one infantry or field artillery unit may be deployed in each Bastion Position (Russian units may attack into but never enter an assault position). Thus the number of units which may be deployed in any one bastion is limited by the total number of positions — e.g., 8 in the Mast bastion. (Addenda correction: there are 10 Bastion Positions at the Mast Bastion, not 8.)
10.33 Russian siege battery units once deployed in bastion Siege Gun or Mortar Boxes may never be moved.
10.34 Russian, field, and marine field artillery units are never considered "limbered", even if they are moved.
10.4 Movement of Leaders
All Commanders-in-Chief and Engineer Officers are treated exactly as infantry units of their respective nationalities for purposes of operational movement.
10.5 Garrison of Parallels
At the end of the Allied Operational Movement Segment, and at the end of an Assault Phase (see Case 11.2), the Allied Player must garrison his four forwardmost parallel counters in each Siege Area. To garrison a parallel, at least one Allied infantry unit must occupy the parallel (units used to construct the parallel may be used). If the garrison requirements are not met in a given Siege Area for any reason at the end of the Operational Movement Segment or Assault Phase, four Allied units of that Siege Area's nationality are eliminated (Allied Player's choice of specific units) and the four forwardmost parallel counters in that Siege Area are damaged (simulating a Russian night sortie). This process could occur twice in a Game-Turn, once after Operational Movement and once at the conclusion of an Allied assault.
11.0 The Assault Phase
Commentary: Siege of Sevastopol employs two time scales. The first time scale concerns the operational "business" of the siege; i.e., construction, siege battery fire, Operational Movement, ammunition supply, etc. These are activities which encompass the periods of time shown on the Game-Turn Record/Reinforcement Track. However, major assaults were undertaken rarely as they required much preparation and resulted in many casualties. The other time scale represents the events of a day and is represented abstractly by the Assault Phase. The five Impulses which comprise the Assault Phase enable five successive waves of infantry or columns of infantry to move across the map to assault Enemy positions or to counter-attack such assaults.
General Rule: The Assault Phase consists of five Impulses, each of which is broken down into six segments (see the Sequence of Play, 4.0). Each Impulse may be considered a "turn within a turn". The Assault Phase is not mandatory and takes place only if the Allied Player announces that he wishes to conduct an Assault. During the Assault Phase the Allied Player may utilize Tactical Movement (Section 12.0) and Melee (Section 14.0) to move Activated Units (Case 11.1) out of the forwardmost parallel to capture (Case 11.2) one or more Russian bastions. In turn, the Russian Player uses Tactical Movement, Field Battery Fire (Section 13.0) and Melee to reinforce and defend his threatened bastions.
11.1 Activation of Allied Units
Whenever the Allied Player decides to conduct an Assault, he must determine how many of his units he can utilize for it. Depending upon which leaders are in command of the British and French Armies (see Section 16.0), a certain number of Brigades from each will be "Activated" during the Initiative Segment of the first Impulse. The Allied Player may select any particular Brigades from among those on the map up to the limits listed in Section 16.0. Those units — and only those units — which are part of the specific Brigades selected during the Initiative Segment may be utilized by the Allied Player during the Assault Phase. Note: Eliminated units may not be replaced by other units not part of that Brigade. In addition, the British may activate any part of the Guards Division only once per game and the two British independent Naval units (Marines) may be activated for free during any assault.
11.2 How an Assault Ends
11.21 At the end of the fifth Impulse of an Assault Phase all Allied units which are not used to garrison a captured bastion are placed behind their respective Allied Start Lines. Then as needed, Allied units are placed in the forwardmost parallels to satisfy garrison requirements (Case 10.5).
11.22 If at the end of the Fifth Impulse of an Assault Phase a Russian bastion is captured, three Allied units which are within that bastion must remain there for garrison. If a unit is specified as a garrison unit for a captured bastion it remains in that bastion for the remainder of the game.
11.23 During the Allied Tactical Movement Segment the Allied Player may select to abort his Assault. If he selects this option place the Allied units as per Case 11.21.
11.3 Capture of a Bastion and Its Effects
11.31 A bastion is considered "Captured" if at the end of the fifth Impulse of an Assault Phase there are no Russian units in any Bastion Position of that bastion and at least three Allied units in Bastion Positions of that bastion. If within a bastion both these conditions are not met at the end of the fifth Impulse of an Assault Phase the bastion is not captured and all Allied units in that bastion are placed behind the Allied Start Line as per Case 11.21.
11.32 If at the end of an Assault a bastion is captured by the Allied Player, that bastion's Reserve Box is considered captured. Any Russian units which are within that bastion's Reserve Box are immediately deployed in an adjacent Bastion Reserve Box or In-Transit Box (see Case 10.3A).
12.0 Tactical Movement
General Rule: During his Tactical Movement Segment, the Allied Player may move infantry units (only) out of parallels and across the open field utilizing the Rangefinder. He may also move infantry units utilizing parallel line (Case 3.5) to parallel line movement. And he may move infantry units that are deployed in Bastion Positions, subject to limitations imposed by the presence of Russian units.
During his Tactical Movement Segment, the Russian Player may move infantry units only (field Batteries may not be moved) that are deployed in Bastion Positions to other Bastion Positions, subject to the limitations imposed by the presence of Allied units. He may also move infantry units in Bastion Reserve Boxes and/or units in In-Transit Boxes; such units may be moved from the box they are in to a second box directly connected to the first, or from a Bastion Reserve Box to a connected unoccupied Bastion Position.
Procedure: Each unit is moved individually. To move a unit across the open field, the Allied Player lines the "0 yards" marker on the Rangefinder with the forward edge of the unit's counter and advances the unit such that the edge is lined up with the "150 yards" mark. To move a unit deployed in a bastion, the owning Player moves the unit from the position along the lines connecting them until the unit is deployed satisfactorily (or has to stop due to the presence of an Enemy unit). To move a unit deployed in a rear parallel line, the Allied Player moves it forward to any parallel counter within the next parallel line. To move a unit in a Transit Box or Bastion Reserve Box the Russian Player moves the unit from one box to another or from a Bastion Reserve Box to a connecting Bastion Position.
Cases:
12.1 Open Field Movement (Allied Units Only)
12.11 Only Allied units activated for an assault (see Case 11.1) may be moved by Open Field Movement.
12.12 Activated Allied units deployed in a Parallel (even a rear Parallel), plus any units already sent over the top in the current Assault Impulse may be moved by open field movement. However, once a unit has utilized open field movement during an Assault Impulse that unit may not be moved using Parallel Line to Parallel Line movement during the rest of that Assault Impulse.
12.13 In any Tactical Movement Segment in which an Allied unit is moved such that its counter or any part of its counter is deployed on an Assault Position, the unit is immediately centered on that Assault Position.
12.14 Terrain lines have no effect on Open Field Movement.
12.15 Units may be moved only 150 yards each Tactical Movement Segment.
12.16 Russian units may never be moved by Open Field Movement.
12.17 No Allied infantry unit may ever be placed on top of another Allied infantry unit during Open Field Movement.
12.2 Parallel Line to Parallel Line Movement (Allied Units Only)
12.21 During the Allied Tactical Movement Segment units which are in a Parallel counter of a rear Parallel (further away from the enemy) or behind the Allied Start Line may be moved forward into any Parallel counter of next forward Parallel Line.
12.22 Units may be moved forward one Parallel Line each Tactical Movement Segment.
12.23 When moving a unit utilizing Parallel Line to Parallel Line Movement the Allied Player must trace a line of undamaged Parallels and/or Saps between the unit's original position and the Parallel line the unit is moved to.
12.24 Allied units which are in a Parallel counter of a Parallel Line may be moved to a Parallel counter within the same Parallel Line during the Allied Tactical Movement Segment (subject to Case 12.23).
12.25 The limitations on the number of units which may be deployed in one siegework position (see Case 10.13) must be observed during the Tactical Movement Segment.
12.3 Intra-Bastion Position Movement
12.31 Only infantry units which begin the Tactical Movement Segment deployed in a Bastion Position which is not connected to a Bastion Position in which an Enemy unit is deployed may be moved from one Bastion Position to another (exception: see Case 12.34).
12.32 Movement of units must be from one Bastion Position to another directly connected Bastion Position. There is no limit on the number of Bastion Positions through which a unit may move in one Tactical Movement Segment, so long as each Bastion Position is directly connected to the last.
12.33 Russian units (only) which begin the Russian Tactical Movement Segment in a Bastion Position which is connected to the Bastion Reserve Box directly or through other Bastion Positions which are not in violation of Case 12.35 may be moved into that Bastion Reserve Box during the Russian Tactical Movement Segment.
12.34 Russian units (only) which begin the Russian Tactical Movement Segment in a Bastion Reserve Box may be moved into a Bastion Position which is connected to that Bastion Reserve Box. Once in that Bastion Position the Russian unit may continue moving subject to Cases 12.31, 12.32, and 12.35.
12.35 A unit moved to a Bastion Position directly connected to a Bastion Position occupied by an Enemy unit must stop and may be moved no further that Tactical Movement Segment.
12.36 The one-unit-per-Bastion-Position limitation remains in effect during the Tactical Movement Segment. Consequently, no unit may be moved to or through a Bastion Position occupied by another unit.
12.4 Bastion Reserve Position and Transit Box Movement (Russian Units Only)
12.41 Only infantry units deployed in Bastion Reserve Positions or Transit Boxes may be moved to other Bastion Reserve Boxes or Transit Boxes during the Russian Tactical Movement Segment. Only units in the Bastion Reserve Box may be moved to connecting Bastion Positions.
12.42 A unit may be moved from one Transit Box or Bastion Reserve Box to one other directly connected Transit Box or bastion Reserve Box per Game-Turn.
12.43 A unit may not be moved to an Allied-captured bastion Reserve Box during the Tactical Movement Segment (or any other time either).
13.0 Russian Field Battery Fire
General Rule: The Russian Player has a number of field batteries which may be utilized to fire at Allied Combat units during the Assault Phase. Unlike siege batteries, field batteries are not fired during the Siege Battery Phase and their fire has no effect on siegeworks. All Russian field batteries deployed in Bastion Positions are eligible to fire. Targets must be within range (600 yards) as measured on the Rangefinder. Field Batteries may not be fired at an Allied unit located in a Bastion Position other than the Bastion Positions of the bastion from which they are being fired. Field battery fire is resolved using the 2-1 column on the Melee Combat Results Table taking into account the terrain (see Terrain Effects Chart, 9.6) that the target unit is in. Note: Field battery units may be fired only during the Russian Field Battery Fire Segment of the Assault Phase.
Procedure: During the Russian Field Battery Fire Segment, the Russian Player may fire all, some, or none of his eligible field battery units. To be eligible to fire, a field battery must be deployed in a Bastion Position. The procedure for firing is as follows:
Step 1: The Russian Player selects a field battery to fire and an Allied Combat unit within range (600 yards) as a target using the Rangefinder to determine the range.
Step 2: The Russian Player rolls the die and modifies the result to account for range considerations.
Step 3: The modified die roll result is referenced to the 2-1 column of the Melee Combat Results Table and resolved according to the rules for Melee Combat (see Cases 14.2 and 14.3). Exception: When engaging in field battery fire, field batteries are never affected by adverse combat results.
When calculating the Range between the Field Battery and the target unit, the Range is calculated from the center of the field battery counter to the center of the target unit. Note: this method is different from the method used for calculating siege battery fire.
If any part of the counter of the target unit of a Russian Field Battery Fire is located in a Depression (see Case 9.6) the Field Battery may fire twice at the unit.
If any part of the counter of the target unit of a Russian Field Battery Fire is located in a Ravine (see Case 9.6) the Field Battery may fire three times at the unit.
When resolving Russian Field Battery Fire the die roll may be modified by Cases 14.22 and 14.23.
14.0 Melee
General Rule: During each Player's Melee Segments, he may have Friendly infantry units attack Enemy units developed in Bastion or Assault Positions. Units which are involved in Melee Combat may be eliminated, routed, or forced to retreat. When a unit is retreated or eliminated as a result of Melee Combat, the victorious Player may occupy the vacated Bastion Position with one of his units which was involved in the combat.
Procedure: The Player whose Melee Segment is in progress is termed the attacking Player. The attacking Player determines what attacks (combats) he will conduct and proceeds to resolve them one-by-one in any order he chooses. For each combat, the attacking Player totals the Strength Points of all his attacking units and compares it to the Strength Point value of the defending unit. This comparison is expressed as a mathematical ratio of attacker to defender. For example, if two units with a total combat Strength Point value of 13 attacked one unit with a combat Strength Point value of 4, the ratio would be 13-4. The ratio is then reduced to one of the simplified ratios found on the Melee Combat Results Table (14.26), rounding off in favor of the defender if necessary. For example, the 13-4 ratio would be reduced to 3-1; 17-6 would be reduced to 2-1. The attacking Player then rolls the die and adjusts the result if required (see Cases 14.21, 14.22, and 14.23). The die roll result (as adjusted) is cross referenced with the simplified ratio on the Melee Combat Results Table. The result will indicate whether either (or both) the attacking unit(s) and/or defending unit are subject to incurring an adverse morale effect as a result of the combat (exception, see Case 14.25). For each unit subject to an adverse morale result, the owning Player rolls the die once for each such unit and refers to the appropriate column(s) of the Morale Effects Table (depending on the unit's Morale Class, see 3.22), adjusting the die roll for Cases 14.32 through 14.35). Any elimination, rout, and/or retreat effects are applied immediately, and victorious units may then be advanced. All such effects must be applied, and any advances conducted prior to the resolution of the next combat.
Cases:
14.1 Which Units May Attack and Which Units May Be Attacked
14.11 During a given Player's Melee Segment, only Friendly infantry units in Bastion or Assault Positions or Bastion Reserve Boxes may attack.
14.12 A Player may have one of his units attack an Enemy unit if and only if his unit is deployed in a Bastion Position or Assault Position directly connected to the Bastion or Assault Position in which the Enemy unit is deployed.
14.13 A Player may combine any number of units in an attack against an Enemy unit so long as each attacking unit is deployed in a directly connected Bastion or Assault Position in accordance with Case 14.12. Remember that only one unit may be deployed in any one Bastion Position or Assault Position at any one time.
14.14 No more than one Enemy unit may be attacked in any one combat.
14.15 No unit may attack, nor may any unit be attacked more than once in any one Melee Segment.
14.16 Melee combat is voluntary for the attacking Player. During his Melee Segment, a Player is never required to conduct Melee attacks. He conducts as many attacks as he desires involving whatever units he desires in accordance with the restrictions listed in this Section.
14.17 Russian field battery units deployed in Bastion Positions may be attacked by Allied infantry units and defends at a strength of 2. Such units cannot perform melee attacks. See Case 14.25 for the effects of Melee combat on field artillery units.
14.18 During the Russian Melee Phase, each Enemy-occupied Bastion Position connected to a Bastion Reserve Box may be melee attacked by one Russian unit deployed in that Bastion Reserve Box. Allied units may never melee with Russian units deployed in any Bastion Reserve Box.
14.2 The Melee Combat Results Table
14.21 One is added to the die roll result for any melee attack made against a Russian unit.
14.22 One is subtracted from the die roll result for any melee or field battery fire attack made against a French unit (exception: Case 14.23).
14.23 Two is subtracted from the die roll result for any melee or field battery fire attack made against a French Zouave unit or any English unit.
14.24 Whenever an infantry unit is the object of an attack and receives a result, the Morale Effects Table (14.37) is consulted in accordance with this Section's Procedure.
14.25 Whenever a Russian field battery unit is the object of an attack and receives a result, the unit is placed in the corresponding Bastion Reserve Box. Field artillery is never eliminated (the gunners ran away). Note that field battery units may be fired during the Russian Field Battery Segment utilizing the 2-1 column of the Melee Combat Results Table; see Section 13.0.
14.26 Melee Combat Results Table (chart sheet, [14.26]). Combat ratio is attacker strength to defender strength.
| Die | 1-3 | 1-2 | 1-1 | 2-1 | 3-1 | 4-1 | 5-1 | 6-1 |
|---|---|---|---|---|---|---|---|---|
| -1 | A | A | A | A | A | A | A | A |
| 0 | A | A | A | A | A | A | A | B |
| 1 | A | A | A | A |
A = Attacker affected; D = Defender affected; B = Both Attacker and Defender affected. Affected Player must roll die on Morale Hit Table (14.37). Note: Field batteries fire on the 2-1 column; no Defender results apply in field battery fire.
Scan note: the Morale Hit Table (14.37) that the chart cites is not on the scanned chart sheet and is not reproduced.
14.3 The Morale Effects Table
14.31 There are four columns on the Morale Effects Table, each one corresponding to a Morale Class (see Case 3.22). The die roll for each affected unit is cross referenced with the column representing the unit's Morale Class.
14.32 Two is subtracted from the morale die roll result for any unit in an assault position that was involved in an attack against a Russian unit in a bastion with a Bastion Strength Level of 4 or greater during the current Allied Melee Segment.
14.33 One is subtracted from the morale die roll result for any unit in an Assault Position that was involved in an attack against a unit with a Strength Level of 2 or 3 during the current Allied Melee Segment.
14.34 One is subtracted from any morale die roll result which applies to a unit that has been retreated once previously in that Assault Phase. (Players must note on a separate sheet of paper which units have been routed or retreated.)
14.35 Additions and/or subtractions made to a die roll result for Morale Effects are cumulative. Thus, for example, 3 would be subtracted from the morale die roll result for a previously retreated Allied unit in an Assault Position which was involved in an attack against a Russian unit in a bastion with a strength level of 5.
14.36 Morale Effects Table (chart sheet, [14.36]). Columns are Morale Level.
| Die | A | B | C | D |
|---|---|---|---|---|
| -1 | E | E | E | E |
| 0 | E | E | E | E |
| 1 | R | E | E | E |
| 2 | 2 | R | E | E |
| 3 | 1 | 2 | R | R |
| 4 |
E = unit eliminated; R = unit routed; 1,2 = retreat (see Case 14.5); – = no effect.
14.4 Morale Effects
Possible morale effects include E, R, 1, and 2. Note that only infantry units are subject to morale effects; see Case 14.25 for the effects of Melee combat on field artillery units.
14.41 An E result results in the permanent elimination of the unit in question for the remainder of the game. It is removed from the map. Note that an advance may be possible (see Case 14.6).
14.42 An R effect results in a unit being rendered useless for the duration of the current Assault Phase. Routed Russian infantry units are removed from the map and automatically returned during the Reinforcement Segment of the next Game-Turn. These units do not count towards the replacement rate. Routed Allied units are placed behind the Allied Start Line and may not be moved again that Assault Phase. Note that an advance may be possible.
14.43 A 1 or 2 effect results in the compulsory retreat of the affected unit (see Case 14.5). An advance may be possible. Note that unlike routed units, retreated units may be moved and attack during subsequent Tactical Movement and Melee Segments of the current Assault Phase.
14.5 Retreat of Infantry Units
A unit incurring a 1 or 2 effect must be retreated by the owning Player to either an unoccupied Bastion Position (or Assault Position for Allied units only) or to the nearest unoccupied parallel (Allied units only) or corresponding Bastion Reserve Box (Russian units only).
14.51 A unit may never be retreated into (or through) a Bastion or Assault Position if that position is occupied and/or directly connected to a position occupied by an Enemy unit.
14.52 A Russian unit to which a 1 effect applies must be retreated to a Bastion Position directly connected to the position it is deployed in. Alternately, if and only if a Russian unit's position is directly connected to the Bastion Reserve Box, the unit may be retreated there. If a unit cannot be so retreated within the restrictions of Case 14.51, it is instead eliminated.
14.53 A Russian unit to which a 2 effect applies must be first retreated one position in accordance with Case 14.52. If the unit is retreated into the Reserve Box, its retreat is considered completed. However, if the unit is retreated to a second Bastion Position, it must once again be retreated to a third Bastion Position, again in accordance with Case 14.52. The third (final) Bastion Position must not be directly connected to the unit's original position. If the unit cannot be so retreated, it is eliminated.
14.54 An Allied unit to which a 1 effect applies must be retreated to a Bastion or Assault Position directly connected to the position it is deployed in. Alternately, if the unit is deployed in an Assault Position, it may be retreated to the nearest unoccupied (or occupied with one unit) parallel. If the unit cannot be so retreated within the restrictions of Case 14.51, it is instead eliminated.
14.55 An Allied unit to which a 2 effect applies must first be retreated in accordance with Case 14.54. If the unit is retreated to a parallel, its retreat is considered completed. However, if the unit is retreated to an Assault Position, it must then be retreated to the nearest unoccupied (or occupied with one unit) parallel. Or, finally if the unit is retreated to a second Assault Position, it must then once again be retreated to a third position, as in Case 14.53. The unit is eliminated if such a retreat is not possible.
14.6 Advance After Combat
In any Melee combat in which one Player's unit(s) is eliminated, routed, or retreated and the other Player's unit is not affected, the second Player's victorious unit may be advanced into the vacated position of the eliminated, routed, or retreated unit.
14.61 Units may only be advanced into Bastion Positions.
14.62 The victorious Player has the option of advancing any one victorious attacking unit in the event that more than one is eligible to occupy a vacated Bastion Position.
14.63 If a unit suffers a 2 result the Victorious Player has the option of advancing a unit which participated in the attack into the second Bastion Position vacated and another unit which participated in the attack into the first Bastion Position vacated. An advancing unit may advance into or through an Assault Position which is directly connected to a position occupied by an Enemy unit.
14.64 An Allied unit may never be advanced into a Bastion Reserve Box.
14.65 A Russian unit may never be advanced into an Assault Position.
14.66 If, at the end of the Allied Movement Segment, an Allied unit occupies an assault position which is connected to an unoccupied bastion position, that Allied unit may be advanced into that bastion position.
15.0 Winter
General Rule: The three Game-Turns of December, January, and February constitute Winter. During Winter, the following parts of the Sequence of Play are skipped: the Russian Field Army Intervention Segment, the Allied Siege Construction Segment, the Assault Phase, and the Russian Siege Construction Segment. During each Winter Game-Turn, each of the armies is subject to Attrition (see Section 7.0).
16.0 Leaders
Cases:
16.1 Allied At-Start Commanders: At the start of play, Lord Raglan is the Commander-in-Chief for the British, and Canrobert is the Commander-in-Chief for the French.
16.11 Lord Raglan may activate 2 British brigades.
16.12 Canrobert may activate 3 French brigades. Note: the French Guard Division comprises 2 brigades.
16.2 Replacement of Lord Raglan: In July 1855, Lord Raglan died and was finally replaced with a new leader. Two men were in line to replace him — Simpson and Campbell. Campbell, the abler of the two, was passed over for the command for political reasons (he was Scottish). On the July 1 1855 Game-Turn, roll the die to determine who replaces Lord Raglan.
| Die Roll | Commander | Brigades Activated |
|---|---|---|
| 1-4 | Simpson becomes C-in-Chief | Three Brigades |
| 5-6 | Campbell becomes C-in-Chief | Four Brigades |
16.3 Replacement of Canrobert: As the major participants in the siege, the French wanted action as well as little loss of life as possible. Thus, the French Commander was constantly under pressure to be doing the exact opposite of whatever he was doing at the time. If Canrobert fails in an assault (loses four units), he is replaced. On the turn following an unsuccessful assault, the die is rolled to replace Canrobert.
| Die Roll | Commander | Brigades Activated |
|---|---|---|
| 1-4 | Pelissier becomes C-in-Chief | Four Brigades |
| 5-6 | Bouquet becomes C-in-Chief | Three Brigades |
(The printed table and text spell the name "Bouquet"; the general intended is Bosquet.)
If this new Commander-in-Chief fails in a succeeding assault he is automatically replaced with the third Commander-in-Chief not selected when replacing Canrobert (e.g., if Bouquet is selected to replace Canrobert and he fails, he would be replaced with Pelissier).
17.0 Russian Marine Field Batteries
The Russian Black Sea Fleet Base and Naval Arsenal was located in Sevastopol. During the siege large guns were stripped from the fleet and dragged to the Bastions to replace previously destroyed Batteries never exhausting the supply. Where the Russians faced limits however was in the supply, of trained gunners.
17.1 During the Reinforcement/Replacement Phase of any Game-Turn the Russian Player may replace any one of his four Marine Battery Infantry units with a Marine Field Battery. Once placed on the map the Marine Field Battery is treated as any other Field Battery. Once a Marine Field Battery Infantry has been replaced with a Field Battery it may not be replaced with the Infantry unit.
18.0 Enfilade Fire
The Parallel siegework is so named because the trench is built parallel to the enemy position, thus guarding from enfilade fire. If a trench were built such that the enemy artillery could fire along its length, the "bowling alley" effect would destroy everything in the siegework.
18.1 If, at the end of any Allied Siege Construction Segment, the Russian Player can trace a line from any point within Sevastopol or the Mamelon (if the Mamelon is in Russian hands) between the parallel lines printed on the parallel counter and out the other side of the counter, and the parallel is within 1200 yards of that point, the parallel counter and the units constructing it are destroyed (removed from the map) with no siege battery ammunition expenditure. (It would take very few rounds to destroy the parallel.) Saps are immune to enfilade fire.
(The rulebook illustrates this with a diagram of a line of "Successful Enfilade Fire" running along a parallel toward "Any point within Sevastopol".)
19.0 Victory Conditions
General Rule: As in any siege, victory rests on the besiegers' success in capturing the enemy fortress. In order to procure victory, the Allied Player must capture at least two bastions (see Case 11.2), a major bastion and a minor bastion (or two major bastions). The Malakoff, the Great Redan, the Mast Bastion, the Central Bastion, and Red Rotislaw are major Bastions; the Mamelon, Little Redan, and Quarantaine are minor Bastions. The Russian Player wins if the Allied Player has failed to capture two bastions by the end of the game.
Omitted from this transcription: the publisher's Designer's Notes and Historical Notes on the final page of the rules, which are commentary rather than rules, and the credits block.
Errata and Addenda (Art of Siege Warfare Addenda, October 1979)
The SPI addenda sheet, "Art of Siege Warfare: Addenda as of October 1979", corrects the Sevastopol rules as follows. Each item is transcribed as printed; where it applies to a case above, the correction is also noted in-line in that case.
Game-Turn Record Track: The Engineer initiative is 4, as per Case 9.23, when an asterisk is indicated on the Game-Turn Record Track.
Rules:
- [3.0, Major Terrain Types] (correction) All references, in the rule to the Terrain Effects Chart, should be to the Construction Points Cost Chart (9.6).
- [6.33] (correction) The Russian unit Grand Duke Michael enters during Game-turn 8 (March). This is not noted on the Turn Record Track.
- [7.14] (correction) "For Game-Turns 8 and 13" should be "Game-Turns 8 through 18."
- [8.98] (correction) "May destroy" should be "must destroy."
- [8.99] (clarification) After "Asterisk =" delete the words "chance of."
- [9.23] (addition) The presence of Engineer Initiative is indicated on the Game-Turn Record Track by the presence of an asterisk next to a nationality's construction points.
- [10.32] (correction) There are 10 Bastion Positions at the Mast Bastion, not 8. In addition, the Russian Engineer does not count as a unit for purposes of deployment.
- [10.5] (clarification) This section refers to undamaged parallels.