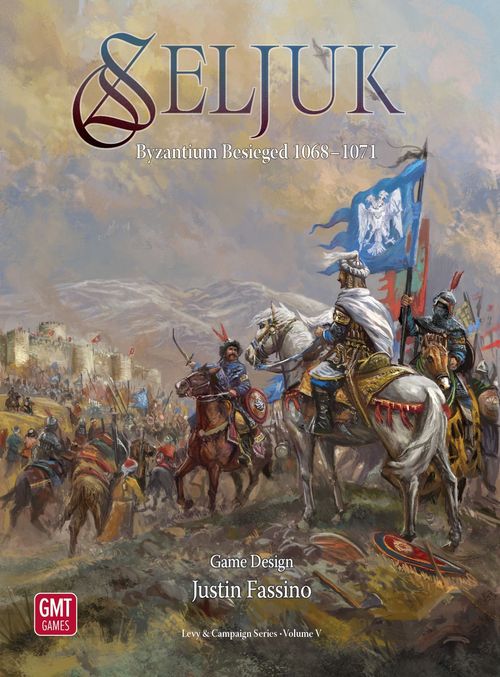
Seljuk: Byzantium Besieged, 1068-1071
Seljuk: Byzantium Besieged, 1068-1071 Rulebook
Table of Contents
Table of Contents
- Summary of Seljuk Changes from Nevsky
- 1.0 Introduction
- 2.0 Setup and Calendar
- 3.0 Levy
- 4.0 Campaign
- 5.0 Victory
- 6.0 Optional Rules
- 7.0 Scenarios
- Key Terms
- Errata and Clarifications (GMT, 2026)
Summary of Seljuk Changes from Nevsky
- Strongholds: Types are Fort, Town, and City; VP Value equals Size (1.3.1).
- Holding Boxes: Certain Seats are map-edge Locales that only the owning Lord may enter. When unavailable for Muster, Lords Muster in an allied Holding Box (3.4.1).
- VP Markers: 1 VP Roman Conquered, ½ VP Ruins, ½ VP Ravaged (1.3.1, 4.5.5).
- Ways: The types are Road and Pass (1.3.1).
- Turns: Each Turn is Seasonal (three months/90 days) (1.3.2).
- Seasons: Spring, Summer, Autumn; there is no Winter Campaign season (4.7.6).
- Lords: Commanders replace Marshals and have additional rules about using Coin (3.2.1).
- Forces: Units include new types; Lord's Force size is now 8 before incurring additional Provender for feeding (1.6, Forces sheet).
- Transport: Just Carts (1.7).
- Waste: The Asset maximum per type is 8 (1.7.3).
- Cards: There are no "No Event" cards (1.9).
- Loyalty Check: Lords may use Coin during a Loyalty Check to entice Enemy Vassals to switch sides (1.4.1).
- : Each side can make use of unique strategic options and Capabilities (3.5).
1.0 Introduction
1.1 General Course of Play
In SELJUK, players take one of two enemy sides, Romans (Tyrian purple) or Seljuks (pale blue). The Romans march from Constantinople to protect their borders with a strong but slow army. The Seljuks comprise a loose alliance of warriors from the Muslim aristocracy and nomadic steppe tribes from Central Asia. Small bands of treacherous Norman mercenaries augment the Roman army, as do their provincial Thematic troops.
In turns covering 90 days each, Roman and Seljuk players will levy lords and vassal forces, gather transport, and recruit specialists. Each Lord's forces and assets are laid out on a mat. Players then plan and command a Seasonal campaign with their Lords.
Cylinders on the map show the Lords' movements, while markers on a calendar show how long each Lord will serve, varying by hunger, pay, political events, and success or failure in their campaigns.
SELJUK is the fifth volume in GMT Games' Levy & Campaign Series that portrays medieval military operations. Players will gather and equip their armies and then send them to ravage, ruin, or conquer enemy locales and defeat enemy forces in battle. Alliances and obligations will provide lords and vassals to serve in the field but only for limited periods. Players must keep an eye on the calendar and offer pay or loot to keep troops in the field.
An optional rule adds detail on vassal service, and optional screens can hide armies' strength for greater fog of war. SELJUK has no solitaire system but is solitaire friendly. Team play also works well.
A folding play aid summarizes key features of the game. The final pages of this rulebook provide five scenarios of varying length (including a "quickstart" setup for learning the game system), and a key terms index. A Playbook offers examples of play for learning the game system, strategy notes, cards lists and implementation tips, plus historical and other reference materials.
Unlike other Levy & Campaign games, SELJUK features a strong scoring asymmetry; the Seljuk player will primarily be accruing points through Ravage and returning Loot to their home territory during Winter. Some Lords on either side can switch sides during the game through Loyalty Checks, which is a die roll against those Lords' Fealty rating. The Roman player has to manage their Themata, garrison frontier troops that can be Mustered during the Campaign phase and also serve defensive purposes. Winter is not a playable season but rather serves as a victory check and reset phase where most Lords must return to their Seats before the new year begins.
1.2 Components
A complete set of SELJUK includes:
- A mounted game board (1.3)
- A Lords sticker sheet (1.5.1, apply to cylinders)
- Sixteen Lord mats (1.5.2)
- One Battle/Storm mat (4.8.1)
- 85 Horse unit wedges (5 silver [Norman knights], 47 pale blue [Turkic Horse], 25 Tyrian purple [Tagmata], 6 dark green [Ghulam], 2 White [Scholai/Hetaireia]; 1.6)
- 65 Foot unit bars (52 steel [Infantry (akritai/skutatoi/light Turkic foot)], 11 brown [(lower-class) Militia], 2 white [Varangian Guard (Norsemen)]; 1.6)
- 20 Lord cylinders (10 Tyrian purple, 10 pale blue, including 3 tall Commander cylinders, 1.5.1)
- Three sheets of markers and counters (1.5-1.8)
- Four decks of playing cards (25 Arts of War cards for each side and 42 Roman Command/46 Seljuk Command cards, 1.9)
- Two copies of a Sequence of Play, Commands, Forces & Strongholds, and Battle & Storm foldout
- Two screens
- Six 6-sided dice (three purple, three pale blue)
- A Playbook
- This rules booklet
1.3 Game Board and Map
1.3.1 Map
The game board shows a map of eastern Anatolia, Armenia, and Syria, circa 1068. It depicts Locales linked by Ways, a Calendar along the top, and Holding Boxes near each player's edge.
LOCALES: Locales are the spaces on the map that hold Lord cylinders and game markers. Locales have either a Stronghold, Unfortified Settlement, or Wilderness. Holding Boxes are considered Locales.
- Strongholds: Fort, Town, and City Locales are Strongholds. They can be Conquered, Besieged, Stormed and Ruined. Lords can Withdraw inside them. Strongholds show a Value (one, two, or three pips) that is also their Size and affects how many Conquered markers they receive (below), how many Lords they can host, whether they have Gardens that aid Forage (4.5.4), and other aspects of Siege, and Storm (4.3.4, 4.5.1, 4.9.1, 4.9.2). Ruins (below, 4.5.2) eliminate the Stronghold there until rebuilt.
- Wilderness and Unfortified Settlements: These Locales provide only Provender during Ravage (4.5.5) and do not block Loot return paths during Bounty (4.7.6).
- Holding Boxes: Locales that serve as a Seat for some Lords and have special rules for movement (4.3) and Muster (3.4).
THEMA: The Roman Empire (Allegiance, below) is divided into regions called Thema. Each Thema contains one or more Locales, as well as a box to hold Themata Service Markers (1.5.1). Themata have special rules with regards to Siege, Recruit, Seljuk Ravage, and Roman Garrisons (4.3.5, 4.5.5, 4.5.7, 4.9.1).
FATIMID CALIPHATE: The three spaces in the Fatimid Caliphate (Hama, Aleppo, and Syria) are Friendly to the Roman player and Enemy to the Seljuk player with the following exceptions:
- The Roman player may not Withdraw (4.3.4) inside Hama or Aleppo.
- The Roman player does not automatically succeed at Forage at Hama or Aleppo.
- Various game Events will change the diplomatic status of Aleppo and the rules around it, as per the Event card text.
- Strongholds in the Caliphate use the Seljuk column of the Garrison table during Storm.
- If the Roman player Conquers a Seljuk-held Stronghold in the Caliphate (such as Ibn Khan's Seat), they only remove the Seljuk Conquered markers and do not place their own (see 4.9.1, Conquer).
- After the Aleppo Independence event is played for its effect, the Seljuks conquering and holding Aleppo through the next Winter will result in a Seljuk automatic victory (4.7.6, 5.2).
ALLEGIANCE: A Locale's symbol (Stronghold circle) in either Roman purple or Seljuk pale blue shows its original Allegiance, the side to which it is Friendly. It is Enemy to the other side.
- Muster (3.4), Pay with Loot (3.2.2), Withdrawal (4.3.4), and other actions require Friendly Locales.
- Original (printed) Allegiance affects who may Ravage where and the color of Ravage and Ruins markers placed, as well as valid targets for Roman Strategic Objective markers (3.5.3).
NOTE: A bi-colored line on the map divides territory between originally Roman Locales to the west (the Roman Empire) and originally Seljuk Locales (the Sultanate) to the East. A green line denotes the lands of the Fatimid Caliphate, which have special rules (above).
PLAY NOTE: Roman Conquered 1 VP markers show gains in territory that add to victory.
SEATS: Some Strongholds and Holding Boxes host Lords' Seats, as shown by that Lord's large Heraldry there (1.5.1) and as written on the Lord's mat.
- Holding Boxes: Constantinople is available for the Roman side, Mosul and Baghdad for the Seljuks. They have special March and Call to Arms effects, but otherwise serve as a Seat Locale for the Lords indicated (3.4, 3.5). No Lord may enter an Enemy Holding Box.
VP MARKERS: Locales can hold various markers that grant a side Victory Points (VPs, 5.1). Whenever placing or removing them, immediately adjust the appropriate round Victory total marker(s) on the Calendar track (2.2.5).
-
Conquered: Roman markers worth 1 VP each (Seljuk Conquered markers are worth no VPs); they reverse a Stronghold's Allegiance. Place the number of Conquered markers at a Stronghold equal to its Value (one, two, or three; 5.1). Surrender (4.5.1) places or removes them. Sack instead supplants them with Ruins (4.9.1).
-
Ruins: Successful Seljuk (only) Storm of a Stronghold (Sack, 4.9.1) may place a single Seljuk Ruins marker there worth ½ VP (5.1), regardless of Stronghold Value. Ruins eliminate the Stronghold at that Locale (for Withdrawal, Bypass, Supply, Siege, and Forage; 4.3.4-.5, 4.4, 4.5.4). Any Seats there remain for Muster (3.4). Allegiance remains as printed.
NOTES: Ruins and Conquered markers never occupy the same Locale. The Imperial Fortress Construction Capability repairs Ruined Strongholds (1.9.1).
DESIGN NOTE: Seljuk raiding armies would destroy enemy settlements to show their power and make off with goods and valuables.
-
Ravaged: Ravage actions place a single Ravaged marker at an Unravaged Enemy Locale (4.5.5) in the Ravaging player's color. Ravaged markers award ½ VP and affect Surrender and Forage (4.5.1, 4.5.4). No Locale can have more than one Ravaged marker.
WAYS: Two types of Ways—gray Roads and brown Passes—link Locales as adjacent. A Way's type affects March speed and Supply command requirements (4.4).
ON MAP: The phrase "on the map" refers to Lords at Locales, including Holding Boxes (i.e., not on the Calendar).
1.3.2 Calendar
A Calendar on the board tracks time and victory scores (2.2, 5.1). Cylinders there track when Lords are Ready for Muster; markers show when Lords (and, if using an optional rule, Vassals, 6.2) must Disband (3.3).
TURNS: Each box of the Calendar is a Seasonal Turn of three months, in one row from Spring 1068 to Autumn 1071.
SEASONS: Calendar box colors show a Turn as Spring, Summer, or Autumn. Seasons show how many Command cards to use each Turn (4.1), and some Events. The Calendar also shows Ravaged removal reminders (4.7.2) and the annual Seljuk Unity goal (below). NOTE: Italicized Calendar notes provide historical background; they do not affect play.
Winter is a special non-campaign interphase as described on the Sequence of Play (4.7.6).
SELJUK UNITY: Each Winter Phase, the Seljuk player will be required to have a specific number of Locales occupied by Ravaged, Conquered, or Ruins markers in their color or lose victory points (4.7.6).
1.4 Loyalty Checks
Certain Events can cause a Treachery card to be placed in a Season's Campaign Plan. When the Treachery card is revealed during Campaign, the player who revealed it chooses a Lord on the Treachery card (even if unlevied)—Robert Crépin or Roussel de Bailleul for Seljuks, Arisighi for Romans—to undergo a Loyalty Check roll.
1.4.1 Loyalty Checks
When a Loyalty Check is triggered (through a Treachery card play or the Imperial Coffers Capability), the revealing player will roll a die. Before the roll, that player can choose to spend Coin from their Commander's Lord mat and/or from the Lord mat of a friendly Lord that is co-located with the target of the Treachery; each Coin spent provides a +1 die roll modifier to the roll. Then, if the Lord being checked for Treachery is Unbesieged, the opponent has a chance to do the same, except each Coin spent provides a –1 die roll modifier to the roll. The die is then rolled; if the result is higher than the Fealty rating of the targeted Lord from the Treachery card, that Lord switches sides; he is Disbanded (3.3) and removed from the game board (he will automatically rejoin the game the following Pay phase under the control of the opposite player). A natural 1 is always a failure and a natural 6 is always a success, regardless of Coin spent.
Lords who can switch sides have pieces in both colors and Command cards with different backs to reflect their current Allegiance status.
1.4.2 Switching Sides by Loyalty Check
Place a Lord who switches sides after a Loyalty Check next to the board along with his Lord mat. If his cylinder was on the Calendar, replace it with his cylinder of the opposite color.
If his cylinder was on the map, before the next Pay phase, place the Lord's cylinder in his new Allegiance color at his Seat with the appropriate number of Conquered marker(s) of his new side (or, if his Seat has an enemy Lord present at this moment, place him in his new faction's Holding Box without placing Conquered markers). His Lord mat should be set up with his starting Forces and Assets and his Service Marker placed on the Calendar as if he were just Mustered.
If a Lord is switching back to his original side and he is able to be placed at his Seat because there is no enemy Lord there, remove the Conquered markers of his previous side. Otherwise place him in his new side's Holding Box.
A Lord remains a part of his new side even when Disbanded.
PLAY NOTE: Arisighi's Seat after joining the Roman player is always the Constantinople box; Roussel de Bailleul and Robert Crépin will use the Mosul and Baghdad box if their normal Seat has an enemy Lord present.
DESIGN NOTE: Arisighi historically joined the Romans after a falling out with Alp Arslan; Roussel and Robert were of dubious loyalty, and the latter rose in revolt over low pay against the Romans in early 1069.
EXAMPLE #1: Robert Crépin switches sides from Roman to Seljuk after a Treachery card causes a Loyalty Check. His cylinder is on the Summer 1070 box on the Calendar. The Seljuk player immediately replaces his Roman cylinder there with the Seljuk one and takes Robert's Lord mat from the Roman player and places it in its current state (unmustered) near his side of the table. He can now be Mustered in a future Season if he is Ready.
EXAMPLE #2: Robert Crépin switches sides from Roman to Seljuk after a Treachery card causes a Loyalty Check in Summer of 1069. His cylinder is currently on the map. The Seljuk player Disbands him and removes his cylinder from the map, setting it aside. He then takes Robert's Lord mat from the Roman player (discarding any attached Roman Capabilities) and places it near his side of the table. Before the next Pay phase (Autumn 1069), the Seljuk player places Robert's cylinder at his Seat in Edessa, placing two Seljuk Conquered markers there. If Edessa had a Roman Lord present at this moment, Robert would instead be placed in the Mosul and Baghdad Holding Box and no Conquered markers would be placed at Edessa. He then places Robert's starting Forces and Assets on his Lord mat and his Service Marker in the appropriate Season on the Calendar as if he were just Mustered.
EXAMPLE #3: It is Summer of 1070 and Robert Crépin is currently a Seljuk Lord located alone at Edessa. Using the ability on the Imperial Coffers Capability during the Arts of War phase of Summer 1070, the Roman player successfully rolls a Loyalty Check against him. Robert switches sides from Seljuk to Roman. The Roman player Disbands him and removes his cylinder from the map, setting it aside. He then takes Robert's Lord mat from the Seljuk player (discarding any attached Seljuk Capabilities) and places it near his side of the table. Before the next Pay phase (Autumn 1070), the Roman player places Robert's cylinder at his Seat in Edessa. Because he is now returning to the Roman side, the two Seljuk Conquered markers there are removed. If there had been another Seljuk Lord with Robert at Edessa, then Robert would have to be returned to the Constantinople Holding Box and the Conquered markers would not be removed. He then places Robert's starting Forces and Assets on his Lord mat and his Service Marker in the appropriate Season on the Calendar as if he were just Mustered.
1.5 Lords and Vassals
Cylinders, Service Markers, and 5" × 5" mats track the status of Lords in SELJUK. Vassals tied to each Lord and Themata also have Service Markers and add Forces.
1.5.1 Lords
Lords (eight on each side) are the figures who carried out military preparations and operations—Levy and Campaign.
CYLINDERS: Each Lord has a cylinder to show his location or readiness to Muster. Any reference to location of a Lord means where his cylinder is—a map Locale, a Holding Box, on the Calendar, or out of the game. A cylinder's sticker shows that Lord's Heraldry and Command rating (1.5.3, 4.2). Commanders use a taller cylinder.
STICKERING: Apply stickers from the small sheet provided onto the 20 cylinders, one sticker each, purple sticker on purple, pale blue on pale blue. The Romanos sticker (purple with golden ring) and the Manuel Komnenos sticker (purple with the golden eagle) each go on a tall purple cylinder. Alp Arslan's sticker (green circle with white eagle) goes on a tall blue cylinder. Robert Crépin (black shield with gold fleur-de-lis), Roussel de Bailleul (red shield with blue cross) and Arisighi (orange circle with black bow) all have one of their stickers on a purple cylinder and one on a blue cylinder.
HERALDRY: Each Lord has a shield-shaped symbol that identifies his Seats, cylinder, mat, Vassals, card effects, etc. Themata Service Markers are placed in their associated Thema on the map (location on the back of their counter) when not levied or under Siege. Both players may inspect them as desired.
COMMANDERS: Romanos Diogenes and Alp Arslan can March several Lords together (4.3.1). A gold ring on their stickers show that they are Commanders. Commanders may not become Lieutenants or Lower Lords (4.1.3). Romanos is always the Roman Commander whenever he is on the map. Manuel Komnenos is Commander only if Romanos is currently not on the map (use Manuel's tall cylinder with the ring to denote this).
SERVICE MARKERS: Each Lord has a Service Marker that shows his Heraldry, Service Rating (1.5.3), and Fealty roll. Mustered Lords' Service Markers shift along the Calendar's Seasonal boxes (2.2.3) to show how long Lords' Service will last.
VASSAL MARKERS: Each Vassal (1.5.4) has a marker showing the Heraldry of the Vassal's Lord, Vassal Forces (1.6), and a Service Rating. Vassal markers stay on a Lord's mat or—if playing with the optional Vassal Service rule—are placed and shift on the Calendar (6.2). If not playing with the optional rule, ignore the Service Rating number on the counter.
SPECIAL VASSALS: Certain Vassal markers have distinctive borders and background symbols to show that they enter play and behave differently than other Vassals (3.4.2).
THEMATA SERVICE MARKERS: Each Thema has a set of Service Markers that serve as Garrison forces for its Strongholds in Storm and Siege (4.3.5), possibly prevent Ravage (4.5.5), and can be Recruited by the Roman Commander during the campaign phase (4.5.7). Some Themata Service Markers depict two unit symbols; these Themata still only roll a single die when defending against Ravage and are Lost if they fail to roll Protection (4.8.2), therefore they are much more efficient at being used as a defender in a Storm.
COMMAND CARDS: Each Lord has a set of Command cards (1.9.2) that enables him to take actions on Campaign (4.2).
TREACHERY CARDS: A special type of Command card (1.9.2) that can trigger Loyalty Checks (1.4.1) for Lords when revealed.
DISBANDED: Lords sometimes Disband (3.3). Disband, Battle (4.8), and Storm (4.9.1) can permanently remove certain Lords from play. Return a Disbanded or removed Lord's Forces and Assets from his mat to their respective pools (1.5.2, 2.1.1) and discard any "This Lord" Capability cards at his mat (1.9.1, 3.4.4). If Disbanded but not permanently removed, return his cylinder to the Calendar as instructed in 3.3.2.
1.5.2 Lord Mats
Each Lord has a 5" × 5" mat that shows his characteristics and holds his Forces, Vassals, and Assets. Set aside a Lord's mat unless Mustered. When a Lord Musters, set his mat in front of that player.
MAT SECTIONS: The Lord's starting Forces at scenario setup or upon Muster (3.4.1) are shown on the mat at the word Forces; put those pieces and any added Forces that the Lord acquires in the Forces section. NOTE: Forces of Vassals do not start Mustered (1.5.4). Units Routed in Battle or Storm (4.8.2, 4.9.1) slide from the Forces section below a line into a Routed section. Keep the Lord's starting Assets (3.4.1) and Ready Vassal Service Markers plus Assets that he acquires in the Assets & Vassals section.
ITEMS ON MATS: When setting up a Lord at start (2.1.2, 7.0) or as Mustered during Levy (3.4.1, 3.5), place his initial Forces, Assets, and Vassal Service Markers onto his mat as noted above. As the Lord Levies his Vassals' Forces or obtains Assets, add those unit pieces and Asset markers to his mat.
RATINGS: A Lord's ratings (1.5.3) are found listed in a column along the upper right of his mat.
CARDS AT MATS: Tuck Arts of War cards that affect specific Lords (1.9.1, 3.1.2, 3.4.4) partly under that Lord's mat—Events at the top edge and a maximum of two "This Lord" Capabilities at the bottom edge.
SHARING: Lords may use and spend Assets (1.7) to help one another if at the same Locale. They never Share Vassals, Forces, or This Lord Capabilities. Unbesieged Commanders may spend Coin from their mats for any reason and across any distance, except to Pay Besieged Lords (3.2.1) or provide die-roll modifiers for a Loyalty Check for besieged friendly Lords.
EXAMPLE: A Lord Shares his Carts with another Lord whose Provender exceeds Transport, so as to allow a group's Unladen March or enable Avoid Battle (4.3).
Important: Lords on the same side may Share but not transfer or trade anything among one another – not Vassals, units, Assets, or cards.
1.5.3 Ratings
Lord mats list several ratings:
- Fealty: A die-roll range for that Lord's propensity to Muster when another Lord Levies him (3.4.1) or switch sides during a Loyalty Check, shown as a die with the upper number of that range (such as four pips for 1-4).
- Service: The number of Calendar boxes ahead of the current box that the Lord's Service Marker is placed upon Muster (3.4.1) or cylinder is placed upon Disband (3.3), shown as a numeral in a box symbol.
- Lordship: The number of Levy actions that the Lord takes (3.4), shown as a numeral in a shield symbol.
- Command: The number of actions that the Lord can undertake each time his Command card is revealed during a Campaign (4.2.1), shown as a numeral in a card symbol. This numeral is also on the Lord's cylinder piece and Command cards.
DESIGN NOTE: Fealty shows a Lord's enthusiasm to fight, Service his obligation to this conflict, Lordship his wherewithal to mobilize for war, and Command his alacrity in the field.
1.5.4 Vassals
Each Lord in SELJUK has Vassals (subordinate elites and troops) who provide their Lord with additional Forces. Like Lords, each Vassal has a Service Marker and a Service Rating (the latter used only with an optional rule, 6.2). Vassals usually have fealty solely to a single Lord, as shown by the Heraldry on the front of the Vassal's Service Marker. A Lord's Vassals, including the number of them with the same composition of Forces, are shown on his mat in the Assets & Vassals section, to simplify preparation of a mat when Mustering a Lord (1.5.2, 3.4.1). Some special Vassals (ex. Seljuk Ghulam) can be Mustered by multiple Lords via Capability.
Important: At setup and when a Lord enters play, place his Vassal Service Markers (but not Vassal units) on his mat. Add Vassal units only as the Lord Musters those Vassals (3.4.2, 3.5).
1.6 Forces
SELJUK represents military Forces with wooden unit pieces: wedges for Horse and bars for Foot. Unit types: Varangian Guard, Tagmata, Norman Knights, Infantry, Militia, Scholai/Hetaireia, Ghulam Cavalry, Turkic Horse.
See the Forces foldout page for a listing of unit types, their pieces, and characteristics (4.8.2). Keep spare Forces pieces in a pool such as a bowl. The pool of units is a limit on play (Muster, 3.4.1-.2).
- If a Lord ever remains Mustered without Forces on his mat, he immediately Disbands as per 3.3.2.
DESIGN NOTE: In SELJUK a Horse unit represents about 1000-2000 fighting horsemen, Foot about 2000-3000 infantry.
1.7 Assets
Various items that Lords obtain and use—Transport (Carts), Provender (food and other supplies), Coin (money), and Loot (livestock and other booty)—are shown by 5/8th-inch counters placed on Lords' mats.
NOTES: Lords use Transport to acquire and move Provender (4.3, 4.4); Lords themselves otherwise can move without Transport and do not need Transport to move Coin or Loot.
1.7.1 Accounting
Lords may add and expend each type of Asset as if money, making change as needed. Plain markers represent one such Asset each; "×2", "×3", and "×4" markers represent those amounts.
NOTE: Asset markers are not a limit on play (but see 1.7.3). If Asset markers run out, stack unused markers below Asset markers as duplicates of the top marker.
1.7.2 Greed
Lords may discard (rather than use) Assets only as needed to help them move—to March Laden or Unladen, Avoid Battle, or Retreat (4.3.2, 4.3.4, 4.8.3) or as rules or card text require.
1.7.3 Wastage
A Lord may have at most 8 of each Asset type (8 Provender, 8 Carts, and so on). Any excess is immediately lost.
1.8 Other Markers
Variously shaped game counters include round markers to track time, scenario end, and victory on the Calendar (2.1.2, 2.2.2, 5.1) and note Battle or Storm Locale (4.8, 4.9.1), plus a rectangular marker for Pursuit in Battle (4.8.2) and one to track Aleppo's diplomatic status. NOTE: The round "SELJUK" token is just a bonus, not used in play.
Several 5/8th-inch square markers include:
- Roman 1 VP Conquered / Seljuk Conquered for Strongholds that switch Allegiance (1.3.1, 1.4, 4.5.1-.2, 5.1).
- Special Call to Arms markers.
- Seljuk Seat and Fortress Construction markers.
- Siege markers to put at Besieged Strongholds and to show Siegeworks in Storm or Sally (4.5.3, 4.9).
- Moved/Fought markers to put at Lord cylinders during Commands (4.3, 4.8.6, 4.9.1, 4.9.2).
- Numbered markers to help log actions, rounds, altered ratings, etc.
- Assorted large square once-per-game event reminder markers.
Several ½-inch square markers include:
- Ruins/½ VP (1.3.1, 4.9.1).
- Ravaged/½ VP (1.3.1, 4.5.5).
- Bypass Stronghold (4.3.5).
1.9 Cards
The game has two types of cards: Arts of War cards with Events and Capabilities, and Command cards for Campaign actions. Players may not inspect one another's decks or cards set aside.
1.9.1 Arts of War
Each side has its own deck of Arts of War cards. Each Arts of War card has an upper Event section and lower Capability section. Only one of the two sections is in effect at a time.
NOTE: There is no discard pile; cards played for Events and discarded Capabilities are shuffled back into the deck.
EVENTS: The upper Event section provides players immediate and/or temporary benefits or opportunities. Players draw two Arts of War cards for their Events at the outset of each Levy after the first (3.1). NOTE: For the use of Events, see 3.1.3.
CAPABILITIES: The lower sections show Capabilities with longer-lasting benefits, either drawn randomly during initial Levy (3.1) or selected during Muster (3.4.4). Heraldry show which Lords may Levy and use the Capability. Capabilities remain in effect unless discarded (Lord removal 3.3, 4.8.5; Discard 4.0).
PLAY NOTE: As Events and Capabilities share cards, draw of some Events delay Levy of the card's Capability, and a Capability in play bars its Event (3.1.3, 3.4.4).
CARD USE: When card text contradicts rules, card text takes precedence. The player of an Event or owner of a Capability decides how to implement card text within what is specified.
1.9.2 Command Cards
Each side's Command deck has four action cards per Lord and five No Command cards. Players build their Campaign Plan each Turn (4.1) by stacking Command cards of their Mustered Lords in an amount determined by the Season. They add No Command cards as needed to fill out a Plan when too few Lords are Mustered or No Command cards and/or Treachery cards when required by an Event.
2.0 Setup and Calendar
This section explains the game's general sequence and use of the Calendar track.
2.1 Setup
2.1.1 Layout
Set the gameboard between the players. You will want enough table space around the board for mats, cards, and pools. See the layouts shown in the rulebook and, for solitaire play, in the Playbook.
POOLS: Create pools for wooden units, Asset markers, and remaining markers (1.8).
DECKS: Separate playing cards into four decks—one Arts of War deck and one Command deck per side (1.9).
OTHER ITEMS: Each player takes a foldout aid. If using the Hidden Mats Option (6.1), each player gets a screen. Keep unused mats and Service Markers, reference sheets, this rules book, and the Playbook handy.
2.1.2 Scenarios
Choose a scenario (7.0). Agree on whether to use Hidden mats screens (6.1) and/or advanced Vassal Service (6.2) options. Set up the situation, including Mustered Lord mats, and begin play with the first Levy (3.0). NOTE: If playing for the first time, try the quickstart scenario (7.0).
2.2 Calendar
The Calendar (1.3.2) tracks time and victory.
2.2.1 Turns
Each Scenario covers one or more 90-day (3-month) Seasonal Turns (1.3.2). Each Turn, conduct a Levy sequence, then a Campaign sequence, as detailed in rules sections 3 and 4 and summarized on the Sequence of Play foldout page.
2.2.2 Marking Time
The round Levy/Campaign marker tracks the progress of Seasonal Turns and Levy and Campaigns within each. Mark that it is Levy or Campaign by placing the marker with that side up in the Levy/Campaign circle of the current Seasonal Turn box on the Calendar. Where indicated on the Calendar, the Winter Phase sequence takes place as part of the end of the current Autumn turn.
2.2.3 Marking Service
Place and shift Service Markers and Lord cylinders in the Calendar's Seasonal boxes as described in various rules or on Event cards (1.9.1). All instructions to shift right or left mean that number of Turn boxes. If a direction is not specified, the executing player chooses. EXAMPLE: "Shift 1 right" from box 8 means to box 9, "1 left" from 9 means to 8.
CALENDAR'S END: When a Service Marker or Lord cylinder is to appear or shift below (left of) box 1 or beyond (right of) box 12, set it just off the board on that side and ignore further shifts in that direction. The first shift back toward the Calendar places the marker into box 1 or box 12, respectively. NOTE: This reduces "end of time" anomalies.
2.2.4 Player Order
Unless noted otherwise, the Seljuks go first and the Romans second in each step of Levy and Campaign. EXAMPLE: During Disband Beyond Service (3.3.1), the Seljuk player Disbands Lords, then the Roman player does so.
EXCEPTIONS:
- Play of Command cards alternates, one Seljuk card, then one Roman card, then another Seljuk card, and so on (4.2).
- The order of many steps in Battle, Siege, and Storm will depend on who is Active, Attacking, has Missiles or Cavalry, and so on (4.8-4.9).
2.2.5 Tracking Victory Points
The Calendar's numbered boxes also serve to track each side's victory score (5.1) using round Victory markers. Place the Victory marker of each side in the Victory circle at the box number equaling that side's current victory point score (VP) between 1 and 12½ (on the +½ side as appropriate); just off-map left of box 1 for 0 VP or, on the +½ side, for ½ VP; or off-map right of box 12 for over 12½ VPs.
EXAMPLE: The Romans have 8½ VPs. Put the purple Victory marker in box 8 with "+½" up.
In the rare case that a side exceeds 12 VPs, use a single Victory marker of the side ahead to show the net score.
EXAMPLE: 14 Roman versus 12 Seljuk VPs puts the purple marker in box 2.
3.0 Levy
At the outset of each Seasonal Turn, players prepare for the campaign to follow by adding to their armies. The Sequence of Play foldout page summarizes the steps of the Levy phase.
3.1 Arts of War
Each side first draws two Arts of War cards as Capabilities or Events as follows.
3.1.1 Shuffle
Collect and shuffle all unused Seljuk Arts of War cards into an Event draw deck; do the same for the Roman player. Held Events (3.1.3) and Capability cards in play (3.4.4) are not included in the draw deck.
3.1.2 Draw Capabilities
If it is the Levy for the scenario's first Seasonal Turn, the Seljuk player then the Roman player (2.2.4) each draws two Arts of War cards from the player's own deck and deploys them as Capabilities (lower half of the card, 1.9.1) at that side's map edge or Lord mats (1.5.2).
- Return to the deck at the end of the phase any "This Lord" card that a side cannot assign to a Mustered Lord (3.4.4).
3.1.3 Draw Events
If it is the second or any later Levy, the Seljuk then the Roman player each draws two cards and implements their Events in the order drawn (the upper half of each card, 1.9.1). Except as specified below, reveal Events immediately and return the cards to the deck. Bold-italic card text specifies certain Event types:
- Players keep drawn "Hold" Events hidden for later use at the holder's discretion. When played on a specific Lord, tuck the card under the top edge of that Lord's mat, so that the Event text shows.
- "This Campaign" Events are in effect until the end of the current Campaign. Do not return them to their deck until then. NOTE: The Capability on the bottom half of such a card will not be available for selection this Levy.
- Events/Capabilities with an asterisk following the title can only be used once per game. Mark the current Season on the Calendar with the appropriate reminder marker when they occur the first time. If those Events are drawn again later, follow the instructions on the card.
NOTE: A side's Events can affect the opposing side. The side playing an Event card makes any decisions allowed unless otherwise specified.
3.1.4 Greed
Players may not discard (as opposed to use) cards unless permitted by a rule. EXAMPLE: Hold Events only return to their deck once used per the text on the card or discarded at Campaign's end (4.7.5).
3.2 Pay
After drawing cards, the Seljuk then Roman player may expend Coin and Loot to encourage their Lords to serve longer. They may remove Coin and Loot in this step only to shift Service Markers (1.7.2).
3.2.1 Pay with Coin
Any Lords with Coin markers on their mat may remove some or all of their Coin to affect their own or other Lords' Service. Each Coin spent shifts a single Service Marker right on the Calendar by one box, either:
- The paying Lord's own Service Marker, or
- That of another Lord at the same Locale.
EXCEPTION: Unbesieged Commanders in play may pay Coin regardless of their location for any Unbesieged friendly Lord.
3.2.2 Pay with Loot
Players may have any of their Lords who are in a Friendly Locale (1.3.1) that is free of Siege (it may be Bypassed) Pay with Loot markers from their mat (or Share from a Lord at their current Locale) as if Coin, one for one.
Important: A Lord must be in a Friendly Locale free of Siege to Pay with Loot. He may do so at an Unbesieged Stronghold with his side's Conquered markers, for example, but not at a Besieged Locale.
3.3 Disband
Seljuks then Romans may have to remove certain Lords from the map because of where that Lord's Service Marker is on the Calendar (2.2).
3.3.1 Beyond Service Limit
First, for each Lord whose Service Marker is to the left of (in a lower-numbered Turn box than) the Levy or Campaign marker (the current Turn), remove him from the map.
REMOVAL: When Disbanding a Lord Beyond Service (or removing him by combat, 4.8.5):
- Remove his cylinder permanently from play (or both of his cylinders in the case he is a Lord with multiple): he may not Muster again.
- Set aside his and his Vassals' Service Markers, his Forces and Assets; return any of his "This Lord" Capability cards (3.4.4) to that side's Arts of War deck.
- If the Lord was Seljuk and had a Roman Strategic Objective marker on his mat, the Roman player claims the marker and places it in the Constantinople Holding Box, which will earn him 1 VP at the end of the game.
3.3.2 At Service Limit
Lords with Service Markers in the same Turn box as the Levy or Campaign marker Disband but may Muster again in a later Levy.
- Place such a Lord's cylinder onto the Calendar (even if under Siege or Bypassed, 4.3.5), a number of Seasonal Turn boxes to the right of the current box equal to that Lord's Service Rating (1.5.3).
- Return his Forces and Assets to their pools and return Capability cards under his mat to the Arts of War deck. Set aside his mat(s), Service Marker, and remaining Vassal Service Markers for possible future Muster.
NOTE: Rarely, a Lord may Disband because his last unit is removed outside of combat (1.6).
3.4 Muster
After any Disband, Seljuk then Roman Lords already on the map may take Levy actions up to their Lordship Rating (1.5.3) to Muster other Lords, Vassals, Transport, or Capabilities. Each Levy action spends one point of a Lords' Lordship Rating. Complete each Lord's actions before the next Lord, in any order desired.
REQUIREMENTS: To use Lordship, a Lord must have begun this Muster segment at an Unbesieged Friendly Locale (1.3.1) including a Holding Box.
Important: Lords may not conduct Muster from Enemy Locales or at a Siege. Lords brought onto the map during this Muster segment (3.4.1) may not take Levy actions themselves until that Levy's Call to Arms at the earliest (3.5).
MUSTERING: When a Lord is Mustered:
- Place that Lord's cylinder at one of his free Seats or, for Arisighi, Robert, or Roussel only, his associated Holding Box per 1.4.2 if his Seat is enemy-occupied/Conquered.
- Take that Lord's mat and place starting Forces on it as shown, drawing from the units pool (1.6). In the rare case that too few unit pieces remain in the pool, the Lord does not receive those units.
- Place his Assets and Vassal Service Markers (Heraldry up, Ready to Muster, 3.4.2) onto the Lord's mat as shown there. Keep aside any Special Vassal Service Markers (e.g., Emperor's Retinue or Scholai) that are not available because the required card has not come into effect (1.5.1, 1.9.1, 3.4.2). NOTE: Do not place Vassal Forces on the mat when the Lord Musters; they are available for the Lord to Levy at a later time.
- Place the Lord's own Service Marker (darker purple or blue than those of Vassals) into a Turn box on the Calendar, a number of boxes equal to his Service Rating to the right (ahead) of the current box (where the Levy marker is; if beyond 12, then just off the game board, 2.2.3).
EXAMPLE: A Lord with Service "2" Mustering in Spring of 1069 (Levy marker in box 4) would place his Service Marker two boxes ahead into Turn box 6 (Autumn 1069).
3.4.1 Levy Other Lords
A Lord may use a Levy action (one point of Lordship) for another Lord to roll Fealty for placement on the map. If the roll fails, the Levying Lord may use more Levy actions (within his Lordship Rating) to keep trying to Muster the same Lord (or others).
FEALTY ROLL: Designate a Lord to roll. The rolling Lord must be Ready, his cylinder in a Turn box at or left of the Levy marker (2.2). Also, he must have a Seat free with no enemy Lord or Conquered markers there (it may be Bypassed, 4.3.5, or Ravaged, 4.5.5). Roll one die—if the roll is within that Lord's Fealty Rating (1.5.3), Muster him per "MUSTERING" above; if not, do nothing.
NOTE: Lords can Levy a Ready Commander to Muster like any other Lord.
PLAY NOTE: Consider keeping some Lords in reserve, ready to Muster in a future Levy.
3.4.2 Levy Vassals
A Lord may use one Levy action to Muster one of his Vassals. The Vassal must have a face-up Service Marker in the Assets & Vassals section of his mat (1.5.2).
PROCEDURE: When a Vassal Musters, slide its Service Marker on its Lord's mat up into the Forces section. Place the units shown on the Vassal's marker near or on it, drawing from the units pool (1.6). In the rare case that the pool holds too few unit pieces, the Vassal does not add those units.
NOTE: Ignore Vassal Service Ratings unless using the optional rule (6.2). Loss of Vassal units leaves the marker in place—it does not Disband it—to show that the Vassal already Mustered.
SCHOLAI, EMPEROR'S RETINUE, ELITE GHULAM CAVALRY, & OGHUZ MERCENARIES: These Special Vassals start set aside until the associated Capability enables them to be Levied per normal rules. Discard of the card Disbands the Vassal.
3.4.3 Levy Transport
A Lord at a Friendly Locale may use one Levy action to add one Cart to his mat.
3.4.4 Levy Capabilities
A Lord at a Friendly Locale may obtain Capabilities (an Arts of War card's bottom half), either for himself, or for his entire side (per card text, 1.9.1), for one Levy action per card selected. Select from any of the side's currently unused cards, within these restrictions:
- The (lower) Capability section of each Arts of War card shows the Heraldry of those Lords who can Levy that Capability and whom it affects, including "any", "ALL", or "NOT".
- Certain Capabilities refer to "This Lord". Such Capabilities when Levied will affect only the Lord who Levied it. Place the card at the bottom edge of that Lord's mat, with the upper half of the card (the card's Event) tucked out of view underneath the mat as shown in 1.5.2. Each Lord mat may only have two "This Lord" Capabilities at a time, neither with the same name. After drawing a third, immediately choose and discard one.
- Other Capabilities do not say "This Lord" and affect more than a single Lord. Tuck such cards' upper half under the player's closest game board edge as shown in table layout (2.1.1). A Lord may Levy any number of such Capabilities (see also 4.0).
PLAY NOTE: Levying a Capability blocks the Event on that card from occurring.
3.4.5 Levy Themata
These markers can be Levied during the Muster Phase by the Roman Commander by spending one Lordship as if he were performing the Recruit action (4.5.7) in his current Thema. Always place the Themata Service Marker on his Lord mat, and then also put the unit(s) depicted on it atop the marker to track the unit status during Battle.
PLAY NOTE: This is different to the handling of Vassals as described in this game and previous games in the series.
3.5 Call to Arms
Each side has different strategic options during this phase depending on what Capabilities have been previously Levied.
PROCEDURE: Each Call to Arms phase, Seljuks may complete any one Call to Arms option, then Romans do so. NOTE: Events can trigger at most one Call to Arms per Levy.
3.5.1 Marwanid Alliance, Deep Raids, Empress Eudokia
During this phase, a Lord that meets the criteria on any of these Capabilities may choose to execute one for their Call to Arms action for the turn.
3.5.1.1 MARWANID ALLIANCE PROCEDURE: During Call to Arms, the Seljuk player may choose to either transfer 1 Coin from Alp Arslan's Assets to this card or spend any number of Coin from the Marwanid Alliance card; for each Coin spent, make either the Amid or Mayyafariqin Locales (marked with the Kurdish star) a Seat for Seljuk Lords until the end of the next Winter Phase. Lords may not tax in these Locales and only one may serve as a Supply Source per Command card. Place the Lord Seat marker(s) as a reminder.
3.5.1.2 EMPRESS EUDOKIA MAKREMBOLITISSA PROCEDURE: During Call to Arms, the Roman player may either place the Empress token on this card or move the Empress token from this card to Constantinople to choose one of the two below effects:
- Shift a Roman Lord cylinder 1 Calendar box
- Decrease the service of a Lord with a Seat located at Constantinople 1 Calendar box to increase the service of Romanos Diogenes by 1 Calendar box
3.5.2 Loot
If desired, the Seljuk player may remove a Loot marker from the Mosul and Baghdad box (adjusting VPs) to shift a Seljuk Lord cylinder 1 Calendar box.
3.5.3 Strategic Objective
If desired, and if a Roman Commander is in Constantinople, the Roman player may take a Strategic Objective marker from the supply and make it available in front of them. Alternatively, if they already have at least one available in front of them from a previous Call to Arms, they may instead, if the Commander is in Constantinople, place one of those available Strategic Objective markers on a Mustered enemy Lord mat or an Enemy Stronghold in the Sultanate (1.3.1). (Errata: the Roman Commander must be in Constantinople to use either Strategic Objective option, taking or placing a marker; the Player Aid Card is corrected accordingly.)
The Roman player may never take a Strategic Objective from the supply and place it on a valid target in the same Call to Arms. There are three Strategic Objective markers in the game, and the Roman player may have all three in front of them at one time. Once a marker is claimed for VPs after being placed (3.3.1, 4.5.1, 4.9.1), it will always be located in the Constantinople Holding Box.
DESIGN NOTE: Empress Eudokia Makrembolitissa engineered Romanos' ascension to the throne and backed his authority in the imperial court while he was away on campaign. The Roman army had major designs on the forts around Lake Van in the east, seeking to turn them into a buffer region for the empire, and focused a lot of military planning on their capture. The Marwanid Dynasty in eastern Anatolia were Kurdish allies to the Seljuks, and enjoyed a period of flourishing economic prosperity and investment in the 11th Century thanks to the expanding Muslim influence from Central Asia.
4.0 Campaign
After Levy, conduct that Turn's Seasonal Campaign, completing the steps below. The Sequence of Play page of the foldout summarizes the Campaign steps.
CAPABILITY DISCARD: The players (Seljuk first) must select and discard any Capability cards they have exceeding their number of Mustered Lords—not including any "This Lord" Capabilities (3.4.4). Compare the number of cards tucked under a side's map edge to its number of Lord mats in use—the player must discard any excess.
CAMPAIGN STEPS:
- Plan: Each side sets its Campaign Plan—an ordered stack of Command cards (4.1)—and may designate Lieutenants to lead other Lords (4.1.3).
- Activation: Starting with the Seljuk player, one side flips its top Command card and executes actions (4.3-4.5, possibly Treachery) with the Lord on that card or does nothing if a No Command card (4.2.3).
- Actions: One side is Active, using Command card actions; the other side is Inactive.
- Feed/Pay/Disband: At the end of each card, both sides Feed Forces who Moved or Fought, may Pay Lords, then check if they Disband (4.6).
- More Activations: The other side next flips its top card and executes that Activation (actions, Feed/Pay/Disband). Continue to alternate Activations by side until both Plan stacks are exhausted.
- End Campaign: After the sides exhaust Plan stacks and finish all Command Activations, the Campaign ends. Reset per 4.7 and, if this was not the scenario's last Turn, advance and flip the Campaign marker to the next Seasonal Turn Levy.
4.1 Plan
The players each build a Plan for the coming Campaign by selecting and stacking available Command cards (1.9.2). The current Season on the Calendar specifies the number of Command cards that each Plan stack must use:
- 7 cards in Spring.
- 8 cards in Summer.
- 7 cards in Autumn.
NOTE: Some seasons may add more cards due to Events.
4.1.1 Selecting Cards
A Plan may use any cards available in that side's Command deck (1.9.2). Command action cards (those with a numeral) and No Command cards are always available.
4.1.2 Arranging Stacks
Each side stacks its required number of selected Command action and/or No Command cards in any order desired, face down. The top face-down card will be that side's first Active Lord, and so on. Players may not rearrange Plan stacks once built. Keep all remaining Command cards face down as well. Players may always inspect their own Plan and the other side's played (but not unused) Command cards.
PLAY NOTE: When arranging one's Plan stack, fan the cards to show the order of Lords by corner Heraldry from left to right, then flip face down.
4.1.3 Lieutenants
During Planning (only), players may put a Lord cylinder of their side on top of one other cylinder at the same Locale. The upper Lord is a Lieutenant, overseeing the Lower Lord for that entire Campaign, unless one is removed. A Lieutenant may have only one Lower Lord at a time; the Lower Lord may not be a Lieutenant. A Commander may not be a Lieutenant or Lower Lord. A side may have several Lieutenants.
NOTE: If Romanos disbands and Manuel Komnenos is in play as a Lieutenant to a different Lord, immediately replace Manuel's cylinder with the taller version with the ring. He is no longer a Lieutenant.
- Lieutenant and Lower Lord always move together in March, Avoid, Retreat, etc. (4.3, 4.8.3).
- If a Lieutenant or his Lower Lord Disbands while the other does not, the remaining Lord becomes a normal Lord.
- Revealing a Lower Lord's Command card results in a Pass, as if a No Command card (4.2.3).
PLAY NOTE: A Lieutenant and Lower Lord may not Withdraw into a Fort (Size one; 1.3.1, 4.3.4).
4.2 Command
After building Plan stacks, the Seljuk then Roman player alternate flipping (revealing) the top current Command card of their stack—one Seljuk card, then one Roman card, and so on. After revealing a Command card, a side Activates the Lord shown on that card or Passes if a No Command card is revealed (4.2.3).
NOTE: After each Command card, Lords who moved and/or fought will Feed their Forces, and Lords may Pay or might Disband (4.6).
4.2.1 Actions
A Lord shown on a Command card (bearing his Command Rating number, 1.5.3), may execute a series of Commands of the owning player's choice (4.2.2, 4.3-4.5), in any order, using actions numbering up to that Lord's Command Rating (1.5.3, as shown on the card, the Lord cylinder, and possibly modified by Arts of War cards), including Pass (4.5.8).
EXCEPTIONS: Besieged Lords (4.3.5) may only Sally (4.5.3), Pass (4.5.8), or perhaps Forage (4.5.4). Siege and Tax take an entire card (4.5.1, 4.5.6). Starting a Siege and any Battle or Storm end that card's actions (4.3.5, 4.8, 4.9).
NOTE: Lords may use multiple actions on a single Command type, for example, three actions to Forage three times.
4.2.2 Command Menu
Lords select from Command actions listed on the Commands foldout page and detailed below: March, Siege, Storm, Sally, Supply, Forage, Ravage, Tax, or Pass; Romans can Recruit (4.5.7).
Important: A Besieged Lord on a Command card may only Sally, Pass, or perhaps Forage.
4.2.3 No Command Card
Upon revealing a No Command card, a Lower Lord's card (4.1.3), or the card of a Lord not on the map, that side does nothing. Play instead passes to the other side or ends the Campaign if neither side has cards left in its Plan (4.7).
4.3 March
An Unbesieged (4.3.5) Lord may expend a Command action (possibly two if Laden or across a Pass, or three if both, 4.3.2-3) to March to another Locale.
Important: Carts are never needed to March; they haul Provender. Their number determines how much Provender a Lord can take along and whether he will be Laden (4.3.2). Lords do not need Carts to move with Coin or Loot.
MOVED/FOUGHT: As a reminder, upon any movement during March, put a Moved/Fought marker on or next to each moving Lord's cylinder that does not yet have one.
4.3.1 Group March
Any or all of a side's Unbesieged Lords in the same Locale with its Commander may March with him (1.5.1). The Lower Lord beneath a Marching Lieutenant (4.1.3) must move with the Lieutenant.
4.3.2 Laden
Provender and Loot can hinder March, Avoid Battle (4.3.4), and Retreat (4.8.3).
- A Lord with any Loot on any Way moves Laden.
- A Lord with more Provender than Carts but not more than twice as much moves Laden along any Way.
- Lords with more than two Provender per Cart may not move unless they discard the excess (1.7.2).
DESIGN NOTE: Medieval war booty (Loot in the game) included livestock herds or delicate goods that could only funnel so fast down narrow ways.
SHARING: Lords moving as a group (4.3.1) Share Carts (1.5.2). Count all Provender and Carts of Lords moving together to determine Laden status.
4.3.3 March Speed
An Unbesieged Lord takes one Command action to March to an adjacent Locale via a single connecting Way, except as modified below.
- Turkic Horse—the first March of a Command card of a Lord commanding Forces comprised entirely of Turkic Horse costs –1 Command actions (to a minimum of 0) to move adjacent along a Way (1.3.1). NOTE: If acting as a Lieutenant or Lower Lord, all Lords' forces in the stack must only be Turkic Horse to gain this benefit.
- Marching Laden—with Loot or more Provender than Carts (4.3.2)—costs two Command actions, not just one.
- Subject to the above, Marching across a Pass (1.3.1) adds one to the total action cost of the March Command.
- EXCEPTION: Marching to/from a Holding Box costs the entire Command Card's actions (and may be done Laden)
NOTES: The type of Way influences the number of Commands a Lord uses to March. Remember, Lords may discard Loot and/or Provender to facilitate March (1.7.2), but never units.
4.3.4 Approach
If a Marching Lord enters the Unbypassed Locale of an Unbesieged enemy Lord, check immediately for Avoid Battle (moving to an adjacent Locale), Withdrawal (into a Stronghold there), Battle, and Siege as follows.
AVOID BATTLE: Upon enemy Approach, some or all Inactive Lords may move to one or more adjacent Locales, within these restrictions:
- Lords may not Avoid Battle across any part of the Way that the Enemy used to Approach the Locale.
- Lords may not Avoid Battle to any Locale with an Unbesieged Enemy Lord.
- Mark Lords Avoiding Battle to an Unbesieged Enemy Stronghold as Bypassing it (4.3.5).
- Lords may only Avoid Battle Unladen (4.3.2). They may take no Loot and may take only Provender equal to their own or Shared Carts.
- Lords may discard Loot and Provender as needed to become Unladen and thereby Avoid Battle (1.7.2). The Approaching Enemy Lords receive and divide among them any Assets so discarded (as if Spoils, 4.8.3).
Mark Avoiding Lords as Moved/Fought (4.3).
PLAY NOTE: The Local Scouts Event can prevent Avoid Battle.
WITHDRAW: Upon Approach or after Battle (4.8.3), the Inactive side may Withdraw some or all Lords into a Friendly Stronghold there (not Ruins), equal to a number of Lords up to its Size (one, two, or three, 1.3.1). NOTE: Withdrawal alone does not mark Lords as Moved/Fought.
BATTLE: Unless all enemy Lords there either Avoid Battle or Withdraw, conduct a Battle immediately with the Marching side as Attacker (4.8), as part of that March Command. Rules section 4.8 covers the Battle procedure in detail.
4.3.5 Besiege or Bypass
When any Lord(s) are in a Locale outside an Enemy Stronghold (not Ruins) that isn't Bypassed or Besieged they must immediately either Besiege or Bypass if no Enemy Lords are outside (either initially or after Withdrawal), after Approach (4.3.4):
- Besiege: Place one Siege marker of that side's color on the Enemy Stronghold or Lord(s) there, skip any more actions on this card, and go to Feed/Pay/Disband (4.6), or
- Bypass: Place a Bypass marker on that side's Lord(s) outside the Stronghold and continue any actions on that Command card without leaving that Locale (EXAMPLES: Supply, 4.4; Forage, 4.5.4; Ravage, 4.5.5).
A Locale can only have a maximum of one Bypass marker (all Lords are considered to be Bypassing that Locale).
At the moment the first Siege marker is placed on a Roman Stronghold, the Roman player may assign a number of available Themata Service Markers from that Stronghold's Thema as defenders of that Stronghold. The number of markers available to defend is at maximum the size of the Stronghold (see Stronghold foldout).
Whenever a Besieged or Bypassed Stronghold becomes free of Enemy Lords in the Locale, remove all Siege and Bypass markers there, then return all Themata Service Markers to their home Thema.
NOTE: Lords outside an Enemy Stronghold are either all Besieging or all Bypassing it. Ruins and Friendly Strongholds do not impede March; Lords never Besiege or Bypass them.
PLAY NOTE: Bypassing rather than Besieging a Stronghold allows a Marching Lord to use actions remaining on his card to Ravage, Supply, or Forage. Siege or Bypass allows Retreat to or Supply past an Enemy Stronghold (4.8.3, 4.4.1).
4.3.6 March from Bypass
For any of the following actions, mark Marching Lords as Moved/Fought:
DEPART: A Lord or group that begins a Command card at a Bypass marker (either Bypassing or Bypassed) may March to an adjacent Locale normally (4.3). If no Lords remain at an Enemy Stronghold, remove any Bypass markers.
ENCAMP: A Bypassing Lord may use one March action (regardless of Laden status, 4.3.2) to replace the Bypass marker at the Bypassed Stronghold with one Siege marker, skip any more actions on this card, and go to Feed/Pay/Disband (4.6). Mark the Encamping Lord (the one who used the March action) Moved/Fought, but not any other Lords there.
PLAY NOTE: With enough Command actions, a Lord could Bypass, Forage or Ravage, and then Encamp all on a single card.
SORTIE: A Lord or group inside a Bypassed Friendly Stronghold may use one March action (regardless of Laden status, 4.3.2) to Approach (4.3.4) the Bypassing Enemy instead of moving adjacent. If they lose a Battle there, they Withdraw or Retreat normally (4.3.4, 4.8.3), keeping the Bypass marker. NOTE: Only a Commander or Lieutenant can Sortie a group (4.3.1).
4.4 Supply
An Unbesieged Lord may use a Command action to add Provender to his mat from his Seats.
4.4.1 Sources and Routes
The Active Lord must have an unbroken Route of Locales and Ways, served by Transport, to his own Seat(s) at an Unruined Stronghold that he will use as a Supply Source. Mark Sources as needed.
- A Supply Route may not include any Locale with an Enemy Lord or Stronghold unless Besieged or Bypassed (4.3.5).
NOTE: Neither Ruins nor Ravaged (1.3.1, 4.5.5, 4.9.1) block Supply Routes, but a Ruined Seat cannot itself be a Source.
TRANSPORT: To add Provender, the Active Lord must have or Share (1.5.2) at least one Cart for each intervening Road crossed (and two for each Pass) along any Route to a Source. NOTE: A Lord at his Seat would not need Carts to use it as a Source.
Important: In order to draw multiple Provender per Supply action, a Lord must have a Cart (2 Carts along a Pass) for each Provender along each Way used by each Route.
4.4.2 Add Provender
The Active Lord adds one Provender to his mat per Unruined Stronghold Seat used within the Transport limit (Carts along Routes to Sources).
NOTE: A Lord may have at most 8 Provender (1.7.3).
EXAMPLE: A Lord two Ways from his Seat, one Road and one Pass, with three Carts could draw one Provender per Supply action (as limited by his Transport). If he could reach two of his Seats, he can still only obtain 1 Provender per Supply action because each Cart is committed to a single Way per action.
4.5 Other Commands
4.5.1 Siege
Any Besieging Lord may use his entire Command card to advance the Siege as follows.
SURRENDER? If the Siege Locale has no Besieged Lords, the Besieging side may roll for Surrender. It rolls a number of dice equal to the Stronghold's Value (one, two, or three, or 4 dice if Aleppo, 1.3.1). If each die rolled is less than or equal to the number of Siege plus Ravaged markers there (up to four Siege markers plus zero or one Ravaged marker), the Besiegers seize the Stronghold:
- Set it to their Allegiance (1.3.1, either placing Conquered markers equal to its Value of one, two, or three or removing markers already there; adjust Victory Points/VP, 5.1).
- Remove all Siege markers.
- Terms: Award no Spoils (4.9.1).
- Themata: All Themata Service Markers (1.5.1) garrisoning the Stronghold are removed from the game.
- If the Stronghold has a Roman Strategic Objective marker on it, the Roman player claims it by placing it in the Constantinople Holding Box.
NOTE: A Ravaged marker at the Siege Locale adds one to the Surrender die roll range regardless of whose Ravaged marker it is.
SIEGEWORKS: If the Stronghold did not Surrender (including because the Besieger declined to roll), and if the Besieging side has at least as many Lords there as the Stronghold's Size (one, two, or three), add one Siege marker, to a maximum of four markers at the Locale.
DESIGN NOTE: Larger Strongholds required more forces to blockade effectively.
PLAY NOTE: Siege markers can erode at Campaign's end (4.7.3).
MOVED/FOUGHT: Finally, mark all Lords of both sides there as Moved/Fought.
4.5.2 Storm
A Lord may use a Command action to Storm a Stronghold currently under Siege. This ends the card, even if there are Command actions remaining. For Storm, see the full procedure in 4.9.1.
4.5.3 Sally
A Besieged Lord may use a Command action to Attack Besiegers in a Battle. See 4.9.2 for the procedure.
4.5.4 Forage
A Lord may use a Command action to seek to add one Provender to his mat:
- His Locale may not be Ravaged (4.5.5) and,
- He may not be Besieged (4.3.5) by a number of Enemy Lords equal to or more than the Stronghold's Size (1.3.1).
PROCEDURE: Forage at an Unbesieged Friendly Stronghold (not Ruins, 1.3.1) automatically adds one Provender. For Forage anywhere else (including Ruins):
- Roll a die: a roll of 1-3 adds one Provender; 4-6 fails.
GARDENS: A Lord at a Friendly Town or City (not Fort) may Forage to add one Provender automatically, even if Besieged.
PLAY NOTE: Ravage blocks Forage while Ruins block Supply Sources. Forage requires no Sources or Transport but can be less sure and bountiful than Supply.
4.5.5 Ravage
An Unbesieged Lord may use a Command action (or two actions if Seljuk) at a Locale to place a Ravaged ½ VP marker there. The Locale must currently be Enemy (1.3.1) and not yet Ravaged. Ravage places a marker of the opposite color to the Locale's current Allegiance (adjust Victory, 5.1).
- Add one Provender to that Lord's mat; if at an un-Ruined Stronghold also add one Loot.
DESIGN NOTE: Settled areas confronted raiders with tougher local defenses but also offered more to carry off.
Roman Ravage costs one Command and is always successful.
If a Seljuk Lord uses two Commands to Ravage a Locale in the Roman Empire, it is automatically successful.
If a Seljuk Lord uses only one Command to ravage a Locale in the Roman Empire, the Roman player may choose one available, Unbesieged Themata Service Marker from the box in that Locale's Thema to defend against the Ravage. Assign a Hit to the Themata Service Marker and roll Protection for its unit type as if in Battle (4.8.2). If the roll is successful, the Ravage action fails and no Provender or Loot is received by the Seljuk Lord. If the roll fails, eliminate the chosen Themata Service Marker from play and the Ravage succeeds as above. Only one Seljuk Ravage attempt is allowed per Locale per Command card.
For this purpose, there is no difference for Themata Service Markers depicting one or two units; if a marker showing two units is chosen to defend, only a single die is rolled and the marker is removed from the game if the Protection roll fails.
If only one Command to Ravage is used and the Roman player chooses not to defend with Themata, the Ravage automatically succeeds as above.
PLAY NOTE: Lords can Ravage while Besieging and at Ruins. Ravage at Enemy Allegiance markers encourages Surrender (4.5.1). Ravaged markers are subject to periodic removal (4.7.2).
4.5.6 Tax
An Unbesieged Lord at any of his Seats may use his entire Command card to add one Coin to his mat, even if the Locale is Enemy. Additionally, the Roman Commander may Tax any Friendly Stronghold (only) in the Roman Empire that is not his Seat. When he does, add one Seljuk Ravaged marker to that Stronghold if not yet Ravaged. A Roman Commander may not tax a Stronghold if a Ravaged marker is already present.
DESIGN NOTE: The Roman Emperor employed special right during the campaign to requisition funds from the population, which had serious negative effects for a community's ability to function.
4.5.7 Recruit
An Unbesieged Roman Commander may spend one Command to add an available Themata Service Marker and its unit(s) to his Forces from the Thema in which he is currently located. Always place the Themata Service Marker on his Lord mat, and then also put the unit(s) depicted on it atop the marker to track the unit status during Battle.
4.5.8 Pass
An Active Lord may opt to Pass (do nothing) instead of using any actions or Treachery.
4.6 Feed - Pay - Disband
At the end of each Command card, those Lords on both sides marked Moved/Fought (because they took part in March, Avoid Battle, Battle, Siege, or Storm) must Feed their Forces. All Lords on both sides may receive Pay. All then check for Disband.
4.6.1 Feed
Each Lord who Moved or Fought (Seljuk then Roman) must remove Provender or Loot per the number of units on his mat:
- One Provender or Loot for 1-8 units.
- Two for 9-12 units.
- Three for 13-16 units.
- Four for 17+ units.
NOTES: Put "Feed ×2" or "Feed ×3" markers on mats as a cue when thresholds are exceeded.
GREED: Feed may not remove Assets beyond this requirement (1.7.2). NOTE: Loot Pays Lords only at Friendly Locales (3.2.2) but Feeds them anywhere.
SHARING: First, all Lords must Feed their own Forces, using Provender and Loot from their own mats. Then, Lords must expend Provender and Loot to Feed Forces of other Friendly Lords at the same Locale who did not fully Feed their own Forces but are out of Provender and Loot (1.5.2). A side may not withhold Provender or Loot; it must use all as able to meet Feeding needs, even if only partially.
EXAMPLE: Romanos Diogenes is at Edessa with 9 units, 1 Cart, and 1 Provender. Nikephoros Bryennios is also at Edessa with 6 units, 2 Carts and 4 Provender. Both are marked Moved/Fought. During Feed/Pay/Disband at the end of the current Command phase, Romanos must spend 2 Provender on himself (because he has more than 8 units in Forces) and Nikephoros one. Because Romanos only has 1 Provender, he must use one from Nikephoros's mat.
UNFED: Shift the Service Marker for any Lord that received less Provender or Loot than required one Seasonal box left. (If using the Vassal Service optional rule, 6.2, also shift those of his Vassals.) A Lord requiring two or three Provender and/or Loot but with access to fewer consumes them and suffers the shift.
4.6.2 Pay and Disband
Any Seljuk then Roman Lords may receive Pay as per Levy (3.2). Then all Lords on both sides Disband as required by their Service limit (3.3.1-.2).
4.6.3 Remove Markers
Remove Moved/Fought markers from all Lords and proceed with the other side's next Command card, if any.
4.7 End Campaign
After revealing all Command cards in both sides' Plan stacks, end this Seasonal Turn.
4.7.1 Game End
If the just-ended Campaign was part of the scenario's final Seasonal Turn, the game ends; the side with the most Victory points wins (5.3).
4.7.2 Grow
At the end of each Spring Turn (boxes 1, 4, 7, and 10), the Seljuk player then the Roman player each must select and reduce the Enemy's Ravaged markers on the map to ½ their total number, rounded up (adjust VPs, 5.1). EXAMPLE: Reduce five markers on the map to three.
4.7.3 Repair
At the end of each Campaign, remove one Siege marker from each Stronghold that has three or four Siege markers.
4.7.4 Wastage
Seljuks then Romans must select and discard any one Asset or "This Lord" Capability card from each of their Lords who has more than one of any type of Asset or more than one such card.
EXAMPLE: A Lord with two Carts, one Loot, and one card at his mat must discard one item because of the two Carts; the owner could choose a Cart, Loot, or the card.
DESIGN NOTE: Wastage represents rotting of food, loss of draft and pack animals to mistreatment, wear and tear on wagons, and so on.
4.7.5 Reset
Prepare for the next Turn:
- The Roman Commander may retain all Themata Service Markers and their units from a Thema on his Lord mat by paying one Coin per Thema with units present. If not, return each unpaid Themata Service Marker to its home Thema and remove the provided Forces (1.6).
- Unstack any Lieutenants and Lower Lords (4.1.3).
- Discard all "This Campaign" Events (3.1.3).
- The Seljuk then Roman player may discard any Arts of War cards back into their decks (1.9.1).
- Advance the Campaign marker to the next Seasonal Turn box and flip the marker to Levy (2.2.2).
4.7.6 Winter
Conduct this phase after Reset in the first three Autumn turns (boxes 3, 6, and 9).
- If the Aleppo Independence event has been played for its effect and Aleppo is Seljuk Conquered, the Seljuk player wins an automatic victory (5.2).
- Bounty. A Seljuk Lord who can trace a path of Locales that are either Ruins, Wilderness, Unfortified Settlements, Friendly Strongholds free of enemy Lords, or Bypassed or Besieged Enemy Strongholds back to his Seat may score 1 VP per Loot on his Lord mat up to the number of Carts he and co-located Lords currently possess. The Carts do not need to be assigned to a Way like during the Supply action, their number just limits the amount of Loot that can be scored during this phase. Put Loot tokens scored this way into the Mosul & Baghdad Holding Box as a way to track those VPs.
- Aleppo Diplomacy. If the Independent Aleppo marker is currently on the map, roll a die. On 1-2, remove the marker. On 3-6, it remains.
- Seljuk Unity. Count the total number of Locales that have Seljuk-colored Ruins, Conquered, or Ravaged markers (not VP value) on the map. Compare to the yearly Seljuk Unity value on the Calendar (Autumn box). If the number of Locales with those markers is less than the Calendar value, the Seljuk player loses VPs equal to the difference, removing Loot in the Mosul and Baghdad Holding Box first (if any), then placing Roman Conquered 1 VP markers in the Constantinople Holding Box. These Roman Conquered 1 VP markers will be removed first when the Seljuk player scores positive VPs during a future Bounty phase (i.e., remove a 1 VP marker from Constantinople for each Loot to be placed in Mosul & Baghdad until there are none remaining, then place Loot markers in Mosul & Baghdad as normal).
- Winter Quarters. Unless allowed by a Capability to ignore this phase, return all Lords to their Seats Unladen by discarding any excess Assets (1.7.2). If Lord's Seat is Enemy Conquered, place Lord in their Allied Holding Box. Each Lord then reduces his Carts to half their number rounded up.
- Remove any Marwanid Alliance Seat markers from the map.
PLAY NOTE: Arisighi's Seat will always be the Constantinople Holding Box if he is currently allied to the Roman player. If Roussel de Bailleul or Robert Crépin is Seljuk-allied, his respective Seat will be the Mosul and Baghdad Holding Box if his normal Seat is enemy-occupied.
4.8 Battle
When a Lord Approaches an Unbesieged, Unbypassed Enemy Lord who does not Avoid Battle or Withdraw (4.3.4), a Battle ensues. All Unbesieged and Unbypassed Lords in the Locale must participate, others may not. A Battle and Storm page of the foldout summarizes these rules. NOTE: Storm of a Stronghold (4.9) follows similar but distinct rules from field Battle.
MARKER: As a reminder where Lords are fighting, put the Battle/Storm marker at that Locale.
4.8.1 Battle Array
Players Array their Lords involved—cylinders either on the Battle mat or mats on the table, as players prefer.
- Attackers then Defenders position their Lords.
- A side must be able to have a Lord in up to three possible Front positions: left, center, and right. Other Lords start in Reserve.
- The Active Lord must start at Front center. The Attackers then fill in Front left and/or right positions with one other Lord present in each, if any, and put any remaining Lords in Reserve.
- The Defender must put one Lord directly opposite each Front Attacking Lord, first in the center, then left and/or right, as able.
PLAY NOTE: Players may use Lord cylinders on the Battle mat or Array Lord mats, as preferred.
EVENTS: Attacking then Defending sides may then play Held Events that specify "in Battle" or "in Storm", as applicable (3.1.3).
PLAY NOTE: In the rare instance the Cavalry Charge event is played in the same Battle as Command Confusion, Cavalry Charge's effect takes precedence.
RELIEF SALLY: When a side Approaches (4.3.4) a Locale where it is also Besieged, any Besieged Lords may join any Attack for no additional Command actions. Array Sallying Attackers in a row as above but behind the Defenders. Any Defending Lords in Reserve instead position as above, opposite Sallying Attackers to fight them as a Rearguard row. If there is no Rearguard, Sallying Lords fight Front Defenders as if Flanking them all equally closely (4.8.2). Siegeworks (4.9.1) protect against Strikes by Sallying Attackers only (round separately). If the Attackers lose, Withdraw Sallying Lords back into the Stronghold (4.8.3) and reduce Siege markers there to one (4.9.2).
4.8.2 Rounds
Once Arrayed, a Battle continues Round after Round, until a side Concedes or all its Lords Rout. A Round of Battle will go through the steps below in this order: Concede?, Reposition, Strike. Within each Strike step, determine Hits, then Protection, then Rout. See the Battle and Storm chart of the play aid.
NOTE: Some Battle Event effects vary by Round.
CONCEDE THE FIELD? At the start of each Battle Round, the Attacker then the Defender may declare that the Battle will end after this Round with that side as the loser but with diminished losses (4.8.3-4). NOTE: Battles last at least one Round.
- Place the Pursuit marker between the two sides, pointing toward the Conceding side. The marker shows that the Conceding side in this final Round will halve its Hits against the Enemy (see below).
REPOSITION: Then, in each Round after the first, both sides reposition Lords as follows (in this order).
- Rout. Remove Routed Lords from the Battle Array. They no longer occupy any Array position nor participate further until Ending the Battle (4.8.3).
- Adjust Rows. If Relief Sally (4.8.1) and all of any row Routed, advance or reface rows: if no Sallying Lords remain, Rearguard becomes Reserve; if no Rearguard, Sallying Lords Flank Defenders; if no Front Defenders, Rearguard faces about as Reserve.
- Advance Lords. Attacker then Defender may slide any Unrouted Lords in Reserve into any empty Front positions (one each).
- Center. If a center position remains empty, first the Attacker then the Defender must select and slide one of that side's Lords from either left or right front to fill its empty Front-center position.
STRIKE: The Forces of each Lord Strike those of the Lord directly opposite them or—if Flanking—of the closest enemy Lord in that row.
- Flanking. Whenever a Lord facing an enemy row has no enemy Lord directly opposite, he Flanks and Strikes the closest enemy Lord in that row. Center Flanks left and right and chooses one to Strike. Total all Hits from Flanking Lords plus the directly opposed Lord, then round up. A Flanking Lord may absorb Hits from a Lord he Flanks if no enemies Flank the target Lord.
- Initiative. Lords Strike step by step in the order shown below; each letter designates a separate step. Within each step, Striking Lords choose the order of Strike, Lord by Lord (or Lord with Flanking Lord[s]). Then any Flanking Lords choose whether to absorb Strikes before opposed Lords. Resolve all Hits, Protection rolls, and Rout before Striking in the next step, not simultaneously. EXAMPLE: Attackers take Hits from Defending Missiles before Attacking Archers Strike.
- Missile steps
- a. Defending Missiles
- b. Attacking Missiles
- Melee steps
- a. Defending Horse
- b. Attacking Horse
- c. Defending Foot
- d. Attacking Foot
- Missile steps
TOTAL HITS: Each unit causes ½, 1, 2, or 3 Hits, depending on Forces and Strike type—see the Forces table. Total all Hits for that step, including Flanking plus directly opposing Lords, rounding up. NOTE: You do not roll to generate Hits—they generate automatically based on the Forces Striking.
- Mixed Missiles. When Garrison Missiles or Missiles that choose targets (Parthian Shot Capability) combine with normal Missiles, round Hits in favor of the Garrison or Capability Missiles.
- Pursuit. The Conceding side halves its total Hits against the Pursuing side. Round all fractions up within each step. EXCEPTION: A single conceding Lord with only Turkic Horse units in his Forces at the start of the battle facing only another single Lord causes both sides to be halved.
APPLY HITS TO LORDS: Hits apply to the Forces of the opposed, Flanked, or Flanking Enemy Lord. A Player with a Flanking Lord where no Enemies are Flanking the target chooses either the Flanking or directly opposed Lord to take Hits. Whenever a Lord Routs to create a new Flanking situation, apply remaining Hits accordingly.
PROTECTION: Strongholds, Siegeworks, some cards, and most Forces types give saving rolls that can nullify Hits—Walls, Armor, Evade, and Unarmored Protection. See the Forces and Strongholds tables. Card text (1.9.1) and Garrison units (below) can change these die-roll ranges by adding to or subtracting from the top number of the range.
EXAMPLES: A "+1" to Armor would improve a 1-3 Armor die-roll range to 1-4. A "–1" to Walls would nullify a single Walls marker.
ROLL WALLS: If this is a Storm or Sally (4.5.2-3, 4.9), a Lord benefiting from any Walls or any Siege markers first rolls dice equal to the total number of Hits just received in that step before assigning any Hits to his units. Each roll within the Walls range specified (typically, "1-4") or less than or equal to the total Siege markers cancels one of those Hits. Roll Hits that differ from others (such as –2 Armor) separately.
ASSIGN HITS TO UNITS: After rolling for any Walls, the owner chooses which unit will absorb each Hit, Hit by Hit (EXCEPTIONS: Select Target; Storm Attack). Each Hit causes a Protection die roll that can Rout that unit.
Important: A unit may absorb several Hits in succession, shielding its fellow units, as long as it succeeds on each Protection roll.
-
Select Target. Garrison missiles and the Event Parthian Shot can enable the Striking side instead to select which Enemy unit takes each such Hit. After the player receiving the Hits chooses a Lord to be affected (such as when Flanking), the Striking side Selects Target units for such Hits; then the owner chooses units to take any other Hits.
PLAY NOTE: Garrison units (4.9.1) will Select Targets when Defending a Stronghold in Storm.
-
Storm Attack. Hits against a side Attacking in Storm must be applied to Armored before Unarmored units, regardless of who is choosing what (4.9.1).
ROLL BY HIT: Units roll Protection as follows.
- Armor. A unit with any Armor Protection assigned a Hit rolls a die. A roll within the Armor range specified (on the Forces table or by card, 1.9.1) means that Hit has no effect (no Rout).
- Evade. Units with Evade Protection roll and absorb Hits just as if Armored, except that Evade is not used against Missile Hits nor Hits in Storm.
- Garrison Missiles. Missile Hits from Stronghold Garrisons roll against Armor reduced by –1, to a minimum Armor of "1".
- Unarmored. Militia avoid Routing on a Hit only on a roll of 1.
ROUT: A unit is Routed as soon as it fails to negate a Hit with a successful Protection roll. Slide each Routed unit to the "Routed" section of the Lord's mat. Routed units no longer Strike nor absorb Hits in that Battle.
- A Lord Routs at the moment that his last Unrouted unit Routs. Remove him from the Array. A new Flanking situation may immediately result among Lords facing each other. When an entire row Routs, ignore remaining Hits against that row.
- Make sure to track Themata status by keeping their units on their marker.
PLAY NOTE: When a Themata marker with more than one unit has only one unit Rout, players are advised to keep track of which units belong to the Themata in some convenient fashion until the Battle is over.
NEW ROUND: If neither side Conceded and at least one Lord on each side has yet to Rout, begin a new Round with the "Concede the Field?" step (above); otherwise end per below.
4.8.3 Ending the Battle
A side that Conceded at the start of the Round or that has no Unrouted Lords when the other side did not Concede loses the Battle at the end of that Round. Proceed thus:
RETREAT, WITHDRAWAL, OR REMOVAL: All losing Lords must either:
- Retreat to a single adjacent Locale that has no Enemy Lords or Strongholds that are not already Besieged or Bypassed (4.3.5), or
- Withdraw into a friendly Stronghold at the Battle Locale (if it Sallied or is Defending at one), or
- Be removed per 4.8.5 below.
The owning player chooses each Lord's fate among the above, within the following requirements:
- Defenders may not Retreat along any part of the Way that Attackers used to Approach the Locale.
- Marching Attackers must Retreat to the Locale whence they Approached (4.3.4).
- Sallying Attackers must Withdraw back into their Stronghold.
LOSSES: Both sides check for removal of Routed Forces per 4.8.4 below.
SPOILS: Lords on the losing side of a Battle (or Sacked in Storm, 4.9.1) may have to immediately transfer Assets to Lords on the winning side; the winning player distributes these Assets among mats of Lords at the Locale:
- Lords who Withdrew keep all their Assets.
- Lords who Conceded and Retreated transfer all Loot and any Provender beyond that which they could move without being Laden (4.3.2) but lose no other Assets.
- Losing Lords who were removed (for being unable to Retreat or Withdraw or by Losses, or who Retreated without having Conceded the Field (see above) transfer all their Assets.
SERVICE: The losing side rolls one die for each of its Retreated Lords and shifts that Lord's Service Marker (and, if using the Vassal Service optional rule, 6.2, each of his Vassals' markers) left one box on a roll of 1, 2, or 3, two boxes on a 4, 5, or 6.
- Losing Lords who Withdrew into a Stronghold do not shift their Service.
PLAY NOTE: Defending outside one's own Stronghold can avoid the worst effects of a defeat.
4.8.4 Losses
After losing Lords Retreat, Withdraw, or are removed in a Sack (4.9.1), both sides determine the fate of their Routed units:
- Roll a die for each Routed unit.
- All Routed units of Lords who Retreated without having Conceded the Field (4.8.2) or who were Attacking in Storm (4.9.1) fail unless they roll a "1".
- For Routed units of all other Lords (even if the Lord Routed after Conceding the Field), compare each unit's roll to its inherent Protection, as shown on the Forces table for that type, unmodified by Events or Capabilities.
- Units that roll within those ranges are no longer Routed—push them above the line on their mat. Those that fail their roll are Lost—remove them to the pool. (Service Markers stay put.)
- Once a Themata Service Marker has all its units Lost in a Battle, the Service Marker is removed from the game.
- For a Lord who loses all his Forces in Battle or Storm, remove him per 4.8.5 below.
4.8.5 Lord Removal by Combat
Lords removed in Battle (4.8.3-4) or Storm (4.9.1)—by failure to Retreat or Withdraw, Loss of all his Forces, or Sack—suffer removal as if Disbanding Beyond Service (3.3.1).
NOTE: Later Disband due to Service Limit (3.3) does not count as removal by combat, even if Battle caused a shortening of Service.
4.8.6 Aftermath
After resolving Spoils and Losses, conclude the Battle or Storm as follows.
- Moved/Fought: Mark all Attacking and Defending Lords Moved/Fought (if not already marked).
- Events: Discard all Hold Events (3.1.3) used in this Battle or Storm.
- Siege: If the combat created or ended a Siege, adjust Siege, Conquered, Ruins, and/or Victory markers (1.3.1, 4.3.5, 4.9.1, 5.1).
- Recovery: Skip any Command actions remaining on this card. Go to Feed/Pay/Disband (4.6).
Important: A Battle or Storm blocks any further Command actions on the current Command card.
4.9 Storm and Sally
Lords at Siege Locales (4.3.5) may advance the Siege, Storm or Sally (Attack).
4.9.1 Storm
Any Lord outside a Besieged Stronghold may use a Command action to launch an Attack. Proceed per Battle rules (4.8) except as follows; refer to the Battles and Storm chart. The Strongholds table lists Walls and Garrisons.
NOTE: Some Events and Capabilities apply to Battle but not to Storm, or vice versa.
ARRAY: Follow Battle rules (4.8.1-4.8.2) except that each side's Front row begins with at most one Lord (for the Attacker, the Active Lord); other Lords start in Reserve. (More Lords may later Reposition to the Front, up to the Stronghold's Size.)
CONCEDE? At the start of each Round after the first, the Attacker (only) may end the Storm then. The Attacker loses. Go to Ending the Storm below.
REPOSITION: In each Storm Round after the first, Attacker then Defender may add one Lord from Reserve to the Front, up to Stronghold Size (one, two, or three). A Reserve Lord (if any present) must move to Front if all of their Front Lords Routed, or must move to Front to match an enemy Front Lord.
STRONGHOLD EFFECTS:
- The Besieged side receives the Garrison units (and for the Romans, any present Themata Service Markers chosen to defend the Stronghold at the start of the Siege) shown for that type of Stronghold on the Strongholds table. The current Allegiance of a Stronghold determines which units are used in defense as indicated by the columns on the Strongholds section of the player aid card (remember: Strongholds in the Fatimid Caliphate, 1.3.1, always use the Seljuk Garrison column).
- In the rare case that the pool has too few pieces, do not place those units.
- The Besieged side uses that Stronghold's Walls, per 4.8.2 and the Strongholds table.
- The Besieging side uses Siegeworks as its own Walls (see below).
- All Defending units Melee Strike before any Attacking units do, unlike Battle in which Horse Melee precedes Foot (4.8.2, see the Battle and Storm chart).
- The Attacking side must absorb Hits with any Armored units before doing so with other units.
- Each Lord of each side in Storm adds no more than six Hits in Melee. (Missiles are unlimited.)
GARRISON FORCES DURING STORM:
- A Garrison's Foot units have both Melee and Missiles. Its Infantry and Militia are × ½ Missile units that select Enemy targets (4.8.2 ASSIGN HITS TO UNIT) with –1 to Enemy Armor.
- Garrisons add their Strikes to those of the Defending Lord (rounding up), if any, but do not otherwise affect the Lord's Strikes. Garrisons are separate from any Defending Lord and ignore cards affecting that Lord individually.
- The Defender must assign all Hits suffered to Garrison units until they are Routed, after which the units of the Front Defending Lord (if any) absorb Hits.
- Whenever Routed and at the end of the Storm, return Garrison units to the pool.
- The full complement of Garrison units Defend in each Enemy Storm action, regardless of what may have happened in previous Storm actions.
SIEGEWORKS: The Besieging side places all Siege markers at the Locale in front of its Attacking Lord(s). Those Lords during the Storm have Walls with Value equal to the number of Siege markers against both Missile and Melee Strikes. EXAMPLE: Lords Storming with three Siege markers would benefit from Walls 1-3.
ENDING THE STORM: A Storm ends once the number of Rounds completed equals the number of Siege markers there, or earlier if a side loses because all its Lords there Rout or the Attacker Concedes.
- Unless all the Defenders Routed, the Attackers lose. Losing Attackers neither Retreat nor give up Spoils. Presuming that Attackers survive, the Locale remains Besieged—return the Siege markers to the map and go to Aftermath (4.8.6).
- If Defenders lose, Sack the Stronghold (see below). If Defenders win, any Themata Service Markers garrisoning the Stronghold remain.
- Both sides' Forces take Losses per Battle (4.8.4), except that Routed Defending units always roll against Protection and Routed Attacking units that fail to roll a "1" are removed.
- Mark all Lords there as Moved/Fought, even Lords who remained in Reserve. NOTE: Lords at a Storm Locale may not simply sit it out. Used or not, they showed up for action.
SACK: When Besieged Defenders lose a Storm:
-
Conquer. The Besiegers Conquer the Stronghold. Remove Siege markers. If the Stronghold now has a Ravaged marker that is the same color as its Allegiance printed on the map, flip it to the opposite color. If the Stronghold has a Roman Strategic Objective marker on it, the Roman player claims it by placing it in the Constantinople Holding Box. Place or remove Conquered markers (1.3.1, EXCEPTION: see FATIMID CALIPHATE) and adjust appropriate VP marker on the Calendar (2.2.5, 5.1).
PLAY NOTE: In other words, only flip a Ravaged marker if it's a Friendly Lord re-conquering a Friendly Stronghold from the enemy. You always place a Ravaged marker of your color at enemy Locales. But if that Locale is printed as friendly to you on the map, when you remove enemy Conquered markers after Siege or Storm, flip your own Ravaged marker to the enemy color if present in the space. Loyal citizens who came under the control of the enemy resent their original liege sowing terror upon them in his attempt to re-take the settlement.
-
Ruin. Instead of Conquering the Stronghold the Seljuk player (only) may choose to Ruin it if it is in the Roman Empire. Remove all Siege markers there (1.3.1, 4.5.1). Place one Ruins marker. Adjust VPs (2.2.5, 5.1).
-
Award Spoils. Besieging Lords receive and distribute as desired among their mats a number of Loot, Provender, and Coin each according to the Stronghold's Value (one, two, or three; 1.3.1, see Strongholds table) plus all Assets from Disbanding Lords. EXAMPLE: Sacking a Town yields two Provender and one Coin.
-
Remove Lords. Remove each losing Lord per 4.8.5—that is, Disband him as if Beyond Service (3.3.1).
-
Remove Themata. Remove each losing Themata Service Marker (1.5.1), eliminating them from the game.
AFTERMATH: Proceed with Aftermath (4.8.6).
4.9.2 Sally
A Besieged Lord may use a Command action to Attack Besiegers in a Battle. Follow Battle rules (4.8), including skipping any remaining Command actions (4.8.6) EXCEPT:
ARRAY AND REPOSITION: Each side begins with one Lord in Front (for the Attacker, the Active Lord); other Lords start in Reserve. In each Round after the first, Attacker then Defender may add one Lord from Reserve to the Front, up to Stronghold Size (one, two, or three). If all Front Lords Routed, a Reserve Lord (if any present) must move to Front. NOTE: Positioning of Lords in Sally in this way mimics that in Storm (4.9.1).
SIEGEWORKS: Defenders receive Siegeworks as if Storming (4.9.1). NOTE: Attackers do not receive any Walls or Garrison.
END: Losing Defenders Retreat normally, ending the Siege. Losing Attackers must Withdraw back into their Stronghold (4.8.3, not Retreat).
RAID: If Sallying Attackers lose, remove all but one Siege marker at the Locale (reflecting damage to Siegeworks by the sortie). The Siege goes on.
5.0 Victory
A side may win an immediate victory during play (5.2). Otherwise, determine victory at Game End (5.3).
5.1 Earning Victory Points
Track victory points (VPs) on the Calendar (2.2.5). A side earns ½ VP for each of its Ruins and Ravaged markers (4.5.5, 4.9.1). The Roman player also earns 1 VP for each of its Conquered markers on the map (1.3.1).
To each player's total add their associated victory points earned from Roman Strategic Objective (3.5.3) and Conquered markers (4.7.6) in the Constantinople box (1 VP each for the Roman player), or Loot markers in the Mosul and Baghdad box (1 VP each for the Seljuk player).
5.2 Campaign Victory
If at any moment during Campaign (4.0) a side has no Mustered Lords on the map, the game ends immediately—the other side wins regardless of VPs.
The Seljuk player wins in the first phase of Winter if they have Conquered Aleppo and the Aleppo Independence Event has been played for its effect.
5.3 End of Scenario Victory
If neither side wins by the Game End step (4.7.1) of the last Campaign of a scenario, the side with more Victory Points wins; if tied, the sides draw.
6.0 Optional Rules
The following optional rules are available for players who wish to tinker with game balance and fog of war. They are not considered the "real" way to play, nor should they be viewed as preferred by the designer. They are simply alternative ways to experience the campaigns of this period.
6.1 Hidden Mats Option
For fog of war, players may agree to hide their Mustered Lords' mats (and "This Lord" Capability cards, 3.4.4) behind screens (2.1.1) except when in Battle or Storm (4.8, 4.9.1).
- Players declare hidden Assets, Capabilities, Forces, and Vassals only as needed to verify actions on the board, such as enough Transport for a March (4.3).
- Capabilities affecting an entire side remain revealed per the usual rules (3.4.4).
6.2 Vassal Service Optional Rule
For more detail, track Vassal Service on the Calendar.
Vassals whose Service Markers are Coat-of-Arms side down—Unready, because they Disbanded this Levy (see below)—may not Muster.
- Place a Mustering Vassal's Service Marker right of the Levy marker by a number of Turn boxes equal to the Vassal's Service Rating (just as for a Lord, 3.4.1) and put its Forces onto its Lord's mat.
- Whenever a Lord's Service Marker is to shift for any reason, also shift all his Vassals' Service Markers on the Calendar that number of boxes in the same direction. Shift Vassal markers the specified number of boxes even when the owning Lord's marker is already left of box 1 or right of box 12. Shift Vassal markers left or right off the Calendar in the same manner as Lord's markers (2.2.3).
- After a side finishes all Vassal Muster for this Levy, flip up all Service Markers that are Lord's Coat-of-Arms side down (3.3.1), making them Ready for Muster later in the game.
NOTE: If using the Hidden Mats Option (6.1), the Vassal Service optional rule will nevertheless reveal on the Calendar which Vassals Muster.
Each Disband step (3.3, 4.6.2), put any Vassal markers that are at or beyond their Service limit onto their Lord's mat (even if under Siege, 4.3.5)—Lord's Coat-of-Arms side down (Unready—they are not available until after the ensuing Muster).
- Return Forces shown on any Disbanding Vassal's Service Marker from that Lord's mat (as able) to the pool. If that leaves the Lord without Forces, Disband him (1.6).
6.3 Simultaneous Horse Combat
For players who want more unpredictable and chaotic combat, they may agree to make all Strikes of Horse units during Battle (not Storm) resolve simultaneously for Missiles and/or Melee. This will heavily reduce defender advantage for firing first in Battle, and will also swing the balance of the game toward the Roman player.
6.4 Deadlier Seljuk Missiles
For players who want the Seljuks to have an easier time in combat (or feel that they deserve an inherent archery advantage), they may agree that Seljuk Missiles always Strike first in Battle, regardless of who is the Attacker or Defender. This will greatly advantage the Seljuk player and encourage them to attack more frequently.
7.0 Scenarios
Prepare general setup per 2.1.1. Agree on whether to use any optional rules (6.0). Choose a scenario from the Scenario Guide below. Find the scenario in the following pages and set it up.
QUICKSTART: If playing Levy & Campaign for the first time, set up the Year of Treacherous Ambition – 1070 A.D. Learning Scenario.
DECKS: Each side has one Arts of War deck and one Command deck per side. Be sure to find and set aside each Command deck's Treachery card.
LORD MATS: Prepare the mats of Mustered Lords listed as if just Levied (3.4.1), with their starting Forces, Assets, and Vassal Service Markers.
- Vassals other than Special Vassals (3.4.2) are Ready, Service Markers face up on their mat.
REMOVE FROM PLAY: Return the cylinders, Service Markers, mats, and Command cards of Lords listed as removed to the game box.
MAP: Place markers, Mustered Lord cylinders, and Capability cards (if any) as listed.
CALENDAR: Place markers and cylinders as listed for that scenario and shown in its Calendar setup illustration. Use the "End" marker to block the Levy/Campaign circle in the box after the scenario's last Campaign.
SPECIAL RULES: Note any listed scenario rules, such as special VP conditions and/or number of Command cards to be used.
BEGIN PLAY: Commence the first Levy by shuffling each side's Arts of War deck and drawing random Capabilities (3.1.1-3.1.2).
The Scenarios Guide below shows a chronology of each scenario with the season and year it begins through to the season and year it will end (if there is no instant Campaign Victory, 5.2). The illustrations accompanying each scenario show how to set up the game pieces for that scenario based on the instructions.
Scenarios Guide
- A. The Emperor and the Lion: Spring 1068 - Autumn 1071 (12 turns)
- B. Specter of Norman Betrayal: Spring 1069 - Winter 1069 (3 turns)
- C. Year of Treacherous Ambition (Learning Scenario): Spring 1070 - Winter 1070 (3 turns)
- D. Showdown in Anatolia: Spring 1070 - Autumn 1071 (6 turns)
- E. Manzikert: The Fall of the Roman East: Spring 1071 - Autumn 1071 (3 turns)
A. The Emperor and the Lion — 1068 A.D. Campaign Scenario
Newly coronated as Roman Emperor, Romanos Diogenes begins a rapid mobilization and reorganization of the Roman army in the wake of Seljuk incursions that are devastating the frontier. His first mission: wrest away control of the Syrian border citadels to secure his southern flank and inflict a defeat on the Sultan's armies they won't soon forget.
Seasons: Spring 1068 through Autumn 1071 (up to 12 turns)
Seljuk Unity target: 10 (Winter 1068), 13 (Winter 1069), 15 (Winter 1070)
Markers on Map:
- Seljuk Ruins marker at Kaisareia
- Seljuk Conquered marker at Hama
Mustered (begin with these Lords on the map):
- Romans: Romanos IV at CONSTANTINOPLE; Nikephoros Bryennios at CONSTANTINOPLE; Chatatourios at ANTIOCH
- Seljuks: Alp Arslan at ANI; Arisighi at MOSUL; Ibn Khan at Hama
Calendar:
- Seljuk Victory +½ marker to the left of Spring 1068
- Spring 1068: Levy marker, Robert Crépin cylinder
- Summer 1068: Joseph Tarchaneiotes cylinder, Afshin Beg cylinder
- Autumn 1068: Andronikos Doukas cylinder, Chatatourios Service, Sav-Tekin cylinder, Ibn Khan Service
- Spring 1069: Nikephoros Bryennios Service, Manuel Komnenos cylinder, Emir of Arran cylinder, Sanduq al-Turki cylinder, Arisighi Service
- Summer 1069: Alp Arslan Service, Romanos Diogenes Service
- Autumn 1069: Artuk Beg cylinder
- Spring 1070: Roussel de Bailleul cylinder
Remove from Play: Remove the following Themata Garrison Service Markers from play:
- Charsianon: 1× tagmata
Victory: The Seljuks win automatically if they have conquered Aleppo during any Winter Phase check after Aleppo Independence Event has been revealed. The Romans win immediately if Alp Arslan is permanently Disbanded. Otherwise, whichever side has more VPs at the end of Autumn 1071 is victorious.
B. Specter of Norman Betrayal — 1069 A.D.
Norman mercenary Robert Crépin, unhappy with his pay from the imperial throne, rises in revolt against Romanos IV and in the process diverts imperial forces from dealing with the Seljuk threat. Meanwhile, Sultan Alp Arslan is away in the east leaving his top lieutenants to continue ravaging the empire…
Seasons: Spring 1069 through Winter 1069 (3 turns)
Seljuk Unity target: 13
Markers on Map:
- Seljuk Ruins marker at Kaisareia
- Seljuk Conquered Marker at Edessa, Hama
- Seljuk Ravaged Marker at Chaldia, Keltzene, Melitene, Romanoupolis, Larisa, Tephrike, Edessa, Theodosiopolis
- Roman Conquered Marker at Manbij
- Roman Ravaged Marker at Manbij
- 1 Roman Strategic Objective marker available in front of Roman player
Mustered (begin with these Lords on the map):
- Romans: Romanos IV at CONSTANTINOPLE (with only 1 Coin, otherwise with starting Assets as indicated on mat); Nikephoros Bryennios at CONSTANTINOPLE; Joseph Tarchaneiotes at CONSTANTINOPLE; Chatatourios at ANTIOCH; Nomisma Debased Capability Levied at board edge
- Seljuks: Afshin Beg at MOSUL (with only 1 Coin, otherwise with starting Assets as indicated on Lord mat); Arisighi at MOSUL; Sav-Tekin at ANI; Robert Crépin (Seljuk) at Edessa; 1 Loot in To Mosul & Baghdad Holding Box; Marwanid Alliance Capability Levied at board edge with 1 Coin on it
Calendar:
- Spring 1068: Roman Victory +½ marker (1½ VPs)
- Autumn 1068: Andronikos Doukas cylinder
- Spring 1069: Levy marker, Nikephoros Bryennios Service, Manuel Komnenos cylinder, Emir of Arran cylinder, Sanduq al-Turki cylinder
- Summer 1069: Romanos Diogenes Service, Chatatourios Service, Joseph Tarchaneiotes Service, Robert Crépin (Seljuk) Service, Afshin Beg Service, Sav-Tekin Service, Arisighi Service, Ibn Khan cylinder, Seljuk Victory +½ marker (5½ VPs)
- Autumn 1069: Artuk Beg cylinder
- Spring 1070: Roussel de Bailleul cylinder, Alp Arslan cylinder
Remove from Play: Remove the following Themata Garrison Service Markers from play:
- Charsianon: 1× tagmata
- Iberia: 1× Turkic horse, 1× tagmata
- Melitene: 1× tagmata
Victory: The Seljuks win automatically if they have conquered Aleppo during any Winter Phase check after Aleppo Independence Event has been revealed. The Romans win immediately if Alp Arslan is permanently Disbanded. Otherwise, whichever side has more VPs at the end of Winter 1069 is victorious.
NOTE: Because Alp Arslan does not start on the map in this scenario, the Roman player cannot achieve automatic victory if/until he comes into play.
C. Year of Treacherous Ambition — 1070 A.D. Learning Scenario
Unavailable to campaign in person due to political maneuvering in Constantinople, Emperor Romanos assigns Manuel Komnenos the title of protostrator and command of the Roman armies with one mission: stop the Turks from ravaging eastern Anatolia.
Seasons: Spring 1070 through Winter 1070 (3 turns). Skip the Levy phase on the first turn and begin immediately with the Campaign phase.
Seljuk Unity target: 15 (Winter 1070)
Markers on Map:
- Roman Conquered 1 VP markers: Arkesh, Manzikert, Manbij
- Seljuk Ruins marker: Kaisareia
- Seljuk Ravaged marker at Romanoupolis, Keltzene, Edessa, Melitene, Theodosiopolis
- Seljuk Siege marker at Manbij
- Bypass marker on Theodosiopolis
Mustered (begin with these Lords on the map):
- Romans: Manuel Komnenos (Commander) at CONSTANTINOPLE (with only 2 Carts, otherwise with starting Assets as indicated on Lord mat and, Centralized Administration Capability Levied); Chatatourios at ANTIOCH; Roussel de Bailleul at Ankyra; Armenian Garrisons Capability Levied at board edge
- Seljuks: Alp Arslan at ANI (with 3 Carts, otherwise with starting Assets as indicated on Lord mat, and, Lamellar Armor Capability levied); Arisighi at Theodosiopolis (with Steppe Raiders Capability Levied); Emir of Arran at Manbij (with Nizam Al-Mulk Administrates the Sultanate Capability Levied); Marwanid Alliance Capability Levied at board edge with 2 Coins on it
Calendar:
- Autumn 1068: Roman Victory marker (3 VPs), Seljuk Victory marker (3 VPs)
- Autumn 1069: Nomisma Debased marker
- Spring 1070: Campaign marker, Joseph Tarchaneiotes cylinder, Afshin Beg cylinder
- Summer 1070: Roussel de Bailleul Service
- Autumn 1070: Emir of Arran Service, Arisighi Service, Manuel Komnenos Service, Chatatourios Service
- Summer 1071: Alp Arslan Service
Remove from Play: Cylinders, mats, and Service Markers of all other Lords. Remove the following Themata Garrison Service Markers from play:
- Iberia: 1× Turkic horse, 1× tagmata
- Charsianon: 1× tagmata
- Melitene: 1× tagmata, 1× double infantry
- Anatolikon: 1× militia, 1× tagmata
- Koloneia: 1× tagmata
- Sebasteia: 1× infantry
Spring Command card deck: Both sides construct a Command deck of only 6 cards in Spring 1070
Victory: The Seljuks win automatically if they have conquered Aleppo during any Winter Phase check after Aleppo Independence Event has been revealed. The Romans win immediately if Alp Arslan is permanently Disbanded. Otherwise, whichever side has more VPs at the end of Winter 1070 is victorious.
In addition to normal VP rules, the Seljuks score 1 VP each for reaching Ikonion and/or Western Anatolia with a Lord, and the Romans score 1 VP if Arisighi switches sides.
At the end of Winter 1070, both sides score one additional VP each for control of Manbij, Edessa, Khliat, and Manzikert.
D. Showdown in Anatolia — 1070 A.D. 6 Turn Half-Campaign
Beginning with Manuel Komnenos' appointment as army commander, this scenario will see players campaign through 1071 towards a decisive final clash that will decide the future of the Roman Empire.
Seasons: Spring 1070 through the end of Autumn 1071 (6 turns)
Seljuk Unity target: 15 (Winter 1070)
Markers on Map:
- Roman Conquered 1 VP markers: Arkesh, Manzikert, Manbij
- Seljuk Ruins marker: Kaisareia
- Seljuk Ravaged marker at Romanoupolis, Keltzene, Edessa, Melitene, Theodosiopolis
- Seljuk Siege marker at Manbij
Mustered (begin with these Lords on the map):
- Romans: Manuel Komnenos (Commander) at CONSTANTINOPLE; Chatatourios at ANTIOCH; Roussel de Bailleul at Ankyra
- Seljuks: Alp Arslan at ANI (with 3 Carts, otherwise with starting Assets as indicated on Lord mat); Arisighi at ANI; Emir of Arran at Manbij (with Nizam Al-Mulk Administrates the Sultanate Capability Levied); Marwanid Alliance Capability Levied at board edge with 1 Coin on it
Calendar:
- Autumn 1068: Roman Victory marker (3 VPs), Seljuk Victory marker (3 VPs)
- Autumn 1069: NOMISMA DEBASED marker
- Spring 1070: Levy marker, Joseph Tarchaneiotes cylinder, Afshin Beg cylinder
- Summer 1070: Roussel de Bailleul Service
- Autumn 1070: Sav-Tekin cylinder, Artuk Beg cylinder, Emir of Arran Service, Arisighi Service, Manuel Komnenos Service, Chatatourios Service
- Spring 1071: Romanos Diogenes cylinder, Nikephoros Bryennios cylinder, Andronikos Doukas cylinder, Sanduq al-Turki cylinder
- Summer 1071: Alp Arslan Service
Remove from Play: Cylinders, mats, and Service Markers of all other Lords. Remove the following Themata Garrison Service Markers from play:
- Iberia: 1× Turkic horse, 1× tagmata
- Charsianon: 1× tagmata
- Melitene: 1× tagmata, 1× double infantry
- Anatolikon: 1× militia, 1× tagmata
- Koloneia: 1× tagmata
- Sebasteia: 1× infantry
Victory: The Seljuks win automatically if they have conquered Aleppo during any Winter Phase check after Aleppo Independence Event has been revealed. The Romans win immediately if Alp Arslan is permanently Disbanded. Otherwise, whichever side has more VPs at the end of Autumn 1071 is victorious.
E. Manzikert: The Fall of the Roman East — 1071 A.D.
As the Emperor assembles a massive multi-ethnic army from all corners of the empire, the largest seen in Anatolia in nearly a century, Alp Arslan and the military might of the Seljuk Sultanate is focused squarely on Aleppo and taking the city from the Fatimid Caliphate once and for all. But when Romanos breaks a previously agreed-upon truce with the Sultan and marches toward the eastern frontier around Lake Van, Alp Arslan rushes home to confront the Romans for one final climactic engagement.
Seasons: Spring 1071 through Autumn 1071 (3 turns). Skip the Levy phase on the first turn and begin immediately with the Campaign phase.
Seljuk Unity target: N/A
Markers on Map:
- Roman Fort markers at Chaldia and Romanoupolis
- Roman Strategic Objective marker at Manzikert
- Seljuk Ruins markers: Kaisareia
- Seljuk Ravaged markers at: Western Anatolia, Ikonion, Herakleia Kybistra, Melitene, Lykandos and Sebasteia
- Seljuk Siege marker at ALEPPO
Mustered (begin with these Lords on the map):
- Romans:
- Romanos IV at CONSTANTINOPLE (with Siege Weaponry and Emperor's Retinue Capabilities Levied)
- Andronikos Doukas at CONSTANTINOPLE (with 2 Carts in Assets on Lord Mat and PSILOI and SYNDOSIS Capability Levied) (Errata: PSILOI is an ALL Capability and starts under the board edge, not attached to Andronikos Doukas.)
- Arisighi (Roman) at CONSTANTINOPLE
- Roussel de Bailleul at Ankyra (with Martial Society Capability Levied)
- 1× Strategic Objective in Constantinople Holding Box
- Armenian Garrisons Capability Levied at board edge
- Seljuks:
- Alp Arslan at ALEPPO (with 3 Carts in Assets on Lord mat, and Shock Tactics and Lamellar Armor Capabilities Levied)
- Artuk Beg at ALEPPO (with Lamellar Armor and Artukid Legacy Capabilities Levied)
- Emir of Arran at ALEPPO (with Javelins Capability Levied)
- Sav-Tekin at ANI (with 2 Carts in Assets on Lord mat and 2× Infantry Vassal Levied)
- Marwanid Alliance Capability Levied at board edge
Calendar:
- Spring 1068: Roman Victory marker (1VP)
- Autumn 1068: Seljuk Victory +½ marker (3½ VPs)
- Autumn 1069: NOMISMA DEBASED marker
- Spring 1071: Campaign marker, Closed Passes event marker, Chatatourios cylinder, Joseph Tarchaneiotes cylinder, Nikephoros Bryennios cylinder, Afshin Beg cylinder, Sanduq al-Turki cylinder
- Summer 1071: Artuk Beg Service, Roussel de Bailleul Service, Andronikos Doukas Service
- Autumn 1071: Sav-Tekin Service, Emir of Arran Service, Arisighi (Roman) Service, Romanos IV Service, Alp Arslan Service
Remove from Play: Cylinders, mats, and Service Markers of Ibn Khan, Robert Crépin and Manuel Komnenos. Remove 1 Roman Strategic Objective from play. Remove the following Themata Garrison Service Markers from play:
- Charsianon: 1× tagmata, 1× militia
- Melitene: 1× double infantry, 1× tagmata
- Anatolikon: 1× tagmata, 1× infantry, 1× militia
- Koloneia: 1× tagmata, 1× infantry
- Sebasteia: 1× infantry
- Kappadokia: 1× infantry
- Armeniakon: 1× tagmata, 1× infantry
- Iberia: 1× tagmata, 1× Turkic Horse
Spring Command card deck: Both sides construct a command deck of only 4 cards in Spring 1071
Victory: The Seljuks win immediately if Romanos IV is permanently Disbanded, or Aleppo is Seljuk conquered at the end of Autumn 1071 (Aleppo Independence is considered to have been revealed). The Romans win immediately if Alp Arslan is permanently Disbanded, or Manzikert and Khliat both contain Roman Conquered markers and Aleppo is not Seljuk-conquered. Otherwise, whichever side has more VPs at the end of Autumn 1071 is victorious.
Both sides scores 1 VP for each permanently Disbanded Lord of their opponent.
Key Terms
- 90 Days—Calendar box, a Turn (1.3.2).
- Active—Acting on Campaign (4.0).
- Adjacent—Linked by a Way (1.3.1).
- Allegiance—Friendly or Enemy (1.3.1); VP markers that show a Stronghold has switched sides.
- Approach—March to enemy (4.3.4).
- Armor—Unit Protection (4.8.2).
- Array—Lords in Battle or Storm (4.8.1, 4.9.1).
- Arts of War—card, deck (1.9.1, 3.1).
- Asset—Coin, Loot, Provender, Transport (1.7).
- Attack—Initiate Battle or Storm (4.3.4, 4.5.2, 4.8).
- Autumn—Type of Season (1.3.2).
- Avoid Battle—Back off from Approach (4.3.4).
- Battle—Fight due to March (4.8).
- Battle mat—Array option (4.8.1).
Errata and Clarifications (GMT, 2026)
- Player Aid Card, Forces (Varangian Guard Notes): "*May Strike in first Round only, no halving for Pursuit (mark)."
- Player Aid Card, Sequence of Play (Call to Arms): "Romans may execute Call to Arms Capabilities OR if Commander in Constantinople take a Strategic Objective marker from supply, OR if Commander in Constantinople, place Strategic Objective marker on any Seljuk Lord Mat or Seljuk-controlled Stronghold in the Sultanate."
- Rulebook, 1.4.2 Example #3: A Lord re-entering the game due to Treachery should arrive in the following season's Levy before the Pay phase (corrected in the text above).
- Rulebook, 4.7.6 Bounty: Enemy Lords block the Bounty path trace (corrected in the text above).
- Rulebook, Scenario E setup: PSILOI is an ALL Capability and starts under the board edge, not attached to Andronikos Doukas (corrected in the text above).
- Clarification: What happens to Themata on the Roman Commander's Lord Mat if he disbands? They are returned to their Thema box.