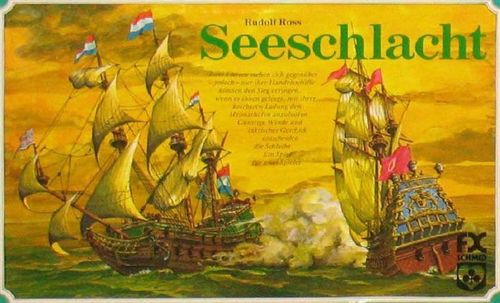
Seeschlacht
Seeschlacht Rulebook
Table of Contents
Table of Contents
- Object of the Game
- Components
- The Game Board
- Ships
- Wind Roses
- Setting Up the Ships
- Moving the Ships
- Changing the Wind Direction and Strength
- Changing the Wind Strength
- Firing
- Heavily Damaged Ships
- Coastal Batteries
- Repairing Damaged Ships
- Loading Merchant Ships
- Ships in Enemy Harbours
- End of the Game
- Sequence of a Turn
Object of the Game
The object of the merchant ships is to cross the playing board and reach their destination harbour. There they take on cargo. The object of the warships is to protect their own merchant ships and to fight the enemy ships. Ships are damaged, lost, or, if they are merchant ships, can save themselves by fleeing into the neutral harbour. Wind direction and wind strength determine the movement of the ships. Both are determined by dice and change during the game, like wind and weather at sea. The merchant ship that first reaches its home harbour with its cargo wins the game and ends it.
Short version: Whoever plays the game for the first time should play the short version. The game rules remain the same; only the object is interpreted differently. In the short version the merchant ships set out already loaded from their home harbours and must bring their cargo into the destination harbours of their own colour. The merchant ship that first reaches an anchor place of its destination harbour receives 10 points. The second merchant ship to reach its destination harbour receives 9, the third 8, the fourth 7, the fifth 6 and the sixth merchant ship 5 points. Whoever reaches the highest point total has won. In the short version the merchant ships do not have to return to their home harbours.
Components
- 1 game board
- 3 merchant ships with yellow sails and 3 with white sails
- 7 warships with yellow sails and 7 with white sails
- 3 wind roses in the colours yellow, blue and red
- 1 colour die
- 1 number die
- 20 red hit markers
- 6 blue cargo markers
The Game Board
The blue water surface is covered with a grid of lines, along which the ships move. A ship's position is always where lines meet or cross (in these rules called briefly a "field"). In the four corners lie the harbours of the white and yellow fleets. The home harbours have 10 anchor places, marked by circles. Diagonally opposite them lie the destination harbours, each with 4 anchor places. The harbour in the middle is neutral and may only be entered by the merchant ships of both parties. The disc next to the neutral harbour serves to fix the wind roses.
Ships
Each player owns a fleet of 3 merchant ships and 7 warships. The sails of one fleet are yellow, those of the other are white. Merchant ships are distinguished from warships by the shape of their sails (see the illustration in the rulebook: the merchant ship on the left, the warship on the right). Speed and fighting strength are the same for both ship types. Only the merchant ship can take cargo on board. In combat the warship is superior to the merchant ship: it can take two hits and is sunk by the third hit. The merchant ship withstands only one hit and is already sunk by the second hit.
Wind Roses
Before the game begins it is decided who moves his ships first. The player who is second in line then determines the wind strength with the colour die and the wind direction with the number die. For each wind strength there is a wind rose: a yellow one for weak wind, a blue one for medium wind and a red one for strong wind.
Example: if the colour die shows blue and the number die shows –5–, the blue wind rose must be placed on the disc next to the neutral harbour. It is then turned so that its blue arrow points at the 5 of the playing board. Before the game begins a wind now prevails that blows from direction –5– towards –2–. The numbers on the wind rose show how many fields a ship can move in each of the 5 possible directions of the playing board; in each case the 6th direction is against the wind. With strong wind the ships move faster than with medium wind.
Setting Up the Ships
Each player places his ships in his own home harbour. The 7 anchor places marked with circles are for the warships; the 3 anchor places marked with circles and dots are for the merchant ships. The tips of the ships indicate their directions of travel. Since the harbours have two entrances, the players are free to decide in which directions they place their ships on the anchor places. Ships must always be positioned so that their longitudinal axes coincide with one of the lines.
The rulebook's illustration "Aufstellung im Heimathafen" (setup in the home harbour) shows the merchant ships (H = Handelsschiff) and warships placed on the anchor places.
Moving the Ships
Moves alternate. When a player is on turn he may move all his ships at once. He may also leave any number of ships standing on their anchor places and deploy them at a later time. Once a ship has left its anchor place, it must be moved every time its owner is on turn. Only when it reaches another anchor place may it stop moving.
The movement of the ships depends on the prevailing wind strength and wind direction. Example: a medium wind blows from direction –5–. The blue wind rose is placed and turned so that its blue arrow points at –5– of the playing board. The numbers on the wind rose then show how many moves a ship can make straight ahead in directions –6–, –1–, –2–, –3– and –4– of the playing board. Ships standing in direction –6– or –4– can move two fields, ships in direction –1– or –3– can move three fields, and ships in direction –2– can move four fields straight ahead. In direction –5–, that is against the wind, no movement is permitted.
Movement examples for medium wind from direction 5 (the rulebook's diagram): the captions show ships moving 2, 3 or 4 fields straight ahead, a ship that turns against the wind during its move ("Schiff dreht gegen d. Wind"), a ship that already stands against the wind ("Schiff steht gegen d. Wind"), and the numbered moves "1. Zug" to "4. Zug" showing a ship's progress over several turns.
Each ship may change its direction during a move. It then turns on the spot by 60°, and the turn, like a move from field to field, is counted. The newly adopted direction always determines how many fields the ship still has to move. After each turn the ship must move straight ahead in its new direction, if that direction still allows a further move.
A ship that stands against the wind need not be moved. It is, however, allowed a turn to get back into the wind. Outside the harbour all ships must move the full number of fields indicated by the wind rose; no field may be given away. A ship that is not to move must already be standing against the wind, or must be manoeuvred against the wind.
If a ship cannot move its prescribed fields because other ships block it, it must "ram" the ship standing in its direction of travel. Both ships remain on their places, but each receives a hit marker: they have rammed each other and damaged each other.
There is one exception. Within their own harbours ships may optionally move one field or move according to the wind rose. This also applies to merchant ships in the neutral harbour.
Changing the Wind Direction and Strength
Before a player moves his ships, he should check whether the prevailing wind is favourable for him. If he wants to change the wind direction and strength, he must announce this to his opponent. [Translator's note: the German text reads "Partner" here and "Gegner" (opponent) in the next section; in this two-player game both mean the other player.] He then makes a roll with the number die. Only if he rolls 2, 4 or 6 is he allowed an attempt to change the wind direction and strength. He then rolls with both dice. The colour rolled determines the new wind rose, and the number rolled gives the new wind direction. If neither the colour nor the number changes, the old wind conditions remain.
Changing the Wind Strength
If a player wants to keep the wind direction but change the wind strength, he must announce this to his opponent as well. He may then immediately make one roll with the colour die, which determines the new wind rose. Here too the old wind strength remains if the colour rolled matches the old wind rose.
Wind conditions may be changed by the players each time before they move their own ships. Once a ship has already been moved, a change of wind conditions is no longer possible.
Firing
After a player has moved his ships, he may fire at enemy ships that stand in the firing arc of his own ships. Each ship entitled to fire has one shot. The firing arc of a ship extends three fields to both sides from the ship's position. It therefore covers, on each side, a triangular area of 9 fields. If enemy ships stand in the firing arcs of his own ships, the player announces which of his ships fires and which ship it wants to hit. He then carries out the announced shot by rolling the colour die:
- A yellow roll hits a ship that stands on one of the four fields next to the firing ship.
- A blue roll hits a ship that stands on a field of the second line, parallel to the firing ship's line, within the firing arc.
- A red roll hits ships on the fields of the third line of the firing arc.
The rulebook's diagram "Schußbereich" (firing arc) marks these lines with R (red hits), B (blue hits) and G (yellow hits).
A ship cannot be hit if another ship stands on the straight line between it and the firing ship. Shots may not be fired over islands or land projections. The light dashed lines on the game board indicate the possible firing arc. Merchant ships standing in the neutral harbour may not be fired upon.
Firing example (diagram "Schußbeispiel"): White has moved, and its ships A and B can fire. In the firing arc of ship A stand the ships C, D, E, F and G. Ship G cannot be fired at, because it is covered by ship E. White must decide which ship to fire at. White announces: "Ship A fires at ship E." It then rolls the colour die, and the roll shows blue. A blue roll hits ship E, so White places a red hit marker on its sail. Now it is White's turn with ship B. In the firing arc of ship B lie ships E and G on one side, and ship H on the other side. Ships D and F are covered by the island. White announces to its opponent: "Ship B fires at ship G." It rolls the colour die again, and the roll shows red. Ship B therefore scores no hit. Ship E stands on a field that a red roll would have hit, but since White aimed at ship G, the shot misses.
Heavily Damaged Ships
Warships with two hits and merchant ships with one hit count as heavily damaged. They move one field less in each direction than the wind rose indicates. If a heavily damaged ship stands in a direction where three moves are allowed, it can make only two moves. If it stands in a direction that allows only one move, it cannot move in that direction, but it may turn to another direction on its spot.
A warship is sunk by its third hit, and a merchant ship by its second hit. Sunk ships must be removed from the board.
Coastal Batteries
Each harbour of the white and yellow parties has two coastal batteries to protect the harbour entrances. The field of fire of each coastal battery covers 7 fields, marked by black dots. When a player is on turn and has moved his ships, he may fire at all enemy ships that stand on the black fields in front of his harbours. For each of these ships he has one roll with the colour die available. Before rolling, he must tell his opponent which ship he wants to hit with the roll. Every yellow roll is a hit.
Repairing Damaged Ships
Every ship that has been hit may remove its hits in its own harbours. To do so it must move onto an anchor place marked by dots. Its owner may then, each time he is on turn, remove one hit marker.
Sequence of repairs for a warship with 2 hits:
- Move – occupy the anchor place
- Move – remove the first hit marker
- Move – remove the second hit marker
- Move – the ship may sail out again
Merchant ships can also be repaired in the neutral harbour.
Loading Merchant Ships
In the large game, when a merchant ship moves onto an anchor place of its destination harbour, it may be loaded in the following move. Loading counts as one move and is carried out by placing a cargo marker on the ship's sail. With its next move the ship may sail out again.
If a merchant ship is damaged when it runs into its destination harbour, the hit must first be removed before it can be loaded. The sequence is then:
- Move – occupy the anchor place
- Move – remove the hit marker
- Move – place the cargo marker
- Move – the ship may sail out
Ships in Enemy Harbours
Ships may enter enemy harbours. There they may then move only according to the wind rose, and they may not pass over enemy anchor places. If wind conditions force them to move onto or over an enemy anchor place, they immediately receive a hit for entering each anchor place.
End of the Game
Large game: The first merchant ship that, coming from its destination harbour laden with cargo, reaches one of the three dot-marked anchor places in its own home harbour wins the game.
Short version: The game ends as soon as all remaining merchant ships are standing on the anchor places of their destination harbours. The order in which the merchant ships reached the anchor places of their destination harbours decides the winner, using the following scoring:
- merchant ship – 10 points
- merchant ship – 9 points
- merchant ship – 8 points
- merchant ship – 7 points
- merchant ship – 6 points
- merchant ship – 5 points
Example from the rulebook (White against Yellow):
| Order of arrival | White | Yellow |
|---|---|---|
| 1st merchant ship | 10 | |
| 2nd merchant ship | 9 | |
| 3rd merchant ship | 8 | |
| 4th merchant ship | 7 | |
| 5th merchant ship | 6 | |
| 6th merchant ship (sunk) | – | – |
| Points | 18 | 22 |
Sequence of a Turn
Whoever is on turn must carry out his turn according to the following scheme:
- If necessary, change the wind strength and wind direction, or only the wind strength.
- Move all ships that have left their anchor place.
- Load own merchant ships on the anchor places of their destination harbour.
- Repair own ships in their own harbours, or merchant ships in the neutral harbour, by removing one hit marker per ship.
- Fire at all enemy ships standing within the area of one's own coastal batteries.
- Fire at enemy ships standing in the firing arc of one's own ships.