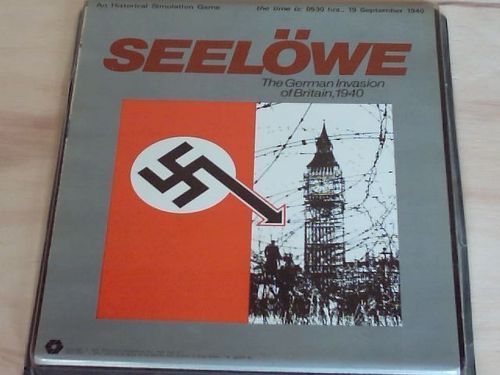
Seelöwe: The German Invasion of Britain, 1940
Seelöwe: The German Invasion of Britain, 1940 Rulebook
Table of Contents
Table of Contents
- [1.0] Introduction
- [2.0] General Course of Play
- [3.0] Game Equipment
- [4.0] Sequence of Play
- [5.0] Movement
- [6.0] Zones of Control
- [7.0] Stacking
- [8.0] Combat
- [9.0] Supply
- [10.0] Air Power
- [10.1] Air Unit Movement and Attack
- [10.2] Air Unit Bases
- [10.3] What Can Be Attacked By Air
- [10.4] What Cannot Be Attacked By Air Units
- [10.5] Supply of Air Units
- [10.6] Normal Range Air Attack Table
- [10.7] Extended Range Air Attack Table
- [10.8] Disruption Due to Air Attack
- [10.9] Air Transport of Supply Units
- [11.0] The Scenarios: How to Set-Up and Start the Game
- [12.0] German Reinforcements [and How They are Transported to Britain] and British Reinforcements [and How They Actively Enter the Game]
- [13.0] Terrain and Supply Effects Chart
- [14.0] British Home Guard
- [15.0] Victory Conditions
- [16.0] Players' Notes
- [17.0] Designer's Notes
[1.0] Introduction
Seelowe is a hypothetical game, simulating on the regiment-brigade-division level, what might have been Hitler's invasion of Britain. The game is based on the courses of action which the Germans and British each had open to them, and the conditions both sides would have faced had the Germans crossed the Channel. In designing this game, several things were assumed: first, that the Royal Air Force had been decisively defeated; and second, that the Royal Navy was incapacitated.
[2.0] General Course of Play
Seelowe is basically a two-player game. Each Player moves his units and executes attacks on Enemy units in turn, attempting to fulfill the conditions of victory. To move from one hex to another each unit expends a portion of its Movement Allowance. Combat is resolved by comparing the total Combat Strength Points of adjacent opposing units and expressing the comparison as a simplified probability ratio (odds). A die is rolled and the outcome indicated on the Combat Results Table is applied to the units involved.
[2.1] Game Scale
Each Game-Turn represents two days of real time. Each hex is equivalent to 8 kilometers (5 miles) in distance.
[3.0] Game Equipment
[3.1] The Game Map
The 23" x 28" mapsheet portrays the area of Southern England in which the invasion would have taken place. A hexagonal grid is superimposed upon the mapsheet to regularize the movement and position of the playing pieces. Note that each hex has a number.
[3.2] The Playing Pieces
Two differently colored groups of playing pieces (henceforth known as units) are supplied. They represent the various units of the opposing armies that were available in the campaign. The opposing forces in the Orders of Battle are composed by selecting units from those provided on the unit sheet. It is strongly recommended that the Players sort their units by type and color, and keep them segregated. This greatly facilitates setting up the game. The playing pieces are distinguished by type, strength, and mobility, as represented by various numbers and symbols printed on their faces. German units are Field Grey; British units are Olive Brown.
[3.21] Sample Unit
A sample unit is shown with: Organization Size Symbol, Identity Number, Unit Type Symbol, Combat Strength, and Movement Allowance (for example, a unit printed 5-4 has Combat Strength 5 and Movement Allowance 4).
[3.22] Unit Type Symbols
Mechanized Units:
- Mechanized Infantry (German only)
- Armor
- Amphibious Armor (German only)
Non-Mechanized Units:
- Infantry
- Mountain Infantry (German only)
- Motorized Infantry (British only)
- Partisan (British only)
- Parachute (German only)
- Airlanding (German only)
Other:
- Air Unit
- Supply (German only)
[3.23] Status Markers
Unsupplied; Entrained; Isolated; Disrupted.
[3.24] Organizational Size Symbols
XX = Division; X = Brigade; III = Regiment; II = Battalion.
[3.3] Definition of Terms
Combat Strength is the basic attacking and defending power of a unit quantified in Combat Strength Points.
Movement Allowance is the basic movement ability of a unit quantified in Movement Points; in most cases a unit expends one Movement Point of its total Movement Allowance for each hex entered.
[3.4] Game Charts and Tables
Various visual aids are provided for the Players to simplify and illustrate certain game functions. These are the Combat Results Table, the Turn Record Reinforcement Chart, and the Terrain Effects Chart.
[3.5] Game Equipment Inventory
A complete game of Seelowe should include the following parts:
- One Game Map
- One Set of Game Rules
- One Set of Die-cut Counters
- Two Combat Results Tables
- One Terrain Effects Chart
- One Players'/Designer's Notes Sheet
- One Die
[4.0] Sequence of Play
[4.1] Sequence of Play Outline
Seelowe is played in turns. Each Game-Turn is composed of two Player-Turns, the first German, the second British. Each Player-Turn is composed of a number of Phases. The Player whose Player-Turn is in progress is called the Phasing Player. A typical Game-Turn will proceed as outlined below:
1. GERMAN PLAYER-TURN
A. Weather Phase: The German Player rolls the die to determine the weather condition for this Game-Turn.
B. Landing Phase: Weather permitting, the German Player lands units available in the Landing Echelons in Britain, up to the limits allowed.
C. Reinforcement Phase: The German Player consults the Turn-Record Reinforcement Track (on the map) and places any newly arriving unit in the Forces Available in France Box on the map.
D. Supply Judgement Phase: The supply status of all German units in England is judged and appropriate "isolated" and "unsupplied" markers are placed.
E. Air Attack Phase: Weather permitting, German air units attack English units and the results are applied.
F. German Initial Movement Phase: The German Player may move all of his units in any direction up to their Movement Allowance, within the restrictions outlined in the Movement rules.
G. Combat Phase: The German Player may attack British units adjacent to German units at his option; combat is resolved as outlined in the Combat rules.
H. German Mechanized Movement Phase: The German Player may again move his mechanized units only. This movement is in addition to movement in the Initial Movement Phase. Non-mechanized units may not be moved during this phase. At the end of this phase, all supply markers are removed.
J. Disruption Removal Phase: The German Player attempts to remove disruption markers from any of his units so affected.
K. Embarkation Phase: The German Player may take units from the available-in-France pool and place them in the several landing echelons off the coast of England up to the limits described in the Transportation rules.
2. BRITISH PLAYER-TURN
A. Reinforcement Phase: The British Player takes the reinforcements from the Turn Record Reinforcement Track and places them in the Inactivated Reinforcement Holding Area on the map.
B. Unit Activation Phase: The British Player attempts to activate all immobile units.
C. Supply Judgement Phase: The supply status of all British units is judged and appropriate markers placed.
D. Air Attack Phase: Weather permitting, British air units attack German units in Britain and in off-shore Landing Echelons, and the results are applied.
E. British Initial Movement and Rail Movement Phase
F. Combat Phase
G. British Mechanized Movement Phase
H. Entraining/Detraining Phase: Place (or remove) Entrained markers on British units that are qualified to change their rail status in the current Player-Turn (i.e., undisrupted ground units which have not moved or attacked in prior Phases of the current Player-Turn and which are on rail hexes not in Enemy Zones of Control).
J. Disruption Removal Phase
These phases are, for the most part, identical in operation to the same Phases in the German Player-Turn.
3. GAME-TURN RECORD
Advance the Game-Turn marker one grade on the Turn Record Reinforcement Track to indicate the passing of one Game-Turn.
[4.2] Game Length
Repeat steps for fifteen Game-Turns. At the end of the fifteenth Game-Turn the Game is over and the Player's performances are evaluated in terms of the victory conditions.
[5.0] Movement
GENERAL RULE:
During the Movement Phase, the Phasing Player may move as many or as few of his units as he wishes. During each Friendly Movement Phase, each unit may be moved as many or as few hexes as the Phasing Player desires, as long as its Movement Allowance is not exceeded in a single Movement Phase. Unused Movement Points, however, may not be accumulated from Phase to Phase, nor transferred from unit to unit.
PROCEDURE:
Move each unit individually, tracing the path of its Movement through the hexagonal grid. Once a unit has been moved and the Player's hand withdrawn, the unit may not be moved again, nor the path retraced and/or changed during that Movement Phase.
CASES:
[5.1] How to Move Units
During a Movement Phase only the Phasing Player's units are moved; all, some or none of his eligible units may be moved. No Enemy movement and no combat, may occur during a Movement Phase. The movement is calculated in terms of Movement Points. Each unit expends one or more Movement Points from its total Movement Allowance for each hex it enters.
[5.2] Movement Inhibitions and Prohibitions
A unit's Movement Allowance may be decreased by supply considerations (see Supply, 9.0) and/or the effects of air attack, lowering the number of Movement Points that it may expend in a given Movement Phase. The number of Movement Points required to enter a hex are cumulative. All effects of reducing available Movement Points and increasing the number of Movement Points required to enter a given hex are cumulative. A unit may always move a single hex in a given Movement Phase so long as it is not leaving one Enemy controlled hex directly for another. Only Mechanized units may move through Enemy Controlled hexes, but only by expending the appropriate number of Movement Points. Units may never enter hexes containing Enemy ground or supply units. Non-Mechanized units may not move through Enemy controlled hexes. Units may freely enter or move through hexes containing other friendly units, regardless of stacking considerations.
[5.3] Terrain Effects on Movement
All British units are exempt from Terrain Effects for Movement Purposes. The number of Movement Points that a German unit must expend to enter a given hex varies with the type of moving unit, the type of terrain in the hex and the presence of Enemy controlled hexes (see Zones of Control). German Mountain Units, Paratroop Units, and Air Landing Units are exempt from terrain effects on Movement (see Terrain Effects Chart, 13.0).
[5.4] Mechanized Movement
There are two Movement Phases in each Player-Turn. All units may move in the Initial Movement Phase. Additionally, all mechanized units may move again in that Player-Turn in the Mechanized (second) Movement Phase. Only these units may move in the second Movement Phase. German Mechanized units are: armor, amphibious armor, and mechanized infantry. British Mechanized units are armor, only.
[5.5] British Rail Movement
There is no limit to the number of units which may use rail movement. Units must be moved along rail hexes. Units may not pass through or enter an German occupied or controlled hex while "entrained." Only British units may use Rail Movement. Units entrain by remaining stationary on a rail hex and not attacking for an entire British Player-Turn. The entrained unit may then move up to thirty hexes on rail, within the above restrictions. It may only move through hex-sides which are connected by a rail line. In order to detrain, a unit must spend an entire British Player-Turn stationary and not attacking, after which it may move normally. Units may not detrain in an Enemy controlled hex. An entrained unit has no Zone of Control. An entrained unit may not attack and has its Combat Strength on Defense halved (retain fractions). In order to identify an entrained unit, simply place an entrained marker over that unit. Units which are attacked by ground units while entrained must detrain in the ensuing British Player-Turn.
[6.0] Zones of Control
GENERAL RULE:
The six hexagons immediately surrounding a hex constitute the Zone of Control of any units in that hex. Hexes upon which a unit exerts a Zone of Control are called controlled hexes, and inhibit the movement of Enemy units. All units exert a Zone of Control (except as noted).
CASES:
[6.1] Units With No Zone of Control
Entrained units, supply units, and air units have no surrounding Zone of Control; they merely occupy the hex they are in, and have no influence on the surrounding hexes. They do not interfere with Zones of Control of other Friendly units that may be in the same hex. Zones of Control do not extend through Sea hexsides.
[6.2] Effect on Movement
All units must expend two additional Movement Points, over and above the ordinary cost, to enter a given hex if it is an Enemy controlled hex. All units must expend one additional Movement Point to leave an Enemy controlled hex. Only Mechanized units may move directly from one Enemy controlled hex to another (through a Zone of Control) by expending three additional Movement Points (two plus one). All other units must cease movement upon entering an Enemy controlled hex, though they may leave the controlled hex in any subsequent Movement Phase and enter another after first having traversed at least one non-controlled hex.
[6.3] Combat Effects
Zones of Control do not affect combat; attacking is completely voluntary and the presence of an Enemy units' Zone of Control in a Friendly occupied hex does not force combat.
[6.4] Retreat Effects
Units may not retreat into an Enemy controlled hex, though Friendly units negate Enemy Zones of Control for retreat purposes.
[6.5] Supply Effects
Supply may not be traced through Enemy controlled hexes, unless the hex is occupied by a Friendly unit. Thus for supply purposes, Friendly units negate Enemy Zones of Control.
[7.0] Stacking
(more than one unit per hex)
GENERAL RULE:
A maximum of two non-supply ground (Combat) units may be stacked in a single hex. This stacking limitation applies only at the end of each Friendly Movement Phase; over-stacking as a result of combat is permitted, as long as stacking limitations are met at the end of the units' respective Movement Phase. In the event of overstacking which cannot be corrected, the Friendly Player chooses which units in a stack will be eliminated.
CASES:
[7.1] Movement Effects
Units may freely move through hexes containing Friendly units, regardless of the number of units that are transiently in that hex. The limitation of two Friendly Combat units applies only at the end of the Friendly Movement Phase.
[7.2] Combat Effect
All units in a hex under attack must be attacked; their separate Combat Strengths are totalled and the entire combined Strength must be attacked. Units stacked together may not be attacked separately. If one unit in a stack of units is attacking a given hex, the remaining unit is under no compulsion to join the attack. It may attack different hexes or not at all.
[7.3] Stacking Positions and Unit Types
Different unit types may stack together freely. There is no effect from the position of a unit in a given stack, and the position may be freely changed at any point in the Game-Turn.
[7.4] Non-Combat Unit Stacking
Supply and British Air units do not count towards Stacking limits. However, no more than one supply unit may be placed in any one hex. When stacked with German Combat units, a Supply unit does not contribute its parenthetical Defensive Strength to the hex defense. It does suffer any adverse combat result obtained against the hex. British air units may stack two to a hex (subject to 10.21).
[7.5] Reduction of Overstacking
Overstacking may occur due to Combat, i.e., Friendly unit(s) are retreated onto other Friendly units in excess of the stacking limit. If this occurs, the Friendly Player must reduce the stack on the following movement phase(s) in which the respective units composing the stack are allowed to move. If not possible, the excess unit(s) must be removed, at the owning Player's choice.
[8.0] Combat
GENERAL RULE:
Combat occurs between adjacent opposing units at the Phasing Player's discretion. The Phasing Player is the Attacker, the non-Phasing Player the Defender, regardless of their overall strategic position.
PROCEDURE:
Total the Combat Strengths of all the attacking units involved in a specific attack and compare it to the total Combat Strength of all units in the hex under attack. State the comparison as a probability ratio: Attacker's Strength to Defender's Strength. Round off the ratio in favor of the Defender to conform to the simplified odds found in the Combat Results Table, roll the die and read the result on the appropriate line under the odds column. Apply the result immediately, before resolving any other attacks being made during that Combat Phase.
CASES:
[8.1] Which Units May Attack
[8.11] During the Combat Phase of his Player-Turn, the Phasing Player may attack any and all Enemy units adjacent to Friendly units. Only those Friendly units directly adjacent to a given Enemy unit may participate in an attack upon that unit.
[8.12] Attacking is completely voluntary; units are never compelled to attack, and not every unit adjacent to an Enemy unit need participate in any attack. Friendly units in a stack that are not participating in a given attack are never affected by the results of the attack.
[8.13] An Enemy occupied hex may be attacked by as many units as can be brought to bear in the six adjacent hexes. Units may not attack through Sea hexsides.
[8.14] No unit may attack more than once per Combat Phase, and no Enemy unit may be attacked more than once per Combat Phase.
[8.2] Multiple Unit and Multi-Hex Combat
[8.21] All units defending in a given hex must be involved in the combat, and they must all be attacked as a single Strength. The defender may not voluntarily withhold any units in a hex under attack. The attacker must attack all the units as a whole, i.e., the Strengths of all the units in a hex are totalled, and this total Strength is attacked. Different units in a given hex may not, therefore, be attacked separately.
[8.22] A unit in a hex that contains an attacking unit need not participate in that same attack or any. Thus when one unit in a stack of two is attacking a given hex, one of the other units could attack a different hex.
[8.23] If a unit (or units) is adjacent to more than one Enemy-occupied hex, it could attack all of them in a single combat. Thus units in a single hex can attack more than one other hex. The only requirement is that all attacking units must be adjacent to all defending units (see also Case 8.13).
[8.3] Combat Odds Calculation
[8.31] Combat odds are always rounded off in favor of the Defender. For example, an attack with a Combat Strength of 26 Strength Points against a hex defending with 9 Strength Points, for an odds ratio of 26-9, would round off to a 2-1 combat situation for combat resolution purposes. That column on the Combat Results Table would be used.
[8.4] Flanking Attacks
When conducting a Flanking Attack, the attacking units have their Combat Strengths doubled (e.g., an attack with twelve Combat Strength Points is treated as if twenty-four Strength Points were being used). Units are considered to be conducting a Flanking Attack when there are two or more participating attacking units directly opposite each other (as illustrated in diagram: attackers in the two hexes on opposite sides of the defender) or when there are three or more participating attacking units arranged around the defender's hex in a triangular formation (as illustrated in diagram: attackers in three alternate hexes around the defender). The diagrams shown give the minimum requirements for a Flanking Attack; there may, of course, be additional attacking units in the other hexes surrounding the defending hex.
To state the Flanking Attack requirements another way, one would say this: in order to conduct a Flanking Attack the Attacking Player must have participating attacking units in, or adjacent to, every hex surrounding the Defender's hex. When determining whether an attack is a Flanking Attack, the presence of uninvolved units (Enemy or Friendly) has no bearing.
[8.5] Effects on Combat Strength
Combat Strengths of units may be affected by air attack and supply considerations (see the Air Power and Supply Rules). This is always expressed as the Combat Strength being halved. When these Strengths are halved, fractions are retained. Thus, an isolated unit disrupted by Air Attack would be quartered in Strength (halved and then halved again). In this case a unit with a Combat Strength of five would effectively use one and a quarter Strength Points for combat. Terrain does not affect the Combat Strength of units, either attacking or defending. Specified types of terrain will cause "two" to be subtracted from the attacker's die roll.
[8.6] Voluntary Reduction of Combat Odds
After calculating the odds for a given combat, the attacker may, at his option, choose to use a Combat Results Table column less than the calculated odds. Thus, a calculated combat situation of 7-1 odds could voluntarily be reduced to an actual combat resolution of 3-1 odds.
[8.7] Retreat and Advance Due to Combat
[8.71] Retreat After Combat
Units which are forced to retreat after combat due to combat results always retreat a single hex. The hex they retreat to must be, if possible, no further from supply than the hex they abandoned. Within these restrictions and the prohibitions listed below, retreating Friendly units may be placed in any hex desired by the Enemy Player.
Units are prohibited from entering or crossing through the following hexes and hexsides:
a) Enemy occupied hexes; b) Enemy controlled hexes (see Zone of Control, 6.4); c) All-sea hexes; d) All-sea hexsides; and e) Off the map edge.
Units with no alternative retreat except into or through forbidden hexes or hexsides are immediately eliminated. Players should note that Friendly units may retreat onto other Friendly units in excess of stacking limitations. Units which are attacked and retreated onto a stack which is itself attacked do not add their Strength to the defense, but suffer all Combat Results. Such units destroyed in an exchange result do not count towards the total Points the attacker is forced to lose.
[8.72] Advance After Combat
If, as a result of a given combat action, any of the defending hexes are completely vacated by the defending units, as many as two of the attacking units may move into the vacated hex at the attacking Player's option. This advance must take place immediately, before resolving any other combats. This advance is not considered Movement and expends no Movement Points.
[8.8] Combat Results Table
(from the separate sheet)
| Die Roll | 1-2 | 1-1 | 2-1 | 3-1 | 4-1 / 5-1 | 6-1 / 7-1 | 8-1 / 9-1 | 10-1 |
|---|---|---|---|---|---|---|---|---|
| -1 | Ae | Ar | Ar | Ar | Br | Dr | Dr | Ex |
| 0 | Ae | Ar | Ar | Br | Br | Dr | Ex | Ex |
| 1 | Ar | Ar | Ar | Br |
Attacks at less than 1-2 odds are not permitted; Attacks greater than 10-1 are treated as 10-1.
[8.81] Explanation of Results
- Ae = Attacker eliminated; all attacking units in the combat situation are eliminated, i.e., removed from the map. Units in the same hexes as the involved units which were not attacking are not affected.
- Ar = Attacker retreat; all attacking units are moved one hex by the Defending Player. See the rules of retreat.
- Br = Both retreat; first the attacker moves all the defending units one hex, according to the rules of retreat. Then all the attacking units are moved one hex by the defending Player. Note that all of the defending units are retreated first, and then the attacking units are retreated.
- Dr = Defender retreats; all of the defending units are retreated one hex by the attacking Player, in accordance with the rules of retreat.
- Ex = Exchange; all of the defending units are eliminated first; then an equal or greater value of the attacking units, in terms of printed Combat Strength Points are also eliminated. The attacking Player chooses which units are to be eliminated.
- De = Defender eliminated; all defending unit(s) are eliminated.
[9.0] Supply
GENERAL RULE:
Ground units must be supplied to use their full Combat Strength or Movement Allowance; if they are not supplied they are penalized with respect to movement and combat values. British and German units have different Supply requirements and effects, reflecting the logistical effect of the invasion. The British units are always supplied so long as they have access to a "large" (two or more hexes) city or the Northern edge of the map. The German units are dependent on supply units which must be transported to Britain. These supply units are consumed whenever German units attack.
PROCEDURE:
The supply status of all Friendly units is determined during the Supply Judgement Phase, and applies all through the rest of that Friendly Player-Turn. Enemy units attacked during a Friendly Player-Turn have their supply condition determined at the instant of combat. Thus the effect on Combat Strength for defense occurs at the moment of combat, while the effect of supply on Movement Allowance and Combat Strength for attacks occurs at the start of each Player-Turn (except as modified, for the German Player, by Case 9.7). Markers have been supplied to indicate which units are Unsupplied or Isolated.
CASES:
[9.1] German Supply
Supply for German hexes is traced along a line of continuous hexes stretching from the unit to a supply unit. This supply path may not be interrupted by the presence of Enemy units or their Zones of Control. It may run through any terrain and through Friendly units in Enemy Zones of Control. German units which are able to trace a path five hexes or less in length to a supply unit are in full supply. If the shortest path is six to ten hexes long they are Unsupplied, and if the shortest path is more than ten hexes in length, or none exists, they are Isolated.
[9.2] British Supply
The supply path for a British unit must be traced to a hex in a major city (two hexes or greater in size) or the northern edge of the map. This path may be of any length so long as it is not interrupted by Enemy units or Zones of Control. It may run through any terrain and through Friendly units in Enemy Zones of Control. It may not be traced through Sea hexsides.
[9.3] Supply Sources
A German supply unit may provide supply to any number of German units. A British supply hex may provide supply to any number of British units. A Friendly unit may never use an Enemy source of supply.
[9.4] Supply States
German units are Unsupplied if their shortest supply path is six to ten hexes in length. They are Isolated if their shortest supply path exceeds ten hexes, or they have none.
British units are in full supply if they are able to trace a supply path to a supply source. Unlike the German supply paths, there is no limit to the length of the British supply paths. Both German and British units are Isolated if they are unable to trace a supply path to a supply source.
[9.5] German Beachhead Supply
German held beach hexes and port hexes represent a partial supply source for German Units. German units which are able to trace a path of three unobstructed hexes or less to a German held beachhead or port hex are "Unsupplied," unless they have a source of full supply.
[9.6] German Supply Units
German supply units may use their Combat Strength only in defense, and only when no combat unit is in the hex. Supply units are always in a supplied condition; they do not trace to any further supply source.
[9.7] German Supply Units and German Attacks
German Supply units must be expended whenever German ground units attack. In order to attack a unit must have been in a Supplied state during the German Player's Supply Judgement Phase. In addition, the unit must be able to trace a supply path of no more than five hexes in length to a Supply unit at the moment of combat. This Supply unit is expended (removed from the map) at the end of the Combat Phase. A unit which cannot meet the above requirements may not attack. Any number of attacks can be traced to a single Supply unit, and there is no limit to the number of Supply units that may be expended in a given Player-Turn.
[9.8] Effects of Isolation and Unsupply
See separate sheet 13.0. Note that units are never eliminated solely due to being isolated or unsupplied. They may remain in those states indefinitely.
[10.0] Air Power
GENERAL RULE:
Both Players are provided with air units which are used to simulate the effect of air power in the campaign. The air units are used to disrupt Enemy combat units and echelons. They may be used once per Game-Turn.
CASES:
[10.1] Air Unit Movement and Attack
British air units have a normal range of 20 hexes; German air units have a range indicated by the air range line on the map. In addition, they may extend their range to cover the entire map. During the Air Attack Phase, the Phasing Player allocates his air attacks by placing his air units on the desired hex or over the Landing Echelon hex. He then totals the number of air units, finds the corresponding column on the proper Air Attack Table, and cross-references that column with the die roll, performed separately, one for each combat unit in the land hex or Landing Echelon hex. He applies the result to each affected unit. Attacks combining air units at normal range and those at [one line of text is cut off in the scan] can only be attacked by units flying at normal range. German air units are returned to France; British air units are returned to any clear terrain hex not controlled by the German Player.
[10.2] Air Unit Bases
British air units may operate from any clear terrain hex, up to a maximum of two units per hex. The British Player may change the base of his air units by simply returning the air units to a different hex within 20 hexes of the hex attacked. British air units have no Zone of Control or Combat Strength. They may be destroyed at any time during the game if the German Player moves a combat unit onto or through the air unit which it is on the ground.
German air units are based in France (placed in the Forces Available in France box on the map). The area within which they can operate over Britain and still be considered flying at normal range is indicated by the air range line printed on the map. When flying beyond this line, German air units are considered to be operating at extended range.
[10.21] One British air unit may stack with British combat units (see 7.4) in a clear terrain hex. If such a hex is attacked by German air units the results apply only to the British Combat units. Air units have no effect on other air units. If such a hex is attacked by German combat units, the combat results apply only to the British combat units in the hex. If the results of the combat expose the air unit (Dr, Br, Ex or De) the German Player could destroy the British air unit by advancing after combat onto the air unit.
Air units may not fly combat missions when the Game-Turn weather result includes a "V" (poor visibility). See case 12.6. British air units may always change base hexes during their Air Attack Phase, regardless of weather.
[10.3] What Can Be Attacked By Air
German air units may attack only British combat units. British air units may attack (1) German combat units deployed in Britain, or (2) all German units in a Landing Echelon hex. Echelon hexes may not be attacked at extended range.
[10.4] What Cannot Be Attacked By Air Units
Air units may not attack other air units. British air units may not attack German Supply units except when they are in Landing Echelon hexes. Neither Player's air units may attack Enemy units located in a city hex. Air units may not attack anything other than a ground combat unit(s).
[10.5] Supply of Air Units
Air units are always in supply.
[10.6] Normal Range Air Attack Table
(from the separate sheet)
| Die Roll | 1 air unit | 2 | 3 | 4 | 5+ |
|---|---|---|---|---|---|
| 1 | D | D | D | D | D |
| 2 | - | D | D | D | D |
| 3 | - | - | D | D | D |
| 4 | - | - | - | D | D |
| 5 | - |
[10.7] Extended Range Air Attack Table
(from the separate sheet)
| Die Roll | 1 air unit | 2, 3 | 4, 5 | 6, 7 | 8+ |
|---|---|---|---|---|---|
| 1 | - | D | D | D | D |
| 2 | - | - | D | D | D |
| 3 | - | - | - | D | D |
| 4 | - | - | - | - | D |
| 5 | A1 |
Explanation of results: "-" = No effect; D = Target Disrupted; A1 = One Air Unit destroyed.
Note: Normal Range for British air units is any target within twenty hexes of point of origin; Normal Range for German air units is any target hex on the seaward side of the Extended Range line on the map.
[10.8] Disruption Due to Air Attack
[10.81] Effects of Disruption
The Combat Strength of a disrupted unit is halved, and its Movement Allowance is reduced to one Movement Point. There is no additional effect on an already disrupted unit. If a unit is in a landing echelon, it is immediately returned to France (regardless of weather) instead of being disrupted. It is not affected in any other way, and may be re-embarked. Disrupted units may not entrain. If already entrained, they are forced to detrain in the ensuing British Player-Turn; they must still undergo the Disruption Removal process.
[10.82] Removal of Disruption Marker
During the Disruption Removal Phase, the Phasing Player rolls the die separately for each of his disrupted units. A die roll of "1, 2, 3" or "4" results in the removal of the Disruption Marker. A roll of "5" or "6" means the Disruption Marker remains, and the unit remains disrupted until the next Friendly Disruption Removal Phase (at which time the process is repeated).
[10.9] Air Transport of Supply Units
Beginning with Game-Turn Two and for every third Game-Turn thereafter, the German Player may attempt to air transport a Supply unit to England. It is placed on the map during the German Reinforcement Phase on any German initial beach hex not controlled by the British Player. If it is delayed due to weather (see 12.4), the German Player may attempt to transport it again on the succeeding Game-Turns until he is successful. Three Game-Turns after he has successfully transported a Supply unit by air the German Player may attempt to air transport another Supply unit. This air transport capability is in addition to the normal German air capability, and does not require the use of air units. Combat units may not be air transported in this manner.
(Heading "10.9 Air Transport of Supply Units" is taken from the rulebook's contents list; the heading line itself is not clearly legible in the scan.)
[11.0] The Scenarios: How to Set-Up and Start the Game
GENERAL RULE:
There are three different versions of the game Seelowe. Each of these versions is called a Scenario. All of these Scenarios use the standard game rules and game length, and are distinguished mainly by the different mixes of forces (Orders of Battle) available to each side at the start of the game and appearing as reinforcements during the course of play.
Players should decide by mutual agreement which Scenario shall be played, or by rolling the die and allowing high roller to pick the Scenario and low roller to pick the sides. Before reading further, examine the pictures of units printed on the playing map. The code letters found under the pictures of the units refer to the Scenario in which these units appear (in the quantities indicated). German units are pictured on the map tinted blue and are coded either "N," "H," or "J" (or a combination of those letters). British units are coded either "S" (for the two September Scenarios, "N" and "H") or "J" (for the July Scenario).
SET UP PROCEDURE:
After deciding upon a Scenario, players should place the appropriate quantities and types of units on their pictures on the map. Quantities of units are indicated by a multiplier number following the Scenario code under the unit picture (e.g., "Nx2" would mean that two of that pictured German unit appear when playing Scenario N; "Sx5" would mean that the British Player receives five of the pictured unit in both of the September Scenarios). Any combat units remaining after this set-up procedure is performed should be placed back in the box and should not be used in that game. Unit pictures which are not covered by units should be double-checked before proceeding to make certain that they do not contain the code of the Scenario being played.
The British Player then takes his units from the Initial Forces section on the map and places each unit in the hexes indicated by the grid numbers above or below that unit's picture. The German Player then initiates the routine outlined in the German Special First Game-Turn Initial Landing Procedure (11.4).
CASES:
[11.1] September Scenario H: The OKH Plan
[11.11] Use the German Forces and Reinforcements coded "H" and German Landing Echelons A, B, C, D, E, and F.
[11.12] Use British Forces and Reinforcements coded "S"; set up Initial Forces face-down in the September Deployment hex numbers.
"H" Special Restriction: no mechanized units may be embarked from the forces available in France before Game-Turn Seven.
[11.2] September Scenario "N": The Navy Plan
[11.21] Use the German Forces and Reinforcements coded "N" and German Landing Echelons C, D, and E.
[11.3] July Scenario "J": The Boldstroke Fantasy
[11.31] Use German Forces and Reinforcements coded "J" and German Landing Echelons E and/or F and/or G.
[11.4] German Special First Game-Turn Initial Landing Procedure
In the first German Player-Turn of the game, the German Player must land all of the units which compose his Initial Landing Force (i.e., the appropriately coded units pictured in the large arrows and the German airborne box on the map). The following is a description of the first German Player-Turn in terms of the Sequence of Play:
[11.41] German Initial Landing Player-Turn
A. Weather Phase: The Weather is automatically considered "Clear" on the first Game-Turn.
B. Landing Phase: The German Player takes the units from their Landing Echelon arrows and places them on beach hexes within their respective Echelon Areas (indicated by the heavy lines emanating from the lettered Echelon hex). As many as two German combat units and one Supply unit may be placed in a single beach hex. The German Player must then land all his available airborne forces. He may land one Parachute unit per hex and then place an Airlanding unit on it. Parachute units must be landed within two hexes of German occupied beach hexes. Parachute units must land in unoccupied clear terrain hexes (which may or may not be within British Zones of Control).
C. Reinforcement Phase: No German reinforcements arrive in France.
D. Supply Judgement Phase: All German units are considered totally in supply for the entire first Game-Turn.
E. Air Attack Phase: German air units in France may attack British units.
F. German Initial Movement Phase: No German units may move in the Initial Movement Phase of the First German Player-Turn.
G. Combat Phase: The German Player may attack British units adjacent to German units, at his option. All German units are considered to be in supply for combat in this first Combat Phase (without having to expend any Supply units).
H. German Mechanized Movement Phase: The German Player may move his mechanized units.
J. Disruption Removal Phase: Inapplicable to German units in the first Player-Turn.
K. Embarkation Phase: The German Player may take units from the forces initially available in France and place them in one or more of the off-shore Landing Echelon hexes in the areas he has invaded or in areas where he has seized ports.
[11.5] British Special First Game-Turn Provisions
The British Player follows the normal Sequence of Play for his units with the following provisos taken into account:
[11.51] All British units are considered to be in supply for the entire first Game-Turn.
[11.52] All British units which have a Movement Allowance of three or five are considered to be unactivated until one of two conditions are met. British units which are unactivated may not move, nor may they attack. They retain their Zone of Control, and defend normally. They become activated in either of two ways:
a - They are attacked by a German ground unit.
b - The British Player rolls a "1" or "2" in the Unit Activation Phase.
For a unit to be activated, the condition must be met for the individual unit. If the German Player attacks one of them, the remainder are unaffected. The British Player rolls the die individually for each unit. Those units which he fails to activate on one turn may be rolled for on each subsequent Game-Turn. All starting British units become activated automatically on the beginning of Game-Turn Five.
[11.6] Scenario Variants
The scenarios given above represent our estimate of the British strength and deployment and of the German planned invasions. For those who want additional variety in their games, we suggest the following Free Set-up rules.
[11.61] German Free Deployment: The German Player is restricted to the same Initial Forces and reinforcements as detailed in whatever standard scenario is chosen. However, he may secretly select what Landing Echelons he will invade on his Initial Landing Phase. He notes on a piece of paper, exactly what units from his Initial Landing Force are going to what Landing Areas. He may invade as many different Areas as he wants or as few. [In September the prevailing weather would normally have prohibited a German descent in strength into Area G. To reflect this we suggest that the German Player roll the die and conceal the result for the British Player. If he rolls a five or six, he can invade area G; otherwise, he can't. The German does not reveal his die roll until after the British Player has deployed.]
[11.62] British Free Deployment: After the German Player has secretly determined his invasion areas, the British Player deploys his units exactly as called for in the scenario. He then takes a "free" move. That is, he may move all of his units on the map any place he wants up to the limit of their Movement Allowance, subject to the following restrictions:
a - He may not use Rail Movement.
b - He may not move a unit into a city hex, beach hex, or port hex (naturally, units which are originally deployed in such hexes may remain where they are).
After both Players have altered their set-ups, the game is begun and played as outlined in the main text.
[12.0] German Reinforcements [and How They are Transported to Britain] and British Reinforcements [and How They Actively Enter the Game]
GENERAL RULE:
During the course of the game both Players receive additional forces (reinforcements). The Turn Record Reinforcement Track (printed on the map) indicates by Game-Turn and Scenario which units enter the game at what time.
GENERAL GERMAN PROCEDURE:
When German units appear on the Turn Record Reinforcement Track, this indicates the Game-Turn in which they are moved to the "Forces Available in France" holding area on the map. They may not actually be landed in Britain on that same Player-Turn (see Sequence of Play); rather, they must wait until the end of that German Player-Turn to be embarked (i.e., placed in one or more of the lettered Echelon hexes) and then wait until at least the ensuing German Player-Turn to be debarked (landed) on a German held port hex or a German held invaded beach hex. Such embarkation and debarkation is limited by the capacity of the particular Transport Wave being used. Note that the German Player begins the game with a certain number of units already available in France (which may be embarked on the first Game-Turn, but not landed on the first Game-Turn).
GENERAL BRITISH PROCEDURE:
Where British units appear on the Turn Record Reinforcement Track, this indicates the Game-Turn in which they are placed in the Inactivated British Reinforcements Holding Area on the map. During the Activation Phase of that Player-Turn, the die is rolled for each of these units (and inactivated reinforcements from previous Player-Turns) to determine whether they are "activated," [i.e., whether they may enter the map on a Rail line (considered entrained), and become involved in play. (The first line of this passage is partly illegible in the scan.)]
CASES:
[12.1] German Embarkation
During the Embarkation Phase of every German Player-Turn the German Player may take units from the Forces Available in France box on the map and place them (face down) in the Landing Echelon hexes of the coast of Britain. Note: due to the restraints of the Sequence of Play, units can never embark and land in Britain (or return to France) in the same Player-Turn. Except for air transporting a supply unit directly into Britain (10.9), there is no instance in which a German unit can be taken directly from the Turn Record Track or the France box and be landed in Britain in the same Player-Turn.
[12.11] The Limits of Embarkation: The Transport Wave
German units are embarked into the Landing Echelon hexes in groups called Waves. After the initial landing force has been landed in Britain (that force is not considered to be a Wave) the units taken from the France box and placed in the off-shore Landing Echelon hexes in the Embarkation Phase of the First German Player-Turn, are considered to be the First Wave. The number of Strength points in this Wave is limited by the Transport Point Value of the first Wave in the Scenario being played (see the Transport Wave Schedule on the map). Each Transport Point can be used to embark one Combat Strength Point.
[12.12] An entire Wave can be embarked in a single Embarkation Phase (assuming there are sufficient units available in France) or the Player can stagger the embarkation of the Wave over two or more Embarkation Phases. Portions of the Wave can be landed from the Echelon hexes in different Landing Phases (or all in one Phase, assuming there are enough ports and beach hexes to receive them).
[12.13] The German Player is not forced to use all of the available Transport Points in one Wave before going on to the next Wave. He must, however, land all the units embarked in one Wave before announcing the initiation of a subsequent Wave. A simple graphic mechanism informs the Player whether or not he initiates a new Wave: if at the beginning of any Embarkation Phase there are no German units in any of the off-shore Landing Echelon hexes, a new Wave can be started in that Embarkation Phase. Any leftover Transport Points from a previous Wave are not passed on to the new wave.
[12.14] In each Wave, one supply unit may be embarked at no Transport Point cost to the Player. Additional Supply units can be embarked in a Wave at a cost of three Transport Points per supply unit.
[12.15] Wave Example: In the Embarkation Phase of Game-Turn One (Scenario N), the German Player uses ten of his First Wave Transport Points to embark one 6-4 from France to Echelon hex C, and one 4-5 from France to Echelon hex D. A supply unit is embarked into Echelon hex D at no cost. In the Weather Phase of Game-Turn Two an "SV" weather result prevents these units from landing in the Landing Phase of that Player-Turn. In the Embarkation Phase of that Player-Turn another 4-5 is embarked into Echelon hex D, expending the remaining four Transport Points. In the Landing Phase of Game-Turn Three, all of the embarked units are landed in their respective Landing Areas. Since the Echelon hexes are free of units, the German Player initiates the embarkation of the Second Wave in the Embarkation Phase of the Third Game-Turn by embarking two 6-4's and a Supply unit into Echelon hex D. These units land in the Landing Phase of Game-Turn Four, and since there is no practical use for the two leftover Transport Points of the Second Wave, the German Player discards them and announces the embarkation of Wave Three in the Embarkation Phase of that Player-Turn.
[12.2] Landing Echelons and Echelon Landing Areas
The seven off-shore hexes lettered "A" through "G" are called Landing Echelon hexes. It is into these hexes that German units from France are placed when they are embarking. Once placed in an Echelon hex, the units may not be directly shifted to another Echelon hex. Units in an Echelon hex have three options: they can land in Britain, return to France, or stay in the Echelon hex.
The heavy lines emanating from each Echelon hex describe the limits of the Echelon Landing Area, i.e., that stretch of British coast which units in that Echelon hex can land upon in the Landing Phase of a German Player-Turn.
[12.3] Debarkation: Landing in Britain (or Returning to France)
[12.31] During the Landing Phase of a German Player-Turn (second Game-Turn and thereafter), all, some, or none of the German units embarked in Echelon hexes may come ashore in their respective Landing Areas, contingent upon the weather, the number of available beach and port hexes in that Landing Area, and the desires of the German Player.
[12.32] Limits of Debarkation Into Britain
A. No more than one unit (including supply units) may be debarked onto a given beach or port hex in a single Landing Phase. This is true even if the hex contains both a beach and port symbol - still only one unit could debark in such a hex.
The one debarking unit may land on a beach or port hex which contains as many as two German Combat units and one supply unit as long as this overstacked condition is relieved by the end of the Initial German Movement Phase of that Player-Turn.
B. No more than one unit may be landed at each German-held port within a given Landing Area. Within each Landing Area only one beach hex per Landing Phase may be used to land a unit. Thus, in Landing Area E a maximum of three units could be landed: one each at port hexes 4524 and 4424 and one at either of the three beach hexes. A supply unit counts as one unit for debarkation.
C. That beach or port hex must be within the Landing Area of the Echelon in which the unit was embarked.
D. That Landing Area must be one of the Areas originally invaded in the First Game-Turn (exception: see H below).
E. The beach or port must be German-held (i.e., the last unit to have passed into or through the hex was German). Such a hex may be in a British Zone of Control.
F. If landing on a non-port beach hex, the weather must be clear. If the weather is Rough Seas, the unit must land in a port.
G. If the unit is a mechanized unit, it must always land on a port hex.
H. A unit may be landed from an Echelon hex not originally invaded if it lands in a German-held port (only) in that Landing Area (see 12.4).
[12.33] Returning to France
One or more of the units in Echelon hexes may be returned to France (debarked) during the landing Phase (unless the weather is "Stormy"). Doing so does not expend any more of the Transport Points of that Wave, but it does not enable the Player to re-use the Transport Points originally expended to embark those units in the first place. Units which return to France may be re-embarked in the Embarkation Phase of the same Player-Turn (assuming there are Transport Points available to do so).
[12.4] Use of Ports and Beaches Outside the Initial Landing Echelons
As the game progresses, German forces may expand outside of their initial beachheads, overrunning port and beach hexes which lie outside of their initial Landing Echelons. Each captured port may be used to debark units from the port's appropriate landing echelon, but beaches seized outside the Initial Landing Echelons may never be used to land units or as a source of partial supply.
Ports are marked on the map with an anchor symbol.
[12.5] Movement and Combat in the Player-Turn of Debarkation
Unlike the Initial Landing Force, units debarking from Waves may move in the Initial Movement Phase of the Player-Turn in which they land. They are not, however, considered to be in automatic supply when they land; they must establish a supply path in the Supply Judgement Phase of that Player-Turn, just as any other German unit already ashore. Note that by virtue of starting out in a beach or port hex, they are at least in an "Unsupplied" state (see 9.5).
[12.51] When units debark onto a beach or port hex, the act of placing them in that hex expends Movement Points from their Initial Movement Phase Allowance just as if they had entered that hex from an adjacent land hex (when placing the unit in the Landing Phase, turn it face down as a reminder that the unit debarked in that Player-Turn). In the Initial Movement Phase, turn the unit face up and move it normally after subtracting the appropriate number of Movement Points from its Allowance. There is no other Movement Point cost for landing, per se.
[12.52] Example of Debarked Unit Movement: A German 3-6 Mechanized unit debarking onto hex 4026 would have five Movement Points remaining in the ensuing Initial Movement Phase, having expended one Movement Point to enter the hex. If the hex were in a British Zone of Control, the unit would have to expend three Movement Points to enter the hex (one for the hex and two to enter an Enemy Zone of Control), and would have three Movement Points remaining in the ensuing Initial Movement Phase.
[12.53] Debarked units may participate in combat in the Player-Turn of debarkation and thereafter just as any German ground unit, suffering the same supply restrictions. Note that units may not "fight their way ashore," i.e., make an opposed landing against a British-occupied hex from an all-Sea hex.
[12.6] Weather
Weather affects the ability of German units to debark and of both German and British air units to be used at all. On Game-Turn One, the weather is always clear. At the beginning of Game-Turns Two through Fifteen, the German Player rolls the die and consults the Weather Table for the weather for that entire Game-Turn.
[12.61] Weather Table
| Sept. Die Roll | Game-Turn Applicable: 2 thru 6 | Game-Turn Applicable: 7 thru 15 | July Die Roll |
|---|---|---|---|
| NA | C | C | 1 |
| NA | C | C | 2 |
| 1 | C | C | 3 |
| 2 | C | R | 4 |
| 3 | R | R | 5 |
| 4 | R | RV | 6 |
| 5 | SV |
(The left die roll column is headed "Sept." and the right one "July"; the middle columns give the result for the Game-Turns indicated.)
[12.62] Explanation of Results
- C = Clear and calm; operations not affected.
- R = Rough seas; units may only land at German held ports (or return to France).
- V = Visibility Poor; air units may not fly combat missions (British units may change base hexes).
- S = Storms; Units may not land at all (neither in Britain nor returning to France).
NOTE: Be sure to use the die-roll column appropriate to the Scenario being played (NA = not applicable).
It is possible, but not probable, that bad weather could prevent the Germans from ever landing reinforcements in England.
[12.63] If units in Landing Echelons are unable to land because of weather, they remain in their Landing Echelons until the weather clears. Bad weather does not prevent the Germans from adding to the forces in the Landing Echelons (up to the limits of the German Transport Wave Schedule).
[12.7] British Reinforcements and How They Actively Enter the Game
In the Reinforcement Phase of the British Player-Turn, the British Player places his newly received units in the Inactivated Reinforcement Holding Area on the map. In the Activation Phase of that same Player-Turn he rolls the die for each of these units and any inactivated reinforcements remaining from previous Player-Turns.
[12.71] Activation Die-Rolls
A die roll result of "5" or "6" means that that unit remains inactive until activated on some subsequent Activation Phase.
A die roll result of "1, 2, 3," or "4" means that that unit may enter the game in that Player-Turn.
[12.72] Where and How Activated Reinforcements Appear
All Activated reinforcements enter the game from the edge of the map, on a rail line in an entrained state. All activated reinforcements enter from the north edge of the map unless their Scenario code is suffixed with the letter "w," meaning that they enter from the west edge. British Partisan units (see 12.8) are a special case, not subject to the normal rules of activation and entry.
[12.73] Activated British reinforcements may not enter the map directly into an Enemy Zone of Control. Entering the first rail hex on the map counts as a rail hex of movement.
[12.74] Unlike the British Initial Forces, unactivated reinforcements are not automatically activated on Game-Turn Five. Unactivated reinforcements must always be activated by a die-roll.
[12.8] British Partisans
Beginning on Game-Turn Ten in the September Scenarios, the British Player receives one partisan unit (2-3) on any one city hex that is not physically occupied by a German unit. This includes cities which may have been occupied by a German unit, but are not currently occupied. The British Player simply places the partisan unit in the city hex during the Reinforcement Phase (no activation necessary); it may then move freely. It is always considered in Supply though all other normal restrictions and effects apply to it. It is not considered to be entrained.
[13.0] Terrain and Supply Effects Chart
(from the separate sheet; see also the Players' Notes first paragraph)
| Type of Terrain | Movement Point (MP) Cost to Enter or Cross | Effect on Combat |
|---|---|---|
| Clear or Beach Hex | 1 MP | No effect. |
| River Hexside | 1 Additional MP* | If any units are attacking across, subtract 2 from the die roll. |
| Forest Hex | 1 Additional MP* | If the Defender is in the hex, subtract 2 from the die roll. |
| Rough Terrain Hex | 1 Additional MP* | No effect. |
| Swamp Hex | 1 Additional MP* | No effect. |
| City Hex | No Additional Cost | "Ar" and "Dr" Combat Results may be ignored at owning Player's option. German Air units may not attack units in the hex. |
| Sea Hexside | Movement Not Permitted | Attacks not permitted. |
*All British units, and German Mountain units, Paratroop units, and Air Landing units, are exempt from the additional cost. They expend 1 Movement Point per hex regardless of terrain. The additional Movement Point cost applies only to German Mechanized Infantry, Armor, Infantry, and Supply units.
| Supply State | Effect on Movement Allowance | Effect on Combat Strength |
|---|---|---|
| Unsupplied (German only, and only when supply path is from 6 to 10 hexes long) | Halved (Round fractions downward) | Normal on Defense (retain fractions); Attack prohibited. |
| Isolated (Germans when path is longer than 10 hexes or either Player when path is cut by Enemy units or Zones of Control) | Halved (Round fractions downward) | Halved on Defense (retain fractions); Attack prohibited. |
[The effect on combat of city hex as described on the Terrain Effects Chart is incomplete. The complete effect is: "Ar," "Br," and "Dr" combat results may be ignored at Owning Player's option. German and British air units may not attack combat units in the hex.]
[14.0] British Home Guard
GENERAL RULE:
Beginning with Game-Turn Ten in the September Scenarios, the British Player receives certain additions to his forces in the form of Home Guard. These are the women, children, old men, mad dogs, and Englishmen determined "never to surrender" and resolved "to take one with them."
CASES:
[14.1] At the beginning of Game-Turn Ten, all British city hexes which have not previously been occupied by German units are automatically given a Defense Strength of "three." This defense value may be added to any British units on the city hex, or it may stand alone.
[14.2] The Defense Strength may not be used to attack adjacent German units. The city hex has no Zone of Control into surrounding hexes. German units may not advance or retreat through the hex or trace supply through it until they reduce the hex.
[14.3] The hex Defense Strength cannot be disrupted by air attack. The German Player reduces the hex by attacking it and any units stacked on it, and rolling either an "Ex" or "De" combat result. The hex Defense Strength is not affected by supply considerations.
[15.0] Victory Conditions
Every Scenario in Seelowe lasts fifteen Game-Turns (30 days). In 1940 the issue would have been decided in this time. And the issue was simply: Do the Germans establish a viable lodgement or not? If they've seized enough ports and brought sufficient troops ashore to defend their beachheads, the eventual success of the invasion is assured. Therefore, at the end of Game-Turn fifteen, victory is evaluated in terms of the number of ports the German holds, and the strength of his forces in Britain in ratio to the surviving British forces.
Naturally the Germans would like to win big, early. A fast conquest of Britain means less chance of Soviet or American intervention. Also a cheap victory is good because it means strength for the inevitable confrontation in the East. Thus we have graded German Victory as Decisive, Substantive, or Marginal. For the British Player there is only one victory level; he must wipe out the Germans or so throttle their beachhead that they would die on the vine.
[15.1] How to Determine Victory
Step 1: Count the number of German-held ports.
Step 2: Total the number of Strength Points left to the British Player (don't count air units or Home Guard city hexes).
Step 3: Total the Strength Points of all German ground combat units (unisolated) which are in Britain (don't count units in the Landing Echelons, in France, air units, or supply units).
Step 4: Divide the German Strength by the British Strength to get the Victory Ratio.
Step 5: Compare the number of German-held ports and the Victory Ratio with the conditions listed in 15.2.
[15.2] Levels of Victory
| Victory Level | German-held Ports | Victory Ratio |
|---|---|---|
| British Victory* | 0 through 4 | less than 1.0 |
| Technical Draw** | 5 or more | less than 1.0 |
| German Marginal | 0 through 4 | 1.0 or greater |
| German Substantive | 5 or more | 1.0 or greater |
| German Decisive | 10 or more | 2.0 or greater |
* If the British at any time succeed in eliminating all German units in Britain, they automatically win a Victory and the Game is instantly ended. This is true even if the German still "holds" beach and port hexes and has the potential to land units on some subsequent Game-Turn.
** A Technical Draw is a situation in which neither Player "wins." Historically, we would say that the future outcome of the invasion is unclear and would undoubtedly depend almost entirely on future weather conditions.
[15.3] The Match Game and "Player Victory" [Optional Victory System]
The Victory Conditions are essentially historical ones and do not directly measure relative Player-to-Player performance. If they wish to achieve this end, Players should play the same scenario twice, switching sides for the second game. "Player Victory Points" are assigned for the level of victory achieved by each Player in each game. These points are totalled and compared at the end of the Match to determine the winning Player (as contrasted to the winning historical side).
[15.31] Player Victory Point Values
A British Victory is worth 3 Player Points. A Draw is worth Zero. A German Marginal Victory is worth 1 point; Substantive, 2 points; Decisive, 3 points.
[15.32] Determining Player Victory
At the end of the Match, each Player totals his personal score. The lower score is subtracted from the higher score to determine the degree of victory attained by the higher scoring Player. These net Player Victory Points can be compared to the following scale:
| Net Player Points | Evaluation of Player's Relative Performance |
|---|---|
| 0 | Equal |
| 1 | Marginally Better |
| 2 | Somewhat Better |
| 3 | Substantially Better |
| 4 | Superior |
| 5 | Substantially Superior |
| 6 | Decisively Superior |
[15.33] Series Play
A more accurate evaluation of the relative skill of two Players can be achieved by playing a Match for each of the three Scenarios and then totalling each Player's Victory Points, subtracting lower from higher, and then dividing the result by three and comparing it to the Evaluation Scale.
[15.34] Concurrent Play
After Players have gained a thorough familiarity with the rules and mechanics of play, it is possible to play two games at once (assuming both Players own a copy of the game) by playing a Concurrent Match (i.e., while one Player is maneuvering the German units on one map, the other Player is maneuvering them on the other map). In this manner, the two games of a match can be played in little more time than one game. It is suggested that the change of the Game-Turn occur in both Games at precisely the same time to avoid confusion.
[16.0] Players' Notes
German Player
STRATEGY: The Navy Plan
In the Navy Plan the German Player lands on Beachheads C, D, and E. This places him on the southeast coast of Britain. His basic strategy, within the fifteen Game-Turns he has to play, is to clear and hold the southeast corner of Britain, roughly from hex 3520 in a line to hex 3122 and then down to Brighton at 3128. This will give him eight ports, sufficient to guarantee him at least a substantive victory, assuming that he doesn't lose too much strength in the interim. This strategy, of course, requires that he be able to land sufficient units to make it possible. In other words, the German is dependent on the weather. A German must drive from the beachhead area D north to the Chatham-Rochester area as soon as possible. This will allow him to seal off the Hastings-Chatham-Dover area and effectively deal with the cut-off British units in this area at his leisure. Of course, the British player is not about to allow this to happen easily, and will probably concentrate to stop such a drive. This means that the decisive battle will be fought on the plains southeast of London sometime between Game-Turns 3 and 7 or 8. If the battle goes against the German he has to make a quick decision to retreat and shrink his perimeter, giving up bridgehead C and parts of bridgehead D in order to hold a line roughly Hastings to the Swamps east of Chatham.
STRATEGY: The H Plan (or German Dream Plan)
If the German's dreams come true he lands on a broad front over virtually all of the south coast of Britain. Unfortunately, on his initial lodgement he is strong in no particular area. His strategy on the first two or three turns that he can land reinforcements is to build at least one strong area, preferably beachhead D if he can do it. The spread of his invasion areas will force the British Player to disperse his forces to cover all of the various beachheads. The German Player, of course, should reinforce success in this situation, since with any luck with the weather he'll be able to get large amounts of forces ashore early. He should win this game big.
STRATEGY: The July Scenario
The July Fantasy is a real crap shoot. If for no other reason than variety, the German Player should land in area G. This provides a nice variant. You're playing in new terrain, if nothing else, and it's far enough away from the main English strength so that you would hopefully get a chance to build up some strength. The German's best chance in this scenario is to drive inland as quickly as possible toward London to tie up the various railroads and communication lines. He is, once again, dependent upon weather to bring ashore his essential reinforcements and supplies. Since there are only four ports in the G area, this means that the Germans can achieve, at best, a Marginal Victory if they concentrate solely on G. In order to add some incentive for the Germans to risk a wide open game, it is suggested that the hexes constituting Greater London be considered as port hexes for victory purposes (only) in the July Scenario.
GERMAN TACTICS: All Scenarios
The German Player must use his air power initially to disrupt the strong British formations, specifically the 13-8 and the 5-6 and 4-6 Armored Brigades which are sitting within easy striking distance to bridgeheads D and C. If these forces get loose before the German has a firm toe-hold the results can be catastrophic for the German Player. The German Supply rules make it necessary for the German Player to expend a supply unit (at least one) any time that he attacks. It's a good rule for the Germans to never attack unless he has at least two supply units on shore. This always gives him one supply unit to keep his boys in supply. Also you can never tell what the weather is going to do and if he expends every supply unit he has in England he may not get another one for a while which would be an embarrassment. The Combat Results Table is relatively bloodless at the lower levels, the 1-1's, the 2-1's, the 3-1's, etc. Practically speaking this means that a continuous front guarantees either Player from being damaged in any given battle or series of battles on any one Player-Turn. The German Player, unfortunately, has to take risks early in the game to expand his beachheads and build a mobile battle in southern England. The reason he has to do this is so that as the game progresses, and the English begin to pile in their reinforcements and activate their immobile units, they can't wall off the German in Southern England. The German must fight to prevent any type of English continuous front forming. The best way he could do this is to have a relatively open, expanded type of battlefield.
GERMAN SUPPLY AND LOGISTICS
The German is only as successful as is his amphibious forces and his transport forces. The German is quite frankly dependent upon the luck of the weather roll. Obviously, if the weather goes against him he is probably going to lose the game. But the German cannot be a pessimist. He has to assume on any given turn that he is going to be lucky with the weather and that he is going to be able to land troops from his Landing Echelons. So essentially he has to play every turn using his transport waves and his Landing Echelons to their fullest possible extent. This primarily involves being efficient with how you handle your transport waves. The German Player should make use of the rule that permits him to return units in the Landing Echelons to France. This permits him, in effect, to clear away for another wave. He really doesn't lose much in doing so. But let us say on Game-Turn 4 he has a 6-4 infantry regiment sitting in Landing Echelon D. That is the only unit that has not landed from presumed transport wave #1. He should return that to France during the landing phase of the turn, and then during the embarkation phase of the same turn, embark 14 points worth of units (wave #2) in the Landing Echelons off of England. This, of course, presumes that the 6-4 could not have landed in England, but could be returned to France.
The British Player
STRATEGIES
The British Player will probably find himself faced with German Air attacks on his heavy units, the 13-8 and the two Armored regiments previously mentioned. He does, however, have a 10-8 and a 4-6 north of London which probably will be free on Game-Turn One. The British Player wants to prevent the German Player from doing what he must do to win, that is, create a broad front early and a front that will unravel when the German brings in sufficient reinforcements. So the English Player has to strike early, and try and contain the German in his narrow beachhead areas. Hopefully, with any bad weather for the Germans, the British Player then will be able to mop up these areas as he is able to deploy more and more of his forces against the invasion. On the whole the British Player is less mobile than the German Player. But he does have one advantage over the German, that is, he can afford to attack on every turn because he has no artificial supply constraints such as the German faces in having to expend a supply unit. Normally, the British Player should be very happy to attack, even at 1-1 and 2-1. The "Ar"s and "Br"s probably hurt him less than the German Player.
TACTICS
On Game-Turn One move your 10-8 to Chatham. Move your 4-6 to Chatham or Rochester. This protects them on Game-Turn Two from German Air attack and puts them in position where they can strike on Game-Turn Two on the British Player-Turn against either beachhead D or beachhead E. The striking power of the British army is really concentrated in the 10-8 and 13-8, the 8-3 over by Bath, and the three armored units. The British Player has to be realistic. The German Player will probably be bombing them at every opportunity and he's never going to be guaranteed that he'll all be mobile on any given turn. This means that the British Player can't really leave them out on a limb, so to speak. When they make attacks they will have to be supported with other units so that they are not exposed to German envelopment and destruction on some subsequent Game-Turn when their strength has been reduced and they're unable to move. Of course, the British Player should beware of the possibility of them being exchanged, if they attack without support from the plentiful 2-5's, 2-3's. Nothing is more painful than to trade off a 13-8 for one 6-4. So keep them together, don't let them get isolated, support them when they attack, otherwise you'll probably lose the game early.
[17.0] Designer's Notes
The two most striking characteristics of Seelowe are the absence of the Royal Navy and Royal Air Force. As most people are aware, Britain, in effect, won the Battle of Britain in the skies during early September, and the navy never had to enter in order to thwart a German invasion. This game posits two elements in a new scenario, one of them with a high degree of possibility, the other almost impossible to consider or to have actually occurred. First, the German Air Force kept up its bombardment of the air bases during early September rather than switch in revenge to attacks upon British cities. At the rate of loss that the British were suffering in the first week of September, they would have been whittled down to an almost insignificant force by September 20th. In point of fact, British contingency plans (that have survived to this day) demonstrate that they planned on pulling back their Air Force after falling below a certain critical point, and not attempting to defend Southern England, but only England north of roughly the Thames-Bristol line. In the game, this is assumed to have happened.
However, there still remains the British Navy. At that time the British Navy was supreme on the sea. There were no conceivable challenges from any other European power. Moreover, everything which has survived to this day concerning the possible use of the Navy shows that the British government fully intended to, if necessary, sacrifice the British Navy in the Channel in order to stop the Germans from instituting an invasion. No probable scenario can be pictured in which the British Navy fails to intervene. However, if the British Navy were to intervene, Seelowe would not be a game. It would merely be a futile exercise of how to exterminate troops on the beach. There is little doubt that the British Navy could have successfully steamed into the Channel, despite heavy losses by 1940 standards, and bombarded the troops on the beaches. Moreover, they would have been able to completely wreck the irreplaceable German invasion fleet. Not only would the German invasion of England have been turned back, but it would have been a crippling blow to the internal European economy, and would have affected the entire German production for the remainder of the year. It could well have shortened the war by a year or two. Thus, it became necessary to remove the British Navy from the game, in order to make a game.
There are a few rather unlikely scenarios which would allow some rationalization of this move. One of these would be that Churchill was not Prime Minister at this time. Certain other men in England at the time, who had previously held a high office, proposed that the British Navy, in order to safe-guard it and to continue to fight over seas, be removed to Canada. Authors of fictional accounts relate other possible scenarios, such as the British fleet removing itself in pursuing various German squadrons let out into the Atlantic. These are found to be incomplete since the destroyers locally based would have probably proved sufficient to defeat any invasion. The Germans undoubtedly could have gotten the troops ashore. It was their survival that was in doubt.
It will be readily noticed that air warfare is very abstract in this game. Originally there was a whole sub-routine, virtually an air game unto itself, which allowed the British and German air forces to combat one another, the Germans to attempt the complete subjugation of the RAF and the RAF to attempt to shoot down an ever increasing number of German bombers and fighters. However, it was found that in the last analysis the most efficient methods were for the Germans to use their air force to interdict various units of the British reserve and the RAF to use their last ditch effort to attempt to interdict the transport waves arriving on English shores. Thus it was decided it would be simpler and yet inherently realistic to simply limit most of their missions to these most logical courses.
The Germans receive many more transport points for their initial landing than they do for subsequent re-supply and reinforcement of the invasion. As noted before, the Germans had just about stripped Europe of all naval transport. This included most of the inland transport. The Germans had concentrated between 50 and 80% of the available sea transport in Occupied Europe at that time for the invasion. Even so, they were capable only of landing two fully-equipped divisions on the first day. Moreover, much of this fragile transport was essentially one-way. Another large section of transport would have to be immediately returned to the civilian sector of the economy so that the home front would not fall apart due to the lack of mobility. These factors, combined with the probable losses on the beaches, drastically reduced the German ability to put troops and supplies ashore after the first day.
It is pointed out frequently in the game that the key to winning for either side is weather. Essentially this becomes a "luck" oriented game. This is heavily connected to the German lack of transport, the inability to risk their ships in the channel during bad weather and perhaps lose the entire invasion, combined with the poor season for invasion in September. Even the capture of ports would not solve all the German problems since most of the ports were prepared for demolition and would have been extensively damaged upon capture.
The Germans were not the only ones with significant transport problems. The severe equipment losses in the evacuation from Dunkirk had not been replaced by September. Even less so by July. The only fully motorized units were the Canadian First Division, the armored divisions, and the motorized machinegun brigades which were actually armed almost exclusively with weapons carriers mounting machine guns. These, of course, have their full motorized Movement Allowances of eight. Certain other units were in the process of becoming re-motorized, but still did not have sufficient equipment to let a large part of a division (Movement Allowance of five). Other divisions almost completely lacked transport (those with a Movement Allowance of three). The British had assigned the divisions to certain areas in the event of an invasion alert, something which occurred several times. Supposedly, the local lorries, buses, and whatever other transport could be scraped together would hustle to division headquarters to be assigned to various battalions. In the actual alerts this was found to be a less than satisfactory system, since many people chose to sleep through the morning, many of the drivers were insufficiently learned of road systems outside of their own country, and communications with this haphazard transport system were sketchy at best. The fact that so many divisions and other units did depend upon local drayage was one reason why the British are scattered across the map in an apparently nonsensical fashion. Although it was frequently proposed that units be concentrated on the beaches, or at some other point, this could never be effected as long as the units depended on local transport. In the immediate area of either the Thames defense line or the Kent invasion area, there was insufficient transport for all of its units. The British had been a motorized army for more than two years and could not operate in the absence of the motorization. This is the reason for the activation rule concerning units beginning on the map. These units were simply taking their time getting their transport together and moving forward. Additionally, British reinforcements were expected to have had severe problems in arriving at the front. The Germans would have utilized night raids led by pathfinders in order to attempt to disrupt the rail system which was necessary to move the reinforcements forward. Thus, the reinforcements may or may not arrive on the Game-Turn that they are scheduled for.
At first the Players may find the Terrain Effects Chart somewhat anomalous. This is one of the very few games with "bigoted" terrain, where terrain affects the Germans but not the British. There are excellent reasons for that. This area of England is virtually covered with local rail nets, which are not described on the map, and local roads. England, at this time, was the most loco-motorized as well as auto-motorized country in the world, with the highest degree of roads per square mile. Thus the British, in the absence of any German interdiction, will have no trouble virtually anywhere. In point of fact, although cities would seem to be an obstacle to an army on the move, there were even plans to use the London subway system to transport units from the northern rail terminals to the southern rail terminals. However, for the Germans, movement would become a problem in certain areas, most notably what we have termed "forests" and "mountains," i.e., rough terrain. Here there were extensive plans for the local populace to block off everything except the major roads and to, in as many ways as possible, disrupt the rail transport, the track system, etc. This could effectively be done by small scale partisan warfare in the more restricted areas. Terrain doesn't affect combat for a very simple reason. What we describe as "forest" are truly not forests, but actually parks; and the mountains are really mole-hills by comparison to most European terrain. The only reason for their portrayal at all is because of the less dense transport network in those areas.
Although the plans for use of British Partisans and other dragooned civilians were quite extensive, it is considered, by the game designer and developer, not to be critical in the game. Although rules are included to re-create what probably would have happened, it is rarely found in any game that they will sway the course one way or another, unless the German makes a stupid mistake such as to leave one of his port cities unoccupied and allowing a partisan unit to appear there. Originally, Seelowe was a 40 Game-Turn game. In that game, although Partisans played a greater role than they currently do, it was still found that if the Germans had broken the back of the British regular army, they could easily mop up the Partisans. So the game was shortened to 15 Game-Turns. Usually Players will find that the game swings one way or another by Game-Turn 7, and they are simply playing out the execution of a pre-determined fact.
THE SCENARIOS
In some ways the July invasion plan was both the most realistic and the least realistic of each of the scenarios. It is not realistic simply because the Germans had no idea that the Manstein Plan of driving through the Ardennes would knock Britain and France out of the war so rapidly. Even Hitler expected a campaign of several months duration rather than a month and a half. Thus it is unrealistic to assume that the Germans would simply seize northern France and Belgium, and then immediately hop over to England. Because they didn't expect they would have that territory in time, they had no plans for it. However, the amount of transport available could have been concentrated beforehand if they had realized what advantage they would have had. And the British opposition would have been so weak as to give the Germans a substantially good chance of winning the game. This plan might have even caught the Royal Navy with its pants down, unable to intervene. Certainly the invasion at area G would allow the German air force to attack with greater vigor the British fleet since it puts it further away from the main British air dromes.
For the actual September scenario, the army (OKH) came up with a plan they thought would be necessary to conquer Britain, that is, the German Dream Plan. This allowed a large number of divisions to land over an extremely wide front and so tie up the British army so that they could concentrate at one point and break through. However, the Navy pointed out that they would be lucky to concentrate 30% of its transport necessary for this plan to be workable.
The Navy Plan is the "real" thing. If the British fleet were disposed of in some fashion, and if the Luftwaffe had been beaten (by September 20th), the RAF out of the air over southeastern England, they could have done this. It is not a fantasy excepting these two postulates. Even so, given these two enormous advantages, the German Player still has a rough time winning. With even weather he has a 50-60% chance of winning. But if the weather lets him down for any significant length of time, he may as well forget about it.