Seeland
Seeland Rulebook
Table of Contents
Table of Contents
Object of the Game
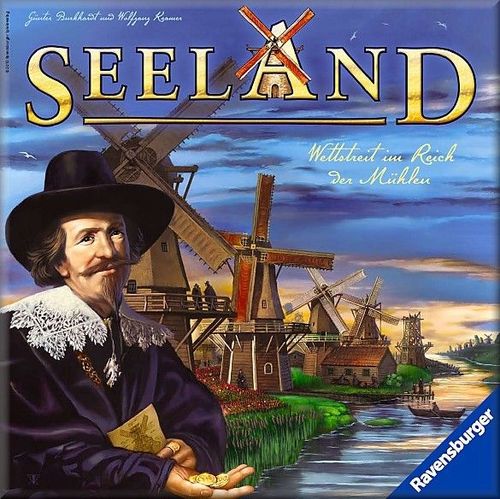
Seeland during the golden age: Players assume the role of wealthy Dutch merchants from the 17th century who are part of a courageous project. By means of splendid mills they want to drain large diked areas in order to cultivate cabbage, rapeseed and tulips so as to increase the wealth of Seeland (and its merchants).*
For this purpose, players purchase construction plans for mills on Seeland's market and then erect them on the landscape (mill tiles). Or they buy seeds and create fields around the mills (landscape tiles). As soon as a mill is completely surrounded, players proceed to the harvest, and the yield is credited to the mill's owner. At the end of the game, the player with the most points wins the game.
* You'll find further information on the historical background of the game on the last page of the playing instructions "Governors and records".
How to Play
On the last page, you'll find an infobox with the text: "What happens if …?", which explains atypical situations that can occur during the course of the game. You do not have to read it before the first game. Simply refer to this text if necessary.
The last player to have been to the Netherlands begins. He is the first to place one of his own mills on one of the six mill illustrations of the starting village. In turns and in a clockwise direction, all other players do likewise. Only one mill is allowed on each square. As soon as each player has placed one mill, the game can begin.
The starting player carries out the actions 1 to 3, one after another:
- Purchase (= take tiles from the market)
- Land reclamation (= place tiles on the game board)
- Harvest (= possibly evaluate mill)
Then, it is the next player's turn, and so on.
1. Purchase
On the market, the guild master does his rounds. The player whose turn it is must move him forward by at least one square in a clockwise direction. Depending on the square on which the guild master stops, the player receives the seeds (in the case of a market stall) or the mill construction plan (in the case of a workshop) located there. Now the player has to pay for the tile. The farther the guild master has been moved, the more expensive the tile is. The tile on the square directly in front of the guild master is free.
But for each square (warehouse included) that the guild master skips, the player must move his merchant on the trade house circle by one guilder forward in a clockwise direction. The merchant may not be moved past the foremost guilder: His financial means are temporarily depleted upon reaching this square.
Example: Purchase. Gregory (grey) skips 2 squares with the guild master (A) and takes the tulip seeds with the value 5 (B). As payment, he moves his merchant 2 guilders forward (C).
If in the above example it wasn't Gregory's turn, but Bill's (brown), he would have to take the mill with the value 0, since the brown merchant already rests on the foremost guilder of the row. So he has no "money" in order to let the guild master skip squares.
Relocation: As soon as all merchants have past the last guilder, it is immediately placed on the first trading house in front of the foremost guilder.
Since there are only unoccupied guilders behind the last merchant, they are placed at the beginning of the guilders row (D and E). Now, all merchants have more "money" at their disposal.
Replenishment: After payment, the topmost landscape tile from the stack (in the case of a market stall) or the topmost mill tile (in the case of a workshop) is placed on the vacant square on which the guild master stood before moving.
Warehouse: If a player moves the guild master on the warehouse, he does not receive a tile during his turn (and thus skips the actions 2 and 3). He donates instead part of his earnings by moving his scoring marker by 3 points backwards on the scoring track.
As compensation, he may move his merchant backwards by up to 3 guilders on the trading house circle.
2. Land Reclamation
The player turns over the tile that he bought on the market. So you can see the planted field (landscape tile) or the completed mill (mill tile). The player places the tile on the board as follows:
Landscape tile: A landscape tile has to be placed on any empty square of the game board that adjoins the player's own mill. The land around his mill is sufficiently drained in order to create fields.
Example: Placing a landscape tile. Bill (brown) has bought a rapeseed field, value 3. He can place it on any vacant square that adjoins any of his own mills (highlighted in green on the illustration). He chooses the square on the left of his mill with the value 2.
Mill tile: A mill tile has to be placed on any empty square of the game board that adjoins developed squares, i.e. landscape tiles, mill tiles or farms (see below). The player may build one of his mills on a mill tile that he has just placed on the board – so it becomes his mill. Otherwise, the mill tile remains vacant and does not belong to any player.
Example: Placing a mill tile. Gregory (grey) has bought a mill tile, value 2. He has to place it on a vacant square that adjoins at least one landscape tile, farm tile or mill tile (including the one of the starting village!). He chooses the square on the right of the rapeseed field with the value 4 and places one of his mills on it.
Turn over island tiles: If a player's own mill borders one or several face-down island tiles, the island tiles are immediately turned over. The island already protrudes out of the water and can thus be easily developed.
In the previous example, the island tile above Gregory's new mill is turned over.
A turned-over island tile shows either a landscape or a farm.
- Landscape: Cabbage, rapeseed or tulips are the same as the other landscape tiles.
- The player immediately receives a stuiver for each recently-turned-over farm.
Note: Governors depicted on the tiles are of no importance in the basic game.
The player can use his stuiver at the end of his turn now or at the end of a later turn (it is taken out of the game), in exchange for an additional turn (purchase – land reclamation – harvest). Each player may only use one stuiver per round.
3. Harvest
As soon as any player's mill is completely surrounded, he immediately harvests there. (A mill on the border of the game board is surrounded when all adjoining hexagon squares are occupied.)
The mill's yield is made up of the value of the mill tile and the values of all adjoining landscape tiles.
- It doesn't matter which players have placed the tiles when calculating the yield.
- Important: Adjoining mill tiles (regardless of whether they show a mill or not) and farms do not bring in any points.
- Landscapes that are adjacent to several mills are considered for the harvest of each adjoining mill.
Landscape bonus: If the mill adjoins the fields of all three sorts of landscape (cabbage, rapeseed and tulips), the player receives a bonus of 5 points.
Monoculture: If the mill does not border any landscape tile or only one single sort of landscape (regardless of how often), the player receives no points for this harvest!
The player moves his scoring marker on the scoring track forward by the number of points that the harvested mill yields. Then the player gets back his mill so that he can place it on the game board again at a later time.
Example: harvest. Olivia (orange) encircles her mill with the cabbage field, value 2 (A). She harvests 3 points for her mill + 13 points (= 2 + 4 + 3 + 0 + 4) for the adjoining landscapes + 5 points landscape bonus = 21 points. At the same time, she has encircled Gregory's (grey) mill. He does not receive any points, since his mill adjoins one single sort of landscape only (= monoculture). Both players get back their mill.
Nancy (natural-coloured) later places a mill tile on the game board and builds a mill on it (B). She thus encircles Bill's (brown) mill. He harvests 4 points (mill) + 4 points (landscapes) = 8 points. Bill gets back his mill.
End of the Game
If either the mill stack or the landscape stack is used up, the game will soon be over: The market stalls or the workshops can no longer be filled and shall remain vacant. The guild master may skip the vacant squares. In this case, the player has to move his merchant forward on the guilders of the trading house circle as he does with skipped squares with tiles or a warehouse.
If a player moves the guild master onto a vacant square (except for the warehouse) – by choice or of necessity – the game is over. No harvest takes place. For this reason, mills that are still on the game board do not yield any points.
The player whose scoring marker is at the front on the scoring track wins the game. In the case of a tie, there are multiple winners.
What Happens If …? (Answers for Atypical Situations)
1. Purchase
- … you move the guild master to the warehouse but do not have any points on the scoring track? You do not lose any points, but you do not receive any guilders either.
2. Land reclamation
- … you want to place a landscape tile on the game board, but do not have a mill of your own on the game board? You may place it on any vacant square that adjoins the developed area.
- … you want to place a mill tile and erect a mill on it, but do not have any mills left? You cannot build a mill, since it is not possible to relocate mills on the game board. The mill tile remains vacant.
- … you place a landscape tile next to an island tile? Nothing. Only erected mills cause the island tile to be turned over.
3. Harvest
- … several mills are encircled at the same time? The mills are evaluated as usual: First the mill(s) of the player whose turn it is, then other players' mills in a clockwise direction.
- … you place a mill tile and a mill so that they are encircled? You harvest immediately and get back the mill.
- … your scoring marker has gone round the scoring track once? You move forward as usual. Take the point tile of your colour and place it in front of you with the "100" face up. If your scoring marker goes round the track again, you turn the point tile over so that the "200" is face up.
Governors and Records
The variation with governors and records follows the same rules as the basic game, but is expanded by two new elements: By means of the governors, Seeland's authority gets involved. In order to bring in high returns, it is worth looking for record harvests more than ever before … At the end of these playing instructions, you'll also find a variation that involves more tactics. You can combine all elements with each other.
General Preparation
Use the same face of the game board to play with governors and/or records and prepare it the same way as the basic game. Each player also receives the 2 record markers of his colour. Place the 7 governors in the middle of the market place.
Record Harvest
When? Action 3 – Harvest
Two times per game, each player may mark his own harvest on the scoring track by one of his record markers. In doing this, he has a chance to receive bonus points at the end of the game.
At first, the total yield of the mill is calculated and the scoring marker moved forward on the scoring track accordingly.
Then, the player (regardless of his scoring marker's position) may place the record marker onto the number of the scoring track that corresponds to his mill's gains (together with the landscape bonus, if applicable). If there is already a record marker on the corresponding square, he must place his onto the next vacant lower number.
Record markers on the scoring track may not be relocated for the rest of the game.
At the end of the game, the four best placed record markers bring in bonus points:
- 1st place = 20 points
- 2nd place = 15 points
- 3rd place = 10 points
- 4th place = 5 points
The respective players move their scoring markers forward on the scoring track accordingly. It is possible that a player receives points for both of his record markers.
Example: record harvest. Bill (brown) places the rapeseed field, value 5, on the game board so that his mill is encircled (A). He harvests 29 points (mill + landscapes + landscape bonus). He decides to use his record marker (B). Since the 29 and the 28 are already occupied, Bill has to place his marker on the 27.
Governor
When? Action 2 – Land Reclamation
If during the land reclamation one or more island tiles showing a governor symbol are turned over, the player immediately takes one governor from the market place and puts it next to the mill. The governor remains on this square until the corresponding harvest.
During this harvest, the governor checks if the city's expected yield has been reached: Players compare the mill's gains with the golden number shown on the trading house in front of the foremost guilder on the trading house circle.
If the yield is the same or higher than the trading house's number, the governor is satisfied: The player receives 5 additional points as a bonus and moves his marker forward on the scoring track accordingly. The player also receives the governor and places him in front of him on the table.
Example: governor. With the rapeseed field, value 3, Olivia (orange) encircles her mill (A). She harvests 30 points (mill + landscapes + landscape bonus). Since there is a governor present, the yield is compared with the city's expectations. The trading house's number in front of the foremost guilder shows an expectation of 28 (B). The yield (30) is thus higher than the expectations (28): Olivia receives a bonus of 5 points and places the governor and her mill in front of her on the table.
If the yield is less than the trading house number, the player's harvest underperforms. After the harvest, the player loses 5 points on the scoring track. The governor immediately moves on to the nearest mill, next to which there is not yet another governor. (This can also be another mill of the same player.) Of course, he only moves across developed squares.
Example (above): Olivia (orange) encircles her mill with a rapeseed field, value 0, instead of using the rapeseed field, value 3 of the above mentioned example. For this reason, she only harvests 27 points. The city's expectations (28) are not fulfilled. She thus loses 5 points on the scoring track after the harvest. She takes her mill back. The governor moves on to the nearest mill: the orange mill, value 2, that is only 2 squares apart, while the grey mill, value 3, is 3 squares apart.
A player loses 5 points for each mill with a governor at the end of the game. Now players check to see which player has fulfilled the city's expectations most often. The player with the most governors receives 10 bonus points. In the case of a tie, the corresponding players all receive 5 bonus points and move their scoring markers forward on the scoring track accordingly.
Tactical Game
Preparation
Assemble the game board so that the side with the green scoring track, and the pre-printed landscape and farms is facing up.
- Place the governors on the squares that show the corresponding symbols.
- Place a stuiver on each farm.
- You do not need the island tiles for this variation.
How to Play
- A tile that is placed alongside pre-printed landscapes/farms must also be connected to the developed area. Only then can players develop more land starting from the pre-printed landscape/farm.
- If a mill is erected next to a farm with a stuiver, the mill's owner receives the stuiver at once.
- If a mill is erected next to a landscape with a governor, the governor is immediately placed next to the mill.
Example "Tactical game" A: Olivia (orange) has bought a mill tile, value 4, and can place it next to developed squares (highlighted in green).
Example "Tactical game" B: Then, it is Bill's (brown) turn. He has bought a mill tile, value 3. He can place it anywhere next to developed areas (highlighted in green).
What Happens If …? (Answers for Atypical Situations, continued)
Record harvest
- … at the end of a game only three (or even less) record markers have been placed on the scoring track? Only the corresponding places are assigned.
Governor
- … you use a record marker for a harvest that at the same moment fulfils/does not fulfil the governor's expectations? The governor's 5 bonus or negative points are not considered for this record marker.
- … the governor is next to your mill that harvests 0 points because of a monoculture? The city's expectations are not fulfilled and you lose 5 points on the scoring track.
- … the governor wants to move to the nearest mill, but there is none on the game board? The governor is put back into the game box.
- … the governor wants to move to the nearest mill, but there are two (or more) mills with the same distance? The player whose turn it is decides where the governor moves to.
Historical Background of the Game
In the 17th century, the Netherlands were the European economic power. Although they did not possess many natural resources, the country soon ascended to the hub of world trade. The citizens benefited from the consequent wealth in cultural and social terms. The merchants' prosperity was soon reflected in representative houses in the Dutch cities. This period is called the "golden age". Works of the famous Dutch painters – like Rembrandt and Vermeer who earned their money by producing portrait paintings of wealthy merchant families, among other things – still attest to this period of economic prosperity.
With the wealth of the golden age the cities' population was also growing steadily. The scarce cultivation area could no longer meet the increasing demand for food. Moreover, because of the winning of peat and the associated subsidence of the ground large parts of the Netherlands were covered with water. Storm surges threatened the coast and caused devastating floods again and again. Clever hydraulic engineers worked out plans to wrest more land from the sea and the marshland. Efficient merchants' money and innovative mill technology made vast land reclamation projects possible. Initially, inland lakes, and later bays, were diked and pumped dry in order to win more cultivation area. At that time, the Dutchmen erected thousands of wind mills that served mainly to drain the land. Sometimes the drained areas (polder) were located up to six metres below sea level. In order to surmount the altitude difference the polder mills often had to be cascaded in several rows and a sophisticated channel system was required.
The dike construction related to the drainage pursued two goals: People did not only win new land, but also protection against storm surges.
Step by step, wind mills characterised the landscape.
© 2010 Ravensburger Spieleverlag GmbH. Ravensburger Ltd · Unit 1, Avonbury Business Park · Howes Lane · BICESTER · OX26 2UB, GB. Ravensburger USA, Inc. · One Puzzle Lane · Newton, NH 03858 · USA. www.ravensburger.com