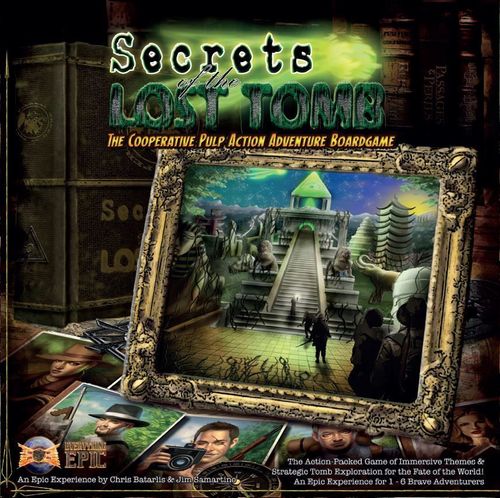
Secrets of the Lost Tomb
Secrets of the Lost Tomb Rulebook
Table of Contents
Table of Contents
- Components
- Component Assembly
- Game Setup
- The Golden Rule
- Object of the Game
- The Tomb
- How to Play the Game
- The Adventurers
- Anatomy of an Adventurer Sheet
- Dice and Dice Checks
- The Adventurer Phase
- The Tomb Phase
- Rooms and Exploring
- Creatures
- Combat
- Items, Artifacts, Companions, and Weapons
- Status Effects
- How to Play the Scenarios
- Solo Play
- Expansion Packs
- The Adventurers of the Eternal Order of Perseus
- Player Reference
Components
- Dice x12
- Adventurer Standees x11
- Clear Adventurer Stands x6
- Pegs x6
- Plastic Dial Connectors x13
- A.R.M. Overlays x6
- Adventurer Sheet x11
- Adventurer Health Dial x6
- Adventurer Audacity Dial x6
- Red Creature Stands x18
- Comet Track Top x1
- Comet Track Bottom x1
- Room Tiles x52
Cards (all cards double sided)
- Base Creatures x38
- Elite Creatures x29
- Boss Creatures x8
- Artifacts x14
- Soul Monger Items x16
- Tomb Cards x36
- Items x52
- Companions x14
- Story Cards x55
- Status Effects x48
Tokens
- Dexterity x17
- Strength x17
- Mythos x16
- Movement x12
- Knowledge x12
- Elder Sign x13
- Damage x65
- Soul Shards x65
- Swarm x26
- Quest Markers (Silver) x19
- Quest Markers (Gold) x18
- Trap x18
- Special Ability x13
- Action x18
- Search x6
- Item Drop x6
- Rope x6
Component Assembly
Assembly of Standees
During play, insert Creature cards and Adventurer standees into the plastic card stands.
Assembly of Comet Track
Assemble the Comet track using a dial connector. Press the male and female ends of the dial connector through the punchboard. Leave this permanently assembled.
Assembly of A.R.M. Overlay
Punch out holes in the A.R.M. (Archimedes Retrieval Machine). Attach an Audacity dial to the top-left corner of the A.R.M. using a dial connector. Attach a Health dial to the bottom-left corner using a dial connector. Repeat these steps for every A.R.M.
The A.R.M. is an overlay for your Adventurer sheet. Its dials track Health and Audacity. Courage is tracked with a peg along the linear track.
Once placed, the A.R.M. covers up the Adventurer's starting Health, Audacity, and Courage, as well as their starting items. Once you've set these numbers and taken these items, you won't need to reference that information any more.
Game Setup
1. Choose Scenario
Choose a scenario from the Scenario Booklet. Each scenario is a unique story with its own difficulty level and objectives. We recommend The Pharaoh with the Blue Eyes for your first game.
Some scenarios have special rules and setup. For more details, see How to Play the Scenarios.
2. Setup Starting Room Tiles
Place the five starting Room tiles as shown in the diagram, and place any as shown in your scenario's Tomb Setup. Then shuffle all other Room tiles into one stack. For a more difficult game, return Quetzalcoatl's Hall to the box. You may now find the Soul Monger on the Tomb's Entrance instead.
3. Organize Components
Follow any instructions in the Tomb Setup of your chosen scenario. Then set aside the Quest, Health, and Attribute Bonus tokens nearby.
Separate cards of the same type into decks. Some decks have a "cut card" that matches their card symbol. Because some cards are double-sided, you can use the cut card to cover them if you prefer to draw from the top rather than bottom.
Choose the difficulty of your game by using different sets of Tomb cards: green (normal) and red (hard) cards.
- For normal difficulty, use only the green cards.
- For intermediate difficulty, use both the green and red cards.
- For hard difficulty, use only the red cards.
Shuffle the Tomb, Story, Creature, Elite Creature, Companion, Item, and Artifact decks. Do not shuffle the Status Effect and Soul Monger decks.
4. Choose Expedition Leader
The Expedition Leader is an important role that is chosen randomly by rolling a die or given to the person who has the most experience in the Tomb.
This player keeps track of the scenario, narrates flavor text, ensures that scenario effects occur and monitors win/loss conditions. The Expedition Leader begins the game with the Comet Track/First Player marker but does not usually pass his or her title or duties to other players when the Comet Track/First Player marker passes at the end of each Tomb Phase.
Many groups will prefer to share the duties of Expedition Leader. If this is the case with your group, simply choose a first player to begin the game with the Comet Track/First Player marker.
5. Choose and Setup Adventurers
Starting with the Expedition Leader (or player with the Comet Track/First Player marker), each player in clockwise order chooses an Adventurer sheet and takes an A.R.M. panel. Note that Lord Harrison Quatourmanus the 13th should only be chosen for Solo Play.
Each player should receive the starting Item, Artifact and Status effect cards (if any) as listed in the Starting Setup section on each Adventurer sheet. Distribute Special Ability tokens to Adventurers that have spaces for them as these indicate abilities with limited uses. If an ability has an infinity symbol, no token is needed. Each special ability that needs tokens gets its full allotment.
Example: Heidi DuPont gets 3 tokens for her PhD ability.
Set the Health and Audacity dials and the Courage track to the starting positions indicated on each Adventurer sheet.
Then distribute one Search token with the green side of the triangle facing up to each player.
Additional Audacity, Action tokens and random Companions are distributed to each player as listed in the Adventurer Setup table below.
Place the Adventurer standees on the Tomb Entrance tile and you are ready to begin.
When playing with three or fewer players, each player may choose to play with more than one Adventurer instead of the additional Action tokens and Companions as shown in the Adventurer Setup table. Consider the player count to be equivalent to the number of Adventurers—so if two players are each playing with two Adventurers, follow the setup for four players.
Playing with more than one Adventurer and with additional action tokens per Adventurer can make for an easier game. For greater difficulty, reduce the number of action tokens per Adventurer.
6. Read Mission Briefing and Begin Play
The scenario's mission briefing is read aloud to the group by the Expedition Leader or another willing player. Additionally, the win and loss conditions, strategy, scenario triggered effects, and special rules sections may also be read to help with strategizing during the game. Each player should share their Adventurer's special abilities with the group so that everyone may more effectively work together.
Adventurer Setup
| # Adventurers | 1 | 2 | 3 | 4 | 5* | 6 |
|---|---|---|---|---|---|---|
| Extra Audacity Points | N/A | N/A | N/A | +1 | +2 | N/A |
| Action Tokens per Adventurer | 13 | 6 | 4 | 3 | 2* | 2 |
| Companions per Adventurer | 5 | 2 | 1 | N/A | N/A | N/A |
*For a 5 Adventurer game, you may choose to give any two players an additional action to make a 5 player game a bit easier. (12 total actions divided amongst 5 players.)
For any number of Adventurers, you may make the game easier or harder by giving extra audacity and/or companions to players or taking them away respectively. However, we recommend you follow the Adventurer Setup table above for your first few games.
The Golden Rule
Many components state effects that contradict rules in this rulebook. Text on components always supersedes text in this rulebook.
Object of the Game
Secrets of the Lost Tomb has many scenarios, each with its own objectives. These scenarios are described in detail in the Scenario Booklet.
In each scenario, the adventurers will win or lose as a team, evading traps and mystic dangers as they explore the Tomb. Will you claim victory—or lose at terrible cost?
For more on reading these scenarios, see How to Play the Scenarios. You can also play Secrets of the Lost Tomb in other ways. For more details, see Solo Play.
The Tomb
Tomb is made up of rooms represented by Room tiles. As the adventurers explore the Tomb they will draw new Room tiles to add to the Tomb. Each Room tile is marked with various symbols and effects, explained fully in the Anatomy of a Room Tile in Rooms and Exploring.
The Tomb has three levels. Level 1 and Level 2 may be reached by stairs located in the starting Room tiles Quetzalcoatl's Descent and Pharaoh's Hall. Level 3 can only be reached once the Adventurers find a way to explore further into the Tomb, usually by means of a special room, effect or by simply climbing a rope down a scary hole in the floor. For more on getting to Level 3, see Rooms and Exploring.
How to Play the Game
Secrets of the Lost Tomb is played over a series of rounds. Each round has two main phases: the Adventurer Phase and the Tomb Phase.
1. The Adventurer Phase
The player with the First Player/Comet Track marker begins each turn, performing one action and spending one green action token by flipping it over to its red side, followed by each other player in clockwise order. Some actions are moving, searching, exploring, starting combat, and resting. This phase ends when the Adventurers have spent all of their Action tokens. See The Adventurer Phase for more.
2. The Tomb Phase
The Expedition Leader (or the First Player) draws and resolves one Tomb card. This card triggers a Tomb Effect, causes creatures to move, initiate Combat against adventurers, Spawns new creatures, moves the Comet Track, turns the Search Token, and triggers Upkeep requirements. At the end of the Tomb Phase, the player holding the First Player/Comet Track marker passes it clockwise to the new first player. Exhausted weapons and other assets refresh and all Adventurers flip their Action tokens over to the green ready side.
After these phases a new round begins starting with the new first player.
The Adventurers
Each adventurer has an Adventurer sheet, which lists their attributes. Most of these attributes affect dice checks (see Dice and Dice Checks), and some are used for other rolls and effects.
- Strength is pure physical strength. It affects Strength checks, including combat with Strength weapons.
- Dexterity is speed and hand-eye coordination. It affects Dexterity checks, including combat with Dexterity weapons. It also determines how easily the adventurer can evade creatures and adventurers, as well as steal items.
- Mythos is connected to the supernatural, experience with the occult, and overall understanding of religions. It affects Mythos checks, including combat with Mythos weapons.
- Knowledge is intelligence gained through formal education, study or research. It affects Knowledge checks, which include the use of Knowledge weapons and attempts to render medical aid.
- Audacity is a willingness to attempt the difficult or even impossible. Unlike other fixed attributes, Audacity is tracked with a variable dial. In addition to affecting Audacity checks, it can be also be spent to reroll dice and to make some dice checks easier.
- Movement is pure athletic endurance. It determines how many rooms an adventurer can move per Move action.
- Health is overall physical vitality and well-being. It is the damage an adventurer can take before dying. An adventurer's current Health cannot be increased above their starting Health.
- Courage is bravery in the face of great danger. It provides bonuses or penalties based on its current value.
Health and Dying
If you reach 0 Health, you die and the Comet track advances one space. When you die, lay your adventurer standee on its side on its current room, and place an Item Drop token next to it. Discard all your Companion cards and set aside all your Item and Artifact cards.
An adventurer in the same room as your Item Drop token can spend an Action token to pick up all the items and artifacts set aside, discarding the Item Drop token.
After dying, you can choose a new adventurer that has not yet died or fled the Tomb. Place the standee of the new adventurer on the Tomb's Entrance, setting up their A.R.M. and gaining starting items as if it were the beginning of the game.
When an adventurer dies, advance the Comet track once.
Courage Bonuses and Penalties
Each adventurer has a Courage value that ranges from -10 to +10. Positive Courage may confer special benefits or abilities, while negative Courage may confer penalties. As Courage fluctuates, immediately apply or remove the prompted effects. These effects are cumulative.
If you attain +10 Courage, you gain a permanent one-time bonus. If you later go below +10 Courage, you do not lose the +10 Courage bonus. The same adventurer cannot gain the +10 Courage bonus multiple times.
Going down to -10 Courage is very bad; usually it will cause you to immediately begin fleeing the Tomb. Unlike the +10 Courage bonus, even if you have reached -10 Courage before, you still begin fleeing if you reach -10 Courage again.
Fleeing the Tomb
When your Courage track reaches the space titled "Flee Tomb" or if another game effect prompts you to flee the Tomb, discard all your Companion cards, place an Item Drop token on your current room, and set aside all your Item and Artifact cards. Then move your Adventurer one room toward the Tomb's Entrance using the shortest path available. If your Adventurer is faced with two, equidistant paths, you may choose between them. You are now fleeing.
While fleeing you gain +1 Movement and must spend every Action token to move towards the Tomb's Entrance. If a fleeing adventurer moves into a room with any creature, that adventurer takes damage equal to half of each creature's Combat rating, rounded down. A fleeing adventurer cannot evade.
If you are on the Tomb's Entrance and move again, you have fled the Tomb. Remove your adventurer from the game as if she had died.
When an adventurer flees the tomb, advance the Comet track once.
Saving an Adventurer from Fleeing the Tomb
If an adventurer who is not fleeing shares a room with a fleeing adventurer, the calm adventurer may spend 1 Audacity point to give the fleeing adventurer +1 Courage, causing them to stop fleeing. This does not cost an Action token.
Example: James T. Temple loses Courage, bringing him to -10, causing him to start fleeing. He immediately moves one room toward the Tomb Entrance. Christopher St. George spends an Action token to move into the room with James T. Temple and then spends 1 Audacity point to raise James' Courage by one, stopping him from fleeing.
Anatomy of an Adventurer Sheet
- Audacity Dial
- Health Dial
- Positive Courage Track
- Positive Courage Effect
- Negative Courage Track
- Negative Courage Effect
- Courage Peg
- Image and Name
- Strength Attribute
- Dexterity Attribute
- Knowledge Attribute
- Mythos Attribute
- Movement Attribute
- Special Ability 1
- Special Ability # of Uses
- Special Ability 2
- Special Ability # of Uses
- * Starting Audacity
- * Starting Health
- * Starting Courage
- * Starting Items
* Hidden by A.R.M.
Special Abilities
Every adventurer has special abilities. Some are activated by spending an Action token, some are ongoing effects, and some require specific circumstances such as combat or specific dice checks. Some abilities (those not marked with an infinity symbol) have limited uses; when you use such an ability, remove a Special Ability token. If an ability requires tokens but has none remaining, it can no longer be used.
Example 1: Christopher St. George has a special ability called Full Auto. Low on health and facing multiple creatures, he decides to use his special ability instead of a normal Combat action. First, he removes a Special Ability token from his Adventurer sheet. Then, he flips one of his Action tokens and follows the instructions on his Adventurer sheet for Full Auto. It reads, "Action: Discard 1 gun item. Deal 5 damage, ignoring armor, to all creatures in your current Room tile." He places 5 Health tokens on all the creatures in his room and discards 1 gun Item card.
Example 2: Professor Forestall has an ongoing ability that means he passes Knowledge rolls on a 4, 5, or 6. This ability is always active; he doesn't need to spend any action tokens to use it.
Dice and Dice Checks
The core of Secrets of the Lost Tomb is rolling dice.
Each die has 12 sides with 1–6 printed twice. Every time you're prompted to roll, you will use these dice. There are three important numbers on these dice: 1s (critical failures), 5s (successes), and 6s (critical successes). Critical failures and critical successes only have effects in combat (see Combat).
Adventurers exploring the Tomb must overcome adversities to move forward. These often come in the form of dice checks. Whenever a dice check is required, it is denoted by the checked attribute icon followed by a number in parentheses, which indicates its difficulty. If there is no difficulty number, the check has a default difficulty of 1.
Example: Christopher St. George must perform a Strength check (2). This is a Strength check with a difficulty of 2.
To perform the dice check, roll dice equal to the checked attribute plus or minus any other modifiers generated by Items, Companions, Statuses or other effects. To succeed, you must roll successes (5 or 6) equal to or greater than the check's difficulty. Otherwise, the check fails.
Example: Christopher is rolling a Strength check (2). He has a Strength of 4, so he rolls 4 dice. The dice results are 2, 4, 5, and 6, generating 2 successes. This equals the difficulty of 2, so he passes the check!
Some abilities and status effects can change which die results count as successes. For example, the Lucky Status Effect card counts 4s, 5s, and 6s as successes, greatly raising the chance of success.
Sometimes you may be prompted to roll 1d3. In this case, read the die as follows: 1, 2, and 3 are read as-is, while 4, 5, and 6 are read as 1, 2, and 3, respectively. For example, a rolled 5 is read as a 2.
If anything reduces the checked attribute or the dice pool to 0, the check automatically fails.
Note: Sometimes you may need to roll more dice than are included in the game. This may require you to reroll dice remembering the previously rolled results. Additional packs of "Secrets of the Lost Tomb" D12 dice may be added, or any generic D6s may be used, in the same way as the included custom D12s.
Audacity and Audacity Checks
Audacity points can be spent in two ways:
- Before rolling any dice check, you can spend 1 Audacity point to count 4s, 5s, and 6s as successes, rather than just 5 and 6.
- After rolling any dice check, you may spend 1 Audacity point to reroll the check. You must reroll all dice rolled for the check and keep the new results unless you continue to spend Audacity for further rerolls.
These effects only apply to a single roll; if you re-roll for any reason, you must spend another Audacity point to trigger either effect.
When prompted to roll an Audacity check, roll dice equal to your current number of Audacity points.
Audacity points can never rise above 10.
The Adventurer Phase
During this phase, the adventurers spend Action tokens to perform various actions, listed in the next section.
To perform an action, flip an Action token from its green side to its red side and then resolve the effects of the action you chose. Then the next clockwise player performs an action. This continues until all the adventurers have used all their Action tokens.
For a full example of the Adventurer Phase, see below.
Adventurer Actions
Move: Your Adventurer may move up to as many Room tiles equal to the character's Movement attribute. While moving, you must move through doors. Doors are indicated on each room tile by the Three-Tailed Green Comet icon. This icon must be on both the tile you are leaving and entering. Over the course of exploration, it may be discovered that some doors in the Tomb are blocked by walls. Doors with the comet icon on only one side should be treated as walls for all gameplay purposes.
Evading: If you move into a room or want to move out of a room with any creatures, you must Evade them to continue moving. To evade, roll a Dexterity check with a difficulty of the creature's Evasion difficulty. If you succeed, continue moving as normal. If you fail, you can stop moving or take damage equal to half the creature's Combat rating, rounded down, to continue moving as normal. This type of evasion differs from evasion during Tomb Phase combat. See Tomb Phase combat in The Tomb Phase.
Exploring: Exploring occurs when you move from a Room tile through a door marked with the Three-Tailed Green Comet into a vacant, connected space.
When you explore a new Room tile, draw the first Room tile in the stack that matches the current Tomb level your Adventurer is located on. Some Room tiles have multiple levels printed on the back, therefore a tile that reads Level I and Level II could be explored on either the first or second level of the Tomb. Discard all Room tiles that do not match your current level in a separate nearby pile. Place the new tile on the open space that your Adventurer moved into, making sure that the doors (indicated by the comet icon) are connected. Place your Adventurer standee on the new Room tile, ending your movement action. Then complete any effects on the Room tile.
For more details on exploring, see Rooms and Exploring.
Combat: Begin combat with a creature in the same room as you. Combat has the following steps:
- Attempt to Evade (Tomb Phase Only)
- Lose Courage
- Choose Weapons and Armor
- Roll Combat Check
- Deal Damage and Resolve Criticals
- Gain Soul Shards
For full combat rules, see Combat.
Trading: If two adventurers share a room one may spend 1 Action token to trade any cards they wish. Only one player must spend the Action token. Soul Shards cannot be traded.
Example of Trading: Christopher St. George wants to help Temple by giving him a Pump-Action Shotgun. Because they are in different rooms, Christopher spends an Action token to move into the same room as Temple. Christopher could spend his next action to start the Trade action, but he wants to hold onto the weapon for now, just in case a creature spawns and combats him. When it gets to Temple's turn, he spends his Action token to perform the Trade action. Christopher and Temple can now trade any number of items, artifacts, companions, and Soul Monger items. Christopher gives Temple the Pump-Action Shotgun. Christopher realizes he could use some healing, so Temple gives a Healing Salve to Christopher.
Search: Roll a die. Then, resolve the effect on the Search Chart (see Player Reference) that matches the color pointing up on your Search token. Then, turn the token clockwise: from green to yellow, yellow to red, or red to green. Searching gets more dangerous as the token turns from green to red. You cannot search in a room with any creatures.
Example of Searching: On Temple's turn, he wishes to search a room in which his Adventurer is standing. There are no creatures in the room, which would prohibit him from rummaging about. He exhausts one Action token to perform the search. His Search token points to green, so he rolls a die on the green Search chart and gets a 5. He draws 1 item from the Item deck and then turns the Search token clockwise once, after which his turn is over.
Deal with the Soul Monger: As an adventurer moves through the Tomb, they will find Soul Shards by killing creatures, resolving Story cards, and exploring new rooms. Soul Shards can be used to barter with the Soul Monger for equipment and benefits.
While on a Soul Monger room, you can spend an Action token to barter with the Soul Monger.
When buying from the Soul Monger, reference the Soul Monger's Inventory (see Player Reference), which lists the costs in Soul Shards of the items and services available. When you purchase an item, take its card from the Soul Monger Item deck. Items purchased from the Soul Monger are subject to all rules and effects regarding items.
You can sell items and artifacts to the Soul Monger. Each item is worth 5 Soul Shards, and each artifact is worth 15 Soul Shards. When you sell an item or artifact, return its card to the box.
There is no limit to the number of items and services you can buy. Items and artifacts set aside during scenario setup cannot be sold.
Use Items or Artifacts: Some items, artifacts, Soul Monger items and companions require the player to exhaust an Action token to activate their ability. Activated abilities occur immediately.
Use Special Ability: Some Adventurers have special abilities which require exhausting an action token and possibly discarding a Special Ability token in addition. These effects occur immediately.
Rest: If an adventurer has less than their starting Health or has negative Courage they can spend an Action token to do one of the following:
- Heal 2 Health, up to starting Health
- Heal 2 Courage, up to 0 Courage
- Heal 1 Health and 1 Courage, up to starting Health and 0 Courage
You cannot rest in a room with a creature. The Rest action may also be used to heal Companions with less than their starting health.
A player fleeing the Tomb cannot rest. See Fleeing the Tomb.
Pick up items or artifacts: An adventurer in the same room as an Item Drop token can spend an Action token to pick up all the items and artifacts set aside there, discarding the Item Drop token.
Stealing: Roll a Dexterity check. If stealing from another adventurer, difficulty is equal to the number of successes (counting critical successes) the opponent rolls on a Dexterity check. The winning adventurer takes one card that can be traded from the other.
If stealing from a creature, the difficulty of your Dexterity check is its Evasion difficulty +1. If you succeed, take an Item or Artifact card they have picked up. This only occurs in specific scenarios; normally, creatures cannot pick up anything.
Example of the Adventurer Phase
- Christopher St. George is on the Tomb's Entrance at the beginning of the Adventurer Phase. Because he is the first player in a six-player game, he can spend the first of his 2 Action tokens.
- He flips an Action token to perform a Move action, letting him move up to his full Movement rating of 5 tiles.
- He moves one tile forward and then through an open door into a blank space, exploring a new Room tile.
- Christopher is on Level 1, so he must find a Room tile that includes Level 1. He searches the stack of Room tiles, starting from the top. He discards Room tiles until he finds a Level 1 Room tile, El Dorado.
- He places El Dorado so that one of its doors connects to the door he just walked through.
- He places his Adventurer standee on El Dorado and begins to resolve all effects of this room.
- First, he resolves the Exploration Effect in the bottom-right corner. The effect reads "Explore: Draw 2 items and discard 1." He draws the top two items from the deck and chooses one to keep.
- Second, he resolves the Story Effect in the top-right corner. In this room, it is an Adventure. He draws a Story card and gives it to the player on his right, who then reads the Story card aloud. After resolving the remainder of the Story card, Christopher's turn is complete.
Play continues clockwise until all players have used their Action tokens, after which the Adventurer Phase ends and the Tomb Phase begins.
The Tomb Phase
The Expedition Leader (or the First Player) draws a Tomb card and performs the steps listed below. Much of what happens in this phase depends on the creature attributes, found under Creatures.
1. Tomb Effect
The Expedition Leader (or the First Player) reads the Tomb Effect to the group, which may trigger an ongoing effect. The Tomb Effect may prompt a dice check for a particular player or all players.
2. Move Creatures
Move all creatures in the Tomb that do not share a room with any adventurers. Creatures always move using their full Movement in the shortest route toward the nearest adventurer. If multiple adventurers are equally close, the creature moves toward the adventurer with the most Soul Shards. If they have equal Soul Shards, the players choose which adventurer it moves toward.
Creatures cannot use ropes (see Rooms and Exploring), so they cannot move to or from Level 3 unless they have the Flying ability.
Creatures are not hindered by traps or other room effects, except those placed by adventurers.
Note: If a creature has no legal movement path to an Adventurer, that creature does not move this round. I.E. If a creature is on level 3, is not a Boss creature and does not have flying, it may not get up to level 2 or level 1 without a room tile that has stairs or other adjacency to move up. In this case, that creature wouldn't move.
3. Initiate Combat
After creatures have moved, each creature in the same room as an adventurer initiates combat with one adventurer. If a creature is in a room occupied by multiple Adventurers it will engage the one with the most Soul Shards. In the event that some Adventurers have equal Soul Shards, the players may choose which Adventurer is engaged.
For full combat rules, see Combat.
4. Spawn Creatures
In this phase, the creatures of the Tomb come to its defense. The Tomb card will spawn creatures on each of the three Tomb levels. There are three types of creatures: base creatures, elite creatures, and boss creatures. Tomb cards will only spawn creatures and elite creatures. Boss creatures are generally spawned as part of a scenario's narrative.
Unless otherwise noted, all creatures spawn in rooms with red outlines. When multiple red-outlined rooms are available on one Tomb level, the adventurers choose where creatures may spawn, spawning them as evenly as possible. Creatures will always spawn in a room with an Adventurer first, before spawning in an empty red-outlined room. If there are no red-outlined rooms on the prompted Tomb level, do not spawn creatures on that level. For an increased difficulty, you may choose to spawn those creatures on that level's starting tile. (Tomb's Entrance, The Pharoah's Hall, or the Mongol's Hall) Keep in mind that this will make the game significantly more difficult because of the Tomb Creature Limit.
Tomb Creature Limit
The Tomb has a creature limit of 10, which does not include boss creatures. Swarm tokens are not counted toward the limit; only count the Swarm creature's card against it. If spawning base and/or elite creatures would exceed this limit, do not spawn further creatures this round. When this occurs, increase the Comet track by one and immediately trigger any scenario effects based on the Comet Track. (Comet Track Triggers, Win/Lose Conditions, etc.)
Example: This Tomb card prompts the adventurers to spawn 1 base creature on Level 2 and 1 base creature on Level 3. Level 2 has no red-outlined rooms, so the creature on that level does not spawn. Level 3 only has two red-outlined rooms, but one room already has a creature on it, so the new creature is placed on the other one.
5. Upkeep
The Expedition Leader checks the scenario for any effects triggered by the new position of the Comet track. The adventurers check all status effects, items, and other components that have Upkeep effects including exhausted weapons that refresh during Upkeep. Then, the adventurers flip their Action tokens to their unused sides.
6. Search
Rotate all Search tokens by the prompted number of steps, from green to yellow, yellow to red, and red to green.
7. Comet Track
Most often, the Tomb card moves the Comet track by +1, +2, -1, or 0. The Comet track is the way the Tomb keeps time. The position of the Comet track can trigger important events during a scenario. The higher the Comet track gets, the closer the game is to ending.
Check for End Game
Each scenario has its own win and loss conditions. Often, if the Comet track reaches a certain point, a boss creature emerges. If all players are dead or have fled the Tomb and they have no more adventurers to choose from, the adventurers lose.
Example of the Tomb Phase
The first player, Heidi Dupont, draws the top card from the Tomb card deck and reads its title aloud: "I'll think of something!"
- Tomb Effect. Heidi gains +1 Knowledge, so she takes a +1 Knowledge token and places it on her Adventurer sheet.
- Move Creatures. The three creatures in the Tomb now move toward the nearest adventurers. The first creature shares Level 2 with only Christopher St. George, so it moves 3 spaces toward him. The second creature on Level 3 is alone; because it is not a boss creature, it has no way to travel upstairs, so it does not move. The third creature on Level 1 is equidistant to Temple and Lee. Because Temple has 23 Soul Shards and Lee only has 13, the creature moves toward Temple, entering his room.
- Creature Combat. A creature shares a room with Temple, so it combats him. It is the Tomb Phase, so the outnumber bonus does not apply.
- Spawn Creatures. On Level 2, one base creature spawns. On Level 3, two base creatures spawn. Level 2 has one red-outlined room, so the base creature spawns there. Level 3 has three red-outlined rooms, so the players can choose which two rooms the base creatures spawn in. They must spawn the creatures as evenly as possible, so they cannot spawn both creatures in the same room. To spawn the creatures, the players draw cards from the Base Creature deck, fit the cards in standees, and place them in the appropriate red-outlined rooms.
- Upkeep. Resolve all "Upkeep" effects listed on components, such as exhausted weapons and certain status effects. In addition, the Expedition Leader resolves any Upkeep effects listed in the scenario.
- Turn Search Token. All players rotate their Search tokens: in this case, one clockwise turn.
- Comet Track. The Expedition Leader advances the Comet track once and passes the First Player/Comet Track marker clockwise to the next player, beginning the next round of play.
Rooms and Exploring
Room tiles have two prominent features: their outline—creatures spawn on red outlines—and their symbols, which represent various one-time and ongoing effects.
Some Room tiles state they are "Adjacent to…" another Room tile. If the named Room tile has been previously placed, Adventurers may move between the two rooms as if they were adjacent regardless of their placement.
Some Room tiles prompt a player to "Place…" another, specific Room tile. Search the Room tile stack and place the named tile on the appropriate Tomb level. Reshuffle the Room tile stack.
Example: Stairs of Blood reads: "Adjacent to Sacrificial Chamber; if not yet explored, search for and place on Level 1." If, when you explore Stairs of Blood, the Sacrificial Chamber is not in play, you would immediately search for Stairs of Blood Room tile and place it on Level 1.
Exploring Rooms
Whenever you move into a space without a Room tile, draw Room tiles from the stack until you find a room on the Tomb level matching yours. Place the drawn Room tile in the empty space you explored, being sure to match the doors (indicated by the Green Comet icon) on each tile. Discard any other Room tiles drawn forming a discard pile nearby.
If you run out of Room tiles, shuffle the discarded tiles and create a new draw pile.
If placing an explored Room tile would result in a level of the Tomb being sealed off—meaning that all doors are blocked by walls—discard that tile and draw until you find one that would not close off the level.
If you attempt to Explore a room on a level, and find that you have run out of room tiles for that level—meaning that there are no more rooms that may be explored on that level in the room tile stack—you have fallen through a Door to Nowhere: place your Adventurer standee on the Mongol's Hall and take lose 4 Health and end your movement. After the first instance of this happening, any adventurer on that level may choose to fall through an open door to the Mongol's Hall losing 4 health and ending their movement. No Ropes of any kind may be used on "Doors to Nowhere".
When you finish placing the Room tile, move your adventurer standee onto the tile. Then, trigger the Scenario Effect on the tile, if any, and then the Story Effect or Trap Effect, if any. For details on these effects, see the following sections.
Story Effect
When you explore a room and find a Story symbol (Adventure or Misadventure) in the upper-right corner, you must resolve a Story Effect. First, draw a Story card. Each card has two sides: the Adventure and the Misadventure. Resolve the side with the symbol matching that on the room you explored.
Adventures usually have a positive outcome if you pass the check, and a neutral or minor negative outcome if you fail the check. Misadventures usually have a negative outcome if you fail the check, and a neutral or minor positive effect if you pass the check.
All Adventures and Misadventures start with a story. This is read aloud, either by the exploring adventurer or by another adventurer to keep the outcomes of the dice check a mystery—we recommend the second option; it's more fun! Then, the Story card will often prompt a dice check for the exploring adventurer. The exploring adventurer rolls the check, applies the pass or fail effects, and reads the matching narration.
Symbols on Room Tiles
Scenario Effect (Scenario Trigger 1/2/3): Trigger the listed effect in your scenario's Triggered Scenario Effects. When you explore a Room tile with a Scenario Effect icon, it means that a critical objective or event has occurred. Consult the scenario to determine what has been triggered corresponding to the discovered icon.
Story Effect: A Story Effect means that your Adventurer has encountered either an Adventure or Misadventure as previously described. Story effects are only triggered when an Adventurer explores a new Room tile. If an Adventurer moves into a previously explored Room tile with a Story Effect, it does not occur again.
Both the Adventure and Misadventure sides of the card are played the same but have varying effects. Adventures are usually more positive in outcome and misadventures are usually negative. When you are asked to make a check during a story card, that is considered a "Story Check". Some effects in the game may give bonus dice to these checks. Such as +1 to Story Checks would mean add 1 die to all Adventure and Misadventure card rolls.
Exploration Effect: This effect triggers immediately upon exploring the room, and never triggers again. They usually prompt a dice check, but may prompt you to search for and place a new Room tile.
Trap Effect: When an Adventurer explores a Room tile with a Trap Effect icon, place the stated number of Trap tokens on it and Trigger the Trap effect on the tile removing one token. Each subsequent time any Adventurer enters an explored Room tile with Trap tokens on it, perform the Trap effect noted on the tile. Pre-explored Trap Rooms do not halt movement. Some Traps may be triggered an unlimited number of times; these are marked with a special Infinite Trap symbol printed on the tile.
Action Effect: At the beginning of their turn, an adventurer on this Room tile can spend an Action token to trigger this effect. This effect is written on the Room tile. Action Effects may be triggered any number of times unless otherwise specified.
Ongoing Effect: This effect remains active while the Room tile is in play.
Artifact Room: An adventurer can spend 1 Action token to take a risk and search this room for a specifically stated artifact.
- Pass: Search the Artifact deck for the listed card, take it, then shuffle.
- Fail: You can't find it. How frustrating.
Audacity cannot be used during this check. Regardless of the result of the check, each Adventurer may only attempt to search this Artifact Room for the specified Artifact once per game. If the listed artifact is already in play or in the discard pile, you cannot search this room for its Artifact.
Soul Monger Room: In this room, you can spend 1 Action token to barter with the Soul Monger. Discard Soul Shards to gain rewards from the Soul Monger's Store (see Player Reference). One Soul Monger is always on the Tomb's Entrance.
Rope Room: Rope tokens can be placed on these rooms. When you use an item that states "Place a Rope Token," or if your Adventurer has a Rope token, you may spend 1 Action token and place a Rope token on your current room and on Mongol's Hall. Adventurers can move between Room tiles with Rope tokens on them as if they were adjacent.
A Rope token can only be placed by an adventurer to connect a Level 2 Room tile to a Level 3 Room tile.
Many effects prompt "+X" or "-X" followed by a card type or attribute (e.g., +1 Mythos). For a card type, draw or discard those cards. For an attribute, track it using Attribute Bonus tokens.
Anatomy of a Room Tile
- Name of Room
- Comet = "Door"
- Arrow = "Stairs"
- Artifact Room & Description
- Story Effects: A. Adventure, B. Misadventure, C. Scenario Trigger, D. Trap, E. Gear Room
- Secondary Effect
- Number of Trap Tokens
- Exploration Effect
- Red Outline = Spawn Room
- Rope Icon
- Adjacency Text A. Soul Monger Room
Anatomy of a Story Card
- The Story Section: This is the part of the Adventure or Misadventure that tells the story of what happens when you explore this room.
- Pass Section: This middle section of the card is what you read if you Pass your check listed in the section above or if you "Choose Pass" as per the instructions of a story card.
- Fail Section: This bottom section of the card is what you read if you Fail your check listed in the section above or if you "Choose Fail" as per the instructions of a story card.
Rooms Leading to Level 3 in the Core Set
There are only four rooms in the core game that allow movement to and from Level 3: The Pitfall, the Mine Shaft, the Stairs of Blood, and the Arc Portal Room.
Pitfall: Once the Rope token has been placed, this room connects to Mongol's Hall and the trap on Pitfall no longer triggers when an adventurer enters the room.
Mineshaft: This room connects to Mongol's Hall. Without a Rope token on this room, an Adventurer can choose to spend an Action token to attempt to climb down the Mineshaft, rolling the Movement check listed on the tile. When a Rope token is on this room, adventurers can move between this room and Mongol's Hall on Level 3 without having to perform the Movement check.
The Arc Portal: This room has a special teleporter that uses the adventurer's consciousness. In this room, an adventurer can spend an Action to move to any other explored room in the Tomb.
Stairs of Blood: This room is considered adjacent to the Sacrificial Chamber. However, you can only move from the Stairs of Blood up to the Sacrificial Chamber, not in reverse.
Example of Exploring a Room
- Christopher St. George is on Level 2. He moves through a door into a blank space. He searches the Room tile stack until he finds the Island Observatory. This is a valid tile because it reads "Level 1, Level 2, and Level 3," which includes Level 2.
- He connects the Island Observatory to the tile he moved from so their doors connect. He resolves the Exploration Effect, shown in the bottom-right corner of the Island Observatory. It reads "Explore: Roll Audacity. Pass: Gain the 'Fearless' status effect."
- Christopher has 5 Audacity, so he rolls 5 dice and gets 1, 3, 4, 5, 6, passing the roll easily. He takes the Fearless status effect and places it near his Adventurer sheet.
- This room displays Symbol 1, so the Expedition Leader resolves the Scenario Triggered Effect, reading its effect aloud. In this scenario, Symbol 1 spawns one creature in the explored room, the Island Observatory.
- Christopher has finished exploring the new room, so his action is complete, as is his turn.
Example of Resolving a Story Card
- St. George has just explored a Room tile with an Adventure. He draws a Story card and passes it to the player to his right, who reads from the Adventure side.
- The Story card prompts a Strength check with a difficulty of 3. St. George needs 3 successes to pass. Having a Strength of 4, he rolls 4 dice, getting 1, 2, 3, 3—no successes, so he fails.
- He wants to pass the Adventure, so he spends 1 Audacity point to reroll all four dice. His new roll is 3, 5, 5, 6. He got at least three successes, so he succeeds. The player to his right reads the Pass section of the Adventure card and its effects are resolved.
Creatures
There are three types of creatures: base creatures, elite creatures, and boss creatures. Some base and elite creatures may be swarm creatures, a subset with different rules.
Base and Elite Creatures
Base creatures and elite creatures spawn during play, while boss creatures only spawn at times specified by the scenario.
Base creatures and elite creatures act the same; their only difference is that elite creatures are more difficult.
Swarm Creatures
Swarm creatures move and fight in packs or groups, like zombie hordes and packs of wolves. Swarm creatures have "Swarm: X" in their special ability box. When a Swarm creature spawns, place X Swarm tokens near its Creature card; these tokens move with the card. The Combat rating of a Swarm creature equals its current number of Swarm tokens. The Health rating on a Swarm creature card indicates the amount of damage that each token has. Therefore, when damage is applied to a Swarm creature, each time the Health rating is met or exceeded, remove one Swarm token. If damage is in excess of a single Swarm token's Health, apply the remainder to another Swarm token and place damage tokens near the creature.
When no tokens remain, the Swarm creature dies, and the adventurers gain Courage and Soul Shards as normal.
Each Swarm token counts as an individual creature when determining the Outnumber bonus during combat. However, when counting the number of creatures in the Tomb against the creature limit (see The Tomb Phase), count the swarm creature only once.
Boss Creatures
Boss creatures are extremely powerful and have the greatest mobility throughout the Tomb. They never need a Rope to move between rooms that normally need one and may always move from Mongol's Hall to Pharoah's Hall as if they were adjacent.
Anatomy of a Creature Card
- Type: The creature type—base creature, elite creature, boss creature, or swarm creature.
- Name: The moniker of this deadly foe.
- Special Text: Its special abilities, special rules, and ongoing abilities.
- Movement: The number of rooms it can move during one Tomb Phase.
- Courage Attack: The amount of Courage an adventurer facing it loses during combat.
- Combat Rating: The maximum damage it can deal during combat.
- Armor: The maximum non-critical damage it can cancel.
- Health: The amount of damage it can take before dying.
- Evasion Difficulty: The difficulty of the Dexterity check an adventurer must make to evade it.
- Soul Shards: The number of Soul Shards it drops when killed.
Combat
Combat represents a back-and-forth struggle usually between an Adventurer and a Creature. Combat usually occurs between one Adventurer and one creature at a time, occurring potentially in the Adventurer Phase and the Tomb Phase. Combat is identical during the Adventurer Phase and the Tomb Phase, except as noted in the Roll Combat Check section below.
1. Attempt to Evade (Tomb Phase Only)
If you wish to evade a creature before combat begins, lose Courage equal to the creature's Courage attack, then roll a Dexterity check. To succeed, you must roll successes equal to or greater than the creature's Evasion difficulty. If you succeed, move to an adjacent room that does not have any creatures and end combat. If you fail, remain in the same room and continue combat. (Lose courage only once per combat per creature per game. See Lose Courage below.) If all adjacent rooms contain creatures you may not Evade.
This step differs from evasion during a Move action (see The Adventurer Phase).
2. Lose Courage
The first time you combat a creature, lose Courage equal to the creature's Courage Attack. After a creature causes an adventurer to lose Courage, that creature cannot cause the same adventurer to lose Courage again for the remainder of the scenario. There is no need to track this, as you will never forget these horrifying encounters.
3. Build Combat Dice Pool
You can wield 1 two-handed weapon or 2 one-handed weapons adding any of their combat bonuses to your dice pool. If you wield 2 weapons, their checked attributes must match. You can only wear 1 piece of chest armor and 1 piece of head armor at once.
If you do not have a weapon or choose not to wield one, your adventurer may take on creatures with good old fashioned fisticuffs. The checked attribute for weaponless hand-to-hand combat is Strength.
Christopher St. George wants to use a Machete, a one-handed Strength weapon. If he uses this weapon, he could not also wield a Bullwhip, a one-handed Dexterity weapon. However, he could wield a Machete in each hand because they are both Strength weapons.
For more on weapons, see Items, Artifacts, Companions, and Weapons.
Checked Attribute
According to the chosen Weapons, add dice equal to the corresponding Adventurer's current attribute score.
Example: Evan Vasion has chosen to use the Tommy Gun which has a Dexterity symbol on the top left corner. His Dexterity attribute is a 4, therefore he adds 4 dice to the pool in addition to the 5 dice automatically added by the Tommy Gun's +5, giving him a total pool of 9 dice.
Outnumber Bonus
When the adventurers outnumber the creatures in a room during combat, add the outnumber bonus. The acting adventurer gains bonus dice equal to the number of adventurers exceeding the number of creatures, up to 4 bonus dice.
When calculating the outnumber bonus, companions count as adventurers, and each token on a swarm creature counts as an individual creature. Remember, the acting adventurer must be in the same room as the creature they are combating to obtain the outnumber bonus.
4. Roll Combat Check
Build the dice pool for the combat check from three sources: the checked attribute of your weapon or weapons, the combat bonuses of your weapons and other items, and the outnumber bonus.
Do not add the outnumber bonus in combat during the Tomb Phase.
5. Resolve Damage and Criticals
First, check if you take damage. Add your successes (5s) and critical successes (6s) to get your base defense. Then, add your armor value from items (if any) to get your final defense. If the creature's Combat rating exceeds your final defense, you take damage equal to that difference.
If the creature dealt any damage to you this combat, and it has a special ability with the critical-failure trigger symbol and you rolled any critical failures (1s), also trigger the creature's special ability. If the creature does not have a special ability that has that symbol, it is not triggered during critical failures.
Next, check if you deal damage. Count your successes (5s), but not critical successes (6s). This is your base damage. Then, subtract the creature's Armor rating from your base damage, to a minimum of 0. Finally, add your critical successes to get your final damage. If your final damage is positive, deal it to the creature. Track damage by placing Damage tokens under the creature standee.
6. Gain Soul Shards
Defeating Creatures
When a creature's Health reaches 0 or less, it dies. The adventurer who dealt the killing blow gains the Soul Shards shown on the Creature card. Each other adventurer in the same room gains 1 Soul Shard.
Each adventurer who gained Soul Shards regains Courage equal to half the dead creature's Courage attack, rounded up.
Area Combat
Some weapons allow for optional area combat. In area combat, the adventurer engages multiple targets in one combat. Usually, the adventurer makes separate combat checks for each targeted creature, resolving combat for each creature as if the adventurer was fighting them individually, but all in one action. Otherwise, area combat is exactly the same as regular combat.
First Example: Adventurer versus Creature
Christopher St. George shares a room with two creatures: a Living Moai-Man and a Tomb's Eye. He spends an Action token to combat the Living Moai-Man.
- Christopher loses 2 Courage from the creature's Courage attack.
- He creates his combat dice pool by choosing weapons and items to use. He uses his Thompson Submachine Gun, which reads "+4 to Combat. Succeeds on a 4, 5, or 6. OR Dexterity: +2 Combat 'Multi-Combat' Upkeep: Roll a die. On 1 or 2, discard."
- Because he used the Thompson Submachine Gun, he exhausts it by turning its card sideways.
- Christopher is only targeting the Living Moai-Man with the Thompson, so he adds +4 dice. He has a total Dexterity of 7—his original score of 5, plus a +2 Dexterity token—so he adds +7 dice. So far, his combat dice pool is 11 dice.
- Temple and Hadji are in the same room as Christopher. Because the room has 2 creatures and 3 adventurers, Christopher gets an outnumber bonus of +1 die, bringing his total to 12. (Note: During the Tomb Phase, adventurers do not get the outnumber bonus.)
- Christopher may spend 1 Audacity before rolling to make 4s, 5s, and 6s count as successes, but he decides not to do so. After all, the Thompson Submachine Gun already counts 4s, 5s, and 6s as successes on combat rolls.
- He rolls 12 dice, getting 1, 1, 1, 2, 3, 3, 3, 4, 5, 5, 6, 6. That's 3 successes and 2 critical successes, thanks to the Thompson.
- The Living Moai-Man has a Combat rating of 3. Because Christopher rolled successes equal to or greater than its Combat rating, Christopher takes no damage. The creature has an Armor of 2, blocking 2 of the 3 successes. The 2 critical successes cannot be blocked. Summed up, the Living Moai-Man takes 3 damage, 1 damage from an unblocked success and 2 damage from the 2 critical successes.
- Christopher places 3 Damage tokens near the Living Moai-Man standee. Christopher's turn is now over.
Second Example: Adventurer versus Swarm Creature
- Temple is in a room with a swarm creature, Carnivorous Scarabs. He spends an Action token to combat it.
- He loses 2 Courage from the creature's Courage attack.
- He creates his dice pool. He's using an M1A1 Rifle, which adds +5 dice.
- He has a Dexterity of 4, which adds +4 dice. He has no other bonuses, and he is in the room alone, so he gets no outnumber bonus. Added up, his total combat dice pool is 9 dice.
- Before rolling, he chooses to spend 1 Audacity. This gives him successes on 4s, 5s, and 6s instead of just 5s and 6s.
- He rolls 9 dice, getting 1, 2, 2, 3, 3, 4, 4, 5, 6. That's 3 successes and 1 critical success.
- The Carnivorous Scarabs have 4 Swarm tokens, so they have a Combat rating of 4. Temple rolled 4 successes, so he takes no damage. The creature has 1 Armor, blocking 1 success.
- The Carnivorous Scarabs take 3 damage. Each Swarm token has 2 health, so 3 damage removes 1 token. To denote the remaining damage, Temple places 1 Damage token near the Carnivorous Scarabs.
- The Carnivorous Scarabs now only have 3 Swarm tokens, so their Combat rating is permanently reduced from 4 to 3.
Creature Versus Creature Combat
Combat occurs as normal (including applying a creature's armor rating to results), other than the following exceptions:
A controlled creature gets a combat dice pool, just as an adventurer does. To create a creature's combat dice pool, add the controlling adventurer's Mythos to the creature's Combat rating.
Combat occurs as normal, except for the following exceptions:
- A controlled creature cannot gain or lose Courage.
- A controlled creature cannot gain status effects.
- A controlled creature cannot use special abilities.
- A controlled creature does not produce Soul Shards when killed. The creature's controller gains courage and soul shards from any other creature killed by the controlled creature as if the Adventurer killed the creature.
If a controlled creature kills another creature, the controlling adventurer and all other adventurers in the same room gain Courage equal to half the Courage attack of the dead creature, rounded up.
Third Example: Creature versus Creature
- Heidi Dupont is controlling a Tomb's Eye, and she wants it to combat a Keeper of the Tomb. The Tomb's Eye does not lose Courage from the Keeper of the Tomb's Courage attack.
- Heidi generates the combat dice pool for the Tomb's Eye. Heidi has a Mythos of 6, and the Tomb's Eye has a Combat rating of 1, adding up to 7 dice. The Tomb's Eye does not gain an outnumber bonus.
- She rolls 6 dice, getting 2, 2, 3, 4, 5, 5. That's 2 successes. The Keeper of the Tomb has a Combat rating of 2, so the Tomb's Eye takes no damage. However, the Keeper of the Tomb has no Armor, so it takes 2 damage.
- Heidi places 2 Damage tokens near the Keeper of the Tomb's standee. Heidi's turn is now over.
Adventurer Versus Adventurer Combat
It is rare for an adventurer to combat another adventurer. However, when it happens, the attacker creates his combat dice pool as normal, and the defender gets a Combat rating as if she were a creature. This rating is equal to half of her combat dice pool, rounded up. If either adventurer has more allies—such as other adventurers, creatures, or companions—he receives the outnumber bonus.
Adventurer-versus-adventurer combat is the same as adventurer-versus-creature combat, except that neither adventurer loses Courage nor gains Soul Shards.
Both the attacker and defender can use Audacity. This works normally for the attacker, but differently for the defender. Before the attacker rolls his combat pool, the defender can spend Audacity to increase her Combat rating by +1 for each spend, up to +3.
To calculate an adventurer's Evasion rating, halve their Movement and round down.
Example of Adventurer versus Adventurer Combat
- A possessed O'Sullivan is in the same room as his opponent, Sinclair. He spends an Action token to combat Sinclair.
- Before O'Sullivan can attack, Sinclair must determine her Combat rating. Sinclair has a Dexterity of 5, adding +5 dice, and a Colt 1911, giving +3 dice. Summed up, her combat dice pool has 8 dice. Dividing 8 in half gives her a Combat rating of 4.
- O'Sullivan doesn't have any weapons, so he rolls his combat check using Strength. He has a Strength of 5, so he rolls 5 dice, getting 2, 3, 5, 6, 6. That's 1 success and 2 critical successes.
- Sinclair has a Combat rating of 4 and no Armor, so she takes 3 damage. However, Sinclair's Combat rating of 4 is one greater than O'Sullivan's 3 successes, so O'Sullivan takes 1 damage.
Items, Artifacts, Companions, and Weapons
Your adventurer will come across helpful equipment, powerful artifacts, and lost comrades during his travels. Some may be used by spending an Action token, some by exhausting or discarding the card. Some have ongoing effects, some have a limited number of uses, and some are only used during combat.
Items and Artifacts
Exhaust: When you use a card that prompts you to exhaust it, you will turn it a quarter turn clockwise. When card is exhausted, its new orientation may indicate how many more uses remain on the card. A card that can be exhausted may note that it refreshes during the Upkeep step of the Tomb Phase, turning the card back to its original, upright position. Or it may show that it has a limited number of uses by listing numbers on the top, bottom, left, and right sides of the card.
Dexterity Weapons: Anytime you use a Dexterity weapon card that has an Upkeep check printed on it, for the first time in a round, you must turn it a quarter turn clockwise indicating usage. This card is not exhausted and may still be used this round. The card is turned only to remind the player to roll an Upkeep check at the end of this round. If the Upkeep check is passed, refresh the card to its upright position. If failed, discard the card as you have run out of ammo or broken your weapon. If a Dexterity weapon card is not turned when the Upkeep phase triggers, you do not roll upkeep for this weapon as it has not been used round.
Attribute Requirements: Some Item and Artifact cards list a minimum attribute required to use the card.
Example: A card that states "Min. Strength 2" requires a Strength of 2 or more to use.
Attribute Bonuses: Some cards provide attribute bonuses, which act the same as Attribute Bonus tokens. An adventurer only benefits from these bonuses while possessing the card with the bonus.
Carrying and Dropping
You can carry any number of items, artifacts, Soul Monger items, and companions. You can drop cards in your current room during your turn without spending an Action token. You cannot drop companions or Soul Shards.
When you drop cards, place an Item Drop token on your current room, and set the dropped cards aside. Any adventurer in a room with that Item Drop token can spend 1 Action token to pick up any or all of the cards set aside. If all the set-aside cards are picked up, remove the Item Drop token.
Companions
Companions are members of the Eternal Order of Perseus or others you find during your travels into the Tomb. Some adventurers begin with a companion, but they can also be found during play.
Companions work exactly like items, but have Health. An adventurer with a companion can redirect any damage they would receive onto the companion, and companions can be healed as an adventurer can. If a companion reaches 0 Health, discard the Companion card.
If you trade a companion, any damage they have is also traded. The only way to heal a companion is to perform a Rest action and heal the companion instead of yourself. You cannot split the effects of the Rest action. Companions may not be healed by items, artifacts, or any other game effects.
Anatomy of Item/Artifact Card
- Checked Attribute: A. General Item, B. Dexterity, C. Strength, D. Knowledge, E. Mythos
- Name
- Use Requirement: A. 1 Handed, B. 2 Handed
- Image
- Optional Flavor Text
- Set Symbol
Weapons
Weapons are items that allow you to make non-hand-to-hand combat checks. Each weapon has a checked attribute, shown in the top left corner of the card. Items, Artifacts, and Soul Monger Items that have an Attribute symbol are all Weapons in addition to any other abilities or effects they may have. The Attribute symbol determines which attribute you add to your dice pool during combat.
Weapons are either one-handed or two-handed. An adventurer can wield 2 one-handed weapons at once, but they must have the same checked attribute. Only 1 two-handed weapon can be wielded at once.
Some weapons are exhausted when used or must be turned to show use and can be refreshed at a later time. Additionally, some weapons require a roll during upkeep to determine if its ammo is depleted or if it has otherwise been rendered useless to the Adventurer. Audacity may be used to support these rolls.
Strength Weapons: Checked attribute is Strength. This applies to most melee weapons, such as axes and swords. If an adventurer wields no weapons, they use their fists, which uses Strength as the checked attribute.
Dexterity Weapons: Checked attribute is Dexterity. This applies to guns, projectile weapons, thrown weapons, and weapons that require hand-eye coordination more-so than brute force. As mentioned earlier, some of these weapons have an Upkeep, usually guns, that may "run out of ammo" or "jam". Remember, even though you've turned them (Exhausted) when used, they can still be used as many times as you have actions during the round, unless otherwise specified.
Knowledge Weapons: Checked attribute is Knowledge. Includes mechanical devices, traps, bombs, and certain magical weapons.
Mythos Weapons: Checked attribute is Mythos. Includes magical weapons, such as magical or holy books, artifacts, and other supernatural weapons.
Anatomy of a Companion Card
- Symbol
- Name
- Image
- Attribute/Effect
- Health
Anatomy of a Status Effect Card
- Symbol
- Name
- Type
- Orientation: A. Positive, B. Negative
- Effect
Passive Abilities
There are many items, artifacts, companions, status effects, Soul Monger items, and Courage Effects that have passive abilities. A passive ability is usually an attribute modifier such as a +1 or other attribute bonus. Other passive abilities may consist of unique abilities or modifiers that are specified on the card itself. Card-based passive abilities are not affected by the card being exhausted or turned unless otherwise stated. Passive abilities on cards like weapons, still add their bonus modifiers or other effects to the Adventurer who possesses them regardless of if they're equipped or being used. The magic or other powers of these effects, good or bad, are bestowed upon the player just by possessing them.
Example of Refreshing
Earlier in the round, St. George fired his Tommy Gun during combat, turning it sideways to show it was used. St. George continues to use the Tommy Gun throughout the round as normal.
It is now Upkeep during the Tomb Phase. Because it is turned sideways and exhausted the Tommy Gun prompts St. George to roll "Upkeep." He rolls one die and gets a 1, because he does not want to discard his best weapon, he spends 1 Audacity to reroll. He then gets a 4, so he does not have to discard the Tommy Gun.
Finally, he refreshes the Tommy Gun by turning it to its normal orientation.
Status Effects
Status effects are enduring effects, gained by various means represented by Status Effect cards. There are three types of status effects: mental, physical, and supernatural. Status effects also have a positive or negative orientation, which indicates whether the effect helps or hinders the adventurer.
Each adventurer can only have one status effect of each type at a time. If an adventurer were to gain an identical status effect, ignore all effects of the new status effect and keep the old status effect.
When you are prompted to draw a random status effect, draw status effects until you draw one of the noted orientation, either positive or negative.
If you are prompted to draw a status effect but there are no more copies in the deck, draw a status effect of the same orientation and type as the prompted card. If there is no card of the same type, draw a status effect of only the same orientation.
Removing Status Effects
Some status effects note how they can be removed: either during the Upkeep Step of the Tomb Phase, or by using a Rest action. To remove a status effect that does not list one of these ways, another effect must prompt its removal. Such as an in game ability that specifically states for you to remove a Status Effect. Remember: The Soul Monger sells a service to remove status effects.
Becoming Fully Infected and Other Traitor Rules
When an adventurer gains the "Fully Infected" status effect or otherwise becomes a traitor, as prompted by a scenario, they gain new win conditions. Bent on killing the other adventurers, they win the game if the non-traitor adventurers lose the game by any means. If the "Fully Infected" status effect is removed, they revert to their original objective. If a traitor adventurer is killed, and the scenario still allows for players to select new adventurers, the player who controlled the traitor can select a new, non-traitor adventurer.
Alternative Infected Rules
If you gain the "Fully Infected" status effect, but don't wish to work against the other players, you can instead let your adventurer die and, as normal, choose a new one. When you do, place an elite creature on your room that represents the now-transformed evil adventurer.
How to Play the Scenarios
Picking a Scenario
Each scenario gives a Difficulty and Play Time. When you are choosing a scenario to play, consider how much time you have and how difficult you want the scenario to be. For your first game, we recommend starting with The Pharaoh with the Blue Eyes. Each one also gives the Boss Creature for flavor. We have specially made extra marks and callouts in that scenario to help guide you through the process of running the scenario.
Reading the Scenario
Throughout the scenario, you will find sets of numbers in parentheses; for example, (1.3). These are prompts to read sections in the Detailed Scenario Rules.
When you find these prompts in the Strategy, Win Conditions, and Lose Conditions sections, do not immediately read the prompted sections. Instead, read them during play if you need more complete rules for the statements or conditions given in those sections.
When you find these prompts in the Scenario Triggered Effects section, read the section it references.
Running the Scenario
Before anything else, follow the instructions given by the Tomb Setup. It may ask you to set aside various scenario-specific cards, rooms, creatures, or tokens. It may also have you create new decks of cards composed of specific creatures. Some scenarios may have you place different combinations and organizations of Room tiles than normally used. More complicated setups of Room tiles will include a diagram showing how to set up the tiles.
After setting up the Tomb, have the Expedition Leader read aloud the mission briefing at the beginning of the scenario; this is the scenario's background story. After that, read the Strategy section aloud. This section gives an overview of the scenario, including the general goals and dangers unique to it, as well as basic strategies the players can follow. After that, read the Win Conditions and Lose Conditions sections aloud so the players understand how they can win and lose.
Many scenarios have Special Rules, which change the basic rules written in this rulebook. Read this section aloud. (The starter scenario, The Pharaoh with the Blue Eyes, does not have any special rules.)
Next are the Scenario Triggered Effects, which are perhaps most important in making the scenario unique. These effects occur at specific times and when the adventurers explore the Tomb. It is not necessary to read these aloud, but the players (especially the Expedition Leader) should familiarize themselves with when these effects are triggered so they know when to refer back to this section.
Remember: Comet Track triggers and other effects that trigger with the Comet Track, occur immediately each time the Comet Track changes.
Many of these triggered effects will end with a reference to another section; if so, search for the prompted section in the Detailed Scenario Rules and read it. It contains the full flavor text and rules for the triggered effect. If an effect does not reference another section, simply resolve the effects given in Scenario Triggered Effects.
The most common scenario effects are triggered by Symbol Triggers. When an adventurer explores a Room tile showing one of the three Scenario Effect symbols, after resolving any Exploration Effects or Trap Effects, read the corresponding prompt in the listed section.
Some symbol triggers may show multiple symbols. In this case, trigger that effect anytime you explore a Room tile showing any of the triggers.
Some symbol triggers have different effects each time they are found. When you see a scenario refer to 1st Time, 2nd Time, and 3rd Time, only trigger these effects the first, second, and third times any adventurer explores a Room tile with the given symbol, respectively.
When you have progressed through the scenario enough to fulfill any set of Win Conditions or Lose Conditions, read the prompted section in Winning and Losing, the last section of each scenario. Many scenarios have different endings depending on the choices you made during play, so different sets of win and lose conditions may prompt you to read different sections. Be sure to read the proper flavor text.
Example of Scenario Trigger
The starter scenario included in the box, The Pharaoh with the Blue Eyes, illustrates how these sections fit together. Its scenario opens with:
1.1 The Curse of the Mummy — Trigger: Scenario Trigger 1 (from The Pharoah with the Blue Eyes)
Example: Christopher St. George just explored a room with a scenario trigger. After triggering the Exploration Effect of the room, the effect for the trigger triggers. The Expedition Leader refers to the Scenario Triggered Effects Section, and then reads the corresponding connected section at (1.1) outloud:
All around the room there are engravings, hieroglyphics, and ancient relics from the age of Egyptian empires. They mention Rhaz Azul'ahamet many times. As you search these histories for clues, you wake something from its deep slumber. Its disembodied blue eyes flash in the darkness, and loud, maniacal laughter echoes in the depths of your mind, mesmerizing you for a moment. You try to resist. You attempt to resist the curse (a Mythos check). (from The Pharoah with the Blue Eyes)
Then St. George rolls the prompted Mythos check, resolving any necessary effects:
- Pass: You resist the curse!
- Fail: You are marked by the ancient Egyptian Curse of Rhaz Azul. Gain "Curse of the Tomb". (from The Pharoah with the Blue Eyes)
Its Win and Lose Conditions read:
Win Conditions — The players must kill Rhaz Azul'ahamet (3.2) after he awakens (3.1). (from The Pharoah with the Blue Eyes)
Lose Conditions — If all players die or flee the Tomb after Rhaz Azul'ahamet has awakened (3.1). OR If Rhaz Azul'ahamet moves out of the Tomb's Entrance (3.2). (from The Pharoah with the Blue Eyes)
Solo Play
Solo Play is another great way to enjoy the pulp action-adventure experience of the Tomb and build your own personal story for any of the scenarios in Secrets of the Lost Tomb.
You may choose one of the following suggested Solo play modes:
- You may use the special Solo Play Adventurer Lord Harrison Quatourmanus the 13th. With special attribute values and a host of Companions, Lord Harrison is properly balanced for a solo experience. Lord Harrison receives 13 Action tokens and five Companions. When a game effect would cause Lord Harrison to flee the Tomb or die automatically, instead discard one Companion card. If you have no companions left and Lord Harrison flees or dies, you immediately lose the game.
- Setup the game choosing any number of Adventurers getting the Action tokens and other bonuses if any, as listed in the regular setup (see Game Setup). The game is played as it is written, with the solo player making all choices for all characters.
- Use one regular Adventurer with 13 Action tokens and 5 random companions. Prepare to be challenged!
Special Note: If you have special promo characters that are stronger than regular characters (like Legendary or Special Ops) you may use one "Legendary" or "Special Ops" Adventurer with 13 Action tokens and 5 random companions.
Remember, anytime you're brave enough to use only 1 Adventurer you may apply the same rules as Lord Harrison has above regarding fleeing the tomb and dying.
Expansion Packs
New Room tiles, Story cards, creatures, items, scenarios, and more!
Secrets of the Lost Tomb has many add-ons and expansion packs that can help create an expansive and replayable board game experience that you and your friends can play for hundreds, maybe even thousands, of hours. Below we list the different types of expansion packs that will be available for you to integrate into your game. Each expansion will feature unique symbols on all components so that you may easily swap expansions in and out, creating a truly modular game system.
Adventure Packs
These expansion packs contain new scenarios, rooms, creatures, cards, and adventurers. These are probably the easiest to incorporate into the core set. Some of these additions may have new rules, but most of these components can be mixed right into their core decks, except for the boss creatures, which are often only used in particular scenarios.
Tile Expansion Packs
Including The Secrets, Passages, and Traps Pack, Atlantis, and Medusa's Meridian.
Each tile pack is meant to be mixed into the core set and cannot be used without the core set, except for the triangular tiles in Medusa's Meridian, which are used instead of the regular tiles.
Each tile pack can be used on its own, mixed into the core set, independent of all other expansion tile packs.
Each pack comes with a page of new rules to familiarize you.
The Adventurers of the Eternal Order of Perseus
Dedicated to the BEST BACKERS IN THE WORLD.
Christopher St. George
As an "Adventure Capitalist", Chris traveled the world in search of rare antiquities and priceless artifacts to sell to the highest bidder. Sometimes working in the "Grey Area" of the law, Chris used all of his skills, talents, networks of many friends, and of course his firepower to get the job done. Dealing with many from the black market, and often taking requests, he one day came upon a very rich Eastern-European Count who was interested in an exotic carved coffin that was said to be kept in an ancient Tibetan Monastery high in the Himalayas. After gaining an ungodly high dollar retainer, Chris formed a team of mercenaries and chartered a flight. The climb up Mount Everest was not only treacherous, but filled with pitfalls and perils. The first Yeti that Chris and his team ran into nearly scared them off the mountainside, but after about three hundred 9mm rounds, that Yeti, or Meh-Teh as the Tibetans call them, went down in a pile of fur and grizzle. Armed to the teeth, Chris and his team not only took down that first Yeti, but another 12 of them as they made their assent. When they finally reached the Monastery of Khan, it seemed as though it had been abandoned for thousands of years. The coffin was easily recovered, However, when they got the coffin off the mountain and the temperatures warmed up, the coffin began to stir. The lid flew off revealing a fully armored and fully preserved, Genghis Khan! The undead Khan slowly rose from the coffin wielding a bow and with inhuman speed, fired arrows deftly killing 8 of the 10 men remaining of Chris' team. Chris ducked out of the way and unloaded both Thompsons into Khan knocking him back into the coffin temporarily. Out of nowhere a man wearing a brown hat and leather jacket ran up and slammed a strange carved stone onto the coffin. With a burst of green flame, the coffin was once again sealed. Chris was soon shaking the hand and thanking of the world renowned Lord Harrison Quatourmanus XIII.
Shortly after Chris was offered a position within the Order. Saving the world while collecting treasure… how could he refuse?
James T. Temple
James T. Temple, Adventuring Documentarian, was conscripted as a soldier as a teenager at the end of first Great War. Trained as a trench sniper, Temple was on the front lines for only a month, with over 50 confirmed kills; when a piece of shrapnel hit him in the eye, earning him the nickname "Deadeye". After the war, he worked as a filmmaker traveling to remote locations where film and danger met. When Temple traveled to Skull Island as cameraman for the ill-fated Whitmore Expedition he took over for the assistant director who disappeared without a trace on the first day of filming. On the second day when a 45ft. tall Gargantuan Gorilla appeared and killed almost the entire party, the captain of the SS Venture wired for rescue. If Temple didn't have his long-ranged M1A1 rifle with him to scare off the huge ape, they would have all been dead. The HMS Parallax fortuitously steamed near the shore and picked up Temple, Whitmore, and Anne Darrow the only remaining survivors. Fortunately, Temple's camera was also saved, with several reels of film that proved the legends of Skull Island were real. Temple, a man of adventure, wanted to know more and he was given the chance. The E.O.P. took notice of Temple's knack for survival and a week later, an anonymous package was delivered to him containing a bronze Compass with a set of coordinates engraved on the back. Inside it was a note stating "If you still want to know more about Skull Island, meet me at this location." He immediately traveled out to meet with a member of the Eternal Order of Perseus named Heidi DuPont. Days later Temple found himself back on the HMS Parallax steaming back towards Skull Island, but this time with help.
Chang Li Tao
The Tao Family have been in EOP for 12 generations. Soon after the 1st generation of the Tao family had been initiated a century long battle begun with the Red Dragon Society, a human component of the Draconian element introduced to Earth long ago. During his youth he spent years traveling with his parents and their Lotus Tea company, one of many fronts used by the E.O.P. While his parents secretly investigated deeper and deeper into the Red Dragon Society, Li was exposed to a great many unusual things; from a murderous poltergeist in Shanghai to a 42 people being killed by ball lightning in a crowded Hong Kong market. These mysteries were never explained to Li, as he was not yet part of the order, but it was not long until his heritage caught up with him. Li joined the Chinese Navy on his 19th birthday. On Feb. 8, 1918, his ship answered an SOS from the SS Ourang Maru 3 days out of Shanghai. Their Morse code messages said that something had come aboard ship at night and had begun to slaughter the crew. Li's ship found the Maru drifting, the entire crew had been torn to shreds. Having remembered similar occurrences from his youth, against his orders to keep the incident a secret, Li reached out to his father. Soon after an E.O.P. Representative named General Drake arrived on Li's ship to investigate. Hours later both vessels were evacuated under a cover story of radioactive contamination, all except for Li, who stayed onboard and assisted the E.O.P. research team and the General discover the true mystery behind the ghost ship, which quickly pointed to the Red Dragons. Only a few weeks later Li was honorably discharged due to "medical reasons" and joined his father in the ranks of the E.O.P. and now together they continue to defend their family and land against their age old enemy.
Hadji Singh
Having graduated from Calcutta University with a PHD in Theology and Ancient Languages, Hadji began traveling the world seeking to understand more of the universal truths of our existence. On his travels he became very interested in the teachings of Gandhi. After a chance encounter the man, Hadji told him of his life's mission and asked him if he could provide guidance. Although incredibly busy, Gandhi took time to ask Hadji a few more questions. After hearing all he needed to hear, he knew the man that stood before him had tremendous potential. Although not an official member of the E.O.P, due to a myriad of varying opinions, Gandhi handed Hadji a small slip of paper and said, "All that you seek will be revealed here." Reverently Hadji accepted the offering and continued on his way when he looked at the paper it was blank? Perplexed he held onto it knowing it had deeper meaning. Which it had, for three days later a man in glasses named Forrestal approached him. After an awkward question and answer session, Hadji presented the paper to Forrestal, to which he shined a special pen light on and proceeded to ask Hadji to come with him on a trip and promised all would be explained on the way, and it was. Hadji was inducted into the order as an initiate. The Order tested him for strengths and weaknesses and discovered Hadji had an aptitude towards telekinesis, if properly developed this skill could have endless applications. And thus, Hadji began his training and became one of the E.O.P.'s premier researchers and field specialists in the art of telekinesis, telepathy and teleportation.
Prof. Forrestal
A youth prodigy, Forrestal carries 6 PhD's In Ancient Languages, Archeology, Cartography, Science and World Cultures. With extreme respect and regard to the civilizations of old, Dr. Forrestal travels the world looking for artifacts, always being sure to keep the major digs exactly the way they were found. One major notable find of Forrestal's was a group of Egyptian temples found in the Grand Canyon with ties to an ancient race of humanoid dragon creatures. This dig was immediately covered up by the Directors of the Smithsonian and Forrestal was ordered to be silent. After this, Forrestal decides that his life mission should be to tell the "true" history of the world, and not just what the government wished it to be. Fortuitously, his next self-funded expedition led him to the ruins of Puma Punku in Tiahuanaco, he proved that they were the oldest stone structures on Earth. Made of granite, and diorite, and could only have been cut with diamond-based tools. When the experts scoffed, Forrestal held a press conference and opened an ancient vault that contained several diamond-edged cutting tools from a technology that would not exist until 1905, and yet, these ancient people had the tools 8000 years ago. This news didn't go over well with his peers, and Forrestal was held up publicly as a fraud. This is where the Eternal Order of Perseus came into the good doctor's life. They noticed his great skill and honorable respect for knowledge. They also knew of the reality of 20th century technologies that existed throughout the Ancient World. The EOP in turn offered a position wherein Forrestal could explore the world and not have to worry about his findings or his reputation. He immediately joined their ranks and began taking advantage of the limitless resources the Order had at it's disposal to uncover additional truths about ancient technology, including further investigation into one of his previous studies, the Antikythera Mechanism of Atlantis.
Alligator MacPhee
Appropriately named after his youthful exploits wrangling alligators in the outback, MacPhee eventually matured and began to use his skills for survival and animal husbandry to investigate the more extreme elements of nature, most of which were not yet recognized by official science as existing. He started off locally, searching for 3 months for the Thylacine, the fabled Tasmanian Tiger. He found a small pack of them, and kept the information to himself, as they had nearly been hunted to extinction. He soon encountered rare giant Moas on a remote island in New Zealand. Within a few years, he had traveled through the Australian Outback, where he found evidence of the Dirawong, an iguana over 30 feet in length. He also discovered the Yeti in Northern India and the 18 foot tall, 2800 lb Kamchatka God Bear in the Kamchatka Peninsula. These discoveries, along with a convincing amount of evidence, soon got the attention of Brett Stewardson, renown cryptozoologist. In 1922, MacPhee was contacted by Brett who began to sub-contract his skills as a freelancer. On one fateful expedition to the Congo to search for the Mokele Membe, their camp was attacked at night by something that could only be described as supernatural. Of the 8 person expedition, only MacPhee, Brett and one other escaped the attack. In the morning the three survivors discovered that they did not escape, but were rather saved be an E.O.P. expedition party that was on its way to investigate rumors of the Tomb's appearance in the Congo. Now having survived a first hand encounter with the Tomb, the Order officially extended an invitation to MacPhee to become an initiate in their organization as his skills would be invaluable to future expeditions. From that day forward, he used every ounce of skill to locate and rid the Tomb of its horrors to prevent others from having to suffer the same fate of his departed companions.
Bianca Sinclair
Orphaned at a young age, the young spirited Bianca was full of adventure and lived without fear. That all changed when she had split from her group as her orphanage toured a nearby farm while on a field trip. While aimlessly wondering the farmland, she stumbled down a small hill and fell down an abandoned fresh water well. Too high and slippery to climb out she had no choice but to press on and see if there was another exit. During her travels she came across a skeletal figure that did not look quite human. The flesh and tissue had long since decayed but a shining golden bracelet caught her attention. She pushed past her new found fear, embraced the adventure and took the shiny object. After hours of wondering she came upon a locked gate. She pulled and pushed to no avail until her wristband accidentally touched the metal. This activated the mysterious device which sent sparks sizzle into the keyhole. When she pushed on the gate next it opened with ease. After wondering around for a few more hours she eventually emerged to find several people looking for her. The incident made the papers. When interviewed, not wanting to reveal her treasure, she gave credit to Harry Houdini as her inspiration to escape. Touched by the event, Houdini sought after Bianca and eventually became her mentor. Over the years he taught her everything he knew. Heartbroken at age 17 when the famous escape artist died. Bianca turned her skill from art form into an art of crime. With her natural abilities and her mysterious bracelet there was little that would stand in her way. That is until Iron O'Sulivan eventually caught Bianca trying to break into a secure E.O.P. facility. Thought to be impenetrable, O'Sullivan was impressed with the youth, reformed her and eventually sponsored her admittance into the Order. Now an expert and infiltration and recovery, Bianca is a key asset to the organization and to this day she still wears the mystical bracelet on her wrist under a leather bangle.
Heidi DuPont
During her graduate studies at the University of Bavaria, upon the death of her parents Heidi inherited their estate. While sifting through old boxes filled with photos and manuscripts she discovered that her family's lineage could be traced back to a man named Victor Frankenstein. She first thought it to be a coincidence that her relative bore the same name as the famous fictitious character created by Mary Shelley. However the more she reviewed the manuscripts and journals, she soon discovered that she was the great great granddaughter of the famed scientist. She read the medical journals and the scientific records of her relative and thought of the pronounced application this science would have now. She knew if she revealed the true nature of her research that she would be laughed out of the University. So she secretly became obsessed with the occult and supernatural. Over time her studies on resurrection engineering began to gain traction in certain scientific and archeological communities and she was invited to join an expedition to the Al-Faw site located in the Riyadh Providence of Saudi Arabia. The research was going very well for several days until the digging team reached an ancient room nested deep within the burial chamber. She was just about to join the team when there was a cave in and all of the crew were instantly crushed under the stone and dirt that fell upon them. As tragic as this event may have been, it made Heidi who she is today, for when the chamber collapsed a hidden antechamber was revealed. The only object in the chamber she would later discover to be none other than the Necronomicon. As much as she tried to keep the discovery a secret, the E.O.P. learned of its discovery and quickly sought to retrieve it before it fell into the wrong hands. Luckily for them in the process of securing the artifact, they also recruited Heidi who has developed into an accomplished expert on the supernatural and a key member of the Organization.
Libby Villa
A few years after Libby was born tensions between Pancho Villa and the Us Government began to falter, fearing for their daughter's life, her parents staged her death and sent her to live with her aunt in Camargo. It was not until her 21st birthday, a few years after her birth father's assassination, that her Aunt told her of her true legacy. Rebelling against the truth of her past, she abandoned her fake life and once again took her true name of Libby Villa. The once understated youth now seeking to live up to the family name began looking for adventures to catch up on lost time. She learned to fly a plane, scuba dive and took an interest in the Aztec, Inca and Mayan archeological sites located throughout South America. The topic that most interested her once she began to settle into a career as a professional explorer was the history and lure of the Mayan calendar. She heard many myths about the science and legend behind the history of the calendar, but having learned firsthand not to believe what you are told, she began to dig deeper. Bit by bit she began to piece together a legend that foretold of the oldest of the calendars being a great seal and if broken would bring about the Apocalypse. Now fully invested into her life's exploits Libby became obsessed with all topics involving the Apocalypse and began to become a fledgling expert on the subject. In 1935, a well laid plan executed by the E.O.P. placed Libby as a co-pilot on a private charter flight to America to investigate rumors of Mayan civilizations reaching as far a Georgia. When she arrived for departure, she discovered her pilot was none other than the legendary Amelia Earhart. On the flight to Georgia, Amelia discussed a great many things with the young Libby Villa, including the possibility of her coming to work for the Order to continue her research and discover the true history of the Mayan Calendar. Libby is now an initiate in the Order and quickly making a name for herself.
Lady Rocket
"Emma Tsiolkovsky was born on August. 26, 1904 in St. Petersburg, Russia. Emma excelled in a great many things in school, however science was by far her favorite subject. The more she studied science, the more she discovered how humans were destroying the planet. This birthed a desire in her that would fuel her passion towards preserving the Earth, specifically in alternative energy sources. During her accelerated schooling, Emma learned a great many things including mechanical engineering, munitions and primitive rocket science. Largely having been influenced by WWI, Emma's talents were predominantly applied towards the improvement of guided missile systems. This resulted in obtaining over a dozen patents before she turned 20, thus earning the nickname "Lady Rocket." One day while continuing her research in a private military facility, Lady Rocket came across some recently archived journals detailing plans for a device that sounded very similar to ones described by Jules Verne in her favorite childhood books. She first thought that the fictional papers must have been misfiled, but she couldn't help but indulge her fascination. As she continued to read, the technology described in detail within the journals spoke to science that was beyond theoretical application. Startled by a voice she jumped from her seat when someone said "I thought you would find that interesting." In reply Lady Rocket stammered, "What this? Is this yours? Where did you get this? Who are you!"
Calmly the man took a seat and informed her that his name was Christopher St George and he was sent to offer her a position to work for his organization. She immediately got angry and ranted about the location being a private facility and "how dare he interrupt her research with his games", but she eventually calmed down and after a very compelling conversation that argued the use of her research being applied to alternative energy instead of weapons of destruction, Lady Rocket found herself on a plane headed to America to discuss working for an organization referred to as the E.O.P.
Harrison Quatuormanus the 13th
Birthed into this world and marked by the eruption of Krakatoa, Harrison Quatuormanus XIII was born in the cabin below deck on the family's yacht while his father, Harrison XII, was about to win the America's Cup. As he was born at sea, his parents raised him to be a citizen of the world. By the age of 12, his passport was a 24 page leather bound book with over 85 unique country stamps contained within. With his parents being people of influence, Harrison had many opportunities to do things most others would not. Fluent in over 42 languages, he is constantly searching for the next great adventure prospect. In 1900, while vacationing in the Greek Islands, he and his family enjoyed several hours of sponge diving. When they all returned to the boat his parents had several baskets of sponges, Harrison on the other hand had only one object, a device later to be identified by an American professor named Forestall as the Antikythera Mechanism. He continued to traveled the world and accomplished a great many things. At the age of 20, being lighter than the brothers, he unofficially became the 1st person to successfully fly a plane. At age 25 he photographed the glowing sunset caused by the Meteor that struck Siberia. For his 28th birthday he received a ticket for the maiden voyage of the Titanic. Not only did he survive, but he was responsible for saving over 100 people on that tragic day. During WWI, Harrison was one of the members of the "Lost Battalion" that survived five days behind enemy lines against increasingly grim odds. Even when relaxing Harrison was know for his epic contributions to the world when in 1934 he tipped of the local Chicago police that he was in the process of enjoying the same film as the infamous John Dillinger. Shortly after Harrison's reputation could no longer be ignored and he was personally asked by J. Edgar Hoover to join a special law enforcement group that he was currently leading. This assignment would eventually lead to Harrison's induction into the esteemed ranks of the Eternal Order of Perseus.
Player Reference
Phases of the Game
Adventurer Phase
In turn order, starting with the player holding the First Player/Comet Track marker, each player spends 1 Action token to perform an action, until all player have spend their Action tokens.
- Move — When you move into a blank space, explore a new room.
- Search a room
- Combat a target
- Use special ability
- Use an item, artifact, or companion
- Pick up items or artifacts
- Rest (Gain +2 Health, or +2 Courage, or +1 of each)
- Trade with another adventurer
- Deal with Soul Monger (when in Soul Monger room)
- Steal
Tomb Phase
The Expedition Leader draws a Tomb card and follows the instructions in order:
- Trigger Tomb Effect
- Move creatures
- Initiate combat (creatures versus adventurers)
- Spawn creatures (in red outlined rooms)
- Perform Upkeep (check status effects, items, Dexterity weapons, creatures, scenario triggered effects)
- Rotate Search Token
- Move Comet Track and Check for end game (refer to scenario)
Combat Phase
- Attempt to Evade (Tomb Phase only)
- Lose Courage a. Check Courage effect for Flee or Modifier.
- Create Combat Dice Pool a. Total Attribute + Weapon or Melee Modifier + Other Item/Effect Modifiers + Outnumber Bonus (if any) = Combat Dice Pool. b. Determine if Audacity will be used.
- Roll Dice and count successes (5's) and critical (6's).
- Determine if Audacity will be used.
- Now compare your successes to the creature's Combat rating.
- If the creature's Combat rating exceeds your total successes, you lose Health equal to that difference. Prevent damage for any Armor you have.
- Then for each point of Armor (if any) the creature has, remove 1 success from your success pool. Never remove 6's, they always hit, ignoring Armor.
- Then deal the creature 1 damage for each success that you have remaining after Armor.
- If the creature dealt any damage to you this combat, and you rolled at least one critical failure, trigger the creature's special ability.
- If the creature dies, Adventurers gain the appropriate amount of Courage and Soul Shards.
All Symbols in the Game Symbol Guide
Adventure, Misadventure, Armor, Artifact, Audacity, Base Creature, Elite Creature, Boss Creature, Combat, Comet Track, Companion, Courage, Dexterity, Evade, Explore, Gear (Atlantis Expansion), Health, Item, Knowledge, Movement, Mythos, Rope, Scenario Trigger 1, Scenario Trigger 2, Scenario Trigger 3, Soul Monger, Soul Shard, Special Ability / Tomb Symbol, Static Effect, Status Effect, Strength, Swarm Creature, Trap, Turn, Omega (The Great Apocalypse Expansion), Delta (Atlantis: Mystery of the 13 Expansion), Theta (Reign of Terror Expansion), PSI (Ancient Myths and Legends Expansion), XI (Passages and Perils Expansion), XI (Fate's Fortune).
Symbol colors may vary depending upon game component.
Soul Monger Inventory
When on a Soul Monger room, you may spend 1 Action token to deal with the Soul Monger, buying and selling any number of items and services.
You may sell an item for 5 Soul Shards and an artifact for 15 Soul Shards.
Soul Monger Items:
| Item | Cost | Item | Cost |
|---|---|---|---|
| Soul Monger Gatestone | 8 | Wendega's Ward | 13 |
| Circlet of Mentality | 8 | Essence of Souls | 13 |
| Soul Monger's Rope | 9 | Map of the Tomb's Traps | 13 |
| Soul Pentacle | 9 | Panacea | 14 |
| Crystal Ball | 11 | Map of the Tomb's Rooms | 14 |
| Eldritch Rune | 11 | Shadow-Blade Revolver | 16 |
| Lion's Breath |
Soul Monger Services:
| Service | Cost | Service | Cost |
|---|---|---|---|
| Rope Token | 6 | Starting Health | 13 |
| Gain +1 Audacity | 8 | Bring adventurer to Starting Courage | 13 |
| Remove any Status Effect | 9 | "Courageous" | 13 |
| +1 Movement | 11 | "Fearless" | 13 |
| +1 to Strength | 11 | "Blessing of the Tomb" | 14 |
| +1 to Dexterity | 11 | "Lucky" | 14 |
| +1 to Mythos |
Search Chart
Roll a die. Then, resolve the effect on the Search Chart that matches the color pointing up on your Search token. Then, turn the token clockwise: from green to yellow, yellow to red, or red to green. Searching gets more dangerous as the token turns from green to red.
| Die Roll | Tomb Raider (green) | Fortune Hunter (yellow) | Glory Seeker (red) |
|---|---|---|---|
| 1 | Misadventure | Spawn 2 Base Creatures | Spawn 1 Base Creature |
| 2 | Adventure | Misadventure & Spawn 1 Base Creature | Spawn 2 Base Creatures |
| 3 | Adventure | Misadventure | Misadventure & Spawn 1 Base Creature |
| 4 | +1 Item | Misadventure & +1 Item | Misadventure |
| 5 | +1 Item | Adventure & +1 Item | +1 Item & Spawn 1 Base Creature |
| 6 | +2 Item & Take 1 Artifact | +1 Item | +1 Artifact |
For printable Player Resources, Tutorials, and FAQ, please visit www.SecretsoftheLostTomb.com.