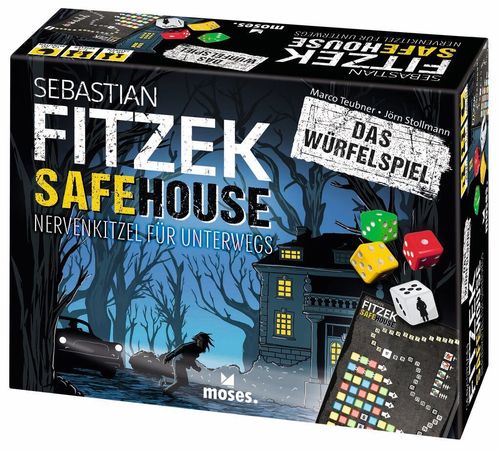
Sebastian Fitzek Safehouse: Das Würfelspiel
Sebastian Fitzek Safehouse: Das Würfelspiel Rulebook
Table of Contents
Table of Contents
- Components
- How to Set Up the Game
- Start Playing!
- Get Rolling!
- When Can You Move Forward on Your Route?
- What Do the Help Squares on the Sheet Mean?
- How Can I Get the Dice Back from the Box Lid?
- Uh-Oh, the Pursuer Has Moved Forward a Different Number of Squares for Each Player
- What Should I Do If I'm Already in the Safe House?
- Game Over
Components
- 1 score pad
- 10 dice (2 of each color: yellow, green, red, blue, and white)
- Each player will also need a pen.
How to Set Up the Game
Each player should take a pen and a sheet from the score pad. Make sure each of you has a different sheet; they should have a different letter in the bottom left corner (S, A, F, or E). Open the box and place it in the middle of the table. The box lid is for storing the dice.
Start Playing!
You all play together, against the game. The youngest player rolls the dice first. Play then continues in a clockwise direction. Are you playing alone? Then the following rules also apply for you. The only difference is that you don't have to coordinate with your fellow players.
Each player takes a look at the route on their sheet (square 1 to the safe house). The pursuer starts on square 1, you start on square 17. So you start with a bit of a lead. When the pursuer moves towards you, you turn the slashes into crosses, to indicate how far away the pursuer is. When you move, make the according number of slashes from square 17 onwards.
Before You Roll the Dice
Before every roll of the dice the pursuer automatically moves forward one square. Before you roll the dice for the first time, you must therefore turn the slash in square 1 into a cross. The next time you roll the dice, you must turn the slash in the next square into a cross and so on. The last cross always indicates the pursuer's current position. And that's always the same square for all players!
Get Rolling!
There are two types of dice: eight colored dice (yellow, green, red, blue) and two joker dice (white). You decide together how many and which dice you want to roll. You can choose as many dice as you like or even roll them all. You must use at least one colored die though. Can't agree which dice to use? Then the player to roll the dice decides. Put the dice you won't use aside for now. You can use them for the next roll.
Is it your turn? Then roll the selected dice once. Add up the total pips shown on the dice of each color. Then arrange them in ascending order. This will give you a better overview.
Example: The pips on the two red dice and the two blue dice must be added up (3+4=7; 4+5=9).
Rolled a Pursuer?
Did you roll one or more pursuers? Then each of you must immediately turn the next slash into a cross for each pursuer rolled. Place all of the dice showing a pursuer in the box lid.
Enter the Dice Scores!
Take a look at your score sheet. There are different missions for you to complete. Each mission (= row) consists of three to six colored squares. Each colored square is in one of the four colors. You should all now enter numbers from the current roll on your sheet. Is there a suitable number in every colored square of a mission? Then this particular mission has been completed.
The following rules apply:
- Each player decides for themselves which mission(s) they want to start with. You don't have to work through them from "top to bottom".
- In each mission, the numbers must be the same value or increase from left to right. You do not have to follow a complete number sequence (e.g., 1-2-3, etc.). The top two missions are the exception here:
- In the first mission, all of the numbers must be the same.
- In the second mission, the numbers must increase from left to right.
- The last three tasks have a gray square printed with a number 6 in the middle of the sequence. To the left of the 6, the numbers may only be lower or equal; to the right of the 6, they may only be equal or higher.
- You may enter numbers in any of the colored squares provided the color of the selected colored dice and the colored square match. So you don't have to enter numbers from "left to right."
- Did you roll both of the colored dice of the same color? Then you must add the two numbers together and use their sum (like in the example above). You cannot enter the individual numbers shown on these colored dice.
- You may enter a maximum of four numbers per roll. So one for each of the four dice colors (joker dice do not count). You can also enter fewer numbers or none at all.
- You can have several "ongoing" missions on your sheet, i.e., enter numbers in several rows. You do not have to complete missions in a single dice roll. Careful though: the more ongoing missions you have, the more squares the pursuer can catch up later on (see "How can I get the dice back from the box lid?"). So you should coordinate well with your fellow players!
- The white joker dice can only be used once on your roll and in combination with the colored dice.
- You may only use the joker dice in combination with the colored dice that you rolled. You may not use them for colors that you do not have available (i.e., did not roll).
- You cannot use them for colored dice where you have rolled the pursuer icon.
- Each of you can choose to use a different number or sum of colored dice.
Example: Ina needs a high yellow number on her sheet, so she uses the white joker die. She enters the number 11 in the yellow square on her score sheet (5 + 1 + 5 = 11). Sami, on the other hand, uses the white joker die for a different color.
Have you all entered the dice roll? Then place all of the dice from that roll in the box lid. Now take the dice you have set aside. Decide how many and which dice you want to roll. Now it's the next player's turn to roll the dice. Remember that the pursuer moves forward one square for each dice roll.
When Can You Move Forward on Your Route?
Did you complete a mission? Excellent work! Then you can move forward on your route by as many squares as indicated by the white arrow next to the completed mission. That can be between two and six squares. Make the corresponding number of slashes on your route. It is important that only you complete your route. Then cross out the completed mission. It's all done now. Over the course of the game, you will find yourself at different distances from the pursuer or safe house.
What Do the Help Squares on the Sheet Mean?
Regardless of the number of players, each square may only be used once during the game.
1) Joint Help Squares
You can use these help squares after rolling the dice. You must decide together whether you wish to use one. Because the help square will not be available to any of you anymore afterwards. Can't agree whether to use the help square? Then the player with the dice decides. If you use a joint help square, you must all cross it out on your sheet.
- Pursuer does not move: This help square allows you to ignore all pursuers rolled on this turn. You must still place the dice in the box lid as usual though.
- Roll again: Don't like the dice roll? Then you may roll any number of your selected dice again. This includes the dice where you rolled a pursuer. In this case, the pursuer stays where he is. Note: You may only roll the dice you selected previously. You may not add any more dice to your selection later on.
2) Personal Chameleon Help Square
You may use the chameleon help square independently of your fellow players.
-
Select any colored square: Use the chameleon help square to enter a number, or sum of a color, in any colored square. This time, the colors of the dice and square do not need to match. You can use any joker dice in the manner as described above. Did you use a chameleon help square? Then only you must cross it out on your sheet.
-
This chameleon is available in a game with any number of players.
-
The second chameleon can be used in a game with three or more players.
-
The third chameleon can only be used in a game with four players.
Example: Ina wants to use the chameleon help square and the joker die. What options does she have? She can use the joker die to turn the red 5 into a 9 (4 + 5 = 9). Or she could use the chameleon and write the red 9 in the yellow colored square on the right. In addition, she could enter the yellow 2 in the yellow colored square on the left. And she can still use the other two colors. However, Ina cannot use the chameleon to turn two different colored dice, such as the yellow 2 and the green 2, into a yellow 4.
Note: You can use multiple help squares after a dice roll.
How Can I Get the Dice Back from the Box Lid?
Have you already rolled all of your dice once or are the dice you can choose from no longer of any use to you? Then you can get the dice back. This has its price though! Because it brings the pursuer closer every time: see who has the most ongoing missions. Ongoing means that the mission hasn't been completed yet. And you've entered at least one number. Each of you moves the pursuer forward as many squares as the number of ongoing missions. Then remove all of the dice from the box lid and place them back in the middle of the table. They're now all at your disposal again.
Uh-Oh, the Pursuer Has Moved Forward a Different Number of Squares for Each Player
It looks like someone wasn't paying attention! The pursuer should have advanced the same distance for each of you. Is this not the case? That's too bad: the position of the pursuer that is furthest forward is always the one that counts. You must adjust his position accordingly.
What Should I Do If I'm Already in the Safe House?
Are one or more of you already in the safe house? Then you're still in the game and can roll the dice. Continue working on, or complete, your missions. Do you still have ongoing missions? Then these should still be counted.
Game Over
The game can end in one of two different ways:
- We did it: Did you all make it to the safe house? Congratulations, you're an unbeatable team!
- Gotcha: Did the pursuer catch up with at least one of you along the route? So at least one of you had to turn their last remaining slash into a cross? Oh dear, the pursuer was faster than you. I'm afraid you've all lost. Even if some of you have already made it to the safe house. Don't despair though! Simply try again.