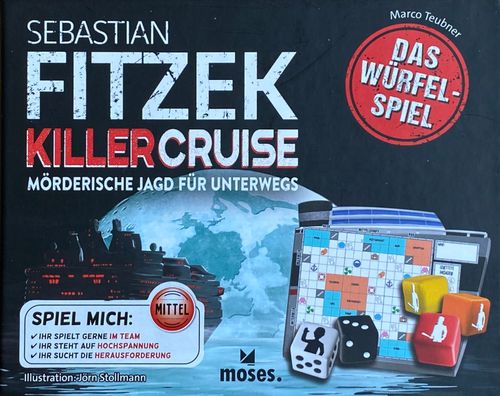
Sebastian Fitzek Killercruise: Das Würfelspiel
Sebastian Fitzek Killercruise: Das Würfelspiel Rulebook
Table of Contents
Table of Contents
- Game Contents
- How to Set Up the Game
- How to Play
- How to Move Around the Ship!
- How Do the Passengers Help You?
- Have You Completed Any Tasks?
- What About the Killer Dice?
- Found Four Clues? Then the Finale Can Begin!
- Game Over!
- About the Different Deck Plans
- Is the Game Too Difficult for You?
- Is the Game Too Easy for You?
- Do You Have Questions During the Game?
- Table: Roll a Clue
Game Contents
- 1 block with 200 sheets (deck plans and tasks)
- 4 movement dice (2 x black and 2 x white)
- 3 killer dice (yellow, orange, and red)
Each of you will also need a pen.
How to Set Up the Game
Lay the four movement dice (black/white) ready at the center of the table. You'll need these from the start of the game. The three colored killer dice are added later–leave them in the box for now.
The Deck Plans–One Each
There are four deck plans of varying levels of difficulty. You can recognize them by the letters on the right (A to D). For the first few games, each take a sheet showing Plan A from the block. (Later you can mix and match the plans as you like–see "About the Different Deck Plans".) There's a space on the sheet to enter your name at the top right.
Now each roll one white die to determine your starting position and mark your start field on your deck plan with an X. (Did you roll a passenger? Then simply roll again.)
The Task Sheet–One to Share
Now take another sheet from the block. Lay it at the center of the table with the task side turned face up. Record your joint progress here over the course of the game.
Now roll the dice to learn your first main task. Roll one white die and mark the box on the task sheet showing the number rolled. (The same applies here: If you roll a passenger, simply roll the dice again.)
Are there less than four of you playing? Then cross out as many columns from right to left for each of the ten tasks so that one column remains for each person. Are there three of you playing? Then cross out the right column for each of the ten tasks. Leaving the three columns on the left for each task (three people = three columns).
How to Play
In each round, all use the dice to move around your deck plans. Collect symbols as you go, which you then cross off on the shared task sheet. This way you'll complete tasks that not only buy you more time, but can also give you clues as to which room the psychopath might be hiding in.
Careful though! Be sure to coordinate well and to always be on your guard! For the psychopath let his killer loose from the very first clue. You also have a trump up your sleeve, though, because if you save passengers, they can then help you!
Are you playing alone? Then the rules detailed in the following also apply for you. The only difference is that you can't confer with anyone.
The game begins!
Whoever played "Safehouse" last starts. What? No one has played it yet? Well then, you really should! In that case, the youngest player starts. Play then continues in a clockwise direction.
Cross Off the Round and Roll the Dice
Is it your turn? Then begin by crossing off the next circled round field on the task sheet. The first four round fields are already circled at the start of the game.
Then take the four movement dice and roll them exactly once. Now decide which two dice apply for you all in this round: black or white. You can of course coordinate, however when in doubt, you're the captain. Set the two dice that you did not choose aside.
Example: You rolled a 3 and 5 (black) or a 1 and 3 (white). So you can choose to have a 3 and 5 (black) or a 1 and 3 (white) available in this round.
Rolled a Passenger?
Do the two dice you've chosen show one or two passengers? Then each of you receives the corresponding number of passengers. Decide for each passenger you receive where you want to put them:
- Circle their location on your deck plan: Circle the next available passenger in the "Rescued passengers" section of your deck plan. You can cross this passenger off as the game progresses so that they help you (see "How Do the Passengers Help You?").
- Cross off on the shared task sheet: Cross off a passenger in any assistance task. This will bring you closer to completing this assistance task.
Decided is decided: You cannot transfer any of your rescued passengers to the task sheet (or vice versa) later on.
How to Move Around the Ship!
The deck plans are divided into six areas and feature symbols and passengers. The dashed lines are not borders, you can cross these without any problems. There are 12 rooms: six red and six blue. You can enter the fields for these rooms entirely normally at the start and thus without any restrictions.
Now you all use the two dice you've selected to move around your own deck plan. You can confer with your fellow players, but ultimately you each decide for yourself how you wish to move.
Each die represents exactly one move in a straight line (vertical or horizontal). Draw a straight line from the center of your current square through as many squares as the die indicates. Then make a dot in the middle of the last field. Continue your move from there with the next die. So you move in straight lines–always from the center of one field to the center of another. Be aware here:
- You decide which of the dice you wish to use: both, just one, or none. Careful though: If you use a die, you must move the full number of pips.
- You may only use fields that are still available–so fields that you haven't entered yet. Rescued passengers can help you to re-enter fields (see "How Do the Passengers Help You?").
Example: You start at the X. First, you go to the right into the restaurant (red line). From there, you move two fields down (blue line) and make a dot.
Staircase Fields
Did you enter a field showing a staircase? Then you may use it. To do this, put down your pen and continue your move from another staircase. You can even change direction (see example below). The "jump" to another staircase does not count as a step!
Collect Symbols and Passengers
Whenever you enter a field with a symbol or passenger, you collect them. You can only collect each symbol and passenger once.
- Have you collected a symbol? Then cross off this symbol on the active main task or a star on any assistance task. (The star stands for any symbol.)
- Have you collected a passenger? Circle the next available passenger in the "Rescued passengers" section of your deck plan, or cross off a passenger on an assistance task on the task sheet. So this works the same way as rolling a passenger.
Example: In the previous round, you stopped in front of the suitcase (gray line). Now move with one die two fields to the left (red line) and collect the suitcase in the process. With the other die you can reach the staircase in just one step and continue your move from another staircase. You choose the staircase on the right. With your two remaining steps, go left from there and rescue the passenger (blue line). Well done!
Have you all finished your move? Then take a look now whether you've completed one or more tasks.
How Do the Passengers Help You?
When moving, you may cross off any number of your rescued passengers from your plan (even the ones you just collected). For each passenger you cross off, you can choose:
- Change die: Decrease or increase the value of a die by 1, to a minimum of 1 and a maximum of 5. This change only applies for you, not for your fellow players.
- Re-enter a field: You may re-enter exactly one field that you have already been on. With several passengers you can also re-enter several fields in one go. For example, you can move between two staircases that are already in use.
Example: You're standing in the shop and have a die available to you. If you cross one of your passengers off, you could a) cross your previous path and go to the left or b) turn right and use the staircase again.
Have You Completed Any Tasks?
There are six main tasks, of which only one is active at a time. They earn you time as well as a clue as a reward. Assistance tasks only earn you time. You need passengers or any symbols for these. You can work on assistance tasks at any time–in addition to your active main task.
Take a look at your active main task and all of the assistance tasks. Did you cross off all of the symbols in a task? Great, then you've completed the task! Tick the small box on the left. Your reward is indicated to the right of the task.
Example: You've completed this task and earned yourself two additional rounds and a clue.
Time gained – You've put stones in the psychopath's path! Circle as many more round fields as indicated in the circle icon.
Clue found – You're hot on the psychopath's trail! Perform these three actions one after the other:
- Roll a clue: Roll a white die, then refer to the table on the back of these instructions. Depending on the dice result and how many clues you've obtained so far, you'll receive information. The psychopath is NOT in the specified rooms. These rooms are now locked and guarded by the on-board security. Hence you're no longer allowed to enter them! Crosshatch these spaces. Are you standing in one of those rooms now? Then simply move out of the room with the next die roll.
- Bring the killer dice into play: The table also indicates which killer die you should roll along with the movement dice from the next round. (More on the killer dice below.)
- Select a new main task: Lastly, select a new main task and mark it. You only had to roll the die for the first main task. From now on, you're free to choose your main task.
Play then continues in clockwise direction with the next round.
What About the Killer Dice?
As soon as you find the first clue, the psychopath unleashes his killer.
- First clue found: Take the yellow killer die from the box and lay it ready.
- Second clue found: Replace the yellow killer die with the orange one.
- Third clue found: Replace the orange killer die with the red one. The red killer die remains in play until the end of the game.
From the next round, you roll the current killer die along with the four movement dice–so a total of five dice. After rolling the dice, first check whether you rolled the killer (see "Rolled the Killer?"). Only then do you choose the pair of dice for your move, as usual.
Rolled the Killer?
Have you rolled the killer using the killer die? Then the killer will strike! You must all cross out the available passenger nearest to you on your deck plan: Count from your current field to the passenger closest to you. (In this case, always a straight line "as the crow flies".) Are several passengers the same distance away? Then you can choose the victim.
You can no longer save this passenger. In addition, the field is no longer free. (So you'll need to cross off a passenger to enter it.)
Example: You're standing near the technical room. The closest passenger is right next to you. That's where the killer strikes! So you need to cross this passenger out.
Found Four Clues? Then the Finale Can Begin!
Once you've found the fourth clue, then there's exactly one room left. That's where you'll have to confront the killer! You no longer select a new main task. Instead, your final goal is for you all to reach this last room. If you can manage this, then you win!
You don't have to all reach the room in the same turn. It isn't a problem if some of you are already there while others are still playing.
You'll be able to collect more symbols and passengers during this finale as well as to complete assistance tasks to buy yourselves more time.
Game Over!
The game can end in one of two different ways:
- You did it: Did you all reach the room where the psychopath was hiding out? Yes? Then congratulations! Thanks to you, the passengers are now safe again–and so are you! You sail into the horizon entirely relaxed.
- You've lost: Can you no longer cross off a round field at the start of a new round? Then unfortunately you didn't manage to catch the psychopath in time. Why not give it another try?
About the Different Deck Plans
Have you completed deck plan A and now want more of a challenge? Then why not give the other deck plans a try as well? There are four different deck plans: A, B, C, and D. Plan A is great for getting started, while Plan D is really quite tricky. Plans B and C are in between in terms of difficulty.
You can mix the deck plans as you like within a game. The rules of the game remain unchanged. Each of you can play with the deck plan that suits your own play experience. Do you have someone new on board? Then Plan A will provide a good introduction. The killer doesn't scare you anymore? Then dare to try the other plans.
Is the Game Too Difficult for You?
Then maybe these tips will help you out:
- Remember that you don't have to use every die to move. Sometimes it makes sense to move less, especially if the dice are not ideal.
- Choosing your next main task is an important decision. How many rounds do you have left? What symbols are located nearby? These questions can help you to decide best.
- If you always keep one or two rescued passengers in reserve, you'll have the flexibility you need at the crucial moment. You'll be able to change a die so that you can collect exactly the symbol that's missing, for example.
If these tips are not enough, try making the following changes:
- Begin with an additional starting round. To do this, simply circle the next dashed round field at the start of the game. That'll take some of the pressure off.
- Alternatively–or additionally–leave the killer dice out entirely. Allowing you to concentrate on the gameplay until you get the hang of it.
Is the Game Too Easy for You?
Want an extra kick? Then play with one less starting round. To do this, immediately cross out the first circled round field at the start of the game. Don't say we didn't warn you though! :-)
Do You Have Questions During the Game?
Do I have to use staircases? No, you can just cross over a field showing a staircase or stop there.
Can I reuse staircases? In principle, you can only enter each field once. This also applies for staircases. However, you can cross off your rescued passengers to re-enter one field at a time. So with two passengers, you could "re-enter" a staircase you've already entered to "exit" from another staircase you've already entered.
Help, I can't move anymore! Oh dear! Have you boxed yourself in? Then try to use your passengers skillfully to cross your previous path, for example. Don't have a passenger in reserve right now? Then remember that you have the chance to roll passengers in each round!
I'm already in the final room, but the others aren't there yet. Well done! Then you don't need to go anywhere and can sit back and relax. The others continue to play like usual until they also reach the final room or you run out of time.
Do I have to roll the exact number to land in the final room? Yes, because you always have to move the full number of pips. But maybe you still have a rescued passenger left to change the die?
Table: Roll a Clue
Have you found a clue? Then roll a white die and check this table to see which rooms the psychopath is NOT in.
First clue
- Roll 1, 2 or 3: He's NOT in a red room!
- Roll 4, 5 or passenger: He's NOT in a blue room!
- Current killer die: yellow
Second clue
- Roll 1 or 2: He's NOT at the stern!
- Roll 3 or 4: He's NOT in the middle!
- Roll 5 or passenger: He's NOT at the bow!
- Current killer die: orange (replaces yellow)
Third clue
- Roll 1, 2 or 3: He's NOT on the upper deck!
- Roll 4, 5 or passenger: He's NOT on the lower deck!
- Current killer die: red (replaces orange)
Fourth clue
- Roll 1, 2 or 3: He's NOT in the larger room!
- Roll 4, 5 or passenger: He's NOT in the smaller room!
- Current killer die: red
Important: The information always means that he's not in any ROOM in the area specified. So "He's NOT at the stern!" means that he's not in any of the rooms at the ship's stern (pool, technical room, spa, cabin).