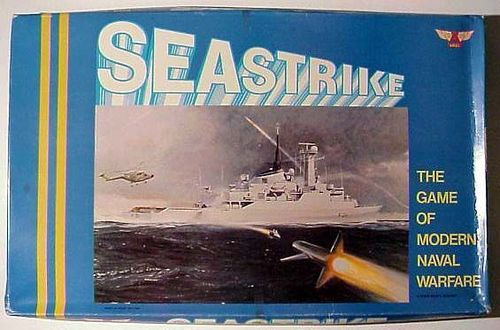
Seastrike
Seastrike Rulebook
Table of Contents
Table of Contents
Brief Description of the Game
First, model islands are laid out on the playing area, and players cut the SEASTRIKE cards for ends. Then, each side draws details of its objective and the sum available to procure forces. All objectives are different, and neither knows what the other has drawn. As the total forces available to each are worth £400 million and the average sum allocated is around £100 million, the decisions are not easy. Forces include missile- and helicopter-carrying surface ships, submarines, aircraft, and land-based surface-to-air missiles. Each side sets up its HQ and deploys its forces.
Then the wargame begins; ships and aircraft are moved, and weapons are fired. Firing, airstrikes, etc., are regulated by turning the SEASTRIKE cards.
The winner is the first side either to achieve its objective or to make it impossible for the other to achieve its objective (in exceptional cases, this alternative does not apply).
The game can last for up to three hours. But, for example, by a successful airstrike on an unprepared enemy, an offensive could be completed in a few minutes.
Contents
SEASTRIKE Naval Wargame Equipment consists of:
- One pack of 80 SEASTRIKE cards
- One numbered set of 18 Objectives
- One set of corresponding summary cards, and 6 blanks (Optional Rules only)
- 8 plain envelopes containing objective and corresponding card
- One Movement Indicator
- One Range Indicator
- Twelve Islands
- One chinagraph pencil
- Two cards containing a summary of main rules
- Two sets of counters etc. (a Red Fleet and a Blue Fleet), each set comprising:
- Twenty-seven ship counters:
- One Cruiser
- Two Destroyers
- Five Frigates
- Five Light Frigates
- Eight Submarines
- Six Missile Patrol Boats
- Twenty "Submarine Blanks" (Optional Rules only)
- Sixteen aircraft counters:
- Eight Strike aircraft
- Eight Interceptor aircraft
- Four land-based Surface-to-Air Missile site counters ("SAM" sites)
- One Command HQ counter
- Six Espionage cards (Optional Rules only)
- Six Counter-Espionage cards (Optional Rules only)
- Twenty-seven ship counters:
Number of Players
For convenience, it is assumed below that there is one player on each side. However, a very interesting game is possible with two or more players on each side: see item 4 of the Rules.
Introductory Game
To get an initial understanding of the fundamentals of SEASTRIKE, it is suggested that a simple version be played as follows:
Observe preliminaries (but reduce the playing area to about 2 x 3 feet). Objectives are not used, and only about four islands are placed.
Each side takes, from its set of counters, one Guided Missile Frigate and one Guided Missile Light Frigate.
DECISION PHASE: Observe steps 1, 8, 10, 11, and 12 only.
ACTION PHASE: Play the game using only the rules for (i) MOVEMENT and (ii) FIRING. Symbols A, © and @ are ignored.
The winner is the first side to destroy the other.
NOTE: Before attempting the full game, it may be useful to carry out some simple exercises involving MPBs, Submarines, Helicopters, and AIRSTRIKES.
Rules
1. Preliminaries
Playing Area
A dining table is ideal. A larger area (a table tennis table or even the floor) provides an interesting if longer game. If possible, the table should have some indication dividing it, across its width, into two equal halves.
Other Equipment
Each player needs paper and pencil. One or two side tables are useful, and a cloth (big enough to cover half the table) is required.
Islands
First, distribute some or all of the islands on the table in a pattern agreed by both players: typically with at least one large island near each end.
SEASTRIKE Cards
Shuffle and place conveniently between players or alternatively divide into two packs, one for each player.
NOTE: When a stack is exhausted, cards are reshuffled and recut.
Decide Ends
Cut the cards: the winner chooses his end of the table, and the loser chooses the Red or Blue fleet.
Objectives
Shuffle envelopes. Each player draws one.
2. Decision Phase
Note that this step involves some of the most important decisions of the game.
The player who lost the cut makes a sketch map of his opponent's half of the table and goes to another room.
Each opens his envelope and reads his objective.
Each chooses the ships, aircraft, etc., he considers he needs, together with the Command HQ counter.
Note: Counters have, on one side, a description of what they represent and their cost. Command HQ costs nothing. Ship and SAM counters have, on the other, symbols indicating firepower. The key will help to interpret these.
Each lists the ships etc., chosen, showing total cost. This is retained: a player claiming a win with forces exceeding Budget loses the game on the basis of having weakened his forces elsewhere.
Each replaces counters etc., except those to be used.
Each replaces Objective in envelope.
The player who stayed behind decides where to set up Command HQ: on any green part of any island on his side (not overlapping the edge of the island) but no nearer the centre line of the table than distance up to the broken line on the Range Indicator, measured from the centre mark on the HQ counter. In the same way, he sets up any SAM sites.
Next, he deploys his ship counters: anywhere on his side so long as none is nearer the centre line than the distance up to the broken line on the Range Indicator, measured from the centre mark on the counter.
He sets out any aircraft along the rear edge of his half. They are assumed to be flown from a base on the mainland, i.e., from just beyond the playing area.
He covers the whole of his half and tells his opponent he is ready. They change places.
The other player sets out his counters etc. in the same way. He tells the first when he is ready.
The first player returns and removes the cover.
The ACTION PHASE can begin.
3. Action Phase
(i) Movement
The player who lost the cut moves first.
He may move all his ships (or less). Then his opponent moves. This completes a MOVEMENT ROUND.
Then (after a FIRING ROUND) there is a second MOVEMENT ROUND; but this time the other player moves first, and so on, with the right to move first alternating.
Ships are moved in any order. None may be moved more than once in a MOVEMENT ROUND.
Movement is regulated either by moving a counter straight ahead (up to its own length) or by using the Movement Indicator as follows:
(a) Place the point of the head of the Indicator next to the bow of the ship.
[Diagram: point of the Indicator head placed at the bow of the ship.]
(b) Keeping the point to the bow, move the Indicator to any angle so long as the side of the head does not overlap the counter.
[Diagram: Indicator set at any angle up to the extremes shown.]
(c) Move the counter so that it is at any position on the Indicator (not overlapping the end) and its side is touching the Indicator.
[Diagram: counter moved to a new position along the Indicator.]
(d) The line from the counter's old position to its new position must not cross another ship (except a Submarine) or land. It is possible to get a counter to a position from which it cannot be moved.
NOTES
Ships cannot move backwards.
When a player is no longer touching the counter, the move is complete and he may not change his mind.
All ships other than submarines have the same maximum speed, i.e., to the end of the Indicator. Submarines move only up to the 2nd mark on the Indicator.
As Missile Patrol Boats may turn more sharply than other ships, use the other end of the Indicator, e.g.:
[Diagram: MPB making maximum turn at maximum speed.]
Ignore the first mark on the movement indicator—used for optional rules only. The first mark on the movement indicator shows half speed for surface ships—see Effect of Hits and Optional Rules.
(ii) Firing
After a MOVEMENT ROUND, the player who moved first may fire all the offensive weapons of any one ship in range of a target.
Then the other player may fire the offensive weapons of any one of his ships in range of a target.
Firing alternates by ship, but if only one player has ships in range, he may fire them all, or, if he has more in range than his opponent, he may fire all remaining ships when alternate firing is completed.
Ships may fire in any order so long as none fires more than once in a FIRING ROUND.
When all ships in range have fired, a FIRING ROUND is complete.
NOTE: When there are a number of counters on the table, players may find it necessary to indicate which have fired (or suffered a SYSTEM FAILURE, see below) during a FIRING ROUND. This is conveniently done by turning a counter over after it has fired.
Firing is regulated as follows:
A. THE WEAPONS
There are basically four offensive weapons:
- SURFACE-TO-SURFACE GUIDED MISSILE (Launcher shown as "◩" or as "⊠" for short-range version). Can be fired at any ship except a Submarine, and also at HQ and at SAM sites.
- GUN (shown as "⟥"). Can be fired at any ship except a Submarine.
- ANTI-SUBMARINE WEAPON (Depth charges, rockets, torpedoes, or guided missiles). Launcher shown as [ASW launcher symbol], or as [long-range ASW symbol] for the long-range version. Can be fired only at Submarines.
- GUIDED TORPEDO (Launcher shown as the torpedo symbol). Fired only by Submarines (at any ship, including another Submarine) and by Helicopters.
B. RANGE
The range for each weapon is shown against the symbol on the Range Indicator. Measured from the centre of the symbol on the firing ship to the centre of the symbol on the target.
C. DIRECTION OF FIRE (J, §§ and 4 only)
Any direction, so long as the line from [symbol] to [symbol] does not cross [symbol] (or, in the case of MPB, [symbol] only)) on a ship counter (Submarines excluded) or the brown part of any island.
D. HOW TO FIRE
First, state which weapon and which target.
Then, turn a card from the stack:
If it has a cross in the center, the weapon is serviceable and your fire control has locked onto the target. This is a FIRE CONTROL card.
If no cross, either the weapon is not serviceable or you have not acquired the target, and that weapon cannot be fired during the current FIRING ROUND.
Then, for ⊠ and ◩ turn one more card. For any other weapon, turn two cards.
The above three steps are repeated for each weapon in range of a target.
E. WHEN IS TARGET HIT?
Each card has four segments: ⊠ (including ◩), ⟥, Δ (including [long-range ASW symbol]) and [torpedo and remaining segment symbols, not recoverable from the source text].
If the relevant segment is blank or shows a hit on a weapon not carried by the target, the shot has missed. But note that, whatever symbol shown, MPBs (Missile Patrol Boats) are destroyed by any hit (remove from game). Otherwise, any weapon shown in the segment is destroyed and should be crossed out using the chinagraph pencil on the target counter. If two weapons are shown, the target loses both if it has two and one if it has one.
Other Symbols That May Be Shown Mean:
Major hit. Effect:
- Cruiser seriously damaged: Reduce to half speed. (Second major hit cripples Cruiser: remove from game.)
- All other ships sunk or disabled: Remove from game.
- SAM site destroyed and HQ hit.
Serious below-decks damage. Effect:
- First hit: MPB sunk: Remove from game.
- Destroyer, Frigate, and Light Frigate reduced to half speed.
- Cruiser unaffected.
- Second hit: Destroyer, Frigate, and Light Frigate crippled: Remove from game.
- Cruiser reduced to half speed. (Note that, for Cruiser, a serious below-decks hit is equivalent to two "below decks" hits.)
- Third hit: Cruiser crippled: Remove from game.
(Draw a single line through the below-decks symbol for each hit.)
Fire Control Equipment hit. Effect:
- First hit: All weapons, except Helicopters, on the ship require two FIRE CONTROL cards before firing (if the first fails, no need to turn the second).
- Second hit: All weapons, except Helicopters, require three FIRE CONTROL cards.
- And so on. (Draw a single line through the fire control symbol for each hit.)
F. SYSTEM FAILURE
If this card is turned, the ship cannot fire any further weapon (offensive or defensive) during the current FIRING ROUND.
NOTE: All combat during a FIRING ROUND is assumed to take place broadly simultaneously. Therefore, a weapon may attempt to fire at only one target. In particular, if it fails to fire or succeeds with the first of two shots, it may not be switched to another target.
(iii) Submarines
Although Submarines are moved and fired basically in the same way as other ships, there are two differences:
Submarines can move under other ships.
Two rules apply to Guided Torpedoes ([torpedo symbol] and [long-range torpedo symbol]):
(i) The line from [symbol] to [symbol] must not cross any part of an island. (This applies also to anti-submarine weapons, Δ and the long-range ASW symbol.)
(ii) They can be fired only into an area forward of [symbol].
[Diagram: "Torpedo can be fired only at target in shaded area" (note how this enables a submarine to be outmanoeuvred). Not to scale.]
(iv) Helicopters
The Helicopter symbol represents a Helicopter. It has the longest range of all weapons (see Range Indicator) and may be used in an anti-submarine or anti-surface ship role. When a player is firing from a ship carrying a Helicopter and he wishes to use it, the procedure is as follows:
Check for serviceability by turning a card: A cross at the center means it is serviceable. If not, it cannot fly during the current FIRING ROUND. If a ship carries more than one Helicopter and it is intended to use more than one, serviceability cards should be turned for both (or more in the case of a Cruiser) before firing.
Indicate target: One or more targets if more than one Helicopter is available. Note: The line from [symbol] (parent ship) to [symbol] (target) may cross any ship or any land.
Then, if the Helicopter target is protected by surface-to-air missiles (SAMs), the defender may fire these. There are two types of SAM:
AREA DEFENSE SAMs (⧮) can defend any target within range ([symbol] to [symbol]) crossing any land or any ships shown on the Range Indicator.
POINT DEFENSE SAMs OR AA GUNS (the point defence missile symbol and the point defence gun symbol) can defend only the ship on which they are mounted.
Turn one Fire Control card for each SAM, and (if successful) two cards for the shots: A RED CROSS at the centre means a helicopter shot down: cross out the symbol on the parent ship.
If the Helicopter survives, it fires at the target: Turn a FIRE CONTROL card, and if successful, two cards for the shots. Use the Δ segment on cards in anti-submarine role and the torpedo segment in anti-surface ship role. This represents a guided missile or torpedo.
NOTE 1. SYSTEM FAILURE: Effect:
HELICOPTER: If turned at serviceability check, it has crashed on takeoff: cross out the symbol. If turned during firing, the attack fails (although an already successful first shot stands).
SYSTEM FAILURE does not prevent other weapons on the parent ship from being fired.
DEFENSE WEAPONS: If a ship suffers SYSTEM FAILURE, it cannot fire again (any weapon) during the current FIRING ROUND.
NOTE 2. DEFENSE WEAPONS (the point defence gun, the anti-SSM point defence symbol, and ⧮): Once used (even without success), they cannot be used again (against another Helicopter or a Strike Aircraft) during the current FIRING ROUND. (Remember the note about simultaneous combat.) It may be helpful to keep a separate note of defense weapons used.
(v) Airstrikes
During a FIRING ROUND, when it is his turn to fire (whether or not he has a ship in range of a target), a player with any Strike Aircraft may attempt to launch an AIRSTRIKE against any target anywhere on the playing area. He may attempt to do so only once during the FIRING ROUND, but in doing so, may use all serviceable Aircraft. Afterwards, the turn to fire reverts to his opponent. Having attempted an AIRSTRIKE, he may not do so again until the next FIRING ROUND but one.
(Note that there is assumed to be a FIRING ROUND between each MOVEMENT ROUND, even though no weapon is fired.)
Procedure:
Check for availability and serviceability by turning a card for each Strike Aircraft (as for a Helicopter). If none or, in the attacker's opinion, insufficient aircraft have taken off, he may abandon the AIRSTRIKE: play reverts to the opponent.
Indicate the target by putting counter(s) next to it: one or more targets if more than one counter is available.
Next, if the defender has any Interceptor Aircraft, he turns a card for each to check serviceability. Note: They may only defend counters with [symbol] in his half of the table, as beyond that, it is assumed the attack cannot be detected in time.
Defender indicates his target (Strike Aircraft) by putting serviceable Interceptor counter(s) next to it: one or more targets if more than one counter is available.
Defender turns two cards for each Interceptor: If either shows a RED CROSS, the target (Strike Aircraft) is shot down: remove from the game.
Interceptors return to base.
Then, if the AIRSTRIKE target is protected by SAMs, the defender may fire these: procedure as for Helicopter attack. If Strike Aircraft is shot down, remove from the game.
Surviving Strike Aircraft attack target(s): For each aircraft, turn four cards; a RED CROSS is a hit. Effect:
- One hit: Destroys SAM site, MPB, or Submarine.
- Two hits: Destroys Command HQ, Destroyer, Frigate, or Light Frigate.
- Three hits: Destroys Cruiser.
For a lesser hit (e.g., one hit on a Frigate), the effect is as shown under [symbol] on the card having RED CROSS.
Strike Aircraft return to base.
NOTE 1. SYSTEM FAILURE: Effect:
AIRCRAFT: If turned at serviceability check, it has crashed on takeoff: remove from game. If turned during an attack, return to base.
DEFENSE WEAPONS: If SYSTEM FAILURE is turned, the ship or SAM site cannot fire again (any weapon) during the current FIRING ROUND.
NOTE 2. DEFENSE WEAPONS (the point defence gun, the anti-SSM point defence symbol, or ⧮): Once used (with or without success) during an AIRSTRIKE, they cannot be used again (i.e., against a Helicopter) during the current FIRING ROUND.
(vi) Conclusion
When a player considers he has achieved his main Objective, he tables that Objective. If he is right, he is the winner, UNLESS his opponent can show he overspent his Budget (see DECISION PHASE), in which case the opponent wins. If he is wrong, the game continues.
When a player considers he cannot achieve his main Objective, he tables that Objective and withdraws. His opponent wins UNLESS his (the opponent's) Objective does not include the alternative of winning in this way, in which case the game continues.
4. Four or More Players
Each side decides who is to be its Commander-in-Chief (C-in-C).
DECISION PHASE: The C-in-C consults with colleague(s) but makes all final decisions.
ACTION PHASE: The C-in-C gives instructions, but ships are moved and fought by his junior colleague(s). (If more than one, the C-in-C will have allocated specific responsibilities.)
Procedure:
(a) Before a MOVEMENT ROUND, the C-in-C may consult his colleague(s) and will give instructions (open or concealed). But, during the MOVEMENT ROUND, his colleague(s) will move the ships (NOT necessarily as instructed), and the C-in-C will take no part in this (even advisory).
(b) After a MOVEMENT ROUND is completed and before a FIRING ROUND begins: The C-in-C may consult and will give instructions. But, during the FIRING ROUND, his colleague(s) will decide which weapons to fire, at what targets, and in what order (NOT necessarily as instructed). The C-in-C will take no part in this (even advisory) except: (1) To initiate AIRSTRIKES (guided to target by a colleague). And (2) To initiate interceptor sorties (likewise guided to target).
Throughout the game, the C-in-C remains seated at his end of the table.
If the Command HQ is destroyed (see below), whether or not part of the enemy's Objective: C-in-C is killed: He takes no further part in the game (even advisory), and his side is deprived of Strike or Interceptor aircraft. Also, if there are two other players on his side, they may not consult about tactics or strategy, as the HQ was also a communication center.
The Command HQ is destroyed by two hits (not necessarily during the same FIRING ROUND), i.e.: Two missile hits (⊠ or ◩) [major hit symbol] on card; or Two AIRSTRIKE hits (RED CROSS on card), or One of each.
5. Optional Rules
When the basic rules of SEASTRIKE are mastered, it will be possible to obtain more realism and interest by adopting some or all of the following optional rules.
(i) Weather
Before the start of the first MOVEMENT ROUND, check the weather by turning up to four cards, starting with the player who won the draw, until two in succession show the same centre marking. Effect:
- Two blanks: GOOD weather
- Two RED Crosses: STORM
- Two BLACK Crosses: FOG
During a STORM, special rules apply:
- Aircraft and Helicopters cannot fly.
- All weapons require an extra FIRE CONTROL card (i.e., turn two cards before firing, or more if a fire control equipment hit, if first fails, second need not be turned).
- MPBs cannot move or fire.
- Other surface ships are reduced to half speed, i.e., they may move up to the first mark on the Movement Indicator. Ships already at half speed cannot move. Submarines are unaffected.
During FOG: Aircraft and Helicopters cannot fly; otherwise, no change.
Weather Duration and Change:
SEASTRIKE takes place in "real-time", so once the weather is established, it should probably not change for the entire game. This provides a realistic element of risk in choosing Aircraft and MPBs. However, some players may prefer to re-check the weather after every three complete rounds (i.e., before the fourth MOVEMENT ROUND, etc.). If so, weather may not change directly from STORM to FOG or vice versa. (This may mean turning more cards.)
NOTE: SYSTEM FAILURE card has no special significance in establishing weather.
(ii) Hidden Submarines
As a Submarine is always submerged, a player will first use not the Submarine counter, but TWO Submarine Blanks, keeping the counter hidden from the opponent. On the blank side of one of each pair, during the DECISION PHASE, the player marks "S" or "MS". The blanks are used with this side downwards. Each blank has a different letter on the top; each player should keep a private note that, for example: B = "S" and C = "MS" etc. A blank is moved as if it were a Submarine counter.
When any of the enemy's [torpedo symbol], Δ, [symbol], or [symbol] comes into range of a Blank, the enemy indicates it as a target and gets a FIRE CONTROL card. The Blank is turned: If neither "S" nor "MS" shows, remove it from the table, and the enemy weapon cannot fire again during the current FIRING ROUND. If "S" or "MS" shows, replace it with the Submarine counter and carry out normal attack and defense procedure.
If a Strike Aircraft scores a hit on a Blank: Remove from game. Even if "S" or "MS" shows, it is not replaced, as the Submarine is destroyed. Opponent is not told of the result.
If a player wishes to fire [torpedo symbol], ⊠, or [PDG symbol] from an undisclosed Submarine, he first replaces the Blank with the correct counter, showing the opponent the Blank's underside first.
During the DECISION PHASE, extra Submarine Blanks may be bought at a cost of £1 million each, allowing players to increase deception about the position of actual Submarines.
(iii) Gun as Defensive Weapon
In the basic rules, the Gun (⟥) is regarded as an offensive weapon. But its more important role is defensive: Anti-aircraft, Anti-helicopter, Anti-missile.
In a FIRING ROUND, a Gun may be used either: As in the basic rules, using the ⟥ segment on cards, OR exactly as if it were a Point Defence weapon ([anti-SSM point defence symbol]), hits being established by a RED CROSS in the centre of the cards. BUT NOT BOTH.
"Not both" because of the basic concept that all action during a FIRING ROUND takes place broadly simultaneously. The tactical effect of this concept is that it puts a premium on combined attacks on one target and provides a dilemma for the defender. For example: A player operating a Frigate may be reluctant to use his Gun offensively because of a possible AIRSTRIKE. But, when the AIRSTRIKE comes, he is still undecided because he may need the Gun for protection against a possible Helicopter and Missile attack.
(iv) Anti-SSM Missile
[anti-SSM point defence symbol] represents a Point Defence SAM with anti-Surface-to-Surface missile (SSM) capability, in addition to its anti-Helicopter and anti-Aircraft role. If a ship so equipped is under [symbol] or [symbol] attack, when the attacker gets a FIRE CONTROL card, the defender may attempt an anti-SSM defence: Turn FIRE CONTROL card. If successful, turn two cards for the shots. A RED CROSS means missile shot down, and the attack fails.
NOTES: SYSTEM FAILURE: If turned, the ship cannot fire again (any weapon) during the current FIRING ROUND.
Once [anti-SSM point defence symbol] is used (successful or not), it cannot be used again (i.e., against another missile, Helicopter, or Strike Aircraft) until the next FIRING ROUND.
The above rules also apply to the Gun when used in anti-SSM capacity (see Option (iii)).
Note: Optional Rules (iii) and (iv) probably make it essential to keep a clear, separate note of which defensive weapons have been used during a FIRING ROUND.
(v) Airstrikes 🛦
Continue with basic rules but incorporate the following:
- Concealed Aircraft
During the DECISION PHASE, a player initially keeps all aircraft counters selected concealed from his opponent. When he wishes to use one (or more), he takes it (them) and places it at his end of the table.
NOTE: This, together with the Hidden Submarine option, enables a player to deceive his opponent about his true strength.
- Target Location
Divide serviceable Strike Aircraft into one or more "Groups" (a Group may comprise one Aircraft). Indicate target for each Group, and whether it is a High or Low level attack. Then, each Group must find its target:
(i) This is automatic (normal rules apply) if:
(a) The target is land-based; or
(b) The target is within "horizon range" of one of the attacker's ships, one of his SAM sites, or his HQ, and there is no Brown Land between the target [symbol] and [symbol] on the ship, SAM site, or HQ.
NOTES: (1) "Horizon range" is [symbol] to the broken line on the Range Indicator.
(2) A hidden Submarine must be declared if it is to be used to guide an AIRSTRIKE.
(ii) Otherwise, turn one card for each Group: If any cross appears at the centre, target found. If no cross, the Group returns to base.
NOTE: Interceptors may now tackle a Group rather than an individual Strike Aircraft, thus one Interceptor could shoot down two Strike Aircraft.
- Low-level Attack
The attacker may declare a low-level attack: If so, the defender may not use Area Defense SAMs (⧮) in range if the line from [symbol] (SAM) to [symbol] (AIRSTRIKE target) crosses Brown Land or [symbol] (MPB: [symbol]).
NOTES: (1) This low-level attack rule may be adopted for all Helicopter attacks.
(2) Attacks on a Submarine will always be at low level.
- High-level Attack
Alternatively, the attacker may declare a high-level attack (he must choose one or the other): In this case, all Area Defense SAMs in range are fully operative. However, a hit (RED CROSS) by a Point Defense SAM ([PDG symbol] or [anti-SSM point defence symbol]) destroys not the Aircraft, but the missile it fires. i.e., The attack fails, and the Aircraft returns to base.
NOTE: When Gun (⟥) is used in anti-aircraft capacity (see option (iii)), treat it as a Point Defense SAM ([anti-SSM point defence symbol]).
(vi) Strengthened HQ
During the DECISION PHASE, a player may elect to strengthen his Command HQ. Each time it is strengthened costs £3 million and means that the enemy needs one extra hit (⊠, ⊠, or AIRSTRIKE) to destroy it. During the DECISION PHASE, make a note of each such strengthening and retain it to show the opponent when necessary.
(vii) Hydrofoil MPB
At a cost of an extra £2 million each, a player may elect to operate MPBs as Hydrofoil Missile Patrol Boats (HMPBs). Mark an "H" on the top of an MPB counter for each HMPB selected.
The rules for HMPBs are exactly as for MPBs, except:
They are faster: Unlike all other ships, the counter can be placed beyond the end of the Movement Indicator, provided it is touching it and parallel to it, e.g.:
[Diagram: HMPB making maximum turn at maximum speed.]
They are operative (movement and firing) during a STORM, same rules as other surface vessels.
They cannot be hit by torpedoes fired from a Submarine.
(viii) "Over Horizon" Missile
At a cost of £3 million per ship, ships equipped with long-range SSMs ( ⊠ ) can be converted to provide them with the capacity to fire their SSMs beyond their radar horizon.
-
Mark "X" on ship counters so converted.
-
When a player wishes to fire an "over horizon" missile, he must:
(a) Have another surface ship (other than MPB):
Within [symbol] range of his target (line from [symbol] to [symbol] not crossing Brown Land or any [symbol] (MPB: [symbol])).
Within horizon range ([symbol] to the broken line on the Range Indicator, ignoring obstacles).
(b) Turn FIRE CONTROL card to determine whether the SSM is serviceable and launched.
(c) If successful, turn another FIRE CONTROL card to determine whether the missile has been acquired by the second ship and guided to target.
(At this stage, the target may deploy any available anti-SSM weapons: see rule at (iv) above.)
(d) If (b) and (c) are successful, and any anti-SSM weapons are unsuccessful, turn the final card to determine whether the SSM has hit the target (SSM segment).
- "Over horizon" missiles can always be fired as normal SSMs, in which case, usual rules apply.
NOTE: An over horizon missile can cross any obstacle between launcher [symbol] and target [symbol].
(ix) Espionage
During the DECISION PHASE, a player may decide to make use of Espionage forces to attempt the discovery of the enemy's Objective or use Counter-Espionage forces to protect his own. Espionage and Counter-Espionage cards cost £2 million each; a player may buy up to three of each.
Before the ACTION PHASE, each player stacks his Counter-Espionage cards (if any) together with his summary Objective Card (anywhere in the stack) and three blank cards, face down on the table. Then, each player takes one card from his opponent's stack, plus an additional card for each Espionage card he declares. He retains the cards so picked. All remaining cards (unexamined by either player) are put to one side.
A player may now know his opponent's Objective. He need not reveal this until it suits him to do so. Example: If he considers his opponent cannot achieve his Main Objective, he may table the card and challenge him to show how he can.
(x) Systems Failure
Instead of the usual rule, the Systems Failure card will have the following effect:
- ⊠ ◩: Further SSMs may not be fired from the ship during the current FIRING ROUND.
- ⟥: Guns may not be fired from the ship (attack or defence) during the current FIRING ROUND.
- Δ [symbol]: Anti-submarine weapons may not be fired during the current FIRING ROUND.
- [torpedo symbol]: No change.
- ⧮ [PDG symbol] [anti-SSM point defence symbol]: SAMs may not be fired from the ship (or SAM site) during the current FIRING ROUND.
- [symbol]: No change.
- AIRSTRIKES 🛦: No change.
The effect of the above is that Systems Failure affects a class of weapon, not all weapons on a ship. A separate note should be made of any inoperable weapons.
(xi) Missile Submarine
In a particular FIRING ROUND, Missile Submarines may fire torpedoes from ⊠ counting as [torpedo symbol] on cards. However, a hit on [torpedo symbol] on a Missile Submarine will then count as a hit on from ⊠ (as printed).
(xii) MPBs: Range and Expenditure of Missiles
At a cost of £1 million each, MPBs or HMPBs may be converted to carry long-range SSMs. To indicate this, mark both ⊠ symbols so that they become [long-range SSM symbol] (as printed).
More short-range than long-range SSMs can be carried: 8 short-range or 4 long-range. Pencil a different number on each MPB and HMPB, and on separate paper, record each missile that is fired. When all missiles are fired, the MPB or HMPB takes no further part in the game except to move and defend itself against air attack. Such an MPB or HMPB is not counted as having been made ineffective.
NOTE: It is assumed that larger vessels carry enough missiles to last throughout the game.
(xiii) Extending ASW, SAM, and Gun Ranges
At a cost of £1 million for each weapon converted, the range of the following weapon systems can be extended as follows:
- Pencil in [ASW symbol Δ] so it appears as [ASW symbol Δ], and use [symbol].
- Pencil in ⧮ so it appears as ⧮, and use ⊠.
- Pencil in ⟥ so it appears as ⟥, and use ⧮.
(The symbol positions in this option were not fully preserved in the source document; the entries above follow the order printed.)
Otherwise, the rules for these weapons are unchanged.
(xiv) Anti-MPB Weapons
The Table of Contents lists this option, but no rules text for it appears in the source document. It is not transcribed here.
Appendices
Appendix I: Other Games
Using the SEASTRIKE cards, islands, counters, etc., and observing the basic rules and any optional rules, it is possible to evolve an almost infinite range of naval actions, from the very simple to the highly complex.
For example:
- One anti-submarine Light Frigate vs. one Submarine. Each side has the same budget (say, £80 million, or £300 million for a long and complex game, preferably over a large area). The first to destroy half the enemy's forces (in value) is the winner.
- Submarines and Aircraft vs. convoy protected by Frigates and Destroyers. Use Submarine Blanks as merchant ships. How many can be brought safely from one end of the table to the other? (Any hit sinks a Merchant Ship.)
And so on. Players will have no difficulty in evolving other games.
Appendix II: Analysis of SEASTRIKE Cards
There are 80 cards in the deck:
- 40 cards have crosses at the center (for FIRE CONTROL, Aircraft and Helicopter serviceability, Strike Aircraft target location, and over-horizon acquisition).
- 20 are RED (AIRSTRIKE and SAM hits and GALE).
- 20 are BLACK (FOG).
- 40 cards have blanks at the center (target not acquired or located, Aircraft and Helicopter unserviceable, and GOOD weather).
There are 4 SYSTEM FAILURE cards.
Weapon hits distribution:
- SSM (⊠): 23 major hits, 5 [symbol], 2 [symbol], and 14 miscellaneous (44 hits out of 80 possible).
- Gun (⟥): 4 [symbol], 4 [symbol], and 32 miscellaneous (40 hits out of 80 possible).
- Airstrike (🛦): 2 [symbol], 2 [symbol], and 16 miscellaneous (20 hits out of 20 possible).
- Δ (ASW): 10 major hits, 8 fire control hits, 10 [torpedo symbol], and 8 SSM hits (36 hits out of 80 possible).
- Torpedo: 11 major hits and 18 [symbol] (29 hits out of 80 possible).
(Bracketed entries are symbols whose glyphs did not survive the source text; they are transcribed in position as printed.)
Appendix III: Designer's Notes
SEASTRIKE contains a number of assumptions and compromises. For example:
SCALE: Although speed and range are broadly to scale, ship counters are much larger than that scale; otherwise, a ship would be about 1 mm long. The ranges of submarine warfare weapons are not strictly accurate.
SPEED: All ships (except submarines and HMPBs) are assumed to have the same maximum speed.
FIREPOWER: Account is not taken of the effect of distance on a shot, the difficulty of firing a torpedo at a receding target, and the fact that ships carry limited numbers of missiles, etc. A "shot" normally represents a salvo.
FIRE CONTROL: This is greatly simplified.
STANDARD TYPES: Although ship types are not meant precisely to represent serving or proposed warships, weapons fit, etc., closely follows present international trends. One problem is that Soviet warships appear to carry more weapons than their Western counterparts.
RANGE/FUEL: This is assumed not to be a problem because of the small area over which action takes place.
AEW/ECM, etc.: No attempt is made to simulate Airborne Early Warning systems, Electronic Countermeasures, decoy targets, etc., although account was taken of them in calculating the odds.
AIRSTRIKES: The apparent speed with which aircraft return to the fray (i.e., every other FIRING ROUND, equivalent to, say, ½ hour of "real time") is based on the assumption that: Each side has stronger air forces than the individual counters represent. Although they are engaged in conflict on other fronts (with losses proportionate to those suffered in the game), priority can be given to aircraft availability for this front.
ENEMY DEPLOYMENT: It is assumed that, immediately before the first MOVEMENT ROUND, each side has flown reconnaissance missions to discover enemy deployment.
VALUES: The values specified for ships, aircraft, etc. are roughly equivalent to real values in early 1973. Although they will change, relative values should remain broadly accurate.
CAPITAL SHIPS: Neither side is able to deploy major ships, such as Aircraft Carriers or Nuclear Submarines. The Cruiser is the exception.
MINES: Because of risk to its own shipping, neither side is prepared to lay mines in these waters.
HELICOPTER RANGE: It is assumed that both sides have decided to limit the distance that helicopters are to fly from their parent ships. There would be good operational reasons for such a decision.
SURFACE-TO-AIR: No account has been taken of any possible SAM surface-to-surface capability.
Appendix IV: Hints on Play
Luck plays a major part in SEASTRIKE: the outcome of a game may appear to depend on the turn of a card. But success really comes from harnessing luck to your side: unless you have the right weapon in the right place at the right time, you will not be able to turn that card.
Get to know the capabilities and disadvantages of the pieces and weapon systems. Study Appendix II.
Take time over the Decision Phase: Your resources are limited and you have no information about the enemy's plans. Normally, it is best to aim for a well-balanced force. Certainly, you should plan a clear but flexible strategy and take care in deploying your forces.
Deceive the enemy about your real strength. Use of the opportunities for this (Optional Rules) usually pays off.
Take care in using the Movement Indicator. Plan ahead: A ship moved to the wrong position may take two or more rounds to get into action, or out of danger.
Make use of the advantage of a combined attack on a single target.
SEASTRIKE is not a balanced game: Objectives differ, the layout of islands may favor one side, cards may fall badly, etc. But it is more balanced than would be the case in reality, when: Weapons would not have the same performance. Ships would not have the same weapons fit, etc. A player who feels, as the game develops, that he has little chance of winning, may not have thought out his position carefully enough. And, in any case, it is a test of tactical skill to hold out against unfavorable odds; perhaps circumstances will change.
Appendix V: Substitution of Models for Warship Cards
A large number of wargame players use models in their games, preferring the visual effect and the pleasure of handling them. None of this affects the play of the game, but this same preference is evident amongst, for example, chess players who are lucky enough to possess sets representing human figures and animals.
Those who wish to use models in SEASTRIKE may, if they have time and nimble fingers, make them up themselves. Otherwise, they can be obtained from: SKYTREX, 28 Church Street, Wymeswold, Leicestershire (address as printed).
These models are to a scale of 1/3000 and represent the types available in SEASTRIKE. Skytrex intends to add to their range models of actual ships in service in the World's Navies.
No change is needed in the play of the game, but the following amendments are needed to cover the use of models:
- Each model should be glued to a rectangular piece of thin card, the length of the model and its maximum width. This is to facilitate the use of the movement indicator.
- For identification, the base should be painted either grey or green.
- Each model must be marked with a distinctive identification letter or number. The same number must be marked on the corresponding ship blank.
- Players must agree on which part of each model represents [symbol] for ranging purposes. This could normally be the center of the bridge/control complex or a small paint mark on the model.
Models are moved and fired exactly as in the rules, while the corresponding ship blanks are kept by each player and marked off in the normal way. Submarine blanks, if used, are deployed in the normal way, but a model submarine is substituted when an active blank is revealed.
For further visual effect, the card islands may be replaced by model islands, with the high (brown) terrain modelled in sculpted polystyrene, plasticene, or any proprietary modeling compounds.
The real expert may wish to make up minute aircraft attached to a thin wire support mounted on a small stand: a piece cut from a 4" dowel would suffice.
Appendix VI: Designing Your Own Ships
The advanced player may wish to add to the game by inventing and making up his own ships, either imaginary types or adapted from real vessels in service. For this purpose, we set out points values for hull sizes and weapons and give limitations on the type and quantity of weapons that a given hull class can mount.
Weapons values include all ancillary equipment, detection, fire control, storage, and crew spaces required. Long-range surface-to-air missile systems, for example, require relatively large ship volumes, besides being expensive in themselves, while a modern automatic gun is both cheaper and very compact, not even requiring crew spaces for the gunners no longer used.
Long-range anti-submarine weapons are not very expensive in themselves, but require very expensive long-range sonar equipment if they are to be effective.
A weapon symbol may not necessarily represent a single weapon, but rather a capacity for engaging a single target. An anti-aircraft missile launcher with only one guidance radar may therefore be represented by a single symbol, one with two guidance radars by two symbols.
Similarly, a gun symbol may represent a mounting with a single gun or two or more slower-firing or smaller guns with the same weight of fire. Values have been adjusted to make home-designed ships slightly more expensive than directly equivalent standard types supplied with the game, just as a small country that insisted on building warships in its own yards would have to pay over the odds in real life.
5 points are equivalent to £1,000,000.
Points values of current ship types. To determine total cost, add:
- The hull value.
- The total value of all weapons.
- 3 points for each weapon type (symbol) used.
Hull values and carrying capacity
| Hull Type | Hull Value | Maximum Symbols Hull Can Carry | Hits to Sink |
|---|---|---|---|
| Patrol Boat | 1 | 3 | 1 |
| Light Frigate | 10 | 5 | 2 |
| Frigate or Destroyer Escort | 25 | 8 | 2 |
| Destroyer | 60 | 13 | 2 |
| Cruiser | 130 | 24 | 3 |
| Battleship | 200 | 30 | 4 |
| Light Carrier |
Note: assume helicopter symbol = 2 symbols.
Points values of weapons and ship limits
Columns: Weapon name, symbol, value, then maximum number carried in MPB, Light Frigate, Frigate, Destroyer, Cruiser, Submarine, Missile Submarine, Nuclear Submarine.
| Weapon | Symbol | Value | MPB | Lt Frig | Frig | Dest | Cruiser | Sub | Miss Sub | Nuc Sub |
|---|---|---|---|---|---|---|---|---|---|---|
| SSM (long range) | ◩ | 12* | 2 | 2 | 3 | 4 | 8 | 0 | 0 | 2 |
| SSM | ⊠ | 5* | (blank) | (blank) | (blank) | (blank) | (blank) | (blank) |
Note: A hit on [symbol] on a SEASTRIKE card = hit on [symbol] where only these are carried.
Points values of obsolete ship types
This section is included so that obsolete vessels of later World War II types can be used. These are assumed to have been updated as far as is reasonably economical, so they all have radar and are subject to the same target acquisition rules as modern ships.
When using Optional Rule (x) Systems Failure, Heavy Guns (⧃) count as a separate class, so that Systems Failure with ⧃ does not affect other weapons ⟥.
Some weapons will not be available to them, but a further weapon type is needed, representing guns of from 5.9" to 8" calibre. We do not think it necessary to make provision for battleship calibers, as the last of these have now disappeared.
No distinction is made between calibers within the range, as with the disuse of heavy side armor, the extra vulnerability to light weapons inherent in radar arrays, and the greater shell weight compensated for by a faster rate of fire.
Use one ⧃ for every 3 weapons of 5.9" to 8" calibre carried by the prototype. The effect is equivalent to that of one (X) at [symbol] range and to two ⟥ at ⟥ range. Missiles and aircraft cannot be engaged.
All ⧃ on one cruiser must engage the same target in any one firing round.
Where ships of this vintage use guns from 3.5" to 5.1" calibre: Count two of these as one ⟥. Count one 5.25" gun as one ⟥.
Aircraft can be engaged, but not missiles.
Two 3", four 40mm, or eight 20mm count as one [PDG symbol]. They can only engage aircraft.
Four or five torpedo tubes count as one [torpedo symbol].
Hull values for obsolete ships
| Hull Type | Hull Value | Maximum Symbols Hull Can Carry |
|---|---|---|
| Corvette | 5 | 4 |
| Frigate or Destroyer Escort | 10 | 6 |
| Destroyer | 15 | 8 |
| Cruiser | 60 | 20 |
| Submarine | 10 | 1 |
Corvettes and submarines move only half the distance of other vessels.
Weapons values and maximum numbers in obsolete ships
Columns: Name, symbol, value, then maximum number in Corvette, Frigate, Destroyer, Cruiser, Submarine.
| Name | Symbol | Value | Corvette | Frigate | Destroyer | Cruiser | Submarine |
|---|---|---|---|---|---|---|---|
| Heavy Gun | ⧃ | 15 | 0 | 0 | 0 | 5 | 0 |
| Gun | ⟥ | 6 | 1 | 3 | 4 | 8 | 0 |
| PDG | [PDG symbol] | 3 | 1 | 2 | 4 | 12 | 0 |
Some obsolete cruisers have been converted to carry one or two ⧮ or four [symbol] instead of half their original armament. These have a hull value of 90. Some smaller nations still have obsolete light aircraft carriers of cruiser size which can no longer operate fixed-wing aircraft. These can be given up to 8 [symbol] and up to 8 [PDG symbol] as their only armament and have a hull value of 60.
Notes:
- When firing at an obsolete cruiser, count a hit on ⊠ as a hit on [symbol].
- When firing at an obsolete surface ship carrying [torpedo symbol], count a hit on Δ as a hit on [torpedo symbol].
Modern Supplement (2025 Additions)
The sections below are the 2025 modern additions to the source document (Cold War Options, Post Cold War Options, the modern symbols legend, the ship comparison table and the usage notes). They are not part of the original 1973 rules and are optional.
Cold War Options
(i) Nuclear Submarines: At a cost of £10 million, submarines may be converted to nuclear power. Mark the counter "N".
A nuclear submarine may move at the same speed as surface ships.
(ii) Airborne Early Warning (AEW) aircraft: At no extra cost, aircraft may be converted to an AEW role. AEW Aircraft remain on table till the end of the game or shot down. While on table any draw for an Interceptor to launch may be redrawn.
(iii) Anti-submarine aircraft: At no extra cost, aircraft may be converted to an A/S role. Mark the counter with the letters "AS".
An A/S aircraft may search and attack similarly to a helicopter, with range similar to an AIRSTRIKE (🛦).
(iv) Quiet Submarines: At a cost of £5 million, submarines may be made more difficult to detect. Mark the counter "Q". Instead of a normal FIRE CONTROL card (Basic Rule 3.4), the attacker must turn a RED CROSS for detection.
Mark the submarine counter and the underside of both or all relevant blanks with a "Q" and declare this fact when the blank is indicated as a target.
(v) Advanced Sonar: At a cost of £2 million each, the Cruiser, submarines, destroyers, frigates, and light frigates may be fitted with ultra-sensitive sonar equipment (sonar TAS and VDS) (mark counter with "U"). This counters use of rule 3.2.2 (Quiet submarines). Both RED and BLACK crosses detect submarines.
(vi) Cruise Missiles: [cruise missile symbol] or [cruise missile symbol]
At the same cost, ships or submarines may be armed with Cruise Missiles ([cruise missile symbol]) instead of SSMs (⊠ or ◩). Cruise missiles have the same range as SSMs. They may be fired at Land targets (HQ, batteries) without penalty for flying over land. Land targets suffer the same impact as guns (⟥). Cruise missiles may be fired at ships like SSMs but they only draw one card to hit instead of two. Anti-aircraft fire vulnerability is the same as for (⊠ or ◩).
(vii) Long Range Torpedos: [long-range torpedo symbol]
At a cost of £10 million each, submarines may be armed with long range torpedos ([long-range torpedo symbol]). Range is ⟥.
Post Cold War Options
(i) Stealthy Ships: At a cost of £2 million each, the Cruiser, submarines, destroyers, frigates, and light frigates, may be fitted with stealth features, including decoys, that increase the difficulty of gaining a radar lock-on.
Against any guided weapons (⊠, ◩, cruise missiles, and standoff attacks by Airstrike (🛦)) the attacker must turn a RED CROSS for detection. Stealth ships do not gain blank counters.
(ii) Stealthy Aircraft: At a cost of £2 million for each air unit converted, strike and interceptor aircraft gain Stealth features.
Against any guided anti-aircraft weapons (⧮, ⧯, [PDM symbol], 🛦 interceptors) the attacker must turn a RED CROSS for detection. Stealth aircraft do not gain blank counters.
(iii) AEGIS Radar: At a cost of £2 million each, the Cruiser, submarines, destroyers, frigates, and light frigates, may be fitted with AEGIS radar. Mark the counter with an "A". AEGIS equipped ships counter's use of rule (Stealth Aircraft). Both RED and BLACK crosses hit aircraft.
Maximum move distances
Maximum distances moved, by the mark on the Movement Indicator:
| Mark on Indicator | Maximum move of | Distance (cm / inches) |
|---|---|---|
| Orange | Hydrofoil | 20 cm / 8" |
| Blue | MPB | 15 cm / 6" |
| Blue | Major surface ship (i.e., not Hydrofoil or MPB) | 15 cm / 6" |
| Blue | Nuclear Submarine (SSN) | 15 cm / 6" |
| Green | Submarine or Transport ship | 12 cm / 5" |
| Green | Major surface ship "turning" (see 1.5.5.) | 12 cm / 5" |
| Green | Nuclear Submarine (SSN) "turning" (see 1.5.5.) | 12 cm / 5" |
| Red | Submarine or Transport Ship "turning" |
Maximum ranges for weapons
| Weapon | Symbol | Distance (cm / inches) | Long Range Version: symbol | Long Range Distance (cm / inches) |
|---|---|---|---|---|
| Helo | [helicopter symbol] | 42 cm / 16.5" | NA | NA |
| SSM | ⊠ | 18 cm / 7" | ◩ | 27 cm / 10.5" |
| SAM | ⧮ | 22 cm / 9" | ⧯ | 27 cm / 10.5" |
| Gun | ⟥ | 17 cm / 6.5" | NA | NA |
| PDM | [PDM symbol] | NA | NA | NA |
Symbols Legend
The source document ends its symbols key with the following list (glyphs shown in brackets where the source did not preserve them):
- Torpedo (L): [long-range torpedo symbol]
- Cruise Missile: ⊞ or ◧
- Heavy gun: ⧃
- SAM (L): ⧮ ⧯
- SSM (L): ⊠ ◩
- PDM: [PDM symbol]
- PDG: [PDG symbol]
- Gun: ⟥
- ASW: Δ
- Nuclear: N
- Quiet: Q
- Ultra Sonar: U
- AEGIS: A
Ship Comparison Table
"SeaStrike 1 Ship Comparison Table" as printed in the source document:
| Ship Type | U.S. Designation | Based On (Example Ship Class) | Displacement (Tons) |
|---|---|---|---|
| Cruiser | None (say "CGH") | Soviet "Moskva" (bigger), Italian "Vittorio Veneto" (smaller) | 10,000+ |
| Guided Missile Destroyer | DLG (= Guided Missile Frigate) | Soviet "Krivak" class | 4,000 |
| Helicopter Destroyer | None (say "DDH") | Canadian "Algonquin", Japanese "Haruna" class | 5,000 |
| Anti-Submarine Frigate | DEG | U.S. "Brooke" Class | 2,500 |
| Anti-Aircraft Frigate | DEG | British Type 42 "Sheffield" | 3,500 |
| General Purpose Frigate | DDG (or better "PF'2") |
Notes on Naval Usage Trends
- U.S. has little use of helicopters in naval operations.
- "Frigate" is larger than "Destroyer" in some navies.
- Limited use of patrol boats in certain modern fleets.