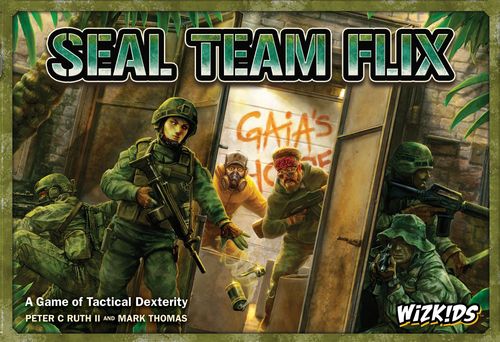
SEAL Team Flix
SEAL Team Flix Rulebook
Table of Contents
Table of Contents
- Components
- How to Flick
- Mission Overview
- Map Overview
- Quick Start: Skirmish
- Quick Start: Campaign
- Difficulty Level
- Player Setup: Selecting Gear
- Mission Setup
- Key Concepts
- Round Order
- Phase 1: Take 2 Actions with Each SEAL
- Phase 2: Alert Sentries Take Cover
- Phase 3: Move Alert Masterminds and All Patrols
- Phase 4: Spawn New Patrols & Reduce Sound
- Phase 5: Masterminds & Patrols with LOS Take Cover
- Phase 6: Tangos Attack and Recover
- Phase 7: Check Victory Conditions
- Phase 8: Advance Timer
- Phase 9: Begin New Round
- Appendix: Equipment
- Appendix: Side Boards
- Appendix: Objective Tokens
- Important Terms
- Quick Reference
Components
Misc Components
- Rulebook: 1
- Campaign Book: 1
- Standee Base: 31
- 10-Second Sand Timer: 1
- Map Board Walls: 182
Boards: 15
- Map Boards: 6
- E-Lock Bypass/Bomb Defusal: 1
- Long-Range Sniping/Hostage Rescue: 1
- Timer Track: 1
- Player Board: 6
Cards: 89
- Specializations: 24
- Weapons: 27
- Equipment: 38
Wooden Components: 35
- Small Disc (Blue): 6
- Medium Disc (Green): 6
- Large Disc (Orange): 4
- Cover Cube: 19
Dice
- Six-sided Dice: 4
- Ten-sided Dice: 3
- Attack Die (custom six-sided): 2
Punchboard Standees: 34
- SEAL Standee: 6
- Tango Patrol Standee: 14
- Tango Sentry Standee: 9
- Mastermind Standee: 1
- Hostage Standee: 4
Punchboard Tokens: 121
- Doors: 21
- Sound Token: 30
- Alert Token: 1
- Timer Token: 1
- Objective Token: 25
- Objective Randomizer Token: 8
- Remote Bomb Token: 2
- Rank Token: 9
- Hit Tracker Token: 4
- Soft Body Armor Token: 4
- Activated Token: 4
- Stun Token: 8
How to Flick
While shooting or performing some other tasks, you will need to Flick a Disc. To do so, simply place the Disc on the map, curl your index finger, and line it up with the rear (or top, if you're really good) of the Disc. Line up your arm so that the Disc will slide in the direction you want, and then simply extend your index finger. This is only one of many ways to propel the disc, but the only rule with regard to legal Flicks is that your HAND CANNOT move. You may move your fingers all you want, but your hand must remain stationary.
Mission Overview
Each game of SEAL TEAM FLIX uses a Mission page from the Campaign Book. The numbered callouts below explain the parts of a Mission page.
-
Mission Name and Number: This is the Mission's identifying name and number. These can both be used to track progress between sessions.
-
Map Diagram: Which Map(s) are used for this Mission. If more than one Map is used in a Mission, the orientation of the Maps will be shown here. When more than one Map is in play, each individual Map is considered a Map Section, and the overall playing Area is considered the Map.
-
E-Lock Doors: The Map Diagram also includes callouts for the location and Difficulty level of all Door Tokens you will need to place.
-
Mission Grade: This is the Mission's Grade, used only in Skirmish Mode to indicate the Grade at which players' SEALs begin the Mission.
-
Mission Briefing: Background information on the Mission, and narrative for the Campaign.
-
Objectives: These are your Primary and Secondary Objectives for the Mission.
-
After Action Report: In Campaign mode, this indicates which Mission will follow the current Mission based on whether you succeed or fail. If "Operation Aborted" is shown, the whole Campaign ends in failure and is concluded.
-
Difficulty & Time: This column indicates the Difficulty level parameters for the Mission, and the Timer Track Space on which to start the Mission Timer (number of Rounds).
Map Overview
Each Mission in SEAL TEAM FLIX is played on one or more Maps, which have a number of key features:
-
Tango Patrol Spawns: These icons indicate where Tango Patrols enter the Map. There are always at least two on every Map, and the die icon indicates which number will Spawn Patrols during play.
-
Green/Yellow/Red Patrol Paths: These are the Patrol Paths, shown in up to three colors. Each path is numerically ordered and has an arrow pointing in the direction of the next sequential Space. While most Paths are circular, some end in "stop symbols", past which Patrols will not advance, and will simply stay there until Alerted.
-
Area Line: These orange lines, along with Walls (4) and Doors (5) delineate the Areas of a Map. These are used for Tango Movement, and for some card effects.
-
Walls: like Area Lines, Walls delineate an Area, but are physical barriers on the board which can be used to deflect discs. They may not be Moved or Fired across, they block explosion effects, no items may be used through them, and they block Line of Sight (LOS).
-
Doors: Doors are of two kinds: Normal and E-Locked, and block LOS. E-Locked Doors must be Bypassed to open, while normal Doors may always be opened. E-Locked Doors are denoted by a red outline, and the numeral on it indicates the number of digits required to Bypass (open) the E-Locked Door. To use a Door, a SEAL must be standing on an Adjacent Space. Door Tokens are removed from the board when opened, and are never replaced.
-
Objective Location: These icons indicate where Objective Tokens will be placed during setup and, subsequently, will be the focus of the SEALs. Not all Objective Locations will be used for every Map, or every Mission, and some Missions use them for special purposes, explained in their Special Conditions.
Quick Start: Skirmish
To play a Skirmish, choose a Mission from the Campaign Book, reading the Briefing and Mission Objectives to the group. Next, have each player choose a Player Board, or more than one if they wish to play with more than one SEAL. There may never be more than four SEALs in play. Once players have chosen their SEAL(s), they may now choose their SEALs' Gear.
Unlike Campaign Mode, the Mission chosen determines the starting Grade for all players' SEALs. If the Mission Grade is greater than E-6, each player chooses a Specialization for their SEAL(s), at the appropriate Grade, and then may choose any Primary Weapon, Equipment and Attachments from the cards which their Grade and Specialization allow.
Quick Start: Campaign
To play a Campaign, open the Campaign Book to the first Mission, reading the Briefing out loud to the group. Next, have each player choose a Player Board, or more than one if they wish to play with more than one SEAL. There may never be more than four SEALs in play. Once players have chosen their SEAL(s), they may now choose one Primary Weapon, and any Equipment or Attachments that they feel will be beneficial for this Mission.
All SEALs start out at a Grade of E-6 and no Specialization; they may initially only choose Gear from the cards which have E-6 printed on the lower left. As the game progresses, your SEALs will gain higher Grades and a Specialization, unlocking better Gear. At the beginning of each of the Campaign's Missions, you will have the opportunity choose your Gear.
Difficulty Level
SEAL TEAM FLIX offers three Difficulty levels: Rookie, Veteran, and Operator. This game was designed to be very challenging, and it's a good idea to start on Rookie while learning the Maps and the game. Move onto more challenging levels once you're comfortable; Playing on Operator is incredibly difficult and should only be attempted if you're a master flicker, or a glutton for punishment. Higher Difficulty delivers a higher score, as well as unlocking some bonuses for SEALs. You may change Difficulty levels at the beginning of any Mission, even amidst a Campaign, but you may never change Difficulty levels during a Mission.
Player Setup: Selecting Gear
Player Boards
The Player Board shows how to properly equip your SEALs for their Mission. You can carry as many cards as you have available Card Slots (see below).
-
Speed: This is how many Spaces a SEAL can Move per Move Action used.
-
Rank Tokens: When a SEAL survives a Mission, they gain a Rank Token. Additionally, if the Secondary Objective is completed, the SEAL team will get a bonus Rank Token, and may decide to whom it is given. When a second Rank Token is gained, increase your SEAL's Grade and remove both Tokens.
-
Specialization: All SEALs begin at Grade E-6 and can be promoted through to E-9. Upon a SEAL's first promotion (to Grade E-7), they will choose and place a Specialization card here. Your Specialization card lists what Rank and Grade you have attained and determines which cards you may carry and use. As your SEAL gains higher Grades, your Specialization's abilities grow. Once you've chosen a Specialization during a Campaign, you may not change it.
-
Card Slots: There are six spaces on the Player Board for cards: 1 Specialization, 1 Primary Weapon, 1 Secondary Weapon, and up to 2 Equipment. When a SEAL reaches Grade E-8, they can carry a third Equipment card. Each slot may only carry one card, though there are some Specializations that allow you to double up certain types of Equipment.
To carry or use any Weapon or Equipment Card, you must meet all its prerequisites: All cards in the game have a Grade requirement, shown in the lower left corner. Many also require a particular Specialization, shown as an abbreviation.
-
Primary Weapon: You can only carry one Primary Weapon (Weapon cards with the following keywords: Submachine Gun, Battle Rifle, Sniper Rifle, or Combat Shotgun).
-
Secondary Weapon: All SEALs have a Secondary Weapon, printed on their Player Board. Some Specializations have access to additional Secondary Weapons to replace the default Secondary Weapon (place the card over top).
Health Track & Token
Place your Health Token on the rightmost space of the Health Track. Each time you take a Wound, Move it one space to the left. Health can be regained through the use of Medical Kits, but if your Health Token ever reaches the dogtags, you have succumbed to your Wounds and your SEAL is KIA (Killed In Action); remove the standee from the map. Players whose SEALs are KIA must sit out the rest of the game, but we suggest that they take control of moving and rolling for Tangos.
Soft Body Armor Token
This Token is only used when playing on Operator level Difficulty. Each SEAL begins with this Token, and places it on top of their Health Tracker Token. Soft Body Armor absorbs ALL forms of damage, from explosions and Bullets–once. Then it's discarded and is never regained for the duration of the Mission by any means.
Card Anatomy
Specialization, Weapon, and Equipment cards all share several common features. Below, the features unique to each card type are listed.
Common Card Features
- Card Name.
- Keywords.
- The effect of using or carrying this card.
- Grade and Specialization requirements. Cards with "ANY" don't require a Specialization.
Specialization Cards
- Abbreviation: This shortform of the Specialization's name is referenced by the Grade requirements on Weapon and Equipment Cards.
- Abilities: This row tells you what Grade of Weapon and Equipment cards you can now carry.
- Specialization Bonus: Any bonus effects you receive for having this Specialization are listed here. Specializations usually gain additional bonuses as they increase in Rank.
Weapon & Equipment Cards 4. Sound: The Sound icon indicates that this Weapon produces 2 Sound Tokens each time it's Fired, regardless of how many discs it uses. Note that the Suppressor Attachment has a negative number; when it's attached, it reduces the Sound of the weapon by 1. 5. Discs: The icons and text in this row indicate the number and size of discs that may be Flicked per Fire Action. Most weapons have two Firing choices: Single (one disc) and Burst (multiple discs, usually smaller). Shotguns have a unique Firing choice: Stack (multiple discs in a stack). The Robinson XCR SD, for example, can Burst Fire 3 Medium or 3 Small discs. 6. Effects: Weapons have different effects on Doors and Cover Blocks. 7. Attachments: Many Weapons also support Attachments, which modify their Sound, discs or effects. If a Weapon doesn't list an Attachment, it can't use it.
Mission Setup
-
Place The Map & Player Boards: The Mission that you've chosen will indicate which Map(s) to use; place the Map(s) in the center of the table as shown in the Mission's diagram, within reach of all players. Each player should place their Player Board with all their selected gear nearby.
Tip: This is the sort of game where you may not wish to sit in chairs to play, as you may need to move around the table to make shots.
-
Place Cover Blocks: Roll one D6 die for each Area that contains a Cover Block icon on the Map. When the value rolled is within the range shown on any of the Areas' icons, place a Cover Block in the center of the icon. Some Cover Block icons have an "ALL", indicating that you always place a Cover Block on the locations.
-
Place Doors: Add Doors and/or E-Locked Doors to any breaks in Walls that have two orthogonally-oriented arrows pointing to one another. These also have dark red Area lines across them. Refer to the Mission's diagram to make sure you put E-Locked Doors in the correct locations with the correct number showing.
-
Prepare The Tango Pool: The Mission and Difficulty level you've selected will indicate how many Patrols will be available during the Mission. Simply take that many Patrols standees from the box and place them in the Tango Pool section of the Timer Track. Leave the rest in the box. Patrols never come from or go back into the box during a Mission, and when killed go back to the Tango Pool.
-
Spawn and Place Patrols: For each color of Patrol Path, roll a D10, take a Patrol standee from the Tango Pool, and place it on the associated numbered Space on the Patrol Path. If the value rolled is higher than the highest numbered Space on a Patrol Path, simply place it on the lowest-valued unoccupied Space on that Patrol Path. Some Missions will deviate from this, asking you to place them in specific locations.
You are now ready to play!
Key Concepts
The following list alphabetically covers the key concepts with which you must be familiar in order to play SEAL TEAM FLIX:
Actions (SEALs): Actions are the core of SEAL activity; Anytime SEALs do anything, it is an Action. Each SEAL in play may take two normal Actions and an unlimited number of Free Actions on their turn, but they must end each Action before taking a new one, checking for Reaction Fire after each.
Adjacent: Spaces and objects are considered Adjacent when they are orthogonally or diagonally touching but not blocked by a walls or a closed door. Unlike above, Areas are only considered Adjacent when they are orthogonally touching.
Alert (Tangos): There are only two behavior states for Sentries, Patrols, and Masterminds: Alert and Unaware. Unaware Sentries and Masterminds do not Move, while Unaware Patrols Move about their Patrol Paths on their turns, until they become Alert.
Tangos are Alert when certain conditions are met:
- Sentries only become Alert when an unbroken path of Spaces can be found between an Alert Token or Sound Token and themselves, or if a Sound or Alert Token is in an Adjacent Area separated only by one Door.
- Patrols and Masterminds are Alert when a Sound or Alert Token is anywhere on the Map, or if any Tango has Line of Sight (LOS) to a SEAL.
When these conditions cease to exist, Tango Patrols and Masterminds return to being Unaware, while Alert Sentries remain so for the rest of the Mission.
While Alert, all Tangos behave differently:
- Sentries become permanently Alert, and will Move to Cover and then perpetually stay there for the rest of the Mission.
- Masterminds and Patrols will rush towards the Loudest Area or toward a SEAL who has the Alert Token, and seek Cover when they have Line of Sight on SEALs.
- All Alert Tangos will deliver Reaction Fire (see Round Order, Phase 1) when a SEAL ends any Action in their Line of Sight.
Alert Tip: It is very easy to determine who is Alert and who is not, simply based on their position and the Sound Tokens:
- Sentries who are not in their starting position are always Alert.
- If the Alert Token or any Sound Tokens are on the Map, or if a Tango has LOS to a SEAL, Patrols and Masterminds are Alert.
Alert Token: Whenever a SEAL is attacked by a Tango, or if an Alarm Token has LOS to a SEAL at the end of that SEAL's turn, the Alert Token is placed beneath the SEAL. Tangos consider any Area containing this Token to be the Loudest Area. When Spawning Tangos, the Alert Token counts as 4 Sound Tokens. If, after all Tango Spawns have been resolved, there is no Tango or Alarm Token which has LOS to a SEAL, it is removed from the Map.
Attack Arrows: Attack Arrows are the pairs of orange arrows on Maps which indicate Spaces that allow both SEALs and Tangos to stand on in order to Fire and determine LOS from the opposing arrow to any other Object. These can be found on every corner on every Map, and on every Door on every Map, but only SEALs utilize Door Attack Arrows. SEALs may only Interact with Doors, either to open them, or Bypass E-Locked Doors while standing upon Door Attack Arrows.
Cover, "In Cover": To be "In Cover", a SEAL or Tango must be in a Space Adjacent to a Cover Block. This can prevent damage to SEALs, and allows SEALs to Fire from either of the two Spaces that are Adjacent to both the SEAL and the Cover Block.
If a Tangos' attack roll results in a hit on a SEAL who is In Cover, and LOS from the Tango crosses the Cover that the SEAL is using, the Cover Block absorbs one hit and is then removed from the Map. Cover does not affect a Bleeding or Stunned effect under any circumstances.
Tangos who are In Cover are protected from SEALs' Fire only in that it is a physical barrier to discs. If a Disc legally strikes the Cover that a Tango is using, refer to the Equipment Card to determine the effect; Tangos may be stunned or killed, and the Cover may be destroyed, depending on the weapon used. Cover Blocks block Explosion damage for SEALs and Tangos; if LOS between the explosion source and the target crosses the Cover that is being used, the Cover Block is removed from the game, but the target is immediately Stunned.
Doors: Doors are special Wall sections placed on Maps during setup, and can be opened by SEALs during play via the Interact Action, while standing on their Door Attack Arrows. Doors block SEAL Movement, block Tango LOS, block Explosion damage, and block most weapons' Bullets. There are two types:
E-Lock Doors (Red): These Doors have an E-Lock icon (black square with white number), and these cannot be opened except by the Bypass Action, at which point they are either removed from the Map or flipped over to their Normal Door side, at the player's choice.
Normal Doors (Green): These Doors are opened using the Interact Free Action, at which point they are removed from the Map.
Free Actions (SEALs): Free Actions differ from other Actions because you can do them as many times as you want on your turn without expending your allotment of two Actions.
Legal Strikes (SEAL attacks): A Legal Strike is defined as a Disc directly striking any Object that it is allowed to affect.
- Only direct strikes by a Disc or a Cover Block hitting a Tango or SEAL is a Legal Strike.
- Cover Blocks hitting other Cover Blocks or Doors is not a Legal Strike.
- All illegally-struck Objects are replaced to their position prior to the illegal Strike.
- Discs that bounce over top of Walls before hitting Objects are not Legal Strikes.
Line of Sight (LOS): Line of Sight, or LOS, is a phrase meaning "an invisible, straight line that can be drawn between the center of one Space to another."
Blocks Line of Sight: Walls; Doors; all standees (Tangos, Hostages, and SEALs).
No effect on Line of Sight: Cover Blocks; Objective Tokens; Open Doorways.
Loudest Area (Sound Tokens, Map): The Loudest Area on the Map is the Area which bears the most total Sound Tokens (unless the Alert Token is on the Map), and is the target of Patrol and Masterminds Movement; they will always Move towards the Loudest Area or, if the Alert Token is on the Map, towards that Area. If two Areas are equally Loud and equidistant when the Alert Token isn't on the Map, the SEAL players may choose which one of the Areas the Tangos Move toward.
Objects: Objects are pieces on the board other than Sound Tokens, Alert Tokens, and Doors. This includes Objectives, Cover Blocks, SEALs and Tangos.
Reaction Fire (Alert Tangos): Alert Tangos who are not Stunned will always deliver Reaction Fire upon a SEAL or unEscorted Hostage when that standee finishes an Action within LOS of the Tango. Reaction Fire happens for each Action that each Alert Tango "sees".
Reaction Fire is resolved by rolling the Attack die once (twice for Masterminds) per instance and resolving the result(s) as follows:
- 1 Bullet: The SEAL who was Fired upon receives 1 Bullet Wound. Cover Blocks absorb the hit and are then removed from the Map.
- Bleed/2 Bullets: A previously Wounded SEAL receives one Bleeding Wound. Cover Blocks do not block Bleeding damage. The 2-Bullet icon is ignored for Reaction Fire.
- Stun: The SEAL who was Fired upon receives one Stunned Token if it does not already have one. If they have a Stunned Token, they ignore this result. Cover Blocks do not protect against being Stunned.
- Miss (Blank): The attack has no effect.
After the Reaction Fire roll has been resolved, immediately place the Alert Token beneath the SEAL who was Fired upon, as normal.
Sound Tokens: When any explosion or gunshot is made by a SEAL, one or more Sound Tokens are placed in the Area where it occurred, based upon the weapon used. The Area with the most Sound Tokens is considered to be the Loudest Area. There may never be more than 6 Sound in an Area, although having the Alert Token in an Area with 6 Sound increases the total in the Area above that. Sound Tokens are never placed by Tango Fire.
While Sound Tokens are physically placed in an Area, they may be stacked or Moved in the Area as desired. They do not have any bearing on LOS or Movement as they are the physical representation of a non-physical phenomenon.
Stunned Tokens (SEALs): Certain events cause SEALs to become Stunned. When a SEAL is Stunned, place a Stunned Token beneath the SEAL's standee. A SEAL can never have more than 2 Stunned Tokens.
On the SEAL's next turn, each Stunned Token prevents the SEAL from performing one Action. SEALs with two Stunned Tokens may only take Free Actions. At the end of the SEAL's turn, remove all Stunned Tokens and place them in the supply. Cover Blocks do not provide defense against SEALs being Stunned.
Stunned Tangos: Certain events will cause Tangos to become Stunned. When a Tango is Stunned, it is laid on its side, with its base in the Space in which it was Stunned.
Stunned Tangos do not deliver Reaction Fire, and do not Move on their turn, except to seek Cover. At the end of the Round, stand up all remaining Stunned Tangos.
Tango Pool (Tangos): The Tango Pool is the maximum number of Tango Patrols available during any given Mission, and is listed on the Mission that's been chosen. While setting up the Mission, be sure to place all unused Tango Patrols back in the box so that you don't accidentally increase the Tango Pool, and make the Mission more difficult.
While Hostages, Masterminds, and Sentries who are killed are removed from the Map and put back in the box, killed Tango Patrols are removed from the Map and are always placed back into the Tango Pool Area of the Timer Track.
Wound Types & Defensive Equipment (SEALs): There are three distinct types of Wounds that SEALs can receive: Bleeding, Bullet, and Explosion. When you receive a Wound, Move the Health Token on your Player Board left, one space closer to the KIA icon.
Bleeding Wounds are only caused by Reaction Fire, and only affect previously Wounded SEALs; discarding a Medical Kit allows a SEAL to ignore one Bleeding Wound. Cover Blocks are not affected by this type of damage.
Bullet Wounds are caused by Reaction Fire, Tango Attacks, and if a SEAL legally strikes another SEAL or itself. Soft Body Armor Tokens (Operator Level only) or discarding the Ballistic Armor Equipment Card allows a SEAL to ignore one Bullet Wound.
Explosion Wounds are caused by Time Bombs and Grenades; The Blast Armor Equipment Card allows a SEAL to ignore one Explosion Wound and Cover will absorb damage for both SEALs and Tangos, leaving them Stunned instead of Wounded.
Medical Kits can be used to regain Health on their Health Track, but Armor of any kind can never be regained during a Mission.
Tangos and Hostages are killed and removed from the Map as soon as they suffer a Wound. Killed Tangos are returned to the Tango Pool unless directed otherwise by the Special Conditions of the Mission.
Round Order
A Round consists of nine Phases, which are carried out in the chronological order shown here:
- Take 2 Actions with each SEAL
- Alert Sentries Take Cover
- Move Alert Masterminds And All Patrols
- Spawn New Patrols And Reduce Sound
- Masterminds and Patrols with LOS Take Cover
- Tangos Attack And Recover
- Check Victory Conditions
- Advance Timer
- Begin New Round
Phase 1: Take 2 Actions with Each SEAL
The first Phase of the game has SEALs taking two normal Actions and an unlimited number of Free Actions. Actions must be completely resolved before beginning a new Action or Free Action, and only once a SEAL has used all of its Actions and Free Actions, its turn is over and another SEAL may take its turn. Each Action is listed below in alphabetical order, with the exception of Fire, which is last.
Each player can use an Activation Token to keep track of whether their SEAL has taken their turn this Round.
Reaction Fire: After each Action or Free Action taken, the active SEAL must check if any Alert Tangos, who are not Stunned, have LOS on them and resolve Reaction Fire for each. SEALs may also choose not to act, forfeiting their Action(s), thus avoiding Reaction Fire.
Bypass (Expends 1 Action): Attempt to Bypass an Adjacent E-Locked Door using the Electronic Lock Bypass Side Board. If successful, the E-Locked Door is either removed from the Map, or flipped over to its Normal Door side; player's choice. If unsuccessful, 1 Sound Token is added to the Map in the attempting SEAL's Area.
Detonate (Free Action): A previously placed Remote Bomb Token is immediately Detonated, affecting its Space and any of the 8 Adjacent Spaces that are not blocked by a Door or Wall. See Remote Bombs, in the Appendix: Equipment section, for more detail.
Command (Expends 1 Action): Command a Hostage in the SEAL's Area to Move, provided it is not on its starting Objective Location. Using the rules for the Move Action, Move the Hostage using the Commanding SEAL's Speed value. Hostages who end their Movement within LOS of a Tango are subject to Reaction Fire, just as a SEAL would be, unless they end their Movement Adjacent to a SEAL. Captured Masterminds can never be Commanded by SEALS. They will only follow SEALs as "Escorted Hostages" during a Move Action.
Defuse (Expends 1 Action): Attempt to Defuse an Adjacent Time Bomb Token using the Bomb Defusal Side Board. Successfully Defused Time Bomb Tokens are removed from the Map and placed on the Timer Track's Cleared Objectives Area. Unsuccessfully Defused Time Bombs immediately explode, dealing one Explosion Wound to every Object in the Area.
Give (Free Action): Give Equipment Cards or Objective Tokens to the player who controls an Adjacent SEAL. For Equipment, the recipient SEAL must meet the Equipment's Grade and Specialization requirements to receive it. If recipients do not have an empty Equipment Card slot, they must discard an Equipment Card to make room. Secondary Weapons may never be Given or discarded, nor may Equipment be placed in the slot.
Interact (Free Action): This Free Action has a variety of uses:
- Alarm Tokens: Remove an Adjacent Alarm Token from the Map.
- Medical Kit Tokens: When Adjacent to or on top of a Medical Kit Token, you may use it to heal one Wound. UnWounded SEALs may not use the Medical Kit Token.
- Primary/Secondary Objectives: When Adjacent to a Bio-Weapon, Dossier, File Folder, Hard Drive, or Photo Evidence Token, you may Recover it: Pick it up and place it on the Timer Track's Cleared Objective Area unless otherwise specified by the Mission's Special Conditions.
- Open Doors: Remove an Adjacent Door that is not E-Locked from the Map.
Knife Attack (Expends 1 Action): If a SEAL is Adjacent to any Patrol or Sentry, the player may declare a Knife Attack, and remove the Patrol or Sentry from the Map. No Sound Tokens are added to the Map. Patrols are returned to the Tango Pool, and Sentries are returned to the box, as usual. Masterminds may never be affected by a Knife Attack.
Move (Expends 1 Action): You may Move the active SEAL from its current Space to an orthogonally Adjacent Space as many times as its Speed value allows. The following restrictions apply:
- You may never end your Action's Movement in a Space that is occupied by another Object.
- You may never cross Walls or closed Doors while Moving.
- You may never Move through Tangos, but you may Move through other SEALs, Hostages, and Objective Tokens.
Escorting Hostages: If a SEAL uses its Move Action while Adjacent to a Hostage, the Hostage can be Moved with the SEAL.
- The Hostage Moves up to as many Spaces as the SEAL's Speed allows the SEAL to Move.
- The Hostage must end its Movement Adjacent to the Moving SEAL, and follows all normal Movement rules above.
- Hostages who are being Escorted are never subject to Reaction Fire.
Line of Sight to Objectives: If you end your Movement with Line of Sight to an Objective Token, flip over the Objective Token and resolve it immediately. See Appendix: Objective Tokens.
Use (Expends 1 Action unless noted on Equipment Card): Each Equipment card tells you what it does and the specifics of where and how you may use it. Not all items require you to expend an Action to use them. After use, most Equipment Cards are discarded. See Appendix: Equipment.
Fire (Expends 1 Action): Firing your weapon at a target involves the following steps:
-
Declare a Weapon: Declare that you wish to Fire, and which weapon you'll use. Sniper Rifles may choose to use the Long-Range Sniping or Hostage Rescue Side Boards instead of Flicking normally, and doing so expends the entire Action. To do so, they must target a Tango in LOS and that is not in an Adjacent Area (see Appendix: Side Boards).
-
Increase Sound: Based on the weapon used, add Sound Tokens equal to the weapon's Sound Rating to the Area that the attacking SEAL is in, to a maximum of 6 Sound. You only add Tokens equal to the Weapon's Sound once per Fire Action, regardless of how many discs you Flick.
-
Choose Rate of Fire: If your weapon has multiple rates of Fire (Single, Burst, Stack), choose your rate of Fire and take the appropriate number and size of Bullet discs. Some weapons give the player a choice of Disc sizes, and all of your allotted shots must be the same size.
For each allotted shot, resolve steps 4-6:
-
Place Disc: Place the Disc (or stack) next to (not touching, but very close to) the SEAL who is Firing. Repeat this process for each Disc of your weapon's chosen Rate of Fire.
- If the SEAL is on an Attack Arrow, it may optionally place its Disc anywhere within the Space that has the linked Attack Arrow.
- If the SEAL is In Cover, it may optionally place its Disc anywhere on one of the two Spaces Adjacent to both the SEAL and its Cover, and Flick its disc(s) from any of them.
- SEALs do not have to Flick all of their discs from linked Cover Spaces when using Burst mode.
- Stack Fire Mode: Shotguns use this mode, where 2 discs are Stacked and Flicked together.
S Stack two discs and Flick them together. Both discs can produce Legal Strikes, but Shotguns are specifically designed to fire through closed Doors (the top Disc won't get blocked). Ignore any discs that bounce over top of Walls.
Firing Action Example
In this example, both SEALs are using an MP5 SMG. This weapon produces 2 Sound for each Fire Action, irrespective of the number of discs Flicked for the Action.
- The SEAL at the bottom is standing on a Corner Attack Arrow, which allows him to Flick his Disc from the linked Attack Arrow. He Fires once, killing the Patrol with a great bank shot.
- The SEAL in the middle is standing in front of an open Door, and decides to Flick from his standee for his first shot against the Patrol in front of him, and then, because he's on a Door Attack Arrow, (3) he chooses to Flick from the linked Attack Arrow while attacking the Sentry.
After each Fire Action is concluded, Reaction Fire is checked for each Tango in LOS, and players add Sound Tokens in the Area from which they Fired (4), based on their weapon's Sound value.
Reaction Fire Example
In this example, the SEALs were very smart in choosing the order that they attacked.
- The SEAL on the bottom attacked first, killing one of the Patrols that had LOS on the middle SEAL. He knew that if the SEAL in the middle had Fired while that Tango was alive, he would receive 2 dice of Reaction Fire from the topmost Patrols instead of 1.
- The SEAL kills the Patrol in front of him, and then the Sentry. It would've been better to try for the remaining topmost Patrol, but it's a hard shot, so he went for the easy kill on the Sentry instead (3).
The middle SEAL's Fire Action ended, and because the remaining topmost Patrol has LOS on him (5), he receives one die of Reaction Fire. Note that the SEAL at the bottom is also in the Patrol's LOS, (thanks to the Corner Arrow) but since she did not take an Action, she receives no Reaction Fire.
Phase 2: Alert Sentries Take Cover
The second Phase of a Round will find players Moving the Sentries in response to one of two situations: Sound or Alert Tokens, and having Line of Sight. Sentries have a very limited amount of Movement and have been ordered to defend their post to the death. Sentries never seek out SEALs or go on Patrol. They simply stand guard and, when Alerted, Move to Cover Spaces. In any order of the players' choosing, Move Sentries that are on their Sentry icon, including Stunned Sentries, as follows.
If a path can be drawn between the Sentry's Space and a Sound or Alert Token, or if a Sound Token is in an Area Adjacent to the Sentry's Area separated only by one closed Door, Move the standee to the closest, unoccupied Cover Space that provides Cover from the closest SEAL.
- Sentries NEVER leave their starting Areas.
- If no Cover Blocks or Corner Arrows are available in the Area, Move the Sentry to the closest unoccupied Cover Block icon and place the Sentry on it.
- If no Cover Spaces that meet the above criteria are available, the Sentry remains in its starting Space, and is considered Unaware.
Remember that Sentries will only Move one time in the entire game, and once they have done so, they remain permanently Alert.
Alert Sentries Example
In this example, 2 Sound Tokens are in an Area (1), and a path can be drawn through an open Door to 2 Sentries, who become Alert.
The first Sentry (2) Moves behind the furthest crate in its Area because that is the closest Space that provides Cover between the closest SEAL and itself.
The second Sentry (3) has no Cover in its Area, so it Moves to the closest available Cover Block icon because Tangos do not use Attack Arrows on Doors and never leave their starting Areas.
The third Sentry (4) does not become Alert because there is no direct path for the Sound to travel – the Door is closed – nor is there a Sound Token in an Adjacent Area that is separated only by a closed Door. Had there been a Sound Token in the Area where the SEAL is (5), the Sentry would have become Alert, and sought cover.
Phase 3: Move Alert Masterminds and All Patrols
The third Phase will find players Moving Alert Masterminds and then all of the Patrols on the Map. They behave differently based on their Alert status, either Patrolling or attacking. Starting with the Alert Masterminds, then the Patrols, in any order of the players' choosing, and determine the Movement of each using the following:
Masterminds and Patrols are all collectively Alert if there is a Sound Token or Alert Token anywhere on the Map, or if a Tango has LOS to a SEAL.
- Stunned Tangos do not Move at all this Round; after all other Tangos attack, they simply stand up (see Phase 6: Tangos Attack and Recover).
- Tangos that have LOS to a SEAL never Move this Phase, but will Move to Cover later this Round.
For Tangos who are not Stunned and do not have LOS to a SEAL, check whether they are Alert or Unaware:
Alert Tangos: Move the Tango 1 Adjacent Area to the next closest Area to the Alert Token, or if the Alert Token is not on the Map, then towards the Loudest Area.
- If two Areas have equal Sound Tokens, the SEALs may choose which Area the Tango Moves toward.
- Use the shortest path possible by counting Areas, and Tangos always ignore Doors and E-Locked Doors. If it appears to be equidistant, the players may choose between the options.
- The standee will be placed in the highest-numbered Patrol Path Space regardless of color in the new Area. If all Patrol Path Spaces in this Area are occupied, do not Move the Tango.
Unaware Tangos: Only Alert Masterminds Move this Phase – do not Move Masterminds that are Unaware unless the Scenario Special Conditions advise otherwise.
- If the Tango is on a Patrol Path, in the order of the SEALs' choosing, Move it to the next highest numbered Patrol Path of their current color.
- If it is on the highest numbered Space on its Patrol Path, Move it to the "1" Space in its current Patrol Path color, unless there is a STOP icon on the current Patrol Path Space; if this is the case, it does not Move.
- If the Tango is NOT on a Patrol Path, Move it to the highest, unoccupied numbered Patrol Path Space of any color in the same Area.
- If, under any circumstances, the target Patrol Path Space is occupied, do not Move the Tango.
- If the target Space is occupied by a SEAL or Hostage, Move the Timer Track Token to the next lowest Space on the Timer Track, if possible (if this cannot be done, nothing happens).
Unaware Behavior Example
There are no Sound Tokens (including the Alert Token) on the Map, and no Tangos have LOS to a SEAL, so the Tangos' Movement behavior is to simply advance to the next-highest numbered Patrol Path of its color if it is already on one.
- The Patrol on Yellow-1 Moves to Yellow-2.
- The Patrol on Green-4 Moves to Green-5.
- The Patrol on Red-5 Moves to Red-6.
The Tango at (4) was in Cover from a previous Round, so because he wasn't on a Patrol Path and isn't Alert, he Moves to the highest-numbered Patrol Path Space, regardless of color, in his Area.
The Mastermind isn't Alert (5), so she simply stays where she is.
The Sentries (6) do not Move in this Phase, so they stand guard do nothing.
Alert Behavior Example
In this example, there are Sound Tokens (A) and (B) on the Map, so the Tangos' Movement behavior is to simply advance to the highest-valued Patrol Path in the next closest Area to the Loudest Area (Area with the highest Sound Token value). If an Alert Token was on the Map, they would Move toward that Area instead.
- The Mastermind always Moves first, and she Moves from her Objective icon to Yellow-10 because it is the highest-numbered available Patrol Path Space in the Area.
- The Patrol on Green-4 Moves to Red-6, because it is the highest-numbered available Patrol Path Space in the Area.
- The Patrol on Green-9 Moves to Yellow-7. The Patrol at (4) has LOS to a SEAL (5), so he doesn't Move. If that SEAL wasn't there, he would have Moved into the Area with the Mastermind, ending up on Green-5 because Yellow-10 and Red-6 are occupied.
- The Patrol at Yellow-9 Moves to Yellow-8.
Phase 4: Spawn New Patrols & Reduce Sound
In the fourth Phase, players will bring new Tango Patrols into play in the following manner:
If the Tango Pool is empty, do the following:
- Remove one Sound Token from each Area.
- If no Tango has LOS on the Alert Token, remove it from the Map.
- Skip the rest of this section and Move onto Phase 5, if time remains on the Timer Track.
If there are Tango Patrols in the Tango Pool, do the following:
If no Patrols are on the Map, place two (or one, if the Tango Pool has only one left) Patrols on the lowest-numbered, unoccupied Space on the colored Patrol Path that matches the color of the background on this Round of the Timer Track.
Then, sum the Sound Tokens on the Map to determine how many rolls will occur:
- Add up the values on Sound Tokens in each Area.
- Add 4 for the Alert Token if it's on the Map or Map Section.
- Halve the sum of the calculated value and Round up; that is how many times you will roll.
Roll the D10 Spawn Dice as many times as is required, and place new Patrols as follows:
- If any roll is equal to the numeral on any of the Spawn Points (usually 1, 2, and 3), place a new Patrol on the lowest-numbered, unoccupied Space on that colored Patrol Path in each Map Section.
- Any rolls that do not match any of the Patrol Path icons' numerals are ignored; that roll produces no new Patrols.
After all rolls have been made, reduce the Sound in each Area by 1 Sound.
If the Alert Token is on the Map, and no Tango Patrols have LOS to the SEAL with the Alert Token, remove the Alert Token.
Sound Calculation Example
If one Area has 3 Sound Tokens, another has 2, another has 4, and one has a SEAL with the Alert Token, the roll is determined is as follows: Sound (3+2+4) + Alert (4) = 13 (Rounded up to 14) 14/2 = 7, so you'd roll the D10 7 times to determine where Spawns occur.
Tango Spawn Example
In this example, there are 11 total Sound Tokens on the Map; 6 in Area (1), 3 in Area (2), and 2 in Area (3). There are already Patrols on the board, so the players don't need to refer to the Timer Track to add Patrols. However, they do need to resolve Sound Tokens by rolling dice and potentially, placing new Patrols. Because there are an odd number of Sound Tokens, we Round up to 12. Half that value is the number of rolls you make: 6 rolls.
This 6-dice roll produced a 1, two 3's, a 5, a 7, and a 9. Because the Green Spawn has a 1 and the Red Spawn has a 3, the players must add 1 Patrol to the Green path (4) and 2 Patrols to the Red path (5) due to the rolled 1 and two 3's. The Green Patrol is placed on Green-1. After placing the first Red Patrol at Red-1, the second Red Patrol must Move to the next-highest numbered Patrol Path Space, Red-2.
Now that all the rolls are resolved, the players must remove 1 Sound Token from each Area that has them. Area (1) will now have 5 Sound Tokens, Area (2) will have 2 Sound Tokens, and Area (3) will have only 1 Sound Token left.
Phase 5: Masterminds & Patrols with LOS Take Cover
In the fifth Phase, Masterminds and Patrols who have LOS on one or more SEALS will Move Into Cover, if possible, while retaining Line of Sight. In any order, starting with Masterminds and ending with Patrols, do the following:
Golden Rules of Tango Cover:
- Only Alert Tangos will seek Cover, and choose the first available option from the list below:
- behind a Corner Attack Arrow in their own Area.
- behind a Cover Block in their own Area.
- behind a Corner Attack Arrow in an adjacent Area.
- behind a Cover Block in an adjacent Area.
- Tangos are only In Cover when Adjacent to a Cover Block in a Space in which LOS from the Tango to SEAL crosses a Cover Block, or when on a Corner Attack Arrow where a SEAL's LOS to the Tango is blocked, but the Tango's LOS from the linked Corner Attack Arrow to the SEAL is retained.
- Tangos will never Move to a Cover Block to which a SEAL is Adjacent, to a Corner Attack Arrow with a linked Space occupied by a SEAL, to a Space Adjacent to a SEAL, or to a Door's Attack Arrows.
How To Move Tangos Into Cover:
If the Tango already has Cover from the closest SEAL, they do nothing. Otherwise, Move the Tango to the closest Corner Attack Arrow in the same Area that provides Cover from the SEAL that was closest prior to it taking Cover, even if it exposes itself to another SEAL.
- If no Corner Attack Arrows exist that meet those criteria, Move the Tango Adjacent to the closest Cover Block Space that provides Cover from the SEAL that was closest prior to it taking Cover, even if it exposes itself to another SEAL.
- If there is no Cover, as described above, in the Tango's current Area, Move it to the closest applicable Cover in any Adjacent Area following the above rules.
- If no viable Cover exists, based on the above rules, the Tango does not Move.
Tango Cover Example
The Tangos are taking Cover, and they do so like this:
- The Mastermind always Moves first, and because there are no Cover Blocks in its Area that would give her Cover from the SEAL, and the Corner Attack Arrow to which she normally would have moved is occupied by a Patrol (7), she leaves the Area to go to the next-nearest Corner Attack Arrow, which retains LOS while giving her Cover. If THAT Corner Attack Arrow was also occupied, the Mastermind would have taken Cover behind the Cover Block in the Adjacent Area. She would not Move to the Cover Blocks in her own Area because she would lose LOS to the SEAL.
- The Patrol has no LOS to any SEALs, so it doesn't take Cover.
- In this situation, the Patrol has LOS to 2 SEALs, but it must only take Cover from the closest. Because the two Cover Spaces to which it would Move to are both 5 Spaces away (4), being equidistant, the SEAL players get to choose where it Moves.
- This is another situation where the Patrol doesn't simply Move to the closest Cover (6), because a SEAL is currently Adjacent to a Cover Block. Tangos will never Move to Cover which is currently being used by a SEAL, so it Moves to the next closest Cover Block, into the closest Space that provides Cover from the closest SEAL in LOS. It should be mentioned that the SEAL just above the Patrol is also 2 Spaces away, making it equidistant, but because it does not have LOS to that SEAL, it ignores that SEAL when deciding where to Move.
- This Patrol is already in Cover from, and has LOS to, the closest SEAL, so it does not Move.
Phase 6: Tangos Attack and Recover
In the sixth Phase, all Tangos who have LOS on one or more SEALs and/or unEscorted Hostages will Fire upon them in the following manner, one Area at a time, and in any order of the players' choosing. The Mastermind, and all Tangos in the same Area as a Mastermind, roll two Attack Dice. All other Tangos roll 1 Attack Die. Starting with Masterminds, who always Fire first, Each Tango Fires upon each SEAL within LOS, and each Hostage that is not on its starting Objective icon and not Adjacent to a SEAL.
Roll Attack Dice and resolve each face rolled in this manner:
- Bleed/2 Hits: The SEAL who was Fired upon receives two Bullet Wounds. Cover Blocks may reduce this by one. The Bleed icon is ignored for Attacks.
- 1 Hit: The SEAL who was Fired upon receives one Bullet Wound. Cover Blocks may negate this Wound.
- Stun: The SEAL who was Fired upon receives one Stunned Token. Cover Blocks do not protect against being Stunned.
- Miss (Blank): The attack has no effect.
Some factors can affect the attack's result:
- A SEAL's Ballistic Armor Equipment card may be discarded to ignore one Bullet Wound.
- On Operator-level Difficulty, a SEAL's Soft Body Armor Token absorbs the first Wound taken that Mission and can never be Recovered, even with a Medical Kit.
- A Cover Block to which a SEAL is Adjacent always absorbs one Wound, and then is removed from the Map, provided that LOS from the Tango to the attacked SEAL crosses over it.
KIA SEALs: If a SEAL's Health Track reaches the dogtags icon, that SEAL is immediately Killed in Action (KIA). In a Campaign, KIA SEALs' Player Boards are placed back in the box and may not normally be used again during the Campaign. In the next Mission, players may choose a replacement SEAL from the remaining SEALs, if available. If there are no remaining replacement SEALS, reduce the team's total Score by 20 points, and then each player who needs a replacement SEAL may choose from any of the previously KIA SEALs. Replacement SEALs start at Grade E-6, with no Specialization or Rank Tokens.
After all attacks have been resolved, stand all Stunned Tangos up, indicating that they are no longer Stunned. Remember to add the Alert Token to the last SEAL Fired upon in this Phase.
Tango Attack Example
In this example, the Tangos Fire upon the SEALs, in the order of the players choosing, but always starting with the Mastermind:
- The Mastermind always gets 2 Attack Dice, and attacks from the Corner Attack Arrow. She rolls a 1-hit and 2-hit face. The SEAL has no Cover, so she takes 3 Bullet Wounds.
- The Patrol attacks from the Corner Attack Arrow and rolls a Miss face, so the SEAL narrowly avoids a fourth Wound.
- This Patrol hasn't got LOS to SEALs, so he doesn't attack.
- This Patrol has LOS to 2 SEALs and attacks each, missing one and rolling a Stun face, giving that second SEAL a Stunned Token. The third SEAL below and to the right of the last one is also visible to the Patrol, but cannot be attacked because the SEAL that was Stunned blocks LOS from the Patrol (red dotted line).
- This Patrol has two targets as well, rolling a 2-hit face for one and a Stun face for the other. Because the SEAL that was hit with the 2-hit face is in Cover, and LOS crosses over the Cover Block, the Cover Block absorbs one Wound and is removed from the Map, while the other hit passes through it and gives the SEAL a Bullet Wound. The other SEAL is already Stunned once, and receives a second Stunned Token (to a maximum of 2).
Phase 7: Check Victory Conditions
The seventh Phase is a passive Phase where players must determine if they have succeeded, failed, or partially succeeded in their current Mission.
If the Timer Track is at zero, or if all Primary Objectives have been completed, the Mission immediately ends. Players then check the following to determine success or failure:
- If all Primary Objectives were completed successfully, the Mission was successful. Add the Primary Objective Score shown in the Mission Briefing to your Team Score.
- If all Secondary Objectives were also completed successfully, add the Secondary Objective Score shown in the Mission Briefing to your Team Score.
If the Timer Track reached zero, but half (Rounded up) of Primary Objectives were completed successfully, and all Secondary Objectives were completed successfully, the Mission was a partial success: Add the Secondary Objective Score shown in the Mission Briefing to your Team Score.
If the Timer Track reached zero, but less than half (Rounded up) of Primary Objectives were completed successfully the Mission was a failure.
Campaign Mode: Use the Mission Tree or After Action Report to determine the next Mission to take on based on the outcome.
- If "Operation Aborted" is shown as the next Mission, the SEALs have been defeated by Gaia's Hope, and the Campaign immediately ends; all players lose.
- If "Campaign Successful" is shown, the SEALs are victorious and all players win.
Rank Tokens and SEAL promotions: When a SEAL survives a Mission, they gain a Rank Token. Additionally, if the Secondary Objective is completed, the SEAL team will get a bonus Rank Token, and may decide which SEAL it is given to. When a SEAL gains a second Rank Token, discard both Rank Tokens and increase its Grade.
Phase 8: Advance Timer
In the eighth Phase, players Move the Timer Track counter one Space toward zero on the Timer Track. If the Timer Track counter ever reaches the Mission Failure Space, the SEALs have run out of time and the Mission immediately ends.
In Campaign Mode, points are still earned for Primary and Secondary Objectives as shown in Phase 7.
Time Bombs: It is also in this Phase that any timed Tokens, such as Time Bomb Tokens, lower their count by 1. To do this, simply rotate the dice to the next lowest value in order to indicate the new value. If the new value is zero, resolve the Token's effect and then remove it from the Map.
For instance, if a Time Bomb die is showing 1 and would be rotated, it immediately explodes (see Appendix: Objective Tokens for more detail).
Phase 9: Begin New Round
If the Mission didn't end based on the Victory Conditions checked in Phase 7, begin a new Round of play.
Appendix: Equipment
Flashbang & High Explosive Grenades: To use either of these Equipment Cards, simply declare that you are using the grenade, discard the Equipment Card, and Flick a Small Bullet Disc just as you would if you were Firing a weapon.
If you're on a Door Attack Arrow, you may Flick from the linked Door Attack Arrow, even if it is a closed Door. This represents opening the Door just a crack, and tossing the Grenade through. You may not use Door Attack Arrows at an E-Locked Door. At the end of the disc's Movement, if it is completely within a Space, that is the target Space. If the Disc is touching multiple Spaces, choose one of the Spaces it is touching and Move the Disc into that Space, which becomes the target Space. Any Object in the target Space, and any Objects in the 8 Adjacent Spaces, that are not blocked by Walls or Doors, are affected as follows:
High Explosive Grenades (Effects: Flick Disc from SEAL or from Door Arrow to inflict one wound upon and destroy anything directly adjacent to its destination space. Discard after use. Grade E-6 / Requires: ANY):
- Reveal all Objective Tokens in the affected Spaces, resolve them, and then remove them from the Map.
- SEALs in the Area take one Explosion Wound unless mitigated; SEALs may discard a Blast Armor card to ignore the Wound.
- SEALs and Tangos who have Cover from the target Space (LOS from the target Space crosses a Cover Block) are Stunned, but do not take a Wound.
- Remote Bomb and Time Bomb Tokens in the affected Spaces cause secondary Explosions which are resolved normally.
- Place 6 Sound Tokens in the Area of the target Space.
Flashbang Grenades (Effects: Can be used as an Action from a Door Arrow to Stun all occupants in the Area on other side of Door, or Flicked to Stun all occupants within 2 spaces of its destination space. Discard after use. Grade E-6 / Requires: ANY):
- Give 1 Stunned Token to all SEALs in the affected Spaces, and place all Tango standees in the affected Spaces on their side in their current Space, indicating that they are Stunned.
- Hostages can never be Stunned.
- Place 4 Sound Tokens in the Area that was affected.
Breaching Charges: (Equipment, Explosives. Effects: Can be used as an Action at Door Arrows to Stun all occupants of Area on the other side of the Door. Destroys Door. Discard after use. Grade E-7 / Requires: ASO, ACC, EOD)
Breaching Charges are used to destroy normal and E-Locked Doors, while Stunning Tangos in the Area on the opposite side of the Door. This Equipment may only be used if standing on a Door Attack Arrow. To use a Breaching Charge, discard the Equipment Card and:
- Remove the affected Door.
- Give 1 Stunned Token to all SEALs in the Area, and place all Tango standees on their side in their current Space, indicating that they are Stunned. Hostages can never be Stunned.
- Place 6 Sound Tokens in the Area.
Remote Bombs: (Equipment, Explosives. Effects: As an Action, place a bomb token in the middle of the active SEAL's Area. As a free Action, discard this card to detonate the bomb, generating 6 Sound. Kills all occupants of an Area. Destroys terrain & objectives. Grade E-8 / Requires: EOD, SS)
Remote Bombs are similar to Grenades, but instead of being thrown, they're placed Adjacent to a SEAL as a Use Action, with the intention of being remotely Detonated later (as a Free Action), with the same effect as a HE Grenade.
During Setup, if a SEAL takes the Remote Bomb Equipment Card, place a Remote Bomb Token on the card. As a Use Action, remove the Token from the card and place it Adjacent to the SEAL who used it.
The SEAL may perform a free Action at a later time to declare that they are detonating the Remote Bomb, and then resolve the damage:
- Remove all Remote Bombs, Cover Blocks, Tangos, Hostages, and Objective Tokens in the affected Area from the Map.
- SEALs in the Area take one Explosion Wound (SEALs may discard a Blast Armor card to ignore the Wound).
- Remote Bomb and Time Bomb Tokens in the Area cause an additional Explosion Wound to SEALs in the Area before being removed from the Map.
- Place 6 Sound Tokens in the affected Area.
Snake Cams: (Equipment, Tool. Effects: Can be used at any Door Arrow as an Action. Reveals all objectives in LOS of other side of Door that are in LOS of the Door Arrow. Grade E-7 / Requires: ASO, EOD)
Snake Cams are small video screens that are attached to a four-foot long, quarter inch wide, flexible-necked video camera. These are generally used to peek under Doors and examine the contents of a room, revealing Objective Tokens in a room without exposing your SEALs to Reaction Fire. Snake Cams may be used on normal or E-Locked Doors.
To use it, your SEAL must be on a Door Attack Arrow, and then declare that it is using the Snake Cam as a Use Action. Reveal all Objectives that are within Line of Sight of the linked Door Arrow. Alarm Objective Tokens are not triggered by this Action.
Dart Pistols: (Secondary Weapon. Single fire mode. Effects: Replaces Secondary Weapon. Place 2 Sound tokens on this card; remove one for each use. Discard after last token is removed. Grade E-8 / Requires: EOD, HTPS, SS)
Dart Pistols replace your Secondary Weapon, but unlike other weapons, they only have two shots. When you begin the Mission, place two Sound Tokens on the Equipment Card to indicate the ammunition carried, and remove one each time the weapon is used.
To use it, your SEAL must perform the Use Action, and Flick a Small Bullet, following the normal rules for Firing a weapon, except for the following:
- Only the FIRST legally struck Tango or Hostage is killed and removed from the Map.
- Doors or Cover Blocks are not affected in any way.
- If a SEAL is the first legally struck standee, it takes a Bullet Wound.
- Once the ammunition is depleted, flip the card upside-down to indicate that your Secondary Weapon is empty and can no longer be used. You may not place any other cards in this slot, and you do not gain access to your default Secondary Weapon as a result.
Seeker Rounds: (Equipment, Ammo, Experimental. Effects: Usable with Primary Weapon in Single fire mode only: You may Flick the same Disc a second time from its ending position if it didn't hit an Object. Place 2 tokens on this card; remove one for each use, and discard after last token removed. Grade E-9 / Requires: EOD, HTPS, SS)
Seeker Rounds are an enhancement to your Primary Weapon; they are used in conjunction with it rather than instead of it. When you begin the Mission, place two Sound Tokens on the Equipment Card to indicate the ammunition carried, and remove one each time Seeker Rounds are Fired.
To use Seeker Rounds, simply declare that you will be using them, remove one of the Tokens from the card, and then use your Fire Action normally, with the following special rules:
- You may only use your Primary Weapon's Single rate of Fire. Burst and Stack Fire Modes cannot be used. If your Specialization grants you an additional disc, you can still Flick an additional Disc.
- Fire all shots normally, but if you do not hit a Cover Block, SEAL, Tango, Door or Objective, you may Flick that same Disc one more time, from the position where it ended its Movement.
- Discard the card when all the ammunition is depleted.
Seeker Shot Example: The SEAL decides to use Seeker Rounds with his Steyr Scout to attempt a shot that would normally be close to impossible. He Flicks the shot to a good position, then Flicks it again to the target. Success!
Appendix: Side Boards
There are two double-sided Side Boards available while playing, which are used in special situations. The rules are written on the bottom of each Side Board, but this section lists all Side Boards together for easy reference.
Electronic Lock Bypass Side Board: When a SEAL is on a Door Attack Arrow in front of an E-Locked Door, they may use the Bypass Action to unlock it.
Setup: Roll a D10 die as many times as is shown on the E-Lock Door icon's numeral. After each roll, place a Small Bullet Disc in the blue circle on top of the corresponding numeral. If a Disc is already on the numeral, place the new Disc on top of it. Based on the Mission Difficulty, select three discs of the proper size, as shown on the Side Board, and leave the rest in the supply if applicable.
How to Play: Flick your Disc from the marked spot on the bottom of the Side Board, with the goal of knocking all of the Small Bullet discs completely out of the red box illustrated on the Side Board. After each Flick, remove the previously Flicked Disc from the Side Board.
Success: If all of the target discs were knocked out of the red box, either remove the E-Lock Door from the Map, or flip it over to its Normal Door side; player's choice.
Failure: The E-Locked Door remains locked, and 1 Sound Token is added to the Map in the attempting SEAL's Area.
Bomb Defusal Side Board: When a SEAL is Adjacent to a Bomb Token, they may use the Defuse Action to Defuse it, by "cutting the wires" in the locations that are shown on the Bomb Token.
Setup: Place Small Bullet Discs on each colored circle that corresponds to the letters on the Bomb Token you're trying to Defuse. Turn the Sand Timer over and let it drain completely. Based on the Mission Difficulty, select one Disc of the proper size, as shown on the Side Board, and leave the rest in the supply.
How to Play: Flip the Sand Timer over to begin the countdown, then Flick your Disc from the marked spot on the bottom of the Side Board, with the goal of knocking all of the Small Bullet discs off of their circles. Continue retrieving your Disc and Flicking it again until you succeed or time runs out. You may only use the original Disc you started Flicking with – you cannot get another Disc from the supply.
Success: If all of the target circles have no target discs touching them before time runs out, remove the Bomb Token from the Map and place it in the Cleared Objectives Area of the Timer Track.
Failure: If any of the target circles have a target Disc touching them, or if time ran out, remove the Bomb Token from the Map and remove all Cover Blocks, Tangos, Hostages, and Objective Tokens from the Area, resolving them if necessary as though they were legally struck. All SEALs in the Area take 1 Explosion Wound (this can be prevented by discarding Blast Armor as usual).
Tool Kit (Equipment, Tool. Effects: Flick 1 Disc BEFORE starting timer for Bomb Defusal. +1 Disc for E-Lock Bypass. Grade E-7 / Requires: ASO, EOD, SS)
Using a Tool Kit:
For E-Lock Bypass: SEALs attempting to Bypass an E-Locked Door may take an extra Disc from the supply when preparing to Bypass.
For Bomb Defusal: Attempting to Defuse a bomb while in possession of a Tool Kit allows you to Flick one Disc prior to starting the Sand Timer. After retrieving that disc, continue playing normally as described above.
Long-Range Sniping Side Board: When a SEAL has LOS to a Tango that is not in an Adjacent Area, you may use this Side Board to attack that Tango as a Fire Action. Sound Tokens are still produced, as usual. This Side Board may only be used with a Sniper Rifle.
Setup: Based on the Mission Difficulty, select one Disc of the proper size, as shown on the Side Board, and leave the rest in the supply.
How to Play: Flick your Disc from the marked spot on the bottom of the Side Board. The goal depends on the Difficulty Level chosen:
- Rookie: End the disc's Movement so that it is touching any dot on the Tango image.
- Veteran: End the disc's Movement so that it is completely covering any dot on the Tango image.
- Operator: End the disc's Movement so that it is completely covering the red dot on the Tango image.
Success: If the above conditions were met, remove the Tango from the Map.
Failure: If the above conditions were not met, the Tango was not killed, and no further Action is required.
Hostage Rescue Side Board: When a SEAL has LOS to a Tango that is not in an Adjacent Area and that has a Hostage in the Area, you may use this Side Board to attack that Tango as a Fire Action. This Side Board may only be used with a Sniper Rifle.
Setup: Based on the Mission Difficulty, select one Disc of the proper size, as shown on the Side Board, and leave the rest in the supply.
How to Play: Flick your Disc from the marked spot on the bottom of the Side Board. The goal depends on the Difficulty Level chosen:
- Rookie: End the disc's Movement so that it is touching the red dot on the Tango image but is NOT touching the red circle over the Hostage image.
- Veteran: End the disc's Movement so that it is touching the red dot on the Tango image but is NOT touching the yellow or red circle over the Hostage image.
- Operator: End the disc's Movement so that it is completely covering the red dot on the Tango image but is NOT touching the green, yellow or red circle over the Hostage image.
Success: If the above conditions were met, remove the Tango from the Map.
Failure: If the above conditions were not met, the Tango was not killed, but the Hostage was. Remove the Hostage from the Map.
Appendix: Objective Tokens
When a SEAL has LOS on an unrevealed Objective Token, either directly, using an Attack Arrow, or using a Snake Cam, immediately reveal it and take the following Actions based on the Token that was revealed:
Alarm Token: If a SEAL ends its turn within LOS of the Alarm, it is triggered: immediately place 3 Sound Tokens in the Area with the Alarm Token, and the SEAL gains the Alert Token. Alarms can be removed from the Map by Adjacent SEALs using the Interact Action. If legally struck, an Alarm is destroyed; remove it from the Map.
Bio Weapon Token: These represent lethal biological weapons that must be neutralized by SEALs. A SEAL must use the Interact Action to pick it up and place it on their Player Board. Some Missions require these to be neutralized, not Recovered; to do this, use an Interact Action and remove it from the Map.
If the SEAL carrying this Token is KIA, or if the Token is hit by a disc, all Tangos in the Area are immediately killed, all other SEALs in the Area are KIA, then the Token is removed from the Map. If a SEAL is carrying it when the Mission ends, it counts as a completed Objective for Scoring purposes.
Evidence Tokens: Several types of Objective Tokens are considered Evidence: Dossier, File Folders, Hard Drive, and Photos. These may be Recovered by an Adjacent SEAL using the Interact Action. When Recovered, these are placed on the Cleared Objectives section of the Timer Track and count as completed Objectives for scoring purposes. When legally struck, these Objective Tokens are destroyed and removed from the Map.
Mastermind Token (standee): When revealed, this token is replaced with a Mastermind standee. It is not always treated as a Mastermind; each Mission's Special Conditions describe how this Mastermind is used.
Hostage Token (standee): When revealed, these tokens are replaced with Hostage standees, which need to be Rescued by SEALs. Hostages can be Moved by using the Move and Command Actions. Hostages who are Moved by the Command Action are subject to Reaction Fire if they do not end their turn Adjacent to a SEAL or on their starting Objective icon. Hostages who are not on the Objective icon where they were revealed, and who also are not Adjacent to a SEAL, are also Fired upon in Phase 6 when Tangos attack.
Some Missions require SEALs to Capture a Mastermind. When a Mastermind is Captured, it is treated as a Hostage except that it may not be Commanded, only Escorted. This also means that Tangos will Fire upon the Mastermind as if it was a Hostage. Death before Capture!
Rescuing Hostages: To Rescue a Hostage, it must end its Movement in the Mission's Starting Area, whether Escorted or Commanded there. If this is accomplished, immediately remove it from the Map and place it in the Cleared Objectives section of the Timer Track, ignoring any Reaction Fire that might have been triggered. If a Hostage is legally struck, it is killed, and removed from the Map.
Medical Kit Token: Once revealed, any Adjacent SEAL can use the Medical Kit Token by using the Interact Action, and immediately heal one Wound, then remove this Token from the Map. Unwounded SEALs may not use this Token. When legally struck, this Token is destroyed and removed from the Map.
Tango Patrol Token (standee): When revealed, if a Patrol is available in the Tango Pool, place a Patrol on the highest-numbered, unoccupied Patrol Path Space in the Area, and remove the Token from the Map.
If no Patrols are available, remove the Token from the Map without effect. If no Patrol Path Spaces are available, simply place the Patrol on the Objective icon on the Map where the Token was, and then remove the Token from the Map.
Tango Patrols that are Spawned in this manner do not deliver Reaction Fire immediately upon being placed on the Map, but may do so in response to future SEAL Actions.
Time Bomb Token: These represent bombs that must be Defused by the SEALs using the Defuse Action. When revealed, place a D6 onto the Time Bomb Token with "4" facing upward, unless the Mission's Special Conditons state otherwise.
During Phase 8: Advance Timer, lower the value of the die on all bombs by 1. When the timer reaches zero, it explodes, dealing one Explosion Wound to every Object in the Area.
Time Bombs also explode when legally struck, dealing one Explosion Wound to every Object in the Area. Cover Blocks will absorb one damage for Objects that are In Cover, if LOS between the Token and the target passes through the Cover Block. Any Tangos who are protected in this manner become immediately Stunned. Any SEALs protected in this manner receive a Stunned Token.
Important Terms
- Action - Each SEAL gets 2 of these during Phase 1 of each Round.
- Adjacent - Spaces that share an edge or corner.
- Alert - Tangos that are actively hunting for SEALs.
- Alert Token - Placed on the Map and draws the attention of Tangos.
- Area - Part of a Map, divided by an orange line or a Wall.
- Attachment - Special type of Equipment card that modifies a Primary Weapon.
- Attack Arrow - Orange arrows on opposite sides of Doors and around corners, used for LOS. Two types: Door Attack Arrows and Corner Attack Arrows (Tangos never use Doors Attack Arrows).
- Bleed - A type of Wound only caused by Reaction Fire.
- Bullet - Wooden discs in three sizes: Small (Blue), Medium (Green), and Large (Yellow).
- Burst - Fire mode for a weapon that Flicks more than one Bullet Disc.
- Bypass - Action used on E-Lock Doors to open them, by using the E-Lock Bypass Side Board.
- Capture - Escorting specific enemies back to the SEAL starting Area. See Rescue.
- - Action that Moves a Hostage up to a SEAL's Speed.
Quick Reference
Round Order
- Take 2 Actions with each SEAL
- Alert Sentries Take Cover
- Move Alert Masterminds & All Patrols
- Spawn New Patrols & Reduce Sound
- Masterminds & Patrols in LOS Take Cover
- Tangos Attack And Recover
- Check Victory Conditions
- Advance Timer
- Begin New Round
1. Take 2 Actions with each SEAL
Actions (Cost 1 Action): Bypass, Defuse, Command, Knife Attack, Move, Use, Fire. Free Actions (Unlimited): Give, Interact. Reaction Fire: After every SEAL or Hostage Action, each Tango in LOS rolls Reaction Fire.
2. Alert Sentries Take Cover
Sentries on Sentry icons Move if they have LOS to a SEAL and:
- Can trace a path to any Sound/Alert Token.
- Are in an Area with a closed Door, and there is a Sound/Alert Token in the Area Adjacent to the Door.
Sentries Move to closest available Cover Block or Corner Arrow in same Area to gain Cover. If there is no Cover, Sentry Moves to nearest Cover Block Icon to indicate it's Alert.
3. Move Alert Masterminds, All Patrols
Masterminds and Patrols are ALL Alert if there is a Sound or Alert Token anywhere on the Map. Players Move all Tangos (except Stunned Tangos and Tangos with LOS) in any order:
Alert Tangos: Move the Tango 1 Area closer to the Alert Token, or if no Alert Token, the Loudest Area.
- Count the shortest path ignoring all Doors.
- Players choose between 2 Areas if they are tied for Loudest Sound or distance.
Place the Tango on the highest-numbered Patrol Path Space (regardless of color) in the new Area.
Unaware Tangos: Unaware Masterminds do not Move. In any order (players choose), Tangos on Patrol Paths Move to the next numbered Patrol Space of their Patrol color, following the arrow. If the next Patrol Space is occupied, the Patrol doesn't Move. If a SEAL stops a Patrol from Moving this way, decrease the Timer Track by 1. If the Patrol reaches the highest numbered Space on their path, it Moves to 1 unless there's a STOP icon in their current Space.
4. Spawn New Patrols, Reduce Sound
If the Tango Pool is empty:
- Reduce Sound by 1 in each Area.
- Remove Alert Token if no Tango has LOS to it.
If there are Tango Patrols in the Tango Pool:
- If no Patrols are on the Map, place 2 Patrols on the lowest numbered, unoccupied Space of the colored Patrol Path that matches the current Space of the Timer Track.
- Add up total Sound: All Sound Tokens, plus 4 if the Alert Token is on the Map.
- Halve the total and Round up. Roll this many D10s and place new Patrols:
- If the roll matches any Spawn Point, place a new Patrol on the lowest-numbered, unoccupied Space on that colored Patrol Path.
- Rolls that do not match are ignored.
- Remove 1 Sound Token from each Area.
- Remove Alert Token if no Tango has LOS to it.
5. Tangos in LOS take cover
Masterminds and Patrols in LOS take cover:
- Only Alert Tangos will seek Cover, and choose the first available option:
- Corner Attack Arrow in their own Area.
- Cover Block in their own Area.
- Corner Attack Arrow in an adjacent Area.
- Cover Block in an adjacent Area.
- Tangos are only In Cover when Adjacent to a Cover Block in a Space where LOS from the Tango to SEAL crosses a Cover Block, or when on a Corner Attack Arrow where a SEAL's LOS to the Tango is blocked, but the Tango's LOS from the linked Corner Attack Arrow to the SEAL is retained.
- Tangos will never Move to a Cover Block to which a SEAL is Adjacent, to a Corner Attack Arrow whose linked Space is occupied by a SEAL, to a Space Adjacent to a SEAL, or to a Door's Attack Arrows.
Moving Tangos to Cover: If a Tango already has cover from the closest SEAL, they do nothing. Otherwise:
- Move the Tango to the closest Space in the same Area that provides cover from the closest SEAL.
- If there are no Cover Blocks that can provide Cover, Move the Tango to the closest Cover Block or Corner Attack Arrow that allows the Tango to keep LOS to the SEAL but prevents the SEAL from keeping LOS to the Tango, even if the Tango must Move to an Adjacent Area to do so.
- If no viable Cover exists according to the rules above, the Tango does not Move.
6. Tangos Attack and Recover
Each Tango (starting with Masterminds) Fires upon each SEAL within LOS, and each Hostage that is not on its starting Objective icon and not Adjacent to a SEAL.
Attack Dice: The Mastermind, and all Tangos in the same Area as a Mastermind, roll two Attack Dice. All other Tangos roll 1 Attack Die.
Stunned Tangos: After all Tangos have attacked, stand up Stunned Tangos.
7. Check Victory Conditions
If the Timer Track is at zero, or all Primary Objectives are complete, the Mission ends:
- Success: All Primary Objectives complete.
- Partial Success: Half (Rounded up) of all Primary Objectives are complete, and all Secondary Objectives are complete.
- Failure: Less than half (Rounded up) of Primary Objectives are complete.
See the Round Order section for Campaign details.
8. Advance Timer
- Move the Timer Track 1 Space closer to 0. If it reaches "Mission Failure", players lose.
- Decrease dice on Time Bombs by 1.
9. Begin New Round
Begin a new Round, starting with Phase 1.