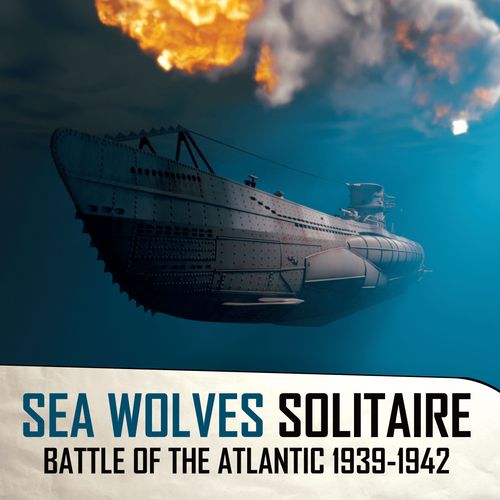
Sea Wolves Solitaire: Battle of the Atlantic 1939-1942
Sea Wolves Solitaire: Battle of the Atlantic 1939-1942 Rulebook
Table of Contents
Table of Contents
2. Board Game or Book?
In this game, you can play directly in the book by drawing and making notes, or you can play it more like a regular board game by copying or cutting the maps and counters provided at the end of the book.
Playing in the Book
You can engage with the game by drawing and writing in the book itself. Use pens or markers to mark your U-Boat's movements and record important information directly on the book's pages. This way, you can immerse yourself in the game's experience.
Traditional Tabletop Play
If you prefer a classic board game setup, you can copy, scan or cut the maps and counters found at the end of the book. Use these copies to create a physical game board and components on a table. This gives you a more hands-on, traditional gaming experience.
You have the flexibility to choose the style that suits you best, but the game's core mechanics and gameplay remain the same in both options. So choose your way of enjoying the challenges of submarine warfare in World War II.
Additionally you can access all the game's materials, including maps and components on our website, www.turgaliumgames.com, or in the files section of the game page on BoardGameGeek (BGG).
3. Book Structure
This book is structured as a collection of separate missions, each representing a distinct stage in the Battle of the Atlantic's timeline. Some missions are interconnected, allowing you to command the same submarine and crew through various phases of the battle.
As you progress through the book, you'll find that your decisions and outcomes in previous missions can influence subsequent ones, just as they did in real-life submarine warfare. Your choices will shape the storyline and the strategies you employ.
At the conclusion of the missions, the book offers a Campaign mode. In this mode, your objective is to achieve the highest possible tonnage of enemy ships sunk during a four-week patrol. This mode provides a sandbox-like experience, allowing you to test your skills and strategies beyond the structured missions.
3.1 Mission Structure
3.1.1 Historical introduction
Each mission kicks off with a dedicated page providing a historical backdrop to its specific moment in the war.
Before you dive into each mission, you'll receive a briefing about the submarine you'll be commanding. This includes details about the specific U-Boat model, its capabilities, and its role in the Battle of the Atlantic. This submarine briefing gives you a deeper understanding of your vessel and its unique characteristics.
You'll also learn about the latest technological developments on both sides of the conflict. These innovations could include advances in naval technology, new tactics employed by the Allies, or improvements in U-Boat technology by the Germans.
You'll also find the mission info and objectives:
- Mission goals: Here, you'll discover the primary and secondary objectives of the mission.
- Starting Grid: This section indicates where your U-Boat begins the mission.
- Victory Conditions: Details about how victory is achieved in the mission are provided here. Meeting these conditions is essential for successfully completing the mission.
3.1.2 Tables
On the next page, you'll find mission-specific tables that will guide your gameplay experience. These elements are different on each mission, ensuring a fresh and dynamic challenge every time you embark on a new operation.
- Technical Specifications: You'll find technical data about your U-Boat, such as its maximum movement distance per turn and the maximum number of torpedoes it can carry.
- Weather Conditions: Understanding the weather is crucial for navigation and combat effectiveness. This section provides information about the prevailing weather conditions during the mission, which can impact your U-Boat's operations, visibility, and enemy detection.
- Tables: These tables offer specific rules and modifiers for movement, torpedo attacks, and evasions during the mission.
- Available Actions in Battle: This section outlines the actions you can take during encounters.
- Patrol Log: The sinking log is your record of success. Use this notepad to keep a tally of the enemy ships you've successfully sunk during the mission. It's your personal victory log to showcase your accomplishments.
3.1.3 Map, U-Boat and encounter map
On the next page, you'll encounter essential game components to help you track your U-Boat's movements, resources, and encounters:
-
Mission Map: This map is the backdrop for your U-Boat's operations during the mission. It provides the geographical context for your journey and serves as the canvas upon which you'll mark your movements and encounters.
The maps provided in the game are reproductions of original Kriegsmarine maps used during World War II. Every effort has been made to capture the essence of these historical documents, ensuring a deep sense of immersion in the era.
-
U-Boat Status Diagram: Here, you'll find a schematic representation of your U-Boat. Use this diagram to track crucial information about your U-Boat's status, including torpedoes expended, fuel consumption, and damage sustained during the mission.
-
Encounter Map: This map is where you'll navigate your U-Boat to engage with enemy ships. It's the battleground where you'll employ your tactics and launch torpedoes to target and potentially sink enemy vessels.
3.1.4 Map Zones
The map is divided into zones of various colors, each representing different degrees of danger and enemy presence. (The zone colors are Red, Yellow and Blue.)
3.1.5 Ships, events and victory points
- Mission Events: This section outlines the events and developments specific to the mission. It provides context for your objectives and the challenges you'll face.
- Enemy Ship Tables: These tables detail the types and quantities of enemy ships you may encounter during the mission. They reflect the historical context and the specific challenges of the given scenario, adding an element of unpredictability to your encounters, ensuring no two missions are alike.
- Victory Points: The number of victory points you can earn depends on your achievements within the mission.
With ever-changing tables and conditions, you'll need to adapt your strategies and decision-making to the unique challenges of each mission.
Each mission may feature a slightly different structure and will introduce new elements and rules as we advance through the game.
At the end of the book, you'll find a journal to record all the data from your game sessions. Use these journals to attempt to beat your own records and keep track of every game you've played.
3.2 Dice, Pen and Eraser
3.2.1 Material needed
All you need to start playing the game are a couple of six-sided dice, a pencil and an eraser.
3.2.2 Dice basics
When you see 1d6 it means rolling one six-sided die. When you see 2d6 it refers to rolling two six-sided dice.
- Example: If the table says Roll 1d6: Result 4. If the table says Roll 2d6: Result 8 (5+3).
The core of the entire game are the dice and tables. When the game instructs us to roll the dice on a specific table, we will look at the total result of the dice and refer to the corresponding row in that specific table. The dice result can be subject to modification by certain modifiers, which we'll explore in more detail later.
These instructions will feel like old hat to experienced wargamers but will be very useful for newbies!
In the following pages, we'll delve into the various phases of the game.
4. U-Boat Movement Phase
4.1 Grid System
The maps are divided into grids, and each grid is numbered for reference. It's important to note that the grids you move through must be adjacent to one another. When moving your U-Boat, you'll count the maximum number of grids per turn as specified by the mission's instructions.
4.2 Plotting U-Boat Movements
To move your U-Boat you'll use a pencil to draw a path on the map, following the maximum distance specified by the technical data for each mission. It's important to note that this distance may be subject to modifications due to events or damage sustained by the submarine during the mission.
Your drawn path should consist of segments of straight lines, but you have the flexibility to create multiple segments to reach the maximum movement distance. Each straight line segment should begin and end at the center of a grid square on the map. To keep track of your movement, you can use a circle or a cross to mark where your movement ends.
Some grids are larger than others. This design choice reflects the reality that the speed of U-Boats during World War II depended on various factors, including weather conditions, operational depth, and engine performance.
Examples:
- Starting grid 22. We want to travel to grid 28. Our max. range in this mission is 2 grids on surface. The path has to be made between adjacent grids. We end our turn in the center of grid 28.
- Starting grid 22. We want to travel to grid 24. Our max. range in this mission is 2 grids on surface. The path has to be made between adjacent grids. We end our turn in the center of grid 24.
- Starting grid 23. We want to travel to grid 88. Our max. range in this mission is 2 grids on surface. Grids 23 and 89 are adjacent, so we can take advantage of this to travel further this turn.
- Starting grid 16. We want to travel to grid 36. Here, we need to skirt the coasts, so we draw an imaginary line between the two centers and travel with our U-boat along the land's edge.
- Starting grid 02. The mission objective is the port of Oban, in grid 61. For the purposes of the game, objectives within a grid are considered the point where we conclude our movement.
- In this example, we are traveling submerged from grid 63 to 37. Our maximum movement range is 1 grid. To keep track of our submerged status, we can draw a dotted line as a reference.
The dotted lines and the arrows in the examples serve solely as a reference to keep track of the number of grids the U-boat has moved.
4.3 Day and Night Cycle
In this game the distinction between day and night is very important, affecting various aspects of gameplay. Day and night conditions play a pivotal role in how you conduct attacks on enemy ships and how enemy aircraft and escorts can detect your U-Boat.
As we progress on the map and consume fuel, time will be passing. The transition between day and night will be indicated by the icons found on the fuel table.
Aircraft attacks and events, as well as enemy ship sightings and attacks, will occur during the time of day currently indicated by the fuel table. If you are submerged the current time is also indicated in the battery table. In the encounter map, you can also note the current time of day directly on the day and night icons located there.
The day and night system in this game is an abstraction for gameplay purposes and doesn't precisely simulate real-time duration.
(Example: in the book's example we have spent 1,5 units of fuel, and it's night.)
As you navigate the map and reach squares marked with an "E" (E1, E2, etc.) in the Fuel Table, you'll roll the dice on the corresponding event table and apply the results immediately.
In some missions, there may be events that offer the opportunity to refuel your U-Boat. However, this option is only available if you haven't reached the "Reserve Zone" yet. When you reach the "Sunk" square on the Reserve Fuel Track you have lost the mission immediately. To make the game easier, you can add one or two days to the fuel track table.
4.4 Fuel and Battery Usage
To move your U-Boat, you must manage two critical resources: fuel for the diesel engines while surfaced and batteries for the electric motors while submerged.
In this table each square for fuel represents one unit of fuel consumed, and each square for batteries represents 25% of your battery capacity.
Before you start moving your U-boat, you have the option to change from submerged to surface state or vice versa. If you spot an enemy ship or an enemy aircraft detects you, this is the state you'll begin the encounter in.
4.5 Fuel units
In each mission the provided data specifies how much fuel is required to cover the maximum distance per turn. To manage your fuel usage, follow these guidelines:
If the data indicates one unit of fuel consumption, you'll cross out one complete square in the fuel consumption table.
If the data specifies half a unit of fuel consumption, you'll cross out only half a square.
Example:
In the following example, we will follow four complete turns of movement to see the U-boat's consumption. Remember to charge the batteries while on surface (25% per turn).
The mission specifies the normal consumption (without damage or events) of our U-Boat.
- Turn 1: AN96->AN93. Surface (2 Grids). We spend 1/2 Fuel
- Turn 2: AN93->AN38. Surface (2 Grids). We spend 1/2 Fuel
- Turn 3: AN38->AN37. Submerged (1 Grid). We spend 50% Battery
- Turn 4: AN37->AN61. Surface (2 Grids). We spend 1/2 Fuel and recover 25% Battery
4.6 Battery Management
Submarines rely on electric motors when submerged and each mission specifies the amount of battery power needed to move the submarine each turn. Managing your battery power is crucial because if your battery reaches 0% at any point during the mission, it results in failure.
To recharge your batteries, you'll need to surface. While surfaced, your batteries recharge at a rate of 25% per turn.
It's important to note that your battery can suffer damage during the mission, reducing its overall capacity. Effective battery management, including when to surface for recharging is essential for your U-Boat's success and survival during the mission.
Example:
- Your battery was at 25% when you surfaced.
- It would be at 50% at the end of the next turn.
- 75% at the turn after that.
It's important to note that battery usage and diesel consumption are only considered on the movement map, not on the encounter map. In other words, you'll manage your batteries and diesel when moving through the open sea, not during combat encounters.
5. Sighting Phase
After completing your movement, check the color of the area in which the U-boat is located and roll the dice on the Sighting Table.
Example:
The U-boat finishes its movement in a red area. We roll two six-sided dice and get a result of 5. We check the Sighting Table and the result for 5 in the red column is Ship (x1). This means that our crew has sighted an enemy ship.
In this situation, we'll need to choose the angle at which you place your U-Boat on the Encounter Map, representing its initial orientation. We'll then roll the dice to determine the initial position of the enemy ship. However, we will get into these mechanics in more detail later in the rules.
If the table result shows -, it indicates that your U-Boat has not spotted any enemy ships, and no enemy aircraft have detected your presence. In this case, you can proceed to the next turn of your patrol, continuing to move your submarine through the mission without any immediate encounters.
5.1 Aircraft
In the Battle of the Atlantic, aircraft played a crucial role in the Allied defense strategy. If the result on the Sighting Table is "Aircraft," it means that your U-Boat has been detected by an enemy aircraft. In addition to alerting other surface vessels, enemy aircraft posed a direct threat to submarines by initiating aerial attacks.
When your U-Boat is subjected to an aircraft attack, you need to roll two dice on the Aircraft Attack Table. After rolling, you'll apply any relevant modifiers (DRM) to the resulting dice values. Nighttime air attacks were nearly impossible until 1944, so in this game, if it's nighttime and the result on the sighting table is 'aircraft,' then we won't roll the dice and will continue our patrol.
5.1.1 What are Die Roll Modifiers (DRM)
In many wargames, including this one, a common concept is Die Roll Modifiers (DRM). These modifiers are applied to dice rolls.
Some tables in the game provide DRM values explicitly. DRM can also be influenced by events that occur during the mission, upgrades or enhancements made to your U-Boat, or damage sustained during encounters.
Example:
We roll a 9 (5+4) on the Aircraft Attack Table. The result is Failed attack. But our E-Engines are damaged (-2), so the final result with DRM is 7 (9-2). Roll on Damage Table.
5.2 Ships
The primary mission of U-Boats during the Battle of the Atlantic was to disrupt Allied supply routes by relentlessly hunting and sinking enemy ships and convoys. Your U-Boat patrol in the game will be dedicated to this goal.
When the result on the Sighting Table indicates the presence of one or more enemy ships, you immediately transition to the Encounter Phase. But you can always choose to ignore the sighting and continue your patrol.
This phase represents the critical moment when you engage with the enemy, where your tactical decisions and dice rolls will determine the outcome of the encounter.
In the upper image, you can see the Encounter Map, which serves as the battlefield where the movements and attacks of your U-Boat and enemy ships will take place.
The Encounter Map is divided into various zones. Your U-Boat is positioned at the center, serving as your reference point while enemy ships move in relation to your U-Boat's position. In the following points we will explain how an attack on enemy ships unfolds and how these ships move relative to your U-Boat's position.
5.2.1 Positioning your U-boat
When you encounter enemy ships in the Sighting Table, the first step before identifying the ships is to position your U-Boat on one of the eight possible positions of the Encounter Map. You can either place the U-Boat counter at the center of the map or draw an arrow to indicate its direction.
(Illustrated in the book: U-boat counter / Drawn U-Boat.)
5.2.2 Determining Enemy Ship Positions
The next step in the encounter phase is to roll two dice to determine the positions of the enemy ships. If the result on the Sighting Table indicates the presence of multiple enemy ships, you'll roll the dice individually for each of them.
These dice rolls will determine where each enemy ship is located on the Encounter Map.
The Encounter Map has numbers from 2 to 12 printed on it. These numbers are used to determine the positions of the enemy ships. It's possible for two or more enemy ships to occupy the same position on the map.
However, if the result of the dice roll for an enemy ship is 2, 3, or 4, it means a false sighting, and you don't need to position any enemy ships.
Example:
The result of the Sighting Table is Ship (x2), this means that our crew has sighted two possible enemy ships. We have to roll 2d6 for each one:
First roll result is a 3, that's a False Contact.
Second roll result is a 7, we have found an enemy Ship!
After establishing the positions of the enemy ships on the Encounter Map, your next step is to roll two dice on the Ship Table. These dice rolls will determine the type of enemy ship or ships you have encountered.
We roll two six-sided dice and get a result of 9. The Ship Table tells us that we have found the Navasota, a medium size British merchant.
Now it's time to place the ship on the Encounter Map position 7. We can write the name on it (for example Na) or use one of the counters.
When playing the game directly on the mission sheet, it's often more convenient to write and erase the names of the encountered enemy ships.
Alternatively, if you choose to use the larger maps provided at the end of the book for a more traditional board game experience, employing counters can be a simpler way to manage the positions and types of enemy ships. For the purpose of this example, we will use the writing method for tracking enemy ships and their positions.
6. Encounter Phase and Actions
Engaging enemy ships involves a series of attack turns, which continue until one of the following conditions is met:
- Sinking all enemy ships: You successfully sink all the enemy ships or they are removed from the Encounter map.
- Deciding to disengage: You choose to end the attack and withdraw from the combat voluntarily.
- Destruction of your U-Boat: Unfortunately, your U-Boat is destroyed, leading to the end of the mission.
During the attack phases, you are constrained by a limited number of actions available. The specific number of actions you can take during each turn is determined by the mission sheet.
6.1 Actions
-
Go to surface/Submerge: Depending on whether your U-Boat is on the surface or submerged, the distance at which you can be seen and detected by your enemies varies. These distances are also influenced by whether it's day or night.
To change the depth of your submarine, use one action and mark the U-Boat's new depth on the map. You can do this by either writing the depth or using a counter, depending on your preferred method of gameplay.
-
Maneuver: This action allows you to change the direction of your submarine. Depending on whether you're on the surface or submerged, there is a maximum number of spaces you can turn. To execute a maneuver, expend one action, and rotate your submarine the maximum number of spaces allowed by the action table.
Example: In the following example, we use the "Maneuver max.2" action, which allows for a maximum of two spaces to change the direction of our U-Boat. We rotate our U-Boat two spaces to the right. (Initial position / Position after maneuver.)
-
Advance: This action is similar to the "Maneuver" action but is used to move your submarine forward. You spend one action to advance a number of spaces (the maximum number of spaces is specified by each mission). When you advance your U-Boat, you're either getting closer to or moving farther away from enemy ships. As you make movements, it's important to remember that the positions of enemy ships are determined relative to your U-Boat's location. You'll then move the other ships on the map according to their speed and relative positions to your U-Boat.
To illustrate how the "Advance" action works and introduce the concept of the U-Boat's reference arc, let's explore a simple example:
On the next example your U-Boat is positioned at the center of the Encounter Map, and you want to advance it forward. You have a mission-specific maximum advance distance of two spaces on the surface.
Reference Arc: The reference arc consists of the central column that your submarine is facing, as well as the two adjacent columns on either side. In other words, the three columns that are directly in front of your U-Boat.
In this example the U-boat is facing the column 9, and the arc consists of the columns 8, 9 and 10.
Advancing: Use one action to move your U-Boat forward up to two spaces along the reference arc. Remember, you don't physically move the U-Boat counter on the Encounter Map. Instead, you use the U-Boat counter as a reference point for the movement of all the other ships on the map. The positions of enemy ships are relative to this counter.
You can keep playing turns as long as there are enemy ships in the Encounter Map and you have actions available to use.
The encounter continues until all enemy ships are sunk, or you decide to initiate an escape action.
7. Ship Movement Phase
At the end of each turn, after you've used all your available actions, it's time for the enemy ships to move. Here's how their movement works:
Each enemy ship will advance one space unless another speed is specified.
The direction of movement follows the same rules as your U-Boat's movement phase. Ships within the reference arc move toward your U-Boat, while those outside the arc move to the right or left along the circumference of the encounter map.
There is one exception to this movement rule, which occurs when an enemy ship inside the arc detects your submarine:
The ship will attempt to change its course to evade the attack. In the next Ship Movement Phase following the detection, the enemy ship will change its trajectory either to the right or left, based on its position in the reference arc. If it's directly in the middle of the reference arc, roll a die: 1, 2, or 3 indicates a right turn, while 4, 5, or 6 indicates a left turn.
7.1 Sighting and detection
Both enemy ships and escorts can spot or detect your U-Boat. The conditions for this detection vary and are specified on each mission sheet, taking into account factors such as distance, time of day, weather and submersion status.
Sighted: Your submarine has been spotted by the enemy. It means they are aware of your presence, but they may not have pinpointed your exact location.
Detected: Your submarine has been detected by the enemy. This typically occurs when escorts or other enemy units have a clear idea of your submarine's position.
The main difference between being sighted and being detected lies in how enemy ships and escorts react:
If you are sighted by a ship and there are no escorts, this doesn't trigger any specific actions or changes. However, if you are sighted and there are escorts, they will be alert to our attacks. Any escort within the "Sighted" distance will detect our U-boat when we initiate an attack, and our U-boat will automatically change to the "Detected" state for that escort.
When your U-Boat is detected and there are no escorts present, we follow the ship movement rules. If there are escorts, they will initiate an attack against your submarine. In this case, at the end of each of your turns, in the ship movement phase, the escorts will move one space toward your U-boat and will attack you by rolling a die on the Detection Table.
Please note that for the first three missions, you won't need to consider these rules, so you won't find these tables. We will cover that in more detail in future missions. For the first three missions only consider that when a ship detects us, it will change its course in the ship movement phase to the right or left to evade the attack (See Ship movement phase).
Examples: In these examples, we will consider the detection distances as shown in the previous image.
- Sighted and no escorts. Ship inside reference arc. Day, surface. (Sighted D3). As we can see in the table, the 'sighted' distance is D3 for day and on the surface. Any ships within that distance (as indicated by the red arc in the example) will spot us. In this case, with no escorts, the ship will move one space towards the U-boat in the ship movement phase, since it's within the reference arc.
- Sighted and no escorts. Ship outside reference arc. Day, surface. (Sighted D3). In this example, we have the same conditions, but the ship is outside the reference arc, so in the ship movement phase it will move along the circumference to the left since it's positioned to the left of the arc.
- Sighted and escort. Ship inside reference arc. Day, submerged. (Sighted D2). In this example, both the ship and the escort are within the 'sighted' distance (D2) since we are submerged. In this case, the escort and the ship will detect us only if we initiate an attack. In the event that we do not initiate an attack and remain in the 'sighted' state, the ship, being inside the reference arc, will move one space towards our submarine, while the escort, positioned outside the arc, will move one space to the right. This movement will position the ship at D1, which means that during the next ship movement phase (next turn), it would have detected us.
- Detected and no escorts. Day, surface. (Detected D2). In this case, the ship has detected us because the detection distance under these conditions is D2. The ship will attempt to flee from the submarine's path in its next movement phase. Instead of moving one space toward the U-boat, it will move along the circumference to the left or right, depending on its position relative to the U-boat. If it's right in the middle, we will roll a die, with 1, 2, 3 indicating a move to the right and 4, 5, 6 signifying a move to the left.
- No detection. Night, submerged. (Detected -). In this example, the detection distance is 0, which means that even nearby ships won't detect us. Ships that reach the red zone (D1) will continue moving either to the right or left based on their position relative to the reference arc. Any ships that move out of the encounter map due to their movement will be considered out of the game automatically.
- Sighted and escorts. Ship inside reference arc. Day, surface. (Sighted D3). In this example, both the escort and the ship are within the 'sighted' distance. However, we initiate a torpedo attack against the ship. Since the escort is within the 'sighted' distance, we have alerted it, and it will move one space towards us and we will need to roll a die on the detection table. Remember that you cannot attack escorts, but you can attempt to escape from them during your action phase.
8. U-Boat Damages
During your patrols your U-Boat may sustain various types of damage. These damages can result from enemy attacks, escape maneuvers, or events encountered during the mission. Each type of damage can have specific effects on your submarine's performance, and they may introduce modifiers (DRM) that affect your dice rolls in certain tables. Mark any damage received on the U-Boat's diagram. Here are the possible damage types and their effects:
- E-Engines (Electrical Engines): Damage to the electrical engines can affect your submarine's movement while submerged.
- Diesel Engines: Damage to the diesel engines can lead to slower movement and a reduced range of movement per turn.
- Radio: Damage to the radio equipment prevents you from sending or receiving messages and intercepting enemy messages. This can be crucial in some missions.
- Periscope: Damage to the periscope can affect your torpedo attacks when submerged.
- Deck Gun: Damage to the deck gun prevents you from using it for surface attacks.
- Torpedo Tubes: Damage to the torpedo tubes significantly hampers your ability to launch torpedo attacks against enemy ships.
Each mission will have specific modifiers for these damages, which will be indicated on the mission sheet and their respective tables.
In addition to specific component damage, your submarine can sustain hull damage, which you'll mark in the Damage column. If your damage track ever reaches the Sunk square, it means an automatic mission failure.
If we receive damage that we already have marked, we will mark this damage on the 'Damage' table.
You've Got the Basics!
At this point, you have all the information you need to embark on Mission 1. In the subsequent missions, additional rules will be introduced and lead you back to this rulebook to add more depth to the game. You'll learn these rules gradually as you play. Good luck, Commander!
9. Weather
Weather conditions played a pivotal role in the daily operations of both U-boats and the Allies during the Battle of the Atlantic.
Clear skies and calm seas favored torpedo and deck gun attacks, yet they made Allied detection systems more effective and increased the visibility of submarines. On the other hand, rainy and stormy weather with rough seas made it harder to spot submarines but significantly complicated torpedo attacks due to the unpredictable nature of waves and visibility.
Also, allied aircraft encountered significant difficulties when patrolling during storms or at night. The adverse weather conditions significantly hindered their ability to conduct reconnaissance and anti-submarine operations, providing U-boats with advantageous cover during these periods.
Each time you make a sighting and proceed to the encounter map, you'll roll a die to determine the prevailing weather conditions for the duration of that encounter. These weather conditions will persist throughout the encounter.
Weather conditions (icons): Rainy, Clear, Stormy, Ice, Foggy.
The specific weather conditions you'll encounter depend on the mission.
9.1 Weather DRM
Each mission comes with a weather DRM table. Depending on the prevailing weather conditions, we will either keep the detection distance value as is or subtract the value.
This simulates the real-life conditions experienced by U-boats and ships at sea. For example, it will be much more challenging for a ship to detect a U-boat during a severe storm.
Example of Weather DRM Table (columns Clear, Rainy, Stormy; each cell gives a Sighted and a Detected modifier):
| Clear | Rainy | Stormy | |
|---|---|---|---|
| Row 1 | Sighted - / Detected - | Sighted - / Detected - | Sighted -1 / Detected -1 |
| Row 2 | Sighted - / Detected - | Sighted -1 / Detected - | Sighted -2 / Detected -1 |
10. Escorts
We've already covered how escorts move, but in this section we'll explain what happens when an escort has detected us. We'll outline the two possibilities that can lead to an escort detecting us.
- The escort is within sighted distance, and we initiate an attack on a ship. In this example the sighted distance is D3. If we attack the ship, the escort will automatically detect us since it's within the sighted distance.
- The escort is within detected distance. In this example the detected distance is D2. The escort will detect us and it will move one space towards us (See the next section 10.1 Detection table).
Detection check: The check to determine whether ships and escorts have sighted or detected us takes place just before starting the ship movement phase. In the encounter map, you'll find boxes to mark whether we are 'sighted' or 'detected'.
10.1 Detection table
If during the detection check we find that an escort has detected us, it will move one space towards the U-Boat and we will roll a die on the Detection Table before moving the ships.
If the result is 'Not Detected,' the escort will continue its normal movement, and we will perform another check before starting the ship movement phase of the next turn. If the result is anything else, apply the outcome and proceed with the ship movement phase.
If there are escorts within the detected distance, we must remain on the encounter map until we initiate the escape action.
11. Enigma
In some missions, players will receive encrypted information about coordinates. To decode this information, they will need to navigate the map and reach grids with specified numbers as outlined in the mission instructions.
When you reach a grid with a numbered coordinate, roll two dice and refer to the corresponding table. The dice roll outcome will determine the amount and quality of information gathered about a specific segment of the convoy's route.
Example:
The U-Boat reaches the grid 3. We roll 2d6 on the Coordinate 3 table and the result is 9. The result are the coordinates HI91 HI01. We need to decode these coordinates using the table attached. In this case, the coordinates are AM42 AM52.
We draw a straight line between the coordinates received from intelligence. By connecting many small segments, we can form a more concrete representation of the entire route.
12. Campaign
In the campaign mode you will embark on patrols, earning experience points that can be exchanged for various upgrades. You can choose between shorter six-month campaigns or chain multiple campaigns together, progressing through the war until 1942.
You can earn experience points by sinking ships and laying mines. The experience points acquired are persistent across campaigns, providing a continuous progression system.
Earned experience points can be allocated to various upgrades. When gaining an experience point, it must be mandatory assigned to one of the available upgrades:
- Crew Level: The crew level provides DRM for the Aircraft Table and Repair Roll. Roll a 1d6 when consulting these tables and determine the DRM based on the crew level. For the Repair Roll, you need a 10, 11, or 12 to succeed in the repair, factoring in the appropriate DRM adjustments.
- Captain Level: The captain's level works similarly to the crew level but applies to the Attack Table and Maneuver Table.
- Deck Gun capacity: You can increase the gun's capacity up to 7 Ammo. This upgrade only applies after completing the current patrol and reaching a friendly port.
- Repair attempts: In the campaign mode, you can only attempt to repair a specific type of damage once. If the repair is unsuccessful, you cannot attempt to repair that damage again. You can allocate experience points to increase the number of repair attempts per type of damage.
- Re-roll: You can gain the ability to make a re-roll per turn. This re-roll can be used for any of the rolls during the turn. For 2d6 you must roll both dice again.
Example:
We spend 5XP to reach the Captain level 3. From now on, apply the DRM obtained in column L3 on the Attack Table and Escape Maneuver Table.
12.1 Torpedoes
In the campaign mode, we can choose how to load our torpedo slots. Here are the three options:
- G7a Torpedo: This is the type of torpedo we have used during the game missions. It operates on steam and leaves a trail of bubbles on the water surface, making it detectable when we initiate an attack even if we miss the target. It has good range and reliability.
- G7e Torpedo: This torpedo runs on batteries, making it silent and leaving no bubble trail on the surface. The drawback is that it has less range than the G7a, and the reliability is poorer. In this game it means that we can attack at a maximum distance of D3, and we have a -1 DRM on the Hit Table. On the positive side, escorts will not detect us if we initiate an attack within their sighting zone, only if we cause a hit on the target.
- Mines: You can use torpedo tube slots to load them with mines. You will receive 2 experience points in your patrols if you use your submarine to lay mines. On the maps, you will find coordinates marked with an M and a number, for example, M6. This means that if we manage to reach this point on the map and lay six mines, we will receive 2XP point.
12.2 Patrols and Ports
In this game a patrol lasts from when we leave a friendly port of our choice until we return to a friendly port or the same port. For game purposes and in an abstract sense, this will be considered one month.
Each campaign map consists of 6 months (6 patrols). If your U-boat is sunk, you will immediately lose the game, and you won't be able to continue the campaign.
After each successful patrol, you'll have the opportunity to restock your U-boat with torpedoes or mines, replenish your ammo supplies, and refuel the submarine. During this time, any damages incurred during the patrol will be repaired.
However, if your U-boat sustains 7 or more damages (including both hull and equipment damage), you'll require an additional month in port for more extensive repairs, leading to the loss of one month of patrol. For example, if you return to port in January with 7 or more damages, your next patrol will commence in March.
12.3 Ship Table
Now we have a ship table for the entire campaign. Roll two dice, one for the tens and one for the units. The ships will now have a new value, XP. If we manage to sink the ship, we will earn the experience points indicated there.
Depending on the year there will be more chances for ships to have escorts. You will find an additional table for escorts alongside the ship table.
12.3 Events
For campaign events, choose the table of your preference included in the missions; the only consideration is to ensure that the mission's year is the same that the current campaign year.
12.4 Campaign log
You will find a diary to keep track of all patrols, damage, and ships sunk.
You will find several of these sheets in the book, but you can also copy or download them from www.turgaliumgames.com or on the files section on BGG.
13. Sequence of Play
1. U-Boat Movement Phase
- Move your U-Boat on the map up to the maximum distance specified by the technical data for each mission. Your drawn path should consist of segments of straight lines. Each straight line segment should begin and end at the center of a grid square on the map.
- Before you start moving your U-boat, you have the option to change from submerged to surface state or vice versa. If you spot an enemy ship or an enemy aircraft detects you, this is the state you'll begin the encounter in.
- Spend fuel or battery depending if you are on the surface or submerged. Aircraft attacks and events, as well as enemy ship sightings and attacks, will occur during the time of day currently indicated by the fuel table.
- Remember that you need to surface in order to recharge the batteries. While surfaced the batteries recharge at a rate of 25% per turn.
- If you reach squares marked with an "E" in the Fuel Table, roll the dice on the corresponding event table and apply the results immediately.
2. Sighting Phase
After completing your movement check the color of the area in which the U-Boat is located and roll the dice on the Sighting Table. If the result is a ship or an aircraft proceed to roll the dice on the corresponding table. If the result is (-) continue your patrol.
2.1 Aircraft
If the result of the dice is Aircraft roll two dice on the Aircraft Attack Table and apply any DRM. But take into account that if it's nighttime an aircraft attack is not possible, in this case continue your patrol.
- If the result on the Aircraft Attack Table is Damage, apply this damage to the U-Boat immediately. Then you have two options: roll on Aircraft Attack Table again or try to escape rolling the dice on the Escape Maneuver Table.
- If the result is Roll on Damage Table apply the damage after rolling the dice on the Damage Table.
- If the result is Failed Attack continue your patrol.
2.2 Ship
If the result of the dice is Ship follow the next steps:
- Position your U-Boat on one of the eight possible positions of the Encounter Map before identifying any ship.
- Roll two dice to determine the positions of the enemy ships. If the result is 2, 3 or 4 it means a false sighting.
- Roll two dice on the Ship Table for each ship sighted and continue with the encounter phase.
3. Encounter Phase
This phase only occurs if you have sighted a ship. Play turns using the available actions until one of the following conditions is met:
- You have sunk all enemy ships
- You decide to disengage
- Your U-Boat is destroyed
The available actions are Go To Surface/Submerge, Maneuver, Advance, Launch Torpedoes, Fire Deck Gun, Repair Attempt and Escape.
3.1 Weather
Roll a die to determine the weather conditions for the duration of the encounter (after Mission 2): 1-2 Rainy, 3-5 Clear, 6 Stormy.
4. Ship Movement Phase
At the end of each player's turn, after all available actions per turn are used, it's time for the enemy ships to move. Follow the next steps:
- Detection check: First check if any ships or escorts have sighted or detected your U-Boat. Each mission has a Detection Distance Table with the weather DRM.
- Move the ships one space following these rules:
| No Escorts | Escorts (after mission 3) | |
|---|---|---|
| Sighted | Nothing changes. Ships move following the ship movement rules taking into account whether they are inside or outside the reference arc | Any escort within the Sighted distance will detect our U-boat when we initiate an attack and our U-boat will automatically change to the Detected state for that escort |
| Detected | The enemy ship will change its trajectory either to the right or left, based on its position in the reference arc. If it's directly in the middle of the reference arc, roll a die: 1, 2 or 3 indicates a right turn, while 4, 5 or 6 indicates a left turn | The escorts will move one space toward the U-boat and will attack by rolling a die on the Detection Table |
- After all the ships and escorts have moved, we move on to the next U-Boat turn. You can continue attacking the remaining ships on the map or escape. If there are escorts within the detected distance, you must remain on the encounter map until you initiate the escape action.
On the following page, the first mission begins. If you are playing for the first time, it is recommended to play the first three missions in order as new rules will be introduced gradually. Once you are familiar with all the rules, you can play the missions in any order and replay them to try to improve your score. Each mission is highly replayable as both the events that occur and the enemy ships you encounter vary in each game.
If you have any questions about the game or the rules, feel free to reach out to me through www.turgaliumgames.com or on the game's page on BGG. I'll be happy to help!