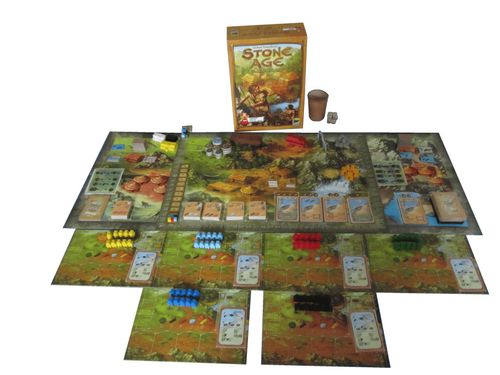
Schmuck und Handel (fan expansion for Stone Age)
Schmuck und Handel (fan expansion for Stone Age) Rulebook
Table of Contents
Table of Contents
Components
- 1 turning game board (Wende-Spielplan), with the Hut Board (left) on one side and the Card Board (right) on the other
- 1 market rate board (Markt-Kurs-Tableau)
- 2 dice
- 6 point markers
- 10 figures in one of two new player colours
- 1 food track marker in one of the two new player colours
- 1 counting track marker in one of the two new player colours
- 75 jewellery parts (30 feathers, 25 shells, 20 bones)
- 36 jewellery pieces (Schmuckstücke)
- 10 new huts
- 10 new civilisation cards
- 1 neutral player figure
- 6 summary cards for the jewellery part values
What Changes
Basically all rules of Stone Age remain in force unless described otherwise. The following changes apply compared with the base game:
- Revealing huts: Like civilisation cards, huts are revealed only after the round.
- Feeding phase: A player who cannot feed his people moves back on the score track 10 points, plus 1 point for each person who cannot be fed. Instead of giving up one raw material for each food, he moves back 10 + 2 points.
- Example: Player A has 8 people but only 6 food. 2 people cannot be fed. Instead of giving up raw materials for one food each, he moves back 10 + 2 = 12 points on the score track.
- Upper card symbol "draw one civilisation card": The player draws from the surplus stack if there is one. If there is none, he draws from the draw stack.
It is strongly recommended that, in games with up to 4 players, only one new card set and one new hut set are used, even if you own two copies of the expansion.
Setup
In addition to the 4 players of the base game, the 5th and 6th players receive their figures and starting food. (This applies if you own the expansion twice; then both game boards are used.) Depending on which side of the turning board is used, the following setup steps are added.
Using the Hut Board (left side)
- There is one more hut stack than in the base game. When it runs out, the game does not end. This stack is always filled with 7 huts, regardless of the number of players. So with up to 4 players there is always one more hut stack in play than there are players. With 5 players the same number of hut stacks is in play as in the base game. With 6 players the Card Board is used instead.
- Preparing the huts: The special huts of this expansion and the huts of the base game are shuffled separately. For each hut stack, draw 2 special huts and 5 normal huts. Return the remaining huts to the box unseen. Shuffle the drawn huts together and make stacks of 7 huts each.
Using the Card Board (right side)
- There is a new space for one additional civilisation card. Civilisation cards lying there cost 2 different raw materials. When cards are moved along, this space is also moved along. So a cheap card that is not bought becomes more expensive when it is moved onto the new civilisation card space. The game therefore also ends when this space can no longer be refilled with a card.
- Limits: In games with 4 or fewer players, only 4 civilisation card spaces are refilled, even if all 5 civilisation cards have been bought. From 5 players on, 5 civilisation cards are refilled. If refilling with the required number of civilisation cards is not possible, the game ends. Refilling always begins on the right, at the new civilisation card space.
- Preparing the civilisation cards: The 36 civilisation cards of the base game are shuffled together with the new cards, and then, according to the author's table (not in the text; see the note in the Table of Contents), a number of civilisation cards is used for the game.
Market
As described above, jewellery parts can be traded for food on the market, and vice versa. Each market has exactly 5 placement spaces. With each figure you may trade one type of jewellery part (sell or buy). For example, if you want to buy feathers and bones, you must place two figures on the market. Decide what you are trading immediately before trading with the figure on the market. There is no limit on quantity; for example, there is no limit on how many bones one figure can trade.
If both markets, left and right, are in play, trading jewellery parts is only possible on the left game board. On the right game board, raw materials are traded instead. The same limit applies here: each figure placed on the market may trade one type of raw material.
The trading rates for the markets are shown on the two-sided market rate board (Markt-Kurs-Tableau), which is placed next to the market on the game board. (The rate table itself is not in the text.)
Tool use: For every 2 tools, you may reduce the cost of a purchase by 1 food. For example, 2 bones cost 8 food normally; with 2 tools used, they cost only 6 food. The cost can be reduced by at most 50%, which equals the selling price of the jewellery part or raw material. Further tools have no additional effect on the cost.
Limits by player count: With 2 players only 1 player may enter a market. With 3 players 2 players may enter a market. From 4 players on, all players may enter a market.
Jewellery (Schmuck)
- Each game board has a jeweller (Schmuckmacher) with 3 jewellery spaces and one space for the draw stack (light background). Each jewellery space has exactly one figure space.
- Obtaining jewellery pieces: During the planning phase, place at least one of your figures on the circle of a jewellery space. In the trade phase, hand in jewellery parts and, where the picture shows it, raw materials, according to the picture on the piece.
- Which pieces you may trade: You may always trade the piece on the jewellery space that belongs to your own figure space, and in addition any piece whose figure space has no figures of opponents on it. So it is possible to trade all three pieces with a single figure, if no opponent occupies one of the other figure spaces. If you do not trade the piece of your own figure space, you cannot trade any other piece.
- There are 3 types of jewellery pieces, which can be recognised by their background colour: blue, red and beige.
- Points: Like the huts, jewellery pieces score points immediately. The points are shown at the top left of the jewellery tile. The points for a piece equal the sum of the points of its individual parts. Normal raw materials score their usual points; the points of the jewellery parts are given in the table, which is not in the text.
- Variable jewellery pieces: There are two variable jewellery pieces. They state only the total number of parts to hand in, and each lists 2 types of which at least 1 part of each type must be handed in. The rest of the number may be chosen freely from the listed types.
- Example: 4 parts must be handed in in total, and at least one shell and one bone must be among them. The other 2 parts may be any mix of shells and bones. The points depend on the parts handed in.
- Each jewellery piece appears exactly once in the expansion.
- At the start of each round, empty jewellery spaces are refilled with jewellery pieces, as far as possible.
Preparing the jewellery pieces:
- With only one game board (Hut Board or Card Board): Shuffle all jewellery pieces well and place them face down on the jeweller's draw-stack space. Turn the top 3 jewellery pieces face up on the 3 jewellery spaces.
- With both game boards: The left jeweller receives the pieces that consist only of jewellery parts. The right jeweller receives the pieces that also need normal raw materials (wood, clay, stone or gold).
Jewellery pieces you have obtained are placed next to your player board and give additional points at the end of the game.
End-game scoring for jewellery:
- You get 1 point for each jewellery piece.
- For every two jewellery pieces of different colours, you get 1 additional point (so 2 + 1).
- For every three different types/colours, you get 2 additional points in total (so 3 + 2 = 5). Three different colours therefore give 5 points in total.
- There are 3 jewellery pieces that count as any one of the three colours. Their background is one third red, one third blue and one third beige. The owner chooses the colour of each of these pieces at the end of the game, during the bonus calculation. Each piece is counted only once.
- Example: 2 blue, 3 red and one brown piece give 5 points for one each of brown, red and blue, 3 points for the second red and the second blue, and 1 point for the last red.
Hunting: Jewellery parts are mainly obtained during the hunt. The individual parts (feathers, shells and bones) are linked to the faces of the dice rolled for the hunt. Which face shows which part is given in the table, which is not in the text.
- If you roll a 5, you receive, in addition to the 2 food, one bone.
- If you do not go hunting, you can trade jewellery parts for food on the market. Conversely, if you have too many jewellery parts but no food, you can trade them for food.
Each player receives a two-sided summary card with the most important data for the jewellery parts.
Huts
Many of the new huts offer a special action. For each special action a certain condition must be met. Some require a payment. The payment is placed on the hut, which at the same time marks the hut as used. At the end of the round, during feeding, this payment is returned to the general supply.
- Unless stated otherwise, a special action may be used only once per round.
- For a special action to be usable, the hut card must not be covered by another hut.
- When buying a new hut you must decide whether to place it under an existing hut or on top of an existing hut, if no free space is left. Since there are only 5 hut spaces, you can use at most 5 special huts.
- Two huts have dark placement spaces. This means that during the planning phase you can/must place a figure on them in order to be able to use their special ability in the trade phase.
- Special case: If a player owns 2 identical special huts, both can be used separately from each other.
- The special actions are used at various points in the game, as described under each hut below. A missed opportunity cannot be made up later; the player is then unlucky. The other players should wait until the player has decided, and should not continue play early to prevent the special action.
- For the end-game scoring of the hut builders, these special huts count as 2 huts. In return, and in compensation for the special actions, fewer points are gained when building special huts.
The new huts (the names of the huts were pictures and are not in the text; they are listed here by their effect, in the order of the source):
- Hut 1 (name missing from text): In the trade phase, the player receives one jewellery part of his choice if he sends at least one figure to the hunt (1 feather, 1 shell or 1 bone).
- Hut 2 (name missing from text): In the planning phase, the player may place one figure and one food on the hut. As the very first action in the trade phase, he may then move that figure to another free space on the game board. The following areas are excluded: the food track, the tools, and empty card, hut or jewellery spaces. Adding to one's own figures is allowed.
- Hut 3 (name missing from text): This hut gives 2 points per feeding phase. If the player places a figure on it during the planning phase, he receives 4 points instead of 2. The 2 or 4 points are set at the end of the feeding phase. (In the round in which the hut is built, it already gives the 2 points.) No further costs.
- Hut 4 (name missing from text): At the start of each planning phase, the player with this hut may place one of his figures on one of the cards for 2 different raw materials, before the starting player places. If the player is himself the starting player, he may use this special action at the start of the round to place a figure on a card, and place his regular figure elsewhere. The cost of the special action applies even if the card is not bought.
- Hut 5 (name missing from text): Once per trade phase, the player may use a tool tile a second time. To do so, he places 1 food on the hut and turns back a tool that was used in this round. Cost: 1 food.
- Hut 6 (name missing from text): Once per trade phase, the player may exchange a raw material of his choice to upgrade another raw material by one level. Example: The player pays one wood, and then another raw material is upgraded: wood becomes clay, clay becomes stone, or stone becomes gold.
- Hut 7 (name missing from text): In the trade phase, the player receives 1 additional stone if he has at least 1 figure in the quarry.
The overview of the new huts, with explanations of the special actions, was given at the end of the original rules as an image and is not in the text.
Civilisation Cards
The expansion contains 10 new civilisation cards. Some of them have new symbols on the upper half of the card and new unique culture symbols on the lower half.
New symbols on the upper half of the card (the labels of these symbols were pictures and are not in the text; they are listed here by their effect):
- An extra figure may be used for one round. It is returned to the general supply after the trade phase. It goes back before feeding, so it does not need to be fed.
- An extra die may be used for one roll. It can be used for the raw material supply, the hunt, civilisation cards that require a roll, and dice-track cards.
- For dice-track cards, the player first chooses one of the faces as usual, and additionally receives the last one that remains. The use must be announced before the roll, and then the card is turned over.
New unique culture symbols (lower half of the card):
- 1 × Agriculture (Ackerbau)
- 1 × Animal husbandry (Haustier-Haltung)
- 1 × Jewellery making (Schmuckfertigung)
With the new unique culture symbols, you can now score 121 points with the green civilisation cards, provided you have all 11 different culture symbols. The scoring basis of the green civilisation cards is: (number of different symbols)².
8 new dice-track cards (Würfelleisten-Karten): The face values determine what is received:
- 1: 2 feathers
- 2: 1 shell
- 3: 1 bone
- 4: 3 points immediately
- 5: 2 food
- 6: 5 points immediately
Overview of civilisation card effects (the list in the source is not tied to card names, which were pictures; the entries are given in the order of the source):
- The player places the civilisation card face up in front of himself. At any time during the game he may choose one of the three jewellery parts and take it from the supply. Then he turns the card over.
- One extra die for one roll.
- Dice-track card: the active player rolls as many dice as there are players in the game, and chooses first. The faces of the dice determine what he receives.
- The player immediately receives 2 wood.
- One extra die for one roll.
- The player immediately draws one civilisation card face down, from the surplus stack or from the draw stack. The upper part of the drawn card is not carried out.
- An extra figure may be used for one round.
- Dice-track card (as above).
- Dice-track card (as above).
- Dice-track card (as above).
Rule Update (27 May 2011)
The author published this change after several games in which too many multipliers of one type were removed from the game.
When cards are removed from the game because there are too few players, observe the following:
- Sort all cards by their multipliers.
- Shuffle each pile separately.
- From each pile, draw at random the corresponding number of cards. (With up to 4 players and one copy of the expansion: 2 from each pile.)
- Combine the remaining cards into one stack, shuffle it well, and use it as the draw stack.
- The cards removed from the game are also shuffled and form the surplus stack.
Furthermore, jewellery pieces are refilled immediately after a player has left the jeweller with all of his figures.
The author's note on this change: The last player can still buy 3 jewellery pieces, but he does not know which parts are needed, and blocking is still possible. This makes the jewellery a little more attractive.