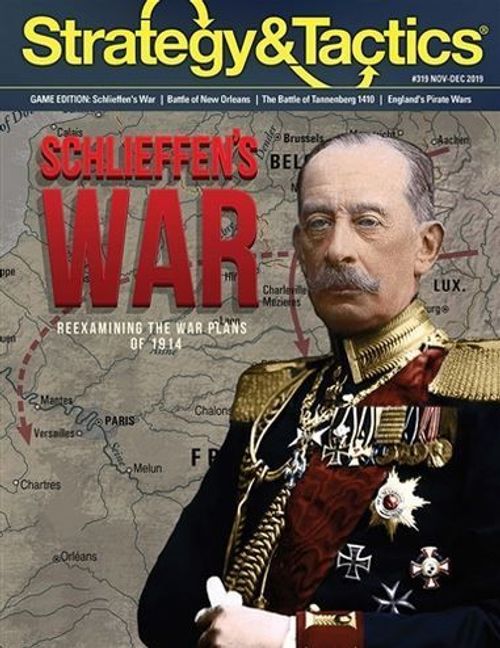
Schlieffen's War: Reexaming the War Plans of 1914
Schlieffen's War: Reexaming the War Plans of 1914 Rulebook
Table of Contents
Table of Contents
- 1.0 Introduction
- 2.0 Components
- 3.0 Set Up & Hex Control
- 4.0 How to Win
- 5.0 Turn Sequence
- 6.0 Stacking & Command
- 7.0 Zones of Control
- 8.0 Supply
- 9.0 Reinforcements & Regrouping
- 10.0 Movement
- 11.0 Combat
- 11.1 Probing Attacks
- 11.2 Maximum Units in a Hex
- 11.3 Stacking Restrictions & Combat
- 11.4 Command Requirements
- 11.5 Indivisibility of Units
- 11.6 Attack Sequencing
- 11.7 Attack Eligibility
- 11.8 Combat Procedure
- 11.9 CRT Odds Limits
- 11.10 Clear or Forest Terrain
- 11.11 Rough Terrain
- 11.12 River Hexsides
- Charts & Tables
1.0 Introduction
1.1 General
Schlieffen's War (SW) is a strategic-level two-player wargame of low-intermediate complexity that covers the first six weeks of fighting on Western Front in 1914. The game's sub-systems are crafted to present a supreme commander's eye-view of the war: it is therefore almost fully strategic in its perspective with only the most pastel of operational undertones added to enhance historical tone and texture.
1.2 Scale
Each hex on the map represents 16 miles (26 km) when measured from side to opposite side. Each full turn of play represents four days of real time. Units of maneuver are corps with army HQs also being represented. Fortresses and forts also play an important role in play.
1.3 Sides
One player commands the German forces. The other player commands the Entente forces (Belgian, British and French) which are allied with each other in opposition to the Germans.
2.0 Components
The components to a complete game of SW include these rules, one 22 × 34 inch map and one sheet of 176 5⁄8 inch counters.
2.1 Map
The game map shows the militarily significant terrain on the early-war western front when portrayed at this scale. The hexagonal (hex) grid printed over it regulates the placement and movement of units. A unit is in only one hex at any one time. Each hex contains natural and/or manmade features that affect movement and combat. Each hex on the map has a unique four-digit identification number printed within it. They are provided to help you find referenced places quickly. For example, the city of Antwerp is in hex 0812. They also allow you to record unit positions if a match must be interrupted and taken down before it can be completed.
Important: The Terrain Effects Chart (TEC) lists cities and heavy fortresses. A city marked with a heavy fortress symbol is both a city and a heavy fortress.
Important: The river hexside line does not note that the 1L shift is only if all units are attacking across a river hexside (11.12). The hexside between hex 1413 and 1513 is a river hexside as is the hexside between 1212/1313, 1010/1111 and 1810/1910.
Errata: Hex 0804 should read "The Ruhr".
Rail lines are intentionally not depicted on the TEC. They do not affect movement or combat, only supply (8.0).
Important: Turn Track, Allied final effort (11.2.4) applies on Turn 10 as well as Turn 9.
2.2 Unit Counters
Most of the counters (also referred to as units and unit counters) represent formations that were present during the campaign. Additional counters are provided as informational markers and memory aids. After reading through these rules, punch out the counters. Trimming the dog ears from their corners with a fingernail clipper will facilitate easier handling and stacking during play.
Errata: The fort counter labeled as Mavpe should be marked Maube (Maubeuge).
2.3 Mobile Units
The below depicted unit is the full-strength German 10th Infantry Corps that is initially assigned to the German 2nd Army. It has a combat factor (used for both attack and defense) of 4 and a movement allowance (MA) of 4.
Counter diagram (corps unit front and back), labelled: Unit Size, Unit Type Symbol, Unit Identification, Army Assignment, Combat Factor, Movement Allowance, Reduced Strength Indicator Stripe. Front shows Full Strength; back shows Reduced Strength.
Army HQs also have their set-up hex (four digit) or game turn of entry (one digit) number in the upper left corner of the counter. (3.1 & 5.2)
Counter diagram (army headquarters front and back), labelled: Set Up Hex / Arrival Turn, Unit Size, Unit Type Symbol, Unit Identification, Combat Factor / Command Radius, Movement Allowance. Front shows In Supply; back shows Out of Supply.
Important: Parentheses indicate unit may only attack if stacked with a unit with a non-parenthesis combat factor.
2.4 National Colors & Abbreviations
There are four nations with units in the game's order of battle. They all have distinctive colors to identify them. The significance of nationality will be discussed at numerous places throughout the rest of the rules. The nationality color schemes are as follows.
National Color Schemes
- Belgian: Orange
- British: Tan
- French: Blue
- German: Grey
Abbreviations
- BAV: Bavaria
- BEF: British Expeditionary Force
- Bel: Belgian Army
- C: Cavalry
- COL: Colonial
- GD: Guard
- GRD: Group of Reserve Divisions
- ERS: Ersatz
- LW: Landwehr
- NA: North African
- R: Reserve
2.5 Unit Types
There are five types of units in the game:
- Infantry Corps and Cavalry Corps: the units of maneuver at this scale.
- Army headquarters (HQ): Representing the command and logistical tail required to coordinate and supply the field forces.
- Static Fort: Represents both the fort and its inherent garrison. Fort counters cannot move or attack, they can only defend.
- Depot units: Representing the forward logistical base required by the German armies to maintain their pace of operations.
Important: A city marked with a heavy fortress symbol is both a city and a heavy fortress.
2.6 Combat Factors
As discussed above, these numbers serve as measures of each unit's ability to engage enemy formations in combat (11.0).
2.7 Step Strength
All units (except HQ and depots) in the game have two steps. Corps and fort units have a full-strength side and a reduced-strength side. Some fort units have more than one counter. When a fort takes its first step loss, flip the counter to its reduced side. If a fort counter takes a second step loss and more than one fort counter (with the same name) exists, replace the original counter with the replacement counter.
Example: The Verdun fort counter is placed on the map at the beginning of the game with its "4" strength side showing. It suffers a step loss and is flipped to its "3" strength side. If Verdun suffers a second step loss, replace the original Verdun counter with the Verdun counter showing a "2" strength.
The front side of headquarters and depots represents their in-supply status with the reverse side representing their capabilities when out of supply.
2.8 Multi-Step Units
If a full-strength corps unit takes a step loss, flip the counter to its reduced side. If a reduced corps unit takes a step loss, the counter is eliminated and placed in the appropriate Eliminated Units Display. Fort units may not be brought back into play. If a HQ or depot suffers a step loss, it is placed in the appropriate Eliminated Units Display. Corps, HQ, and depots may be returned to play (5.2 & 9.5).
2.9 Movement Allowance
All units have their movement allowance (MA) printed on the counter. A unit's movement allowance is the number of movement points (MP) the unit may expend each game turn. Unlike most wargames, a unit that expends MA may be penalized during combat (11.0).
2.10 Markers
The counter-mix also includes the following types of informational memory aid markers. Their uses are explained in appropriate sections of the rules.
- Game Turn Marker
- German Victory Point Markers (4.6)
- French Plan XVII Mandatory Attacks Marker (4.4)
- Out of Supply (OOS) Markers
- Morale Markers
- German Coup de Main Marker (11.23)
- German Heavy Artillery Bombardment Marker (11.23)
3.0 Set Up & Hex Control
After first deciding who will command which side, both players should cooperatively sort and set up the units and markers of both sides according to the following instructions. The Entente player sets up first.
3.1 Initial Unit & Marker Placement
Players should sort all French and German army HQs and corps into separate armies. HQs and forts are printed with a hex number in the upper left corner.
- Forts marked with a hex number must be placed in the hex corresponding to the number printed on the counter.
- German and French Army HQ units may be placed in or adjacent to the hex listed on the counter. Assigned corps may be placed in any hex within the command radius of their superior HQ. The placement hex must be in the home country of the HQ (i.e., Germany for German HQ, France for French HQ). All units must adhere to stacking restrictions (6.0).
Exception: Corps that are part of the French 1st Army are exempt from the command radius restriction. They may be placed in any hex on or south of the 22xx hex row.
- Place Elan markers on all German mobile corps. Do not remove the marker during the first turn regardless of the number of MP expended.
- The Belgian army HQ and three mobile corps may be placed in any hex in Belgium. Corps must be in the command radius of the Belgium army HQ. No more than one corps unit can be placed in any one hex.
- Place the British Expeditionary Force (BEF) and the French 6th Army (including the four assigned corps) in the appropriate boxes on the Turn Track.
Place the Game Turn marker in the "1" Box. Place the Plan XVII marker in the "0" Box of the French Plan XVII Mandatory Attacks Track. Place the German victory point markers in the "0" box of the German VP Track.
3.2 Neutral Nations
The only neutral (non-involved) nations shown on the map are the Netherlands and Switzerland. That status is visually emphasized by the fact the hex grid has been deleted from their territory on the map and the area has been greyed out. No unit of either side may in any way move or attack into those countries' territories. The former neutrality of Belgium and Luxembourg has already been violated by the Germans prior to the start of play.
3.3 Hex Control
At the start of play the Entente player is said to "control" (own) all hexes lying in Belgium, Luxembourg, and France. The German player controls all the hexes in Germany. The control status of a hex changes from one side to the other each time a unit of the opposing side moves into it. Opposing units will never be in the same hex at the same time, and the mere projection of a zone of control (ZOC) into a hex does not cause a control switch (7.0).
4.0 How to Win
The German player is on the overall offensive, striving to win the game via the occupation (control) of large sections of France and Belgium. More importantly, the German Army has to eliminate the French Army as a threat, thus lowering the French will to fight and to be able to release significant forces to counter the Russian threat in the east. Historically, the German Army came close to achieving both of those goals. To win, the German player must exceed what was accomplished historically. The Entente player must strive to prevent that outcome while preserving enough of his army to force the war into a war of attrition that will eventually lead to the defeat of the German Imperial Army.
4.1 Paris Endangered German Victory
No matter what the overall situation across the map, the German player cannot win the game unless at some time prior to the end of Turn 10 he has endangered Paris.
- Paris is endangered the instant a German unit enters any hex inside the Paris endangered perimeter of hexes shown on the map, roughly within three hexes from the city itself.
- Once Paris has been endangered it need not be kept in that state and this victory pre-condition is considered to have been permanently satisfied.
4.2 German Sudden Death Victory
If, at the end of any game turn prior to the end of Turn 10, the German player gains control of one or more Paris hexes, play stops and he is declared to have won the game at that time. Supply status (8.0) has no bearing on this determination.
4.3 Allied Sudden Death Victory
If, at the end of any game turn prior to the end of Turn 10, the Entente player controls one or more German city hexes, play stops and the Entente player is declared to have won the game. Supply status (8.0) has no bearing on this determination.
Important: If the Allies achieve this victory, they are not required to meet the conditions set in 4.4.
4.4 French Plan XVII Attack Victory
If, at the end of Turn 7 (26–29 Aug), the Entente player has not met the below requirements, the German player is declared the victor:
- The Entente player must have conducted at least seven all-French attacks into hexes within Germany.
- Attacks made that include or are conducted by British and/or Belgian units do not count towards this total.
- There is no specific timing requirement for these attacks (other than conducting all seven prior to the end of Turn 7).
- Use the French Plan XVII Mandatory Attacks Track (on the map) to record the number of qualifying attacks that have been made.
Exception: Probing attacks (11.1) do not count towards the XVII attack requirement.
4.5 German East Front Withdrawal Victory
If, during the German Regroup & Reinforcement Phase of Turn 7, the German player cannot (or will not) eliminate two German Corps which are in supply, at full strength, and with a combat of 4, the Entente player is declared the victor (9.4).
4.6 Winning & Losing on Points
If, the end of Turn 10 (7–10 Sep) is reached and none of the sudden death victory conditions have been met, the winner is determined based on German "victory points" (VP).
- The German player starts the game with zero VP.
- One VP is awarded to the German player for each city in Belgium and France that is captured by the Germans.
- One VP is subtracted from the VP total for each city in Belgium and France that the Allies recapture from the Germans.
- These apply each time that a city is captured by the Germans or recaptured by Entente.
- Use the German Victory Point Track (on the map) to record the current number of German VP.
Note: The Belgian and French cities that begin play with heavy fortresses in them are depicted with a red boundary around their hex.
4.7 Win, Lose or Draw
If, at the end of Turn 10, the German player has 10 or fewer VP, the Entente player is declared the winner. If the German player has 11 or 12 VP that game ends in a draw. The German player wins with 13 or more VP (i.e., he controls 13 or more of the 25 Entente city hexes (excluding Paris)).
5.0 Turn Sequence
Every turn of Schlieffen's War is divided into two player turns (German and Entente) and an End of Turn Phase.
- The player whose turn it is, is called the phasing or active player; the other player is called the inactive or non-phasing player.
- Each player turn is divided into phases.
- Once a player has finished an operation within a phase, or has finished an entire phase within a turn, the player may not go back to perform some forgotten action or redo a poorly executed one unless his opponent graciously agrees to permit it.
5.1 Turn Sequence Outline
The turn sequence is presented below. The overall phase order is the same every turn.
Important: The Regroup & Reinforcement Phase is skipped for both sides on Turn 1.
German Player Turn
- Regroup & Reinforcement Phase
- Movement Phase
- Combat Phase
- Administrative Phase
Entente Player Turn
- Regroup & Reinforcement Phase
- Movement Phase
- Combat Phase
- Administrative Phase
End of Turn Phase
5.2 Regroup & Reinforcement Phase
Starting on Turn 2, during the active player's Regroup & Reinforcement Phase, the active player may regroup all supplied mobile units.
- Regrouping allows units that are reduced to return to their full-strength side.
- Units that have been eliminated may be returned to play.
- Regrouping also allows corps to remove fatigue markers. (9.5).
Reinforcement:
- The German side does not receive any reinforcements.
- The Entente side receives reinforcements on Turn 3 and Turn 7.
- Reinforcement units are marked with a single number in the upper left-hand corner, denoting the turn of arrival (9.0).
5.3 Movement Phase
During each Movement Phase, the active player may move none, some or all his units (10.0).
- Units that do not move may be marked with an elan marker.
- Units that move more than one-half of their MA lose one level of morale (9.6).
- Units that force march lose one level of morale and may be reduced (10.6).
5.4 Combat Phase
During the Combat Phase, the active player may attack with any units that are adjacent to enemy units (11.0).
- Units are not required to attack.
- Units that are in command may combine their attack with units in other hexes.
- Units not in command may only combine their attack with other friendly units if all units are in the same hex.
- Corps units that win a combat may gain one level of morale (9.6 & 11.20).
- Corps units that lose a combat lose one level of morale (9.6 & 11.20).
- During each player turn, each unit may only conduct one attack and enemy units may only be attacked once.
5.5 Administrative Phase
During each Administrative Phase, the active player checks the supply status of all friendly units.
- Mark those units that are out of supply (OOS) with an OOS marker.
- Check OOS units for attrition (8.8).
- Heavy fortresses and those units stacked in them are never marked OOS.
5.6 End of Turn Phase
On Turns 1 through 9 determine if either side has met its sudden death victory conditions.
- If either side has achieved a sudden death victory (4.2 & 4.3) the game ends and the side obtaining the sudden death victory is declared the winner.
- If it is the German Regroup and Reinforcement Phase of Turn 7, and the German player does not eliminate 2 German corps (4.5), the games ends in an Entente victory.
- If it is the end of Turn 7 and the Entente side has not met the Plan XVII requirements (4.4), the game ends in a German victory.
- If neither side has obtained a sudden death victory, advance the game turn marker one space on the Turn Track. If the turn just completed was Turn 10, determine victory.
6.0 Stacking & Command
Stacking is the word used to describe the placing more than one friendly unit in the same hex at the same time. Entente units and German units may never occupy the same hex.
6.1 Stacking & Movement
Stacking rules are in effect at the end of each phase. Players may overstack hexes during a phase; however, at the end of each phase, any hex found to be overstacked suffers the penalties outlined in 6.5.
6.2 Stacking Limit
A maximum of three corps and one army HQ may stack in any hex.
- Forts count as a corps equivalent.
- Three corps and one HQ may attack out of a single hex.
- Only two corps and one HQ may defend a single hex.
Example: The German player has the 1st Army HQ, 2nd, 3rd, and 4th Corps stacked in one hex. The hex is attacked by Entente forces. The German player must choose which two of the three corps will defend the hex. He may also use the army HQ to assist in the defense.
6.3 Entente International Stacking
National forces within the Entente may not stack with another nation's forces, including fort counters (Exception: 8.4).
6.4 Free Stacking Units
Markers do not count towards stacking. They may be added freely to any stacks within the strictures governing their use.
6.5 Over-Stacking Penalty
At the end of a phase, any units found to be overstacked (either side), take the following actions:
- All corps and/or fort units without an elan or fatigue marker are marked with a fatigue marker. If any of the units have an elan marker remove that marker.
- The owning player must then move enough units (of his choice) out of the hex to comply with the stacking restrictions.
- Moved units must move one hex towards a friendly source of supply. The hex may not be in an enemy zone of control (EZOC) unless already occupied by a friendly unit.
- Moved units may create another overstack situation. If they do, implement the above procedures for that hex. This sequence continues until all overstacked hexes meet the stacking limitations.
- The owning player may choose to eliminate excess units, instead of moving them.
- If the overstacked units do not have a legal hex they could move into (due to prohibited terrain, enemy units, or EZOC), excess units are then eliminated (owning player's choice).
6.6 Fog of War
Players may always examine their own units. Opposing players are free to examine the top unit in an enemy stack. Opposing players may always examine the top most combat unit, ignoring markers.
6.7 Command
To operate at full efficiency, regroup, and conduct multi-hex attacks units must be in command. To be in command a unit must be within the command radius of a friendly army HQ. Entente units must be in the command radius of an army HQ of the same nationality.
Exception: German units are also in command if in a German city that can trace a line of supply in the same manner as a depot to the eastern map edge (8.6).
Important: After initial set up, players may ignore army designations. Corps units are in command if they are within the command radius of any HQ of the same nationality. This applies to all game functions.
- Each HQ has a command radius equal to its combat factor.
- Terrain has no effect on command radius.
- Units that are in command may:
- Regroup (9.0).
- Conduct forced marches (10.6).
- Combine with units in other hexes to conduct a single attack against a single enemy occupied hex (11.4).
- Units that are not in command may not conduct any of the above actions.
7.0 Zones of Control
The six hexes immediately surrounding a hex containing one or more mobile corps constitute the zone of control (ZOC) of the units in that hex.
Important: Depots, HQs, fort counters and mobile units in a fortress or stacked with a fort counter do not project ZOC.
- Zones of control extend across all hexsides and into and out of all types of terrain.
- All corps of both sides (that are not in a fort) always project ZOC. Supply and command status have no effect when projecting ZOC.
- There is no difference in effect between ZOC projected by units of different sides into the same hex.
- Opposing units may simultaneously project their ZOC into the same hexes and with the same effect.
- A ZOC projected by an enemy unit is referred to as an enemy zone of control (EZOC).
7.1 EZOC & Movement
A moving unit must end its movement for that phase when it first enters an EZOC.
- A mobile unit that starts the Movement Phase in an EZOC may move normally provided the first hex it enters does not contain an EZOC.
- Friendly units do not negate EZOC for movement purposes.
Important: Units may not move from one EZOC directly to another EZOC. This includes EZOC generated by different units.
7.2 EZOC & Supply
Friendly units can trace supply into but not through an EZOC unless that hex is occupied by friendly units.
7.3 EZOC & Retreat
Units may retreat out of but not into EZOC. Friendly units do not negate EZOC for the purposes of retreat.
7.4 EZOC & Advance
EZOC do not inhibit or block the ability of attacking units to advance after combat.
7.5 Negating EZOC
Friendly units negate EZOC for supply and command. They do not negate EZOC for movement and retreat.
8.0 Supply
Mobile units require supply to operate with full efficiency when moving or participating in combat.
A mobile unit is always in one of three supply states: In Supply, Heavy Fortress Supply, or Out of Supply.
- A unit's supply stat is determined in the friendly Administrative Phase, and the unit remains in that state until the next friendly Administrative Phase.
- Units that are OOS or in heavy fortress supply are penalized in terms of their movement and combat capabilities.
- Mobile units of both sides may move into hexes where they are OOS or heavy fortress supplied.
Important: Fort counters do not provide heavy fortress supply.
8.1 When to Check Supply
The active player determines his unit's supply status during his friendly Administrative Phase. Supply status is not checked at any other time during the game turn.
Example: During the German Administrative Phase of Turn 2, the German player determines that a hex containing two corps is OOS. He marks the stack with an OOS marker. These units remain OOS until the next German Administrative Phase.
8.2 Supply Lines
Supply lines may be traced through any passable hex and/or hexside that is free of enemy units.
- The supply may be traced into, out of, and through EZOC, if the hex in question is occupied by a friendly unit. In the case of the Entente, friendly units may be of any nationality.
- If a given supply source hex becomes enemy occupied, but that occupation is later ended, that hex again (immediately) functions as a supply source.
8.3 French Supply
French units are in supply if they can trace a supply line:
- From the unit to a French army HQ; then,
- From the HQ along a rail line to any grid numbered hex on the map's south or west side.
- The distance from the unit to a French HQ may be no longer than two hexes. In this case each rail line hex in France counts as one-half a hex, if the path is along the rail line.
- The army HQ must be on a rail line that can trace a supply of any length to a French supply source.
- A unit and/or French HQ may be in heavy fortress supply if it occupies any French heavy fortress hex.
8.4 BEF Supply
British units are in supply if they can trace a supply line:
- From the unit to the BEF HQ or any French HQ; then,
- From the HQ along a rail line to any grid numbered hex on the map's south or west side, or to any friendly controlled port.
Important: If tracing to a port, the unit must trace its supply line using the BEF HQ.
- The distance from the unit to the BEF/French HQ may be no longer than two hexes.
- The army HQ must be on a rail line, that can trace a supply line of any length to a British supply source.
Exception: If tracing to the BEF HQ, the HQ could be in a port with no rail line.
- BEF units and/or the BEF HQ may be in heavy fortress supply if it occupies Liege or Maubeuge only.
- BEF units are not in heavy fortress supply if occupying any other heavy fortress.
Important: This is an exception to 6.3, that units of different nationalities cannot stack together. In this case a BEF unit may stack with the fort counter, but not with mobile units of any other nationalities.
8.5 Belgian Supply
Belgian units are always in supply if they occupy any hex in Belgium. If they occupy a hex outside Belgium, they must trace a supply line.
- Belgian units are in supply if they can trace a supply line:
- From the unit to the Bel HQ; then,
- From the HQ along a rail line to any grid numbered hex on the map's south or west side.
- The distance from the unit to the Bel HQ may be no longer than two hexes.
- The army HQ must be on a rail line, that can trace a supply line of any length to a supply source.
8.6 German Supply
German units are in supply if they can trace a supply line:
- From the unit to a German army HQ; then,
- From the HQ along a path of friendly hexes to that army's depot; then,
- From the depot along a rail line to any hex in Germany along the east side of the map.
- The distance from the unit to a German HQ may be no longer than two hexes.
- The distance from the HQ to its depot may be no longer than two hexes. In this case each rail line hex counts as one-half a hex, if the path is along the rail line.
- The distance from the depot to a German supply source may be of any length but must be traced along a rail line free of enemy units and/or EZOC.
- A German HQ may trace directly to a rail hex in Germany if the path is no longer than two hexes from the HQ to the rail line in Germany.
- German units are also in supply if they are within two hexes of a German city and that city can trace a line of supply in the same manner as a depot to the eastern map edge.
8.7 Effects of OOS
Units that are OOS suffer the following:
- Their regular movement allowance is halved (rounded up).
- They cannot force march (10.6).
- Their combat factor is halved when attacking and defending (round up) (11.7 to 11.16).
- They cannot regroup (9.5).
- They may be subject to attrition (8.8).
8.8 OOS Attrition
During each player's friendly Administrative Phase, the active player must check the supply status all of his units (5.5).
- Corps and HQ units that are found to be OOS must be checked for attrition.
- German depots that are found to be OOS are flipped to their OOS side.
- An OOS depot that is found to be in supply is flipped to its front (in supply side).
- The owning player rolls a die for each of his OOS corps and HQ. If the result is a 1 or 2: the unit loses one step. HQ units are eliminated.
- Corps units eliminated while OOS (attrition or combat) are permanently removed from play. Place them off to the side of the map. They may not regroup.
- HQ that are eliminated while OOS (attrition or combat) are placed in the appropriate Eliminated Units Display.
- OOS depots do not roll for attrition; however, they can be eliminated due to combat. If eliminated due to combat while OOS, they are placed in the appropriate Eliminated Units Display.
Exception: Units that are in fortress supply do not check for attrition.
8.9 Fortress Supply
Fortress cities are always in supply.
- Units stacked in fortress cities are immune from attrition checks and do not halve their defensive strength.
- Their movement allowance and attack strength are halved.
- If a unit's position is such that both fortress supply and regular supply are available to it, it is considered to be using regular supply.
Exception: See 8.4 for British heavy fortress supply.
9.0 Reinforcements & Regrouping
9.1 Reinforcements
Reinforcements are units that do not start the game set up on the map; instead, they enter play for the first time during turns after the game has begun. The BEF and the French 6th Army are the only reinforcements in the game.
9.2 BEF Entry
During the Entente Regroup and Reinforcement Phase of Turn 3, the Entente player may place all British units in any friendly controlled French port hexes of his choice (Dunkirk, Calais or Boulogne).
- Stacking limits (6.2) must be adhered to.
- British units may not move or attack until Turn 4. They do defend and exert ZOC normally during Turn 3.
9.3 French 6th Army
During the Entente Regroup and Reinforcement Phase of Turn 7, the Entente player places all units of the French 6th Army in any friendly controlled and non-EZOC hex along the map's west edge. All units operate normally on that turn.
9.4 German East Front Withdrawal
During the Regroup and Reinforcement Phase of Turn 7, the German player must remove (eliminate) two corps from play.
- These corps must be in supply, be at full-strength, and have an attack strength of four.
- The German player may select any two corps and remove them from the map. They may not return to play.
- If the German player is unable, or refuses to withdraw these units, he automatically forfeits the game.
9.5 Regrouping
Beginning with Turn 2, both sides may attempt to regroup eligible units during their respective Regroup and Reinforcement Phases.
Important: To conduct any of the below regroup actions, units must be in supply, in command, and not in an EZOC.
Exception: All units in the Eliminated Units Display are automatically in supply and command.
- Each unit eligible to regroup may conduct any of the following actions. All units conducting one type of action must complete that action prior to units conducting another action. Actions are conducted in the order given.
- Remove fatigue markers.
- Return units to full-strength (flip the reduced unit back to its full-strength side). Place a fatigue marker on all units returned to full-strength.
- HQ, depots, and corps units in the Eliminated Units Display may return to play. Units return at full-strength. Place a fatigue marker on all units returning to play. Units returned to play are placed according to their nationality as follows:
- German: Any city in Germany that is friendly controlled, not in an EZOC, and is connected to a rail line free of enemy units and/or EZOC that exits the east map edge.
- French: Any city in France that is friendly controlled, not in an EZOC, and is connected to a rail line free of enemy units and/or EZOC that exits the west or south map edge or to a port that is not in an EZOC.
- British: British units only return to play in Dunkirk, Calais or Boulogne if the British HQ is present and the hex is not in an EZOC (8.4).
- Belgian: Belgian units may not return to play. Once eliminated they are permanently removed from play.
Example: A player has two units that are fatigued and one of those units has taken a step loss. He also has one unit that is not fatigued but has taken a step loss. All units are in supply, in command and not in an EZOC. He would take the following steps.
- The player could remove the fatigue markers from either or both of the two fatigued units.
- He then could choose to return either or both units with one step loss to full-strength, however in doing so he would place fatigue markers on the unit(s) that did so.
- He could then return units that had been eliminated to the map.
Note: If, due to enemy control no eligible city exists, that nationality may not return units to play.
9.6 Elan & Fatigue
Corps units (only) are always in one of three states of morale; fatigued, normal, or elan. A unit can be in only one morale state at a time.
Important: Only corps units are affected by elan and fatigue.
- A fatigued unit is affected as follows: a) Its movement allowance is halved. b) If involved in an attack, the attack suffers a one column shift left. c) When involved in a defense, the defender suffers a one column shift right. d) It cannot force march. e) It cannot recover a step loss during the Regroup and Reinforcement Phase.
- When fatigued units would incur another fatigue for any reason, ignore the second fatigue.
Exception: Apportioning Step Losses 11.20.
- Fatigued units that meet any of the requirements for increasing their morale have their fatigue marker removed.
- A unit with normal morale does not have a marker placed on it and operates with its full MA and combat abilities (if in supply). Units in normal morale can become fatigued or gain elan.
- Units marked with an elan marker are in a state of high morale, rested, and/or well organized.
- Elan confers favorable combat shifts when attacking and defending.
- A unit that meets the requirements for a loss in morale/organization would return to normal morale.
Important: Units may only shift one level of morale. A fatigued unit could return to normal morale but could not go directly from fatigue to elan. Units in a normal status may either be fatigued or gain elan. A unit could in one game turn shift from a fatigued status to elan; however, a unit could not go from fatigued to elan in a single phase.
10.0 Movement
Movement is the method by which units on the map move from hex to adjacent hex.
- Movement takes place in each player's own Movement Phase.
- The active player may move none, some, or all of his mobile units (exception 9.2).
- All mobile units of both sides have a movement allowance (MA) printed on the counter.
- The MA of each unit is the maximum number of movement points (MP) that a unit may expend in a friendly Movement Phase.
10.1 Procedure
Movement takes place from hex to adjacent hex within the strictures given below and summarized on the Terrain Effects Chart (TEC) printed on the map. No moving unit may ever give or loan MP to another unit nor may any hexes be skipped over during movement.
10.2 Movement & Fatigue
If a unit expends more than one-half (round up) of its MA in a Movement Phase, that unit suffers fatigue (mark it with a fatigue marker or remove an elan marker).
Exception: On Turn one, German units do not suffer fatigue if moving more than one-half their MA.
If a unit does not move during the Movement Phase that unit increases its morale by one level (fatigued to normal, or normal to elan).
10.3 Enemy Units & Movement
No moving unit or stack may enter a hex containing one or more enemy units of any kind.
10.4 Terrain Effects on Movement
A moving unit must expend one or more MP to enter a hex based on the type of terrain in it and along the hexside crossed. See the TEC for details.
- For a hex to be considered clear terrain, it must be completely clear without any other terrain feature present.
Important: If a hex does not contain forest, rough, marsh, or city terrain, it is clear terrain.
10.5 Crossing Rivers
It costs one extra MP to cross a river hexside. Extra means in addition to the cost involved in entering the terrain in the hex being crossed into.
Example: A unit crossing a river hexside into a forest hex would pay a total of three MP to do so: two MP to enter the forest hex and an "extra" MP to cross the river.
Note: River hexsides are negated when crossing a river into or out of a city.
10.6 Forced March
Forced march is a variant of regular movement that has the benefit of allowing a unit to expend additional MPs. Units conducting a forced march have an additional two MPs to expend during the current turn.
- Only corps and HQ may force march.
- The unit must be in command and in supply (not heavy fortress supply).
- The unit may not be fatigued.
- The unit may not begin its movement in an EZOC. In this case, other friendly units do not negate the EZOC.
- Units that force march may suffer attrition. Roll one die, and consult the Attrition Table on the map and apply the result.
Exception: German units are not subject to fatigue or attrition when conducting forced march on Turn 1.
10.7 No Minimum Movement
Units may only move into hexes if they have the MP available to pay all attendant costs for that move, both for hexside and in-hex terrain.
Exception: German depots can only move along rail lines. They pay one MP to enter any hex via a connected rail line.
10.8 Belgian Army Movement Restriction
The Belgian Army may only move, retreat after combat, and attack into hexes inside Belgium or within two hexes of Belgium when in France or Luxembourg.
- Belgian ZOC do extend into all other hexes normally.
- If any circumstance would force a Belgian unit to leave the above area, that unit is eliminated.
11.0 Combat
Combat is always voluntary; the mere adjacency of enemy units does not force either player to attack.
- Attacks take place between adjacent opposing units during the Combat Phase in each player's turn.
- Both players are always free to attack or not, as each chooses on a case by case basis.
- The active player is always the attacker, and the inactive player is always the defender.
- Each attack is a discrete action that is conducted from one or more hexes into one other hex immediately adjacent to it/them.
11.1 Probing Attacks
Prior to declaring any attacks, the phasing player may declare probing attacks into any adjacent hex that is not occupied by an enemy unit.
- The hex must be adjacent to an enemy occupied hex.
- Probing attacks do not require odds determination or use of the CRT.
- The owning player simply moves the units conducting the probe into the unoccupied hex.
- The units conducting the probe can move from one hex in an EZOC directly into another hex that is in an EZOC.
- Units that conduct a probing attack cannot participate in any other attacks during the current phase.
- Fatigued units cannot conduct probing attacks.
Important: Probing attacks do not count towards the number of Plan XVII attacks (4.4).
11.2 Maximum Units in a Hex
If there is more than one unit in the defending hex, those units must be attacked as a single unit.
Exception: If there are more than two corps in a defending hex, the owning player determines which two corps will participate in the combat, although the additional (third) corps unit will suffer the results (if any).
Note: Fort counters count as a corps equivalent (6.2).
11.3 Stacking Restrictions & Combat
Each friendly unit can only attack one enemy hex, although not all units stacked in the same hex need attack the same hex.
- A maximum of three corps equivalents and one HQ may attack out of a single hex during one Combat Phase.
- An enemy occupied hex may be attacked in one combat by as many of the phasing player's units as may be brought to bear from one, some, or all of the surrounding hexes.
11.4 Command Requirements
If the attacking player wishes units in different hexes to attack a single hex, all those units must be in command.
Note: Attacking units may trace command to any friendly army HQ.
11.5 Indivisibility of Units
No single attacking unit may have its attack factor divided and applied to more than one battle.
- No defending unit may have part of its defense factor attacked by one or a few attackers while another part is attacked by others.
- No attacking unit may attack more than once per Combat Phase and no defending unit can be attacked more than once per Combat Phase.
11.6 Attack Sequencing
There is no arbitrary limit on the number of attacks a player may declare during a Combat Phase. The resolution of a declared attack must be completed before another combat is declared.
11.7 Attack Eligibility
Some units have restrictions as to how they can used to attack enemy units:
- Heavy fortresses and forts cannot attack.
- HQ can only attack if attacking with other eligible units.
- The BEF may not attack on Turn 3.
- The Belgian Army may not attack outside its operating area (10.8).
11.8 Combat Procedure
Normally, the attacking player should strive to have several times more combat factors involved in a battle than the defender has involved on that side. Such battles are called high odds attacks. To resolve such battles, the attacking player begins by calculating his odds.
- If the attacker is attacking with multiple stacks, determine if all attacking units are in command. If they are, the attacking player may combine units in more than one hex into the attack.
- Total the attack factors of all the attacking units involved in the combat. A maximum of three corps (plus one HQ) is allowed per attacking hex.
- Total the defense factors of the units in the defending hex. A maximum of two corps (plus one HQ) may defend in a hex.
- Divide the defender-total into the attacker-total and round down any remainder.
Important: The combat factors of units marked OOS are halved.
Example: If 27 combat factors attack 7 combat factors, the situation yields an odds ratio of 3:1 ("three to one"). That is, 27÷7=3.71, which rounds down to 3. To turn that "3" into a ratio, you must set a "1" next to it on the right. Thus "3" becomes "3:1," which corresponds to a column-heading on the Combat Results Table (CRT) (on the map).
11.9 CRT Odds Limits
The column headings on the CRT range from 1:2 to 7:1.
Important: Final odds greater than 7:1 are resolved without a die roll; their results are always automatically 0/3. Odds less than 1:2 are resolved without a die roll; their results are always "2/0."
11.10 Clear or Forest Terrain
Units defending in clear or forest hexes do not receive terrain column shifts.
11.11 Rough Terrain
Units defending in rough terrain hexes receive one column shift in their favor (one shift to the left).
11.12 River Hexsides
If all attacking units are attacking across a river hexside, the defending units receive a one column shift in their favor (one shift left). The river odds shift is applied in addition to any applicable shift for in-hex terrain.
Important: To receive the shift, all attacking units must be attacking across a river hexside.
11.13 Cities
Units defending in city hexes receive one column shift in their favor (one shift left). Units defending in a city cannot be subject to the concentric attack shift.
11.14 Heavy Fortresses
Units defending in a heavy fortress receive one column shift in their favor.
Important: City hex, river hexside and heavy fortress shifts are cumulative.
Important: Fort counters have a combat factor printed on the counter (defensive only) that is added to the total defense factors of that hex. They do not impose a column shift.
11.15 Concentric Attack Column Shift
When an attack attacks a hex as listed below, the attacking side receives a variable number of shifts. If the defending hex is attacked through:
a) Two diametrically opposite hexsides; or, b) Three hexsides with an uninvolved hex between each of the attacking hexes; or, c) More than three hexsides.
If any of the above is true, the attacking player rolls one die, and divides the result by two (round fractions down). The result is the number of right column shifts the attacker receives.
Note: The attacking side does not receive the concentric attack shifts if attacking a city or a heavy fortress hex.
11.16 Fatigue & Elan
Elan and fatigue affects a unit's efficiency in combat. The effects of elan and fatigue are as follows:
Defenders:
- If all units participating in the defense of a hex are marked with an elan marker, they receive a one column shift in their favor (one shift left).
- If any of the participating defending units are marked with a fatigue marker, that defending hex receives a one column shift in favor of the attacker (one shift right).
Attackers:
- If all the attacking units are marked with an elan marker, that attack receives a one column shift in its favor (one shift right).
- If any of the attacking units are marked with a fatigue marker, that attack receives a one column shift in favor of the defender (one shift left).
11.17 Final Combat Resolution
After the CRT odds column has been determined and all applicable odds shifts have been applied, the attacker rolls a die and cross-indexes that result within that odds ratio column to get a "combat result."
Example: A result of "3" rolled for an attack made at 3:1 odds yields a combat result of "1/2" on the CRT.
11.18 Combat Results
Combat results are given in terms of steps lost by the involved units of one or both sides.
- The number printed to the left of each result's slash applies to the involved attacking units.
- The number printed to the right of the slash applies to the involved defending units.
Example: A combat result of "2/3" would mean the attacking force must lose a total of two steps, while the defending force must lose a total of three steps.
Important: The numbers in a combat result represent the grand total of step losses that must be suffered by the involved forces of each side; they do not represent the number of steps every involved unit must suffer.
- The defender must always completely absorb his combat result before the attacker absorbs his.
- There is never any carry over of a combat result from one battle into any other battle or phase.
- Any combat losses more than the step strength of the units involved are ignored.
11.19 BEF Defensive Proficiency
German losses are increased by one when attacking British units.
Example: The German result was zero. The German loss would become one.
11.20 Apportioning Step Losses
Each player is generally free to apportion his side's step losses among his involved attacking or defending units as he sees fit.
Exception: The defending player cannot assign step losses to a fort until all mobile corps in the hex have been eliminated.
Important: Mobile corps that are eliminated while OOS are set aside; they cannot be regrouped. Mobile corps eliminated while in supply are placed in the Eliminated Units Display; they may be regrouped.
Defender Losses:
- The first step loss must be taken as a step loss from one of the participating defenders.
- After assigning the first step loss, the defender may convert additional step losses to retreats. For each hex the force retreats, the owning player may reduce the total step losses required by one. All mobile defending units must retreat as a stack.
Exception: Mobile units defending in forts or fortresses cannot use the retreat option (11.21).
- Non-participating defenders (i.e., a third corps equivalent) can be used to absorb step losses after the first step loss.
- If all participating defenders are eliminated, the non-participating unit (if any) must absorb any remaining losses or suffer the remaining step losses as a retreat.
- Defending units that retreat immediately suffer fatigue (place a fatigue marker or, alternatively, remove an elan marker). If all defending participating units are already fatigued, the owning player must apportion one additional step loss to the retreating units (one step loss to one unit).
Exception: No unit can suffer two step losses, until all units (including the non-participating unit) have suffered one step loss.
Example: Three full-strength defending corps receive a combat result of three. The defending player could apportion the step losses as follows:
- One participating corps suffers one step loss (the one mandatory step loss), and then all corps retreat two hexes.
- One step loss to each of two corps, and then all three corps retreat one hex.
- Each corps suffers one step loss and all three corps remain in place.
Attacker Losses:
- All step losses suffered by the attacking side must be taken as step losses.
- The first step loss must be from a participating attacker. After the first step loss, a non-participating corps (stacked with the participating units) can be used to absorb step losses.
Exception: No unit can suffer two step losses until all units (including the non-participating unit) have suffered one step loss.
- If all participating attacking units are eliminated, the non-participating units (if any) must absorb any remaining losses.
- If the defending force is eliminated or retreats out of the defending hex, all attacking units decrease their fatigue level. If already marked with a fatigue marker, remove it. If not marked, place an elan marker.
- If the defending force is not eliminated or retreated, all attacking units (not non-participating units) suffer fatigue (place fatigue markers or remove elan markers). If a corps is already fatigued, that corps must suffer an additional step loss.
11.21 Retreat After Combat
The defending player (only) may choose to decrease his side's combat losses by one step by retreating all mobile units in that defensive force.
- For each hex retreated, the defender reduces the number of step losses by one.
- Units cannot retreat into an EZOC even if occupied by friendly units.
- Mobile units defending in forts or heavy fortresses never have the retreat option available to them.
- No unit may retreat off the map or into a hex where it would be overstacked.
- If more than one retreat destination hex is open to the retreating units, they should be retreated into the hex that brings them closest to their nearest functioning supply source hex.
- If two or more equally eligible retreat-destination hexes exist, the owning player is free to choose between them.
11.22 Advance After Combat
At the end of every attack, whenever the defender's hex is left vacant of defenders, the victorious attacking units may advance after combat into that hex.
- Stacking limitations must be observed.
- Advance after combat does not expend movement points.
- Advancing units must observe normal terrain prohibitions.
- An EZOC does not block advance after combat.
- Advance after combat is an option; it is never mandatory. However, in every battle the decision to advance must be made immediately after it is resolved and before another action is begun.
- Defending units never advance after combat.
11.23 German Coup de Main & Heavy Artillery Bombardment Markers
At the start of play the German player has a coup de main and three heavy artillery bombardment markers available for use. All four counters have the same potential effects; the coup marker is only distinguished in name from the artillery markers for historical narrative. The German player is not required to use any of the markers, but when or if he does, he does so under the following strictures.
- No more than one heavy artillery marker may be committed to any one German attack. The coup marker may be used in conjunction with heavy artillery markers.
- A marker may only be committed to support a supplied attack being launched into a city hex that also contains a fort counter.
- The commitment of a marker is announced by the German player and its effects resolved as the last step in an eligible battle's resolution prior to the combat die roll.
- That declaration made, the German player immediately rolls a die and consults the German Heavy Artillery Table printed on the map.
- The result is either "No Effect," or a shift for the supported German attack of one or two column shifts to the right.
- The coup de main marker can only be used once. After it is used, no matter the result, remove the marker from the game.
- When using a heavy artillery marker, no matter the result, roll one die. If the result is one, the marker may be used again (place it on the Turn Track, in the next game turn box). If the result is a 2 thru 6, remove the marker from the game.
Exception: Do not roll for artillery loss on Turn 1. The markers are available the next game turn.
11.24 Allied Final Effort
During the Entente Player Turn of Turns 9 and 10, all attacks launched by the Entente player gain a one-column rightward (1R) odds shift, which are applied in addition to all other normally applicable shifts.
Charts & Tables
The following charts are reproduced from the final page of the rules sheet. The Terrain Effects Chart is also printed on the map.
Terrain Effects Chart
| Terrain Type | Movement Cost | Combat Effect |
|---|---|---|
| Clear | 1 | No Effect |
| Forest | 2 | No Effect |
| Rough | 2 | 1L |
| Marsh | No Entry Allowed | No Combat Allowed |
| City | 1 | 1L & No Concentric |
| Heavy Fortress | 1 | 1L & No Concentric |
| River Hexside | +1 | 1L |
| All-Sea Hex/Hexside | No Entry | Not Allowed |
| Paris Endangered Line |
Other Effects Chart
| Type | Movement Cost | Combat Effect |
|---|---|---|
| Elan Marker | No Effect | Attack 1R, Defense 1L |
| Fatigue Marker | No Effect | Attack 1L, Defense 1R |
| Forced March | Add 2 to MA | Fatigue, Possible Attrition |
| Out of Supply | One-Half MA | One-Half CF, Possible Attrition |
| Concentric Attack | No Effect | #R = 1D6/2 |
German Heavy Artillery Table
| Die Roll | Shift Attack Odds |
|---|---|
| 1 or 2 | No Effect |
| 3 or 4 | Shift Odds One Right |
| 5 or 6 | Shift Odds Two Right |
Attrition Table
| Die Roll | Effect |
|---|---|
| 1 or 2 | Lose one step |
| 3 to 6 | No Effect |
Combat Results Table
| Die Roll | 1:2 | 1:1 | 2:1 | 3:1 | 4:1 | 5:1 | 6:1 | 7:1 |
|---|---|---|---|---|---|---|---|---|
| 1 | 2/0 | 2/0 | 2/0 | 2/1 | 1/1 | 1/2 | 1/2 | 0/2 |
| 2 | 2/0 | 2/0 | 2/0 | 1/1 | 1/2 | 1/2 | 0/2 | 0/3 |
| 3 | 2/0 | 2/1 | 1/1 | 1/2 |
If after all shifts are applied, the odds are less than 1:2 automatically apply a 2/0 result. If after all shifts are applied, the odds are greater than 7:1 automatically apply a 0/3 result.