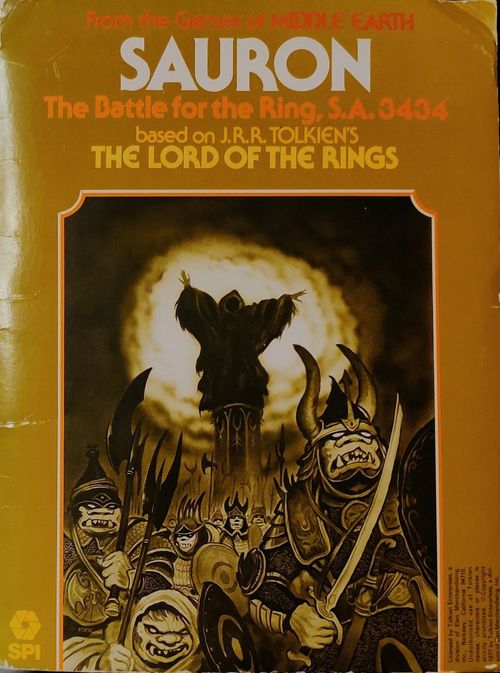
Sauron
Sauron Rulebook
Table of Contents
Table of Contents
Standard Rules (for Gondor and Sauron)
1.0 Introduction
The Game System for the Battle Games Gondor and Sauron simulates two important battles from the fictional Lord of the Rings fantasy by J.R.R. Tolkien. The playing pieces in each individual game represent combat units that participated in the battles, while the game-map represents the terrain over which the battle was fought.
Two rules folders are provided. The first contains Standard Rules, which are common (with a very few noted exceptions) to both battle games. The second folder contains Exclusive Rules pertaining to each individual game only.
2.0 Game Equipment
2.1 The Game-Map
The 22" x 17" mapsheet portrays the area in which the battle was fought. It includes all the significant terrain. A hexagonal grid is superimposed over the terrain features printed on the mapsheet in order to regularize movement and combat. To make the map lie flat, it will help if you back-fold it against the creases.
2.2 Game Charts and Tables
Various visual aids are provided for the Players in order to simplify and illustrate certain game functions. These are the Terrain Effects Chart, the Casualty Probability Table, the Casualty Results Table, the Leader/Individual Combat Results Table, the Leader Rally Tables, and the Turn Record/Reinforcement Track. The Exclusive Rules may contain additional tables or charts.
2.3 The Playing Pieces
The cardboard pieces represent the various military units, magical units, and leaders that took part in the battle. The letters and numbers printed on each unit counter represent Attack Strengths, Armour Protection, and Morale of the various combat units (see Case 2.41). Leaders have a Rally Rating printed on them, while Magical Leaders have an additional Magic Capability number. Certain combat units are capable of both Melee and Missile fire Combat and thus have two Attack Strength letters. Missile strengths are in lower case letters; e.g., e; units that have only a lower case letter strength may not attack in a Melee Phase.
2.4 How to Read the Units
2.41 Sample Units. A combat unit counter (front) shows its Nationality, a unit-type symbol, Melee Attack Strength, Missile Attack Strength, Armour Protection Rating and Morale Rating (for example "B3Z"). The back of the counter shows the Reduced Strengths and Ratings. A Leader unit shows the leader's name and its Rally Rating (and, for Magic Leaders, a Magic Capability Rating).
2.5 Parts Inventory
Game map; die-cut counter sheet (Gondor 200 counters, Sauron 100); Standard Rules (1); Exclusive Rules for the game; Chart Sheet (2); Plastic Die (2); Folio (folder).
2.6 Glossary of Terms
Certain terms are used in the game which may be unfamiliar to players. The following are basic definitions used for the purpose of familiarizing players with the language of the game.
Attack Strength: The ability of a unit to inflict casualties. A lower case letter attack strength (e.g., e) shows Missile Fire Capability - the ability to fire a weapon at a unit over a distance. The best Attack Strength is A; the worst is E.
Armour Protection Rating: The ability of the armour (or lack thereof) worn by the unit to protect that unit. The best armour is rated 4; the worst, 1.
Demoralization Level: The maximum number of Demoralization Points a Player may collect before his units lose good morale and become demoralized. Players keep track of the Demoralization Points accumulated as the game progresses.
Morale Rating: The ability of a unit to withstand casualties. The higher a unit's morale, the less serious the casualties it will sustain in battle. The best Morale is W; the worst, Z.
Movement Allowance: The number of Movement Points a unit may expend towards movement in a Game-Turn. Movement Allowances are not printed on the counters; they are found in the rules.
Magic Capability Rating: The maximum number of Magic Capability Points a Magic Leader may expend in a game.
Rally Rating: The numerical ability of a Leader to rally a disrupted unit. It is also used in Leader Combat.
Unit Demoralization Value: A numerical value representing the Demoralization Points accumulated by a Player when he has lost that unit in combat. The value is added to the total points lost to reach the Demoralization Point Sum. (See Demoralization Level.)
3.0 Sequence of Play
Players should first punch out their playing counters and place them on the map according to the initial set-up given in the Exclusive Rules.
Each game is played in a series of Game-Turns. The number of Game-Turns which comprise a complete game is given in the Exclusive Rules for that game. Each Game-Turn consists of eight (Gondor) or seven (Sauron) separate Phases. These Phases take place in the sequence listed, and the Player performing the function of that Phase is called the Phasing Player. All actions must take place within the appropriate Phase and in the Sequence given.
Outline of the Sequence of Play
A. Initial Magic Leader Movement Phase: Leaders with a Magic Capability Rating may either move or attempt to cast a Spell. Westernesse Leaders go first in this Phase.
B. [Forces of Sauron Siege Phase omitted: Gondor only.]
C. Forces of Sauron Movement Phase: The Sauron Player may move as many of his units as he wishes, excluding units used in Sieges, within the restrictions of the Movement rules. Magic Leaders may not move in this Phase.
D. Forces of Sauron Combat Phase: Combat units of the Sauron Player may attack by either Missile or Melee Combat units of the Westernesse Player (see Section 7.0). All Missile Combat is resolved first, followed by Individual Leader Combat and finally Melee Combat.
E. Second Magic Leader Movement Phase: Players repeat Phase "A" with the following exceptions: Leaders that cast Spells in "A" may not do so in this Phase; and the Sauron Magic Leaders move (or cast Spells) first in this Phase.
F. Westernesse Movement Phase: Same as "C," using Westernesse units.
G. Westernesse Combat Phase: Same as "D," using Westernesse units.
H. Joint Rally Phase: Both Players may use their Leaders to attempt to rally combat units that are disrupted.
At the conclusion of the above sequence (A through H) the Game-Turn Marker is moved to the next turn and the sequence is begun again for the next Game-Turn.
4.0 Movement
General Rule: During a Movement Phase, the Phasing Player may move as many or as few of his units as he desires. They may be moved in any direction or combination of directions, up to the limit of the unit's Movement Allowance.
Units are moved one hex at a time, tracing a path of connecting hexes through the hex grid. As a unit enters each hex it pays one or more Movement Points from its Movement Allowance according to the schedule on the Terrain Effects Chart. Units do not have to move, and sometimes their movement may be restricted.
4.1 Movement Allowances
The Movement Allowance of a unit represents the total number of Movement Points a unit may expend during a given Movement Phase. Movement Allowances are not printed on the counters.
4.11 All cavalry units and Leaders have a Movement Allowance of six. Magic Leaders may expend their Movement Allowance during both Magic Leader Movement Phases if they do not cast a Spell; they may not move in the Phase in which they attempt to cast a Spell.
4.12 All infantry units have a Movement Allowance of four.
4.13 See the Exclusive Rules (13.0 and 14.0) for an example of a cavalry unit. All other units, except for Leaders, are considered to be infantry for the purposes of movement.
4.2 Movement Limitations
4.21 The number of Movement Points which a unit may expend during a single Movement Phase may not exceed that unit's Movement Allowance.
4.22 A Player's combat and leader units may be moved only during their designated Movement Phases. They may never be moved out of sequence (Exceptions: see Cases 7.5 and 7.6 and Siege rules for Gondor).
4.23 No combat may take place during a Movement Phase.
4.24 A unit may expend any portion of its Movement Allowance during a Movement Phase, but unused Movement Points may not be accumulated for use in subsequent Movement Phases or transferred to other units.
4.25 Movement from one hex to another must be consecutive; i.e., units may not skip hexes during movement.
4.26 If the Terrain Effects Chart calls for the expenditure of more Movement Points than the unit has left to enter a particular hex, that unit may not enter that hex.
4.27 Hexes occupied by Friendly units (units controlled by a Player) or their Zones of Control (see Section 6.0) have no effect on the movement of a Friendly unit through any of those hexes. A Friendly unit may never enter an Enemy-occupied hex. There is no limit to the number of units that may move through a hex in a Movement Phase.
4.28 All stacking restrictions (see Section 5.0) must be met by the Phasing Player at the end of his Movement Phase.
4.29 Terrain Effects on Movement (and combat) are covered in the Terrain Effects Chart, Case 4.3.
4.3 Terrain Effects Chart
| Terrain Type | Movement Point Cost to Enter or Cross | Effect on Combat |
|---|---|---|
| Clear | 1 MP | No effect |
| Road | 1/2 MP | Depends on other terrain in hex |
| Slope | 1 additional MP | If a defending unit is attacked through an up-slope hexside, add 1 to defender's Armoured Protection Rating |
| Crater (Sauron only) | May not enter | Not allowed |
| Mountain | May not enter | Not allowed |
| Gate | 1 MP if under Friendly control; may not cross if under Enemy control | No Zones of Control through unbreached Gate hexsides (see Case 6.13) |
5.0 Stacking
The placing of more than one unit in a hex is called "stacking." No two units may ever occupy the same hex (except under certain circumstances). Stacking restrictions always apply at the end of a Player's Movement Phase. Units may always move through Friendly occupied hexes. There are certain exceptions to stacking restrictions:
a. Leaders do not count toward stacking restrictions; they may stack freely with combat units or other Leaders.
b. When using special Formations (see Case 8.4) more than one Friendly unit may be in a hex.
6.0 Zones of Control
General Rule: The Zone of Control (ZOC) of a combat unit is defined as the six hexes adjacent to and surrounding the hex that the combat unit is occupying. As soon as a Friendly combat unit enters an Enemy combat unit's ZOC, that Friendly unit must stop; it may not move for the rest of that Movement Phase. Friendly units in an Enemy ZOC at the beginning of a Friendly Combat Phase must engage in Melee Combat with one Enemy unit (see Case 7.31).
6.1 General Effects of Zones of Control
All Combat units exert a ZOC throughout the game, regardless of the Phase. The effects of ZOCs are never negated by other Friendly units, or otherwise.
6.11 Once a Friendly unit enters an Enemy ZOC it must cease all movement. There are only two ways to leave an Enemy ZOC: by Retreat or Advance after Combat (see Cases 7.5 through 7.7) or by eliminating the Enemy unit exerting the ZOC.
6.12 If there are both Friendly and Enemy ZOCs exerted in the same hex, both ZOCs co-exist and that hex is controlled by both Players. There is no additional effect for having more than one unit exerting a ZOC into a single hex.
6.13 ZOCs extend into all six hexes adjacent to the controlling unit's hex. However, ZOCs do not extend into or through Mountain hexes nor into or out of Tunnel hexes. ZOCs do extend through Wall, Gate or Tower hexsides that have been Breached (see Gondor Exclusive Rules: Sieges).
6.14 Demoralized units (see Section 9.0) do not exert a ZOC.
6.15 Leaders of any type neither have nor are affected by ZOCs.
6.16 Friendly ZOCs never affect Friendly units.
6.2 Effects of ZOC on Movement
It does not cost any additional Movement Points to enter an Enemy ZOC. Furthermore, paths of Retreat may never be traced through an Enemy ZOC regardless of the presence of Friendly units and/or their ZOCs.
6.3 Effect of ZOC on Combat
A Friendly unit must attack one Enemy unit if there are one or more Enemy units exerting a ZOC on such Friendly unit (see Case 7.31).
7.0 Combat
General Rule: There are three different types of combat:
Missile Combat is the firing of projectiles (e.g., arrows) by the Phasing Player's units capable of Missile Fire. Enemy units must be within range of the units firing missiles.
Leader/Individual Combat represents "hand-to-hand" combat between two adjacent Leaders.
Melee Combat takes place whenever a Phasing Player has a Combat unit in the ZOC of an Enemy combat unit.
A given unit may move, fire missiles, and then melee during the same Game-Turn. All Missile Combat is resolved first in the Combat Phase; then any Leader/Individual Combat is resolved, followed by any Melee Combat.
7.1 Missile Combat
7.11 Only combat units with a Missile Capability (an Attack Strength in small letters; e.g., e) may engage in Missile Combat. Missile-firing units may fire only at an Enemy unit within Range (see Case 7.12).
7.12 The range for Archers or Bowmen is two hexes. This range includes the target hex, but excludes the firing unit's hex.
7.13 Missiles may not be fired through Tower, Grove, or Mountain hexes, or over hexes occupied by Siege Towers. Missiles may be fired through wall hexsides and hexes occupied by other units, and into or out of Tunnel hexes if they follow the path of the tunnel.
7.14 Missile units may fire only once per Game-Turn.
7.15 Units that are capable of only Missile Combat (i.e., have only a small letter Attack Strength) may never voluntarily enter an Enemy ZOC.
7.16 All Missile Combat initiated by the Phasing Player is resolved in his Combat Phase before any other type of combat.
7.17 Missile Combat is resolved in the same way as Melee Combat (see Case 7.33) with the exception that the opposing units need not be adjacent. Players will note that all units capable of Missile Fire have a Missile Attack Strength of (e).
7.18 If a defending unit is fired on (during a Missile Combat Phase) through a wall hexside that is part of the hex the defending unit is in, then the defending unit adds one to its Armour Protection Rating. However, a four Armour Protection Rating remains a four.
7.2 Leader/Individual Combat
7.21 Following the resolution of all Missile Combat (see Case 7.1), Players may engage in Leader Combat; i.e., Leader units may fight each other. Any of the Phasing Player's Leaders may, if he wishes, attack any Enemy Leader to whom he, or she, is adjacent. Leader Combat is always optional.
7.22 To engage in Leader Combat, the defending Leader subtracts his Rally Rating from that of the attacking Leader. The result - either a plus or minus number (or a zero) - is the Combat Differential. The Phasing Player then rolls one die and cross-references that die roll with the Combat Differential on the Leader Combat Results Table (7.26) to get the result. All results are applied immediately.
7.23 If a Leader engaging in Leader Combat is stacked with a combat unit and that Leader suffers any combat result, then the combat unit must retreat two hexes. If it cannot do so, it is either flipped over to its reduced strength or, if already flipped over, it is eliminated.
7.24 Leaders may attack only once per Combat Phase. A given Leader may be attacked any number of times per Combat Phase (see Case 7.32).
7.25 Leaders may not attack Enemy combat units and vice versa.
7.26 Leader Combat Results Table
Combat Differential (Attacker minus Defender). Columns: +6 | +4 or +5 | +2 or +3 | +1 | 0 | -1 | -2 or -3 | -4
| Die | +6 | +4 or +5 | +2 or +3 | +1 | 0 | -1 | -2 or -3 | -4 |
|---|---|---|---|---|---|---|---|---|
| 1 | Dr2 | - | Ar2 | Ar2 | A1/2e | A1/2e | Ae | Ae |
| 2 | D1/2e | Dr2 | - | Ar2 | Ar2 | A1/2e | A1/2e | Ae |
| 3 | D1/2e | D1/2e | Dr2 | - |
Key: Dr2 (Ar2) = Defender (Attacker) retreat two hexes. D1/2e (A1/2e) = Defender (Attacker) reduced to half-strength; the affected Leader must use its back-printed strength for the rest of the game. If the Leader is already in a reduced state, he is eliminated instead. De (Ae) = Defender (Attacker) eliminated. "-" = No effect.
Notes: Differentials greater than +6 are treated as +6; differentials less than -4 are treated as -4.
7.3 Melee Combat
7.31 In a given Combat Phase, after all Missile and Leader Combat has been resolved, each Phasing combat unit that is in the ZOC of one or more Enemy combat units must attack one of the Enemy combat units whose ZOC the Phasing unit is in. The Phasing combat unit does not have to attack all the Enemy combat units; it must attack one.
7.32 If more than one Friendly combat unit is adjacent to an Enemy unit, each Friendly unit may Melee that Enemy unit, with each attack being resolved separately. The Phasing Player must, however, state which of the adjacent units are attacking the defending unit, and the Phasing units allocated to that attack may not attack any other Enemy units during that Combat Phase regardless of the outcome of the individual battle.
7.33 Melee Combat is resolved in two steps. First, the Phasing Player cross-references the Attack Strength of his unit with the Armour Protection Rating of the defending unit, using the Casualty Probability Table (7.41). The numbers listed under that cross-reference include the total which the Phasing Player must throw with two dice to produce a casualty. If the total of two dice thrown by the Phasing Player is not listed, there is no casualty. If that total is amongst those listed, the Phasing Player then proceeds to the Casualty Results Table (7.42). There the Phasing Player throws one die and cross-references that throw with the Morale Rating of the defending unit. The result is the type of casualty inflicted on the unit.
Example: A "B" unit attacks a "3" unit. Looking at the Casualty Probability Table we see that the attacker will need to throw a 2, 3, 4, 5, 6, or 7 with two dice to inflict a casualty. If he throws, say, a 10, nothing has happened and that combat is finished. If he throws a 7, there is a casualty, and he proceeds to the Casualty Results Table to see what has happened. Let's say the "3" unit had a "Y" Morale Rating. If the attacker now throws a 3 with one die, the defending unit must retreat one hex and, in addition, flip over to its reduced strength.
7.34 No combat unit may attack/melee more than once per Combat Phase. A defending unit may be meleed more than once (see Case 7.32).
7.35 Combat units may not melee/attack through unbreached Wall or Tower hexsides, unless the attacking unit is using a Siege Tower or a Ladder or if the attacking unit is on a city level higher than the defending unit. This rule applies mainly to the Gondor game.
7.36 Units may not melee through prohibited hexsides or into a prohibited hex. E.g., a cavalry unit (in Gondor) may not attack an Enemy unit in a Grove hex.
7.37 Combat units that become fanatical (see Case 9.33 and Section 10.0) do not use the Casualty Probability Table when they attack. They automatically cause casualties and proceed immediately to the Casualty Result Table, regardless of whom they attack.
7.4 Melee Combat Tables
7.41 Casualty Probability Table
Number required on a roll of two dice to inflict a casualty (e.g., "6-9" means that the total of both dice must equal 6, 7, 8, or 9 to inflict a casualty).
| Attacker's Strength | Defender's Armour 1 | 2 | 3 | 4 |
|---|---|---|---|---|
| A | 2-10 | 3-9 | 2-8 | 4-7 |
| B | 4-9 | 4-8 | 2-7 | 3-6 |
| C | 4-8 | 2-7 | 4-7 | 4-6 |
| D | 2-7 | 5-8 | 6-8 | 2-5 |
| E | 4-7 | 6-8 | 3-6 | 5-6 |
Note: A unit defending behind a wall hexside during the Missile Combat Phase adds one to its Armour Protection Rating to a maximum rating of 4 (see Case 7.18).
7.42 Casualty Results Table (roll one die; cross-reference with the defender's Morale Level)
| Die | W | X | Y | Z |
|---|---|---|---|---|
| 1 | 1/2E, r1 | 1/2E, r2 | E | E |
| 2 | 1/2E, r1 | 1/2E, r1 | E | E |
| 3 | r2 | 1/2E, r1 | 1/2E, r1 | E |
| 4 | r1 | r2 | r2 | E |
| 5 | r1 | r1 | r2 | r2 |
| 6 |
Key: 1/2E = Defending unit is inverted and now uses the values on its reverse side; if already using its reverse side, the unit is eliminated. E = Defending unit is immediately removed from play and is counted toward Demoralization. r1 (r2) = Defending unit must retreat one (two) hex(es). Example: "1/2E, r1" calls for the defending unit to be inverted and retreated one hex.
7.5 Movement After Combat
7.51 Whenever a hex is vacated as a result of Melee (only) Combat the victorious unit may advance into that vacated hex. This advance is made regardless of Enemy ZOCs.
7.52 After advancing a unit may not be attacked or attack during the remainder of that Combat Phase.
7.53 Combat units may advance across a Wall or Tower hexside only if they are on ladders, in Siege Towers, or if the wall, tower or gate hexside is breached.
7.54 Certain Results on the Casualty Result Table require the defending unit to retreat a number of hexes. This is done by moving the defending unit the required number of hexes out of the ZOC of any Enemy units. Neither advances or retreats after combat require the expenditure of Movement Points.
7.55 The Player whose unit is retreating decides the course of retreat. However, the retreating unit may not enter an Enemy ZOC, Enemy-occupied hex, prohibited hex, or pass through an impassable hexside.
7.56 Units that must retreat which are unable to fulfill the requirements of Case 7.55 are eliminated.
7.57 Units that have retreated are considered disrupted. Disrupted units may not move or attack in any fashion until rallied by a Leader (see Case 8.3). Disrupted units defend normally. However, a disrupted unit that is forced to retreat is eliminated instead. Thus, disrupted units may not use displacement (see Case 7.6). Place a marker with a large D on disrupted units.
7.6 Displacement
7.61 If the only hex available for retreat is occupied by a Friendly combat unit (remember stacking restrictions) then the unit in that hex may be displaced to make way for the retreating unit. Displacement is handled exactly as if it were a normal retreat (see Case 7.5).
7.62 Displaced units follow all the rules of retreat.
7.63 If the displacement of a unit would cause the displaced unit's elimination, the retreating unit is eliminated instead.
7.64 A unit may be displaced more than once per Game-Turn, and a retreating unit may cause the displacement of more than one unit.
7.65 All displaced units are disrupted.
7.7 Retreat Before Combat
Certain units may retreat before melee combat: i.e., if they are in danger of being attacked they may choose to retreat one or two hexes (their choice) before the opposing Player melee/attacks. Retreats before combat follow all standard retreat rules with the exception that they occur before combat takes place. In addition, the attacking unit may, if the Player so chooses, move into the hex vacated by the retreating unit. Units that may retreat before combat are: all bowmen units with only missile capability; and any cavalry unit when attacked solely by an infantry-type unit. Units that retreat before combat are disrupted on a die roll of 1, 2, or 3.
8.0 Leaders
General Rule: Leaders represent the fictional figures from the Tolkien novels that played a prominent part in the simulated battles. Leaders may engage in individual combat, rally combat units, command special formations (Westernesse Player only) and, if given a Magic Rating, cast Spells.
8.1 Leaders and Stacking
Leaders must be stacked with a combat unit at the beginning of a Friendly Combat Phase. Normal (non-magic) Leaders must be stacked with a combat unit of their own "nationality." For example, in the Gondor game King Theoden may stack only with a Rohan unit. See the Exclusive Rules deployment and reinforcement schedules for further information. Magic Leaders - those leaders with a Magic Capability Rating - may stack with any combat unit.
8.2 Leaders and Combat
8.21 Leaders may only be attacked by other leaders (See Case 7.2). Regardless of the result of combat Leaders are never disrupted; they may be reduced in effectiveness (See Case 7.25).
8.22 Leaders do not have a ZOC, nor are they ever affected by the ZOC of any other unit.
8.23 Casualties to Leaders may affect the position of the combat units with which they are stacked (See 7.23). Leaders have no other effect on combat units, except in cases of Rallying (8.3).
8.24 If a combat unit with which a Leader is stacked suffers either a 1/2E or an E result - by Melee, Missile, or Case 7.23 - the Leader suffers the same result if, when the owning Player rolls a die, he rolls a five or six. Otherwise, the Leader is unaffected. If the combat unit is eliminated entirely and the Leader remains, the Leader is transferred to the nearest Friendly combat unit.
8.3 Rallying
Leaders may be used to Rally disrupted combat units during the Joint Rally Phase.
8.31 A Leader may attempt to Rally any disrupted unit of its own nationality (see Case 8.1) to which it is adjacent in the Joint Rally Phase. Leaders may not attempt to Rally units of a different nationality or units in adjacent hexes that are separated by unbreached wall hexsides or like impassable terrain.
8.32 Leaders may attempt to Rally only three combat units per Game-Turn.
8.33 Gandalf, the Lord of the Nazgul, and Sauron may Rally any units. This is an exception to Case 8.31.
8.34 To Rally a unit, the Player announces which Leaders are doing the Rallying. He checks the Rally Rating of the Leader and consults the Rally Table (8.37). He throws two dice; if their total is one of those numbers listed under that Rally Rating, that unit is rallied. Otherwise the attempt is unsuccessful. A Rallied unit is no longer disrupted.
8.35 Combat units may be Rallied whether or not they are in an Enemy ZOC. There is no limit to the number of times a unit may be disrupted and then Rallied.
8.36 Leaders may not combine their Rally Ratings in order to Rally a disrupted unit. Furthermore, each combat unit may have a Rally attempt performed on it only once per Game-Turn.
8.37 Rally Table
Number required on a roll of two dice to rally (e.g., "4-7" means that the total of both dice must equal 4, 5, 6, or 7 in order to rally).
| Leader Rating | Dice Roll Total Needed to Rally |
|---|---|
| 1 | 4, 5 |
| 2 | 6, 7 |
| 3 | 3-6 |
| 4 | 4-7 |
| 5 | 2-7 |
| 6 | 3-8 |
| 7 | 3-9 |
| 8 | 3-10 |
8.4 Special Formations
Westernesse Leaders - and only Westernesse Leaders - are capable of enabling their combat units to exceed the normal stacking restrictions to make special formations.
8.41 Special formations may not be made by Dark Power/Sauron combat units. Furthermore, special formations may form only in clear terrain. They may move only into clear terrain and may never enter any other type of hex or cross any other type of hexside.
8.42 There are two types of special formations: two cavalry units may form a Wedge or two infantry units may form a Shield Wall. These are the only types of special formations that may be formed.
8.43 To make a special formation, the two units involved must be of the same nationality and Attack, Armour and Morale strengths. They must begin a Movement Phase stacked with or adjacent to a Leader. They may not be in an Enemy ZOC. The two combat units then move into the same hex with the leader, and they are then in Special Formation.
8.44 All Special Formations have an Attack Strength of A and Armour Protection Rating of 4. Their Morale Rating is the same as that of the units making up the formation.
8.45 Wedges have a Movement Allowance of three. Shield Walls have a Movement Allowance of two. Special Formations may not move in the Game-Turn in which they are formed.
8.46 If a Special Formation suffers a 1/2E result, one of the units in the formation is eliminated. If the formation is forced to retreat, then each unit must retreat to a different hex.
8.47 Leaders may not form Special Formations if they are under a Freeze Leader Spell or a Fear Spell. (See Exclusive Rules for these spells.)
8.48 To disband a Special Formation, simply move one of the units to a different hex than the other during a Movement Phase. Leaders are not needed to disband.
8.5 Magic
8.51 Certain Leaders are designated Magic Leaders. These are Leaders with a Magic Capability Rating to the right of their Rally Rating. (Example counters: Lord of the Nazgul 7-8; Gandalf 8-10, i.e., Rally Rating 8 and Magic Capability 10 for Gandalf.)
8.52 Players will note that there are two Magic Leader Movement Phases in a Game-Turn. Thus, Magic Leaders may move twice during a Game-Turn. They may not move in the Magic Leader Movement Phases. They may not move in the Magic Leader Movement Phase in which they cast a spell. (Printed as such in the original.)
8.53 Magic Capability Points are used to cast spells. The number of spells a leader may cast is limited only by his Magic Capability Rating (or what is left of it) and Case 8.52.
8.54 To cast a spell, a Player announces, in his Magic Leader Movement Phase, which Leader is trying the spell and what spell is being attempted. (See the individual Exclusive Rules for the Spells and their cost in points.) The Player then notes the number of Points required to attempt to cast that spell, rolls two dice, and cross-references the number of Points being used with the dice roll to see if the spell succeeds, using the Magic Spell Chart (8.57) for the Exclusive Rules for that game.
8.55 If a Magic Leader does not have sufficient Capability Points left to attempt a certain spell, that spell may not be attempted by that Leader.
8.56 Magic Capability Points used in an unsuccessful attempt are not subtracted from the Leader's total. Magic Capability Points used in successful spells are subtracted from the total, permanently reducing it.
9.0 Demoralization
General Rule: Demoralization simulates the cumulative effect of combat losses on any army. While, for the most part, combat losses dishearten an army, in some instances they spur it on to greater efforts. Each side has a Demoralization Level. When an army, through losses to its units, exceeds its Demoralization Level, it is demoralized. Once demoralized a unit remains so for the rest of the game.
9.1 Unit Demoralization Value
9.11 The Unit Demoralization Value is the numerical value of a given unit which, when added to such value of other eliminated units, is used to determine whether or not losses have forced an army to reach its Demoralization Level.
9.12 To determine a given unit's Demoralization Value the full strength of the unit is used. The Player adds together the numerical strengths for Attack (A = 5, B = 4, C = 3, D = 2, and E = 1), Armour Protection, and Morale (W = 4, X = 3, Y = 2, Z = 1) to obtain the Demoralization Value. Thus, a unit with values of B-3-Y has a Demoralization Value of 9 (4 + 3 + 2 = 9). Units with both Missile and Melee Attack Strengths add both to their value. Only combat units with the above strengths have a Unit Demoralization Value.
9.13 When a unit is eliminated (i.e., removed from the game), its Demoralization Value is added to the value of other eliminated units to determine that army's current Demoralization Level.
9.2 Mechanics of Demoralization
9.21 An army becomes demoralized when the total value of all units eliminated exceeds its assigned Demoralization Level. (See Exclusive Rules for an army's Demoralization Level.)
9.22 Either or both sides in a game may become demoralized. An army is not prevented from becoming demoralized simply because the other side is already demoralized.
9.23 If both armies become demoralized during the same Combat Phase, they are considered to have become demoralized simultaneously.
9.3 Effects of Demoralization
9.31 Units of a demoralized army may not be Rallied if disrupted.
9.32 All demoralized units with a Morale Rating of Z may not voluntarily enter an Enemy ZOC. Furthermore, they may never attack/melee. They may use Missile fire. They still defend normally.
9.33 Westernesse units (only) with a Morale Rating of W or X become fanatical when their army is demoralized. They remain so for the rest of the game (see Case 7.37).
10.0 Night Turns
Night, as delineated by the Turn-Record Track for the individual games, has a special effect on various units of Sauron's armies. During Night Turns Sauron units are considered fanatical (see Case 7.37). Furthermore, all Leaders of Sauron's armies add three to their Rally Ratings during night Game-Turns.
Sauron Exclusive Rules
11.0 Introduction
11.1 Background
A. Sauron is a simulation of the greatest battle of the Second Age of Middle Earth. After the defeat of Morgoth, at the end of the First Age, Sauron had inherited the position of Dark Lord and sought to subjugate the entirety of Middle Earth. A formidable mage, Sauron forged the One Ring, within which he stored much of his power, and also controlled many of his minions. He was also a being of great persuasive powers and so was able to influence men to his side.
B. Toward the end of the Second Age, he sought to capture Middle Earth from his stronghold Barad-dur in Mordor. In doing so, he brought down the wrath of Elendil, the King of Amor, and Gil-galad, the last High Elven King. The two, forging the Last Alliance, assembled the greatest host seen in Middle Earth since the end of the First Age and sought to defeat the evil Sauron on the Plains of Dagorlad. The tremendous victory by the Alliance led to the seven-year siege of Barad-dur: a siege that ended in Sauron's losing the Ring during a duel in which both Elendil and Gil-galad were killed.
11.2 New Counters
The new counters are: The Pedestal; The Beast of Mordor; Narsil; Aiglos. (Counter artwork is not reproduced.)
12.0 Game Length and Sides
A. The game is 18 turns. Turns 15-18 are night turns.
B. The forces of Mordor under the command of Sauron are called Sauron forces.
C. The forces under Elendil, Gil-galad, and Baldrim are called collectively Westernesse (or Alliance) forces.
13.0 Initial Deployment of Units
A. Some units start the game on the map, while others arrive during the course of the game (14.0).
B. Each side deploys the units listed in this section in their assigned hexes (one unit per hex.)
C. As soon as both sides have placed their starting units, the game may begin.
13.1 Sauron Initial Forces
| Qty | Type | Strength | Hex(es) |
|---|---|---|---|
| 7 | Goblins | Ee-2-Z | 0821, 1021, 1221, 1421, 1621, 1821, 2021 |
| 5 | Wargs (cavalry) | D-2-Z | 1324, 1325, 1326, 1327, 1328 |
| Gorgol | 1324 |
13.2 Westernesse/Alliance Initial Forces
| Qty | Type | Strength | Hex(es) |
|---|---|---|---|
| 4 | Cavalry | B-3-W | 2207, 2007, 1908, 1807 |
| 6 | Men | D-3-X | 1108, 1007, 0907, 0806, 1805, 2005 |
| 3 | Dwarf | B-3-X | 1308, 1408, 1508 |
| 2 | Cavalry | B-3-X | 1407, 1906 |
| 3 | Men | e-1-X | 0608, 0709, 0808 |
| 2 | Men | De-2-Y | 1405, 1406 |
| 2 |
14.0 Reinforcements
A. Both sides receive reinforcements per the schedules below. Units arriving as reinforcements may be placed on the edge of the map adjacent to their designated entrance hexes or areas.
B. During the friendly Movement Phase, reinforcements may enter the map using all standard movement and stacking rules. The first hex entered on the map is treated in the normal fashion in terms of usage of MPs.
C. When bringing units on one behind another (visualize a chain), if the first unit expends 1 MP, the second expends 2 MPs to enter the map, the third expends 3 MPs, and so on. This situation is more likely to occur with the Sauron reinforcements, which are too numerous to enter the map all at the same time.
D. Reinforcements may be brought in at any time during the Movement Phase, and they may move and attack freely, just as any other unit.
14.1 Sauron Reinforcements
All Sauron reinforcements enter the game from inside Mordor through hex 1331. In their first turn of movement they may not move more than two hexes from the Road of the Orcs.
| Turn | Qty | Type | Strength |
|---|---|---|---|
| 4 | 8 | Orc Archers | Ee-3-Y |
| Sauron, The Pedestal | |||
| 6 | 10 | Slaves | A-1-Z |
| Ringwraith | |||
| 8 | 3 | Trolls | B-3-X |
| 12 | 9 | Orcs | D-3-Y |
14.2 Westernesse/Alliance Reinforcements
A. On Turn 2, all Elven units, including all Elven Leaders plus Aiglos (carried by Gil-galad), arrive within two hexes of 1401.
B. All units must stay within two hexes of the Road of the Orcs during their first Movement Phase on the map.
| Qty | Type | Strength |
|---|---|---|
| 7 | Elves | D-4-W |
| 5 | Elven Archers | De-3-X |
| 5 | Elven Bowmen | e-2-X |
| Gil-galad, Cirdan |
15.0 Special Unit and Leader Capabilities
15.1 Elves
15.11 Movement Capabilities
A. All Elven units may enter any hex on the map, excluding craters, mountains, and walls (i.e., all impassable hexes) at the cost of 1 MP per hex.
B. They may still use roads at ½MP.
15.1.2 Elves and EZOCs
A. Elven units may leave EZOCs.. It costs an Elven unit 1MP to leave an EZOC in addition to the cost of entering the hex to which it is going.
B. Elven units thus have a much greater mobility than other units in the game, which are forced to remain in EZOCs once they have entered such a hex.
15.1.3 Range of Elven Bowmen
All Elven Bowmen have a range of 3 hexes.
15.2 Dwarves
15.2.1 Dwarves and EZOCs
Dwarf units ignore the ZOCs of all Troll and all Goblin units only for the purposes of movement.
15.2.2 Dwarves and Orcs
If a Dwarf unit starts a Movement Phase within 2 hexes of any Orc unit, the Dwarf unit must move adjacent to that Orc unit, if possible, and attack it during its Combat Phase.
15.3 Slave Phalanxes
15.3.1 Eligibility
Two Slave units may form a Slave Phalanx at any time during a Sauron Movement Phase, without a leader.
15.3.2 Procedure
A. To form a Slave Phalanx, the two Slave units must begin the Movement Phase in adjacent hexes.
B. During the Movement Phase one simply moves into the hex occupied by the other. The Slave Phalanx is now formed.
C. It may move no more during that Movement Phase.
15.3.3 Attributes of Slave Phalanxes
Slave Phalanxes have an MA of 2, APR of 3, and Morale Rating of Y.
15.3.4 Full Strength Requirement
Only full-strength Slave units may form Slave Phalanxes.
15.3.5 Effect of Combat Results on Slave Phalanxes
A. If a Slave Phalanx suffers a ½E result, one of the units in the formation is eliminated.
B. If a Slave Phalanx is forced to retreat, each unit must retreat to a different hex.
15.4 Orcs
A. The only Sauron units that become fanatical during night turns are Orcs; no other units become fanatical during night turns.
B. During a night turn, all Orc units raise their Morale Rating by one level.
16.0 Magic and Spells
Only Sauron may cast spells. He may cast the spells in this section, using the Standard Magic Rules (9.0).
16.1 Sinister Visions
| Attribute | Details |
|---|---|
| Duration | One full turn |
| Effects | All Westernesse units, other than Dwarves or Elves, with a Morale Rating of X or lower are immediately disrupted. To be rallied, they must be at least three hexes from Sauron. |
| Allowance | Two per game |
16.2 Wrath of the Ringwraith
| Attribute | Details |
|---|---|
| Duration | Three consecutive turns |
| Effects | All Sauron units within five hexes of the Ringwraith increase their AS one level when attacking in a melee. |
| Allowance | Three per game |
16.3 Total Eclipse of the Sun
| Attribute | Details |
|---|---|
| Duration | One turn |
| Effects | All turns in which this spell is in effect are treated as night turns |
| Allowance | Two per game |
16.4 The Beast of Mordor
The Beast of Mordor is a special item. Rules for conjuring this dreaded demon are covered in Section 17.0.
16.5 The Pedestal
16.5.1 Requirement to Cast Spells
A. For Sauron to attempt to cast a spell, he must be stacked in the same hex as the Pedestal counter at the beginning of his Magic Leader Movement Phase.
B. The Pedestal counter may not have moved in the previous normal Movement Phase.
16.5.2 Moving the Pedestal
The Pedestal itself has no MA. It must be carried by an Orc Archer. The Orc Archer carrying the Pedestal retains its normal MA and combat ratings while carrying the Pedestal.
16.5.3 Orcs Attacked While Carrying Pedestal
A. If an Orc Archer carrying the Pedestal is attacked and eliminated or forced to retreat, the Pedestal may be captured.
B. The Pedestal may never retreat or be eliminated.
C. The Pedestal may be captured and recaptured throughout the game. It may be captured by any type of unit. However, if it is recaptured it must be turned over immediately to an Orc Archer unit.
16.5.4 Attacking Sauron on the Pedestal
A. If Sauron is forced to retreat while on the Pedestal, the retreat result is ignored.
B. If Sauron suffers a ½E result while on the Pedestal, he remains on the Pedestal.
17.0 The Beast of Mordor
A. The Beast of Mordor may be conjured during any night turn for 5 MCPs. In addition, the Beast may have one its Magic Capabilities activated by Sauron in the Magic Leader Movement Phase immediately following its appearance.
B. Upon being conjured, stack the Beast with Sauron.
C. Once slain, the Beast may not return to play.
17.1 Normal Capabilities of the Beast
A. The Beast has an MA of 4, a normal (non-magic) APR of 4, and a Morale Rating of X.
B. The Beast is unaffected by EZOCs and does not exert a ZOC of its own.
17.2 . Magic Capabilities of the Beast
A. Once the Beast is conjured, Sauron may use his magic to give the Beast special capabilities, in each Magic Leader Movement Phase, using the schedule below. This uses Sauron's spell attempt for that turn.
B. Unless the Beast is using special Magic Capabilities, he uses his Normal Capabilities (17.1).
17.2.1 Flight
| Attribute | Details |
|---|---|
| Cost | 8 MCPs |
| Effects | Beast may move 12 hexes regardless of terrain movement costs and restrictions. |
| Duration | One turn |
17.2.2 Horn Attack
| Attribute | Details |
|---|---|
| Cost | 4 MCPs |
| Effects | Beast attacks with an AS of A. |
| Duration | Two turns |
17.2.3 Magic Armor
| Attribute | Details |
|---|---|
| Cost | 9 MCPs |
| Effects | Beast may only be attacked by a leader carrying a Magic Weapon (17.3). |
| Duration | Unlimited |
17.2.4 Death Breath
| Attribute | Details |
|---|---|
| Cost | 20 MCPs |
| Effects | Automatically kills all Westernesse units within a two hex radius of the two frontal hexsides through which the Beast blows his breath. See Death Breath Kill Zone below. |
| Duration | One turn |
[Figure omitted: Death Breath Kill Zone diagram.]
17.3 Killing the Beast of Mordor
17.3.1 Regular Combat
The Beast may be killed by any combat unit using missile or melee combat.
17.3.2 Magic Armor Protection
A. If the Beast has magic armor, it may be attacked only by a leader with a magic weapon. When the leader with such a weapon attacks, he does so with an AS of A.
B. The procedure for the attack is the same as for melee combat, and the Beast uses its normal APR and Morale Rating.
17.3.3 Effect of Combat Losses to the Beast
If the Beast suffers a ½E result, flip it over. Its normal MA is halved and it costs double the MCPs to activate its Magic Capability.
18.0 Mordor
A. The land of Mordor is represented by hex 1331 and the area off the map that it leads to. Entrance into and out of Mordor is through the Gates of Mordor (1331/1330).
B. If Sauron is outside Mordor (on the Plains of Dagorlad), the gate is considered to be open at all times, and anyone may pass through it.
C. If Sauron is inside Mordor (either in hex 1331 or off the map) the gates are closed to the Westernesse Player. Only Sauron units may then enter Mordor.
19.0 Magic Weapons
A. The Westernesse side has the use of two magic weapons: Narsil and Aiglos. They may be used to slay the Beast of Mordor.
B. In addition, leaders and combat units receive benefits for being stacked with a magic weapon.
C. Only Gil-galad may use Aiglos.
D. Isildur or Elendil may use Narsil.
19.1 Uses of Magic Weapons
19.1.1 Effect on Rally
Leaders carrying magic weapons add one Rally Point to their Rally Rating for the purposes of individual combat.
19.1.2 Effect on Combat Units
Combat units stacked with a leader who has a magic weapon increase their AS by one level.
19.1.3 Sinister Visions Spell
The Sinister Visions spell has no effect on the rallying capabilities of a leader carrying a magic weapon.
19.1.4 Narsil
Isildur or Elendil may exchange Narsil, at no penalty to their MAs, if they occupy the same hex at any point during the Westernesse Movement Phase. However, this can occur only if Elendil has been wounded (flipped) and Isildur is unhurt.
19.2 Destroying and Capturing Magic Weapons
19.2.1 Destruction
A magic weapon is considered destroyed if the leader it is stacked with is eliminated by missile, melee combat, or Death Breath.
19.2.2 Capture
A magic weapon is considered captured if the leader it is stacked with is eliminated by leader/individual combat.
19.2.3 Carrying Magic Weapons
Any unit or individual may capture and/or carry a magic weapon. Only the individuals specified in the 19.0.C and 19.0.D may use these weapons.
20.0 Demoralization Levels
20.1 Sauron
A. The Demoralization Level for the Sauron army of is 71 DPs.
B. Add 15 DPs to the current level if the Beast of Mordor is slain.
C. If Sauron is slain, his army is automatically demoralized.
20.2 Westernesse/Alliance
A. The Demoralization Level for the Westernesse/Alliance army is 112 DPs.
B. Add 20 DPs to the current level For each magic weapon destroyed or captured,.
C. When any Westernesse Leader is killed, his Leadership value is added to the current Demoralization level.
21.0 Victory Conditions
21.1 Victory Points
Each side receives two Victory Points (VPs) per the schedule below.
| VPs | Event/Condition |
|---|---|
| +2 | per enemy unit eliminated (either side) |
| -1 | per Westernesse unit exited into Mordor (Sauron) |
| +10 | per magic weapon that is captured by one of its leaders (Sauron) |
21.2 Determining the Winner
| Victory Level | Condition |
|---|---|
| Westernesse Decisive | Westernesse has more VPs than Sauron and Sauron Army demoralized without Westernesse demoralization. |
| Westernesse Tactical | Sauron Army demoralized without Westernesse demoralization. |
| Sauron Tactical | Sauron not demoralized. |
| Sauron Decisive | Sauron has more VPs and is not demoralized. |
| Draw | Any other result. |
Historically, the Westernesse side won a Decisive Victory.
21.3 Adjusting Play Balance
If you wish to do so, the balance of the game may be affected by adjusting the arrival of Sauron's reinforcements. To help Sauron, bring them in earlier; to help the Alliance, delay them longer.
22.0 Notes
A. The major problem in designing this game was that there was very little information on the actual battle, other than that it took place. Even The Silmarillion provides little insight on a battle level into this cataclysmic event. Therefore most of the Orders of Battle, weaponry, etc., was derived from hints and suggestions spread throughout the Ring novels. In addition to that - and mostly for play purposes - we added a few inventions of our own, inventions which, we think, are in keeping with the spirit of both the battle and the novel.
B. In terms of play, Sauron is what is known as a "meeting engagement." The design problems centered around maintaining play balance and keeping the game fairly fluid. Initially we started with both armies on the field, but this proved to be too static an affair. We then experimented with a variety of deployments and reinforcement schedules until we arrived at the present solution. Still, as we state in the rules, if you find the game leans too much in any direction, feel free to adjust that by staggering the reinforcements at a rate different from what is given.
C. Sauron originally contained some siege rules. However, What we do know of the battle precluded much of this, and what happened during testing forced us to dispense with that ideal altogether. The players simply did not get around to using siege equipment.
D. A bigger problem was the power of Sauron himself. He had the Ring at this time; the question was what could he do with it. Obviously he couldn't do too much with it, as his armies were roundly trounced in this battle. Sauron's magic capabilities thus became a balancing influence, and players should treat these rules accordingly. The Beast of Mordor (a designer's invention in toto) is a lot of fun, but used unwisely, it can have an undue influence on the game.
Section 23.0 (Design Credits) is omitted from this transcription.