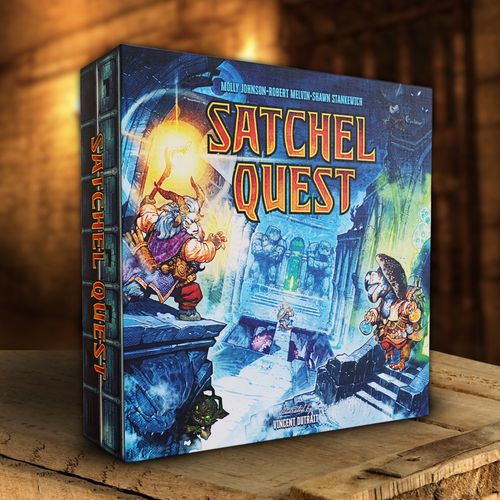
Satchel Quest
Satchel Quest Rulebook
Table of Contents
Table of Contents
Game Overview
Phase 1: The Dungeon - Players explore a dungeon map by placing chips from their Satchel into each empty space. The chips are double-sided so each draw gives you a choice with the goal of filling your dungeon with beneficial combinations of monsters, weapons, chests and more.
You will start exploring the top floor of your dungeon, and must fill each floor completely before moving to lower levels. After you have placed all of the chips from your Satchel, or decide to stop, you will resolve your dungeon.
Phase 2: Resolution - Each chip placed in your dungeon will have an effect during the resolution phase. Potions recover health, Chests can be opened for rewards (but beware of traps), Monsters attack you, but you can defeat them to gain great rewards, Coins and precious Gems give you money, and Artifacts offer any reward you choose.
Phase 3: Camp - Spend XP to level up and refresh skills.
Phase 4: Path - Reveal the next Path card which add a special rule or effect for the coming round.
Phase 5: Tavern - Players with less VP heal or earn Gold.
Phase 6: Village - Purchase new Chips and Tools.
Below you'll find an example of a dungeon after the Dungeon phase has been played, as well as a brief description of how different chips are resolved.
An Example Finished Dungeon
- Monsters deal damage and grant rewards.
- Shields and armor block monster damage.
- Obstacles prevent you from playing chips and block ranged effects!
- Potions recover health!
- Coins give you gold.
- Swords hit monsters in the 4 adjacent squares left, right, up and down.
- Chests want to be near specific types of chips to be disarmed and unlocked!
- Ranged weapons hit monsters from a distance.
- Place Artifacts in connected groups for a variety of rewards.
- Gems gain value from nearby coins.
Components
- 1 Village Board
- 4 Hero Boards
- 4 Skill References / Quick References
- 4 Starting Skill tokens
- 48 Level Up Skill tokens
- VP Token
- 12 Dungeon Entrance maps
- 12 Dungeon Depths maps
- 4 Hero Figures
- 4 Health Trackers
- XP Tracker
- 40 Starting Chips - 4 for each Hero
- 21 Path Cards
- 1 Start Player Token
- 30 Tier 1 Chips
- 20 Tier 2 Chips
- 15 Tier 3 Chips
- Gold Tokens
- 4 Satchels
- 45 Tools
Setup
A. Game Setup
- Place the Market Board in the center of the table.
- Place the tier 1, 2, and 3 chips (marked with 1, 2 or 3 dots) in randomized piles of the same tier to form a supply near the Market Board. (You may make multiple piles of each tier — they don't have to be in a single pile.)
- Place the gold tokens and Tool tokens next to the Market Board.
- Shuffle the Dungeon Entrance Maps and Dungeon Depths Maps separately and place each size in a stack within easy reach of all players.
- Give the first player token to a randomly selected player.
B. Player Setup
Determine which hero each player is playing (randomly or by choice).
Each Player:
- Take the Hero Board, skill reference, and the 10 starting chips (marked with their Hero's symbol) for your hero. Take the bag that matches your hero's color.
- Place one health tracker and one XP tracker on the zero space of your health and XP tracks on your Hero Board.
- Place your VP token on the 0 (zero) space of the VP track on the Market Board.
Leave an area clear for your dungeon maps.
What's special about my Hero?
Each hero starts with a few extra chips in their starting Satchel:
- Fighter - Sword and Shield
- Rogue - Coin and Bow
- Alchemist - Potion and Staff
- Wizard - Coin and Staff
In addition, each Hero has 2 unique starting skills, and 12 level up skills. Each game, you randomly build a skill tree using only 8 of the 12 level up skills, so even games with the same hero will present you with different options.
C. Skills
- Place your Hero's starting Skill Token above your Hero board.
- Divide your skill tokens (1-4 on the reverse) into 4 piles by the number on their back (1, 2, 3 and 4). Randomly draw two from each pile, and place them face-up on the corresponding spaces on your player board.
- Keep your unused skill near your play area face down to mark Quest Completion.
D. Adventure Path Setup
There are 4 standard Adventure Paths, each consisting of 5 Path cards. Each card has a number printed on the back that shows the order in which they occur. Look through the cards marked 1 on the back and choose a path. (If this is your first game we suggest starting with the Ruins of Molthune).
- Place the chosen card face-down on the top left above the Market Board. Place the remaining 4 Path cards face-down from left to right in ascending numeric order next to it.
- Reveal the first Path card and read its text aloud. Each player takes the starting resources listed on the card (gold, health, and tools).
Advanced Adventure Path
Once you have played through all the Adventure Paths you can visit unknown realms by playing the Planar Chaos Path. To do so, use the Planar Chaos card for 1, and randomly choose a card without looking from among the other paths for cards 2-5.
Phase 1: Dungeon
Each round starts with the Dungeon Phase, where you will choose a dungeon and explore it by drawing chips from your Satchel and placing them strategically to solve adjacency puzzles. You start on the top floor, descending lower when you fill all the spaces on a floor, pulling and placing chips until your Satchel is empty or you choose to stop.
Once your dungeon is complete, move to the Resolution phase to determine the effect of all the chips you played.
Anatomy of a Dungeon
Each dungeon has floors (rows of spaces), features (that look like chips), and obstacles (which look like rubble). The different parts of the dungeon are explained in the diagram below.
- Spaces are divided by pillars. Each floor is made up of 6 spaces.
- Dungeon Entrance maps show an entrance at the top and have 3 floors.
- A Floor is a single row of the dungeon map. The floor with your Hero figure next to it is your current floor.
- Empty spaces do not have a feature or obstacle, and chips may be played to them. Some have flavorful illustrations like torches or bones. Cool, but no gameplay effect.
- Dungeon Features look like chips, and have the same effect as if a chip was placed there. Only features on floors your Hero has reached affect you.
- Mandatory Features have a red ring around them. Chips may not be played to their space.
- Optional Features have a white ring around them. Chips may be played to their space, replacing the effect with the played chip.
- Obstacles prevent you from playing chips to that space. Ranged effects like armor, wands, and bows do not pass through obstacles.
- Dungeon Depths maps have 2 floors and no entrance. When adding a Dungeon Depths map, you may place it directly below your Dungeon Entrance or shift it one square to the right or left.
Step 1: Choose a Dungeon Map
Each player will start with their own Dungeon Entrance map. Each player should:
- Draw a Dungeon Entrance map from the bottom of the stack.
- Look at both sides. Place the map with the side of their choice face-up in front of them.
- Place their Hero figure next to the top floor of their dungeon map.
Once all players have placed their Dungeon Entrance, play begins!
Step 2: Play Your Dungeon
Players simultaneously draw chips from their bags and place them on their dungeon maps. Players start at the top floor, and once it is full, descend to the next floor. If a player fills all the floors on their dungeon map, they add a Dungeon Depths map to go even deeper.
Playing Chips
Draw chips one at a time from your Satchel, and place them on your dungeon map in the following manner.
- Draw a chip from your Satchel and look at both sides. You choose which side you would like to play face-up.
- You may only play chips on your current floor.
- You may place a chip on empty spaces or optional feature spaces, but not on obstacles or mandatory feature spaces, or on top of previously played chips.
Each chip shows its Chip level (# of dots), Chip Strength, and color helps denote type.
When you draw the last chip in your bag, play it, then immediately stop (before advancing to the next floor.)
Descending
Each row of the dungeon is a floor. Use your Hero figure to track your current floor.
Finishing a Floor: A floor is finished when it has no empty spaces (there is a chip, obstacle, or feature in every space.) When a floor is finished, before you draw your next chip. If you do you must choose to either:
- Continue: Move your hero figure to the next lower floor, and keep drawing chips. You may only continue if you have at least one chip left in your bag.
- Stop: Leave your hero figure on the current floor, and stop drawing chips. You are finished with this dungeon. It's usually best to play all of your chips, so you'll only want to stop early very rarely.
Finishing a Map
When you fill the final row of a dungeon map (Entrance or Depths), if you have chips left in your bag, immediately draw a new Dungeon Depths map from the bottom of the stack. Choose a side, and place it below your current map. Then carry out the rest of the "Finishing a Floor" steps.
When placing a Dungeon Depths map, you may place it directly below your Dungeon Entrance or shift it one space to the left or right, but once placed you may not change it.
End of the Dungeon Phase
Once all players have placed all of their chips, or stopped, the Dungeon phase is over, and the Resolution phase begins.
Dungeon Play Example
Nyx (the Rogue) places their dungeon map and puts their figure next to the first floor. Their dungeon has 3 obstacles (A), 2 optional features (B), and 1 mandatory feature (C).
Nyx draws their first chip. It's a Sword/Chest. They must place it in one of the spaces on the first floor, so they place with the Sword side up above the Monster feature (swords hit orthogonally), and adjacent to the Chest feature (which needs an adjacent weapon, coin and potion to unlock).
Nyx continues to draw, placing chips on the 1st floor. When they draw their 4th chip, they have a decision to make: place it on the empty space (A) and finish the floor, or on the Potion optional feature (B). Nyx places it on the empty space, finishing the floor.
Now Nyx has another choice to make: continue to the next floor, or stop and leave the dungeon. They choose to continue, so they immediately advance their Hero figure and continue drawing.
Nyx finishes the third floor of their Dungeon Entrance map. They check to see if they have chips left in their bag. The do, so they immediately draw a Dungeon Depths map, choose a side, and place it below their current map. They shift the Depths map one space to the right (so the Sword feature (A) is hitting the monster).
After placing the Depths map, they now decide whether to stop or continue. They again choose to continue. They move their figure to the first floor of the Depths, draw their next chip, and continue their adventure.
If they finish the Depths map, they'll get to draw another Depths!
Skills and Tools
Every adventurer reaches a point when their luck runs out. Skills and Tools help you mitigate the luck of the draw and change the way chips work to your advantage. Gain XP and level up to gain more skills, and purchase Tools in the Village!
Skills
Skills are special abilities that each Hero has access to, represented by Skill Tokens. Each Hero starts with 2 skills. As you gain levels, you gain more skills.
Skills come in three different types, denoted by a symbol on the skill token.
- Passive Skills are always in effect.
- Active Skills may be used once per round. If an Active Skill alters the affect of a chip, place it on that chip when you use it. Otherwise, turn it face-down to indicate it is no longer available for the remainder of the round.
- One-Time Skills may only be used once per game, and then the token is returned to the game box.
Skill Effects
Each skill has an effect that is shown on the skill token in symbolic form, and detailed in text on the Hero's Player Aid. If a skill must be used at a certain time, it will be described on the Hero's player aid
Starting Skills
Each Hero has 2 skills that they start with. These Skills are printed on a single token.
Skill Token Diagram
Each skill token shows: Hero Symbol, Level, Name, Skill Type, and Effect.
Tools
Tools are single-use items that are discarded after being used. The 1st Path card will tell you which tools you start with, and more may be purchased during the Village phase.
Tool Limit: Each player can carry up to 3 tools. If a player has more than 3 tools at any time, they must choose 3 to keep and discard the rest.
- Torch – After drawing a chip, set aside the chip you just drew. Draw a new chip and play it, then return your set-aside chip to the bag.
- Ladder – After drawing a chip, place the ladder token on an empty space on your current floor. That floor is finished. Immediately move your Hero figure and place the chip on the next floor. (Draw a new map if needed.)
- Key – During Resolution, you may use a key to satisfy a single requirement of a chest of your choice. You may not use more than one key per chest.
Hero Board and Skill Reference
The Hero Board shows: Symbol, Name, Starting Chip Counts, Starting Skill Details, Level 1 Skill Details, Experience (XP) track, and Health track. The Skill Token diagram shows: Hero Symbol, Skill Type, Level, Name, Skill Token Space, Effect, and XP costs to level-up.
Phase 2: Resolution
Players resolve each step of the Resolution phase in order together. The steps are listed in order with reminders on the back of each player's skill reference.
We recommend one player reads them aloud and waits for each player to finish before advancing to the next step.
0 - Path Cards
Calculate bonus VP (if any) for the current Path.
Some Path cards reward players for completing their dungeons in certain ways. These are evaluated at the beginning of the Resolution Phase.
1 - Potions
Gain health equal to the total strength of your potions.
Add up the strength of all the potions in your dungeon and gain that amount of health by advancing the token on the health track on your player board. You may not exceed 10 health–for each point you would gain above 10, instead gain an XP.
2 - Chests
Check to see if you opened each chest and whether you disarmed the trap. Take any damage first, then collect rewards.
A chest shows Requirements along the top (e.g. 2 Weapons & 1 Potion), a Reward (if opened), and Damage (if not opened exactly).
To open a chest, you must match at least the number of required chips. If opened, chests grant their rewards, but inflict damage if not disarmed. To disarm a chest, you must match the required chips exactly, no more, no less.
Chest Requirements
The icons along the top of the chip indicate the chips the chest requires to be opened. Each icon indicates that 1 chip of that type must be adjacent to the Chest–the strength of the chip does not matter. For example, a chest showing 2 weapon symbols cannot be solved by a single 2-strength sword. Two weapon chips need to be placed adjacent to it.
Requirement Icons
- Monster
- Potion
- Gem
- Coin
- Defense
- Chest
- Artifact
- Weapon
Rewards and Damage
Rewards you receive if the chest is opened. The damage you take if the chest is not disarmed.
For each chest, there are 3 possible outcomes. If the surrounding 8 spaces:
- Do not contain the required chips, the chest is neither opened or disarmed. Take damage and gain no rewards.
- Contain the required chips in excess of the number shown, the chest is opened but not disarmed. Take damage, but collect the rewards.
- Contain the required chips in exactly the amount shown, the chest is opened, and the trap is disarmed. Take no damage and collect the rewards!
First take all damage from chests that were not disarmed. If your health drops to zero or below, refer to the Dying section (page 15). Then collect the rewards from chests you opened.
Chest Examples
- This chest is adjacent to exactly 2 weapons and 1 Potion, so it is opened and disarmed.
- This chest is adjacent to 2 weapons and 2 Potions. It meets the requirements and is opened. However, that is 1 more Potion than it requires, so it is not disarmed.
- This chest is adjacent to 1 Weapon and 1 Potion, which is 1 less Weapon than it requires. It is not opened and is not disarmed.
3 - Fighting Monsters
Take damage from monsters first, then check to see if you defeated them to collect rewards.
Monsters attack players and can be defeated to collect Gold, XP, and VP. Monsters all work the same way, regardless of type. To defeat a monster, players must hit it with weapons following each weapon's attack pattern.
Each monster chip shows Damage and Defense at top, and a Reward (gold, XP, and VP) at the bottom.
- Defense: The damage required to defeat the monster.
- Damage: The damage the monster deals to you if not blocked with defense. Monsters **deal damage before heroes (**even if they are eventually defeated).
- Reward: The star icon at the bottom of the chip shows how much gold, XP, and VP you receive for defeating the monster.
3a - Monsters Attack
Determine the damage from each monster in your dungeon, reduced by the strength of any relevant Defense chips. Lose 1 health for each damage. If your health drops to zero or below, refer to the Dying section (page 15).
Defense Chips: Defense chips reduce damage equal to their strength from monsters. A single Defense chip may protect you from multiple monsters.
Shields
Shields protect against monsters in the four orthogonally adjacent spaces next to the shield's space.
Armor
Armor protects against monsters at any distance in all four orthogonal directions. This does not pass through obstacles.
Dying
When you reach zero health, your Hero dies. You continue to resolve the dungeon, with these differences:
- You may not gain health–ignore any healing effects.
- Each time you would lose health beyond zero, instead lose 1 VP.
- In each remaining step of the Resolution Phase, divide the total VP you would gain in half (round down).
Example, Nyx is at 5 health and takes 9 damage from monsters. They drop to 0 health. They would lose an additional 4 health, so instead lose 4 VP.
Nyx keeps the VP they earned from Chests (since it has already been resolved) but they only gain half of the VP from the monsters they defeated (rounded down), and half of any VP they would receive in any subsequent steps.
3b - Attack Monsters with Weapons
After taking damage from monsters, weapons are used to defeat them. Weapons have strengths and attack patterns. Weapons hit all enemies in their attack pattern. The weapon's strength is the amount of damage it deals to each monster it hits.
Swords
Swords hit enemies in the four (4) orthogonally adjacent spaces next to the sword's position.
Staves
Staves hit enemies at any distance from their position in all four orthogonal directions. Staves may damage multiple monsters in a line, but do not pass through obstacles.
Bows
Bows hit enemies any distance from their position in all four diagonal directions. Bows may damage multiple monsters in a line, but do not pass through obstacles.
Defeat Monsters and Collect Rewards
Determine whether each monster is defeated, then total the reward number for each defeated monster and take that amount each of gold, VP, and XP.
4 - Coins
Gain gold equal to the total strength of all the coins in your dungeon.
Coin chips provide gold taken from the supply, no matter where they are placed in your dungeon (as long as they are on or above your current floor).
5 - Gems
Gain rewards for coins that are adjacent to your gems.
Gem chips grant rewards for the strength of all coin chips in the 8 spaces surrounding them.
Jade
Grants gold equal to the strength of coins in the surrounding spaces.
Amber
Grants gold equal to the strength of the coins in the surrounding spaces and XP equal to half that amount (round down).
Diamond
Grants gold equal to the strength of the coins in the surrounding spaces, and VP equal to half that amount (round down).
6 - Artifacts
Gain a variety of rewards for each group of adjacent artifacts.
Unlike other steps, players take turns resolving their artifact rewards starting with the player with the most VP and moving to the player with the least VP. (Ties are resolved in clockwise order from the starting player.)
Artifacts that are connected (diagonally or orthogonally adjacent) form a group. You may not treat connected artifacts as multiple groups.
Each group has two important features, size and power.
Score each group separately, following these steps:
- For each different type of artifact in the group, choose one reward–XP, VP, health, or gold. You can't choose the same reward twice.
- Gain an amount of each chosen reward equal to the size of the group (the total number of all connected artifacts in the group).
Artifact Example
Nyx has a group of 3 artifacts–1 scroll, and 2 chalices. There are two types of artifact, so they choose two rewards, XP and VP. Then they gain 3XP and 3VP (3 is the size of the group).
Resolution Example
Nyx's Satchel is out of chips, so they stop. When all players are ready, they resolve their Dungeon.
- Potions: Nyx gains 1 health, putting them up to 6 health.
- Chests: Chest 2a is opened but not disarmed (more coin chips than needed). Chest 2b is not opened (does not meet requirements). Chest 2c is below the farthest floor that Nyx reached, so Nyx does not evaluate it for damage or rewards. Nyx takes a total of 2 damage from the chests. Nyx gains 3 gold and 3XP from the opened chest.
- Monsters: The shield reduces 1 damage from monsters 3b and 3c, so Nyx takes 1 damage from the Bramble Gremlin (3c) and 0 from the Snake-bat (3b). Nyx takes 2 damage from the other Snakebat for a total of 3. This leaves Nyx at 2 health. Nyx deals 2 damage to the Bramble Gremlin, which is not enough to defeat it, and deals 2 to Snakebat 3b, which does defeat it. Nyx also deals 2 damage to Snakebat 3a, defeating it as well (one from the adjacent Sword and one from the Staff on the 4th floor). The Snakebats each have a Reward of 1, for a total of 2, so Nyx gains 2 gold, 2xp, and 2vp.
- Coins: Nyx has 3 coins with a total of 4 strength, so gains 4 gold.
- Gems: Nyx has a Jade gem. It has two adjacent coins with a total strength of 3, so Nyx gains an additional 3 gold.
- Artifacts: Nyx has one group of artifacts. There are 2 different artifacts in it, so Nyx chooses 2 different rewards: VP and health. The group size is 3 (the total number of artifacts in it), so they gain 3vp and 3 Health. Artifact 6b is below the furthest floor that Nyx reached, so Nyx does not evaluate it.
Camp, Path, and Tavern Phases
Phase 3: Camp
Our heroes return to their camp, where they have a chance to level up before their journey back to the village.
- Return all your chips to your bag. Return your dungeon maps on the top of the appropriate stacks.
- Players who died are resurrected with 5 health.
- Players with enough XP may spend it to level up.
- Refresh all your Active skills.
- Pass the Start Player token clockwise until it reaches the player with the least VP (or the 1st player tied for least).
Leveling Up
You start at level zero. During the Camp phase, you may level up as many times as you are able. To do so, spend the XP equal to the amount shown on the next level of your skill tree. Choose one of the available skills from your new level. Place it next to your player board and turn the other one face down to indicate your new level.
Level Up Example
Dondarion has 15 XP at the start of the Camp Phase.
- They've already unlocked a level 1 skill, so the next level they'll be able to unlock is 2. They spend 6 XP.
- They choose one of the two level 2 skills, and flip the other one face-down.
- They have enough XP remaining to level up again, so they spend 8 more and choose one of their level 3 skills.
Phase 4: Path
Flip the next Path card face-up, read the text out loud, and follow any instructions. See the last page of this rulebook for clarification on Path Cards.
If all the Path cards are already face-up this is the final round. Skip the remaining phases and go to Game End.
Phase 5: Tavern
After returning to the village, the player with the most VP is flooded with requests from nobles. Meanwhile, other adventurers head to the local tavern to work and rest for the journey ahead.
For each mug icon between the leader's token and your token on the VP track you may choose to earn 2 gold or recover 1 health, mixing and matching as you see fit.
Phase 6: Village
Beginning with the starting player and proceeding clockwise, players take turns shopping. On each turn a player may buy a new chip from an open shop or visit one of the specialty shops. The phase ends when all players have taken 3 turns.
Chip Shops
There are 4 different chip shops in the village–two tier 1 shops, a tier 2 shop, and a tier 3 shop. The tier 3 shop begins the game closed, and opens in round 2. The shops offer the matching tier of chips. Players may not look at the face-down side of the chips in shops.
At the start of the Village phase, fill each empty space in the open shops by taking chips of the matching tier from the bottom of that chip stack and placing them in the shops without looking at the face-down side.
A Village Turn
During your Village Turn you may perform one browse action, and then one shop action.
Browse Actions
You may choose one of the two browse actions:
- Peek at a Chip: Look at the face-down side of a single chip in secret, then return it with the side of your choice face-up. Note: You are not required to purchase this chip after peeking.
- Refresh a Shop: Discard any tool to remove all the chips from one shop and refill them. Place the removed chips on top of an existing stack of that tier.
Shop Actions
Visiting a Specialty Shop
You may visit one of the other three shops instead of purchasing a chip. To do so, pay any required costs, and collect the reward. You may only gain the reward once per visit, but you may visit the same shop more than once in the phase.
Gurdy's Gear: Gain any 2 tools of your choice for 1 gold, or 3 tools of your choice for 2 gold.
Healer's Hut: Recover 1 health for free, and you may pay 1 gold to recover 1 additional health. The most you can heal from one visit is 2 health.
Pterry's Tavern: Gain 2 gold and 1 Torch tool.
Buying a Chip
Choose one chip, pay the amount of gold shown on the price tag to the supply, and place the chip into your bag. You may look at both sides of the chip after purchasing it.
Note: Each Hero receives a discount on certain types of chips, but only if the face-up side matches the discounted type.
If the purchased chip was the last chip in the shop, refill all empty spaces in every open shop, not just the shop you purchased from (don't discard any chips). Otherwise, do not refill empty shop spaces after making a purchase.
End of the Village Phase
The Village Phase ends when each player has taken 3 turns.
Village Turn Example
- Nyx starts their 1st Village turn with 11 gold. They use their Browse action to peek at the Tier 2 Gem chip, and sees a Coin on the reverse. They return the chip to the space, Coin side up. Nyx uses their shop action to buy that chip. Nyx starts with the skill Treasure Hound, giving them a discount of 1 gold on Coin chips, so they pay 7 for it, leaving them with 4 Gold. Then it is the next player's turn. Nyx does not refill the space they bought the chip from.
- On their 2nd turn, Nyx peeks at the Artifact chip, hoping to find another Coin for a discount. It's a Shield, so they return it with the Artifact side up (so other players don't get that information). For their shop action, Nyx visits the Healer's Hut. They recover 1 health for free, and pay 1 gold to recover an additional health, leaving 3 Gold.
- With their final turn, they peek at the Tier 2 Potion chip. They can't afford it, but the information may be useful for next round's Village phase. With their discount, they can buy the Chest chip in the Tier 1 shop. Since a shop is now completely empty, at the end of their turn they refill all the empty spaces on the Village board (except the Tier 3 spaces--that shop won't be open until next round).
Game End
The game ends during the Path Phase when there are no more Path cards to reveal.
- Gain 3VP for each skill you unlocked.
- Add together your Health, XP, and Gold. For every 5 of the combined total, you gain 1 VP.
For example: Nyx unlocked 3 skills, so gains 9 VP. Nyx also has 7 gold, 4XP, and 2 health, for a total of 13. Nyx gains 2 VP, ignoring the remainder.
The player with the most Valor Points (VP) wins the game. In the event of a tie, the player with the most gold wins. If still tied, the tied players share the victory.
Glossary, Path, and Skill Clarifications
Chip Types: Whenever a chip type is referred to, it is referring to only the face-up side of the chip.
Player Order: Starting with player with the start player token and proceeding clockwise.
Adjacent: A chip in any of the 8 spaces surrounding the chip (orthogonal and diagonal).
Group: Chips that share an attribute (i.e. type) and are all connected through adjacency to each other.
Path Cards
Ongoing Quest: An objective that each player may complete once during the remainder of the game. Players mark that they've completed it by placing an unused skill token on the card, number side up.
The 1st player who completes the objective places their level 4 token, and each subsequent player places the next lower token. If multiple players complete it in the same round, they each place the same number. At the end of the game, players gain VP equal to the level of their token on the card.
Ongoing Decree: A rule that is in effect for the rest of the game, rather than a single round.
Changing Dungeon Orientation: This means that what are usually floors on the map are now columns, and vice versa.
Changing Dungeon Directions: Some path cards will instruct players to proceed upwards rather than down. Reverse the effects of any relevant skills or tools to match the changed direction.
FAQ
When can I look at my chips?
Dungeon Phase
Players may NOT look at chips in their bags or the reverse of chips they have already played.
Resolution Phase
Players may look at the reverse of played chips before resolving abilities.
Other Phases
Players may freely look in their bags and remove chips to look at them in other phases. All chips must be returned before the next Dungeon Phase.
When should I stop early?
Very rarely! Each chip has at least one beneficial side, so you want to play as many as possible. However, only features on floors you have reached affect you, so stopping early can save you from a dangerous monster or chest, especially when your Satchel is getting low on chips.