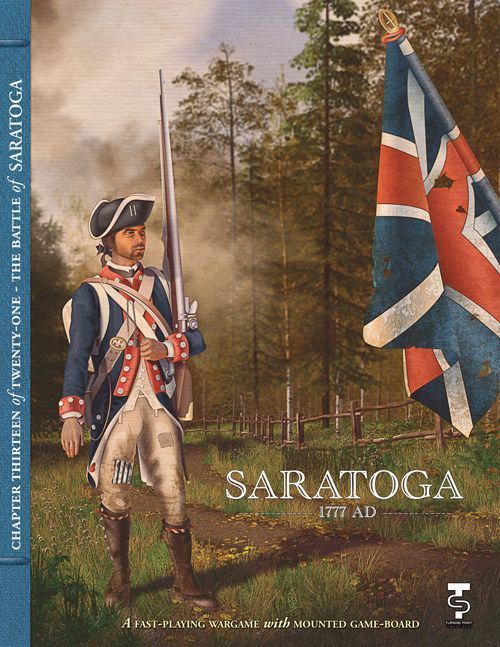
Saratoga 1777 AD
Saratoga 1777 AD Rulebook
Table of Contents
Table of Contents
- Introduction
- How This Book Is Organized
- Learning to Play
- 2.0 Game Components
- 3.0 Important Concepts
- 4.0 Sequence of Play
- 5.0 Command Phase
- 6.0 Movement Phase
- 7.0 Combat Phase
- 8.0 Recovery Phase
- 9.0 End Phase
- 10.0 Victory Conditions
- 11.0 Game Set Up
- Combat Results Table (CRT)
- Terrain Effects Chart (TEC)
Introduction
1.0 Introduction
Saratoga is a two-player game of the battle that was the turning point of the American Revolution on a tactical scale. There are two scenarios, one covering the first clash of September 19, 1777, and the other for the second engagement of October 7.
1.1 Game Scale
Each turn represents 45 minutes, and each hex on the map represents about 200 yards. Most combat units are battalions and artillery batteries, with individual Leaders.
How This Book Is Organized
This rulebook is structured to introduce concepts following the game's sequence of play. They are written in a format known as the Case System. This approach divides the rules into Modules, each dealing with an important aspect of play. Modules are numbered sequentially and possess a title. Each Module is divided into Sections, dealing with major sub-topics within the Module. These are also numbered sequentially. Finally, the majority of each Section consists of Cases: the specific, detailed rules that govern play. Their sequential numbering follows a logical progression based upon the Module and Section of which the Cases are a part. Look to these numbers to determine where a Case is located in the rules.
Example: 3.1.4 is the fourth Case of the first Section of the third Module of the rules.
Learning to Play
Begin by familiarizing yourself with all of the components listed for this game. Then skim through the charts and rules, reading all the titles of the Modules and Sections. Set up a game scenario or portion of a scenario (after reading the applicable Module) and play a trial game against yourself. Try referring to the rules only when you have a question and remember the numbering system we employ makes it easy to look up rules. While a trial game may take you an hour or two, it is the quickest and most pleasant way to learn (short of having an experienced friend teach you). We don't recommend attempting to learn the rules word-for-word. We've written these rules to be as comprehensive as possible—but they are not designed to be memorized. Taking in the rules as you play along is the best approach to mastering this game.
The publisher's postal and e-mail contact details for missing parts and rules questions are omitted from this transcription.
2.0 Game Components
Your copy of Saratoga should contain the following components:
- One 11" by 17" map sheet, depicting the terrain the battle was fought over and containing the Game Turn Track, Terrain Key, and Morale Track
- One set of 200 die cut ½" playing pieces
- One rulebook
- Two six-sided dice
2.1 The Game Map
The game map shows the area around Bemis Heights over which a hexagonal grid ("hexes") has been superimposed to regulate the movement and positioning of pieces. Each hex is also individually designated with a four-digit number, which is used in set-up.
2.1.1 Map Features
Various types of terrain and certain features are denoted on the game map to define the effects explained on the Terrain Effects Chart. These terrain types and features are Elevation Levels 1, 2, and 3, rivers, roads, woods, and streams.
2.2 The Counters
The cardboard playing pieces (or counters) in the game should be carefully separated before trying to play the game. There are two basic types of counters: Combat Units and Leaders (a term encompassing both Overall Commanders and their subordinate Formation Commanders). The pieces are of different types, depending on the information that appears on each. In general the pieces represent either combat units or Leaders or informational markers.
Combat units represent the actual historical units that fought, or could have fought, in the battle of Saratoga. The front of each combat unit shows the combat unit at full strength, while the back of the counter represents the same combat unit at a reduced strength. Each face of a combat unit presents information that determines its capabilities in the game. Combat unit and Leader counters use background and typeface colors to show relationships and the general layout of the pieces are illustrated on the opposite page. The various unit and marker information, appearing on the counters, is explained below.
2.2.1 Combat Rating (CR)
Combat units have a letter code printed in the lower left hand corner of the counter. This is a letter code from "A" (best) to "D" (worst) that measures the offensive strength of the combat unit in combat, plus its cohesion in combat.
2.2.2 Movement Allowance
Printed in the lower right-hand corner of all units is the Movement Allowance. This is the maximum number of Movement Points (MPs) a unit may expend during a single Movement Phase as it moves from hex to hex on the map.
2.2.3 Combat Bonus
All Formation Commanders possess a Combat Bonus Number that can increase the chance of combat units scoring hits in battle. It is located in the lower left corner of all Formation Commander counters. The ratings range from –(0) to +2.
2.2.4 Activation Rating
The Overall Commanders (Burgoyne for the British, Gates and Arnold for the Americans) have an Activation Rating that is the number of Formation Commanders (which are their subordinate leaders) that may be activated in a turn if they are within the Command Span of their Overall Commander.
2.2.5 Command Span
Each Leader (all the Overall and Formation Commanders) has a Command Span. This is the number of hexes that units may be away from their Leader and still be in command. Combat units may trace to either their Formation Leader or to their Overall Commander. When tracing for command, count the hexes to include the combat unit but not the Leader they are tracing to.
2.2.6 Range
Printed on the artillery counters are their range, or how far they may attack. All non-artillery combat units have a range of one. Artillery combat units can use their Combat Ratings to attack opposing combat units that are not adjacent, up to five hexes away. Range is the distance (in hexes) to which the artillery can fire. Count the range to include the target hex but not the hex containing the firing artillery unit.
2.2.7 Caliber
The size of artillery pieces in a unit, provided for informational purposes only.
2.2.8 Unit Abbreviations
Some units have abbreviations within their designations and leader names.
British:
| Abbreviation | Meaning |
|---|---|
| CinC | Commander-in-Chief, Lieutenant General John Burgoyne (Overall Commander) |
| Breymann | Lieutenant Colonel Heinrich von Breymann |
| Fraser | Brigadier Simon Fraser |
| Hamilton | Brigadier James Hamilton |
| Phillips | Major General William Phillips |
| Riedesel | Major General Frederick von Riedesel |
| Gren. | Grenadiers |
| Rhetz | von Rhetz's Regiment |
| Riedesel | von Riedesel's Regiment |
| Specht | von Specht's Regiment |
| L.Wing | Left Wing |
American:
| Abbreviation | Meaning |
|---|---|
| Arnold | Maj. Gen. Benedict Arnold (Overall Commander) |
| Gates | Maj. Gen. Horatio Gates (Overall Commander) |
| Learned | Brigadier General Ebenezer Learned |
| Nixon | Brigadier General John Nixon |
| Paterson | Brigadier General John Paterson |
| Poor | Brigadier General Enoch Poor |
| Albany | Albany County Regiment (New York Militia) |
| Cook | Colonel Thaddeus Cook's 1st Regiment (Connecticut Militia) |
| Graham | Colonel Morris Graham's Dutchess & Ulster County Regiment (New York Militia) |
| Latimore | Colonel Jonathan Latimore's 2nd Regiment (Connecticut Militia) |
| MA |
2.3 Markers
Markers are special pieces used to record various game functions. There is one game turn marker, and there are five Morale Track markers for each player (one for each of their five subordinate Formation Commanders). The only remaining markers are the black and white markers to record step losses and units out of command.
3.0 Important Concepts
Before You Begin
Before getting on with the main body of the rules, there are several important concepts with which players should familiarize themselves. These are presented here and include the rules on stacking, Zones of Control, and the role of Leaders.
3.1 Stacking
The player is permitted more than one counter in a hex. Groups of more than one piece in a hex are called stacks and making up such groups is termed "stacking." Combat units can freely combine into stacks or leave them by movement, within the following restrictions.
3.1.1 Stacking Limits
Players may stack up to two friendly combat units per hex at the end of their Movement Phase. Leaders and markers of any type do not count towards stacking. Stacking limits are ignored while moving, as long as no single combat unit ends a Movement Phase in violation of the stacking limit.
3.1.2 Road Stacking Limits
No more than one combat unit (plus any number of Leaders) may stack in a road hex at any point in its move if it wishes to move along the road at any point expending MPs at the more favorable road rate. Otherwise, use the other terrain type present in the hex to determine MP costs.
3.1.3 Joint Movement By Stacks
Combat units and Leaders that move together as a stack are limited to the movement allowance of the slowest combat unit in the stack.
3.1.4 Stacking Violations
Combat units present in a hex in violation of the stacking limit at the end of their side's Movement Phase are eliminated. In addition, the stacking limit applies during the Combat Phase, so when friendly combat units are forced to retreat into a hex in violation of the stacking limit, excess friendly combat units must displace one hex to make room for them or the retreating friendly combat units are eliminated. Combat units removed from play to meet stacking limitations are chosen by the owning player.
3.2 Zones of Control (ZOC)
Combat units (but not Leaders or markers) project a Zone of Control into some or all of the hexes surrounding the hex they occupy. These surrounding hexes are considered "controlled" hexes in that they inhibit enemy combat unit movement and the tracing of retreat paths through them.
3.2.1 Who Projects a ZOC
The six hexes surrounding and immediately adjacent to a hex containing a combat unit constitute that combat unit's Zone of Control (ZOC). Each combat unit projects a ZOC into all six surrounding hexes. Leaders do not project a ZOC. A unit's step losses have no impact on whether or not it projects a ZOC.
3.2.2 Mutual ZOCs
There is no additional effect when one or more friendly combat units each project a ZOC into the same hex. If both enemy and friendly ZOCs project into the same hex, the opposing ZOCs co-exist mutually and both sides exert control on that hex. Unless specified, the effects of enemy ZOCs are never negated by the presence of friendly combat units (or friendly ZOCs) in the controlled hexes. A friendly combat unit's occupation of a hex in an enemy ZOC does not negate that enemy ZOC for movement. Combat units are unaffected by the ZOCs of other friendly combat units.
3.2.3 Terrain and ZOCs
Combat units project ZOCs into all terrain types, except across river or stream hexsides.
3.2.4 ZOC Effects on Movement
Combat units and Leaders entering a hex in an enemy ZOC must immediately stop for the remainder of that Movement Phase. Halted combat units and Leaders may not move farther that current movement phase. If, at the beginning of its Movement Phase, a phasing stack occupies a hex in an enemy ZOC, the phasing stack may freely exit the enemy ZOC hex but must immediately stop if entering another hex in an enemy ZOC. In addition, combat units and Leaders may not move directly from one enemy ZOC hex to another enemy ZOC hex without first moving into a hex not in an enemy ZOC, or unless the hex to which they move is already occupied by other friendly combat units.
Transcription note: the printed text reads "farther that current movement phase"; it is transcribed as printed.
3.3 Facing
Combat units and Leaders possess all-around facing in Saratoga and do not need to orient themselves in any particular way to the grid.
3.4 The Fog of War
Players may not examine each other's stacks of units on the map board except insofar as the top combat unit in a hex (even if under a marker) in a stack is always visible. Players may only inspect the identities and strengths of a stack of enemy combat units and Leaders in a hex during the Combat Phases. Exception: Do not reveal the identity or strengths of combat units or Leaders when attacks are made solely by non-adjacent enemy artillery combat units.
3.5 Artillery
Artillery combat units are the only units that have the capability to engage in ranged fire. They also have certain other restrictions:
a. Artillery units may not enter an enemy ZOC.
b. British artillery units start under the command of their respective Formation Commander. All US artillery begins the game in Fort Neilson under the command of Overall Commander Gates, but both sides' artillery units may subsequently trace command to any friendly Leader, and not just their starting Leader.
c. American artillery units that set up in Fort Neilson can leave there during the course of the game.
3.6 Terminology
The term "combat units" includes both infantry and artillery units. The term "Leaders" includes both Overall Commanders and the lower level Formation Commanders. Overall Commanders have Activation Ratings (first printed number on left). Formation Commanders may have a Combat Bonus printed there instead.
Burgoyne is the sole British Overall Commander and has five subordinate Formation Commanders as follows:
- Fraser (his formation's historical name was "Right Wing").
- Hamilton (his formation's historical name was "Center").
- Riedesel (his formation's historical name was "Left Wing").
- Philips (his formation's historical was "Rear Guard").
- Breyman (his formation's historical name was "Reserve").
Gates and Arnold are both considered Overall Commanders for the Americans. Gates has three subordinate Formation Commanders (collectively known as the "Right Wing"):
- Glover (his formation's historical name was "First")
- Peterson (his formation's historical name was "Second")
- Nixon (his formation's historical was "Third")
Arnold has two subordinate Formations Commanders (collectively known as the "Left Wing"):
- Learned (his formation's historical name was "First")
- Poor (his formation's historical was "Second")
Regardless of the name or number printed on their counter, treat all ten Formation Commanders the same for rules purposes. Thus, the Americans have five unique Formations (each with its own Morale marker) that can break, and the British have five as well.
Transcription note: the printed spellings "Philips" and "Breyman" are kept as printed; the Formation Commanders are Phillips and Breymann in the rest of the rulebook.
3.7 Leader Command Span
In order for units to be considered "in command" and be able to move their full movement allowance, they must start their movement within the Command Span of their Formation Commander or their Overall Commander (Burgoyne for the British and Arnold and Gates for the Americans). If they are not within range, their Movement Allowance is reduced by 2 MPs for the turn. When counting for range, count the hex the combat unit is in but not the hex the Leader is in.
3.8 Subordinate Formation Morale
Each of the five Formations in both American and British Armies has a Morale Track printed on the map. The Morale Track counter for each Formation is placed on the track on the box marked "Start" for the scenario being played. Each time a combat unit is flipped during combat to its reduced side, or is eliminated, the player makes a Morale Check (Case 3.8.1). Exception: Loss of American artillery units does not have any effect on the Morale Track of the Formation they are assigned to.
3.8.1 Breaking the Morale of a Formation
To make a Morale Check, roll two dice against the number in the Formation's current box on the Morale Track. If the result is equal to or lower than the number in the current box, then the Formation passes, and all units function normally, though the Morale marker is moved down one space. If the roll is higher, then the Formation has broken and the Morale marker is flipped to its Broken side.
3.8.2 Effects of a Broken Formation
When a Formation breaks, all of its units immediately retreat one hex out of any enemy ZOCs; immediately before the retreat, the enemy may initiate one round of combat against the affected units, with only adjacent enemy infantry firing. Non-phasing artillery, whether adjacent or not, may not fire. A Formation that breaks must move away from all enemy units at least one hex more than the turn before, during the movement phase, toward the north map edge for the British, and the south if American. The player may move his units further than one hex from the enemy, and units may move up to their movement allowance, if the player so chooses. They may not move into enemy ZOCs nor may they take part offensively in combat. A broken Formation cannot be rallied or reformed during the course of the game; once broken, it stays that way.
3.8.3 Retreat
When a unit retreats, or moves away from the enemy as part of a broken Formation, it must retreat to a vacant hex, if one is available. Then, in each subsequent movement phase, it must move at least one hex further away from enemy units, toward its friendly map edge. If there is no empty hex, then it can retreat to a friendly-occupied hex, provided that it does not violate stacking limits. A unit that cannot retreat to either, or can only retreat off the edge of the map, is destroyed. British units retreat to the north, and Americans toward the south, if at all possible.
Developer's Note: The last is basic common sense, codified to prevent players from turning retreats into advances. Also, when a unit is destroyed in this manner, it is considered to have surrendered.
4.0 Sequence of Play
The following Sequence of Play is used for each turn:
A. First Player Determination
Each player rolls one six-sided die. The player with the higher die roll decides to be the first or second player for the turn. In case of a tie, the American player decides whether to be the first or second player for the turn.
B. First Player Turn
- Command Phase
- Movement Phase
- Combat Phase
- Recovery Phase
C. Second Player Turn
- Command Phase
- Movement Phase
- Combat Phase
- Recovery Phase
D. End Phase
5.0 Command Phase
During the Command Phase, the phasing player first checks to see which of his combat units are in command, defined as being within the Command Span in hexes (Case 2.3.5) of their Formation Commander (or an Overall Commander if tracing to him). Place an Out-of-Command marker on top of any combat unit found out of command, these combat units may not activate this turn. Then begin declaring activations. Each Overall Commander automatically activates each turn (exception: Section 5.2 below) and also has an Activation Rating printed on his counter. This is the maximum number of his subordinate Formation Commanders that he may choose to activate during this turn (no limit on activating combat units tracing command directly to an Overall Commander). To activate a subordinate Formation Commander, that Formation Commander must be within the Command Span in hexes (Section 3.7) of an Overall Commander. The phasing player then chooses which of his Formation Commanders to activate (up to the maximum limit) and flips the others over to their unactivated side.
Transcription note: the printed text cites "Case 2.3.5" for Command Span; the Command Span rule is Case 2.2.5, and the printed reference is kept as printed.
5.1 Effects of Activation and Being In Command
When a Formation Commander (or Overall Commander) is activated, all of the combat units that are in command under him (i.e. tracing command to him) are considered activated too until that player's next Command Phase.
- Combat units that are in command and activated may move into enemy ZOCs and subsequently attack.
- Combat units that are in command but unactivated may move normally, but may not enter enemy ZOCs or subsequently attack.
- Combat units that are out of command and unactivated may move, but have their Movement Allowance reduced by 2 MPs, and may not enter an enemy ZOC or subsequently attack.
- Out of command and/or unactivated combat units may still take part in combat (by firing defensively) if they began the Command Phase in an enemy ZOC. Artillery units may also take part in these types of combats (by firing defensively) if they are in range and possess a LOS.
5.2 Activation of Gates
While Burgoyne and Arnold both automatically activate during their respective Command Phases, the American player must roll each turn to see if Gates activates. Roll two dice and on a result of 10+, Gates activates for this turn (only) until the next American Command Phase. If enemy combat units are within 3 hexes of Gates, he activates on a two-dice roll of 8+. If he fails, flip Gates over to his unactivated side. If Gates is activated, he may then activate his subordinate Formation Commanders (or combat units tracing command to him) normally. Gates still always provides command to combat units that can trace to him, even if unactivated.
6.0 Movement Phase
Movement in the Movement Phase is always voluntary, never required. In a friendly Movement Phase, that side may move as many or as few of its combat units and Leaders as the player wishes. Each combat unit or stack may be moved as many hexes as desired, within the limits of its Movement Allowance, and within the restrictions of the Terrain Effects Chart.
6.1 Procedure
During the Movement Phase, the phasing side moves its combat units and Leaders. Each combat unit or stack is moved individually, tracing a path of contiguous hexes on the game map in any direction or combination of directions. Each combat unit or stack must complete its movement before the next combat unit or stack may be moved, though combat units and Leaders at any stage may be dropped off or picked up en route by a stack. Stacks may break down into smaller stacks or component combat units and Leaders at any stage during the Movement Phase, but if a stack is moving together then its Movement Allowance is that of its slowest member.
6.2 MP Expenditure
Each combat unit within a stack expends MPs from its Movement Allowance for each hex it enters. As explained on the Terrain Effects Chart, each type of hex has its own MP cost, and there are additional or reduced MP costs for certain hexsides and features. All movement costs are cumulative, except when moving along roads (Section 6.3). Exception: Movement as a result of combat (retreating before or after a battle) does not require a combat unit to expend MPs.
6.3 Road Advantages
To gain the terrain MP cost advantage of moving on a road, the road network must be followed exactly. In initially moving onto a road, the non-road terrain MP cost is used. While engaging in road movement, a unit does not have to pay the normal penalty for moving up or down slopes, but do still pay +1 MP extra to cross streams. Non-road and road movement may be combined in a combat unit's movement during a Movement Phase.
Clarification: A stack can't move by road movement. Units cannot move "over" another unit on a road, and still claim road movement MP rates.
6.4 Moving Through Combat Units
A combat unit or Leader (or stack) may move freely into or through hexes occupied by other friendly stacks but must stop upon entering an enemy ZOC (Section 3.2). Combat units and Leaders may never move through hexes containing enemy combat units (there are no "overrun" rules in this game) but may do so through hexes containing only enemy Leaders (eliminate the Leaders in this case). A combat unit or stack may end its movement stacked in the same hex with another friendly combat unit or stack, subject to the stacking rules (Section 3.1).
6.5 Minimum Movement
A unit can always move at least one hex in a turn, regardless of movement points available, provided that it does not violate Section 6.4.
7.0 Combat Phase
During the Combat Phase, the phasing player may first move all activated infantry and Leader units up to three MPs and then conduct combat. Units that move at the beginning of the Combat Phase must end that movement adjacent to an enemy unit; those unable to do so may not move at this time. This is in addition to movement conducted in the Movement Phase. After combat movement finishes, both sides conduct combat during this phase.
7.1 Combat Priorities
Attacking (phasing) combat units fire individually at adjacent single enemy combat units and Leaders. No enemy combat unit in a hex may be fired at twice if there are other enemy combat units that have not been fired at least once.
7.1.2 Voluntary Combat
Combat is completely voluntary, including for non-phasing units, and phasing units that moved during the Combat Phase.
7.1.3 Combat Fire Priority
Combat by adjacent enemy units is resolved using the following priority order:
- Defensive "A" Combat Rating units fire first
- Offensive "A" Combat Rating units fire second
- Defensive "B" Combat Rating units fire third
- Offensive "B" Combat Rating units fire fourth
- Defensive "C" Combat Rating units fire fifth
- Offensive "C" Combat Rating units fire sixth
- Defensive "D" Combat Rating units fire seventh
- Offensive "D" Combat Rating units fire last
7.2 Combat Procedure
Using the Combat Rating of each firing combat unit, the player selects a target (a single combat unit in an adjacent hex), finds the To Hit number on the Combat Results Table (CRT), and rolls for each combat unit's fire. Die rolls are adjusted by the modifiers listed under the CRT and include things such as the terrain type the defender is occupying, the presence of Leaders, etc. Note that if a Formation Commander is stacked with two combat units he does get to apply his Combat Bonus in both attacks; however, Formation Commanders may only provide a Combat Bonus to combat units in their formation. Combat results are applied immediately, so that a unit could be hurt or eliminated before it has a chance to fire back.
7.3 Combat Results
Each hit on the CRT causes a step loss on the target combat unit as follows:
- The first step loss to a combat unit causes a Step Loss Marker to be placed on the combat unit.
- The second step loss removes the Step Loss Marker and flips the combat unit to its reduced strength side. Check for the Formation breaking, and then move the Formation's Morale marker down one space on the Morale Track (Case 3.8.1).
- The third step loss on the same unit causes a Step Loss Marker to be placed on the (now) reduced side of the combat unit.
- The fourth step loss on the same unit causes the combat unit to be eliminated. Leaders in a hex where all friendly combat units are eliminated are moved to the nearest friendly combat unit in his Formation. Immediately make a Morale Check to see if the Formation breaks, and if not, then move the Formation's Morale marker down one space on the Morale Track (Case 3.8.1).
7.4 Ranged Fire
Artillery combat units are the only combat units that may fire both offensively and defensively at non-adjacent enemy combat units and Leaders. Artillery units may fire at targets up to five hexes distant, depending on the range of the unit. If two friendly artillery combat units are stacked together, they must fire at the same target hex. Therefore if two artillery units with different ranges are in the same stack, they can fire no further than can the shorter-ranged unit.
7.4.1 Lines of Sight
Artillery combat units can fire at targets at a distance up their range in hexes. When artillery combat units are attacking non-adjacent combat units and Leaders, a Line of Sight (LOS) must first be established to see if the attack is allowed. To trace an LOS, place a straight edge on the map between the firing combat unit and the target. If any of the intervening hexes are blocking terrain types, the target may not be fired upon. Woods are blocking terrain. Also, if a higher elevation terrain hex is between the firing combat unit and the target, the target is blocked. If the LOS falls exactly between two hexes, it is only blocked if both hexes are blocking terrain. Terrain in the target hex does not block the LOS. Units and Leaders, both enemy and friendly, never block the LOS. An LOS is never blocked when attacking adjacent enemy combat units and Leaders.
7.4.2 Ranged Fire Resolution
If an LOS exists, the range is determined by counting the hex the target is in and the intervening hexes, but not the hex the artillery unit is in. Otherwise, ranged fire is resolved in exactly the same way as with adjacent units firing (Section 7.1).
7.5 Advance After Combat
If a hex is empty as a result of all units in the hex being eliminated, or retreating as a result of breaking, the opposing player may advance up to two combat units that just attacked it into the hex as well as any number of Leaders.
7.5.1
There is no advance after combat if the attack was made entirely by artillery, at any range.
7.6 Combat Against Leaders
If friendly infantry units enter a hex occupied solely by an enemy leader or leaders, at any time, or initiate combat against that hex, then the leader or leaders are eliminated. However, there is no such automatic elimination solely for ranged artillery fire against such a hex. When a Formation Commander is killed this way, no immediate Morale Check to see if the Formation breaks is required. But the Formation's combat units are considered both unactivated and out of command (see Section 5.1 for effects) until they come within the Command Span of an Overall Commander.
8.0 Recovery Phase
During the Recovery Phase, the phasing player may attempt to recover Step Loss Markers on all of the units in one of their Formations. To do so, the player announces which Formation will attempt to recover. All combat units stacked with their Formation Commander or their Overall Commander have their Step Loss Markers removed. Combat units adjacent to their Formation Commander or Overall Commander reduce their recovery die roll by one. All other units receive no modifiers to their die roll (1D6). Combat units that are adjacent to enemy units may not roll for recovery, nor may they recover if stacked with a Leader.
Recovery only effects the removal of Step Loss Markers. This means that once a combat unit has flipped to its reduced side, it may never be changed back to its full strength side.
Note: American artillery units are allowed to perform Recovery as part of the Formation they are under command of at that time.
When rolling, use the following:
| Combat Rating | Die Roll Needed to Recover |
|---|---|
| A | 1-5 |
| B | 1-4 |
| C | 1-3 |
| D | 1-2 |
Developer's Note: Note that artillery, rated D, is among the units that fire last. This is no accident, and reflects the relatively poor quality of the artillery on both sides. Had these been gunners in the armies of Frederick the Great or Napoleon, they would, no doubt, have been rated higher, giving them the ability to fire before the infantry. Yet Saratoga is an entirely different situation, with artillery served by lesser crews.
9.0 End Phase
During the End Phase, the Turn Marker is moved and each player checks to see if his army has been demoralized. A side is demoralized if it has three of its Formations broken at the end of the turn. If this is achieved by both sides in the same turn, then the game is considered a draw and ends. If the army of one side is demoralized, then the game ends and that player has lost. Also, if the British have exited 4 full-strength units on the road at 0113, the British player wins an immediate and automatic victory, regardless of demoralization on either side.
10.0 Victory Conditions
At the end of either scenario, if the automatic victory conditions of Module 9.0 have not been met, each player totals the losses inflicted on the other side as follows:
- For each Formation broken, 10 victory points.
- For each A unit step eliminated, 1 victory point.
- For each two B unit steps eliminated, 1 victory point.
- For each three C unit steps eliminated, 1 victory point.
- For each four D unit steps eliminated, 1 victory point.
The player with the most victory points wins. In case of a tie, the American player wins.
Transcription note: the printed reference "Module 9.0" is kept as printed; the automatic victory conditions are in Section 9.0 (End Phase).
11.0 Game Set Up
11.1 Battle of Freeman's Farm – September 19, 1777
Americans:
Arnold sets up in 0313. Left Wing combat units and Leaders (Poor and Learned) set up within two hexes of Arnold. Gates sets up in 0815. Right Wing combat units and Leaders (Glover, Peterson, Nixon) within two hexes of Gates. Gates' artillery units 1-11 set up in the fortification hexes (those with the smaller black hexagons in them) of Fort Neilson (ignore fortification hexes in 0313 and 0412 which are not in play in this scenario).
American combat units not set up for this scenario are Latimore (Poor's 2/Left Wing), 2nd Albany, 17th Albany, and Graham (Glover's 1/Right Wing).
British:
Fraser and his units set up within one hex of 0201. Breymann and his forces set up within one hex of 0401. Hamilton and his forces set up within one hex of 1504. Riedesel and his force set up within one hex of 2106, and Phillips and his force sets up within two hexes of 2203. Burgoyne (CinC) is set up with any British unit.
This scenario lasts 11 turns (starting at 10:30 a.m. and ending at 6:45 p.m.). All Morale Track markers are placed on their "Start 1" spaces as notated on the mapboard.
11.2 Battle of Bemis Heights – October 7, 1777
Americans:
Arnold sets up in 0313. All Left Wing combat units and Leaders (Poor and Learned) set up within two hexes of Arnold. Gates sets up in 0815. All Right Wing combat units and Leaders (Glover, Peterson, Nixon) set up within two hexes of Gates. Gates' artillery units 1-11 set up in any fortification hex (those with the smaller black hexagons in them) of Fort Neilson except for fortification hexes 0313 and 0412, which are in play this scenario but may not have any artillery set up in them at start.
British:
Burgoyne (CinC) sets up in 0605. Fraser and his units set up within one hex of 0406. Breymann and his units set up within one hex of 0706. Hamilton (minus the 62nd Foot) sets up within one hex of 1107. Riedesel and his units set up within one hex of 1507, while Phillips and his units set up within two hexes of 1305.
The game lasts 11 turns (starting at 10:30 a.m. and ending at 6:45 p.m.). All Morale Track markers are placed on their "Start 2" spaces as notated on the mapboard.
Combat Results Table (CRT)
| Firing Unit's Combat Rating | Die Roll Needed to Hit |
|---|---|
| A | 3-6 |
| B | 4-6 |
| C | 5-6 |
| D | 6 |
Modifiers:
- -? for terrain the defender occupies (see the TEC)
- -1 for artillery units firing at a range of three or more hexes
- +1 for artillery units firing at a range of one hex
- +1 if two defending combat units (do not count leaders or markers) are stacked in the target hex
- +? for leader's Combat Bonus if stacked with firing units
Note: A natural roll of "6" (before modifiers) is always a hit.
Transcription note: the two modifiers printed as "-?" (terrain) and "+?" (leader's Combat Bonus) carry a question mark in the official rulebook, with no value printed in the text; they are transcribed as printed. The Combat Bonus values are listed on the counters (Section 2.2.3).
Each hit on the CRT causes a step loss on the target as follows:
| Step Loss | Result |
|---|---|
| First Step Loss | Step Loss marker placed on the unit |
| Second Step Loss | Step Loss marker removed and unit flipped to its reduced strength side |
| Third Step Loss | Step Loss marker placed on the reduced unit |
| Fourth Step Loss | Unit is eliminated. Leaders in a hex where all friendly combat units are eliminated are moved to the nearest friendly combat unit. |
Terrain Effects Chart (TEC)
| Terrain | Movement Cost | Combat Effects | Line of Sight |
|---|---|---|---|
| Clear Level 1 | 1 (Treat partial land hexes along the Hudson River as full Clear Level 1 hexes, units may enter, stack, and have combat in them normally.) | None | Does not block |
| Clear Level 2 | 1 | None | Does not block |
| Clear Level 3 | 1 | None | Does not block |
| Road* | ½ | None | Does not block |
| River | May Not Cross To Opposite Side | N/A | Does not block |
| Woods | 2 | -1 | Blocks LOS through (but not into) hex |
*Note: Stream hexsides negate roads for purposes of movement.