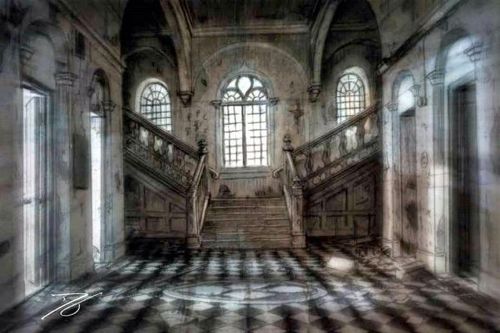
Sanitarium: The Foyer
Sanitarium: The Foyer Rulebook
Table of Contents
Table of Contents
- Components
- The Sanitarium Map
- Placing Cards
- Setup
- Character Card
- Turn Structure
- Taking Actions
- Actions: Move
- Actions: Search
- Actions: Expand
- Actions: Concentrate
- Actions: Escape
- Actions: Go Nuts
- Playing Events
- Shadows
- Horror Checks
- Hallucinations
- Escape / Game End
- FAQ/Clarifications
- Foyer Character Cards
- Foyer Scenario Cards
- Solo Scenario: Is it just me?
Components
- 4 Player Tokens
- 4 Shadows Tokens
- 9 Hallucinations
- 54 Hallway Cards
- 13 Safe Things
- 4 Character cards (each double-sided)
The component page shows example cards for each type.
Protected Item. An Item that has been claimed as one of your Safe Things is protected: it cannot be stolen by other players.
Hallucinations. Each Hallucination example card reads: "Other Worlds," sanity cost 3, "You may not jump between rooms. Each of your items and events is worth one less Sanity."
Types of Hallway Cards. The main deck is 54 Hallway cards. There are four different types of card:
- Item. Items provide you a bonus effect that you can use each turn. Example: Rope (sanity cost 2), "Once during your turn, you may choose to reroll any or all dice just rolled."
- Event. Events are used once. Example (sanity cost 2): "You may exchange one of your Safe Things cards with one randomly chosen from those not in play."
- Room. Rooms provide protection from Shadows, and allow you to move around the Sanitarium more easily. 8 Rooms are in the deck.
- Dark Hallway. There are 10 identical Dark Hallway cards, each with a Shadow icon. Shadows spawn from these locations, and they make Horror Checks more difficult.
As you travel through the Sanitarium, you will collect Items and Events by using the Explore action. There are 13 different Items and 5 different Events in the deck, and 2 copies of each. Both can provide Sanity, which is used to disbelieve Hallucinations.
Safe Things. Safe Things cards tell you which items you need to escape. Once claimed, Safe Things cannot be stolen from you.
Hallucinations. Each player will start with a Confusion Hallucination, and getting caught by Shadows will earn you more insanities.
The Sanitarium Map
Sanitarium cards connect via doors. Each card has six doors around its edge, and the back of Hallway cards have an additional door in the center -- dividing the card into two separate spaces you can stand on. Any time a card is added to the board, it must connect with at least one door (or have a door touching the Foyer). A door is connected if any part of it touches another door. Below are examples of connected (green) and unconnected (red) paths in an area of the Sanitarium.
Placing Cards
Face down Hallway cards form most of the Sanitarium layout. At many points during the game, including setup, you will be required to place a new card. To do so:
- Draw and look at the top card of the deck, secretly. If it is a Room or Dark Hallway it will be placed face up, if it is an Item or Event it will be placed face down.
- Place the card so that it has at least one doorway lined up with the doorway of an existing card.
- If the card placed was a Dark Hallway, place a Shadow token on it. If all Shadow tokens are already in play, move one there (your choice).
If the deck is empty when a card needs to be drawn, shuffle any discarded Item and Event cards to form a new deck. If there are none, time has run out! The Desperation (see p. 15) phase of the game will begin, as the Sanitarium crumbles around you.
When placing a new card to replace one taken during a Search action, it must be oriented exactly like the old card, and any tokens that were on the old card are placed back on top of it. If the new card is a Dark Hallway, it does get a Shadow token. This can cause a player to be immediately caught!
Setup
Choose a Scenario card, and pick a random start player*. Take one Dark Hallway from the deck, and set it aside for use in initial placement.
- Each player takes a Character card (Insane side up) and the corresponding token.
- Give each player a Confusion Hallucination, and remove any leftover Confusion cards, then shuffle the rest of the Hallucinations together, face down.
- Deal out the Safe Things evenly to all players (2P: 6 each, 3P: 4 each, 4P: 3 each), and leave the remaining one face down away from the board.
- Place the Foyer in the middle of the table, and all player tokens on it.
- In order from the start player clockwise, each player secretly peeks at and adds one hallway card to the map, face down. Any Room or Dark Hallway cards should be discarded and redrawn.
- The start player then places the set aside Dark Hallway, and the first Shadow token on it.
- Shuffle any discarded cards back into the main deck, and perform any additional setup steps specified by the Scenario.
* You do have dice!
Example of how initial setup may look in a 4 player game: (example image not reproduced)
Character Card
Your Character card has two sides. A Hallucinating, insane side, and a sane side. At the start of your turn, your card will flip over if your status has changed. The two sides have different actions available, and give you different bonuses and penalties based on your AP die choice. Events, once used, will be tucked under your Character card to be spent as Sanity later on.
Example Event on a Character card (Twist of Fate, sanity cost 2): "Play at the start of a turn. Peek at the top three cards of the deck. Place one on top of the deck, and the others on the bottom." Flavor: "Why is this happening... Why is this happening to me..."
Turn Structure
The right side of the Scenario Card will describe the phases of each player's turn, which vary from scenario to scenario.
Taking Actions
During your turn, you will roll the three dice which will result in choosing an AP Die. Based on your character card, this will give you a number of Action Points. The specific actions you are allowed to take depend on which side of your card is face up.
Actions: Move
Move actions cost 1 AP each. A Move action allows you to move through one set of connected doors. If you are in a Room (not a Dark Hallway!), you may use a Move action to jump to any other Room in the Sanitarium. You can take two Move actions (2AP) to move to the Foyer from any location.
Example: Stacey wants to move away from the creepy Shadow next to her. She has 5 AP this turn and uses 4 AP on move actions (once to move from one room to another), and plans to spend the fifth to Search the card she wound up on.
Note that the back of each face down Hallway card has two spaces on it, separated by a door in the middle.
Actions: Search
Search actions cost 1 AP each. A Search action allows you to peek at the face down hallway card you are on. You may choose to claim it, or return it to where it was. If you claim it, draw and place a new card from the deck to replace it. Either way, tokens that were on the card return to the same location they were in before Searching.
Item cards you acquire are put face up in front of you, while Events are held hidden in your hand until they are used. If the Item you claimed was one of your Safe Things, immediately reveal it and tuck it under the Item. It is now protected, and you are one step closer to escape!
You may only take one Item per turn, but you may use additional Search actions to look at other face down cards. You may take any number of Event cards.
Note: You have a limit of 3 non-protected Items. If you have more than 3 non-protected Items at any time, you must discard the excess.
Actions: Expand
Expand actions cost 2 AP each. An Expand action allows you to place a new card into the Sanitarium, attached to a door on your current space. You must follow the normal rules for placing a new card. If there is no place for you to add an adjacent card, you cannot Expand.
Actions: Concentrate
A Concentrate action costs 1AP, and can only be done once per turn. Concentrate allows you to discard Hallucinations, by spending AP from Items you posess, tucked Events, and bonuses you may have. Discard the cards you wish to spend as Sanity, add your bonuses, and then disbelieve any number of Hallucinations -- of total Sanity Cost equal to or less than the Sanity you spent. Note that you can only spend tucked Events during a Concentrate action. You cannot use Events you have not yet played. Discarded Items and Events go to a face up pile next to the draw deck.
Actions: Escape
The Escape action costs 2AP, and will allow you to escape the Sanitarium and win! The specific requirements for Escape vary by the Scenario card being used.
Actions: Go Nuts
The Go Nuts action allows you to take a risk to spend extra AP. It can only be used while 'sane'. It grants you 2 AP, but you must make a Horror Check of difficulty 7.
Playing Events
Events can be played at any time, as specified on the card. After you play an Event, tuck it under the side of your Character Card, to be used as Sanity in Concentrate or Escape actions.
Shadows
Shadows represent the nasty horrible unseen things inside the Sanitarium, lurking around the winding pathways. One Shadow will begin play in the first Dark Hallway, and additional Shadows will enter play as more Dark Hallways are placed. Getting caught by a Shadow will cause you to make a Horror Check.
Shadows will move during your turn, in different ways depending on the Scenario. Shadow movement is always along the shortest path toward the targeted players. Shadows move like players, except that they cannot jump between rooms. If there are two equally distant paths from a Shadow to the player, the current player chooses which path it follows.
Any time a Shadow is in the same space as a player, they are caught. If there are multiple players on the same space, the current player decides which is caught. If this happens in the middle of a Shadow's movement, it does not continue moving afterward.
The player who was caught then moves the Shadow to any empty Dark Hallway. If there are none, move it to any empty space.
Horror Checks
You may be forced to make a Horror Check due to being caught by a Shadow, or due to the effects of a card or the Scenario. Each Horror Check has a difficulty number. The difficulty for a Horror Check after being caught by a Shadow is the number of Shadow icons on the board (1 for each Shadow and each Dark Hallway in play). The difficulty for a Horror Check caused by a card will be stated in its game text. To make a Horror Check, roll two dice. If the number rolled is at least as high as the difficulty, you succeed! Nothing happens, that is good.
If you fail a Horror Check, draw a new Hallucination and place it face up in front of you. If you already have two Hallucinations and you would draw a third or if there are no Hallucinations left to draw, discard a card in your posession -- a tucked Event, an unplayed Event, or an unprotected Item. If you have none, nothing happens.
Hallucinations
Hallucinations provide you with negative effects, and may prevent you from escaping. As you might imagine, it is in your best interest to get rid of them!
The Hallucination deck is not reshuffled after it depletes.
Escape / Game End
Each Scenario describes the requirements for escaping the Sanitarium. Once you take an Escape action, you skip the Actions part of your turn but still perform the other phases. Ignore the AP Die you choose, and any parts of the turn that would move Shadows toward you.
When the last card of the deck is drawn and placed, shuffle the discard pile to form a new deck. If there is none, flip the Scenario card over to its Desperation side. During Desperation, the Sanitarium will crumble around you as Hallway cards are removed every turn. Your only hope of escape will be to attack the Shadows, possibly discarding your Items and Hallucinations, in a last ditch attempt to regain your sanity. The requirements for this vary by Scenario.
If the Scenario instructs you to remove a Hallway but none can be, everyone still inside is trapped, and the game ends! Depending on the Scenario, some, all, or no players might have escaped.
FAQ/Clarifications
Do the extra Confusion Hallucination cards get shuffled in with less than 4 players? No. Remove them from the deck during setup if playing with 2 or 3.
What happens if I Search, claim a card, and draw a Dark Hallway to replace it? A Shadow will move (or be added) to that card, and immediately catch you.
If I have excess Items and discard or losea Backpack, what happens? You must immediately discard enough Items to have only three non-protected ones.
If I use Sneakers, can I take only two, or one free Move actions? Yes. But you don't get the others later during the turn.
How does Ghost Writing work? It stops you from playing events, but you can spend already played events for Sanity.
How does Ghostly Child work with different Scenarios? In any Scenario, the text of Ghostly Child overrides the normal Roll Dice phase.
Foyer Character Cards
Transcribed from the Foyer print-and-play Character cards. Each Character card has a sane side (named character) and a Hallucinating side (Unknown Subject). The print-and-play sheet does not state which Unknown Subject side pairs with which named character, so they are listed separately below. The AP die tiers are as printed on each card. The Law Student's die faces are shown on its card; for the other three named characters the tier labels are as printed, with the same face layout assumed.
Law Student
"What is all this? I need to get home..."
Start of Turn: If you have any Hallucinations, flip this card.
- Move (1 AP): Move one space, or move from one Room to another Room anywhere.
- Search (1 AP): Peek at the card you are standing on. You may take it or return it face down. If taken, Expand a card to take its place. You may take one Item per turn and any number of Events.
- Expand (2 AP): Draw and place a new card adjacent to your current space.
- Event (Anytime): Use an event for its effect, then tuck it under this card to use as Sanity in a future Concentrate or Escape action.
- Go Nuts (0 AP, Once per Turn): Gain 2 AP. Then, make a Horror Check of difficulty 7.
- Escape (2 AP): See Scenario Card.
AP Die:
- 1-2: 4 Action Points
- 3-4: 5 Action Points, -1 to Horror Checks
- 5-6: 6 Action Points, -2 to Horror Checks
The Professor
"It's all coming back. I know how to escape..."
Start of Turn: If you have any Hallucinations, flip this card.
- Move (1 AP): Move one space, or move from one Room to another Room anywhere.
- Search (1 AP): Peek at the card you are standing on. You may take it or return it face down. If taken, Expand a card to take its place. You may take one Item per turn and any number of Events.
- Expand (2 AP): Draw and place a new card adjacent to your current space.
- Event (Anytime): Use an event for its effect, then tuck it under this card to use as Sanity in a future Concentrate or Escape action.
- Go Nuts (0 AP, Once per Turn): Gain 2 AP. Then, make a Horror Check of difficulty 7.
- Escape (2 AP): See Scenario Card.
AP Die:
- 1-2: 4 Action Points
- 3-4: 5 Action Points, -1 to Horror Checks
- 5-6: 6 Action Points, -2 to Horror Checks
Warehouse Foreman
"I...remember. I remember everything..."
Start of Turn: If you have any Hallucinations, flip this card.
- Move (1 AP): Move one space, or move from one Room to another Room anywhere.
- Search (1 AP): Peek at the card you are standing on. You may take it or return it face down. If taken, Expand a card to take its place. You may take one Item per turn and any number of Events.
- Expand (2 AP): Draw and place a new card adjacent to your current space.
- Event (Anytime): Use an event for its effect, then tuck it under this card to use as Sanity in a future Concentrate or Escape action.
- Go Nuts (0 AP, Once per Turn): Gain 2 AP. Then, make a Horror Check of difficulty 7.
- Escape (2 AP): See Scenario Card.
AP Die:
- 1-2: 4 Action Points
- 3-4: 5 Action Points, -1 to Horror Checks
- 5-6: 6 Action Points, -2 to Horror Checks
Business Executive
"I'm back in control. It's time to leave..."
Start of Turn: If you have any Hallucinations, flip this card.
- Move (1 AP): Move one space, or move from one Room to another Room anywhere.
- Search (1 AP): Peek at the card you are standing on. You may take it or return it face down. If taken, Expand a card to take its place. You may take one Item per turn and any number of Events.
- Expand (2 AP): Draw and place a new card adjacent to your current space.
- Event (Anytime): Use an event for its effect, then tuck it under this card to use as Sanity in a future Concentrate or Escape action.
- Go Nuts (0 AP, Once per Turn): Gain 2 AP. Then, make a Horror Check of difficulty 7.
- Escape (2 AP): See Scenario Card.
AP Die:
- 1-2: 4 Action Points
- 3-4: 5 Action Points, -1 to Horror Checks
- 5-6: 6 Action Points, -2 to Horror Checks
Unknown Subject (Hallucinating side)
Four Hallucinating sides are printed: B47, C22, C13 and D81. Each has the same text, shown once here.
Status: Hallucinating.
Start of Turn: If you have no Hallucinations, flip this card.
- Move (1 AP): Move one space, or move from one Room to another Room anywhere.
- Event (Anytime): Use an event for its effect, then tuck it under this card to use as Sanity in a future Concentrate or Escape action.
- Search (1 AP): Peek at the card you are standing on. You may take it or return it face down. If taken, Expand a card to take its place. You may take one Item per turn and any number of Events.
- Concentrate (1 AP, Once per Turn): Disbelieve one or more Hallucinations by discarding Items or already used Events for Sanity, plus your Sanity Bonus.
- Expand (2 AP): Draw and place a new card adjacent to your current space.
AP Die:
- 1-2: 3 Action Points, +2 Sanity
- 3-4: 4 Action Points, +1 Sanity
- 5-6: 5 Action Points
Foyer Scenario Cards
Transcribed from the Foyer print-and-play Scenario cards. Each scenario card has a front (the scenario) and a back (its Desperation side).
Paranoia
2-4 Players, Individual Victory. Difficulty: Hard.
Setup: Normal.
Escape: You can take an Escape Action if you have all your Safe Things, and are in a Dark Hallway. You may substitute 6 Sanity worth of Items and Events for one Safe Thing. Once you've escaped, skip the Actions part of your turn. Multiple players can escape! Any player who escapes wins.
They're out to get you: Subtract 1 from Horror Check rolls for each player in the same or an adjacent space as you, but add 3 if you are in a Room.
On your turn:
- Creeping Darkness: Place one new card (anywhere).
- Roll Dice: Roll three dice. Choose one as your AP die. Use the other two for Shadows.
- Move Shadows: Use one Shadow die to move one Shadow directly toward another player. Use the other to move all other Shadows directly toward you. If multiple Shadows catch you, subtract 3 from your Horror Check.
- Actions: Spend any or all of your AP on actions.
Paranoia: Desperation
"You were paranoid for a reason..."
- Escape: You can take an Escape action if you have enough Shadow tokens in your possession, and are in a Dark Hallway. 1-2 Player: 3 tokens. 3-4 Player: 2 tokens.
- Attacking the Shadows: When you land on a Shadow token's space, you attack it. Make a Horror Check of difficulty 12. After rolling, you can discard Items, Events, or Hallucinations for a bonus of +2 each.
- If you pass, claim the Shadow token. If not, move the Shadow to any empty Dark Hallway.
- Attacking the Others: You may spend 3AP to attack another player on your space. If you roll 10 or higher, steal a Shadow token from them. Add 2 to your roll if you have a Switchblade.
On your turn:
- Roll Dice: Roll three dice. Choose one as your AP die. Use the other two for Collapse.
- Collapse: If the two Destruction dice are the same, remove three empty Hallway cards from play. Otherwise, remove empty Hallway cards from play equal to the difference between the Destruction dice.
- The End: If you cannot remove enough cards during the Collapse phase, the game ends! Anyone that has not escaped is trapped.
- Actions: Spend any or all of your AP on actions. During Desperation, any time you move off an empty Hallway card, remove it from play.
The Go Nuts and Concentrate actions are not available during Desperation.
Together!
2-4 Players, Individual Victory. Difficulty: Medium.
Setup: Normal.
Escape: You can take an Escape Action if you have all your Safe Things, and are in the Foyer. You may substitute 5 Sanity worth of Items and Events for one Safe Thing. Once you've escaped, skip your turn except for the Creeping Darkness phase. All players must escape to win!
Safety in Numbers: Add 2 to Horror Check rolls for each player in the same space as you, and add 3 if you are in a Room.
On your turn:
- Creeping Darkness: Place one new card (anywhere).
- Roll Dice: Roll three dice. Choose one as your AP die. Use the other two for Shadows.
- Move Shadows: If the two Shadows dice are equal, make a Horror Check of Difficulty 7. Otherwise, move each Shadow a number of spaces equal to the difference of the two dice, directly toward the closest player to it.
- Actions: Spend any or all of your AP on actions.
Together!: Desperation
"Can you all make it out...?"
- Escape: You can take an Escape action if the players have all four Shadow tokens in their possession, and are all in the Foyer.
- Attacking the Shadows: When you land on a Shadow token's space, you attack it. Make a Horror Check of difficulty 12. After rolling, you can discard Items, Events, or Hallucinations for a bonus of +2 each.
- If you pass, claim the Shadow token. If not, move the Shadow to any empty Dark Hallway.
On your turn:
- Roll Dice: Roll three dice. Choose one as your AP die. Use the other two for Collapse.
- Collapse: If the two Destruction dice are the same, remove three empty Hallway cards from play. Otherwise, remove empty Hallway cards from play equal to the difference between the Destruction dice.
- The End: If you cannot remove enough cards during the Collapse phase, the game ends! Anyone that has not escaped is trapped.
- Actions: Spend any or all of your AP on actions. During Desperation, any time you move off an empty Hallway card, remove it from play.
The Go Nuts and Concentrate actions are not available during Desperation.
Simple Escape
2-4 Players, Individual Victory. Difficulty: Easy.
Setup: Normal.
Escape: You can take an Escape Action if you have all your Safe Things, and are in a Dark Hallway. You may substitute 4 Sanity worth of Items and Events for one Safe Thing. Once you've escaped, skip the Actions part of your turn. Multiple players can escape! Any player who escapes wins.
Safety in the Light: Add 3 to Horror Checks if you are in a Room.
Turn Structure:
- Creeping Darkness: Place one new card (anywhere), then move all Shadows one space directly toward you.
- Roll Dice: Roll three dice. Choose one as your AP die. Use the other two for Shadows.
- Move Shadows: If the two Shadows dice are equal, make a Horror Check of Difficulty 6. Otherwise, choose a Shadow and another player. Move the Shadow directly toward them a number of spaces equal to the difference of the two dice.
- Actions: Spend any or all of your AP on actions.
Simple Escape: Desperation
"Simple Escape wasn't so simple..."
- Escape: You can take an Escape action if you have enough Shadow tokens in your possession, and are in a Dark Hallway. 1-2 Player: 3 tokens. 3-4 Player: 2 tokens.
- Attacking the Shadows: When you land on a Shadow token's space, you attack it. Make a Horror Check of difficulty 12. After rolling, you can discard Items, Events, or Hallucinations for a bonus of +2 each.
- If you pass, claim the Shadow token. If not, move the Shadow to any empty Dark Hallway.
- Attacking the Others: You may spend 3AP to attack another player on your space. If you roll 10 or higher, steal a Shadow token from them. Add 2 to your roll if you have a Switchblade.
On your turn:
- Roll Dice: Roll three dice. Choose one as your AP die. Use the other two for Collapse.
- Collapse: If the two Destruction dice are the same, remove three empty Hallway cards from play. Otherwise, remove empty Hallway cards from play equal to the difference between the Destruction dice.
- The End: If you cannot remove enough cards during the Collapse phase, the game ends! Anyone that has not escaped is trapped.
- Actions: Spend any or all of your AP on actions. During Desperation, any time you move off an empty Hallway card, remove it from play.
The Go Nuts and Concentrate actions are not available during Desperation.
Solo Scenario: Is it just me?
Transcribed from the Solo Scenario PDF (Asmadi Games). Read from page images.
1 Player, Combined Victory. Difficulty: Medium.
Setup: Set up the game as if there were two players. You will take turns as each of the two characters: yourself, and your split personality.
Escape: You can take an Escape Action if you have all your Safe Things, are in a Dark Hallway, and your split personality also meets these requirements. You may substitute 4 Sanity worth of Items and Events for one Safe Thing on each character, or 10 for two Safe Things. If you escape, you unite your two identities and win!
Who are you: If you move through the other player's location on your turn, make a Horror Check of difficulty 9.
Who am I: If you forget which character's turn it is, draw a Hallucination immediately.
Turn Structure:
- Creeping Darkness: Place one new card (anywhere), then move all Shadows one space directly toward you.
- Roll Dice: Roll three dice. Choose one as your AP die. Use the other two for Shadows.
- Move Shadows: If the two Shadows dice are equal, make a Horror Check of Difficulty 6. Otherwise, choose the closest Shadow to the other character. Move the Shadow directly toward them a number of spaces equal to the difference of the two dice. Move all the other Shadows two spaces toward you.
- Actions: Spend any or all of your AP on actions.
Is it just me?: Desperation
"Only one of us is real..."
- Escape: You can take an Escape action if you have eliminated your split personality, and are in a Dark Hallway.
- Attacking the Shadows: When you land on a Shadow token's space, you attack it. Make a Horror Check of difficulty 12. After rolling, you can discard Items, Events, or Hallucinations for a bonus of +2 each. If you pass, claim the Shadow token. If not, move the Shadow to any empty Dark Hallway.
- Attacking Yourself: You may spend 3AP to attack your split personality. Make a Horror Check of difficulty 18. After rolling, you may discard Items, Events, or Hallucinations for +1 each, and Shadow tokens for +3 each. If you succeed, the other character is eliminated.
On your turn:
- Roll Dice: Roll three dice. Choose one as your AP die. Use the other two for Collapse.
- Collapse: If the two Destruction dice are the same, remove three empty Hallway cards from play. Otherwise, remove empty Hallway cards from play equal to the difference between the Destruction dice.
- The End: If you cannot remove enough cards during the Collapse phase, the game ends! Anyone that has not escaped is trapped.
- Actions: Spend any or all of your AP on actions. During Desperation, any time you move off an empty Hallway card, remove it from play.
The Go Nuts and Concentrate actions are not available during Desperation.