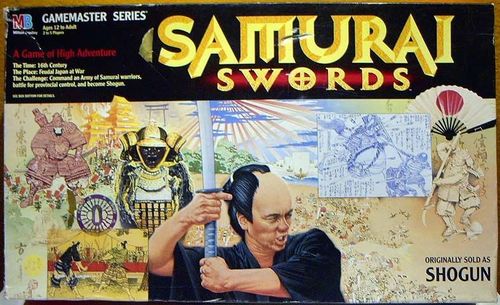
Samurai Swords
Samurai Swords Rulebook
Table of Contents
Table of Contents
Game Contents
- 1 gameboard
- 5 reference screens
- 5 army cards
- 5 foam planning trays
- 1 foam master tray
- 5 colored sets of 72 plastic military units
- 10 castles
- 5 fortification bases
- 30 red plastic chips
- 1 set of 26 plastic ronin pieces
- 5 plastic swords
- 5 foam sword stands
- 72 province cards (in 2 decks)
- 12 battle markers
- 1 label sheet
- 6 twelve-sided dice
- Rulebook
About This Booklet
For a thorough understanding of the rules of Samurai Swords, we recommend that you read the entire booklet before beginning play.
Chapter 1 covers initial assembly—first-time-only chores you'll never have to do again.
Chapter 2 is a brief overview of all game parts. In it you'll find a description of each playing piece as well as information about the gameboard and other game parts.
Chapter 3 is devoted to game setup, a strategic ingredient of this game. This first phase of gameplay should take you and your friends approximately 30 minutes to accomplish.
Chapter 4 contains the bulk of gameplay information. Each section explains in detail the actions players follow during each round of play. Important rules are highlighted in pink. You'll also see graphic, easy-to-follow examples of the first round of play in a 4-player game.
Chapter 5 explains how to win the game.
Chapter 6 contains special rules for a 2-player game.
Chapter 7 is an illustrated example of a conflict between two players during one critical round of play.
Chapter 8 explains rules for a faster game.
Rules Questions
If you have any questions about the rules for Samurai Swords, write to:
GAMEMASTER SERIES: SAMURAI SWORDS Consumer Service Department Milton Bradley Company 445 Shaker Road East Longmeadow, MA 01028
Chapter 1: Initial Assembly
-
Carefully remove all of the plastic pieces from their runners, and separate them by color.
-
Count the spearmen in each color group. If there are more than 36 of any color, set the extras aside, and store them separately.
-
Carefully punch out the 12 round battle markers from the cardboard sheet.
-
Carefully break apart the 5 army cards and reference screens.
-
Carefully separate the foam parts: 5 planning trays, 1 large master tray, and 5 sword holders.
-
Label the Army/Experience Markers: These markers are the 30 plastic figures holding flags. There are 6 of each color.
Separate the markers by color. Then carefully apply the labels to one color group at a time, by following the steps below.
A. Separate the markers in pairs, by base shape: 2 circular-based, 2 square-based, and 2 hexagonal-based markers.
B. Use the flag labels that match the color of the markers, as directed on the label sheet. For each pair of markers, peel any 4 matching-style labels off the sheet, and apply one label to each side of both flags.
For example, apply any 4 matching-style labels to the 2 circular-based markers, one label on each side of both flags. Then apply 4 matching-style labels to the square-based markers. Finally, apply the remaining 4 matching-style labels to the hexagonal-based markers.
-
Remove the 4 blank (unnamed) province cards and set them aside. Then combine the 2 decks.
NOTE: Save the blank cards, to replace any lost or damaged cards.
Chapter 2: A Look at the Game Parts
Military Units
Each military unit represents a large number of 16th century Japanese warriors. Each unit type has unique combat capabilities. Below is a brief description of the role each unit type plays in the game.
DAIMYOS: A daimyo was a powerful provincial warlord who commanded a large army of warriors. Each player begins the game with 3 daimyo units, each representing command and cavalry, and each leading its own army.
Your daimyos are never placed on the gameboard; they (and their armies) fight from their positions on your army cards. Their positions and movement on the gameboard are represented by your army markers.
Each of your daimyos fights with its army, and counts as a military unit in that army. A daimyo is powerful in battle, with a combat value of 6, meaning that on a die roll of 6 or lower, a daimyo eliminates an enemy unit from play. A daimyo can be lost in battle or assassinated by the ninja. Guard your 3 daimyos well: if you lose your last daimyo, you're out of the game!
SAMURAI BOWMEN: These long-range weapon units represent experienced warriors who were deadly-accurate with bow and arrow. Because they can quickly fire at the enemy over the heads of their own men, they are powerful during battle: bowmen have combat values of 6.
ASHIGARU GUNNERS: These long-range weapon units represent inexperienced peasant farmers, each armed with a gun called a harquebus. Although these guns had greater penetration power than bows, they were less accurate and took more time to load. Therefore, gunners are less effective in combat, having combat values of 4.
SAMURAI SWORDSMEN: These units represent the samurai elite class: warriors by birth who were highly-disciplined in Kendo, the Way of the Sword. Your swordsmen are hand-to-hand combat units, and have combat values of 5.
SAMURAI RONIN: In feudal Japan, ronin were masterless samurai: warriors for hire, whose loyalty lasted only as long as the battle. Your samurai ronin units symbolize those mercenaries. You may "hire" two or more ronin units for only one round of play at a time. Your samurai ronin fight along with your samurai swordsmen in hand-to-hand combat, and (like your swordsmen) have a combat value of 5.
ASHIGARU SPEARMEN: These units represent peasant warriors, each armed with a long, curved spear called a yari. Like swords, yaris are hand-to-hand weapons; but historically, the ashigaru's inexperience rendered his spear less deadly than the samurai's sword. As a result, spearmen are less effective in combat, with combat values of 4.
Army Cards
Your army card is used to hold your 3 daimyos' armies. Each army card has 3 separate sections—one section for each daimyo and his army. The Japanese name printed on each section represents the daimyo's family name.
Unless it is lost in battle, each daimyo unit stays on your army card throughout the game. The daimyo's army units also stay on your army card. During the game, you'll add units to your army card to strengthen your daimyos' armies; and you'll remove units from your card as they're lost in battle.
Army/Experience Markers
Each player owns 3 army markers and 3 experience markers. Throughout the game, you'll use one army marker and one experience marker (with matching base shapes and flag labels) to represent each of your 3 armies, as explained below.
ARMY MARKERS: The 3 flat-based markers are your daimyos' army markers. Because your 3 daimyos often command large armies, each daimyo and his army will stay on your army card, while the corresponding army marker stays on the gameboard, to represent the daimyo army's position.
EXPERIENCE MARKERS: The 3 peg-based markers are your daimyos' experience markers. The pegs fit into the numbered holes on your army card. As a daimyo gains experience by winning battles, his corresponding experience marker is moved to the right, to mark his experience level (1, 2, 3 or 4). After several successful battles, a daimyo's experience level becomes 1 higher—giving his army more mobility and battle power!
Daimyo experience is explained in detail in Action 7: Wage War.
The Ninja
The ninja performs a special role in the game.
To hire the ninja for one round of play, you must outbid your opponents. Use this unit to perform one of two services: either to attempt the assassination of an opponent's daimyo on the current round of play; or to spy on an opponent's plans at the beginning of the next round of play. But beware! If the ninja fails in an assassination attempt, your opponent gets a chance at revenge!
Koku
The red plastic chips are called koku. In feudal Japan, 1 koku was the amount of rice necessary to feed one man for one year. Koku were used to measure wealth and power. In Samurai Swords, they're used in the same way.
One chip represents thousands of koku. During Action 1: Plan, you'll place koku in one or more of the bins in your planning tray, to buy or bid for certain privileges. After a round of play, you'll collect a certain number of koku to spend during the next round, depending on how many provinces you currently own.
Battle Markers
Battle markers are used to mark the provinces you plan to attack during Action 7: Wage War of each round. When an attack is made on an adjacent province, a battle marker is placed on the border between the attacking province and the defending province, with the arrow pointing to the defending province.
The Gameboard
The gameboard is a modified map of feudal Japan. Open the gameboard and take a look at it as you read about its features.
ISLANDS: The map shows three of Japan's large islands: Honshu, Shikoku and Kyushu. You'll find their names in the gameboard illustration, and in examples throughout the rulebook; but to avoid confusion with province names, they are not labeled on the gameboard.
PROVINCES: The gameboard provinces are divided by thin black borders. Each province is considered a game space. NOTES: There are 2 provinces named Awa: one is located on the island of Shikoku, and the other on the island of Honshu. Also note that the two small islands of Tsushima (in the upper left corner) are considered one game space.
ADJACENCIES: Attacks and military unit movement can only be made to and from adjacent provinces. Provinces that share a common border are adjacent to each other; provinces that meet at a single point are not adjacent to each other. For example, the provinces of Kozuke and Echigo are adjacent, whereas the provinces of Kozuke and Shimosa are not adjacent.
SEA LINES: The thin blue lines connecting certain provinces are called sea lines. Provinces connected by sea lines are considered adjacent. For example, the provinces of Iki and Nagato are adjacent to each other; but Iki and Buzen are not adjacent to each other.
Province Cards
There are 68 province cards—one for each province on the gameboard. Each card shows an outline of the gameboard map and a red silhouette to help you locate that province on the gameboard. NOTE: There are two cards labeled Awa: one for each of the two Awa provinces on the gameboard. The red silhouette indicates which Awa the card represents.
Castles
In feudal Japan, daimyos built castles as strongholds against attacks from hostile neighbors. Likewise, in this game, you can build castles to aid in the defense of your provinces.
Fortresses
You can build a fortress by adding a fortification base to one of your existing castles.
A fortress makes a castle's defense even stronger.
Planning Trays
Each player has a planning tray. A reference screen will be fitted into it during setup. The use of this tray/screen combination is explained below.
PLANNING TRAY: The large compartment of your planning tray will hold your military units (when they're not in use on the gameboard or on your army card), and will store all of them after the game. The 5 smaller compartments (bins) along the back will hold the koku you allocate during Action 1: Plan.
REFERENCE SCREEN: Your reference screen serves three purposes. First, it's a quick guide to the Action Sequence, the Combat Sequence and unit costs; second, it names the five bins into which you allocate your koku during Action 1: Plan; and third, it keeps your plans (your koku allocation) secret from your opponents!
The Master Tray
The master tray holds a common pool of game parts that players buy or draw from during the game.
Swords and Holders
SWORDS: There are 5 swords, each sword showing a different number of diamonds on its blade (from 1 to 5). During setup and each round of game play, players each take 1 sword, to establish the TURN ORDER.
The player with the 1-diamond sword takes the first turn; the player with the 2-diamond sword takes the second turn; and so on.
SWORD HOLDERS: After taking a sword during setup and game play, each player slides it into his sword holder, to remind himself (and other players) of his place in the turn order.
Dice
The 6 twelve-sided dice are rolled to resolve combat—and to determine the success or failure of a ninja strike!
Chapter 3: Game Setup
Set Up Your Planning Tray
Fill Your Planning Tray with Your Colored Pieces: Take any planning tray, and place it in front of you. Then take all of the plastic military units of one color, and place them into the large compartment of your tray. All players do the same.
NOTE: You may sort your units by type if you wish, though it's not necessary.
Fit a Reference Screen into Your Tray: Take the reference screen that matches the color of your military units. Fold it along the two score lines, then fit it into the groove in your planning tray with the chart-side facing you.
All players do the same.
Set Up the Master Tray
Set up the master tray, then set the tray near the gameboard. During the game, you'll be removing pieces from the tray, and returning them to it.
Set Up Your Army Cards
Take the army card that matches the color of your military units.
Place your army card next to your planning tray. Then set up your card with units from your planning tray, as described below. All players do the same.
Experience Markers: Take your 3 (peg-based) experience markers. Match each base shape to its outline at the top of your army card, and insert the marker into the left-most hole (marked "1").
Daimyos: Take your 3 daimyos, and place one of them in each section, on the square marked "D" (for daimyo). Each of these 3 sections will hold a separate daimyo army.
Samurai Bowmen and Samurai Swordsmen: Take 3 bowmen and 3 swordsmen. Place 1 bowman and 1 swordsman in each army, on the two left-most squares marked "S" (for samurai). Place one unit per square.
Ashigaru Gunners: Take 6 gunners. Place 2 gunners in each army, on the squares marked "A" (for ashigaru). Place one unit per square.
NOTE: Ashigaru spearmen and samurai ronin are not placed on your army card during setup.
Army Unit Limits: Throughout the game, your daimyos will always stay on their "D" squares on your army card (unless they are lost in battle). Samurai units (bowmen and swordsmen) are always placed on the "S" squares, and ashigaru units (gunners and spearmen) are always placed on the "A" squares. An army can never hold more than the daimyo, 4 samurai units and 10 ashigaru units.
Deal Out the Province Cards
Shuffle the province cards, then deal them out facedown, one at a time, to each player. Deal out the maximum number of cards to give each player an equal share. The deal comes out even in a 4-player game. In a 3- or 5-player game, place the extra cards faceup inside the large red rectangle on the right-hand side of the gameboard. These extra cards indicate unowned (empty) provinces. Players must conquer these provinces to take the cards.
Each player places his province cards in a pile in front of him. These cards indicate the gameboard provinces he owns at the beginning of the game.
Claim Your Provinces
To claim your provinces, place 1 ashigaru spearman from your planning tray in each gameboard province you own. All players do this at the same time.
Draw Swords
Next, players draw swords to establish the order in which they will place their first reinforcements.
Remove Extra Swords: In a 2- or 4-player game, remove the 5-diamond sword. (Rules for a 2-player game are detailed in Chapter 6.) In a 3-player game, remove the 4- and 5-diamond swords.
Draw Your Swords: One player holds the swords in his fist so that only the hilts are exposed. In turn, each player draws one sword. The player who held the swords takes the last one. The number of diamonds shown on each player's sword indicates his turn order for placing his first reinforcements.
Slide Your Sword Into a Holder: Take a sword holder and place it in front of you. Then slide your sword into the two notches. All players do the same.
Distribute Koku
Each player adds up the number of province cards he holds, and divides by 3. Drop any remainder. The result equals the number of koku you take at the beginning of the game. For example, if you hold 13 province cards, divide by three, then round the result (4 1/3) down to 4.
Each player takes the appropriate number of koku from the master tray, and places his koku in front of him.
Place Your First Reinforcements
Players now place their first reinforcements, for the purpose of establishing a power base. This is done in turn order; that is, the player with the 1-diamond sword places his units first; the player with the 2-diamond sword places his units second; and so on.
Place Ashigaru Spearmen: Each player takes 12 ashigaru spearmen from his planning tray and must place them in 6 provinces that he owns. This is done as follows: In turn order, each player places 2 ashigaru spearmen in any one province he owns. All players repeat this step 6 times, until each player has placed all 12 of his spearmen on the gameboard.
NOTE: For now, there can be no more than 3 ashigaru spearmen in any one province (1 claiming the province, and 2 reinforcing it). Once the game begins, this rule no longer applies.
Placement Strategy: If possible, place your ashigaru spearmen in 6 of your provinces that are clustered near each other. These provinces will define your power base, or area of command. Later on the first round of play, you can attempt to move outward and consolidate your domain.
The First Round Example below shows where two players placed their spearmen.
Place Army Markers: In turn order, each player places 1 of his 3 army markers in any province he owns. Players repeat this step 3 times, until all army markers are on the gameboard. Your army markers will indicate the provinces occupied by the 3 armies on your army card.
NOTE: No province can ever have more than 1 army marker in it.
Placement Strategy: As explained later, a level-1 daimyo army can move to one adjacent friendly province (a province that he owns) before declaring a battle against an adjacent enemy or empty province. Keep this in mind as you place your army markers—and your opponents place theirs!
The First Round Example below shows where two players placed their army markers.
Collect Swords
Once players have finished placing their military units, collect the swords and set them aside for later use.
Diplomacy: The Need for Temporary Alliances
Diplomacy is an important part of this game's strategy. At any time, you and an opponent may form an alliance, the conditions and length of which are entirely up to the two of you. For example, you and an opponent may agree not to attack each other during one complete round of play. While the agreement lasts, you're each free to focus your military strength in one direction, without fear of being attacked from the rear. But beware! Ultimately, only one of you can win—and this cold fact makes any alliance risky, fragile—and temporary!
The First Round Example below illustrates a truce between players Pink and Gray, for the purpose of establishing their power bases.
FIRST ROUND EXAMPLES
The First Round Examples in this chapter show the actions of one player throughout the first round of a sample 4-player game. The examples feature Player Pink, as he establishes and expands his power base on the left side of the gameboard. Also featured is Pink's main adversary, Player Gray.
In each example, province ownership is shown by player color (Pink, Gray, Pink-Stripe and Gray-Stripe). Gameboard pieces are shown in silhouette: battle marker, spearman, gunner, swordsman, army marker and bowman.
CLAIMING PROVINCES AND PLACING FIRST REINFORCEMENTS: In this example, all players first claim their provinces by placing one ashigaru spearman in each gameboard province they own. Next, they place an additional 12 ashigaru spearmen, 2 at a time, in the turn order established by the draw of the swords. They do not place their army markers yet.
Players Pink and Gray plan to establish their power bases in this area of the gameboard. Their opponents choose to reinforce their claimed provinces elsewhere on the gameboard.
PLACING ARMY MARKERS: Before players place their army markers onto the gameboard, players Pink and Gray discuss the control of the small island of Shikoku. Player Gray proposes a truce line. This truce line will allow player Pink to establish his power base on the islands of Kyushu and Shikoku, while player Gray establishes his power base on the island of Honshu.
Players then place their army markers one at a time, in the turn order established by the draw of the swords.
Chapter 4: Action Sequence
Samurai Swords is played in rounds. Each round of play is made up of 9 actions, called the Action Sequence (shown on the middle panel of your reference screen). The chart below is an overview of each action in the Action Sequence. The sections following the chart describe each action in detail. Finally, the First Round Examples throughout this chapter show, action-by-action, what certain players do during the first round of play in a sample game.
Each action in the Action Sequence is performed simultaneously by all players, except for Action 7: Wage War. Wage War is composed of 4 phases; all 4 phases are performed by one player at a time, in the turn order established during Action 2: Take Swords.
| Action | What Players Do | Important Features |
|---|---|---|
| Action 1: Plan | All players allocate their koku secretly to their 5 planning bins. Then they reveal their plans to each other. | All koku must be allocated; players cannot accumulate them. Koku determine which privileges they win during Actions 2 through 6. |
| Action 2: Take Swords | Players compare the koku in their Take Swords bins to determine turn order. Players who bid the most koku take the swords of their choice; players who didn't, draw remaining swords at random. | Turn order is important during Action 7: Wage War—the player with the 1-diamond sword goes first, the 2-diamond sword second, and so on. |
| Action 3: Build | Players who allocated 2 koku to their Build bins buy and place either 1 castle or 1 fortification base. A player can build only one castle or fortress per round of play. | Castles and fortresses add temporary bonus defensive units to the provinces they occupy. |
| Action 4: Levy Units | Players who allocated koku to their Levy Units bins buy and place reinforcement units from their planning trays. | Levied units are placed into armies or provincial forces, 1 unit to a province. |
| Action 5: Hire Ronin | Players who allocated koku to their Hire Ronin bins buy ronin units, then secretly deploy them. | It's possible to place several ronin units into an army or provincial force, to fight along with the regular units. Ronin are powerful mercenaries capable of deadly sneak attacks. |
| Action 6: Hire Ninja | Players compare the koku in their Hire Ninja bins. The player with the most koku buys the ninja for one round of play. | In case of a tie for the most koku, no one hires the ninja! The ninja can be used as an assassin or as a spy. RISK: If an assassination attempt fails, the ninja-hirer could become the victim of a retaliatory strike! |
| Action 7: Wage War | Each player attacks enemy and empty provinces in 4 phases: A. Move Daimyos' Armies; B. Declare First Battles; C. Conduct Combat; D. Final Movement. | In the turn order established during Action 2: Take Swords, players attack adjacent enemy and empty provinces. Experienced daimyos' armies can move farther and attack more often. |
| Action 8: Remove Ronin | Players with surviving ronin units return them to the master tray. | As mercenaries, ronin are hired for only one round of play at a time. If you want their services again, you must hire them again! |
| Action 9: Collect Koku | Players collect koku according to the number of provinces they currently own. | The more provinces a player owns, the more koku he can collect to spend on the next round of play. |
Action 1: Plan
In Action 1, all players allocate all of their koku to their bins in their planning trays. Koku are allocated to bid for or buy these special privileges: Take Swords, Build, Levy Units, Hire Ronin and Hire Ninja (Actions 2 through 6 of the Action Sequence). All players allocate their koku at the same time—but secretly, behind their reference screens! After allocation is complete, all players reveal their plans for all to see.
Allocate Your Koku
Allocate your koku by secretly placing them into one or more of the 5 bins in your planning tray: Take Swords, Build, Levy Units, Hire Ronin and Hire Ninja. Make sure to hide your allocation from all other players! Allocate all of your koku—no holding back for the next round. You can place some koku in each bin, some koku in some bins—or all koku in one bin.
NOTE: The only bin with a koku limit is your BUILD bin; you can never place more (or less) than 2 koku there.
Allocate your koku to fit your strategy for the current round of play. For example, you might want to reinforce a vulnerable province with a castle and extra units. To do this, you would allocate koku to your BUILD and LEVY UNITS bins—and possibly to your HIRE RONIN bin. To understand fully the reasons for allocating koku to a certain bin, you must read Action 2 through Action 6.
USING THE NINJA AS A SPY
If you hired the ninja during the previous round and didn't use him as an assassin, you can use him during this action to spy on one player's allocation before you allocate your own koku.
For details, see Ninja As a Spy, under Action 6: Hire Ninja.
FIRST ROUND EXAMPLE — ACTION 1: PLAN
During Action 1: Plan, all players secretly allocate their koku, then turn their trays around to reveal where they placed their koku.
In this example, players Pink and Gray allocate their 5 koku as follows: Player Pink allocates 1 koku to his TAKE SWORDS bin, and 4 koku to his LEVY UNITS bin. Player Gray allocates 3 koku to his LEVY UNITS bin, and 2 koku to his HIRE NINJA bin.
Reveal Your Plans
Once all players have allocated their koku, they turn their trays around at the same time, to reveal their plans to one another. Let all players see how many koku you've placed in each bin.
During Actions 2 through 6, players buy privileges, or resolve bids for them. Read on to see how the five privileges are gained.
Action 2: Take Swords
In Action 2, each player takes one sword, to establish a turn order for Action 7: Wage War of the current round of play. The player who takes the 1-diamond sword wages war first; the player who takes the 2-diamond sword wages war second; and so on. A new turn order is established on every round of play, depending on the swords players take during this action.
Each player who placed koku in his TAKE SWORDS bin during Action 1: Plan can choose a sword. Each player who didn't place koku in his TAKE SWORDS bin must draw a remaining sword at random from someone's fist.
Why Bid for Your Choice of Sword?
Usually, you'll place koku in your TAKE SWORDS bin if you want to take the first turn during Action 7: Wage War. This will allow you to attack first or escape from an enemy, before being attacked.
Players Who Placed Koku Choose Swords
The player who placed the most koku in his TAKE SWORDS bin chooses any sword he wishes. The player who placed the second-most koku chooses any sword from those that remain; and so on.
In case of a tie, the tying players must try to agree who gets which sword. If they can't agree, they draw their first- and second-choice swords randomly from another player's fist.
Players Who Didn't Place Koku Draw Swords
Each player who didn't place any koku in his TAKE SWORDS bin draws a sword at random. One player holds the remaining swords in his fist so that only the hilts are exposed, while each player draws a sword.
Take Swords Example: In a 5-player game, player A placed 2 koku in his TAKE SWORDS bin; player B placed 2 koku there; and player C placed 1 koku there. Players D and E didn't place any koku in their TAKE SWORDS bins. Players A and B (who tied) both want the 1-diamond sword, so they draw the 1- and 2-diamond swords randomly from someone's fist. (If player A wanted the 1-diamond sword, and player B wanted the 5-diamond sword, player A would simply choose the 1-diamond sword and player B would choose the 5-diamond sword.) Player C chooses any sword he wants from the three remaining swords. Finally, players D and E draw the two remaining swords at random.
After the turn order is established, each player slides his sword into his sword holder, as a reminder of his turn order during Action 7: Wage War on the current round of play.
Finally, all players return any koku in their TAKE SWORDS bin to the master tray.
FIRST ROUND EXAMPLE — ACTION 2: TAKE SWORDS
In our First Round Example (not illustrated here), only player Pink placed koku in TAKE SWORDS. He chooses the 1-diamond sword; the other 3 players draw from the remaining 3 swords. Player Gray draws the 2-diamond sword; player Gray-Stripe draws the 3-diamond sword; player Pink-Stripe draws the 4-diamond sword.
Action 3: Build
In Action 3, each player who allocated koku to his BUILD bin now builds one castle or one fortress in one of his provinces.
All players build at the same time. A province can hold no more than one castle or fortress. A fortress is built by adding a fortification base to an existing castle.
How to Build
Cost: One castle costs 2 koku. One fortification base also costs 2 koku. You cannot build more than one castle or one fortress per round of play. This means that you will never place more than 2 koku into your BUILD bin on any round of play.
If you placed 2 koku in your BUILD bin, return them to the master tray. Then take one castle or one fortification base out of the master tray, and place it into one of your provinces, as follows:
- If you're building a castle, place it in any province you own that's not already occupied by a castle or fortress.
- If you're building a fortress, fit the fortification base into any castle that occupies a province you own.
If there aren't enough castles or fortification bases for all players who need them, players build in turn order: the player with the 1-diamond sword builds first, and so on. Players who aren't able to build lose their 2 koku to the master tray.
The Advantage of Building
A castle or fortress adds temporary bonus units to the defense of the province it occupies.
When you own a province with a castle or fortress, here's how your temporary bonus units work:
Castle Defense: If one of your castle-occupied provinces is attacked, 4 bonus spearmen join in its defense.
Fortress Defense: If one of your fortress-occupied provinces is attacked, 5 bonus ronin (instead of 4 spearmen) join in its defense.
These defenders of castles and fortresses never join in attacks. They count as temporary units—not regular military units.
A castle or fortress can never be destroyed or moved from its province. The player who owns the province owns the castle or fortress—whether he built it himself, or won it by conquering the province it occupies.
Castle and fortress defense rules are detailed under Special Defender Advantages, in Action 7: Wage War.
FIRST ROUND EXAMPLE — ACTION 3: BUILD
In our First Round Example (not illustrated here), none of the players placed any koku in their BUILD bins, so no castles are built on this first round of play.
Action 4: Levy Units
In Action 4, each player who allocated koku to his LEVY UNITS bin levies (buys) additional regular military units: bowmen, swordsmen, gunners and spearmen (from his tray). Players then place their levied units in their provinces, or on their army cards. All players at the same time first levy, then place their units.
The One-Unit-Per-Province Limit: You can place only one levied unit per province; so never levy more units than the number of provinces you own. For example, if you own 8 provinces, be aware during Action 1: Plan, that you can only levy up to 8 units during Action 4: Levy Units.
How to Levy Your Units
Cost: As shown in the Planning Guide on your reference screen, for each koku in your LEVY UNITS bin, you can levy: 1 samurai bowman; or 2 samurai swordsmen; or 2 ashigaru gunners; or 3 ashigaru spearmen. NOTE: Because swordsmen and gunners are the same price, you may buy one of each with 1 koku.
At the same time, all players who placed koku in their LEVY UNITS bin decide which units to levy. Then they return the koku they placed in their LEVY UNITS bin to the master tray, and place their levied units in front of them.
Running Out of Regular Units: Once your tray is empty, you can't levy units until you suffer combat casualties (combat casualties are returned to your tray, and are redeployed when you levy units).
How to Place Your Levied Units
Once all units have been levied, all players (at the same time) place their levied units on their army cards, or into provinces they own. This is done either to create or add to provincial forces; or to add to one or more armies. See the shaded box below for the difference between an army and a provincial force.
Remember: never place more than 1 levied unit into a province! Make sure you don't place 1 unit onto your army card, and a second unit into the province that army occupies.
THE DIFFERENCE BETWEEN AN ARMY AND A PROVINCIAL FORCE
LOCATION
Army: Army units are always positioned on your army card, never on the gameboard. An army's location on the gameboard is represented by its matching army marker.
Provincial Force: A provincial force is always positioned on the gameboard, never on your army card. Never place more than one provincial force in any province.
SIZE
Army: An army is always led by a daimyo. In addition to the daimyo, an army can hold up to 14 regular* units: 4 samurai units (on the "S" squares) and 10 ashigaru units (on the "A" squares).
Provincial Force: A provincial force can hold any combination of 1 to 5 regular* units. It never includes a daimyo.
* Regular units do not include ronin or bonus castle/fortress units.
MOVEMENT
Army: An army is allowed to move the number of provinces less than or equal to the experience level of its daimyo during phase A, and again during phase D of Action 7: Wage War.
Provincial Force: The units in a provincial force can each move to one adjacent province only, during movement phase D of Wage War.
COMBAT
Army: During combat phase C, an army can make a number of attacks less than or equal to the experience level of its daimyo. Experienced daimyos (level 2, 3 or 4) have additional movement capabilities during this phase. See Experienced Daimyos in Combat, in Action 7: Wage War, for details.
Provincial Force: During combat phase C, a provincial force can make only ONE attack. It cannot move at all during this phase.
BREAKING UP ARMIES AND FORCES
Army: An army can only split off units to fill an empty province as a garrison during phases A, C and D, or to conquer a province during movement phase D.
Provincial Force: A provincial force can split off units to move in different directions to adjacent provinces during movement phase D.
Unit Limits for Armies and Provincial Forces
You already know that you can levy and place only one unit per province. Here's another rule to consider when you levy and place your units: never violate the Limit of Regular Units rules.
Regular unit limits are as follows:
- Limit of Regular Units in an Army: Never place more units into an army than your army card can hold (a total of 15 units). Refer to Game Setup for the number and type of units allowed in each army.
- Limit of Regular Units in a Provincial Force: A provincial force can never hold more than 5 regular units. So when placing a levied unit onto a gameboard province, don't exceed this limit.
NOTE: Never count army markers, ronin units, castles, fortresses or bonus castle or fortress defense units as part of your army or provincial force. These units do not count as regular military units.
The First Round Example below shows where two players placed their newly-levied units.
DOUBLE-TROOP PROVINCE
A double-troop province is a province occupied by one army and one provincial force.
If you declare a battle from a double-troop province, you can attack with either troop, or with both. If both troops attack, they can attack in separate adjacent provinces, or attack the same province. If they both attack the same province, the two battles are waged separately.
When attacked, a double-troop province defends with all of its army units and provincial force units combined.
See Special Defender Advantages, in Action 7: Wage War, for more details.
FIRST ROUND EXAMPLE — ACTION 4: LEVY UNITS
During Action 4: Levy Units, players Pink and Gray levy and place their new units.
With the 4 koku in his LEVY UNITS bin, Pink buys 2 gunners, 2 swordsmen and 2 bowmen. With the 3 koku in his LEVY UNITS bin, Gray buys 2 gunners, 2 swordsmen and 1 bowman.
Both players then place their levied units 1 to a province.
NOTE: In this example, both players choose to place all of their newly-levied units into their provincial forces (on the gameboard) rather than placing some of them into their armies.
Action 5: Hire Ronin
In Action 5, each player who allocated koku to his HIRE RONIN bin "hires" 2 or more temporary ronin units from the master tray, then deploys them secretly in one or more provinces, as part of an army or a provincial force. All players at the same time first hire, then secretly deploy their ronin units.
The Advantages of Ronin
Ronin units wage deadly sneak attacks on the enemy. Once hired, they're deployed secretly. Until they attack, defend or move, their locations remain a secret from opponents. This element of surprise—plus a high combat value of 5—makes ronin powerful (though temporary) allies.
While you can levy and place only 1 regular unit per province in Action 4: Levy Units, it's possible to place several ronin units into a province during Action 5. Because they are temporary units, ronin can be added to an army or a provincial force without breaking the Limit of Regular Units rules. However, there is a Ronin Units per Province Limit! See below for details.
The Disadvantages of Ronin
Ronin units cannot move or fight by themselves; they must be accompanied by the army or the provincial force they joined. Also, ronin are hired for only one round of play at a time: any ronin that survive until Action 8: Remove Ronin are returned to the master tray at that time.
How to Hire Ronin
To hire ronin, each player takes 2 ronin units out of the master tray for each koku he placed in his HIRE RONIN bin, and places them in front of him. All players do this together. As ronin are hired, koku spent for them are returned to the master tray.
Running Out of Ronin: If there aren't enough ronin in the master tray for all players who need them, players hire ronin in the turn order indicated by their swords: the player with the 1-diamond sword hires ronin first, and so on. Any players who aren't able to hire ronin lose their koku to the master tray.
How to Deploy Your Ronin
After all players have hired ronin, they deploy them at the same time. Ronin are deployed secretly by each player as follows:
-
Decide which province(s) you want to place your ronin units into. Then remove the matching province card(s) from your pile. Place these cards facedown in front of you.
-
Place the number of ronin you wish to deploy in each province on top of the matching province card(s). Don't exceed the Ronin Units Per Province Limit (explained below).
Ronin Units Per Province Limit
The limit of ronin units you can place in one province is one less than the total number of military units in the occupying army and/or provincial force they join.
NOTE: Remember to count the daimyo as an army unit.
Examples: In a province occupied by a 10-unit army, you can place a maximum of 9 ronin units. In a province occupied by a 5-unit provincial force, you can place a maximum of 4 ronin units. In a double-troop province occupied by an 11-unit army and a 3-unit provincial force, you can place a maximum of 12 ronin units—10 in the army and 2 in the provincial force.
NOTE: Never count army markers, castles or fortresses as military units. Also, never count castle or fortress bonus defense units.
When to Reveal Your Hidden Ronin
Reveal your hidden ronin only when they prepare to attack, defend or move. Here's how to reveal your ronin: Turn your province card faceup, then place your ronin units with the attacking, defending or moving army (on your army card) or provincial force (into the gameboard province).
If your ronin units join an army, place them on your army card below the squares. The squares hold only the daimyo and regular army units.
FIRST ROUND EXAMPLE — ACTION 5: HIRE RONIN
In our First Round Example (not illustrated here), none of the players placed any koku in their HIRE RONIN bins, so no ronin units are hired on this round of play.
Action 6: Hire Ninja
In Action 6, players determine who—if anyone—hires the ninja. The ninja can be hired only by the player who placed the most koku in his HIRE NINJA bin.
The Ninja Advantage
If you win the services of the ninja, you may dispatch him to perform one of two tasks (not both):
- Either use him during the current round of play, to attempt the assassination of any enemy daimyo;
- Or use him at the beginning of the next round of play, to spy on any opponent's allocation of koku before you allocate your own koku.
If you hire the ninja, you don't need to decide right away which service (if any) you'll use him for; you may hire him only to prevent another player from hiring him!
Important: Don't reveal the ninja's mission until you're ready to use him; this "cloak and dagger" secrecy will keep your opponents wary—and may even change their strategy!
Special First-Round Rule: Daimyo assassination attempts are not permitted on the first round of play. This gives each player one round to consolidate his domain without risking his daimyos. If you hire the ninja on the first round of play, you can only use him as a spy during Action 1: Plan of the second round.
How to Hire the Ninja
The player who placed the most koku in his HIRE NINJA bin hires the ninja, returns his koku to the master tray, and places the ninja in front of him. All other players lose the koku in their HIRE NINJA bins—they must return them to the master tray.
If there is a tie for the most koku, no one hires the ninja! All players lose the koku in their HIRE NINJA bins—they must return them to the master tray.
Ninja As an Assassin
The ninja assassin has one chance to strike any opponent's daimyo at any time on the current round of play. For example: Just as an opponent attacks one of your provinces with an army, you can attempt to assassinate the daimyo leader of that army. But beware! If the attempt fails, your opponent gets one chance for revenge by striking back at one of your own daimyos!
If you've hired the ninja for this mission, keep him in front of you until you decide the time is right for him to strike. Then do the following:
Attempt the Assassination: First, announce to all players which daimyo the ninja will strike. Then roll one die and follow the rules below:
- If you roll 8 or less, the ninja succeeds in assassinating your opponent's daimyo. Your opponent now follows the rules for The Assassinated Daimyo, below.
- If you roll 9 or more, the ninja fails. Your opponent now strikes one of your own daimyos as described under The Intended Victim Gets Revenge, below.
After rolling the die, return the ninja to the master tray.
The Intended Victim Gets Revenge: If you were the intended victim of a failed ninja strike, you now strike back once at the ninja-hirer! To do this, roll a die. Then follow the rules below:
- If you roll 9 or more, you succeed! Choose one daimyo to assassinate from those owned by the ninja-hirer. Your opponent now follows the rules below for The Assassinated Daimyo.
- If you roll 8 or less, you fail.
- Until hired again on a future round, the ninja remains out of play.
The Assassinated Daimyo
If your daimyo is assassinated, turn your assassinated daimyo unit on its side on your army card. Then turn the matching army marker on its side in the gameboard province. Your assassinated daimyo cannot move, attack or defend for the rest of the current round. During that time, its army is "disrupted;" they cannot move or attack; but when attacked, they must defend.
At the end of the current round, follow the rules below, depending on whether or not the assassinated daimyo's army survived combat.
-
Appointing Your Assassinated Daimyo's Successor: If at least one unit in the disrupted army survives until the end of the round, you may appoint a successor to your assassinated daimyo at the beginning of the next round, before Action 1: Plan. Appoint the successor as follows:
- Choose any unit from the assassinated daimyo's army, and place it in your planning tray.
- Return the assassinated daimyo and his army marker to their standing positions. In effect, you're re-using the same daimyo to symbolize its successor.
- Return the daimyo's experience marker to the left-most hole marked "1." The newly-appointed daimyo must begin at the lowest experience level (daimyo experience is explained under Daimyo Experience, in Action 7: Wage War).
-
Losing Your Assassinated Daimyo: If the assassinated daimyo's entire army is eliminated in battle during the round, your daimyo is out of the game! Place the daimyo, his army marker, and his experience marker into your planning tray.
If your assassinated daimyo is the only unit left in its army, the daimyo is out of the game.
NOTE: If you lose your last daimyo, you're out of the game. See Eliminating an Opponent From the Game, in Action 7: Wage War, for details.
Ninja As a Spy
If you don't use the ninja as an assassin, you may want to use him as a spy on the next round of play.
The ninja spy allows you to take a sneak peek at one opponent's planning bins, after he's allocated his koku—and before you allocate your own! Does he want to choose his sword? How many (if any) ronin does he plan to hire? Is he bidding for the ninja? Once you know his plans, you can react to them by strategically allocating your own koku.
To use the ninja as a spy, keep him in front of you until Action 1: Plan of the next round of play. Then do the following:
-
Wait until all other players have allocated their koku. Then name the player the ninja will spy on. The player must show you his planning tray (without letting any of the other players see it).
-
After you've studied this player's plans, allocate your koku. The spied-on opponent cannot change his allocation of koku.
-
After allocating your koku, return the ninja to the master tray. Then all players reveal their plans as described in Action 1: Plan.
If you did not use the ninja as an assassin or as a spy, return him to the master tray after you allocate your koku.
FIRST ROUND EXAMPLE — ACTION 6: HIRE NINJA
In our First Round Example (not illustrated here), Player Gray placed 2 koku in his HIRE NINJA bin, and Player Pink-Stripe placed 1 koku in his HIRE NINJA bin. Players Pink and Gray-Stripe placed no koku in their HIRE NINJA bins. Player Gray hires the ninja. Because the ninja can't be used for an assassination during the first round, Gray will use him as a spy during Action 1: Plan on the second round.
Action 7: Wage War
In Action 7, each player wages war against enemy or empty provinces. The Wage War action is the most important part of every round—the culmination of all the actions preceding it.
As shown on the center panel of your reference screen, there are 4 phases to the Wage War action. They are:
A) Move Daimyos' Armies B) Declare First Battles C) Conduct Combat D) Final Movement
Wage War in Turn Order
In the turn order indicated by his sword, each player completes the entire 4-phase Wage War action, from A to D. The player with the 1-diamond sword wages war first; after he completes all four phases, the player with the 2-diamond sword wages war; and so on.
Three Critical Concepts: An Overview
There are three critical concepts involved in various phases of the Wage War action: ownership of provinces, garrisons and daimyo experience. All are explained briefly here, and in more detail in the following sections.
OWNERSHIP OF PROVINCES
During Wage War, players can move from friendly provinces to adjacent friendly provinces. They can attack enemy provinces and empty provinces from adjacent friendly provinces, and they can move into empty provinces to conquer them. Below is a description of each of these three types of provinces.
A Friendly Province: A friendly province contains at least one of your military units. You own the province; you hold the corresponding province card.
An Enemy Province: An enemy province contains at least one military unit of an opponent. This opponent owns the province; he holds the corresponding province card.
An Empty Province: An empty province contains no military units; it is unowned, for one of two reasons: 1) Either the province card was left over from the deal in a 3- or 5-player game, and the province is "up for grabs" until a player moves in to conquer it; or 2) All attacking or defending units were eliminated from it during battle, and no player has yet moved in to conquer it. The first player to move into an empty province automatically conquers it.
During phases A, C, and D, you cannot leave a province empty by moving all of your units out of it. See Garrisons, below.
GARRISONS
As you expand your domain, you must keep your provinces friendly by leaving one or more regular units (never a ronin) behind as your army or your provincial force moves out. These provincial force units are called garrisons. Garrisons are discussed in phases A, C and D of the Wage War action. Though they may become vulnerable to enemy attack during an opponent's Wage War turn, garrisons allow you to maintain ownership of friendly provinces while you move out to conquer new provinces.
DAIMYO EXPERIENCE
Daimyo experience represents the knowledge and status a daimyo achieves with success in battle. A daimyo's experience is charted on your army card by its matching experience marker. As a daimyo's experience level increases, its army can move farther and attack more often during the Wage War action. These expanded capabilities make such an army very powerful!
What is an Experienced Daimyo? An experienced daimyo has an experience level of 2 or more: its matching experience marker occupies a hole marked "2," "3" or "4" ("4" is the highest experience level). While a daimyo's experience marker occupies the hole marked "1," it is not experienced; as a level-1 daimyo, it has no additional movement or attack capabilities.
How Does a Daimyo Gain Experience? A daimyo gains experience by successfully attacking (not defending) enemy (not empty) provinces.
If a daimyo has made one or more successful attacks, his experience marker is moved one hole to the right after he concludes combat for the current round of play. After three rounds of successful attacks, a daimyo gains experience: it now is a level-2 daimyo, and its army can move farther and attack more often. As its experience level increases, its movement and attack capabilities increase.
Rules for experienced daimyos' movement and combat are detailed under Experienced Daimyos in Combat, below.
Phase A: Move Daimyos' Armies
In phase A, the player waging war can move one or more of his armies from friendly provinces to adjacent friendly provinces. Provincial forces cannot move in this phase. Remember that sea lines make provinces adjacent.
Most likely, you'll move your armies into combat position.
Combat Position: When your units occupy a friendly province adjacent to an enemy or empty province, you are in combat position. You can declare a battle against this province during Phase B: Declare First Battles.
NOTE: One or more of your armies may already be in combat position, and if so, are eligible to declare battles without moving.
At the end of this phase, if two or three armies are in combat position with the same enemy or empty province, both or all three of these armies can declare separate battles against it.
Other Movement Options: You can move an army into a position other than combat position. You may want to move away from combat position, or move simply to escape the threat of a future attack. You may also move to "pick up" provincial force units (explained under Movement Rules, below).
Movement Rules
To symbolize the movement of each army, move its corresponding gameboard army marker only—leave your army units on your army card.
The rules for army movement during phase A are as follows:
- You cannot move into an empty province during this phase, because empty provinces are not friendly.
- An army can move the number of provinces less than or equal to the daimyo's experience level (indicated by the experience marker on your army card). For example, if the daimyo's experience level is 3, its army can move as far as three adjacent provinces during phase A.
- Only one army marker can occupy a province at one time. An army can pass through a province occupied by another one of your armies. Or it can move into and remain in an army-occupied province, as long as the other occupying army is, in turn, moved out. When moving two armies this way, never exchange units between them.
- Leaving a Garrison Behind: When moving out of a province, you must make sure that one or more units stay behind, to keep ownership of the province. Unless a provincial force occupies the province your army is moving out of, you must leave a garrison behind by removing one or more units from your army card and placing it (or them) into the province. You cannot split off army units for any other reason in this phase.
- When you move into a province occupied by a provincial force, you can either keep the army separate to create a double-troop province; or you can "pick up" one or more provincial force units and add them to your army, if there is room for them on your army card. To pick up units, remove them from the province and place them directly on your army card, on the appropriate squares.
Phase B: Declare First Battles
In phase B, the player waging war must declare which provinces he plans to attack during Phase C: Conduct Combat.
Where Will You Attack?
A battle can be declared against an adjacent enemy or empty province only. Your attacking province can contain an army, a provincial force, or both, as long as your attacking units are in combat position.
NOTE: A province in combat position is not obliged to conduct combat against an adjacent enemy or empty province.
You may declare more than one battle against the same enemy or empty province, as long as each of your attacking provinces is in combat position with the declared province. These battles must be fought separately.
Special First Round Rule: You cannot declare a battle against an enemy province occupied by a daimyo (army marker) during the first round of the game. This allows each player one round to consolidate his domain without risking his daimyos.
How to Declare a Battle
Place a battle marker directly on the border between your attacking province and the defending province, with the arrow pointing toward your opponent's defending province. For a naval invasion (an attack across sea lines), place the battle marker on the sea line, with the arrow pointing from your attacking province to the defending province.
Once you declare a battle, you must follow through with the attack, if possible.
Declaring Battles from a Double-Troop Province
When attacking from a double-troop province, you can declare battles in one of three ways:
- The army or the provincial force can attack alone;
- Each troop can attack a different adjacent enemy or empty province; or
- Both troops can attack the same adjacent enemy or empty province. These battles must be fought separately.
To declare battles from a double-troop province, place one battle marker on the border for each planned attack, with the arrow pointing toward the defending province.
Battle markers are removed during Phase D: Final Movement.
FIRST ROUND EXAMPLE — PHASE B: DECLARE FIRST BATTLES
During Action 2: Take Swords, Pink chose the 1-diamond sword—so he wages war first.
During Phase A: Move Daimyos' Armies, Pink decides not to move any of his armies, because they are already in combat position with provinces he wants to attack.
During Phase B: Declare First Battles, Pink declares 8 attacks by placing 8 battle markers. As part of the agreement, Pink will take Buzen from Gray. Later, Gray will take Nagato from Pink.
Phase C: Conduct Combat
In phase C, the attacking player must conduct combat against each declared enemy province. Empty provinces are handled differently.
The attacker conducts combat one battle at a time, in any order he chooses. All units in the attacking army or provincial force must take part in the battle.
The defender always defends with all units in the defending province. This rule also applies when defending from a double-troop province.
Attacks by Experienced Daimyo Armies: An experienced daimyo's army (which can make more than one attack) must resolve all of its battles before the next army begins to fight. Daimyo experience is discussed in detail under Experienced Daimyos in Combat, below.
The Combat Sequence chart is on the right panel of your reference screen. Refer to it (or to the sequence below) as you read the Combat Sequence rules below.
Special Treatment of Empty Provinces: Because a declared empty province is undefended, you can conquer it without having to conduct combat. Movement into a declared adjacent empty province is permitted during this phase by an experienced daimyo's army (see Experienced Daimyos in Combat, below). Movement into any adjacent empty province is permitted during Phase D, Final Movement, by any army or provincial force unit(s).
The Combat Sequence
Combat is resolved by die-rolling: one die roll for each battling unit. Attacker and defender roll for each unit type simultaneously.
COMBAT SEQUENCE
- Players roll dice simultaneously to hit — Bowmen roll 6
- Gunners roll 4
- Remove Casualties
- Daimyos roll 6
- Swordsmen and Ronin roll 5
- Spearmen roll 4
- Remove Casualties
- Repeat sequence unless attacker calls off battle
The Combat Sequence determines which units battle in which order. First, long-range weapon units (bowmen and gunners) battle in order, and any casualties are removed. Then hand-to-hand combat units (daimyos, swordsmen, ronin and spearmen) battle in order, and any new casualties are removed. Attacker and defender repeat this sequence (perhaps several times) until all units in one province are eliminated, or until the attacker calls off the battle in Step 8.
Each unit type battles separately, in order (bowmen first, then gunners, etc.). Attacker and defender roll dice at the same time for each unit type. If one player has no battling units of that type, his opponent rolls alone. If neither player has any units of that type, both players move on to the next step in the sequence.
NOTE: There are 6 dice in the game. If more than 6 units battle at the same time, players roll the dice separately.
Scoring Hits: A player scores a hit whenever he rolls the combat value or less for his battling unit(s). For example, a bowman scores a hit against the opponent on a die roll of 6 or less. Since die-rolling is simultaneous, the attacker and the defender can score hits at the same time. Players keep track of hits, then remove casualties together during the next Remove Casualties step.
Below is a step-by-step account of how each battle is resolved.
STEP 1: Bowmen Roll
The attacker rolls one die for each bowman in his attacking army or provincial force, while the defender rolls one die for each bowman in his defending province. Each die roll of 6 or less scores a hit against the opponent. Both players keep track of any hits scored.
STEP 2: Gunners Roll
The attacker rolls one die for every attacking gunner, while the defender rolls one die for every defending gunner. Each die roll of 4 or less scores a hit. Both players keep track of total hits scored by gunners and by bowmen.
STEP 3: Remove Casualties
Now both players remove any casualties they suffered during the two previous steps and replace them in their planning trays.
Rules for removing casualties are as follows:
- Each player who suffered casualties chooses which of his own units to remove. The player who scored the hit(s) never chooses his opponent's casualties.
- Players must choose casualties from units involved in the battle only. They can choose units that have already rolled—or any other units involved in the battle.
- Any player battling with an army must choose the daimyo as the last casualty to be removed. This rule applies in defending double-troop provinces as well.
- In a defending province occupied by a castle or fortress, remove bonus units as casualties first. See Special Defender Advantages, below.
- While removing casualties, players must keep within the Ronin Units Per Province Limit: after casualties are removed, there must still be at least one less ronin unit than surviving units in the army or provincial force the ronin belong to.
NOTE: This rule does not apply to bonus ronin units in a defending province with a fortress. See Special Defender Advantages, below.
STEP 4: Daimyos Roll
Each player rolls one die for his daimyo (in army battles only). A hit is scored on a die roll of 6 or less. Both players keep track of any hits scored.
STEP 5: Swordsmen and Ronin Roll
Ronin battle with swordsmen. The attacker rolls one die for every attacking swordsman and ronin, while the defender rolls one die for each defending swordsman and ronin. Each die roll of 5 or less scores a hit. Both players keep track of total hits scored by swordsmen, ronin and daimyos.
STEP 6: Spearmen Roll
The attacker rolls one die for every attacking spearman, while the defender rolls one die for every defending spearman. Each die roll of 4 or less scores a hit. Both players keep track of total hits scored by spearmen, swordsmen, ronin and daimyos.
STEP 7: Remove Casualties
Each player chooses and removes his casualties as described in Step 3.
STEP 8: Repeat Sequence Unless Attacker Calls Off Battle
The above sequence is repeated until one player wins the battle, or the attacker calls off the battle on this step. See Battle Results, below, for details of these two events.
Battle Results
A battle ends as soon as one (or more) of the following happens:
A. Defending Units Are Eliminated. If all defending units are taken as casualties, the battle ends. The defender surrenders the now-empty province as described below under Losing Ownership of a Province.
B. Attacking Units Are Eliminated. If all the attacker's units are taken as casualties, the battle ends. The attacker's province (if empty) must be surrendered, as described below under Losing Ownership of a Province.
C. The Attacker Calls Off the Battle. Only the attacker can call off a battle. As the attacker, you can call off a battle on Step 8 of the Combat Sequence during any round of combat.
Call off a battle by telling the defender that you are ceasing to fight. Surviving units remain where they are, and you either resolve your next attack, or (if you have completed phase C) you proceed to Phase D, Final Movement.
After calling off a battle, an experienced daimyo's army may be able to attack again in another location. See Experienced Daimyos in Combat, below.
Losing Ownership of a Province
Any player who loses ownership of a province must remove his matching province card from his pile, and place it faceup on the red gameboard rectangle. The card remains "up for grabs" until a player moves in to conquer the province.
Eliminating an Opponent's Daimyo from the Game
During phase C, you can eliminate an opponent's daimyo in any of three ways:
- By eliminating it as the opponent's last casualty in a battle; or
- By eliminating the opponent's entire army after its daimyo has been assassinated; or
- By assassinating the opponent's daimyo if it is the last unit in its army.
Eliminating an Opponent from the Game
If you are the player to eliminate an opponent's last daimyo, that player is out of the game, and you instantly own all of his units and provinces. You also recover any daimyos you previously lost. You do not recover the lost daimyos of the player you defeated: 3 daimyos is the most you can ever have.
The following rules apply when you eliminate an opponent from the game:
-
Immediately replace any daimyos you lost on your army card. Place their matching experience markers in the left-most hole marked "1."
-
Then place your recovered daimyos' matching army markers on the gameboard, into any province you now own (that doesn't already contain an army) including the eliminated opponent's provinces.
-
Your recovered daimyos have no army units; however, once placed in a province, they can immediately "pick up" any occupying units—just transfer such units from the gameboard province to the appropriate squares on your army card.
-
You can move any of the units you now own during Phase D: Final Movement on the current round of play. On following rounds (during Action 4: Levy Units) you can also levy units of either color you now own, and mix the two colors for the duration of the game.
After eliminating an opponent from the game and taking control of his units and provinces, count your new total of provinces. If you own 35 or more of them, you win the game! See Chapter 5: Winning the Game.
Special Defender Advantages
As the defender, you have an advantage over the attacker if certain provinces you own are attacked. The rules below explain these special defender advantages.
Defending with a Castle or Fortress: If your defending province contains a castle or fortress, temporary bonus units join your regular defending units when a player attacks the province. These temporary bonus units symbolize the walls of the castle or fortress. Defend with these units as explained below.
-
Castles: Before beginning the Combat Sequence, take 4 spearmen out of your tray and place them near your other defending units (either in the province, or on your army card below your defending army). These extra spearmen defend along with the regular units in your defending province. However, during the Remove Casualties step of the Combat Sequence, you must choose them as casualties before you remove any of your regular defending units.
After the attacker's turn, return any surviving bonus spearmen to your tray. Then fully replenish the 4 bonus spearmen when your castle-occupied province is attacked by another player.
-
Fortresses: Before beginning the Combat Sequence, take 5 ronin out of the master tray, and place them near your other defending units (as described above under Castles).
NOTE: If there aren't 5 ronin in the master tray, use other game pieces to symbolize your bonus ronin.
These extra ronin defend the same way extra spearmen defend a castle. After the attacker's turn, return any surviving bonus ronin to the master tray.
Chapter 7 is an illustrated example which shows the defense of a castle-occupied province.
Defending in a Naval Invasion: An attack across a sea line is called a naval invasion. When a province you own is attacked in a naval invasion, your defending units have a first-strike advantage! This means that your defending units follow all steps of the Combat Sequence alone for one round, before the attacker can fight back!
NOTE: Temporary bonus units for castles and fortresses do not take part in this first strike.
Rules for a defender's first strike during a naval invasion are as follows:
-
Roll one die for each defending unit type, separately and in Combat Sequence order. The attacker does not roll dice for his attacking units.
-
As in normal combat, score hits according to each defending unit's combat value, and keep track of them as you roll for each unit type.
-
After you finish rolling the dice, the attacker must remove any casualties he suffered. This ends your first-strike defense. Now both players begin the normal Combat Sequence simultaneously.
Defending castles and fortresses can now use their bonus units.
Experienced Daimyos in Combat
A provincial force or an army led by a level-1 daimyo can only make one attack and cannot move at all during combat phase C. An experienced daimyo can make additional attacks and can even move between battles in this phase:
- Any army can make a number of attacks less than or equal to its daimyo's experience level. Additional attacks are not declared by battle markers.
- Between each attack, the army can move into the newly-defeated province and make its next attack from there. When an army enters a newly-defeated province, conquer it by taking the matching province card from the red gameboard rectangle and add it to your pile.
Here are three situations that can arise during combat for an experienced daimyo's army.
-
After a Successful Battle — A daimyo that can make no more attacks must remain where it is until phase D. However, a daimyo that can make at least one more attack can do any one of three things:
- Move into the newly-defeated province and make another attack from there; or
- Move into the newly-defeated province and remain there until phase D; or
- Remain where it is until phase D.
-
Attacking an Empty Province — If the experienced daimyo's army has attacked an empty province and can make at least one more attack, it can move into the empty province, conquer it and attack from there; or move in and wait for phase D. Even though there were no defenders, this action counts as one battle, but it does not count as a successful battle for experience purposes (see Moving a Successful Daimyo's Experience Marker, below).
-
After Calling Off a Battle — If the experienced daimyo's army calls off a battle, this "unfinished" battle still counts as one attack, but not a successful one. The army can attack elsewhere if its experience level permits.
The illustrated example in Chapter 7 shows how experienced daimyos' armies move and attack.
Moving a Successful Daimyo's Experience Marker
After an army conducts all of its battles, if at least one battle was successful, move the matching daimyo's experience marker one hole to the right.
If an army fought more than one successful battle, the marker still moves only one hole per round. Successful battles are those that left the defending province empty; DO NOT count as successful: 1) attacks against empty provinces; 2) attacks you called off; 3) attacks you were unable to make because of a previous successful attack.
A daimyo whose experience marker is moved up to the next level (e.g. from 2 to 3) cannot attack again on this round; but its movement capability is increased in Phase D: Final Movement of this round.
INTRODUCTION TO COMBAT EXAMPLES
The First Round Examples below describe the events of Player Pink's battles during Phase C: Conduct Combat. A final example shows the aftermath of these battles, after defeated provinces have been surrendered.
Pink's army units are shown below, in their locations on Pink's army card.
Army #1 contains: The daimyo, 1 bowman, 1 swordsman, 3 gunners and 3 spearmen. Army #2 contains: The daimyo, 1 bowman, 1 swordsman and 2 gunners. Army #3 contains: The daimyo, 1 bowman, 1 swordsman and 2 gunners.
CONDUCT COMBAT: CHIKUZEN ATTACKS HIZEN
First, Pink's Army #1 in Chikuzen attacks Pink-Stripe's lone spearman in Hizen. The combat sequence begins: Pink rolls one die for his bowman unit. A bowman's combat value is 6 (6 or less needed to score a hit). Pink rolls a 9 for his bowman—a miss. Pink-Stripe doesn't roll, because he has no bowmen.
Next, Pink rolls three dice for his 3 gunners (combat value: 4). Pink rolls a 2, 3 and 4—all hits! Pink-Stripe doesn't roll, because he has no gunners.
Long-range weapon casualties are now removed: Pink has scored three hits (two more than he needs to defeat Pink-Stripe). Pink-Stripe must now remove his only defending unit (he didn't even get to roll for it), leaving Hizen empty. Thus, the battle ends: Pink-Stripe has lost Hizen, and must surrender his Hizen province card to the red gameboard rectangle.
Pink's Army #1 is led by a level-1 (non-experienced) daimyo, so this ends Army #1's combat for the current round of play. Pink moves his matching experience marker one hole to the right on his army card (because the army won a battle)—then resolves his attack against Chikugo.
CONDUCT COMBAT: HIGO ATTACKS CHIKUGO
Next, Pink's provincial force of 1 swordsman and 3 spearmen attack Gray-Stripe's lone spearman in Chikugo. Since there are no bowmen, gunners or daimyos in the battle, the combat sequence begins on Step 5: Swordsmen and Ronin Roll.
Pink rolls one die for his swordsman (combat value: 5). Pink rolls a 3 for a hit. Now spearmen roll. Since Pink has already hit Gray-Stripe's lone defending unit, he doesn't need to roll for his spearmen; but Gray-Stripe's spearman hasn't been removed as a casualty yet—so he rolls one die for it. He rolls a 1, for a hit.
Now players remove casualties: Pink chooses 1 spearman and removes it, while Gray-Stripe removes his only defending unit, leaving Chikugo empty. This ends the battle: Gray-Stripe has lost Chikugo, and must surrender his Chikugo province card to the gameboard.
AN ATTACK FROM A DOUBLE-TROOP PROVINCE: THE AWA ARMY ATTACKS SANUKI
Pink's Army #3 in Awa attacks Gray-Stripe's lone spearman in Sanuki. Pink's bowman misses, but one of his gunners scores a hit. Gray-Stripe removes his spearman, loses Sanuki, and surrenders his Sanuki province card to the gameboard.
Pink's Army #3 is led by a level-1 (non-experienced) daimyo, so this ends Army #3's combat for the current round of play. Pink moves the matching experience marker one hole to the right on his army card, because the army won a battle.
THE AWA PROVINCIAL FORCE ATTACKS TOSA
Pink's provincial force of one bowman and three spearmen attacks Pink-Stripe's lone spearman in Tosa. Pink misses with his bowman, but scores one hit with his 3 spearmen. Pink-Stripe scores a hit with his spearman. Both Pink and Pink-Stripe remove one spearman as casualties. Pink-Stripe loses now-empty Tosa, and surrenders his Tosa province card to the gameboard.
A DOUBLE-TROOP PROVINCE ATTACKS: THE ARMY IN SATSUMA ATTACKS HYUGA
Next, Pink's Army #2 in Satsuma attacks Gray-Stripe's lone spearman in Hyuga. Pink misses with his bowman and gunners, but gets a hit with his daimyo. Gray-Stripe rolls for his spearman and misses. Gray-Stripe removes his only defending unit, loses Hyuga and surrenders his Hyuga province card to the gameboard.
Pink's Army #2 is led by a level-1 (non-experienced) daimyo, so this ends Army #2's combat for the current round of play. Pink moves his matching experience marker one hole to the right on his army card.
THE PROVINCIAL FORCE IN SATSUMA ATTACKS OSUMI
Now Pink's provincial force of one bowman and three spearmen attack Pink-Stripe's lone spearman in Osumi. Pink scores a hit with his bowman to end the battle. Pink-Stripe removes his spearman, loses Osumi and surrenders his Osumi province card to the gameboard.
A NAVAL INVASION: NAGATO ATTACKS BUZEN
Because Pink's provincial force attack on Buzen is a naval invasion, Gray's defending units have a first-strike advantage.
Gray rolls three dice for his three spearmen (combat value: 4). Gray rolls a 3, 4 and 11 for two hits. Pink does not roll for any of his attacking units—he immediately removes two spearmen as his chosen casualties. This ends Gray's first-strike advantage.
Now the normal combat sequence begins. Pink rolls for his gunner (combat value: 4). Pink rolls a 4—a hit. Gray removes a spearman. Then both players roll for their spearmen (combat value: 4). Pink rolls one die—a 2, for a hit; Gray rolls 2 dice—a 1 and an 8, for one hit. Pink and Gray each remove a spearman as a casualty.
It's now one gunner against one spearman. Pink can call off the attack at this point (Step 8); but he chooses to conduct another round of combat. He rolls a 3 for his gunner—a hit! Gray removes his spearman, leaving Buzen empty. This ends the battle: Gray has lost Buzen and must surrender his Buzen province card to the gameboard.
A NAVAL INVASION: BUNGO ATTACKS IYO
Because this is a naval invasion, Gray's defending units in Iyo have a first-strike advantage. Gray rolls one die for his only defending unit: a spearman. He rolls a 2, for a hit. Pink chooses a spearman and removes it. This ends Gray's first-strike advantage. Now the normal combat sequence begins.
Pink rolls for his remaining attacking units (first for his swordsman, then for his spearmen), and gets a hit. Gray rolls for his defending spearman and misses. Gray removes his spearman, loses now-empty Iyo, and surrenders his Iyo province card to the gameboard.
BEFORE FINAL MOVEMENT
Player Pink has completed his Wage War turn for this round of play. He has conducted combat with all provinces he declared for battle. The provinces lost in battle during Phase C: Conduct Combat are now empty. Each of these provinces is "up for grabs" until a player moves in to conquer it.
Phase D: Final Movement
In phase D, the attacking player can move any or all of his armies or provincial forces. During this phase, an army or provincial force can move only into an adjacent empty or friendly province.
Remember that sea lines make provinces adjacent. Also remember that you cannot leave a province empty by moving everything out of it.
Surviving Ronin Units: Since ronin units are not removed until Action 8: Remove Ronin, the Limit of Ronin Units Per Province rule still applies. Don't violate this limit as you move your armies or provincial forces. Ronin units alone cannot garrison provinces you move out of!
Move your armies first, then move your provincial forces.
Move Daimyos' Armies First: You may move any of your army markers the number of provinces less than or equal to the daimyo's experience level. For example, a level-4 daimyo can move up to 4 provinces during phase D. Army movement rules in this phase are the same as those in Phase A: Move Daimyos' Armies, with one addition: any army can now move into any adjacent empty province to conquer it (see Conquering an Empty Province, below).
Move Provincial Forces Next: After moving your armies, you may move your provincial forces, or any number of units from them, into adjacent friendly or empty provinces. If the adjacent friendly province is occupied by an army, any or all of the provincial force units may be added to your army, as long as they fit on your army card. The units of a provincial force can split up to move into different adjacent empty or friendly provinces. If the adjacent friendly province is occupied by a provincial force, a larger provincial force results.
NOTE: Make sure you don't violate the 5-unit provincial force limit.
If a provincial force moves into an adjacent empty province, it conquers it. See Conquering an Empty Province, below.
CONQUERING AN EMPTY PROVINCE: To conquer an empty province, just move in your army or one or more of your provincial force units from an adjacent province. Then take the matching province card from the red gameboard rectangle, and add it to your pile. You now own the province.
At the end of this phase, return your battle markers to the master tray.
FIRST ROUND EXAMPLE — PHASE D: FINAL MOVEMENT
During phase D, Pink moves his armies, then his provincial forces into adjacent empty provinces, to conquer them. Each time he conquers a province, he takes the matching province card from the gameboard and adds it to his pile.
Army Movement: Army #1 moves into Hizen (leaving a spearman to garrison Chikuzen). Army #2 moves into Hyuga. Army #3 remains in Awa.
Provincial Force Movement: From Bungo, a swordsman moves into Buzen. From Higo, a spearman moves into Chikugo; a swordsman moves into Army #2 in Hyuga, leaving a spearman behind. From Satsuma, a bowman and a spearman join Army #2 in Hyuga; a spearman moves into Osumi. From Awa, a bowman moves into Sanuki; a spearman moves into Iyo; and another spearman moves into Tosa.
Action 8: Remove Ronin
In Action 8, all players remove any surviving ronin units from their provinces on the gameboard, their army cards or their facedown province cards. All players do this at the same time. Return the ronin units to the master tray. Ronin can be hired again during Action 5: Hire Ronin, on the next round of play.
Action 9: Collect Koku
In Action 9, players count their province cards, then collect koku to spend on the next round, according to how many provinces they currently own. All players do this at the same time.
Calculate Your Income
To calculate your income, add up the province cards in your pile, and divide by 3. Drop the remainder, if there is one. The result equals the number of koku you collect. For example, if you own 26 provinces, divide by 3, and round the result (8 2/3) down to 8. This means you can collect 8 koku.
Each player calculates his income by the same method.
Collect Your Koku
Take the number of koku you earned from the master tray, and place them in front of you. Each player does the same.
Minimum Koku: No player can ever collect less than 3 koku. If you have less than 9 province cards left, and at least one daimyo, take 3 koku.
Chapter 5: Winning the Game
To win the game, a player must own 35 provinces. As soon as one player conquers his 35th province, the game ends, and he is the winner! A player can win the game at any time during a round of play.
For a Longer Game: Players may prefer to declare a winner only after a round of play is complete. At the end of any round (after all players have completed all 9 actions), if one player owns at least 35 provinces, the game ends and he is the winner!
In this longer version, opponents have a chance to recapture lost provinces before a round ends and a winner is declared.
Chapter 6: Rules for a 2-Player Game
The rules for a 2-player game are exactly the same as for a 3-, 4- or 5-player game, with the following exceptions:
- Each player chooses and controls 2 different color sets of military units. For each color, use a separate planning tray, reference screen, etc. All actions for each set are performed separately.
- Shuffle and deal out all of the province cards into two separate piles; one for each player. In turn, each player divides his pile of province cards into two sets of 17 cards.
When setting up units, follow the setup rules described in Chapter 3. Place military units of one color in 17 provinces, and military units of another color in the other 17 provinces. Try to group provinces together in each set.
- The two sets of military units you control cannot battle each other; they are allies. Therefore, be sure to place each set of your military units so that each has access to enemy provinces.
- Military units from each of your sets cannot occupy the same provinces; nor can they attack or defend together.
Winning a 2-Player Game: At the end of any round of play, if one player owns at least 50 provinces, the game ends and he is the winner!
Chapter 7: Illustrated Example
Chapter 7 is an illustrated example of a conflict between two players, Pink and Gray, during one critical round of play. The original booklet illustrates this chapter with diagrams of the gameboard (Diagram A and Diagram B) showing planned troop movements; the text below picks up as Gray's hired ninja strikes during Pink's Wage War turn.
Pink loses the 2 koku he bid for the ninja—and braces himself for the ninja strike he knows will take place against one of his two remaining daimyos!
Action 7: Wage War
PINK: In Phase A: Move Daimyos' Armies, Pink moves his two armies as planned (shown in Diagram A): Army #2 moves into Etchu, then Army #1 moves into Shinano.
In Phase B: Declare First Battles, both armies declare their first battles against Hida. Pink's plan is to attack first from Shinano with Army #1 (the larger army), and call off the battle before losing his daimyo; then attack next from Etchu with Army #2, to eliminate any remaining Gray defenders in Hida.
The Ninja Strikes! Suddenly (before Pink can begin Phase C: Conduct Combat), Gray's ninja strikes the daimyo in Shinano! Gray rolls a lucky 7, and the assassination is a success! Army #1 is now "disrupted"; unable to attack or move.
Now Pink begins Phase C: Conduct Combat. Since Army #2 in Etchu is committed to attack Hida, it must battle by itself, without support from the now-disrupted Army #1 in Shinano.
Army #2 takes a beating from the Hida army (which includes the 5 bonus fortress ronin, the 4 hidden hired ronin, and the one garrison spearman), before it calls off the battle and withdraws to Musashi during phase D (see dotted arrow in Diagram B).
GRAY: Since Pink's Wage War turn was such a disaster, Gray decides to move in Phase A: Move Daimyos' Armies, and declare battles in Phase B: Declare First Battles, according to his original plan (shown in Diagram A).
In Phase C: Conduct Combat, Army #3 makes its first attack and succeeds in eliminating the disrupted army in Shinano (which includes the four bonus castle spearmen, the 2 hidden hired ronin and the one garrison spearman), after 5 rounds of combat. Army #3 has the option to move into Shinano, but remains in Hida and makes its second attack on Etchu, eliminating the lone defending spearman. It then moves into Etchu (leaving a gunner behind to maintain control of Hida), conquers it, and conducts its third and final attack against the 2 spearmen in Hoki. The attack is successful. Gray leaves Army #3 in Etchu, not able to move in to conquer Hoki until Phase D: Final Movement.
Gray's Army #1 now moves into Shinano (as declared) for its first "battle," then attacks Musashi. Gray successfully eliminates Pink's army there, including the 4 bonus castle spearmen, the garrison spearman and Pink's last daimyo.
Pink is now out of the game. Gray claims Pink's units and all 19 of Pink's provinces for a total of 36, and claims the rank of Shogun to win the game!
Chapter 8: Quick-Start Game Rules
This chapter is for players who are already familiar with regular gameplay and are interested in playing a faster game. Quick-start rules feature revised setup procedures and a new way to win the game.
Game Setup
Having set up your planning tray and the master tray as described in Chapter 3, follow the steps below, which are a revision of the regular setup.
1. Deal Out the Province Cards
Shuffle the province cards and deal them out facedown to each player, according to the number of players in the game:
- 5-player game: deal 7 cards to each player
- 4-player game: deal 11 cards to each player
- 3-player game: deal 16 cards to each player
Place the remaining province cards aside for now.
2. Claim Your Provinces
Each player places one spearman in each of his provinces on the gameboard.
3. Draw Swords
Players draw swords according to the regular rules.
4. Claim Extra Provinces and Place Reinforcements
Each player takes 18 spearmen from his planning tray.
In the turn order according to sword numbers, each player places one spearman in any unoccupied province, and takes the matching province card from the extra cards. The player then places two more spearmen as reinforcements in provinces already owned. Both spearmen may be placed in 1 province, or 1 spearman each in 2 provinces.
No province may contain more than three spearmen during this step. Each player will claim one new province and add reinforcements in turn order, until each player has done so six times.
5. Set Up Your Army Card
Each player sets up his army card as follows:
A. Place one daimyo in each army. Place your three pegged experience markers into the lowest (left-most) holes marked "2."
B. Distribute the following troops among the three armies: 5 samurai bowmen, 5 samurai swordsmen, 6 ashigaru gunners (no ashigaru spearmen).
Each player may distribute his troops among his three armies as he wishes, as long as he stays within the legal limits of each army. Armies may pick up spearmen from the provinces they occupy.
6. Place Your Army Markers
Each player deploys his three army markers on the gameboard in turn order, one marker at a time, according to the regular setup rules. Continue until all players have placed all three of their markers on the gameboard.
Once this step is in progress, no player is allowed to make changes on his army card.
Game Play
After following the above steps, players count their provinces and collect koku according to the regular game rules. Players then start with Action 1: Plan, and play the regular game except for the following rule: assassinated daimyos are brought back to life at the lowest (left-most) experience level "2."
Winning the Game
You can win the game in either of the following two ways:
- Have the most provinces when the first player is eliminated. NOTE: The player who eliminates an opponent immediately owns all the eliminated player's provinces.
- Or, be first to win the following number of provinces, depending on the number of players in the game:
- 5-player game: own 30 provinces to win
- 4-player game: own 35 provinces to win
- 3-player game: own 40 provinces to win
QUICK REFERENCE: KEY RULES AT A GLANCE
Setup: As you set up the game, make sure each player has exactly 36 spearmen.
Levying Units: Levy only one unit per province during Action 4: Levy Units. Never place a unit on a province, and again in the army (on the army card) that is in that same province.
Ronin: The number of ronin in a provincial force or army must always be at least one less than the number of regular units they are joining. (Don't forget to count the daimyo as an army unit.)
The Ninja: A daimyo cannot be eliminated from the game by ninja assassination unless it is the last unit in the army, or the army units are eliminated after the daimyo is assassinated during the same round.
- An experienced daimyo (level 2, 3, or 4) may move up to the same number of provinces as its experience level during phase A.
- During phase C, it may attack up to the same number of provinces as its experience level, and may only move into newly-defeated provinces between each attack.
- In phase D, it may again move up to the same number of provinces as its experience level.
- A daimyo must complete all of its battles before any other army or a provincial force can conduct battle.
- Daimyos cannot gain experience by attacking empty provinces.
- During phase D of Wage War, move all of your armies, then move your provincial forces.
- A defender against a sea attack has the first strike advantage: he gets one round of defending rolls before simultaneous battle begins.
- Never move an army or a provincial force without leaving one to five units behind as a garrison.
Waging War: On the first round of play, your armies cannot attack any province occupied by a daimyo.
Collecting Koku: During Action 9: Collect Koku, each player receives a minimum of three koku.