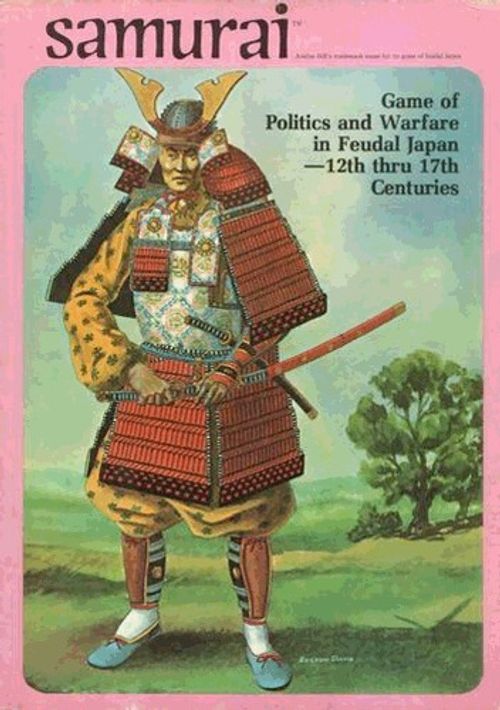
Samurai: Game of Politics and Warfare in Feudal Japan
Samurai: Game of Politics and Warfare in Feudal Japan Rulebook
Table of Contents
Table of Contents
Concept of Play
Each player controls a Clan, with one or more Daimyos. Each Daimyo has a Province representing his personal fief or home, and often has additional holdings of troops, titles, ships, Castles, more Provinces, etc.
The game is played in 20 turns, each representing between a few months to a few years, depending on the pace of historical events. In each turn, players each have their own Phase. In your Phase, you maneuver the Daimyos of your Clan, engaging in battles or sieges against other Clans or neutrals, and acquire new holdings for your Daimyos.
Playing Procedure
Samurai is played in turns. During a turn, each player has his own Phase, for moving, fighting battles, etc. To start a turn, each player rolls the die. The highest roller has the first Phase ("moves first"), then the next highest roller has the second Phase, etc. In case of ties, the tied players rolls again to break it.
Die rolls for order of Phases are made at the start of every turn, and thus the order of play will usually change from turn to turn.
Each player's Phase consists of the following steps, which must be performed in the order given:
- Event step: the player rolls 111-666 dice and reads aloud the result on the Event Table. This event may apply to just that player, or to all players, depending on the instructions.
- Movement step: the player may move his Daimyos if he desires.
- Combat step: the player may make attacks on other players, as allowed by combat rules.
- Fate step: the player draws a counter from the fate deck. He may give this holding to an existing Daimyo, create a new Daimyo (if the counter was a Province), or hold it for later assignment.
When all player Phases are finished, the turn is over. The turn marker is moved to the next number on the track, and the next turn starts.
Samurai Daimyos & Their Holdings
Starting a Daimyo
For each Province you draw in the initial set-up (see Prepare for Play), one Daimyo of your Clan may be started. To start a Daimyo, place the Province marker face up in a new box on the Clan chart, and then place the Daimyo's marker anywhere on the map within his Province. The face-up marker indicates his Home Province.
You must start at least one Daimyo at the beginning of the game. However, you need not start as many Daimyos as you have Provinces. A Daimyo can have one Province as his home, and additional Provinces as holdings (see below).
If you acquire additional Provinces during the game, you may start an additional Daimyo in each Province. A Daimyo may be started any time during the game, including during another player's Phase, provided an unassigned Province is available for him.
Holdings
When the game starts, you often have additional holdings. These additional holdings are distributed to the Daimyos started. A Daimyo need not have additional holdings. All holdings can go to one Daimyo, or they can be distributed among the Daimyos, as desired. All holdings drawn at the start of the game must be assigned to a Daimyo.
Each Daimyo's holdings are placed on the appropriate box of the Clan chart. Except for the home Province counter, all holdings are normally facedown in the box. Only you can examine the holdings of your Daimyos. In combat resolution procedure, and at other times in the game, you may wish to reveal your holdings to show additional troop strength, claim certain bonuses, or prove that you have the ability to do a certain thing. For example, a Daimyo with an office that entitles him to additional ships must show that office to acquire those ships, but once having shown it, can put it face down again. Similarly, if a Daimyo uses sea movement, he must show a ship to prove his ability.
Holdings must be shown when they are returned to the fate deck.
During the game, you may acquire additional holdings. Those acquired from the fate deck can be assigned to any Daimyo, or held aside until you wish to start a new Daimyo. If a new Province is drawn, it too can be held aside until you wish to start a new Daimyo. Holdings can be held aside, and then assigned to an existing Daimyo. This allows players to create a "secret army".
Holdings acquired by any other means (transfers, trades, etc.) must be assigned to a Daimyo immediately, or returned to the fate deck.
Daimyos may never jointly have a counter, share a Province, or otherwise control a single item between them, even if of the same Clan.
Troops
Almost every holding has Strength Points. These are retainers that a Daimyo has due to that holding. These troops will accompany the Daimyo, and cannot be separated from him unless the holding itself is given away or lost. If troops must be lost, holdings of sufficient strength must be returned to the fate deck.
A Daimyo may receive bonus troops with various titles in various situations.
It is vital that you avoid confusing the mobile troops shown on the holding counters, and the fixed garrison troops printed on the map. The two are entirely different things. For example, Yedo Castle provides the holder of the Yedo Castle counter with 40 Strength Points. In addition, the Castle has a fixed garrison of 125, as printed in white on the Castle symbol on the mapboard.
Troops are lost by removing one or more holdings from a Daimyo, and returning them to the fate deck. You may select which holdings to lose, provided the total troop strength of the holdings at least equals the troop strength you must lose. Many times holdings will not provide an exact amount; in this case, you will have to lose more. For example, if you must lose 20 points, and only have two holdings, each worth 50 points, you will have to lose one of the 50-point holdings.
Control
All locations are neutral until a Clan takes control of Provinces, Cities, and Port Cities; when a Daimyo receives a Province in his holdings, his Clan acquires control of all neutral Cities and Port Cities in that Province. If the counter is shown (it must be shown, if a home Province), control markers can be placed on the proper locations. However, if another Clan already controls one of the Cities or Port Cities in the Province, acquiring the Province holding counter does NOT change this control situation.
Castles and Monasteries: when a Daimyo receives a Castle or Monastery holding, he always gets the mobile troop strength shown on the counter. In addition, if the Castle or Monastery is neutral, he gains control of the location itself and its garrison. If the location is already controlled, the Clan in control retains possession of the location.
Change Control: control of a location can change as Clans successfully besiege or otherwise acquire physical possession on the map. This is entirely separate and distinct from ownership of the holdings counter. Even though a player may lose a location, he can still keep the counter for that location in his holdings. This is because Japanese warriors were far more loyal to their leaders than to a particular place.
Friendly vs Unfriendly
At times in the rules, Daimyos, locations, etc., are described as "friendly" or "unfriendly." Friendly is defined as a Daimyo, location, etc., of a player or controlled by him. A player may also declare a Daimyo, location, etc., as friendly to any other player, at any time. This declaration of friendliness can be revoked at any time. If a Daimyo, location, etc., is not friendly, it is automatically unfriendly instead. Due to revocation of friendly status, a Daimyo may find himself in violation of the rules. In such a case, the Daimyo must rectify the situation on his next Phase, or commit Seppuku if unable to rectify the situation. For example, if a Daimyo is allowed into another player's Castle, and then the other player declares himself unfriendly, the Daimyo must leave the Castle on his next Phase or commit Seppuku.
Transfer of Holdings
You can trade or give holdings to another Daimyo, regardless of Clan. However, this can only occur at the start of your own movement step in your Phase, and both Daimyos must be in the same area. Holdings cannot be transferred in sea areas.
Only the following holdings may be transferred: troops, ships, Castles, ninja, and extra Provinces (but never "home" Provinces).
Control of a location may be ceded from one Clan to another entirely separate from transfer of holdings. Control can be changed by simply changing one Clan's control marker for another, regardless of the location of the Daimyos. However, actual holdings counters can only be transferred within the system described above.
Samurai Ability
Each Daimyo has a Samurai Ability level. This represents his personal skill and bravery as a warrior. When a Daimyo is started, roll 1 die to determine his starting ability level:
- 1 or 2: level one (1)
- 3, 4, or 5: level two (2)
- 6: level three (3)
Death of a Daimyo
A Daimyo may be killed by combat, event, or Seppuku. Note that if a Daimyo loses his home Province holding, that Daimyo must commit Seppuku and dies.
When a Daimyo dies, his marker is removed from the map and returned to the Clan chart. All the Daimyo's remaining holdings are returned to the fate deck.
Any Daimyo currently out of play, including one who died earlier in the game, may start in the game again at any later time (see Starting a Daimyo, above). This new start represents the appearance of a son or other relative in cases where the Daimyo had previously died.
Return of Imperial Articles
When a lord with the Emperor, Heir or Regalia is removed from the game, that imperial article may be returned to its starting location. For each article, roll 1 die and consult the table below.
Relocation of the Emperor
- 1: Monastery in Omi
- 2: City of Sekigahara
- 3 or 4: Oki (Island nearest his current location)
- 5 or 6: Monastery in Hida
Relocation of the Heir
- 1: Monastery in Omi
- 2: City of Sekigahara
- 3 or 4: Kagoshima
- 5 or 6: Monastery in Iwami
Relocation of the Regalia
- 1: Fukuyama Castle
- 2: City of Miyazu
- 3: Monastery in Hida
- 4-6: Yedo Castle
Death of a Clan
A Clan survives as long as at least one Daimyo remains in play on the mapboard at all times. If, at any time, all Daimyos of a Clan are killed, the Clan itself collapses. All control markers of the Clan are removed. Loss of individual Daimyos will not change control per se, only death of the Clan, battle results, or voluntary transfer.
Whenever a player's Clan is killed, he is considered out of the game and an automatic loser.
Movement
General Procedure
In your Phase, you can move none, one, some, or all of your Daimyos.
Each Daimyo normally can move four areas in your Phase. A Daimyo moves from area to area across the common boundary (dotted line or solid white line). A Daimyo can enter up to four new areas per Phase using this method. Dice are not used in movement; speeds are standard.
Daimyos of a Clan can move together, join together during a move, split apart, etc., as desired. However, each Daimyo moves separately and independently. Movement ability cannot be transferred between Daimyos, nor can it be accumulated from turn to turn.
All the holdings of a Daimyo, including Strength Points marked on the holdings counters, automatically travel with the Daimyo. They cannot be picked up or dropped off, nor can they move independently.
Movement Restrictions
If the Daimyo of another Clan is in an area you wish to enter, that area normally counts as two areas to enter (i.e., counts double). If your Daimyo does not have at least two areas of movement ability remaining, he is unable to enter the area.
A Daimyo in a sea area or in a location does not exert this doubling effect on movement. Each sea area counts as one area only (see Sea Movement, below).
A Daimyo of another Clan may waive this doubling effect, and allow you to enter normally, counting the area as just one against your movement ability. You have no control over this; the player running the other Clan makes this decision.
If a Daimyo enters a mountain area, he must stop, ending movement for that Phase in the area. A Daimyo in a mountain area may leave it freely. Only entrance into mountains halts movement. Note that if the Daimyo of another Clan is in a mountain area, the area will normally cost two to enter, as well as halting movement there.
Locations
Inside some areas are locations (Cities, Port Cities, and Castles). Whenever a Daimyo enters an area, he may consider himself inside the area (in the mountains, countryside, etc.) or at any one location of his choice within the area. If at a location, the Daimyo is placed on the location symbol.
A Daimyo that begins his Phase inside a location may leave the location and move into the area around it (i.e., the area in which the location resides) at no extra movement cost. This can be part of any move, including road or sea movement. Exception: if the location is under siege, exit is restricted (see Siege).
A Daimyo can actually enter a location only if his Clan controls it, or if he is given permission by the Clan that does control it. Neutral (uncontrolled) locations are presumed hostile to all.
Any one Daimyo inside a location may have troops under arms. All other Daimyos in that location count as having no troops while within the location. A Daimyo in a location can always relinquish his right to bear arms to any one other Daimyo also in that location; the same Daimyo need not have troops under arms all the time.
Minor Ports are not locations. They simply represent ability to embark or debark within the area. However, if a Daimyo occupies a Minor Port, he can prevent other Clans from using it. Occupation of a Minor Port is done instead of occupying a location.
Road Movement
A Daimyo may use road movement instead of the normal movement procedure. Normal and road movement may never be combined by a Daimyo in the same Phase (exception: in forced march, a Daimyo may make a road move, and then a second non-road move, if desired — see Event Table). A Daimyo could use road movement on his turn, and non-road movement on the next.
To use a road, the Daimyo must start in an area with a road. The Daimyo then follows the road as far as he wishes, until the road is blocked. When a Daimyo enters an area with a blocked road, he must end his movement in that area. A Daimyo need not travel along the road until he reaches a block; he can stop earlier if desired. When the Daimyo does stop in an area, he can end anywhere in that area, including in locations off the road, etc.
A road is blocked whenever it passes through a location not controlled by the Clan currently moving. If no Clan controls the location, the road is blocked to all. A road is also blocked when another Clan's Daimyo is in the area, unless that Clan permits passage along the road. The Daimyo need not control the area to block it. Control alone does not block an area; a Daimyo must be present.
Sea Movement
A Daimyo may use sea movement instead of normal land or road movement. Sea movement cannot be combined with another type of movement in the same Phase.
To use sea movement, the Daimyo must start the movement Phase in an area with a friendly Port City (either one his Clan controls, or one another Clan will allow him to use), or an area with a Minor Port. The Minor Port can be used unless another Clan occupies it, and prevents its use.
To make the sea move, a Daimyo must have at least one ship counter among his holdings.
To execute the move, the Daimyo simply leaves the area of land, and moves into the sea area on which the Port City or Minor Port borders. The Daimyo can remain in this area or continue moving into the second sea area, all as part of the sea move. Then, still as part of that move, the Daimyo can either remain at sea, or land in any land area with suitable facilities (see next paragraph).
To make a landing, the Daimyo must land either at a friendly Port City, or at a Minor Port.
A Daimyo may land at a Minor Port occupied by another Clan. If that Clan attempts to prevent the landing, a battle automatically results, with the landing Daimyo as the attacker. A dice roll modifier of -2 is used instead of the normal +1 for an enemy occupying a Minor Port. If the Daimyos in the Minor Port are attacked by a Daimyo that arrived via normal land or road movement, the +1 modifier applies instead. If the Daimyos in the Minor Port are attacked both by Daimyos arriving via land and sea, the +1 modifier is also used. The special -2 modifier is only used if a purely seaborne attack is made.
A Daimyo can remain at sea up to three turns. That is, he can put to sea one turn, remain at sea for the entire second turn, and then must land by the end of his third turn.
If the Daimyo does not land by the end of his third turn at sea, he is automatically lost at sea and killed. If a Daimyo starts a turn at sea instead of on land, he must use sea movement, and can move up to two sea areas before landing or remaining at sea, as desired. A Daimyo at sea cannot trade away or otherwise lose any ships. A Daimyo on land can do what he wishes with his ships. The ships held by a Daimyo represent an ability to use sea movement; the ships always accompany the Daimyo, as part of his holdings, and do not have independent movement. A Daimyo can have two or more ships, but he cannot carry other Daimyos with him (exception: see Court Clan). Instead, he must give ships to Daimyos for their use.
Combat
Types of Combat
There are three types of combat: personal challenge, battle, and siege. Personal challenge is actually a part of open-field battle. A challenge can never exist on its own or as part of a siege.
To resolve combat, the phasing player announces all battles and determines the results. Then the phasing player announces all sieges, and determines those results. Only the player (Clan) whose Phase it is may initiate combat. This player or Clan is called the "attacker," and his target in each combat is called the "defender."
Combat is always optional, it is never mandatory.
Limitations on Combat
Combat is possible in countryside and mountain areas, sea areas, and locations. Attacker and defender must be in the same area.
In each Phase, each Daimyo cannot fight or be forced to fight in more than one battle, or in one siege. However, the same Daimyo could fight in a battle, and then in a siege, provided both were in the same area.
A Daimyo inside a location may participate in a combat with one important exception. If a Daimyo is besieged inside a location, he can only participate in combat if his enemy in the combat will be the besieging Daimyo. The enemy may include more Daimyos than just the besieging Daimyo in that area.
Multiple Clan Combat
In each combat situation, the attacker announces his intention to make a battle or siege attack against another Clan. The attacker announces and resolves all combats one by one, in whatever order he desires.
After the attack is announced, any third or fourth Clans in the same area may aid either the attacker or defender, by joining that side in the battle. Alternately, a third or fourth Clan can remain out of the battle, and not participate on either side.
A third or fourth Clan cannot join a siege on the side of the defender, only on the side of the attacker.
If two or more Clans are involved in a combat on the same side, those players must agree on how to distribute losses. If no agreement can be reached, each Clan must suffer the losses specified. For example, if two Clans fight in a battle, and must lose 100 Strength Points, if no agreement on proportioning losses is reached, each must lose 100!
Battles
Battle Involvement
You may attack in battle any other Clan in the same area as your Daimyos. You may use one, some, or all of your Daimyos in the area. All Daimyos of the defending Clan in that area are automatically involved in the battle. The only exception is defending Daimyos inside locations, which can remain out of the battle and within those locations, at the defender's option.
Garrison troops (marked in locations on the mapboard) are only involved in battles if defending against a siege attack, with or without a Daimyo. All other troops must be with a Daimyo, and may fight if he fights.
Attacking or defending Daimyos still under siege in the area cannot participate in a battle, unless the battle involves the besieging Daimyos. Note that Daimyos besieging a location are free to participate in battles as desired. A Daimyo besieged inside a location can attack the besieging forces outside, or can help another Daimyo defend in that area if the besiegers are involved in the attack. If the besiegers leave even one besieging Daimyo behind, involved in the attack, the besieged Daimyos cannot participate in the battle.
Challenges
Before each battle, the attacker may issue a personal challenge, by naming any one of his Daimyos as "champion."
The defender can either refuse the challenge and lose 25 Strength Points, or have one of his Daimyos commit Seppuku, or the defender can accept and name his own "champion" Daimyo.
If the challenge is offered and accepted, a personal combat is immediately fought between the two champions.
Resolving Personal Combat
Personal Combat is fought in rounds. Each round each player rolls dice and applies the Personal Combat Table result to his enemy. Results are presumed simultaneous.
To use the Personal Combat Table, take the Samurai Ability of your champion Daimyo, and subtract from it the ability of the enemy champion. If the enemy champion has a higher ability, the result will be a negative number. Now, compare the differential with a 2-12 dice roll on the Personal Combat Table, and indicate the result to your enemy. The enemy will be doing the same thing simultaneously to you.
If one of the champions is killed in the round, the personal combat is over and the battle begins.
If one of the champions is forced to run, the personal combat is also over and the battle begins.
If neither of the above occur, each champion has the option to run from personal combat. If neither elects to run, another round is fought. This continues until one of the champions either runs or is killed.
If a Daimyo runs from personal combat, he must lose 40 Strength Points. He can still participate in the battle.
A Daimyo may be wounded in personal combat. Wound effects accumulate from round to round, with a total of five wounds killing a Daimyo. A Daimyo who survives a personal combat with wounds is presumed to recover sufficiently to participate in the battle.
Recovery from Wounds: If a wounded Daimyo survives a personal combat, add a 1-6 die roll and the wounds suffered, and find the total on the table below. Wounds are not carried over from one combat to another, but the wounds may have additional effect:
- 5 or less: No adverse effect; Daimyo instantly recovers.
- 6-8: Daimyo temporarily incapacitated; his Strength Points are halved in the battle following this personal combat.
- 9-10: Daimyo seriously wounded; immediately move him to his home province. He must remain there until the end of the player's next Phase.
- 11+: Daimyo seriously wounded; immediately move him to his home province. He must remain there until the end of the player's next Phase. In addition, he loses 1 point of Samurai Ability.
Change in Samurai Ability
If a Daimyo survives a personal combat without running, his Samurai Ability increases by one.
If a Daimyo runs from personal combat, either as result of combat, or voluntarily after a round, his Samurai Ability decreases by one.
Ability increases above six (6), or below one (1), are ignored.
Resolving Battles
After personal challenge, if any, the battle itself is resolved. The battle is resolved in rounds, one after another, until one side retreats or is wiped out.
In a round, the attacker and defender each reveal their total troop strength. The attacker reveals his first. Each may choose to keep some holdings secret, but these cannot be counted toward troop strength that round, although they can be subtracted as losses at the end of the round (but must be revealed when they are lost).
For every 50 Strength Points the attacker has, he rolls 2-12 dice once on the Battle Table. For a fraction of 50 Strength Points, he rolls once on the special Battle Table for less than 50 points. The attacker then combines all these losses inflicted into one grand total, and that is what the defender suffers that round.
Meanwhile and simultaneously, the defender will roll 2-12 dice once for each 50 points he has, and once for a fraction of 50 points if appropriate, and combines these into a total the attacker suffers.
Both sides now remove losses as required. If one side is wiped out, the battle is over. If both have one or more Daimyos remaining, either side has the option to retreat. If neither retreats, another round must be fought. This continues, round after round, until one side retreats or is destroyed.
Battle Modifiers
In open field battles, various amounts may be added or subtracted to the dice roll when consulting the Battle Tables. Only battles are affected, not personal challenges or sieges.
Dice roll modifiers are:
- +1: enemy occupies a Minor Port
- -1: enemy is in a mountain area
Retreat from Battle
After a round, the Daimyos of any Clan involved in a battle may retreat. Retreat is an admission of defeat and that Clan is considered the loser of the battle. Note that if two or three Clans are fighting together, one of them may retreat, while the others continue fighting.
Daimyos may retreat individually, or as a group. The Clan making the retreat decides the direction taken for each Daimyo.
Daimyos may retreat into any location in the battle area, provided their Clan controls that location.
A Daimyo cannot retreat into a besieged location unless he is retreating from a battle involving the besieging Daimyos.
A Daimyo may retreat into any adjacent area, except a sea area. A Daimyo cannot retreat into an area which has the Daimyos of another Clan in it unless that other Clan gives the Daimyo permission to retreat into the area.
If neither of these retreat options are available, the Daimyo cannot retreat, and must continue the battle.
Naval Battles
A Daimyo at sea may attack another at sea, just like Daimyos can fight open field battles on land. However, there are no personal challenges at sea. The defender may seek to evade battle by adroit maneuver of his fleet. This is represented by attacker and defender each rolling a die. Battle does not occur if the defender rolls higher — the Daimyos simply remain in the sea area without combat. If the rolls tie, or the attacker is higher, the battle occurs normally.
If a Daimyo retreats (mandatory or voluntary) from a sea battle, he can only retreat to the nearest friendly Port or Minor Port not occupied by an enemy.
Siege
Siege Situations
To start a siege, the attacker must be in the same area as the defender's location. No defending Daimyos can be outside locations in that area; if any defending Daimyos are, no siege attack is allowed. Daimyos of a third or fourth Clan in the area cannot join the defender, and by their presence outside, prevent the siege attack. This is because additional Clans cannot join a siege defender.
Once a siege attack is made, the location is under siege. The siege is presumed continuous as long as at least one of the attacking Daimyos remains at that location and a new siege attack is made each turn by the attacker in his Phase. If the attacker fails to make a siege attack, or fails to have at least one besieging Daimyo present at all times, the siege is ended.
The attacker may use whatever troops he has available in the area, but need not use all.
Once a siege is begun, new siege attacks on successive turns can be made regardless of whether any other Daimyos (of any Clan) are present in the area or not.
Under Siege
A location under siege has a variety of special restrictions and limitations imposed on it.
A Daimyo inside a besieged location cannot leave that location, using normal movement. He may however attack in battle the besiegers, and then retreat after battle in some direction other than back into the besieged location. He might even win the battle, and can then remain in the area outside, or within the location, as desired. Exception: if a Port City is besieged, a Daimyo inside with a ship may attempt to leave via sea movement. If one of the besieging Daimyos also has a ship, exit is prevented. Otherwise, the Daimyo can leave by sea.
A Daimyo inside a besieged location cannot receive any new holdings, nor can any new Daimyos be started inside a besieged location. Exception: you may attempt to add a ship to the holdings of a besieged Daimyo in a Port City and can succeed unless one of the besiegers already has a ship. In addition, if any of the besieged Daimyos in a Port City has a ship, new holdings may be added to him unless the besiegers have a ship.
No new Daimyos may enter a besieged location, except as a result of battle (either by defeating the enemy and ending the siege, thus allowing entrance, or by retreating from battle into the location). Exception: a Daimyo may enter a besieged Port City by sea movement, unless one of the besieging Daimyos has a ship.
Resolving Siege Attacks
When the attacker makes a siege attack, any other Clans in the area may join in the attack. To resolve the attack, the attacker reveals whatever troop strength he desires from the holdings of the attacking Daimyos. The defender then reveals whatever he desires of the troop strength of the one Daimyo with men under arms within the location, and adds to it the strength of the garrison.
The attacker subtracts the defender's total from his own. The result is compared with a 1-6 die roll by the attacker on the Siege Table. Results indicate how many Strength Points are lost by the attacker and defender.
Attacker Strength Point losses are taken from the troop strength revealed only. Defender Strength Point losses may be taken from the Daimyo with men under arms, or from the garrison, as the defender desires, provided he meets at least the total required. If the defender's troop strength is reduced to zero by these losses, the location has been captured by the attacker. To indicate reductions in garrison strength during the siege, use the garrison strength markers, instead of the numbers printed on the map, for location Strength Points.
The defender may voluntarily surrender a location under siege at any time.
Regardless of whether a location is voluntarily surrendered, or captured by the attacker, the attacker may kill any defending Daimyos in the location, or let them live if a suitable arrangement can be made.
Whenever a siege ends, either because the attacker fails to continue it, or because the location is captured, the garrison markers are immediately removed, and the location garrison automatically returns to full strength as marked on the map.
Unlike battles, there is no personal combat in sieges. There are no multiple rounds of combat in sieges, just the one resolution per attacker's Phase.
Recovery of Garrisons
Garrisons recover 10 Strength Points per Phase whenever the siege ends, starting with the Phase the siege ended. Garrison recovery continues as long as the location remains not under siege. The garrison may only recover to its initial strength. It can never exceed initial strength, no matter how long it "recovers."
Hostages
Players are required to obey the game rules, but are not required to keep written or verbal agreements, promises, or other pledges made among themselves during the game. Being honest, truthful, and honorable is but one of many political gambits a player can use.
This very much reflected the situation in Japan. Therefore, to help cement deals between Clans and encourage honorable conduct, it was a Japanese custom to sometimes exchange hostages. In the game, this may be done by each party picking up the agreed upon Daimyo, and giving it to the other party in the deal. Hostages are normally a one-for-one trade. A player receiving a Daimyo as hostage may select any location he controls, and place the Daimyo there.
Once a player has a hostage, he may hold him indefinitely. Return of a hostage is always voluntary, but since the giving of hostages is usually mutual, it is common for hostages to be mutually returned. A hostage may not be killed except by ninja, but can be asked to commit Seppuku if the deal or agreement the hostage guaranteed is not kept.
If one Clan's hostage commits Seppuku, the other Clan's hostage can be asked (and must) to commit Seppuku also.
Hostages cannot participate in battles or sieges. However, a hostage can be rescued by the capture of the location where he was imprisoned. Hostages cannot be moved from location to location; they must remain imprisoned at the original location selected.
When a hostage is returned, his Clan may either place him anywhere in his home Province (except a location under siege), or in a controlled location nearest the place where the hostage had been kept. Hostages can never be returned the turn they are taken. They must be returned on the next turn, at the earliest.
Seppuku
A Daimyo may be required to commit Seppuku (suicide) whenever one of the following situations occur. A Daimyo that commits Seppuku is dead, and removed from the game.
- A Daimyo must commit Seppuku if he loses his home Province holding (because he must lose Strength Points, and only the home Province remains to be lost).
- A hostage may be required to commit Seppuku by his captors if his Clan failed to honor their part of the agreement. The captors of a hostage need not require Seppuku, but may keep him hostage (or even turn him free) instead.
- If a Daimyo uses a ninja, and fails to assassinate the selected target, he must commit Seppuku.
- If a Daimyo is summoned to Court, or to the Kyoto Cherry Blossom Festival, and fails to go, he must commit Seppuku within four turns. However, if that Daimyo's Clan becomes the court Clan within those four turns, Seppuku is no longer required. A summons will affect any one Daimyo designated by the summoner; the Cherry Blossom Festival will affect any two Daimyos designated by their own Clan.
- If a Clan is attacked in battle, and refuses a challenge, instead of losing Strength Points, one of their Daimyos may commit Seppuku.
- In addition to the above, any Daimyo may voluntarily commit Seppuku as directed by his own Clan. If a Daimyo voluntarily kills himself at the start of his Clan's Phase, he may give away his holdings first, insofar as rules allow, to other Daimyos in his Clan. In all other cases, no transfer is allowed at the instant of Seppuku.
Special Situations
Imperial Articles
The Emperor, Heir, and Regalia are each acquired by a Clan when a Daimyo of that Clan takes control of the location where the article resides. If taken by siege, one of the Daimyos involved in the siege takes the article as his holding. If acquired by drawing from the fate deck the location (and getting control because it is currently neutral), the Daimyo taking the location gets the Imperial article. The Imperial article is placed on the Clan chart, face up, with the appropriate Daimyo, among his holdings.
If a Daimyo with an Imperial article is killed in battle (including personal combat) or siege, the victor takes possession of the article, and can give it to any one of his Daimyos involved. If a Daimyo with an Imperial article dies for any other reason, the article is instantly returned to its original location. The Daimyo currently at that location, or the next to occupy it, acquires the article.
Kyoto (the Castle) is the fourth Imperial article. It can only be acquired by successful siege of the City. Drawing Yamashiro Province from the fate deck does not give a Clan control of Kyoto. The Kyoto article is held by a Clan only as long as the Clan controls the fortress. If another Clan takes control of the fortress, it takes the Kyoto article from the Clan that had it.
Court Clan
If a Clan has two of the four Imperial articles, it becomes the "court Clan," and may award any one of its Daimyos the title of Shogun. If two Clans each have two articles, neither is the court Clan. One must lose an article before the other can become the court Clan. In other words, the court Clan must be the only one to have two or more Imperial articles.
Daimyos of the court Clan have special advantages and disadvantages:
- Movement is limited to three (3) areas per turn for each Daimyo, instead of four. If movement is halved, it is reduced to two (2) areas per turn.
- Ship Capacity is doubled. Each Daimyo in the Clan moving by sea may bring a second Daimyo with him, on the same ship. Being a member of the court Clan does not affect sea movement rates. If a Clan ceases to be a court Clan while a double-loaded ship is at sea, the ship and Daimyos may continue, but once they reach land they revert to normal rules again.
- Shogun: any one Daimyo of the court Clan may hold this office, but only as long as he belongs to the court Clan. If the shogun is killed, another Daimyo in the Clan takes the title. If the court Clan loses its status, it also loses the title of Shogun. This title is always kept face up, in public view, while a Daimyo holds it.
- Call to Arms: the court Clan may exercise this option when allowed and desired.
Call to Arms
The court Clan player may issue a call to arms whenever he controls Kyoto and it is under siege. A call to arms lasts only as long as Kyoto remains under siege. If the siege is abandoned, the call stops. If Kyoto is captured, the call stops until the new owner wishes (and is allowed to) issue it.
When you make a call to arms, you select any six Provinces (not areas), other than Daimyos' home Provinces, and place your control markers temporarily on the provincial name. This signifies that provincial sentiment is strongly in favor of the court Clan, and greatly against the besiegers of Kyoto.
Each time any Daimyo (or Daimyos) of the besieger's Clan enter one of the six Provinces, they must lose 40 Strength Points. This is taken at the end of the movement Phase. If a Daimyo (or group of Daimyos) passes through multiple Provinces, they must pay multiple penalties. Once having paid the cost to enter one of the six Provinces, the Daimyos may remain in the Province with no extra cost. However, if they leave and then return, they must pay the cost again. Strength Point losses are taken by the player removing holdings equal to at least 40 points, and returned to the fate deck. Only the besieging Clans are affected by a call to arms.
Betrayal
If two or more Daimyos are in a location, only one can have troops under arms. This Daimyo may betray all the other Daimyos in that location, and kill them, any time during the betrayer's Phase.
Ninja
The ninja were fanatical devotees of a secret sect expertly trained in the fine art of assassination. Although mercenaries, they were very selective about their employers, and were rarely used. Traditional Japanese Daimyos regard the use of ninja as both immoral and illegal, but sometimes these sentiments were supplanted by more pressing issues of self-interest.
You may draw a ninja marker as one of your holdings. Ninja can only be used if actually assigned to a Daimyo. Ninja must be assigned as soon as drawn; they cannot be held aside.
Ninja can be used at any time, during your Phase or another player's, by revealing the Daimyo who has the ninja counter. Only one ninja counter may be revealed and used by a Clan per turn, regardless of how many are held.
A ninja counter is used in an attempt to assassinate any one Daimyo in the game, regardless of where that Daimyo may be. If the attempt is successful, the target Daimyo is killed, removed from the game, and all his holdings are returned to the fate deck. If the attempt is unsuccessful, the failed ninja reveals your Daimyo as their employer, and your Daimyo is therefore obliged to commit Seppuku.
To resolve a ninja attempt, roll a 1-6 die. Depending on the effectiveness of the ninja, and the die roll, the attempt will succeed or fail. See the Ninja Effectiveness Table for results.
Titles
A number of holdings are Imperial titles (appointments) that have special bonuses attached.
- Clan Armorer: The Daimyo is the Clan Armorer. He has 30 extra Strength Points while he is anywhere in his home Province.
- Imperial Advisor: The Daimyo is the Imperial Advisor. He has 30 extra Strength Points, and a special bonus of 10 points more while he is in Kyoto.
- Diplomat: The Daimyo is the Imperial Diplomat. He has 30 extra Strength Points, and a special bonus of 20 more while he is in Kyoto.
- Minister of Roads: The Daimyo is the Minister of Roads. He has 30 extra Strength Points, and a special bonus of 20 points more while he is in Kyoto.
- Protector of Imperial Regalia: The Daimyo is the Protector of Imperial Regalia. He has 30 extra Strength Points. In addition, he has a special bonus of 20 points more if he also holds the Imperial Regalia article.
- Imperial Chancellor: The Daimyo is the Daijo Daijin, Chancellor of the Imperial Government. He has 20 extra Strength Points, and a special bonus of 25 more while he is in Kyoto.
- General of Invasion: The Daimyo is the General of Invasion. He has 30 extra Strength Points, and a special bonus of 20 points more while he is in Kyoto. In addition, the Daimyo is awarded the ships Uso and Deiji as his holdings.
- Admiral of Imperial Navy: The Daimyo is the Admiral of the Imperial Navy. He has 40 extra Strength Points, and a bonus of 20 more while he is in any Port City. In addition, the Daimyo is awarded the ships Yagato, Kaii, and Musu.
- Shogun: Any one Daimyo of the court Clan may become the Shogun, but can only retain the office as long as his Clan remains the court Clan. The Shogun has 50 extra Strength Points, and a bonus of 30 more whenever he holds (or is with a Daimyo who holds) the Emperor Imperial article.
End of Game & Victory
The game has twenty (20) turns. At the end of the 20th turn, the Clan that has the office of Shogun wins. If no Clan is the court Clan (and is Shogun) at the end of the 20th turn, the game goes into "sudden death overtime," and at the end of each additional turn, if any Clan has the office of Shogun, it wins and ends the game.
For tournament purposes, the winner of the game naturally places first. The player with the next most Imperial articles after that places second, etc. If the winner has all four Imperial articles, all other players automatically tie for last.
Advanced Tournament Games
For a longer game involving considerably more maneuver, double-dealing, and general nastiness, require that a Clan must have three Imperial articles before becoming Shogun, and before that Clan is able to claim victory on or after the 20th turn.
For a truly diabolical game, require all four Imperial articles for the Shogunate and victory. This game is very likely to run over twenty turns, and may run into hundreds of turns among good players. This does accurately reflect the real situation in feudal Japan.
A Clan still only needs two Imperial articles to become the court Clan.
Background & Notes
Historical Background
The lifespan of the Bakufu (military government) in Japan lasted from the 12th to the 19th century. Scholars disagree in their definition of each sociopolitical period within these centuries. Samurai is concerned primarily with developments from the 12th to the 17th century, events preceding the advent and widespread employment of firearms — which was to drastically alter the nature of warfare in terms of tactics, weaponry, army organization and martial philosophy. After the arrival of Portuguese traders and the Jesuits, Japan was inexorably forced into the mainstream of world civilization. For the Samurai there would never be a turning back to the age of the solitary warrior.
794-1185, Heian Period: The Fujiwara family established a strong central government that began deteriorating by the 1100's. As a consequence of growing government impotence the powerful Taira and Minamoto families were pirates of the Inland Sea. By the 11th Century a power struggle erupted in Kyoto between these Clans. In 1160 the Taira leader seized control of the government (Gempei War).
1185-1338, Kamakura Period: The Minamotos, led by Yoritomo, revolt and crush the Tairas in 1185. The new government is constructed around the Samurai code of loyalty and conduct. The Mongols invade Japan in 1274 and 1281 and are repulsed. The country is split into two Imperial courts.
1338-1500, Ashikaga Period: Warfare between the rival courts continues for almost 50 years. Japan dissolves into a mass of independent Provinces. In 1467 the Onin Civil War begins and Kyoto is devastated. The Imperial Household is impoverished and the government is in ruins. Also known as the Muramachi Period. War ends in 1477. First Ashikaga Shogun is Takauji in 1338.
1500-1603, Civil War and the Tokugawa Period: The Portuguese introduce firearms in 1543. Oda Nobunaga suppresses opposition to become Shogun in 1568. Oda's successor, Hideyoshi, reintroduced strict feudalism over a united Japan. Korea was invaded in 1592 and 1597. Ieyasu assumed the reins of government after defeating Ishido at the Battle of Sekigahara and was appointed Shogun in 1603. The Jesuits arrived at Kyushu in 1543. Ieyasu's summer campaign at Osaka in 1615 solidifies the Tokugawa Shogunate.
This extremely brief summary encompasses an enormous amount of history and excludes events such as the assassination of an Emperor, the mass suicide of the Taira Clan at the Battle of Dan-no-ura (sea battle), or the resurrection of the Taira in later years. Broad movements of human affairs are restricted to within one of these periods, each of which saw its own unique events transpire.
Designer's Notes
Samurai is a seesaw contest based on the proposition that might alone does not make right. The game board's geography and movement allowances do not favor the top-heavy army that bulldozes its way through Provinces. Japanese history from the 12th-17th century was typified by a continuous flow of broken alliances, vendettas, treachery, and subtle military actions.
Kyoto is a tempting lure, and most novices will rush for its gates on the assumption that a fixed position is an excellent pivotal point for maneuver. Such ambitions are quickly dashed unless you can fend off repeated assaults and absorb the event table losses. Yet the terrain is suited to envelopments, a characteristic of "set-piece" battles of these eras. Although numerous Clans participated in the wars for political dominion, only four families — Hojo, Taira, Minamoto, and Fujiwara — are included. The high attrition rate for Clans is incorporated in the constant shortage of nobles. The map has been divided and subdivided into Provinces and minor "fiefdoms" under the control of lesser daimyos. Movement must be, as it was then, a calculated affair since few main trunk roads existed and these were often subjected to Imperial regulations. During these centuries Japanese politics was a matter delegated to the military ambitions of the more resourceful Clans. Scattered among these major participants were various minor actors who, in their own peculiar fashion, contributed to the flow of human affairs. The Zen Buddhist and Shinto priests, for example, fought frequently on behalf of different Clans while maintaining an incredible esprit de corps founded in spiritual independence. These monks represent an opportunity to turn imminent defeat into victory. The titles are of limited utility since many of them were ceremonial with little actual power. The game's keys are troop acquisition, Provinces, possession of fortified positions, and ships. The event table reflects the wide sweep of events that occurred from time to time and led to gradual attrition in Clan armies and abrupt shifts in seats of power. The Imperial articles represent sources of legitimacy and power, but by themselves they are only symbolic figures of an Emperor who ruled solely in name.
A survey of Japanese warfare demonstrates a culture nourished from within, centered around a caste system, and controlled by a rigid feudal code steeped in the philosophy of fatalism. Men died in great numbers by the sword, the bow, the lance, and the occasional rocket in order to fulfill ambitions that spanned a dozen generations. The certainty that there would always be another family member to carry on the struggle assured that the battles and intrigues of court would weather all types of natural and human disasters.