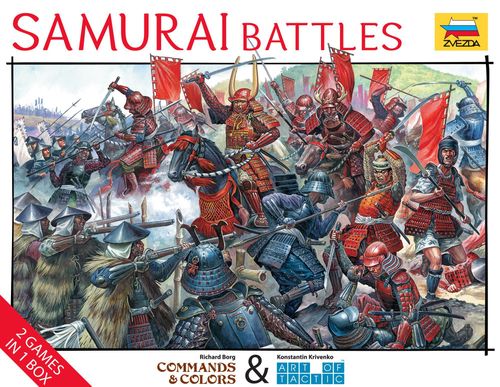
Samurai Battles
Samurai Battles Rulebook
Table of Contents
Table of Contents
-
- Contents
- Object of the Game
- Setting Up the Game
- Game-Turn
- Phase 1 - Play a Command Card
- Phase 2 - Order Units and Leaders
- Phase 3 - Movement
- Phase 4 - Battle
- Retreats
- Leader Casualty Check
- Bolster Morale
- Retreat & Loss of Honor
- Special Actions
- Phase 5 - End of Turn
- Honor & Fortune
- End Game & Victory
- Dragon Cards
- Command Cards
- Battlefield Terrain
- Scenario Legend
- Art of Tactic Rules
Contents
- 6 Battlefield game board double-sided tiles
- 2 Terrain punch boards containing 30 double-sided terrain tiles
- 13 Plastic Hills
- 60 Command cards
- 38 Dragon cards
- 2 Samurai Victory Record cards
- 8 Battle dice
- 122 Medieval Japanese plastic figures
- Sahimono flags
- 40 Unit Standards
- 30 Honor & Fortune tokens
- 1 Rule and Scenario Book containing 8 battle scenarios
Battlefield Game Board
The six map board tiles that make up the battlefield are two-sided: One side pictures a countryside setting with no other terrain features, the other side has a number of river terrain hexes already printed on the battlefield.
The map board tiles are normally arranged to build a battlefield, 12 hexes wide by 11 hexes deep. The map tiles are arranged by the code in the corner, according to the specifics of each scenario. The half-hexes that border the sides of the map and baseline of each army are not considered to be part of the Commands & Colors field of battle.
The battlefield is divided into three sections by the vertical split between the map boards, giving each player a left flank section, a center section, and a right flank section. Where the split cuts through a hex, the hex is considered to be part of both the flank section and the center section.
The numbers printed in the hexes are not used in the Commands & Colors rules.
Terrain Tiles
These represent a wide range of terrain features and are placed on the battlefield to recreate the historical battlefield for each scenario. For a description of all Terrain features, see the Terrain rules section.
Hill terrain tiles may be placed on top of the plastic hills to give a battlefield additional dimension.
Command Cards
Units may only move or battle when given an order. Command cards are used to order troops to move, battle, or do something special. For a description of each Command card: see the Command Card rules section.
Dragon Cards
These cards represent powerful, mythical, and sometimes unexplainable abilities. These cards may hinder the opposition army, enhance a player's units, or may instantly change the course of a battle.
Samurai Victory Record Cards
When the last figure of an enemy unit with its unit's standard, or a leader with its standard is eliminated, it is placed on your Samurai Victory Record card to track victory.
Battle Dice
The six-sided dice are used to resolve combat and are also used for other game functions.
Medieval Japanese Plastic Figures
The forces that players command on the battlefield are represented by 122 detailed plastic figures. The figures of each warring army have their own distinctive Sashimono flag color.
- Infantry units have four figures, one figure with a unit standard and three other figures.
- Cavalry units have four figures, one figure with a unit standard and three other figures.
- A leader is represented by a single figure.
- The commander's unit is made up of a commander (leader) figure with a standard, three bodyguard figures and a command tent terrain tile.
Unit Standards
One figure of each unit must have a standard inserted into the figure's base. The unit's standard-bearer is a key element in the game and offers visual clues as to the nature of the unit he leads into combat. A standard's symbol (circle, triangle, or square) defines the unit's rank and combat strength. The standard-bearer is also the last figure of a unit to be removed from the battlefield when the unit is finally defeated. A leader figure's standard has a Samurai helmet.
Movement Trays
The movement trays are not used in the Commands & Colors rules.
Honor & Fortune Tokens
In terms of game play, honor & fortune tokens are a measurement of the staying power of a player's army and also act as the currency that fuels the play of Dragon cards.
Object of the Game
The object of the game is to be the first player to capture a set number of Victory Banners, depending on the selected battle scenario's victory conditions.
One Victory Banner is gained for each enemy leader or enemy unit entirely eliminated. When the last figure of an enemy unit with its unit's standard, or a leader with its standard is eliminated, the figure is placed on your Samurai Victory Record card.
In some scenarios, additional Victory Banners may be gained by capturing a certain terrain hex or other battlefield objective. Victory is decided the instant the last banner required is gained.
Setting Up the Game
- Select a battle from the scenario section of the booklet. First time players should play the "First Samurai Skirmish": a non-historical scenario expressly designed to introduce players to the basics of Samurai warfare using the Commands & Colors rules.
- Arrange the game board tiles according to the battle scenario map. Each scenario specifies which army is at the top or bottom of the battlefield, and players should sit on the side closest to the army they will command.
- Place the terrain hexes on the battlefield as indicated by the scenario's battle map.
- Place the unit figures and leaders onto the battlefield, matching the various units' positions and leaders to the scenario's battle map. Each unit symbol represents an entire unit composed of a banner bearer and additional figures. Each warring army has it's own distinctive Sahimono flag color. A colored Sahimono flag should be inserted into the back of each figure in the army, or for a faster set up, at least into each figure in the army that has a standard.
- Each player takes a Samurai Victory Record card and places it in his play area in front of him.
- Shuffle the Command card deck thoroughly and deal the number of Command cards to each player as indicated by the scenario's battle notes. Keep your Command cards a secret from the opposing player. Set the remaining deck of Command cards facedown alongside the board within easy reach of the players.
- Shuffle the Dragon card deck thoroughly and deal the number of Dragon cards to each player as indicated by the scenario's battle notes. Keep your Dragon cards a secret from the opposing player. Set the remaining deck of Dragon cards facedown alongside the board within easy reach of the players.
- Create a common honor & fortune token pool alongside of the battlefield. Each player takes the number of honor & fortune tokens from the common pool as indicated by the scenario's battle notes and places them in his own honor & fortune reserve pool in the area in front of him.
- Place the battle dice within reach of both players.
- Review any special rules or victory conditions that apply for the scenario.
- The starting player, as indicated in the scenario's battle notes, begins play.
Game-Turn
A scenario's battle notes state which player goes first. Players then alternate taking turns, until one of the players reaches the number of Victory Banners indicated in the scenario's victory conditions.
Player's Turn
Follow the sequence shown below:
Phase 1. Play a Command Card Phase 2. Order Units and Leaders Phase 3. Movement Phase 4. Battle Phase 5. End of Turn
Note: One phase must be completed before proceeding to the next phase.
Phase 1 - Play a Command Card
At the start of a turn, the player must play a Command card from his hand. Place it face up, and read it aloud. Command cards are used to order a player's units to move, battle, or do something special. The card played dictates in which section(s) of the battlefield orders are issued and how many units may be ordered. Units may only move or battle when given an order. There are two types of Command cards: Section cards and Tactic cards.
A Section Command card is recognizable by an iconic representation of the battlefield on the lower half of the card. Each card is used to order a set number of units and/or leaders in a section or combination of sections of the battlefield highlighted by an arrow and a number.
A Tactic Command card orders units across the battlefield in any section and may allow the ordered units to move and/or battle in ways not normally allowed in the basic rules. Some Tactic cards are used to order units of the same rank, i.e. units sharing the same standard symbol, or order units of the same type, i.e. infantry, or cavalry.
When the number of units to be ordered is not a fixed number, but instead the Command card states "For each Command card you have, including this one", the number of units and leaders a player may order is equal to the number of Command cards in the player's possession (including the Command card currently being played).
If a player is ever in a situation where no unit can be ordered by the Command card just played, disregard phases 2 through 4 of the game turn and go directly to the draw phase.
Phase 2 - Order Units and Leaders
After playing a Command card, announce which corresponding units or leaders will receive orders. Only those units or leaders that are issued an order may move, battle, or take a special action during this turn. Only one order may be given to each unit or leader during the course of a single game turn.
When a unit or leader is on a hex that is vertically split between the map boards, it may be ordered from either section.
If a Command card issues more orders in a given section of the battlefield than the number of units or leaders in that section, those additional orders are lost.
Figures grouped together on the same hex form a unit. A unit's most important figure is its standard bearer, which proudly carries the unit's banner into combat. A standard bearer is always the unit's last figure to be eliminated. Its elimination marks the defeat of the unit, and the gain of a corresponding victory banner for the opponent.
A leader figure, when alone in a hex, is still considered a unit and in general will follow the rules for unit of his type. An infantry leader (leader figure on foot) will follow the general rules for infantry units, while a cavalry leader (mounted leader figure) will follow the general rules for cavalry units.
A leader figure in the same hex as a friendly unit, is considered to be "attached" to the unit. The leader will behave like and is subject to the same rules and limitations as the unit he is accompanying. An infantry leader may only serve as a leader for an infantry unit, while a cavalry leader may lead an infantry or cavalry unit. The leader and the unit he is with are considered to be a single combined unit for game purposes even though the unit will have two standards, the leader's standard and the unit's standard.
- A leader and the unit he is leading can be ordered together as a single unit at the cost of a single order.
- A leader must remain with the unit he is leading unless ordered to split from the unit.
- A leader can be ordered to split from the unit he is leading at the cost of a single order. The unit is not ordered when a leader is given an order and splits from a unit.
- For the cost of two orders a leader can be ordered to split from the unit he is leading and the unit can also be ordered separately.
- When a leader is ordered and the leader moves and joins a unit, the unit the leader joins is not ordered.
- A leader may not move, join a unit, and move again with the unit he just joined.
Section Command cards and the Shogun card have a Samurai helmet symbol in the top left corner of the card to remind players that a leader, when with a unit, may be ordered separately and split from the unit he is with. If a Command card does not have a Samurai helmet symbol, a leader may not be ordered to split from the unit he is with.
Phase 3 - Movement
Movements are announced and made sequentially, one ordered unit or leader at a time, in the sequence of a player's choice. A player must complete one unit or leader movement before beginning another.
Unit Movement
- A unit may only move once per turn.
- A unit that is ordered does not have to move.
- Ordered units may move from one section of the battlefield into another.
- A unit may never move onto any of the half-hexes that border the side of the battlefield.
- A unit may only move off the battlefield's baseline half-hexes when explicitly allowed to by the scenario's battle notes.
- Two units may not occupy the same hex.
- When moving a unit, the unit may not move onto or through a hex occupied by friendly units or enemy units and leaders.
- A unit may not split off individual figures from a unit; they must stay together and always move as a group.
- A unit that is reduced through casualties may not combine with another unit.
- Some terrain features impact movement and may prevent a unit from moving its full distance or battling.
- An infantry unit may move onto a hex containing a friendly lone leader (infantry or cavalry leader), as long as the unit does not already have a leader. Upon moving onto the lone leader's hex, the infantry unit must stop and join the leader.
- A cavalry unit may move onto a hex containing a friendly lone cavalry leader, as long as the unit does not already have a leader. Upon moving onto the lone leader's hex, the cavalry unit must stop and join the leader.
- An ordered unit may not move and join a leader and move again if the leader is also ordered to move.
- Retreat movement rules vary slightly from ordered movement: see the Retreat rules section.
An ordered unit will move differently by default according to its rank as noted by the symbol of its standard and its status: infantry or cavalry.
Infantry Unit Movement
- An ordered infantry unit with a circle on its standard may move up to 2 hexes and battle.
- An ordered infantry unit with a triangle on its standard may move up to 1 hex and battle, or 2 hexes and not battle.
- An ordered infantry unit with a square on its standard may move up to 1 hex and battle.
Cavalry Unit Movement
An ordered cavalry unit with a square on its standard may move up to 2 hexes and battle.
Leader Movement
A leader, when in the same hex as a friendly unit, must move with the unit to the same hex when the unit is ordered, unless the leader is ordered to split from a unit he is with. A leader and the unit he is leading are ordered together as a single unit at the cost of a single order.
An ordered infantry leader, when not with a unit, may move up to 2 hexes on his own. An ordered cavalry leader, when not with a unit, may move up to 3 hexes on his own.
A leader, moving on his own, is subject to the same movement rules and terrain limitations as any other unit in the game, except as follows:
- A leader may only move once per turn.
- A leader may be ordered to split from a unit and move according to the leader's movement type statistic.
- A leader may move onto and through a hex occupied by another friendly unit, a friendly unit with a leader, or a friendly leader alone in a hex.
- An infantry leader may move onto a hex with a friendly infantry unit and stop in the hex and join the unit.
- A cavalry leader may move onto a hex with any friendly unit and stop in the hex and join the unit.
- An ordered leader may not move and join a unit and move again if the unit is also ordered to move.
- A leader may not stop in a hex with an enemy unit or a leader.
- Only one leader may occupy a hex.
- A leader may never move onto any of the half-hexes that border the side of the battlefield.
- A leader may move off of his army's baseline side of the battlefield to save his skin. Doing so prevents his standard from falling into the enemy's clutches, but removes the leader from the battle for the rest of the scenario and he may not return on a later turn.
Moving Leaders Off the Battlefield
As part of his normal movement, a leader not with a unit may move off his side of the battlefield provided he has enough movement. The move off of his side of the board from a hex adjacent to the board side is considered one hex movement. The half-hexes that border the baseline of the battlefield are not counted as full hexes.
A leader that moves off the battlefield does not give the opponent a victory banner, but a leader that retreats from the battlefield is out of the battle and may not return on a later turn.
Phase 4 - Battle
Battles are checked and resolved one ordered unit at a time, in the sequence of the player's choice. Announce and resolve one unit's battle entirely before beginning the next one.
- A unit that is ordered does not have to battle, even when adjacent to enemy units.
- A unit may normally battle only once per turn. In some situations, a unit may gain ground after a successful close combat and then make a bonus combat attack. This advance and bonus combat must be completed before beginning another unit's battle.
- A unit may not target and split its battle dice between several enemy units.
- The number of casualties a unit has suffered does not affect the number of battle dice the unit rolls in combat. A unit with a single figure retains the same combat strength as a unit at full strength.
- An ordered unit may only engage in one type of battle when ordered, even if it is capable of both ranged and close combat.
The combat sequence is purely at the owner's choice and he may freely switch between ranged combat and close combat from one unit to the next unit's combat.
In combat, the number of dice a unit normally rolls is determined by the unit's rank, as shown by the symbol on its standard:
- A unit with a circle on its standard rolls 2 dice.
- A unit with a triangle on its standard rolls 3 dice.
- A unit with a square on its standard rolls 4 dice.
Some units will be subject to combat restrictions caused by their movement prior to battle.
Ranged Combat (Fire)
Only units armed with missile weapons may engage in ranged combat. In this core game, units with a circle symbol on their standard all have missile weapons.
A unit with missile weapons battling an enemy unit more than 1 hex away is said to conduct ranged combat at that enemy unit, the "target unit".
- In ranged combat, the target unit must be within both range and line of sight of the firing unit.
- Ranged combat may not be used against an adjacent enemy unit.
- A unit with ranged weapons adjacent to an enemy unit may not target and fire on another, more distant, enemy unit. If it chooses to battle in this case, the unit must close combat an adjacent enemy unit.
- A target unit may not battle back after a ranged combat attack.
Ranged Combat Procedure
- Announce Firing Unit
- Check Range
- Check Line of Sight
- Determine terrain battle dice reduction
- Determine Combat and Dragon Card dice adjustments
- Resolve Battle
- Score Hits
- Apply Retreats
1. Announce Firing Unit: Announce which ordered unit is going to fire and its target enemy unit. State the base number of battle dice the ordered unit is entitled to in ranged combat, per the unit's rank.
2. Check Range: Verify that your target is within range. The range is the distance between the firing unit and the enemy target unit, measured in hexes. When counting the range in hexes, include the target unit's hex, but not the firing unit's hex.
- An Ashigaru infantry bow unit has a range of 3 hexes: (adjacent, no fire dice) (two hexes to target, 2 dice) (three hexes to target, 2 dice). When an Ashigaru infantry bow unit moves and engages in ranged combat, the number of battle dice rolled is reduced to one die.
- An Ashigaru infantry arquebus unit has a range of 4 hexes: (adjacent, no fire dice) (two hexes to target, 2 dice) (three hexes to target, 2 dice) (four hexes to target, 1 die). When an Ashigaru infantry arquebus unit moves, it may not engage in ranged combat.
3. Check Line of Sight: Verify that your target is within line of sight. A unit must be able to "see" the enemy unit it wants to fire at. This is known as having "line of sight."
Imagine a line drawn from the center of the hex containing the firing unit to the center of the hex containing the target unit. This line of sight is blocked only if a hex (or part of a hex) between the battling unit and the target hex contains an obstruction. Obstructions include a unit or leader (regardless if friend or foe), some terrain features, and the half-hexes that border the side and baseline of the battlefield. The terrain in the target unit's hex does not block line of sight.
If the imaginary line runs along the edge of one or more hexes that contain obstructions, line of sight is not blocked, unless the obstructions are on both sides of the line.
4. Determine terrain battle dice reduction: The terrain in which the target unit is on, and in some instances, the attacking unit battles from, may impact (usually reduce) the number of battle dice rolled in combat. Adjust the number of battle dice rolled for terrain: see the Terrain rules section for terrain effects.
5. Determine Combat and Dragon Card dice adjustments: After terrain effects are applied, adjust the number of battle dice, based on any unit special abilities, Command card modifier, and Dragon card modifier.
6. Resolve Battle: Roll the adjusted number of battle dice and resolve the resulting dice roll.
7. Score Hits: The unit firing scores one hit for each dice symbol rolled that matches the targeted unit standard symbol.
- A circle will score one hit on a unit with a circle symbol on its standard.
- A triangle will score one hit on a unit with a triangle symbol on its standard.
- A square will score one hit on a unit with a square symbol on its standard.
- A arquebus unit will score one hit in ranged combat for each sword symbol rolled.
- A bow unit will not score a hit when a sword symbol is rolled in ranged combat.
Effect of Range Combat Hits
For each hit scored, one figure is removed from the target unit. When the last enemy figure with the unit standard is eliminated, place the figure with its standard on your Samurai Victory Record card. If more hits are rolled than the number of figures in the enemy unit, these additional hits have no effect. For scoring a hit on a leader: see the Leader Casualty Check rules section.
A flag rolled in ranged combat does not cause a hit, but may cause the unit to retreat: see the Retreat rules section.
A bow unit, in ranged combat, will collect one honor & fortune token for each honor & fortune symbol rolled. A arquebus unit will not collect an honor & fortune token when an honor & fortune symbol is rolled in ranged combat.
8. Apply Retreats
After all hits have been resolved, casualties removed and leader casualty checks made, retreats are resolved: see the Retreat rules section.
Close Combat
A unit, battling against an enemy unit in an adjacent hex, is said to be in close combat with the enemy unit. A unit adjacent to an enemy unit must close combat the adjacent enemy unit if it chooses to battle, it cannot use ranged combat against the adjacent enemy unit or another enemy unit within its range.
Close Combat Procedure
- Announce Close Combat
- Determine Terrain battle dice reduction
- Determine Leader Inspired, Combat Card, and Dragon Card dice adjustments
- Attacker Resolve Battle
- Attacker Score Hits
- Apply Retreats
- Possible Gain Ground and bonus Close Combat
- Battle Back. The defender may battle back in some situations. If battle back occurs, the defender will battle and apply hits and resolve retreats on the original attacking unit.
1. Announce Close Combat: Announce which ordered unit is going to attack in close combat and the enemy unit it is attacking. A unit must be adjacent to an enemy unit to engage in close combat.
State the base number of battle dice the ordered unit is entitled to in close combat, per the unit's rank.
- An ordered infantry unit with a circle on its standard may stay in position or move one or two hexes and close combat an adjacent enemy unit with 2 battle dice.
- An ordered infantry unit with a triangle on its standard may stay in position or move one hex and close combat an adjacent enemy unit with 3 battle dice. If the unit moves two hexes, the unit may not battle.
- An ordered infantry unit with a square on its standard may stay in position or move one hex and close combat an adjacent enemy unit with 4 battle dice.
- An ordered cavalry unit with a square on its standard may stay in position or move one or two hexes and close combat an adjacent enemy unit with 4 battle dice.
Each close combat attack is declared and resolved one ordered unit at a time, in the sequence of the player's choice. Resolve one unit's close combat entirely (including any gaining ground, bonus close combat, and battle back) before beginning the next unit's combat.
Note: Regardless of the number of ordered units adjacent to an enemy unit, each ordered unit's close combat attack must be resolved separately.
2. Determine terrain battle dice reduction: The terrain in which the target unit is on and, in some instances, the attacking unit battles from, may impact (usually reduce) the number of battle dice rolled in combat. Adjust the number of battle dice rolled for terrain: see the Terrain rules section for terrain effects.
3. Determine Inspired Leader, Combat Card, and Dragon Card dice adjustments: After terrain effects are applied, adjust the number of battle dice, based on any unit special abilities, inspired Leader modifier, Command card modifier, and Dragon card modifier.
Leader Inspired Close Combat
A leader, when alone in a hex, may not battle. When a leader is attached to a unit, he will follow the combat rules of the unit he is accompanying, including retreats and special actions.
Although a leader may not battle, a leader may still impact a unit's close combat by inspiring a unit. A player may choose to spend one honor & fortune token to have a leader inspire a unit. A leader inspired unit will add one die to a unit's close combat dice roll.
An infantry leader (a leader on foot) must be in the same hex as the unit he is going to inspire. A cavalry leader (a mounted leader) can inspire a unit in his hex and may also inspire friendly units in adjacent hexes.
- A maximum of one honor & fortune may be spent on a unit during a close combat, therefore a maximum of only one die may be gained.
- A unit may be inspired when it is attacking and also when the unit is battling back.
- The honor & fortune token spent is returned to the common pool.
- When a player's unit was inspired and rolls the one additional dice in its close combat, the first honor & fortune symbol rolled during the combat will not gain the player an honor & fortune token. The honor & fortune symbol roll is ignored and no honor & fortune token is collected for this honor & fortune symbol.
4. Attacker Resolve Battle: Roll the adjusted number of battle dice and resolve the resulting dice roll.
5. Attacker Score Hits: In close combat, the unit attacking scores one hit for each dice symbol rolled that matches the targeted unit standard symbol.
- A circle will score one hit on a unit with a circle symbol on its standard.
- A triangle will score one hit on a unit with a triangle symbol on its standard.
- A square will score one hit on a unit with a square symbol on its standard.
A sword rolled will normally score one hit in close combat, no matter what the target's standard symbol with the following exceptions:
- Because of its superior stature, a cavalry unit will ignore one sword rolled against it when attacked in close combat by an infantry unit.
- Because of superior rank, a unit with a square symbol on its standard will ignore one sword rolled against it when attacked in close combat by a unit with a triangle symbol on its standard.
- Because of superior rank, a unit with a square symbol on its standard will ignore two swords rolled against it when attacked in close combat by a unit with a circle symbol on its standard.
- Because of superior rank, a unit with a triangle symbol on its standard will ignore one sword rolled against it when attacked in close combat by a unit with a circle symbol on its standard.
Note: Superior rank only applies to close combat, not ranged combat.
Effect of Close Combat Hits
For each hit scored, one figure is removed from the target unit. When the last enemy figure with the unit standard is eliminated, place the figure with its standard on your Samurai Victory Record card. If more hits are rolled than the number of figures in the enemy unit, these additional hits have no effect. For scoring a hit on a leader: see the Leader Casualty Check rules section.
A flag rolled in close combat does not cause a hit, but may cause the unit to retreat: see the Retreat rules section.
For each honor & fortune symbol rolled in close combat collect one honor & fortune token. However, when a player's unit was inspired and rolls the one additional die in its close combat, the first honor & fortune symbol rolled during the combat will not gain the player an honor & fortune token. The honor & fortune symbol roll is ignored and no honor & fortune token is collected for this honor & fortune symbol.
6. Apply Retreats:
After all hits have been resolved, casualties removed and leader casualty checks made, retreats are resolved: see the Retreat rules section.
7. Possible Gain Ground and Bonus Close Combat: see Special Action rules section.
8. Battle Back: In close combat, the defending enemy unit may battle back against the attacking unit if one or more of the defending unit's figures survived the close combat attack and the defending unit did not retreat from the hex it was in.
Battle Back Procedure will follow the same rules the attacker close combat:
- Announce Battle Back Close Combat
- Determine Terrain battle dice reduction
- Determine Inspired Leader and Dragon Card dice adjustments
- Defender Resolve Battle Back
- Apply Hits
- Apply Retreats
- A defending unit may still battle back when it is unable to fulfill a required retreat because its retreat path is blocked, as long as it still has one or more figures remaining on the battlefield after taking losses for not being able to complete its retreat movement: see the Retreat rules section.
- A defending unit may not battle back when it is forced to retreat out of its original hex, even if the retreat move leaves the retreating defending unit in a hex that is still adjacent to the attacking unit.
- No further battle back is possible after the defending unit's battle back. The close combat will stop immediately after the non-active player unit's battle back.
- A unit battling back may not gain ground or a bonus close combat attack.
- The target of a ranged attack is never eligible to battle back. Only units engaged in a close combat may battle back.
Retreats
After all hits have been resolved, casualties removed and leader casualty checks made, retreats are resolved. Each retreat flag rolled against a unit will require the unit to retreat one hex back toward its own side of the battlefield. Two flags will push the unit back two hexes, etc.
The player controlling the unit that is retreating decides which hex the unit retreats onto, using the following rules:
- A unit must always retreat toward its controlling player's side of the battlefield regardless of what direction the attack came from. A unit may never retreat sideways. There are usually two hexes of choice when retreating to a player's side of the battlefield, except near the side of the battlefield. The retreating player may choose either of these two hexes, but must choose one that is not blocked, occupied, or impassable.
- A unit may never retreat onto any half-hexes that border the side of the battlefield.
- A unit may not retreat onto, or through, a hex already containing another unit regardless if friend or foe.
- Terrain has no effect on retreat movement, therefore a retreating unit may retreat through, for example, a forest terrain or fordable stream without stopping. However, impassable terrain may not be retreated onto or through during a retreat move.
- A friendly infantry unit may retreat onto a hex containing a lone leader (infantry or cavalry leader), as long as the unit does not already have a leader. Upon moving onto the lone leader's hex, the infantry unit must stop and join the leader, even if the unit has not fulfilled its entire retreat movement. The unit will ignore any additional retreat movement.
- A friendly cavalry unit may retreat onto a hex containing a lone cavalry leader, as long as the unit does not already have a leader. Upon moving onto the lone leader's hex, the cavalry unit must stop and join the leader, even if the unit has not fulfilled its entire retreat movement. The unit will ignore any additional retreat movement.
- When a unit cannot retreat because the unit's retreat path is occupied by other units or impassable terrain, one hit is scored on the unit for each retreat hex of movement that cannot be completed.
- When a unit cannot retreat because it is at its army baseline, one hit is scored on the unit for each retreat hex of movement that cannot be completed. The half-hexes that border the baseline of the battlefield are not legal retreat hexes.
Leader Retreat
A leader with a unit that retreats must stay with the unit through the unit's entire retreat movement.
A leader, not with a unit, is subject to the same retreat rules and terrain limitations as other units with the following exceptions:
- A leader's retreat movement is 1, 2, or 3 hexes back towards his side of the battlefield. The controlling player determines the number of hexes the leader will move, and which path he will take as he retreats.
- A leader may retreat through a hex that contains a friendly unit, a friendly unit with a leader, or another friendly leader. A unit or leader is not affected when a leader retreats through its hex.
- A leader may not end his retreat movement in a hex that contains another friendly leader, impassable terrain, an enemy unit, or enemy leader.
- A retreating leader may not move through an enemy unit or enemy leader.
- An infantry leader may retreat onto a hex with a friendly infantry unit that does not have a leader and stop in the hex and join the unit.
- A cavalry leader may retreat onto a hex with any friendly unit (infantry or cavalry) that does not have a leader and stop in the hex and join the unit.
- A leader may retreat off of his army's baseline side of the battlefield to save his skin. Doing so prevents his standard from falling into the enemy's clutches, but removes the leader from the battle for the rest of the scenario.
Leader Retreat from the Battlefield
As part of his normal retreat, a leader not with a unit may retreat off his side of the battlefield provided he has enough retreat movement. The retreat move off of his side of the board from a hex adjacent to the board side is considered one hex of retreat movement. The half-hexes that border the baseline of the battlefield are not counted as full hexes.
A leader that retreats off the battlefield does not give the opponent a victory banner, but a leader that retreats from the battlefield is out of the battle and may not return on a later turn.
Leader Seppuku
Instead of retreating, the controlling player may choose to have a lone leader commit Seppuku (honorable suicide), even if that leader has a clear path for retreat.
When a leader commits Seppuku, the owning player removes the leader figure from the battlefield and gains 5 honor & fortune tokens, but the player must lose one Command card from his hand of cards selected at random by his opponent. The selected card is discarded. A leader that commits Seppuku will not give the opponent a victory banner, but the opposition player does draw one Dragon card and adds it to his Dragon cards.
Leader Casualty Check
When a leader is with a unit and the unit loses one or more figures in combat (ranged or close combat) there is a chance that the leader may also be hit and a leader casualty check must be rolled against the leader.
If a unit with a leader loses one or more figures because it fails to complete a retreat movement, or due to a Dragon Card, or during a lack of honor roll does not make a leader casualty check. A leader casualty check is only made when a unit loses one or more figures in combat.
The opposing player will always roll for your leader casualty checks. When a hit is scored on the enemy leader on the casualty check, the leader figure with his standard is placed on your Samurai Victory Record card.
Ranged Combat Casualty Check Procedure
During a ranged combat attack, when a leader is with a unit and the unit loses one or more figures, but the unit is not eliminated, the leader casualty check is made with 2 battle dice. To hit and eliminate the leader, two sword symbols must be rolled. If two sword symbols are not rolled, the leader will survive the casualty check and remains with the unit.
When a leader is with a unit and all the figures in the unit are eliminated during a ranged combat attack leaving the leader alone in the hex, the leader casualty check is made with 1 battle die. To hit the leader, a sword symbol must be rolled. If the leader is not hit, the leader must retreat 1, 2, or 3 hexes, or commit Seppuku. Flags rolled against a lone leader have no effect, a leader, if not eliminated on the casualty check, must always retreat 1, 2, or 3 hexes or commit Seppuku.
Close Combat Casualty Check Procedure
During a close combat attack, when a leader is with a unit and the unit loses one or more figures and the unit is not eliminated, the leader casualty check is made with 1 battle die. To hit and eliminate the leader, a sword symbol must be rolled. If a sword symbol is not rolled, the leader will survive the casualty check and remains with the unit.
When a leader is with a unit and all the figures in the unit are eliminated during a close combat attack leaving the leader alone in the hex, the leader casualty check is made with 1 battle die. To hit the leader, a sword symbol must be rolled. If the leader is not hit, the leader must retreat 1, 2, or 3 hexes, or commit Seppuku. Flags rolled against a lone leader have no effect, a leader, if not eliminated on the casualty check, must always retreat 1, 2, or 3 hexes or commit Seppuku.
- If a lone leader cannot retreat, the leader must commit Seppuku.
- When a lone leader is at the friendly map edge hex, he must retreat off the battlefield or commit Seppuku.
- In a close combat after the leader retreats or the leader is eliminated, the unit that was attacking the leader may gain ground onto the vacated hex.
Leader Alone in a Hex
When an enemy leader is alone in a hex, not with a unit when being attacked, the attacking unit determines the number of battle dice to roll as normal against the lone leader. One or more sword symbols rolled will score a hit and eliminate the leader. Place the leader figure with his standard on your Samurai Victory Record card.
- A range weapon bow unit cannot hit a lone leader in ranged combat, because it does not score a hit when it rolls a sword symbol in ranged combat.
- A arquebus unit can hit a lone leader in ranged combat, because it does score a hit when it rolls a sword symbol in ranged combat.
Bolster Morale
Some situations will allow a unit to disregard one or more flags rolled against it. If more than one situation applies, a maximum of two flags may be ignored.
A unit may disregard one or more flags each time it is attacked. Disregarding a flag result when eligible is purely a matter of choice. The owning player may decide to accept a flag result and if two flag results can be ignored, the owning player can choose to ignore one and accept one. All flags rolled against a unit, above and beyond those that can be ignored, automatically trigger a retreat, and must be taken.
A unit may disregard a flag:
- When supported by two friendly units. Support units may be in any two hexes that are adjacent to the unit. A unit must determine if it is in support for each attack made against a unit.
- Support is reciprocal, units in three adjacent hexes support each other.
- A leader figure when alone in a hex, may act as an adjacent hex of support and will provide support as a unit.
- A leader figure, with a unit will allow that unit to ignore one flag. Note, a leader casualty check takes place prior to determining if a unit must retreat. Therefore, when a leader is eliminated, the unit may not ignore the flag because a leader is no longer with the unit.
- A unit with a square symbol on its standard, may ignore one flag.
- The effect of certain Dragon cards may also give a unit the ability to ignore one or more flags.
Retreat & Loss of Honor
Anytime a unit or leader retreats, the retreat will cause the controlling player to lose honor & fortune tokens.
- A unit, with a circle on its standard must lose 1 honor & fortune token for each hex it retreats.
- A unit, with a triangle on its standard must lose 1 honor & fortune token for each hex it retreats.
- A unit, with a square on its standard must lose 2 honor & fortune tokens for each hex it retreats.
A unit, with a leader that retreats will lose 1 additional honor & fortune token for each hex the unit together with the leader retreats. For example, a retreating unit with a triangle on its standard with a leader will lose 2 honor & fortune tokens for each hex the unit with a leader retreats (1 token for the unit and 1 token for the leader being with the unit).
A leader that is alone in a hex when he retreats must lose 3 honor & fortune tokens. After losing 3 honor & fortune tokens, the leader may retreat 1, 2 or 3 hexes. Note a leader does not lose honor & fortune for each hex he retreats. A leader that is alone in a hex, instead of retreating may commit Seppuku.
Lack of Honor Roll
When a player does not have enough honor & fortune tokens in his reserve to cover the loss of honor due to a retreat or caused by the action of a Dragon card, the player must lose what tokens he has in his reserve and also suffers the following consequences to his army.
The opposition player will roll a "Lack of Honor" roll of 4 dice against the player's army that was not able to pay.
Lack of Honor when Unit Retreats
When a player cannot pay, because a unit is retreating, after the unit has completed its retreat movement, each symbol rolled on the lack of honor roll that matches the symbol on the retreating unit's standard will eliminate one figure in the unit that retreated. Each standard symbol rolled that does not match the retreating unit will cause one figure loss to the nearest unit in the army with a matching symbol on its standard. The controlling player will choose which unit will lose figures when two or more units are the same distance in hexes from where the retreating unit ended its retreat movement. A sword, flag or an honor & fortune symbol rolled during a lack of honor roll will not have any effect.
Lack of Honor when Leader Retreats
When a player cannot pay because of a lone leader is retreating, after the leader has completed his retreat movement, one or more sword symbols rolled on the lack of honor roll will eliminate the leader figure. Each unit standard symbol rolled will also cause one figure loss to the nearest unit in the army with a matching symbol on its standard. The controlling player will choose which unit will lose figures when two or more units are the same distance in hexes from where the retreating leader ended its retreat.
Lack of Honor from Dragon Card Play
When a player does not have honor tokens to cover a honor loss from a Dragon card played against him, each symbol rolled on the lack of honor roll will cause one figure loss to a unit in his army with a matching symbol on its standard of the controlling player's choice.
Special Actions
Gaining Ground
When an ordered unit attacks in close combat and eliminates or forces the defending enemy unit to retreat from the hex it occupies, it has conducted a successful close combat. The victorious attacking unit may advance (move) onto that vacated hex. This is referred to as a gaining ground.
Gaining ground after a successful close combat is not mandatory. However, if the unit does not gain ground, the victorious attacking unit forfeits the possible opportunity to make a bonus close combat, even if adjacent to another enemy unit.
The following situations do not allow a unit to gain ground:
- A unit that moves onto a terrain hex that prevents further movement on the turn will prevent a unit from gaining ground.
- A unit battling back is not eligible to gain ground.
- A unit ordered by a "First Strike" card is not eligible to gain ground.
Bonus Close Combat
After a successful close combat, a cavalry unit or an infantry unit with a leader that gains ground is eligible to battle in close combat a second time. This bonus close combat is optional and gaining ground does not require an eligible unit to attack in close combat again.
A unit that qualifies for a bonus close combat attack, after gaining ground, may choose to battle any enemy unit in any adjacent hex. It does not have to battle the enemy unit that just retreated from the hex. When a unit's bonus close combat is successful, it may gain ground onto the vacated hex, but may not battle again this turn.
Some terrain restrictions will prevent a unit from taking a bonus close combat.
Phase 5 - End of Turn
After all units' movements and combat have been resolved, the active player draws a new Command card and has the choice of drawing one Dragon card or gaining two honor & fortune tokens.
If the active player did not play a Dragon card during his turn, one Dragon card may be discarded and one honor & fortune token is collected. A maximum of one Dragon card may be turned in at the end of a player's game turn.
If the Command card deck or Dragon card deck runs out of cards, shuffle the discarded cards to form a new draw deck.
Once the active player's Command card is drawn and Dragon card or honor & fortune is replenished, the player's turn is over.
Note: A player who plays a Dragon card during the opponent's turn does not immediately replenish his Dragon card or the honor & fortune tokens. Replenishment of Dragon cards or honor & fortune token reserve is only done at the end of an active player's turn.
Honor & Fortune
An army commander, during the Age of Warring States, had to bring some measure of order to the chaos that constantly hung over a fighting army. For the fighting force that maintained some measure of control and discipline was likely to be the army that won the day. Honor & fortune in a roundabout way serves to measure an army's discipline, honor, and the fortunes of war.
Players will be challenged to maintain a balance between exploiting the use of these tokens to impact the army's fortunes when using Dragon cards and a leader's inspired close combat actions, while at the same time retaining enough honor to prevent chaos in the ranks, when morale fails and units retreat.
Honor & fortune tokens are initially placed in a common honor & fortune pool, alongside the game board within easy access of all players. During the course of the game, the honor & fortune a player earns is placed in his honor & fortune reserve in his play area. The number of honor & fortune tokens a player holds is public information throughout the game.
Managing and Replenishing Honor & Fortune Reserves
Just as important as managing his hand of Command cards and Dragon cards, a player must carefully watch his honor & fortune token reserve, and make sure to keep adequate reserves if he is to launch his own Dragon card actions at the most opportune time and prevent army figure losses because of a lack of honor.
The following are some ways a player may gain honor & fortune:
- A number of honor & fortune tokens are taken at the game's start as indicated by the scenario's battle notes.
- At the end of the active player's game turn, the player opts to pick up two honor & fortune tokens instead of drawing a Dragon card.
- At the end of the active player's game turn, the player discards one of his Dragon cards and gains one honor & fortune token.
- Honor & fortune tokens are gained for each honor & fortune symbol rolled in a close combat battle.
- As a result of playing certain Dragon cards.
Rolling an honor & fortune symbol during other times during play, for example, a leader casualty check, lack of honor roll, etc. will not gain honor & fortune tokens for a player.
There is no limit to the number of honor & fortune tokens a player may have in his reserve. However, should the common honor & fortune tokens pool run out, no further honor & fortune tokens can be gained until the common pool is replenished. Actions that normally grant honor & fortune tokens grant you nothing instead.
End Game & Victory
Players alternate taking turns, until one player reaches the number of victory banners indicated by the scenario's victory conditions.
Players accumulate victory banners in a number of ways: eliminating enemy units and leaders is the most common way. Accomplishing scenario specific objectives like capturing certain terrain hexes, etc. Such victory conditions will be explicitly spelled out in the scenario's battle notes.
A game ends the very moment a player reaches his required number of victory banners, regardless of when this occurs during the game turn. This means that a game might even end on a successful battle back, with the victory of the active player's opponent.
During the game, if a player hand of Command cards is reduced to a single card due to leader personal challenges and/or leaders that commit Seppuku, the player must surrender.
Dragon Cards
Dragon cards and honor & fortune tokens are a player's most precious assets. Dragon cards in terms of game play are the gateway to legendary and mythical actions on the battlefield. There is no limit to the number of Dragon cards a player may hold.
Every Dragon card bears the following information:
- Title: The name of the Dragon card.
- Cost: The cost, in honor & fortune tokens, a player must pay from his honor & fortune reserve pool for the Dragon card to take effect. Honor & fortune tokens quite literally fuel the action and special powers of a Dragon card. Some Dragon cards do have a zero honor & fortune cost.
- Phase of Play: This text explains when in a game turn the Dragon card must be played.
- Target: Text detailing the Dragon card target, subject, beneficiary, or area of effect of the Dragon card action.
- Effect: A description of the Dragon card effect and the special rules governing it.
Players must observe a number of simple but critically important rules when bringing a Dragon card into play. When playing a dragon card, place it in front of you during the appropriate phase of play (possibly in reaction to one of your opponent's actions), and read it aloud. Spend the required number of honor & fortune tokens out of your honor & fortune reserve, temporarily placing those tokens on the Dragon card; at the end of the game turn, return these tokens into the common honor & fortune pool, and discard the Dragon card onto the discard pile next to the Dragon card deck.
To play a Dragon card, the player must be able to immediately pay its corresponding honor & fortune cost, out of the honor & fortune tokens already in his possession prior to the card's effect coming into play.
A Dragon card must always be played during its indicated phase of play. Some Dragon cards may be played out of turn, during the opponent's game turn, or in reaction to one of his actions or Dragon card play.
Dragon Cards Phase of Play
- Play alongside your command card - (the Dragon card is played at the same time you are playing your Command card - Phase 1. Play a Command Card.)
- Play in reaction to your opponent's command card - (the Dragon card is played at the same time your opponent is playing a Command card - Phase 1 of opponent's turn. Play a Command Card.)
- Play during movement - (the Dragon card is played prior to moving one of your units.)
- Play in reaction to your opponent's movement - (the Dragon card is played during your opponent's turn, when an opponent's unit is moving or just remains in the same hex when ordered.)
- Play in reaction to opponent's unit taking ground - (the Dragon card is played during your opponent's turn, when an opponent's unit is taking ground.)
- Play before your combat roll - (the Dragon card is played after declaring a ranged combat, close combat or battle back, but prior to the dice roll.)
- Play before your close combat roll - (the Dragon card is played after declaring a close combat or battle back, but prior to the dice roll.)
- Play before your opponent's close combat roll - (the Dragon card is played during your opponent's turn after the opponent declares a close combat or during your turn after the opponent declares a battle back, but prior to the dice roll.)
- Play after your close combat roll - (the Dragon card is played after your close combat or battle back dice are rolled.)
- Play after your opponent's close combat roll - (the Dragon card is played during your opponent's turn after an opponent's unit's close combat dice roll, or after the opponent's unit has battled back.)
- Play after opponent's ranged combat roll against one unit - (the Dragon card is played during your opponent's turn, after an opponent's unit has completed a ranged combat against one unit.)
- Play after successful close combat - (the Dragon card is played during your turn, after one of your unit's close combat has either eliminated or caused the enemy unit to retreat from its hex.)
- Play before your battling back close combat roll - (the Dragon card is played during your opponent's turn after declaring a battle back close combat prior to the dice roll.)
A player may only play a maximum of one Dragon card during your turn. A player may only play a maximum of one Dragon card during your opponent's game turn. As a result, during the course of any single game turn, there can only be a maximum of two Dragon cards coming into play, one from each player. In case of contradiction between the effects of two Dragon cards played in succession, the second card trumps the effect of the first one.
In case of conflict between the basic rules in this book and a Dragon card, the rules of the card take precedence, however, terrain movement and battle restrictions will still apply.
Command Cards
Section Cards (39 cards)
Section cards are used to order units and/or leaders in a specific section of the battlefield to move and/or battle. These cards indicate in which section of the battlefield you may order units or leaders and how many units or leaders you may order.
All Section Command cards have a Samurai helmet symbol on the card, to remind players that any leader in the section with a unit may be ordered to detach and move separately (for the cost of one order) when the card is played.
- Order One Unit Left: Issue an order to 1 unit or leader in the left section. When drawing a new Command card, draw two, choose one and discard the other. (2 cards)
- Order One Unit Center: Issue an order to 1 unit or leader in the center section. When drawing a new Command card, draw two, choose one and discard the other. (2 cards)
- Order One Unit Right: Issue an order to 1 unit or leader in the right section. When drawing a new Command card, draw two, choose one and discard the other. (2 cards)
- Order Two Units Left: Issue an order to 2 units and/or leaders in the left section. (3 cards)
- Order Two Units Center: Issue an order to 2 units and/or leaders in the center section. (4 cards)
- Order Two Units Right: Issue an order to 2 units and/or leaders in the right section. (3 cards)
- Order Three Units Left: Issue an order to 3 units and/or leaders in the left section. (3 cards)
- Order Three Units Center: Issue an order to 3 units and/or leaders in the center section. (3 cards)
- Order Three Units Right: Issue an order to 3 units and/or leaders in the right section. (3 cards)
- Advance Left: For each command card you have, including this one, issue an order to 1 unit or leader in the left section. (2 cards)
- Advance Center: For each command card you have, including this one, issue an order to 1 unit or leader in the center section. (2 cards)
Tactic Cards (21 cards)
Tactic cards allow ordered units to move and/or battle in ways not normally allowed in the basic rules. Terrain movement and battle restrictions still apply when a Tactic card action contradicts the basic rules.
- Order Units with Circle Standard: For each Command card you have, including this one, issue an order to 1 unit with a circle symbol on its standard. If you do not have any units with a circle standard, issue an order to 1 unit of your choice. (2 cards)
- Order Units with Triangle Standard: For each Command card you have, including this one, issue an order to 1 unit with a triangle symbol on its standard. If you do not have any units with a triangle standard, issue an order to 1 unit of your choice. (2 cards)
- Order Units with Square Standard: For each Command card you have, including this one, issue an order to 1 unit with a square symbol on its standard. If you do not have any units with a square standard, issue an order to 1 unit of your choice. (2 cards)
- Cavalry Charge: Issue an order to 4 or less cavalry units. Ordered units battle in close combat with 1 additional die for the entire turn. Cavalry units with a square symbol on its standard may move 3 hexes and battle. Ordered units may not do ranged combat. If you do not have any cavalry units, issue an order to 1 unit of your choice. (2 cards) Note: A cavalry leader alone in a hex may be issued an order. A leader attached to an ordered cavalry unit may not be ordered to split from the cavalry unit.
- Counter Attack: When you play this card, it becomes a copy of the Command card your opponent played on his last turn. Follow the instructions on that card as though you were actually playing it, except reverse any section references made on the card (left section becomes right section and vice versa). (2 cards)
- First Strike: Play this card after your opponent declares a close combat, but before he rolls his dice. Your defending unit will battle first. If the opponent's unit is not eliminated or retreats, it may then battle as originally ordered. At the end of the turn, you draw a replacement Command card first. (2 cards)
- Hold and Shoot: Issue an order to 4 or less ranged weapon units. Ordered units may fire twice. Ordered units may not be in an adjacent hex to an enemy unit or leader. Units may not move before or after combat. If you do not have any ranged weapon units, order 1 unit of your choice. (2 cards)
Battlefield Terrain
A detailed description of each terrain type follows, including terrain movement effects, combat restrictions and whether the terrain will block line of sight. This list covers both the terrain printed on the map board and the terrain hex pieces that are placed on top of the board at the beginning of the battle.
Each terrain hex description includes the following statistics:
- Movement: Any effect on moving into a hex of this terrain type is detailed here. Retreat moves are not subject to stated terrain movement restrictions.
- Combat: Any effect on a combat involving a unit in this type of terrain feature is detailed here. Terrain battle limitations impose a cap on the default number of battle dice a unit attacking into or from this terrain type will roll. Usually, the rougher the terrain, the lower the limit. For example, units with a square symbol on their standard, weighed down by their superior armament, usually suffer the worst in difficult terrain, while units with a circle symbol on their standard banner fare comparatively better. This limit on the number of dice rolled, when present, only applies to the base number of dice rolled by that particular unit type. Dice bonuses gained from Command cards, Dragon cards, or leader inspired are not subject to this limit and will still add to the combat dice, so that the actual number of dice rolled by a unit in difficult terrain may still exceed the maximum for that terrain type.
- Line of Sight: Whether or not the terrain blocks line of sight is detailed here.
Countryside Terrain
Countryside Terrain is the default terrain type of all the hexes on the board. This open ground terrain type has no movement, battle, or line of sight restrictions.
Forest Terrain
Movement A unit or leader that enters a forest terrain hex must stop and may move no further on that turn.
Combat
- A unit that moves onto a forest terrain hex, may still battle that turn.
- A unit on a forest terrain hex battles with a maximum of 2 dice.
- A unit attacking an enemy unit on a forest terrain hex battles with a maximum of 2 dice.
- A unit attacking an enemy unit on a forest terrain hex with ranged combat battles with a maximum of 1 die.
Line of Sight A forest terrain hex blocks line of sight.
Hill
Movement No movement restrictions.
Combat
- A unit on a hill terrain hex battles with a maximum of 3 dice.
- A unit not on a hill terrain hex attacking an enemy unit on a hill terrain hex battles with a maximum of 2 dice.
Line of Sight A hill terrain hex blocks line of sight, except from adjacent hill terrain of the same height. Plastic Hill - Hill terrain tiles may be placed on top of the plastic hills to give a battlefield additional dimension.
River
Movement Rivers are impassable terrain except at fords and bridges.
Combat No battle.
Line of Sight A river hex does not block line of sight.
Ford & Fordable Stream
Movement A unit or leader entering a fordable waterway must stop. Gaining ground remains possible.
Combat
- A unit that moves onto a ford terrain hex may still battle that turn.
- A unit on a ford hex battles with a maximum of 2 dice.
- A unit on a ford hex battles with a maximum of 1 die in ranged combat.
- A unit attacking an enemy unit on a ford hex battles with a maximum of 2 dice.
Line of Sight A ford hex does not block line of sight.
Fordable Stream - When the battle notes state an entire stream is fordable, apply rules for fords to all hexes that form the stream. In addition, any ford hexes that are a part of the fordable steam are considered very shallow and do not have any battle or movement restrictions.
Bridge
Movement No movement restrictions.
Combat No battle restrictions. A unit on a bridge hex may ignore 1 flag.
Line of Sight A bridge hex does not block line of sight.
Building
Movement A unit or leader that enters a building hex must stop and may move no further on that turn.
Combat
- A unit entering a building hex may not battle that turn.
- An infantry unit on a building hex battles in close combat with a maximum of 2 dice.
- An infantry unit on a building hex battles with a maximum of 1 die in ranged combat.
- A cavalry unit on a building hex battles with a maximum of 1 die.
- A unit attacking an enemy unit on a building hex battles in close combat with a maximum of 2 dice.
- A unit attacking an enemy unit on a building hex battles in ranged combat with a maximum of 1 die.
- A leader may not impact a unit's close combat by inspiring the unit when the unit is on a building hex.
- A unit on a building hex may ignore 1 flag.
Line of Sight A building hex blocks line of sight.
Field Terrain
Movement A unit or leader that enters a field terrain hex must stop and may move no further on that turn.
Combat
- A unit that moves onto a field terrain hex may still battle that turn.
- A cavalry unit on a field terrain hex battles with a maximum of 2 dice.
- A cavalry unit attacking an enemy unit on a field terrain hex battles with a maximum of 2 dice.
Line of Sight A field terrain hex does not block line of sight.
Ravine
Movement A unit or leader that enters a ravine hex must stop and may move no further on that turn.
Combat
- A unit entering a ravine hex may not battle that turn.
- A unit on a ravine hex battles in close combat with a maximum of 1 die.
- An unit on a ravine hex battles with a maximum of 1 die in ranged combat.
- An infantry unit attacking an enemy unit on a ravine hex battles in close combat with a maximum of 2 dice.
- A cavalry unit attacking an enemy unit on a ravine hex battles in close combat with a maximum of 1 die.
- A unit attacking an enemy unit on a ravine hex battles in ranged combat with a maximum of 1 die.
Line of Sight A ravine hex does not block line of sight. Note: a unit on a ravine hex would block line of sight.
Command Tent
Movement A command tent is normally only placed onto the battlefield along with the army Commander's unit. Because it is always occupied by the Commander's unit, the command tent is considered impassable.
Combat No combat restrictions.
Line of Sight A command tent hex blocks line of sight.
Special - When an enemy's command tent hex is not occupied, the camp hex is removed from the battlefield and placed on your Samurai Victory Record card. A command tent is worth three victory banners. When an opponent's command tent is captured, one opponent's Command card is also selected at random and is discarded.
Scenario Legend
- AY — Ashigaru-yari: infantry unit, rank 4 (triangle standard)
- AB — Ashigaru-archers: infantry unit, rank 4 (circle standard)
- AA — Ashigaru with arquebus: infantry unit, rank 4 (circle standard)
- SN — Samurai-naginata: infantry unit, rank 4 (square standard)
- MSY — Mounted samurai: cavalry unit, rank 4 (square standard)
- Cavalry leader, Infantry leader, Commander's unit — leader and command-tent unit icons used on scenario maps.
Samurai Battles is published by Zvezda (product code 6413/A).
Art of Tactic Rules
Welcome to Samurai Battles and the Art of Tactic System! These are all of the rules that you will need to create epic battles on the fields of feudal Japan, using the innovative and unique Art of Tactic System.
Battlefield Basics
Here are a few basic features of the Art of Tactic that you should understand before you begin your first battle:
- Simultaneous Play: During each game phase, all players act simultaneously. You give orders to your troops at the same time, and then resolve your orders simultaneously. For ease of play, some actions may be done in turns—such as rolling dice when units are engaged in combat—but the results of those actions occur simultaneously.
- Units and Unit Cards: Your army is made up of a number of units. Each unit is an independent group of warriors that you control. Every unit has a matching Unit Card, where all of the unit's abilities and available orders are listed. You cannot give an order to a unit if that order is not on the matching Unit Card! For example, a unit of Samurai swordsmen does not show the "Fire Ranged Weapons" order: You cannot order this unit to fire arrows at an enemy unit because they have no bows!
- 20-Sided Dice: This game uses special 20-sided dice, which may be different from other dice you are familiar with. These dice are used just like traditional 6-sided dice: roll the dice and read the number that lands on top to determine the result of your roll.
- Art of Tactic is based on realistic battlefield encounters. While it is impossible to consider every detail of a battle in a board game, you must keep in mind the same rules of engagement that real commanders must remember. This valuable tactical advice will help you lead your army to victory:
- Try to foresee the actions of your opponent.
- Bluff: try to mislead your opponent.
- Use reconnaissance to uncover your enemy's plans.
- Use the terrain to your advantage.
- Focus your efforts against your main targets and objectives.
- Spare your troops: don't expose them to enemy attack needlessly.
- Samurai Battles is an expandable game system. This starter set has everything you need to create many battles, but it's only the starting point. New sets of units can be purchased separately to expand your army with new and different types of units. Each set includes the Unit Card you need for the game. You can learn about new sets and game expansions on our website: www.samurai-battles.com.
Preparation for Play
Before you begin your first game, you will need to carefully separate the pieces from the frames and assemble the units.
When you are ready, choose a scenario to play. Each scenario has a map of the battleground. Set up the game board using the terrain tiles as shown on the map and place the units on the board.
The scenario you have chosen will explain the length of the game, and how you can earn Glory Points. The player who scores the most Glory Points wins the battle.
Basic Rules
Units and Unit Cards
Before we get into the details of how to play, let's take a look at the units you will command in the battle. Every unit is represented on the game board by a group of models set into a base so they are easy to move around. Each unit has a matching Unit Card that shows all of the unit's abilities as well as the orders you may assign to it.
Unit Flags
Every unit has a Unit Flag that shows the symbol for this unit type (Ashigaru, Samurai, Monks, etc.), the type of armament (naginatas, bows, arquebus, etc.), and experience level (experience level will be used in a future expansion release).
Each unit's flag and Unit Card must be marked with the same number, so it is always clear which card belongs to which unit on the game board.
Unit Characteristics
The front side of a Unit Card lists all of the unit's characteristics. In the Basic Game, you only use the abilities in the orange boxes.
Unit Type and Symbol
A unit can be one of many different types, and can be identified by the symbol on the Unit Card and matching Unit Flag:
Ashigaru with Yari — Ashigaru were the common soldiers of Japanese armies. Though not as well trained as Samurai, Ashigaru armed with yari (spears) were much more numerous—in fact, they formed the backbone of Japanese armies in the XVI and XVII Centuries.
Ashigaru with Arquebus — The Arquebus was introduced to Japan by Portuguese traders in the middle of the XVI Century. Easier to master than the bow, the arquebus soon became popular with Ashigaru soldiers.
Samurai with Naginata — Samurai were trained to use a plethora of melee weapons, and would often use a polearm called the naginata. This versatile weapon could be used in massed formations as well as in single combat.
Mounted Samurai — Medieval Japanese armies lacked good horses, and therefore also lacked true heavy cavalry. Nevertheless, Samurai cavalry compensated for the poor quality of their horses with superior skill.
Ashigaru Archers — The bow was traditionally regarded as a weapon of the Samurai. Eventually, however, Ashigaru began using them too. Through their superiority in numbers, Ashigaru archers could achieve adequate results.
General Staff — Japanese generals were Samurai from the noble families, and were as proficient in fighting as they were at commanding an army. Surrounded by his elite loyal bodyguards, the general could change the course of a battle.
Range Chart and Firepower Value
Only units armed with ranged weapons, such as mounted archers or arquebusiers have this ability.
A unit's Firepower Value is determined by the range of the attack. The chart on the Unit Card shows different Firepower Values for each range that unit can hit. If a space on the chart is marked with an "x", the unit may not attack an enemy at that range.
The Firepower Value tells you how likely the unit is to hit when attacking with its ranged weapons. You must roll the number shown or less on a die to score a hit when this unit makes a ranged attack. The Firepower Value is the same whether you are attacking infantry or cavalry (see Ranged Combat).
Example: This unit of archers can fire on an enemy target that is between 2 and 6 hexes away. If it attacks a unit 3 hexes away, the Firepower value is 4, but if the target is 5 hexes away, the Firepower is only 2.
Attack Values
A unit's Attack Values determine how likely the unit is to hit an enemy when it attacks. You must roll the number shown or less on a die to score a hit (see Melee Combat).
Example: This unit has an Attack Value Against Infantry of 4. When it attacks, any die roll of 1-4 is counted as a hit, while any result of 5-20 is a miss.
All units have 2 Attack Values:
Attack Value Against Infantry is used only when the unit attacks an enemy infantry unit.
Attack Value Against Cavalry is used only when the unit attacks an enemy cavalry unit.
Cavalry units show two numbers in each Attack Value box, such as "8x3". The first number is the unit's Attack Value. The second number is the number of dice you roll for each model in the unit when attacking.
Example: When this cavalry unit attacks an enemy infantry unit, it rolls 3 dice for each model in the unit, with a base Attack Value Against Infantry of 8, and Attack Value Against Cavalry of 6.
Defense Value
The quality of a unit's defensive equipment, as well as the level of training and combat experience, determines how well the unit can avoid losses during a combat. These abilities are combined into a single number called "Defense Value". A unit's Defense Value is the number of hits the unit can take without suffering any casualties. Each time a unit is hit, its current Defense Value is reduced by 1 point for each hit.
Some orders can increase or decrease a unit's Defense Value, as can some types of terrain. Always record the current Defense Value for each unit in the matching box of the Unit Card.
At the beginning of each turn, the Defense Value of all units return to their original, unmodified values.
The Order Chart
The back side of the Unit Card shows a chart which lists all of the orders that you may assign to that unit. You cannot issue any orders to a unit that are not listed on its Order Chart!
During the Planning Phase, place a mark in the right hand column for the order you wish to issue to each unit. If you issue Fire Ranged Weapons or Assault orders, write the number of the target enemy unit in this box.
Below the Order Chart is a series of hexes. When you issue a movement order to a unit, you must write down the hex numbers that the unit will move through that turn.
The Course of the Battle
The game is played over a series of turns. The number of turns played is determined by the scenario you chose before the game.
Each turn is divided into two phases:
- Planning Phase
- Execution Phase
The phases must be completed in order. Both players play simultaneously during each phase. A phase is complete when both players have finished all of their actions for that phase. You cannot begin the next phase until the current phase is complete.
The Planning Phase: Issuing Orders to Units
All players must secretly give orders to all of their units during this phase. Do not reveal your orders to your opponent at this time!
To issue an order, mark the Order Chart on the back of your Unit Card in the row that matches the order you want that unit to execute. Some orders also require you to write in additional information, such as the target of an attack. After you write the unit's orders, place the Unit Card on the table face up (so your opponent cannot see the orders you have given).
When all players have issued orders to all of their units, the Planning Phase ends.
If for any reason you do not issue an order to a unit that is not engaged in melee combat, that unit automatically executes the Rest order.
The Execution Phase: Carrying Out the Orders
The players now turn over all of their Unit Cards to reveal the orders that were issued. After this moment, no orders can be cancelled or changed!
All units now execute their orders, following the steps listed below. All units with the first order (Defensive Orders) execute their orders before any units with the second order (Ranged Combat Orders) execute theirs, and so on. Orders of the same type always occur at the same time. To simplify play, you may complete your orders by taking turns, but the effects of orders of the same type are always simultaneous.
Execution Phase Sequence
The Execution Phase is divided into 6 steps. Each step must be completed before the next step begins:
- Defensive Orders (All-Around Defense, Defend, Fire and Retreat)
- Ranged Combat Orders (Fire Ranged Weapons)
- Movement Orders (Assault, March, Move and Fire, Pursue, Run)
- Special Orders (Ambush, Join Up, Receive Supplies, Reconnaissance, Rest)
- Melee Combat
- Retreat Orders (Flee, Panic, Retreat)
Note: Flee and Panic are special orders that a unit may be forced to execute if it fails a Fortitude Test. These orders are not listed on the Unit Cards.
Unit Commanders
Commanders are special models that can be added to a unit to increase its abilities. Units with Commanders have a higher Fortitude, and roll additional dice when attacking. You may only assign 1 Commander to each unit.
Important: Your General Staff unit always counts as having a Commander, and has all the benefits listed below.
Units Without a Commander
Normally, a unit will not have a Commander. A unit without a Commander is limited to certain types of orders. You can only give these orders to a unit without a Commander:
- Defend
- All-Around Defense
- Rest
- March
Units without Commanders can engage enemy units by using the March order, and will defend themselves normally if attacked. But, these units cannot gain the benefits of the Assault order and cannot make any ranged attacks.
Important: These restrictions do not apply to a unit if you have a Commander in any adjacent hex. Any unit adjacent to a friendly unit that has a Commander may be given any order that is listed on its Unit Card, and may assault the enemy and make ranged attacks as normal.
Commander Abilities
A unit that includes a Commander receives these benefits:
- The unit can be assigned any order that is listed on the Unit Card. Units without Commanders that are adjacent to a unit with a Commander can also be assigned any listed order.
- The Commander fights with the rest of the unit, and is counted when the unit attacks.
Example: A unit of spearmen includes 5 warriors and 1 Commander. Since this is an infantry unit, each model rolls 1 die when the unit attacks. There are 6 models total, so the unit attacks with 6 dice.
A cavalry unit with a Commander has suffered 1 casualty, so it now includes 1 warrior and 1 Commander. The Unit Card shows "x3" in the Attack Value box, so each model rolls 3 dice when the unit attacks. Since there are 2 models total, the unit attacks with 6 dice.
- If the unit suffers casualties, the Commander model is always the last one removed from the unit stand (the other warriors will lay down their lives to protect their Commander).
Exception: If an enemy Ninja unit attacks and inflicts casualties, the Commander model is the first casualty removed! The unit loses all the benefits of having a Commander if enemy Ninjas kill the Commander.
Movement
Movement orders are used to move your units around the battlefield. When you give a movement order to a unit, you must write down the exact path that the unit will follow when it moves. During the Movement Orders Step of the Execution Phase, all units with movement orders will take their actions.
Movement Value
Each unit has a limit to how far it can move each turn. This is called the "Movement Value". All infantry units have a Movement Value of 1 when marching, or 2 when running or charging. All cavalry units have a Movement Value of 2 when marching, or 4 when running or charging. Battlefield terrain can affect a unit's Movement Value (see Terrain).
All units with movement orders must follow the exact route written on their Unit Cards. Usually, it is more convenient to move the units one at a time (e.g., the first unit moves its entire route, then the next unit moves, and so on). But, when several units are trying to move into the same hex, or when enemy units move into adjacent hexes, these units must move one hex at a time. Once all such units have moved one hex, all of them that still have moves to make move a second hex, and so on.
Example: These archers have been given the March Order. They will move straight ahead 2 hexes, as written in the Order Chart.
Encounters
Only one unit may occupy a hex at a time. If, during movement, two units try to enter the same hex at the same time, they have an "encounter." Both units must stop moving in the last space they occupied before entering the same hex.
Example 1: After both moving 1 hex, these 2 units try to enter the same hex for their next move. Both units must stop.
If the units are in adjacent hexes and try to move towards each other, both units must stop.
Example 2: After each moving 1 hex, these units find themselves adjacent to each other. Now their orders require them to move into each other's hex, so both units must stop. Since they are enemies, they enter melee combat.
Zone of Control and Movement
A unit must stop moving if it enters an enemy Zone of Control or Defense Zone, or if it moves in a way that causes an enemy unit to enter its own Zone of Control. Those units will attack during the Melee Combat Step of the Execution Phase.
Zone of Control
A unit threatens the area around it with its weapons, and this limits the enemy's ability to move through that area. This is called a "Zone of Control". The Zone of Control for all units includes all 6 adjacent hexes.
No unit may ever move through an enemy unit's Zone of Control. If a unit enters an enemy Zone of Control, it must stop moving and enters melee combat with that unit. Similarly, if a unit moves in a way that puts an enemy in its own Zone of Control, it must stop moving and engage the enemy.
Example: A unit of Samurai cavalry moves across the battlefield, and into a hex adjacent to an enemy archer unit. Since this hex is in the archers' Zone of Control, the cavalry must stop moving for the turn. It is now engaged with the archers and they will fight during the Melee Combat Step of the Execution Phase.
A unit that has the Defend, Ambush, or Fire and Retreat order does not have a Zone of Control. Instead, this unit has a "Defense Zone".
Important: A unit engaged in melee combat does not have a Zone of Control.
Defense Zone
Only units that have been given Defend, Ambush, or Fire and Retreat orders have a Defense Zone. When you give one of these orders to a unit, you must turn the unit on the game board so it is facing a single side of the hex it occupies. This will determine where the Defense Zone is.
Melee Combat
Melee combat is fought between units in adjacent hexes, using hand weapons such as swords or spears. A unit enters melee combat if any of the following occurs:
- If the unit attacks an enemy unit when executing the Assault order;
- If the unit is attacked by an enemy unit executing the Assault order;
- If the unit moves into an enemy unit's Zone of Control or Defense Zone when executing any movement order;
- If the unit moves in such a way that an enemy unit enters its own Zone of Control; or
- If an enemy unit moves into this unit's Zone of Control or Defense Zone when executing any movement order.
If a unit enters melee combat with an enemy unit, we say that the unit is "engaged" with that enemy. You must turn the unit model so that it is facing towards the enemy unit. A unit can only attack an enemy in melee combat if it is facing that enemy.
If a unit moves into an enemy's Zone of Control or Defense Zone, it must immediately stop moving and engage that enemy. Point the moving unit so it is facing the enemy unit.
If a unit is attacked by two or more enemy units at the same time, it must turn to face the enemy unit that has the highest total Attack Value (multiply each unit's current Attack Value by the number of figures in the unit).
Example: The defending unit 1 must turn to face attacking unit 3, since it has a higher total Attack Value (40) than unit 2 (24).
Exception: If a unit moves to attack an enemy that is already engaged in melee with another unit, that defender does not turn to face the strongest attacker. Instead, it remains engaged with the current enemy, for as long as both units are still involved in the melee fighting.
Teaming Up: Units 1 and Unit 2 are engaged in melee at the beginning of the turn. Unit 3 joins the attack on Unit 1 from the front, but Unit 1 cannot turn to face this attack as long as Unit 2 is still engaged. Unit 4 is making a flank attack against Unit 1, and Unit 5 is attacking the rear.
Melee Attacks
A unit engaged in melee can only be given one order: Retreat. If the unit was not ordered to Retreat, it gets to make an attack during the Melee Combat step of the Execution Phase. Each unit can make 1 melee attack each turn, against the enemy that it is facing. These attacks take place simultaneously.
To make a melee attack, you must follow these steps:
1. Determine Attack Value: The unit's Attack Value is based on the type of unit you are attacking (infantry or cavalry). Add or subtract all modifiers to determine your final Attack Value.
2. Roll Attack Dice: Each model in the unit rolls dice when you attack. All infantry units roll 1 die for each model (including any Commander). Cavalry units roll the number of dice listed on the Unit Card for each model (including any commander).
3. Count Hits: The number rolled on each die is compared to the final Attack Value. If the die roll is equal to or less than the Attack Value, you score a hit! If the roll is higher, it missed. Add up the total number of dice that rolled hits.
4. Apply Damage: Each die that rolled a hit in step 3 inflicts 1 damage to the target unit. Damage is applied to the target's Defense Value first. Each hit reduces the Defense Value by 1 point. If the Defense Value is reduced to 0, each hit that remains inflicts 1 casualty. Remove 1 model from the unit for each casualty inflicted.
Important: Always write the current Defense Value of the target unit when it takes damage. The reduced Defense Value remains until the beginning of the next turn, and does not protect the unit against other attacks this turn. When 2 or more units attack the same target, they are more likely to inflict casualties since the defender does not recover its Defense Value until the beginning of the next turn.
Flank and Rear Attacks
Units are trained to fight facing their enemy, where their weapons and formations are most effective. But, if a unit is engaged in melee, it cannot turn to face other foes that attack from the sides or rear where it is more vulnerable to attack.
When a unit is engaged, the model must be turned to face the enemy unit. This is called the unit's "front" side. The sides of the unit are called "flanks" and the side opposite the front is the "rear" (see the illustration).
A unit can keep 2 enemy units in its front side if they are in adjacent hexes. If the second attacking unit is not in an adjacent hex, it can attack the flanks or rear of the defending unit. So, you can use one unit to engage an enemy, then assault the defender through the flank or rear sides to gain the benefit of a flank or rear attack.
Important: If your unit enters an enemy's flank or rear hex when executing a March or Run order (instead of the Assault order), your unit must engage in melee combat with the defender but it is not a flank or rear attack! Only units with Assault orders can benefit from these bonuses.
Continuing Melee Combat
Any unit that is engaged in melee at the beginning of the turn that was not given a Retreat order must continue to fight in melee combat. Do not issue any orders to these units: units involved in a continuing melee do not receive any ability modifiers for their orders. Units that do not retreat may not move away from the melee combat.
Zone of Control in Melee
A unit engaged in melee combat at the beginning of a turn does not have a Zone of Control for the entire turn.
Unit 1 is still engaged in melee at the beginning of the turn, so it does not have any Zone of Control. Unit 2 can move through hex 320 without entering melee combat with unit 1, but only if it has been given an Assault order against unit 3: If unit 2 is executing a Move or Run order, it must stop in hex 315 and enter melee because unit 2 does have a Zone of Control.
Ending Melee Combat
Units engaged in melee combat must continue fighting until one of the following occurs:
- The unit is issued the Retreat order;
- The unit is completely destroyed; or
- The enemy unit is destroyed or retreats.
When your enemy's unit is destroyed or retreats, you must check if there is another enemy in your unit's Zone of Control. If there is, your unit immediately turns to face the next strongest of these enemy units (the enemy with the highest total Attack Value). Turn your model to face the next enemy.
If there are no more enemies to fight, you may issue orders to your unit normally on the next turn.
Ranged Combat
Ranged combat occurs when a unit with the Firepower ability (a "ranged unit") attacks an enemy unit from a distance.
Line of Sight
A unit can only make a ranged attack against an enemy that it can see. Where a unit can see is called "Line of Sight". Some types of terrain and most units on the battlefield block Line of Sight.
To determine if a unit has Line of Sight to an enemy unit, draw an imaginary straight line from the center of the attacker's hex to the center of the target's hex. It is recommended that you use a piece of string or similar object stretched between the centers of the two hexes to help determine if a unit can see the target. If any part of this imaginary line crosses any part of a hex that is occupied by a terrain type or a unit that blocks Line of Sight, the attacker cannot see the target and cannot make a ranged attack.
Important: All units except Ninja units block Line of Sight.
Range
When you make a ranged attack, you must first determine the range between the attacker and its target. The range is the number of hexes between the 2 units, counting the target's hex but not counting the attacker's hex.
Example: The archers are at range 3 from the cavalry unit.
Every unit with a ranged attack has a range chart at the top of its Unit Card. The arrow symbol on the range chart shows the hex that the unit is in. Find the range to the target on the chart. The number in that box is the Firepower Value for the attack.
If the box for that range shows an "x", your unit may not make a ranged attack against an enemy at that range.
Ranged Attacks
Ranged attacks follow the same procedure as melee attacks, except that the attacker uses its Firepower Value instead of its Attack Value. When you determine the final Firepower Value, remember to check the range chart on the attacker's Unit Card.
Ammunition
While melee weapons such as swords and spears can be used for the entire battle, ranged weapons like bows or the arquebus require ammunition each time they are fired. Every ranged unit (archers, mounted archers, arquebusiers, etc.) begins the game with a full supply of 7 Ammunition points.
Each time the unit executes an order that requires it to fire its weapons (such as Fire Ranged Weapons) it must spend 1 Ammunition point. If the unit has no Ammunition left, it cannot execute one of these orders.
The arrow models are used to record the amount of Ammunition a unit has. At the beginning of the battle, insert 7 arrows into the unit's stand. Each time an Ammunition point is used, remove 1 arrow.
A ranged unit can get more Ammunition from a Peasant Transport by executing the Receive Supplies Order (see Orders).
Note that the Peasant Transport unit is not included in this Starter Set, but may be purchase separately.
Kill Zones
Some orders, such as Defend or Ambush, will give a ranged unit a Kill Zone. This is the area of the battlefield that the unit can fire it's weapons at. The Kill Zone is a cone of hexes that begins at the front side of the unit, based on the direction it is facing, and extends to the maximum range that it will fire (determined when you issue the order to the unit). A unit with a Kill Zone will automatically attack any enemy unit that enters this part of the battlefield, interrupting that unit's movement.
Orders
Each turn, you will assign orders to all of your units. Each unit can only be assigned 1 order each turn. Mark the order you choose on each unit's Unit Card. All orders are resolved during the Resolution Phase.
Defensive Orders
These orders are used for units that you want to defend themselves against enemy attacks. They are executed during the Defensive Orders Step of the Execution Phase:
All-Around Defense
This order prepares a unit to defend itself against enemies from all directions. This unit does not have any flank or rear sides, and no attacker receives those bonuses, even if they assault it from a direction this unit is not facing.
Cavalry units cannot be issued the All-Around Defense order.
Ranged units may not shoot ranged weapons when executing this order.
Defend
This order tells a unit to defend part of the battlefield. The defending unit has a Defense Zone (see Defense Zone) You must write down which hex the unit will face when it executes this order. This will determine the direction of the unit's Defense Zone.
If a unit with this order is attacked, it engages the attacking enemy units. If an assault comes from the unit's front facing, it can engage 2 enemy units at once. Turn the unit to face the attacker with the highest total Attack Value. If the unit is assaulted from any other direction, it is treated as a flank or rear attack, as appropriate.
Cavalry units cannot be issued the Defend order.
A ranged unit with Defend orders gains a Kill Zone in addition to its Defense Zone. You must write down the maximum range that the unit will fire (in the order box for the Defend order).
The unit will fire its ranged weapons at the first enemy unit that moves into its Kill Zone, or that begins its movement inside the Kill Zone. The enemy's movement is temporarily interrupted until the ranged attack is complete. If multiple enemies move into the Kill Zone at the same time, the defender chooses which 1 enemy unit to shoot at. The ranged unit must spend 1 Ammunition point to make this attack (see Ammunition).
Example: This unit of archers has the Defend order with a Kill Zone range of 3 hexes. The highlighted hexes are in the Kill Zone. As soon as the enemy Samurai enter the Kill Zone, the archers will immediately attack. Then the Samurai can continue moving (assuming they survive).
Fire and Retreat
This order tells a ranged unit to fire at any attackers and fall back. You must write down the direction the unit will be facing when it executes this order. This will determine the direction of the unit's Defense Zone. You may issue this order only to units that have a ranged attack.
The unit gains a Kill Zone with a maximum range of 2 hexes. If an enemy unit enters this Kill Zone, the defending unit immediately makes a ranged attack against the moving unit (its movement is temporarily interrupted). Then, the defending unit moves directly backwards 1 hex.
If multiple enemies move into the Kill Zone at the same time, the defender chooses which 1 unit to attack.
The unit must spend 1 Ammunition point if it fires its weapons at an attacker.
If the defending unit is assaulted from any direction that is not covered by the unit's Kill Zone, it is treated as a flank or rear attack, as appropriate. The defender does not get to fire its weapons or retreat.
Example: An arquebusier unit has Fire and Retreat orders, when a unit of enemy cavalry with Assault orders moves to attack through their Kill Zone. The arquebusiers immediately fire their weapons, inflicting 1 casualty, then they move back 1 hex. The cavalry unit passes its Fortitude Test and keeps moving, but because the arquebusiers retreated 1 hex, the cavalry cannot reach them—the attack fails!
Playing Hint: Use this order with caution: on the one hand, it allows you to shoot at an enemy from a short distance and then retreat, thus disrupting his assault. On the other hand, if your unit is attacked by the enemy it will fight at a disadvantage. Think carefully before giving this order!
Ranged Combat Orders
These orders can only be issued to units that can make a ranged attack. They are executed during the Ranged Combat Step of the Execution Phase:
Fire Ranged Weapons
This order tells the unit to fire its ranged weapons at an enemy unit. You may only issue this order to units that have a ranged attack. You must write down the number of the enemy unit you want to shoot at. The target enemy must be within your weapons' range and in Line of Sight (see Ranged Combat). The unit must spend 1 Ammunition point.
Movement Orders
These orders are used for units that you want to move around the battlefield. They are executed during the Movement Orders Step of the Execution Phase:
Assault
This order instructs a unit to move across the battlefield and attack an enemy in melee combat. You must write down the exact path that the unit will take when it moves. Infantry units may move up to 2 hexes when making an assault. Cavalry units may move up to 4 hexes. You must also write down the number of the unit you want to attack. You can only target an enemy unit that is in Line of Sight of the assaulting unit when the order is issued. When a unit with Assault Orders moves, it has no Zone of Control.
Assault orders are resolved at the same time as other movement orders. To see if any units run into each other, you must resolve all movement 1 hex at a time (see Movement). Your assault movement may be interrupted by an enemy unit that fires on or attacks your unit.
If your unit can move adjacent to the target unit, your assault succeeds and you engage that enemy in melee combat.
If a unit with the Assault order encounters another unit during movement (see Encounters), the assaulting unit must continue to move towards the target unit and engage it in melee combat. If two units with Assault orders encounter each other, roll 1 die for each unit and add its current Fortitude to the result of the roll. The unit with the higher total moves into the encounter hex. If the totals are equal, roll again.
Note: You can only receive bonuses for flank and rear attacks when you execute an Assault order.
March
This order tells your unit to move carefully across the battlefield. You must write down the exact path your unit will take when it moves. Infantry units may move 1 hex. Cavalry units may move up to 2 hexes. Some types of terrain can prevent your unit from executing a March order (see Terrain). Your movement may be interrupted by an enemy unit that fires on or attacks your unit.
If your unit moves into an enemy Zone of Control or Defense Zone, it must stop moving and engage that enemy (see Movement).
Move and Fire
This order instructs your unit to move across the battlefield and fire its ranged weapons at the enemy. You may only issue this order to cavalry units with ranged weapons, such as mounted Samurai archers. Infantry units may not execute a Move and Fire order. Note that mounted Samurai archers are not included in this Starter Set, but may be purchased separately.
You must write down the exact path your unit will take when it moves. Your unit may move up to 4 hexes. You must also underline the exact hex that your unit will fire from during its movement, and write the number of the enemy unit you want to attack. The target enemy must be within your weapons' range and in Line of Sight when you make the attack.
Example: A unit of mounted archers has been assigned the Move and Fire order. It will move 2 hexes to the right, fire its weapons, and then move 2 hexes towards the rear.
The unit must spend 1 Ammunition point.
Some types of terrain can prevent your unit from executing a Move and Fire order (see Terrain). Your movement may be interrupted by an enemy unit that fires on or attacks your unit.
Run
This order tells your unit to move as quickly as possible across the battlefield. You must write down the exact path your unit will take when it moves. Infantry units may move up to 2 hexes. Cavalry units may move up to 4 hexes. Some types of terrain can prevent your unit from executing a Run order (see Terrain).
Special Orders
These orders include a number of activities that are not directly related to movement or combat. Not all units can execute all of these orders. You can only issue a special order to a unit if it appears on the Order Chart of its Unit Card. All special orders are executed during the Special Orders Step of the Execution Phase:
Ambush
This order tells your unit to hide from the enemy. A unit that executes the Ambush order becomes "hidden". You may only issue this order to a unit that is not engaged in melee combat, and there must be no enemy units within 2 hexes. You can only issue this order to a unit that is in certain types of terrain (see Terrain).
When you execute this order, remove the unit model from the game board, and place it on its Unit Card. You must write down the hex number where the unit is located, and the direction that the unit is facing. A hidden unit has a Defense Zone and a Kill Zone (if it has a ranged attack):
- If an enemy unit enters the Kill Zone of a hidden ranged unit, and is within 2 hexes range, the hidden unit immediately fires its weapons. If several enemy units move to within 2 hexes range (and are in the Kill Zone), you must choose which single enemy unit to shoot at. Your unit must spend 1 Ammunition point to make this attack.
Important: A hidden unit can only fire if the enemy is within 2 hexes range!
- If an enemy unit enters the Defense Zone of the hidden unit, the units are engaged in melee. The hidden unit attacks normally, but the enemy unit does not to get to attack the hidden unit this turn.
- If an enemy unit approaches the hidden unit from any direction that is not in its Defense Zone, the units are engaged in melee combat, but it does not count as a Flank or Rear attack.
A hidden unit cannot be the target of any ranged attacks or the Assault order. If the hidden unit is engaged in melee by any enemy unit, or if it makes any ranged attack, it is immediately revealed. Return the unit model to the game board in the space written on the Unit Card. A Ninja unit (and only a Ninja unit) can detect a hidden unit by executing the Reconnaissance order within 2 or 3 hexes of the hidden unit. Note that Ninja units are not included in this Starter Set, but may be purchase separately.
Join Up
This order allows you to combine two damaged units. You must issue this order to two units of the same type that are in adjacent hexes, and may do so only if the total number of models left in both units (combined) is not larger than the full strength starting size of one unit of this type. You must also write down which hex the joined unit will be located in after the order is executed.
Place the models from the smaller unit in the base of the larger unit. Remove the empty model base and it's matching Unit Card from the game. When two ranged units join together, the new unit has Ammunition points equal to amount of Ammunition the larger of the two joined units had.
Example: Two damaged Samurai units in adjacent hexes are issued the Join Up order. The smaller unit only has 2 models left, so they are added to the larger unit. Together, they have a total of 6 models, so the combined unit is back to full strength!
Receive Supplies
This order allows a ranged unit to refill its Ammunition points. You may only issue this order to a unit that is adjacent to a Peasant Transport unit. You may give this order to multiple ranged units that are adjacent to the same Peasant Transport. You must also give the Receive Supplies order to the Peasant Transport unit.
The ranged unit cannot have more Ammunition than it began the game with (7 arrows per unit).
Each Peasant Transport only has a limited supply of Ammunition that it can give to other units. This Ammunition supply is shown on the Peasant Transport card. When a unit receives supplies from the Peasant Transport, you must cross off 1 Ammunition point on the transport's Unit Card for each Ammunition point added to the other unit. If the Peasant Transport runs out of supplies, it cannot give any more Ammunition to other units.
Note that the Peasant Transport unit is not included in this Starter Set, but may be purchased separately.
Rest
A unit with Rest orders does nothing during the turn, though it may fight in melee if attacked. Any unit that did not receive an order (for any reason), or which received an order that it cannot execute (such as shooting at a unit that is out of Line of Sight), automatically executes the Rest order instead.
Reconnaissance
This order can only be given to a Ninja unit. If there are any hidden enemy units within 3 hexes of the Ninja unit, all of them are revealed. Return the hidden units to the game board.
Retreat Orders
Units that are ordered to leave melee combat move during the Retreat step of the Execution Phase, after all melee combat is complete.
Retreat
This is the only order that allows a unit to voluntarily leave melee combat. You must write down the exact path your unit will take when it moves. Infantry units may move 1 hex. Cavalry units may move up to 2 hexes.
This order is only executed if your unit is not destroyed or Put to Flight during melee combat this turn (see Melee Combat).
If all units engaged in a melee combat are issued Retreat orders, the melee is abandoned and all units move without any combat rolls being made.
Special Unit Abilities
Some units have special abilities that apply only to that unit. These elite units can be very powerful, and can sway a battle in a moment.
Ninja Units
Ninja are highly-trained assassins, often used to eliminate key enemy leaders during a battle. All Ninja units have these special abilities:
- Agility: Ninja units may enter types of terrain that are forbidden to other units, such as thick forests or steep slopes (see Terrain).
- Spies: Only Ninja units may execute the Reconnaissance order (see Orders).
- Assassins: If a Ninja unit inflicts casualties on an enemy unit that includes a Commander, the Commander must be taken as the first casualty (instead of the last – see Unit Commanders).
Mounted Samurai Archers
These units are very mobile, and can strike an enemy from a distance, making them an extremely valuable addition to your army. Only mounted Samurai archers can execute the Move and Fire order.
General Staff Units
Each army has 1 General Staff unit. This represents your generals and their staff, and must be protected. General Staff units have the following special abilities:
- High Command: General Staff units always count as having a Commander, as long as any models are still part of the unit. All rules that apply to units with a Commander also apply to General Staff units.
Terrain
Most battlefields are not simple, wide open, flat fields. Hills, trees, or buildings can all appear on a battlefield, and each type of terrain can influence a battle in different ways. Clever use of terrain can be the difference between victory and defeat, so consider the terrain carefully during the battle! Some types of terrain grant bonuses to unit abilities, such as Defense Value, for any unit that occupies the hex. Many terrain types also reduce movement, and some block Line of Sight. Units may only execute an Ambush order if they are in the right kind of terrain. Any reduction to movement is applied only when the unit enters a hex with this terrain.
Example: An Infantry unit assaults an enemy and must move into a hex with light woods. The unit can only move 1 hex when entering light woods, so it will only reach the enemy if it began its movement in a hex adjacent to the light woods.
Plains
Plains hexes do not block Line of Sight. You cannot issue the Ambush order to any unit that is in a plains hex.
Light Woods
Light woods hexes block Line of Sight. No unit can execute the Run order into or through a light woods hex. If a unit executes an Assault or Move and Fire order into or through a light woods hex, its movement is reduced: infantry units may only move 1 hex and cavalry may only move up to 2 hexes. All units may execute an Ambush order when in a light woods hex.
Heavy Woods
Heavy woods block Line of Sight. No unit can execute Assault or Run orders into or through a heavy woods hex. Cavalry units cannot move into or through a heavy woods hex. Infantry units may execute an Ambush order when in a heavy woods hex.
Rice Fields
Rice fields hexes do not block Line of Sight. No unit can execute the Run order into or through a rice fields hex. If a unit executes an Assault or Move and Fire order into or through a rice fields hex, its movement is reduced: infantry units may only move 1 hex and cavalry may only move up to 2 hexes. You cannot issue the Ambush order to any unit that is in a rice fields hex.
River
River hexes do not block Line of Sight. Any unit can attempt to cross a river, but it must make a Loss Test. The Loss Test is made immediately when the unit enters the river hex. All units except Ninja units must spend their entire turn to enter a river hex (they can only enter the river from an adjacent hex). The unit moves out of the river hex normally during the next turn, but it can only use the March order (the unit may not run): infantry may only move 1 hex, cavalry may move up to 2 hexes.
If a unit crossing a river enters a hex adjacent to an enemy unit, it must enter melee after the Loss Test, and does not recieve any benefits from the Assault order.
Loss Test To make the Loss Test, roll 1 die for each model in the unit. Each die roll that is 1-10 means that one model has safely crossed the river. Each result that is 11 or higher means that the unit suffers 1 casualty (the soldiers have drowned). Defense Value has no effect on these casualties. If a unit suffers any casualties due to a Loss Test, the unit must make a Fortitude Test as normal (if using the Intermediate Rules).
Ford
Ford hexes do not block Line of Sight. A ford is a shallow part of a river than can be crossed more safely. A unit crossing a river at a ford hex does not make a Loss Test.
No unit can execute the Run order into or through a ford hex. If a unit executes an Assault or Move and Fire order into or through a ford hex, its movement is reduced: infantry units may only move 1 hex and cavalry may only move up to 2 hexes. You cannot issue the Ambush order to any unit that is in a ford hex.
Bridge
Bridge hexes do not block Line of Sight. No unit can execute the Run order into or through a bridge hex. If a unit executes an Assault or Move and Fire order into or through a bridge hex, its movement is reduced: infantry units may only move 1 hex and cavalry may only move up to 2 hexes. You cannot issue the Ambush order to any unit that is in a bridge hex.
Ravine
Ravine hexes do not block Line of Sight. Cavalry units cannot move into or through a ravine hex. Infantry units cannot execute the Run order into or through a ravine hex. If an infantry unit in a ravine hex executes an Assault order, its movement is reduced: the unit may only move 1 hex. A unit in a ravine hex is visible only to units in adjacent hexes, and only has Line of Sight to the adjacent hexes.
Rocky Ground
Rocky ground hexes do not block Line of Sight. No unit can execute the Run order into or through a rocky ground hex. If a unit executes an Assault or Move and Fire order into or through a rocky ground hex, its movement is reduced: infantry units may only move 1 hex and cavalry may only move up to 2 hexes. You cannot issue the Ambush order to any unit that is in a rocky ground hex. If there is rocky ground on a hill hex, cavalry units cannot move up the slope into that hex.
Village
Village hexes block Line of Sight. All units may execute an Ambush order when in a village hex.
Hills
Hills are created using the plastic tiles. A hill hex can have any type of terrain on top of the hill. Simply place the right kind of terrain tile on the hill tile. The terrain on top of the hill determines any bonuses or penalties units receive for being in that hex.
You can create hills of any height by stacking 1 or more hill tiles in the same hex. The difference in number of hill tiles between two adjacent hexes determines how steep the slope is. The type of slope may apply a movement penalty to some units if they move between those hexes:
Gentle Slope If the difference in height is 1 hill tile, there is a gentle slope. Infantry units with the Run order may not move across a gentle slope. If an infantry unit executes an Assault order across a gentle slope, its movement is reduced: the unit may only move 1 hex.
Abrupt Slope If the difference in height is 2 hill tiles, there is an abrupt slope. Cavalry cannot move up or down an abrupt slope. Infantry units with Assault or Run orders may not move up or down an abrupt slope. No unit may engage in melee with an enemy that is on the other side of an abrupt slope.
Steep Slope If the difference in height is 3 hill tiles, there is a steep slope. Only Ninja units can move up or down a steep slope. No unit may engage in melee with an enemy that is on the other side of a steep slope.
Hills and Line of Sight
Hills block Line of Sight for all units except those standing on the hill itself.
If the firing unit is on a hill hex, its Line of Sight is blocked for only 1 hex behind any terrain that blocks Line of Sight, but not any hexes farther away.
Example: The archers on this hill cannot see the Ashigaru right behind the forest, but they can see the mounted Samurai farther away.
Intermediate Rules
Once you have mastered the Basic Rules, you are ready for even greater challenges. Now you will have to consider the morale and fortitude of your units. Sometimes, it will be the braver—rather than the stronger – unit that carries the day.
Units and Unit Cards
Unit Abilities
In addition to the unit abilities in the Basic Rules, the front of each Unit Card shows some other information:
Attack Values
The orders you assign to a unit may modify its Attack Values, as can the terrain your unit occupies. These modifiers always apply to both Attack Values.
If a unit has an Honor Marker, both of its Attack Values are increased by +1 (see Honor).
Fortitude
No matter how well trained they are, warriors on the battlefield are still human: they hope to survive the battle! The willingness of soldiers to continue fighting when things get tough is represented in the game by the unit's "Fortitude". Fortitude determines how a unit will react to the psychological impact caused by suffering casualties and enemy attacks on their flank or rear. A unit's Fortitude can change during the game. You must always mark the current Fortitude value in the corresponding box of the Unit Card (see Fortitude Tests). A unit's Fortitude immediately decreases when the unit suffers casualties (-1 Fortitude for each casualty).
If a unit has a Commander, it receives a +3 bonus to its Fortitude.
If a unit is within 2 hexes of a friendly General Staff unit, it receives a +4 bonus to its Fortitude.
If a unit has an Honor Marker, its Fortitude value increases by +2.
The unit's orders and the terrain it occupies may also modify its Fortitude (See Orders and Terrain Modifiers).
Order Modifiers
Below the unit's abilities is a row of boxes you can use to write down the ability modifiers the unit receives from the orders you have issued to that unit (see Orders).
Unit Conditions
Beneath the Order Modifiers row is a chart showing all of the different conditions that may apply to that unit, as well as the modifiers that those conditions apply to the unit's abilities.
The Order Chart
The columns of the Order Chart show the ability modifiers that apply to the unit for each order.
The Course of the Battle
Each turn is now divided into three phases:
- Morale Phase
- Planning Phase
- Execution Phase
The Planning Phase and Execution Phase are played the same as the Basic Rules.
The Morale Phase
All units that are Hesitant, Shaken, or Panicked must make a Fortitude Test. If a unit passes this test, its Morale Level will improve. If it fails, the Morale Level does not change (see Unit Morale).
Unit Morale
Morale represents a unit's willingness to risk its life and continue fighting the enemy. A unit can have one of four different Morale Levels, which may change over the course of the game. The Morale Level for each unit is shown by adding red Morale Markers to the Unit Flag. The more markers, the worse the unit's Morale Level:
- Normal (0 Morale Markers)
- Hesitant (1 Morale Marker)
- Shaken (2 Morale Markers)
- Panicked (3 Morale Markers)
A unit's Morale Level affects its ability to fight, and may restrict the orders that you may assign to that unit:
Normal
A unit at the Normal Morale Level has no modifiers and acts normally.
Hesitant
A unit with 1 Morale Marker is Hesitant. A Hesitant unit suffers these penalties:
- -2 Attack Value;
- -1 Defense Value; and
- -1 Fortitude.
During the Morale Phase of each turn, every Hesitant unit must make a Fortitude Test. If the unit passes the test, it becomes Normal (remove the Morale Marker from the Unit Flag). If it fails this test, its Morale Level does not change.
Hesitant units may be given orders normally.
Shaken
A unit with 2 Morale Markers is Shaken. A Shaken unit suffers these penalties:
- -3 Attack Value;
- -2 Defense Value; and
- -2 Fortitude.
During the Morale Phase of each turn, every Shaken unit must make a Fortitude Test. If the unit passes the test, it becomes Hesitant (remove 1 Morale Marker from the Unit Flag) and can be given orders normally. If it fails this test, its Morale Level does not change.
Shaken units will move during the Retreat Step of the Execution Phase, starting in the turn that the unit became Shaken. The unit will execute the Flee order every turn, as long as it remains Shaken (see Flee). This order is executed automatically, and is not listed on the Unit Card.
If a Shaken unit is engaged in melee combat, and fails any required Fortitude Test before combat (such as being assaulted on a Flank side), it becomes Panicked before the fighting begins. If it fails a Fortitude Test because of casualties it has suffered, it becomes Panicked after the fighting for the turn.
Panicked
A unit with 3 Morale Markers is Panicked. A Panicked unit suffers these penalties:
- Its Attack Value is reduced to 0;
- Its Defense Value is reduced to 0; and
- -3 Fortitude.
During the Morale Phase of each turn, every Panicked unit must make a Fortitude Test. If the unit passes the test, it becomes Shaken (remove 1 Morale Marker from the Unit Flag) and must be given the Flee order. If it fails the test, its Morale Level does not change.
Panicked units will move during the Retreat Step of the Execution Phase, starting in the turn that the unit became Panicked. The unit will execute the Panic order every turn, as long as it remains Panicked (see Panic). This order is executed automatically, and is not listed on the Unit Card.
If a Panicked unit is engaged in melee combat, and fails any required Fortitude Test before combat (such as being assaulted on a Flank side), it immediately surrenders – before the fighting is resolved – and is removed from the game board (the unit is treated as destroyed). If the unit passes the test, it continues to fight, but with the penalties listed above.
If a Panicked unit suffers any casualties during melee combat, it immediately surrenders and is removed from the game board (the unit is treated as destroyed). The unit does not get to make a Fortitude Test to avoid surrendering.
Commander Abilities
In addition to the abilities explained in the Basic Rules, a unit with a Commander gains a +3 bonus to its Fortitude.
Melee Combat Modifiers
The orders assigned to the attacker can increase or decrease the unit's Attack Value. The defender's orders can increase or decrease its Defense Value (see Orders).
If the attacker has an Honor Marker, it receives a +1 bonus to its Attack Value (see Honor).
The attacker's Attack Value may be modified by the unit's Morale Level. The defender's Defense Value may also be modified by its Morale Level.
If a unit with the Assault order attacks an enemy from the Flank or Rear, it receives the bonuses listed below.
Flank Assault
If a unit with the Assault order attacks an enemy from a flank side, it receives these benefits:
- The defender must immediately make a Fortitude Test with a -3 penalty. Note that this penalty is applied to this test only.
- The attacker receives a +2 bonus to its Attack value, +1 to its Defense value, and +1 to its Fortitude.
Rear Assault
If a unit with the Assault order attacks an enemy from the rear side, it receives these benefits:
- The defender must immediately make a Fortitude Test with a -5 penalty. Note that this penalty is applied to this test only.
- The attacker receives a +3 bonus to its Attack value, +2 to its Defense value, and +2 to its Fortitude.
Combined Assaults
If a unit is assaulted from both flanks, or from the flank and the rear at the same time, it must make 2 Fortitude Tests (1 for each attack).
Ending Melee Combat
Units engaged in melee combat must continue fighting until one of the following occurs:
- The unit is issued the Retreat order;
- The unit is completely destroyed;
- The enemy unit is completely destroyed or retreats;
- The unit is Put to Flight; or
- The enemy unit is Put to Flight.
If a unit destroys an enemy unit in melee combat, the winning unit receives 1 Honor Marker.
A unit with an Honor Marker gains +1 Attack Value (see Honor) and +2 Fortitude (see Fortitude). If there is another enemy unit in the winner's Zone of Control, the winning unit must engage the strongest of these enemy units during the next turn (the enemy with the highest total Attack value)—turn the unit to face the next enemy.
If the enemy unit is Put to Flight, the winning unit does not receive an Honor Marker. If there is another enemy unit in the winner's Zone of Control, the winning unit must turn and engage the strongest of these enemy units next turn. If there are no more enemies, the winner will try to pursue (see Pursue).
Put to Flight
A unit engaged in melee combat will be Put to Flight if it is Hesitant or Shaken and it fails a Fortitude Test for any reason. After combat is resolved for the turn, during the Retreat Step of the Execution Phase, a unit that was Put to Flight will make a Flee or Panic move (see Unit Morale).
Melee Combat Example
This unit of Samurai cavalry has engaged some Ashigaru spearmen. The Samurai are attacking!
Step 1: Determine Attack Value: Since the Samurai are attacking an infantry unit, it must use the Attack Value Against Infantry, which is 8. This is modified by the Samurai unit's Assault orders (+2) for a final Attack Value of 10.
Step 2: Roll Attack Dice: There are 2 models in the samurai unit, so it rolls 6 dice. The die results are: 1, 3, 4, 9, 13, and 13.
Step 3: Count Hits: Each die that rolls less than or equal to the Attack Value (10) scores 1 hit, so the Samurai inflict a total of 4 hits on the Ashigaru!
Step 4: Apply Damage: The Ashigaru unit has not been attacked yet this turn, so it still has its base Defense Value of 1. The first hit reduces this value to 0 (which is marked on the Ashigaru Unit Card). The remaining 3 hits each cause 1 casualty, so 3 models are removed from the Ashigaru unit. This reduces the unit's Fortitude by 3. Since the Ashigaru unit suffered casualties, it must make a Fortitude Test against its reduced Fortitude value. The roll is a 14: the unit fails the test!
All melee combat is simultaneous, so the Ashigaru unit will get to attack the Samurai unit at the same time, before the 3 casualties are inflicted. Since the Ashigaru unit had 4 models at the start of the fighting, it will roll 4 dice when it attacks.
Fortitude Tests
When the stress of battle may cause a unit to lose the will to fight, it must make a Fortitude Test. The following situations force a unit to make a Fortitude Test:
- Each time the unit suffers casualties (after the attack is complete). Remember that the unit loses 1 Fortitude for each casualty before it makes the Fortitude Test.
- When the unit is attacked from one of its Flank sides. Remember that the unit suffers a -3 penalty to its Fortitude for this test only. This test must be made before the melee combat is resolved.
- When the unit is attacked from its Rear side. Remember that the unit suffers a -5 penalty to its Fortitude for this test only. This test must be made before the melee combat is resolved.
- If the unit is Hesitant, Shaken, or Panicked, and not engaged in melee combat, it must make a Fortitude Test during the Morale Phase each turn (see The Morale Phase).
- If your General Staff unit is destroyed, all of your units must make a Fortitude Test once the attack is resolved, with a -2 penalty. For the rest of the game, all of your units suffer a -2 penalty to Fortitude.
Making Fortitude Tests
When you must make a Fortitude Test, first determine the current Fortitude value of your unit. Remember to count all modifiers (if the unit has a Commander, bonuses or penalties for Orders you have given, if your General Staff is within 2 hexes, from suffering casualties, etc.) and mark the correct value on the Unit Card. Then roll the die: If the number rolled is less than or equal to the unit's current Fortitude, it passes the test. If the result is higher, the unit fails the test.
Example: A unit of Ashigaru archers began the battle with a Fortitude of 10. This turn it has Fire and Retreat orders, which imposes a -1 Fortitude penalty, but it is only 2 hexes away from its HQ unit. The archers just suffered their first casualty, so they must make a Fortitude Test. The unit's current Fortitude is 10 (base) -1 (Orders) +4 (HQ) -1 (1 casualty) = 12. If the die roll for the Fortitude Test is 12 or less, the unit passes. If the roll is 13 or more, it fails.
Failing a Fortitude Test
If your unit fails a Fortitude Test, it's Morale Level will get worse:
- If the unit has an Honor Marker: The Honor Marker is lost (remove it). The unit suffers no other penalty.
- If the unit did not have an Honor Marker: The unit's Morale Level decreases by 1 level:
- If the unit was at the Normal Morale Level, it is now Hesitant.
- If the unit was Hesitant, it is now Shaken.
- If the unit was Shaken, it is now Panicked.
- If the unit was Panicked, it may now rout or surrender.
To show that the unit's Morale Level has decreased, add 1 red Morale Marker to its Unit Flag.
Exception: If a unit fails a Fortitude Test during the Morale Phase, or when testing to see if it must pursue an enemy unit that is Put to Flight, its Morale Level does not get worse (see The Morale Phase and Put to Flight).
Honor
If a unit is victorious in melee combat, it may gain an Honor Marker. Each unit on the winning side of a melee combat receives 1 Honor Marker if the enemy unit is completely destroyed or if it surrenders (by failing a Fortitude Test when Panicked—see Unit Morale).
A unit may never have more than 1 Honor Marker at a time. Any additional Honor Markers are lost.
If a unit has an Honor Marker, it receives the following bonuses:
- +1 Attack Value
- +2 Fortitude
If a unit with an Honor Marker fails a Fortitude Test, the Honor Marker is lost instead of the unit losing a Morale Level. Do not put a red marker on the Unit Flag.
Order Combat Modifiers
The orders you issue to a unit may increase or decrease the unit's abilities, such as Attack Value or Fortitude. These modifiers apply for the entire turn, unless the unit's orders change (due to a failed Fortitude Test).
A few orders are changed from the Basic Rules, and there are new orders that apply to units that fail Fortitude Tests.
Defensive Orders
All-Around Defense — Modifiers: -2 Attack; +1 Defense; -1 Fortitude
Defend — Modifiers: +1 Defense; +1 Fortitude
Fire and Retreat — Modifiers: -2 Attack; -1 Defense; -1 Fortitude If the attacker suffers casualties from the defender's fire and fails the resulting Fortitude Test, it must stop moving.
Ranged Combat Orders
Fire Ranged Weapons — Modifiers: None
Movement Orders
Assault — Modifiers: +2 Attack
March — Modifiers: None
Move and Fire — Modifiers: -1 Attack; -2 Firepower
Run — Modifiers: -1 Attack; -1 Defense; -1 Fortitude
Flee — Modifiers: -3 Attack; -2 Defense; -2 Fortitude Units that are Shaken (units with 2 red Morale Markers on their Unit Flags) will execute the Flee order every turn, during the Retreat Step of the Execution Phase. The unit must move at its fastest rate towards your General Staff unit, following the shortest possible path (2 hexes for infantry and 4 hexes for cavalry). Units executing the Flee order can leave melee combat.
If the unit reaches a hex that is adjacent to the General Staff unit, it immediately becomes Hesitant and stops moving for the turn. Remove 1 Morale Marker from the Unit Flag (automatically: do not make a Fortitude Test).
If you have no General Staff unit (because it was destroyed), units executing the Flee order must move towards your edge of the game board instead.
Panic — Modifiers: Attack = 0; Defense = 0; -3 Fortitude Units that are Panicked (units with 3 red Morale Marker on their Unit Flags) will execute the Panic order every turn, during the Retreat Step of the Execution Phase. The unit must move at its fastest rate towards the nearest edge of the game board, following the shortest possible path (2 hexes for infantry and 4 hexes for cavalry). Units executing the Panic order can leave melee combat.
If the unit reaches the last hex on the edge of the game board, the unit is routed and removed from the game (treat it as if it was destroyed).
Pursue — Modifiers: None This order is given to a unit in melee combat if its enemy is Put to Flight, if there are no other enemies engaged with the unit and it fails its Fortitude Test. If there is another enemy unit in its Zone of Control, it immediately turns to face the strongest enemy and engages it in melee combat instead (see Ending Melee Combat).
You must write down the number of the enemy unit that your unit is going to pursue (your choice if there are multiple enemy units running away from that melee combat).
A unit with Pursue orders always moves directly towards the fleeing unit at maximum speed (2 for infantry or 4 for cavalry). If it can reach the enemy unit, it will engage that unit in melee combat again.
Special Orders
Ambush — Modifiers: +3 Attack; +1 Defense; +2 Firepower; +1 Fortitude If an enemy unit approaches the hidden unit from any direction that is not in its Defense Zone, the units are engaged in melee combat, but it does not count as a Flank or Rear attack. The hidden unit does not receive the +3 Attack value bonus, but it still receives +1 Defense and +1 Fortitude.
If an enemy unit enters the Kill Zone of a hidden ranged unit, the hidden unit shoots with +2 Firepower.
Join Up — Modifiers: -2 Attack; -1 Defense; -1 Fortitude If two Hesitant units join up, the combined unit is still Hesitant. If a Hesitant unit joins a Normal unit, the combined unit will be at the Normal Morale Level.
After the two units join up, recalculate the unit's Fortitude based on the new unit's size.
Example: A Hesitant unit with 2 models joins a Normal unit with 3 models. The new unit will be Normal and include 5 models. The combined unit will only be at -1 Fortitude.
Receive Supplies — Modifiers: None
Reconnaissance — Modifiers: None
Rest — Modifiers: -2 Attack; -1 Defense; -1 Fortitude
Retreat Orders
Retreat — Modifiers: Attack = 0; +1 Defense; +1 Fortitude
Special Unit Abilities
General Staff Units
Each army has 1 General Staff unit. This represents your generals and their staff, and must be protected. General Staff units have the following special abilities:
-
High Command: General Staff units always count as having a Commander, as long as any models are still part of the unit. All rules that apply to units with a Commander also apply to General Staff units.
-
Inspirational: Units close to the General Staff are less likely to break. When a friendly unit is within 2 hexes of your General Staff unit, it receives a +4 bonus to all Fortitude Tests (see Fortitude), +2 bonus to Attack Values, and +1 bonus to Defense Value.
-
Rally Point: If a Shaken unit is able to move into a hex adjacent to a friendly General Staff unit, it immediately becomes Hesitant and stops moving. Remove 1 Morale Marker from the Unit Flag (See Flee).
-
Dishonor: If your General Staff unit is destroyed, all of your units on the game board must immediately make a Fortitude Test with a -2 penalty. For the rest of the game, all of your units have -2 Fortitude (See Fortitude Tests).
Advanced Rules
Terrain Modifiers
In addition to its effect on unit movement, terrain can modify a unit's combat abilities.
Plains — Modifiers: None
Light Woods — Modifiers: +1 Defense
Heavy Woods — Modifiers: +2 Defense
Rice Fields — Modifiers: None
River — Modifiers: -3 Attack; -2 Defense; -2 Firepower; -2 Fortitude
Ford — Modifiers: -1 Attack; -1 Defense; -1 Firepower; -1 Fortitude
Bridge — Modifiers: -2 Attack; -2 Firepower
Village — Modifiers: +1 Defense; +1 Fortitude
Rocky Ground — Modifiers: None
Ravine — Modifiers: None
Hill — Modifiers: A unit in melee gains +1 Attack Value if it is 1 level higher than the enemy it is fighting. A unit in melee suffers -1 Attack Value if it is 1 level lower than the enemy it is fighting.
Expert Rules
Fatigue
Fighting battles is hard work, and just running around a battlefield in heavy armor will tire the hardiest of men. During the game, units gain Fatigue when they perform various actions. Fatigue can reduce the unit's ability to perform.
A unit's level of Fatigue is represented by Fatigue Markers. These grey markers are placed on the tip of the Unit Flag. 1 Fatigue Marker is gained when the unit:
- Executes an Assault order;
- Goes up a slope when executing any type of movement order;
- Executes a Move and Fire order;
- Executes a Retreat order (unless both sides retreat at the same time);
- Executes a Run order; or
- Crosses a River without using a Bridge or Ford.
The number of Fatigue Markers on the Unit Flag determines the penalties the unit suffers:
| Unit Ability: | Fatigue Points: 2 or 3 | Fatigue Points: 4 or more |
|---|---|---|
| Attack | -1 | -1 |
| Defense | no effect | -1 |
| Fortitude | -1 | -2 |
| Firepower | -1 | -2 |
If a unit has 4 or more Fatigue Markers, you cannot issue Assault or Run orders to that unit.
If a unit has 6 or more Fatigue Markers, it can only execute the Rest order. If this unit is engaged in melee combat, it surrenders to the enemy at the end of the Melee Combat Step of the Execution Phase (remove the unit from the board and treat it as destroyed).
A unit can remove Fatigue Markers by executing the Rest or Ambush orders. Remove 1 marker each turn that a unit rests or remains hidden.
Orders
Assault Whether the assault succeeds or not, your unit receives 1 Fatigue Marker.
Move and Fire Your unit receives 1 Fatigue Marker when it executes a Move and Fire order.
Retreat After moving, your unit receives 1 Fatigue Marker.
If all units engaged in a melee combat are issued Retreat orders, the melee is abandoned and all units move without any combat rolls being made. The units do not suffer any casualties, and they don't receive Fatigue Markers.
Run Your unit receives 1 Fatigue Marker when it executes a Run order.
Ambush A hidden unit also recovers Fatigue. Each turn that the unit remains hidden, remove one Fatigue Marker from the Unit Flag.
Join Up If either unit has Fatigue Markers, the new unit has Fatigue equal to the unit with the most Fatigue Markers.
Rest This order instructs the unit to rest so it can recover from Fatigue. When the unit executes this order, remove 1 Fatigue Marker.
Terrain
River If a unit crosses a river, it receives 1 Fatigue Marker.
Ford A unit crossing a river at a ford hex does not make a Loss Test and does not receive a Fatigue Marker.
Bridge A unit crossing a river at a bridge hex does not make a Loss Test and does not receive a Fatigue Marker.
Hills
Gentle Slope If an infantry unit moves up a gentle slope, it receives 1 Fatigue Marker.
Abrupt Slope If an infantry unit moves up an abrupt slope, it receives 2 Fatigue Markers.