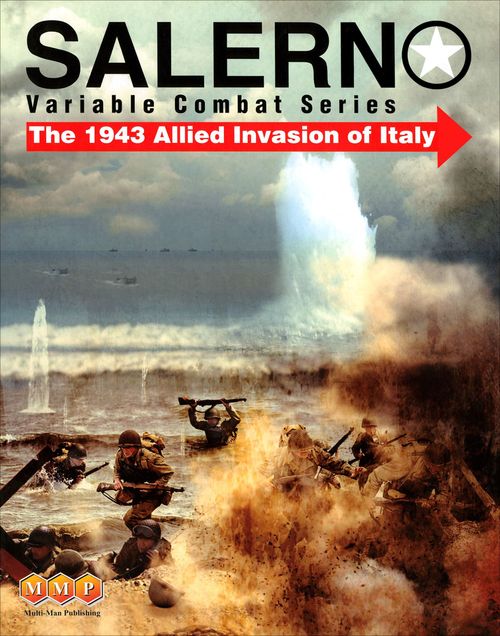
Salerno: The 1943 Allied Invasion of Italy
Salerno: The 1943 Allied Invasion of Italy Rulebook
Table of Contents
Table of Contents
- Scale and Components
- Sequence of Play
- Setting Up the Game
- Amphibious Landing
- Airborne Operations
- Weather
- Supply
- Support Points
- Ports
- Air Operations
- Special Movement
- Special Combat
- Reinforcements
- Replacements
- Mandatory Attacks
- Victory Conditions
- Additional Scenarios
- Design Notes
- Historical Scenario Setup, Landing & Reinforcements
- Variable Reinforcement Table
Scale and Components
Map Scale: Map A and Map B are approximately 1 mile = 1 hex. Map C is approximately 3 miles = 1 hex.
Unit Scale: Units are represented as regimental or battalion size, with some companies in the landing sequence. Aircraft: Group or Wing. Ships: Capital warships are represented by individual ships or groups of ships. Landing craft, Transports, Minesweepers etc, are not represented, but are simulated in support elements and availability of reinforcements.
Additional Units or Markers: Some markers, warships or combat units not present in other Variable Combat System games are included in Salerno. These include: Blown Bridge, Commando, Disrupted, Depot, Reserve, Anti-Ship Missile, Entrenchment, Light Cruiser, Monitor, Pack Transport, Paratroop Battalion, Port Demolitions, Allied Rangers, Support Control Points, Aircraft Carrier, Airfield Marker, Air Support, Zone of Control, Boundary Marker, Assault Battalion, Battleship, and Demo markers.
Counter Abbreviations: The following abbreviations are used on the unit counters in Salerno.
- A: Armored
- AB: Airborne
- BB: Battleship
- Can: Canadian
- Cdo: Commando
- CL: Light Cruiser
- CV: Aircraft Carrier
- FJ: Fallschirmjaeger
- HG: Hermann Goering
- Ind: Indian
- M: Monitor
- PG: Panzergenadier
- Pz: Panzer
- Rgr: Ranger
Sequence of Play
[17.0] Sequence of Play
Salerno is played in Game Turns. Each Game Turn is divided into Phases, several of which are different from those in other Variable Combat System series games. Players take actions as directed during the phases according to the following sequence of play. The first Game Turn is always an Invasion Turn and uses a special sequence to allow 1st and second waves to enter the game, move and have combat all in their own phase. Some actions (for example variable reinforcement determination) are taken only on certain game turns.
Game Turn Outline
A. Preliminary Stage
- Weather Phase. Dice are rolled to determine weather for the current Game Turn. If airborne operations are due, a separate die is also rolled for wind direction.
- Bookkeeping Phase.
- a. Allied segment:
- The Allied player determines how many airfields he owns and adjusts the Airfield Marker on the Allied Airfield/Support Point Track.
- The Allied player determines how many Tactical Points he controls (only on turns 4, 8, 12 etc).
- Support Point Segment. The Allied player determines how many support points he receives and adjusts the markers on the Support Point/Airfield Track accordingly.
- The Allied player may attempt to improve damaged ports at this time. Consult the Port Status Chart. [See Ports]
- b. Mutual Variable Reinforcement Segment. Both players consult the variable reinforcement chart and, depending on the total of both Captured Airfields and Tactical Points, roll two dice each, cross-indexing the result with the combined total and finds out how many optional units are available for use in the coming turn(s). (Only on turns 4, 8, 12 and 16.) Modify this die roll with the current control of Battapaglia modifier as listed in the Variable Reinforcement Table.
- a. Allied segment:
B. Air and Sea Stage
- The Allied player consults the Air Missions Chart and stages for the landing of eligible Paratroop and/or Glider missions from pre-planned Landing Zones. See [20.0].
- Naval movement orders between maps.
- Port assault.
C. Allied Player Turn
- Supply Phase.
- a. Mutual Supply Determination Segment. Both players determine the supply status of their units. The Allied player may assign pack transport, conduct air and/or special sea supply, and expend replacement points.
- b. Support Point Segment. The Allied player determines how many support points he receives and adjusts the markers on the Support Point/Airfield Track accordingly.
- Movement Phase.
- a. Airborne segment. The Allied player conducts airborne missions.
- b. Amphibious segment. The Allied player conducts amphibious missions.
- c. Depot Segment. The Allied player may transfer depots to ports and return previously eliminated depots to the map.
- d. Tactical Movement Segment. The Allied player may move units using tactical movement.
- e. Strategic Movement Phase. The Allied player may move units using strategic movement. No unit may move both tactically and strategically in the same player turn. Resolve any Evasion die rolls inside the Transit Tracks.
- Combat Phase. Allied units adjacent to Axis units may attack per the combat rules.
- Reserve Phase. Allied units that were placed in reserve during the previous friendly movement phase may now be moved at ½ movement rate.
- Engineer Phase. Construction and demolitions may now take place per the engineer rules.
- Post Invasion Build Up Segment.
D. Axis Player Turn
- Supply Phase. Per the Allied Supply Phase, except the Axis player may receive support points, conduct air supply and expend Replacement Points.
- Movement Phase.
- a. Tactical Movement Segment.
- b. Strategic Movement Segment.
- Combat Phase.*
- Reserve Phase.*
- Engineer Phase.*
- Post Invasion Build Up Segment.
*As per the Allied Player turn. Except: German Anti-ship fire segment (AM turns only). Mark targeted ships, assign firing missile or artillery and perform German Anti-Ship die roll.
E. Special Stage
Invasion Game Turns only: Advance the game turn marker to 1b.
- Allied Phase. The Allied player executes a second movement phase and a second combat phase.
- Axis Phase. The Axis player executes a second movement phase and a second combat phase.
F. Game-Turn Indication Stage
The Game-Turn marker is advanced one box along the Game-Turn Record Track to indicate the end of the game turn. Notes: Naval units in coastal hexes now automatically return to sea. Mutual support point depreciation is applied. Rubble markers may be removed. Disruption markers are removed. Pin markers are removed.
{17.1} First-Turn Rules
The first Game-Turn of the Invasion Scenario or the Campaign Game is subject to a number of special rules.
{17.11} There are no Bookkeeping, Supply, Reserve, or Engineer Phases in the first Game-Turn.
{17.12} Movement Allowances of all units are halved during each Movement Phase, rounding down fractions. Allied units may not use strategic movement.
{17.13} There is a Special Stage during which each player takes a second Movement Phase and Combat Phase. Thus, although Movement Allowances are halved, units may move twice. Refer to these game turns as Game Turn 1a (first wave) and 1b (second wave). The sequence of the first Game Turn is thus: Weather, Allied Tactical Movement and Combat; Axis Movement and Combat; Allied Tactical Movement and Combat; Axis Movement and Combat. At the end of turn 1b, roll any eligible German Anti-shipping artillery die rolls.
{17.14} If Storm is rolled, roll the weather die roll again.
Setting Up the Game
[18.0] Each unit has a set-up code printed to the left of its unit symbol. Units with four-digit set-up codes are initially deployed on the map in the hex corresponding to the set-up code.
Units with a date and Map/road entry lettering enter the game as reinforcements. (Example: 9PM A/C would indicate the unit enters on the 9PM Game-Turn, on Map A, and enters on road C on that map.)
Additionally, Allied units arriving as seaborne assault units or reinforcements have codes specifying their destination beach, turn of entry, and may have a deployment "name" for placement in an Invasion Staging Area or garrison town name.
Units coded as "VAR" are available in special conditions. These units are set aside for use when conditions for entry to the game have been met. (See Variable Reinforcements.)
Markers for weather, game turn, indication, support points [23.0], wind direction, airfields and tactical points should be placed on the tracks at the start of the game and credited with the proper indication per the rules in each case. Ships assigned to a map section initially are placed into any full sea hex on that map.
Amphibious Landing
[19.0] Only the Allied player may conduct amphibious landings. Amphibious landings occur only on the First Game-Turn (exception see [32.0] Variable Campaign Game). The invasion Game-Turn always includes a Special Stage (see {17.13}).
[19.1] Procedure. During the Amphibious Segment, the Allied player places units to be landed on coastal hexes directly in front of the deployment square. He rolls a die for each landing unit to determine whether or not it is disrupted, adjusting the die roll per the Disruption Chart. If there are disrupted units in the beach hex add +1 to the die roll.
{19.11} Place a Disrupted marker on units that fail the die roll (if the result is 7 or more). These units may move no further than the designated beach landing hex this Game Turn except as a result of combat.
{19.12} Undisrupted units may move one hex beyond the landing beach hex unless prohibited by terrain or enemy zones of control.
{19.13} All units on First Wave landing boxes must be landed on the invasion turn 1a. First wave units may move normally (at half movement) in the second half (1b) of the Special Stage.
{19.14} Units in Second Wave boxes are landed on the second half of the Special Stage (1b). These units follow the exact procedure as first wave units.
{19.15} Supply Depots must be landed in any friendly beach hex of the designated beach.
{19.16} On Game Turn 2, movement is considered to be back to normal, units paying costs per the Terrain Effects Chart. Reinforcements then use the depot as their first entry hex and Disruption die rolls cease. Exception: Allied units on Map C may not use Strategic Movement until turn 12 or by use of the Alternate Scenario rules.
[19.2] Stacking in an Invasion Beach. Maximum stacking limits for a designated invasion beach hex are 4 units if all are battalion sized. If regiments are stacked in an invasion beach hex, the stacking limit is three units. If a beach has reached maximum stacking limits, units in second wave boxes or follow-up forces may choose an adjacent beach hex of the same nationality. If none are available, the unit(s) must delay their landing for one turn. U.S. and British units may not freely stack. If forced to by combat results they may defend normally, but must separate at the first opportunity if possible.
[19.3] Combat in an Invasion Beach / German Attritional Die Rolls. Allied units perform combat normally without change in an invasion situation. German units still in entrenchment hexes on game turn one and two may only attack by firing attritional die rolls at adjacent Allied stacks. Once per friendly combat phase, choose a hex occupied by Allied units and roll one die:
- 1: Pinned (no movement or attacks on the next Allied turn)
- 2-5: No Effect
- 6: One Step-loss
(No support points are expended for these die rolls.)
[19.4] Special Post-Invasion Build Up. At the end of each Game Turn, starting with turn 2, both sides may enter a special build up phase. When building smaller component units up into brigade or regimental units follow the guidelines for nationality and unit type:
{19.41} Allied: All regimental members shown as Assault Battalion are removed from the game. Replace these with full and half strength regiments of the same regimental code or number. Allied units must be within 5 hexes (inclusive) to qualify for build up. The regimental unit may be placed in any available controlled hex that is in supply, not adjacent to German units and that every unit comprising the build up force can trace the 5 hex limit.
{19.42} If there are three battalions on the map, even if these have taken step-losses in the initial battles, a full strength regiment is placed. If one battalion has been eliminated, a half-strength regiment is placed.
{19.43} The German 16th Panzer division has a different makeup for its two regiments. Each regiment will need at least 1 infantry battalion and 1 infantry company and 2 antitank or tank company units to build to a full strength regiment. Less than 4 units = reduced regiment.
{19.44} When this division has completed the buildup of its two regiments all of the company sized units making up the 16Pz division will have been removed from play. The only units that start the game on Map A that will not be removed are the artillery, engineer and battalion sized tank units. If the necessary unit combinations are within 10 hexes of each other, a full sized regiment is placed within that 10 hex limit that is, still German control, not adjacent to Allied units and outside the original fortification line perimeter. The regimental unit may be placed in any qualifying hex as long as every unit comprising the build up force can trace the ten hex limit.
{19.45} If at least one unit survives either the Allied or German side, the cadre of the regiment is brought on the map.
{19.46} Units must be on the same map section or in the same Transit Track to qualify for building up purposes. Once built up, units cannot break back down to the smaller components. Units comprising the force to be built up must be on the same map or Transit Track and not in an isolated status to qualify. Units may never break down into smaller components.
Airborne Operations
[20.0] Only paratroop and glider units may conduct airborne missions. There are two types: assault and reinforcement.
[20.1] Procedure. During the Airborne Segment, airborne units are placed in their target hexes. The phasing player now announces which type of mission is being made for each target hex and rolls a single die (D6) to determine wind direction. Each unit in each target hex is now rolled for Loss and Scatter per the Airborne Chart. Modifiers for weather and wind direction are applied.
[20.2] Airborne Missions. There are two types of airborne missions: assault and reinforcement. Before conducting missions, the phasing player must announce which type is being performed and the target hexes for the mission(s).
{20.21} Target hexes for paratroop units may only be Level 1, 2 or 3 hexes. Glider units may be targeted only to Level 1 hexes. City, swamp and enemy occupied hexes may not be chosen as targets. The same target may not be chosen for both paratroop and glider units, although up to three units of one type may be targeted for a single hex.
{20.22} A target hex for an assault mission must be at least two hexes away from all friendly units. A target hex for a reinforcement mission must be vacant, adjacent to a friendly unit and not be in an enemy Zone of Control. Both types of missions may be performed on the same game turn.
{20.23} If the current turn weather is Rain or Storm, no missions may be attempted.
[20.3] How Units Land.
{20.31} As each unit is placed in its target hex, the player must determine loss and scatter for the unit.
{20.32} Refer to the Airborne Missions Chart for LOSS and roll one D6. Modify the roll as directed by the modifiers listed at the bottom of the chart. Cross-reference the die roll with the unit type (paratroop or glider) and apply the result.
{20.33} The player then rolls again, modifies the roll, and refers to the SCATTER column on the chart. Cross-reference the die roll with the unit type and apply the result as explained on the chart, noting prevailing wind direction.
{20.34} If a unit scatters to a hex that could not normally be the target of an airborne mission (e.g., a Level 4 hex), the unit's LOSS result is increased by one level (from no effect to D to -1 to -1D). If a unit scatters to an all sea hex, it is eliminated. Units scattering to Transit Track hexes must end movement there for the phase.
{20.35} A unit scattered to an enemy occupied hex is subject to increased LOSS also (from no effect to D to -1 to -1D). In addition, it is displaced to an adjacent hex by the opposing player according to the following set of priorities: a) to a hex legally targetable according to unit type, b) to any other non-enemy occupied hex. If there are no eligible hexes, the unit is eliminated.
{20.36} A unit expends no movement points to conduct an airborne mission. An undisrupted airborne unit may move tactically on the game turn it conducts a mission. Strategic movement is only possible on later turns, after it has first established a supply line to a supply source.
{20.37} Airdropped units are considered to be in supply for two game turns.
Note: Only the US 82nd Airborne division may be airdropped. The German and British airborne units may not perform this action. Airdropped units are considered to be in supply two game turns.
Weather
[21.0] During the Weather phase, the players roll two D6 and refer to the Weather Track. This dice roll determines the weather in effect for the current game turn, as indicated by the track.
[21.1] Effects of Weather
{21.11} Good weather has no effect on play.
{21.12} A Mistral affects air supply, airborne, amphibious, and air operations.
{21.13} Rain affects air supply, airborne, amphibious, and air operations as described in those rules. In addition, all rivers are impassible except where bridged by roads on Rain turns. No air operations are possible on Rain turns.
{21.14} Storm, effects several operations as on Rain turns, including the inability to use sea movement, receive seaborne reinforcements, or provide Naval Gunfire Support. Additionally, no port repairs or port assaults may be made.
Supply
[22.0] Section [11.0] of the Standard Rules applies to Salerno except as modified in the following.
[22.1] Supply Lines
{22.11} The German player must use the northern edge of Maps A and B for supply sources. Foggia is also a supply source.
{22.12} The Allied player may only trace supply to Depots of the same nationality (U.S. or U.K.). After game turn 12, U.K. 8th Army supply can be traced off the west board edge of Map C, but support for game functions is charged to the 8th Army Depot in Taranto. However, if units of 8th Army can only trace off map and not to Taranto, no action that would require the expenditure of support points may be taken by 8th Army units until the connection to the 8th Army depot is reestablished.
{22.13} Ranger and Commando units remain in supply and may continue to trace to their landing beaches as a supply source for these two units only; no other units may trace from these beaches. If the beach is captured, no more supply may be traced from the beach until recaptured and one additional turn has passed. Both may trace from either beach Vietri or Maiori.
{22.14} To trace supply to a supply source across a Transit Track to another map, one road linking both sides of the track must not be in the undisputed ZOC of an enemy unit. Enemy units solely occupying a Transit Track Zone block all friendly supply lines from tracing through. If both enemy and friendly combat units occupy a transit track, supply for either side may be traced through the zone.
{22.15} Supply links through a Transit Track zone may connect, for supply purposes, two adjacent maps, or back onto the same map if no enemy combat unit is either solely occupying the track during the Mutual Supply Phase or blocking supply roads by their presence or ZOC. Supply may not be traced through more than two Transit Track zones.
{22.16} Units within supply range (no road) of a transit track that is not enemy controlled may trace through up to two tracks, and then on through a series of connecting roads to a supply source.
{22.17} For a unit in a Level 4, 5 or 6 hex to be in supply, it must occupy or be adjacent to a supply source, transit track, or road hex. The road must be connected as per [ ] to a friendly supply source by a fully linked road net. A unit may be in supply three hexes (Maps A and B) (two hexes Map C) from a supply source or road hex if the unit's hex and the intervening hex are no higher than Level 3 terrain. A unit may be in supply four hexes (Maps A and B) (three hexes Map C) from a supply source or road hex if the unit's hex and all intervening hexes are Level 1 terrain. This includes swamp hexes, which are considered to be Level 1.
| Level of occupied/intervening Hexes | Max Distance from Road/Supply Source, Map A or B | Max Distance from Road/Supply Source, Map C |
|---|---|---|
| 1 | 4 | 3 |
| 2, 3 | 3 | 2 |
| 4, 5, 6 | 1 | 1 |
{22.18} Units equipped with Pack Transport may trace supply lines one hex farther than other units in the same terrain.
{22.19} Units in entrenchments must trace supply normally.
{22.20} All units are automatically in supply on the Game Turn they enter play.
Note: The Allied player has one spare U.S. Depot which, if landed by Port Assault may become a supply source after undergoing any German Port Demolitions and normal Port Repair sequence.
[22.3] Depots
The Allied player has four depot counters, two each for the U.K. and U.S. A unit may only trace supply to depots of its own nationality. [see Note>>]
{22.31} The Depots are initially deployed in Second Wave boxes as indicated by their set-up codes. The Allied Player must land them according to the amphibious rules. They can only be landed in beach hexes containing roads; they may not be landed in a port, swamp or city hexes. They may only land in a hex in an enemy Zone of Control if the hex is occupied by a friendly combat unit. Depots are never subject to disruption. (Exception: See Ports, Note XX, the British Depot is placed directly into Taranto on Game Turn 1b).
{22.32} A depot is not a combat unit. It has no ZOC, movement allowance, or attack strength. If attacked while alone in a hex, the depot defends with a combat strength of 1; all column shifts and terrain modifiers apply. A depot can never add its defense strength to those of friendly units. A depot can never retreat and is eliminated by any loss or retreat result. A depot is eliminated if left alone in a hex as a result of the elimination and/or retreat of other friendly units in the hex. A hex may contain no more than one depot, but a depot does not count against stacking limits.
{22.33} Salerno starts all scenarios with a Port Demo +1 marker.
{22.34} A depot in a non-port may be moved to an Allied owned port during the Depot Segment of the movement phase. Simply move the depot into the port. A depot in a port may be moved to another port. Depots may not otherwise be moved.
{22.35} Depots eliminated due to combat results are returned to the map on a friendly beach hex after two turns. The loss of a depot causes the following effects: Half of any positive Support Points accumulated by the depot are lost (round down). If the second depot of a nationality is lost, all remaining Support Points for that nationality are lost.
{22.36} One eliminated depot of each nationality may be returned per Game Turn. A returned depot may be placed in any friendly beach/road hex, provided that hex is occupied by a friendly combat unit and is not within three hexes of an enemy unit. A depot must be placed on the appropriate side of the U.S./U.K. boundary and cannot be directly placed into a port. (Exception: see Port Assault and Taranto).
[22.4] Air and Sea Supply
{22.41} During the Supply Phase of the player turn, each side may attempt to supply one unit by air per game turn. Only the Allied player may attempt to supply a unit by sea. Successful air and sea supply improves a unit's supply status by one level (from Isolated to Out of Supply to Supplied).
{22.42} If a unit to be supplied by air is in an enemy ZOC, it is successful on a single D6 roll of 1-3. If not in an enemy ZOC it is supplied on a roll of 1-5. If the German player rolls a 6 on any air supply attempt he gains a +1 Die Roll Modifier on any successive attempts. For each 6, one more DRM is gained.
{22.43} To be supplied by sea, a unit must be in a coastal hex no more than 20 all sea or partial sea hexes from a friendly depot. Sea supply is automatic but for either Air or Sea supply one support point must be expended.
{22.44} Air supply may only be attempted in Good Weather. Sea supply may be made in any weather except Storm.
{22.45} No Allied unit may receive both Air and Sea supply in the same game turn.
Support Points
[23.0] Section [12.0] of the Standard Rules applies to Salerno except as modified in the following.
Both players are restricted as to the number of attacks units of each nationality may make without penalty. Before the start of the Campaign Game, 4 support points are given to each of the U.S., U.K. and German nationalities. Players may receive additional points during the game. Once allotted to a nationality, a point may never be transferred to another. Points are expended when attacks are made, special actions taken, replacements and variable reinforcements taken. A listing is made of the cost per action on the Support Point Cost Summary Chart.
Place Support Point markers on the Support Point/Airfield track in the correct amounts at the start of the game for each nationality. Keep track of gains and losses here.
[23.1] Expending Support Points
{23.11} If a depot is eliminated, half of any positive Support Points (round fractions down) immediately are lost by the depot's nationality. If a nationality loses both of its depots, all positive support points are lost.
Various actions require the expenditure of support points. See the Summary sheet for the cost per use.
{23.12} Support points may only be gained and lost by the units that use them. For example, Support points expended for 5th Army attacks in the Salerno Beachhead may not come from those generated from the 8th Army Taranto Depot.
[23.2] Gaining Support Points
{23.21} During the Support Point Segment of his player turn, a player may receive points. Note that there are no such segments on Game Turn 1.
{23.22} ALLIED: Each depot on the map generates Support Points each Game Turn. A depot generates one point in a beach hex, two in a minor port and 3 points in a major port.
{23.23} GERMAN: During his Support Point Segment, the German player consults the Airfield Chart to determine the number of airfields captured by the Allied player and rolls one D6. Cross-referencing the number of airfields captured on the German Support Points column and subtracting any modifier called for by the column. The modified roll indicates the Support Points received by the German player for the current Game Turn. If the modified number is negative, he loses Support Points.
Ports
[24.0] Ports
{24.01} Each time the Allied Player captures or recaptures a port, the German player immediately rolls 1 D6 to determine whether it has been affected by demolitions. Port repair die rolls must be successful to enter a previously damaged port. Even after the waiting period has elapsed, the repair die roll sequence must be followed. Port repair attempts cost 1 Support Point.
{24.02} Salerno starts all scenarios with a Port Demo +1 marker.
{24.03} Taranto does not roll a demolition die roll. (The Italian Navy gave it up intact as a parting gift when their fleet departed on Sept. 9.) (Exception: Storm)
Port Status Summary
| Demolition Die Roll | Result |
|---|---|
| 1-4 | No Effect |
| 5 | 1 Turn Delay |
| 6 | 2 Turn Delay |
| Repair Die Roll | Result |
|---|---|
| First Attempt | 1-2 Repaired |
| Second Attempt | 1-4 Repaired |
| Third Attempt | Automatically Repaired |
(Exception: Storm)
[24.1] Port Assault
{24.11} This is an exception to the rule governing the movement of depots and may be performed only once during the game.
{24.12} If, during any Bookkeeping Phase it is determined that a port of any size has been captured by the Allied player and held in supply for two full game turns, it may now be declared as a port assault and the spare U.S. depot moved directly in. Expend 2 U.S. Support Points immediately. This action also costs 2 Allied Victory Points for diverted shipping. The port now may function as a supply source and entry point for U.S. reinforcements.
Note that the capture of any port must have undergone a normal port demolition die roll and have fully recovered before becoming operational. After this sequence is complete, place a port garrison 1-0 unit in the depot hex.
Air Operations
[25.0] Air Operations
[25.1] Airfields and CV Units
{25.11} An airfield is considered captured by the Allies if an Allied unit occupies or was last to move through the airfield hex and there are no supplied German units adjacent to the airfield hex.
{25.12} During the Bookkeeping Phase, the Allied player determines how many airfields he has captured and moves the Airfield marker on the Airfield/Support Point Track to the proper numbered box. The marker may not be changed for the rest of the Game Turn.
{25.13} Due to the long distance to friendly airbases, CV (aircraft carrier) units are provided that maintain existing Allied airpower until ample land based airfields are captured. CV presence is necessary to maintain air power on Map A and B. Loss of these units while the airfield marker is 5 or less means that no Allied air power is possible on Map B and suffer -1 drm on Map A attempts. Once the marker reaches 6, CV units are not necessary.
[25.2] Air Points
{25.21} During the Bookkeeping Phase, players consult the Airfield Chart and cross-reference the number of airfields currently captured by the Allied player, with the "Air Points Available" column. This will show how many Air Points can be used in the current turn.
{25.22} Using an Air Point does not automatically result in a column shift in combat. When the players allocate a point, he refers to the appropriate line and column ("attacking" or "defending") under "Die Roll Needed When" section of the Airfield Chart. Roll 1 D6. If the result is within the span indicated on the chart, the Air Point provides a column shift on the Combat Results Table. Otherwise the point is lost. No more than one point may be allocated to a combat per side, regardless of whether or not it was successful.
{25.23} Air points are shared by both Allied nationalities.
{25.24} On Rain turns, the number of available Air Points is halved dropping fractions. On Storm turns, no air points or air missions are possible.
{25.25} If the Allied player controls less than 4 airfields during any Bookkeeping Phase on Game Turn 4 or later, he may declare Emergency Bombing twice per scenario. There are 2 additional Air Points available. These points automatically produce column shifts in combat and cost 2 Support Points per use.
{25.26} The off map airfield at Crotone on Map C is captured automatically on the Bookkeeping Phase of turn 4.
Special Movement
[26.0] Special Movement
Units moving on Map A and B use the assigned Terrain Effects Chart and units on Map C use the other Terrain Effects Chart. The scale is about 3 times larger on Map C, so the costs in movement factors are increased to allow for the greater distance traveled in the same relative time period.
[26.1] Transit Track Movement
When moving between maps, units must use the Transit Tracks that separate the maps before entering a different map. These tracks represent 20-40 miles of terrain and may be occupied by both enemy and friendly units.
{26.11} There are bold dividers within the tracks that may not be crossed without spending a complete game turn waiting inside of the track.
{26.12} Units entering a transit track pay costs per the terrain type exited, lose excess movement factors and may not move further in the current game turn.
{26.13} All units that enter a transit track are required to spend one full, friendly movement phase on the Waiting side before moving out of the track, unless combat results require it to exit.
{26.14} Units beginning the Game Turn on the Ready side of the Transit Track may move either to an adjacent map or instead enter an adjacent Transit Track and end movement there.
{26.15} German units entering the game from the north map edge as reinforcements may enter Transit Track #1 on the first hex of entry, but if doing this, lose all remaining movement factors once they enter.
{26.16} Note: No building or demolition actions are allowed inside of a Transit Track. Units within Transit Tracks are not considered when calculating proximity for demolition attempts.
[26.2] Limited Movement
Some units may have their movement reduced or enhanced due to circumstances and different situations.
{26.21} Invasion. Undisrupted Allied units may only move a single hex beyond the beach on the first turn, 1a of the Special Stage. On the first turn 1b, undisrupted first wave Allied units may move at ½ movement rate. Second wave units are still limited to one hex beyond the designated invasion beach hex if undisrupted.
{26.22} Map C. Unit of the 8th Army (Allied units entering Map C as reinforcements) may not use strategic movement on Map C until Game turn 11. (note: see 28.0/Special)
Only the German 29/15, 29/Rcn and 1FJ/4 are free to move on turn 1 due to fuel shortages. The rest of the 29PG division is free to move on turn 2.
{26.23} Salerno Beach Defenses. Units occupying entrenchments on Salerno beach may not move on turn 1 except as a result of combat. Units without entrenchment markers are under no restrictions. Special: The German entrenchments that begin the game have a temporary Zone of Control even though the units occupying them are battalion or company size. Once these hexes become vacated for any reason, the temporary ZOC is lost.
{26.231} Allied units may not attempt to leave Map A in an eastern direction until Game Turn 4.
{26.24} Paratroop Units. Paratroop units that are airdropped may move only tactically until a legal supply line exists to a friendly depot. Map C depot will not function for this purpose until after Game Turn 11 unless the optional scenario rules are used.
{26.25} Commando and Ranger Units. Commando and Ranger units may always ignore the first enemy ZOC they enter during retreat or advance after combat.
[26.3] Pack Transport
During the Supply Phase of the Player Turn, after Game Turn 8, the Allied player may equip units with Pack Transport. Up to 3 units may be equipped with Pack Transport. One Support Point is expended to equip a unit with Pack Transport.
{26.31} A unit must be in supply to receive Pack Transport.
{26.32} Pack Transport allow a unit to trace supply one hex longer than other units in the same terrain.
{26.33} Units marked with Pack Transport may not use Strategic Movement.
{26.34} If the marker is removed for any reason, it is lost.
{26.35} Pack Transport markers cannot be transferred between units after placement.
[26.4] Roads, Bridges, Rivers and Towns
{26.41} A unit using Tactical Movement must pay one additional movement point when entering a road hex containing a friendly combat unit. Additional units in the hex do not increase the cost. The point must be paid even when the unit is not moving along the road.
{26.42} Pure armor or artillery units may not cross unbridged rivers except if accompanied by an engineer unit. This special ability is lost on Rain or Storm turns. The engineer and armor or artillery unit must start the movement phase stacked together and adjacent to the river in order to perform this task. It costs both the engineer unit and the armor/artillery their entire movement allowance to cross.
{26.43} Mechanized Infantry may cross an unbridged river by beginning the movement phase adjacent to the river and expending all of their movement allowance. This may not be performed on Rain or Storm game turns.
{26.44} A Mechanized unit using Tactical Movement pays one additional movement point for entering a town (not city) hex.
[26.5] Sea Movement
Allied warships may use only the full (not partial), ocean hexes to apply pressure to German defenders in several ways:
a. Warships occupying full, Light Blue sea hexes adjacent to coast hexes employ their fullest range when firing in combat. These hexes are subject to German artillery fire and minefields.
b. A mine clearing die roll must be made before an Allied warship may enter the full light blue hexes closest to the coast each time a warship attempts to move into these. Each ship must roll before entering (even where another ship has cleared a path into the hex). Roll a single D6. 1-3 clears a path into the hex. 4-6 entry is forbidden this turn. After Game Turn 4, all coastal hexes are considered to be free of mines and no further die rolls must take place to enter these hexes.
c. Only one attempt at either Sea Movement or NGS per turn is allowed. If ships are moved between maps, they cannot be used for combat that turn. If ships committed to support a combat fail the minefield die roll and now cannot fire due to range limitations, the combat will not receive NGS support this turn. Flip these ships to their "fired" side. Warships must be within range to participate in combat. Leaving the coastal hexes is automatic. Just place the ship counter in the staging area behind the beachhead at the end of the game turn.
d. Movement between Map A and Map C is allowed by spending 2 full turns off map. Movement to the East coast of Map B is only possible from the South of Map C and 2 turns delay off map is required.
e. One combat unit may accompany each ship unit from a friendly, in port depot to another in port depot if the unit begins the game turn in the depot.
f. No Sea movement from Map C to Map A is allowed until turn 8.
[26.6] Reserve Movement
{26.61} Stacks marked with a Reserve marker during the Movement Phase may be moved at ½ movement allowance during the Reserve Phase.
{26.62} Reconnaissance units may add the die roll of 1 D6, after rounding down, to its movement factor.
{26.63} To qualify for Reserve movement, a stack may not be adjacent to an enemy unit, must be in supply and may not move or perform any functions during the Movement or Combat Phases. IE. receive replacements, air supply, sea supply, provide combat shifts or build entrenchments.
{26.64} Reinforcements have the option to enter the game during the Reserve phase. No markers are necessary for these.
{26.65} Three Reserve markers are available, per friendly movement phase.
{26.66} There is no sea movement allowed in the Reserve Phase except for the landing of reinforcements.
{26.67} Units already in the "Ready" side of a non-enemy occupied Transit Track at the start of the regular movement phase may be placed in Reserve mode.
{26.68} There is no combat phase after the Reserve Phase; it is solely a movement function.
{26.69} There is no Railroad movement (5.3) possible in Salerno.
Special Combat
[27.0] Special Combat
Units in the Salerno game are never forced to attack adjacent enemy units. However, if units are attacking, special rules apply that force the combat of adjacent enemy units.
Unless (attacking) units occupy city, town, entrenchment or level 4 or higher terrain which is also higher than the defenders terrain level, all enemy units adjacent to any attacking units must be attacked in some way.
British and US may not normally stack together or attack together except within a Transit Track. If forced to stack due to combat results, they must separate at the first opportunity. When attacked, they may defend together but only one nationality may add artillery, air and/or Naval defensive support. The exception is the Darby Ranger unit that may fight either with British or US units freely.
{27.1} Terrain
a. Units in City (and town) hexes are subject to the voluntary attack provisions of {10.0} (but see c. below).
b. A unit in a Level 4, 5 or 6 hex is not forced to attack an enemy unit in a hex of terrain lower than its hex. If it does, it need attack only one such hex.
c. Even if in a city, town or entrenchment, an attacking unit adjacent to enemy units in higher terrain must include these units in an attack of some kind.
d. If a player's units occupy a higher level of terrain than enemy units, the player receives column shifts equal to the difference in Level between the two hexes. In multi-hex combat, the highest terrain level each player occupies is used to calculate the column shift.
Example: Allied units occupy Levels 2 and 3; German units occupy Level 5. Allied units are attacking and are considered to occupy Level 3 (the highest level) and German units Level 5; the column shift is 2 columns for the German player (5-3=2).
e. City, swamp and sea hexes are considered to be Level 1 when considering elevation.
f. A unit defending in a town (not city) hex receives a one-column shift to the left on the CRT. Only one such shift may be awarded per combat.
g. A German unit defending against an amphibious landing has its combat strength doubled if attacked solely from a sea hex.
h. A unit defending normally across a river hex side also has its strength doubled per {10.1}.
{27.2} Transit Track Combat
Units starting inside or entering Transit Track Zones that are enemy occupied, start a possible encounter sequence of die rolls that may cause the forces to "evade" each other or "engage" each other in combat. Both players must roll a single die (D6) at the end of the movement phase.
| Die Roll | Result |
|---|---|
| 1-2 | Evade |
| 3-6 | Engage |
(If either player rolls a 6 the result is automatically "Engage".) In order for combat to take place in the Transit Track, unless a 6 is rolled, both results must read "Engage". If either player rolls "Evade", and there is no 6 rolled, no combat takes place and combat units remain in the Transit Track until the next movement phase.
Combat is per the standard combat rules except that:
- Artillery must be within the zone to apply combat odds shifts.
- When a retreat is called for in a Transit Track combat result, the owner has the option to 1) Retreat to an adjacent Transit track, 2) Retreat to an adjacent map, 3) Take step-losses that fulfill the result and remain in place. When choosing direction for retreats, the one closest to a friendly supply source must be chosen.
- All Advances after combat are ignored.
- B1-(1) results force the Defender to exit the Transit Track and take a step loss. In order to remain in the Transit Track, the Attacker in this case, must take two step losses; otherwise, a retreat back to the map and road of origin is required.
- Terrain for combat purposes in Transit Tracks is considered to be on the Level 2-3 line.
- Multi-unit combat within a Transit Track is subject the same restrictions as combat on the hex map. Units defending are totaled and defend as a single group. Attacking units are totaled and attack as a single group. Shifts for Divisional Integrity, Combined-Arms and Artillery apply normally if the conditions allow. No air point, NGS, or elevation, shifts may be applied.
- More than one regimental unit may participate in Transit Track combat. This is due to the larger area involved and is an exception to the standard combat procedure.
Units entering the Transit Track during the friendly Reserve phase do not roll to evade, engage in combat, or impair the movement of enemy units inside the Transit Track in any way.
Allied units of different nationalities may occupy the same Transit Track and defend together normally, if attacked. Unlike normal combat restrictions, Allied units may attack together, but do so with a negative column shift to the left during resolution, and cost one support point for each nationality. Units within a Transit Track may only engage in combat with units that are also within the same track. ZOCs do not extend into or out of a Transit Track.
[27.3] Artillery, German Anti-Ship Rockets, Inter-Army Restrictions
a. Throughout the game, the Allied player must maintain a boundary between the British 8th Army and the multi-national 5th Army. The line is marked each game turn by the 8th Army boundary arrow markers. These are marked by designating hexrows in any way the 4 provided markers can divide the play area of the map. 8th Army units may enter this hexrow, 5th Army units may not. The boundary markers may be moved in the accounting phase, [4.21 a].
Hexrows chosen for the army boundary ignore Transit Tracks. Both army units may share Transit Tracks for all game functions.
b. Artillery must be in full supply to provide support.
c. Until Game turn 5, eligible German artillery may also attack warships in full sea hexes closest to land. At the end of the Allied turn, the German may fire Artillery at Warships. Roll one D6 for each German Artillery unit that has not fired in the current turn that is within 3 hexes of an Allied warship. 1-5 No effect, 6-Damaged and out of service for 2 full turns.
d. On Game turn 5, and thereafter (see*), on all AM turns the German secret weapon- Anti-ship radio controlled rockets replace the Artillery die rolls. There is a range limit on these weapons. Any one Allied ship on either Map A or Map B may be targeted, even within the open sea staging areas. The German rolls 1 D6 during the German Anti-Ship Phase and applies the result as follows: 1 – Hit- Remove the ship and any combat unit using that ship for transport from play. 2-6 – No effect. (Note: If Foggia is captured, the die rolls stop for the remainder of the game.)
{27.31} A replacement ship of the same type may arrive after 4 turns. There is a cost of 2 Support Points and 3 Victory Points when a warship is lost. 8th Army and 5th Army must immediately share the cost. It will cost 2 Support Points and 3 Victory points again when the replacement arrives.
[27.4] Naval Gunfire Support (NGS)
Allied Warships may bombard German defenders by shifting the odds column on the combat table. Warships only attack or defend together with attacking or defending ground troops and automatically produce combat column shifts if in normal, not extended, range.
Naval missions may involve no more than one of the following combinations per combat.
Ship Range Summary
| Ship Type | Map A/B | Map C | Shifts |
|---|---|---|---|
| BB-M | 6 hexes | 3 hexes | 2 Shifts |
| CL | 3 hexes | 2 hexes | 1 Shift |
a. Allied Battleships or Monitor Class ships add 2 shifts to combined attacks, or 2 in defense.
b. Allied Cruiser class ships add 1 shift to combined attacks, or 1 in defense.
c. Only one attempt at either Sea Movement or NGS per turn is allowed. Warships marked "fired" may not fire defensively in the German combat phase.
d. Allied warships may extend the range of their support beyond the listed range per ship type but must roll a single D6 to produce column shifts. BB and M class ships may extend the effective range by up to three hexes (2 hexes on Map C) if rolling 1-3. CL class ships may extend the effective range by up to two hexes (1 hex on Map C) if rolling 1-3.
e. Procedure: Just before combat, the Allied player makes a declaration of combat and may earmark eligible ship units that wish to support combined attacks. He then may deploy these on full sea/dark blue sea hexes as close to the land combat as possible, and roll a single D6 to attempt to enter full sea/ light blue coastal hexes. 1-3 - succeeds (lanes are swept free of mines), 4-6 fails, (lanes are not swept) - If successful, the ship may enter the hex and can automatically support, in range combat units ashore. If unsuccessful, the ship remains in the dark blue sea hex from which the attempt was made. If the target is still within the range of the ship, support can still be applied. One supporting capitol ship, per combat is allowed.
f. Stacking is unlimited for warships.
g. There are two CV Aircraft Carrier unit provided. Loss of either of these ships will mean a reduction of available air points by one if the Allied player is in control of 4 airfields or less. One CV unit is necessary to provide air support on Map B until the airfield marker reaches 6. CV ship units do not provide NGS support.
Example: On Map A, a BB class ship wants to extend the range to support an attack that is 8 hexes away. A single D6 is rolled and a three is the result. Two column shifts are now applied in this combat in favor of the Allied player. If the die roll produced a 4-6 no NGS column shifts would be available in this combat.
[27.5] Miscellaneous
{27.51} Some battalions have two steps of strength. When such a unit suffers a one step-loss, flip it to its reduced side. A two-step loss or additional one step-loss result eliminates it.
{27.52} No unit may ever retreat or advance into terrain impassible to it by the rules of movement. (See Terrain Effects Chart). A unit forced into prohibited terrain, or ending its Combat Phase in a sea hex, is eliminated. Combat units may advance and/or retreat into, but not through, non enemy occupied Transit Track zones without penalty.
{27.53} In addition to the retreat priorities in the standard rules, units that are retreating must first choose a hex that will be closer to, the direction of their supply source, and continue in that direction unless prohibiting terrain or enemy units prevent it.
[27.6] Optional
To add to the uncertainty of the random nature of the combat system in Salerno, Units should surrender all full strength chits once every fourth turn on the Allied Bookkeeping Phase. Return these chits to the force pool cup.
Reinforcements
[28.0] Reinforcements
Units with an AM or PM by their left facing number may be received a reinforcements on the Game Turn corresponding to the number. Variable reinforcements may also be available depending on the case.
[28.1] Seaborne Reinforcements
{28.11} Allied seaborne reinforcements arrive at a depot hex of the appropriate nationality. If there are no such depots on the map, reinforcements are delayed until one arrives.
{28.12} Seaborne reinforcement may not arrive in a hex in an enemy ZOC unless the hex is occupied by a friendly combat unit.
{28.13} As a unit enters the map it pays the terrain cost for its entry hex.
{28.14} If a unit enters using Tactical movement, all costs must be paid according to the Terrain Effects Chart.
{28.15} Units may enter the map in Strategic movement only if all the normal conditions are met.
{28.16} Reinforcements may enter the game in the reserve phase but must use the reduced movement rate.
{28.17} Reinforcements may be delayed at the owning player's option.
{28.18} Some Allied reinforcements are marked "VAR". If the Allied player brings such units into play, he immediately spends two Support Points if the unit is a regiment or brigade, one if it is a battalion. He also loses Victory Points as detailed on the schedule. This rule also applies to optional airborne reinforcements in the Variable Campaign game.
[28.2] Off Map Reinforcements
{28.21} Some Allied and all German reinforcements enter on a friendly map edge on a designated Entry Road. These units are coded with a Map/Road designation to regulate entry. The Game Turn of arrival is also coded on the unit.
{28.22} Units arriving from off-map pay terrain costs normally. If more than 3 combat units arrive at one entry road, they must be deployed behind one another, on off-map road hexes of the same type, up to the limit of stacking.
{28.23} Off-map units may arrive either in Tactical or Strategic mode when calculating costs.
{28.24} If all of the Entry Roads are blocked by enemy units (not just their ZOC), delay the entry by one Game Turn. Units delayed may then enter any non-enemy occupied hex on the same map edge, or may enter a Transit Track (if the edge blocked is the north edge).
{28.25} Special: The UK 1 Canadian and 5 British reinforcements may enter the game on the game turn after there are not supplied German regimental size units on Map C, or on the listed turn of arrival, whichever occurs first. Check for the conditional release during the Allied movement phase. Early arrival of these reinforcements ends the prohibition of Allied Strategic Movement on Map C on the game turn that they arrive. Supply also may be traced off map at this time for 8th Army units.
[28.3] Variable Reinforcements
If the German can limit Allied gains, there is a chance of receiving more reinforcements than historically. If the Allies push back the German quickly enough, there is a chance that more support could have been given sooner.
{28.31} Red numbers in brackets are printed on the map next to the names of some cities and towns. These are Victory Points.
{28.32} During the Bookkeeping segment of game turns 4, 8, 12 and 16, the players total the Victory Points for all cities and towns captured by the Allies.). The number of captured airfields (including Crotone) is added to this. Add or subtract the die roll modifier for the capture of Battapaglia and Altavilla per the Variable Reinforcement chart. The result gives an Allied/German listing of available conditions or units available to each player. No more than 3 units per turn may be added and not before turn 5.
{28.33} All available Variable reinforcements are optional and players are never forced to bring these into play. Note that Victory Points are paid for each entered unit. Added, single use Air Points, Anti-shipping Missiles or Support Points are free, however.
Replacements
[29.0] Replacements
{29.11} Players receive Replacement Points by nationality as shown on the Game Turn Record Track. Replacement Points may be saved for use on later turns.
{29.12} A player may spend Replacement Points on his friendly Replacement Phase. No more than one point per friendly nationality may be spent per Game Turn.
{29.13} Players receive armor and infantry Replacement Points.
{29.14} By expending one Armor Point, a player may:
- Flip a reduced tank battalion to its full strength side.
- Restore to full strength a parent mechanized infantry regiment or brigade that has suffered a one step-loss.
- Restore a cadre to a reduced strength parent regiment or brigade.
- Return an eliminated parent mechanized infantry to the map as a cadre in a town closest to divisional members and at least three hexes away from enemy units.
{29.15} By expending one Infantry Replacement Point, a player may:
- Flip a reduced subordinate infantry or engineer battalion to its full strength side.
- Restore to full strength a parent infantry regiment that has suffered a one step-loss.
- Restore a parent infantry cadre to a reduced strength regiment.
- Return an eliminated parent infantry regiment to the map as a cadre in a supplied town closest to divisional members and at least three hexes away from enemy units.
{29.16} Eliminated regiments or brigades without non-cadre survivors on the map, units in Zones of Control, out of supply units, isolated units, artillery, eliminated battalions, and ship units may not receive replacements.
{29.17} Units that have just received air or sea supply may not receive replacements.
{29.18} Each time a player spends a Replacement Point, one Support Point is lost for that nationality and from the correct Depot. Players also lose Victory Points for receiving replacements.
{29.19} If a side has no engineer units on the map, one can be returned from the eliminated units at the cost of one infantry replacement.
{29.20} Replacements begin 5 days (10 turns) into the campaign and one infantry or armor step is allowed for each nationality, per day.
{29.21} Regiments receiving a replacement point should be noted and for their first combat draw, two chits are pulled. The chit with the lower corresponding rating number is used and the other chit placed back into the cup.
[29.23] Replacements (schedule)
| Turn | Allied | German |
|---|---|---|
| 10 | Infantry Step (Br) | Infantry Step |
| 12 | Armor Step (US) | Armor Step |
| 14 | Infantry Step (US) | Infantry Step |
| 16 | Armor Step (Br) | Armor Step |
| 18 | Infantry Step (Br) | Infantry Step |
Mandatory Attacks
[30.0] Mandatory Attacks (Historical campaign only)
{30.11} If the Allied player has not made an attack by the end of Game Turn two, 1 Victory Point is immediately deducted from the Allied VP track.
{30.12} If the German player has not attacked Allied seaborne forces by the end of Game Turn six 1 Victory Point is immediately awarded on the Allied VP track.
Victory Conditions
[31.0] Victory Conditions (Historical Campaign)
The Game ends after Game Turn 18. At the end of the game, the Allied player totals his Victory Points, and determines the victor and level of victory. The German player never accumulates Victory Points.
Accumulating Victory Points. The Allied player should keep track of the Victory Points turn by turn on the track and bring this total to the end of the game where it is added or subtracted according to the following schedule:
{31.1} Victory Point Schedule
- +1 per captured airfield
- +1 per captured tactical Point
- +2 per eliminated German artillery unit, brigade or regiment
- +1 per German regiment or brigade reduced to cadre
- +#5=1VP per full Combat Strength each eliminated German battalion
- +5 per variable German brigade or regiment brought into play
- +2 per variable German battalion brought into play
- +1 per German Replacement Point spent
- +2 per exited Allied brigade or regiment in supply
- +1 per exited Allied battalion in supply
- +15 for capture of Foggia by Game Turn 14
- +5 for capturing Foggia after Game Turn 14
- -2 per Port Assault
- -3 per lost Warship
- -3 per added Warship
- -2 per eliminated Allied brigade or regiment
- -1 per Allied brigade or regiment reduced to cadre
- -2 per, in supply German combat unit on Map C
- -#5=1VP per full Combat Strength Allied battalion eliminated
- -5 per Variable Allied Brigade or Regiment brought into play
- -2 per Variable Allied battalion brought into play
- -1 per capture of Vietri or Maiori, (one time only each)
Note: If no German units or only isolated German units remain on each of the maps, the Allied player receives full credit for airfields and tactical Points, even if not all of them were captured. Count each map separately in this case.
{31.2} Determining Victory
After Victory points are computed, players refer to the following Victory Level Schedule to determine the victor and level of victory.
| Net Victory Points | Result |
|---|---|
| 61 or more | Allied Decisive Victory |
| 56-60 | Allied Substantive Victory |
| 50-55 | Allied Marginal Victory |
| 40-49 | Draw |
| 34-39 | German Marginal Victory |
| 29-33 | German Substantive Victory |
| 28 or fewer | German Decisive Victory |
Additional Scenarios
[32.0] Additional Scenarios
(Note: German setup and reinforcements remains unchanged)
Scenario #1 Long Shot to Barletta
This fictional scenario uses shipping constraints and airborne destinations that were entirely within the means of the commanders of the Italian campaign.
The 82nd Airborne division was stationed on Sicily with 318 transports and 318 Gliders with tows. The 7th Armored division was loaded for reinforcement of the Salerno operation in Africa and had assigned LSTs.
The scenario provides the players a look at one optional plan that could have been used had the commanders wished to a) Race north, b) Set a trap for up to 2 German divisions, c) Provide a diversion for the risky Salerno invasion.
This urgency to press north is all the more important when seen in the view of an unfinished German fortification project along the Volturno/Cassino line well known to the Allies at that time.
The goal of this scenario is to study the threat to German plans by moving substantial Allied forces north at an earlier date than they did historically.
Note: The airborne battalions and companies are not used in the historical campaign.
Initial deployment and reinforcements:
Historical campaign schedule - unchanged except for the following:
Choose a Landing hex (LZ) within 5 hexes of Barletta on Map B.
Roll wind direction, disruption and scatter normally.
- Turn 1a - 2 airborne battalions B/505/82, C/505/82 on the LZ, companies 1, 2 and 3 of 'A' Battalion may land within 2 hexes of the LZ. Deploy CV Formidable and BB Valiant on Map B sea area at start.
- Turn 1b - Glider regiment 325/82 - LZ
- Turn 2 - 319/82 airborne artillery, 504/82 - LZ (build up phase at the end of the turn)
- Turn 3 - 509/82 within 3 hexes of Barletta
- At Taranto: 131/7A, 7 Eng, 5 RTR tank, 3RH tank
- Turn 4 - 22/7A, 11H tank, 65 AT, 4 Eng
- Turn 5 - 3RHA, 5RHA Art, 21 Eng
Unlike the historical campaign, Strategic Movement on Map C is allowed for all units directly connected to a depot. Tracing off the southwest board edge will not count for this purpose.
Available Allied air support is effective only on a die roll of 1 on Map B until turn 4. This point is available only if an Allied CV is present on Map B sea hexes. The German air points attack die is increased to 1-3 with a defend point available on a 1-2 die roll on Map B only. If these points are not used on Map B, the Air chart numbers are used normally.
On the game turn after Barletta is captured an automatic port assault occurs. Roll any demolition and subsequent repair rolls if necessary. After this, the spare US depot is moved in and supply and reinforcement is traced normally. US reinforcements may be diverted to Barletta, but must first stage using sea movement as if traveling from Map A, starting on the turn of arrival that they would have landed at Salerno. No warships are required to make this transfer.
Exiting the northern map edge on or before turn 8 forces the German player to delay entry of equal sized units, or if this is not possible, withdraw units equal in size. Exited or withdrawn units may not return to the map for any reason, and count for victory only if they can be deemed to be supplied from the same road that they were exited from. Mark exited roads for this purpose.
German units may not enter or withdraw from roads that have been used for Allied exit purposes.
The northern most transit track may not be used for exiting the map. Once an Allied unit has exited anywhere on the northern map edge, no German units may enter this track as reinforcements as their first move onto the game map.
Victory Points for supplied, exited Allied units are +5 per Regiment, + the number of Battalion, current combat strength points exited.
Victory Conditions: Exactly as in the historical campaign except:
Early capture of Foggia and both major airfields by turn:
- 6 = 20 VPs
- 7-10 = 10 VPs
- 11-13 = 5 VPs
These Victory Points are over and above the listed value.
Scenario #2 Gavin's Gambit
This was a scrubbed mission to land airborne forces around Nocera and hold open the critical mountain pass leading to Naples. General Gavin of the 82nd Airborne later commented that he was relieved when he heard that the highly dangerous mission was canceled because, in his opinion, it was too tactical in nature and not strategic, as was the best use of airborne forces.
Some afterthought as to the value of this mission and its uses is worth studying and is now provided to help prove one way or the other its importance to the campaign.
Initial deployment and reinforcements:
Historical campaign schedule - unchanged except for the following:
Initial deployment: Choose a landing hex (LZ) within 3 hexes of Nocera. Roll wind direction and disruption/scatter normally according to the Airborne Operations section.
- Turn 1a - 2 Airborne battalions - 505/82. Companies 1, 2 and 3 of 'A' Battalion may land within 3 hexes of the LZ, but not on the map edge, in prohibited terrain or on enemy units.
- Turn 1b - 325 G/82 Rgt
- Turn 2 - 319 Art, 504/82 Rgt - (recombine battalions and companies into regiments normally)
- Turn 3 - 509/82 Bn within 5 hexes of the nearest AB unit
AB forces may not exit the north map edge until turn 12.
Use historical landing schedule for all other units.
Victory Conditions per Historical Campaign except for the following:
All regiments of the 82nd Airborne eliminated pay double at the end of the scenario even if replaced. -10 VP for each cadre eliminated.
Scenario #3 Race for Cassino
This is a fictional proposal that places the two most successful Allied Generals in another cooperative adventure with the goal of moving the Allied armies as far to the north as possible before winter sets in. In this battle, Montgomery will be landing an all Commonwealth force at Salerno. Patton will head up an all U.S. force starting at Taranto. The use of the 82nd Airborne division to open up the port of Bari will be explored. Patton will retain most of his 7th Army while Montgomery will keep the 8th Army. Both armies have experience at amphibious landings and will bring most of their experienced staff along. It is supposed that Patton has convinced his superiors that use of shipping necessary to transport the 2nd Armor from Sicily will be necessary to link up with the airborne division. Operation Goblet, the capture and use of the airbase at Crotone by the Operation Baytown off map divisions (1 Canadian and 5th British Inf), is assumed to have been necessary to assure ample air support for the operation. The airfield on the southern edge of Map C is deemed operational at the beginning of the scenario.
Initial deployment: Map C
Choose a Landing hex (LZ) within 5 hexes of Bari on Map C.
Roll wind direction, disruption and scatter normally.
All U.S. Naval ships begin on Map C, with HMS Illustrious, HMS King George V and HMS Howe. Either side of the heel may be chosen initially.
- Turn 1a - 2 airborne battalions B/505/82, C/505/82 on the LZ, companies 1, 2 and 3 of 'A' battalion may land within 2 hexes of the LZ.
At Taranto:
- Turn 1a - 30/3 Inf, 1/531 Eng
- Turn 1b - depot, 2/531 Eng, Glider regiment 325/82 on LZ
- Turn 2 - 15/3, 7/3 Inf, 751 tank, 131, 151 Art, 531/3 Eng, 504/82, 319/82 airborne artillery on LZ (build up phase at the end of the turn), 7A Port Garrison Port assault Bari, Darby's Rangers lands at Bari. -1 DRM on demolition roll if Darby lands undisrupted.
- Turn 3 - CCA/2A, 160 Art, 509/82 (airdrop) within 3 hexes of Bari.
- Turn 4 - CCB/2A, 645 tank, 111 Eng, US depot to Bari if cleared of demolitions.
- Turn 5 - 179/45, 157/45
- Turn 6 - 601 tank
- Turn 7 - 191 tank, 158 Art
- Turn 8 - 180/45, 636 tank, 120 Eng, 171 Art
- Turn 9 - 141/36, 142/36, 143/36
At Salerno beaches: Map A
- Turn 1a - The British 46th and 56th divisions and Laycock commando land per the historical campaign. Darby is withheld as reinforcement on Map C.
The U.S. beach is re-designated U.K. The British 1/1 and 2/1 Parachute Infantry are broken down to 1/1/1P, 2/1/1P, 3/1/1P, 5S/2/1P, 6W/2/1P and 4/2/1P and lands on this beach. Set up the battalions on the U.S. Invasion display.
Additions to Historical order of appearance:
- Turn 1b - 2/1, 8th Army depot, 23 Eng, HMS Valiant
- Turn 2 - 4/1, 7 RHA Art, 44RTR tank
- Turn 3 - 11/78, 36/78, 105 AT
- Turn 4 - 38/78, 17 Art, 8th Army port garrison
Special Rules: US reinforcements may, after Bari becomes operational, use the depot as an entry point. Units must delay scheduled entry by one game turn if exercising this option.
Victory conditions: Per Long Shot for Barletta schedule.
Scenario #4 Invasion Tutorial
This scenario is 4 game turns in length and is only played on Map A and B.
Players begin on Game Turn 1a and total victory points after the German game turn 4 is complete.
Special Stage E., using the ½ turn sequence of play is in effect as well as all campaign rules governing the first 4 turns of play.
Mandatory attacks 30.11 is in effect but 30.12 is not.
The order of appearance is unchanged except the two units 15/29 and 29/Recn appear in Transit Track #6 on the German Game Turn #2.
71/29, 129/29, 9/26Pz, 26Rcn appear in Transit track #6 on Game Turn #3.
Only Victory Points on Map A count for victory purposes.
Unit and ship losses count as normal on the Victory Point schedule.
Exited units are counted normally.
| Net Victory Points | Result |
|---|---|
| 10 or more | Allied Decisive Victory |
| 8-9 | Allied Substantive Victory |
| 6-7 | Allied Marginal Victory |
| 5 | Draw |
| 4 | German Marginal Victory |
| 3 | German Substantive Victory |
| 2 or fewer | German Decisive Victory |
Design Notes
Although players may prosecute the battle however they see fit, much effort was taken to create a framework that addresses the historical events and conditions. Some players are initially thrown off by the two different maps scales (three miles per hex in the south, one mile per hex in the north), but they work together with the transit tracks and each unit's single, printed movement allowance to allocate properly the forces of three separate, distant operations.
Additionally, the game tries to give players some sense of the capabilities of naval units and their value during the battle. The German counterattack may at times seem irresistible until it gets within range of the ships' powerful guns.
Finally, a German player who wants to do well will understand the need for establishing a workable defensive line north of Salerno as well as mobilizing a strong counterattack force. On the other hand, a lazy or too cautious offensive will doom the Allied effort.
Updated: 2/16/2013
Historical Scenario Setup, Landing & Reinforcements
Allied Landing and Reinforcement Schedule
Sept. 9 AM
Turn 1a First Wave
- US: 36th Inf.-1, 2/141, 1, 3/142 assault infantry, 1, 2/531 Eng
- At Maiori-Darby/Rangers, (CL) USS Philadelphia, (CL) USS Brooklyn, (CL) USS Boise, (M) HMS Abercrombie
- UK: 56th Inf.-2/5, 2/7/Q (169), 8RF, 9RF/167 assault infantry, 56 Eng
- 46th Inf.-2H, 4H/128 assault infantry, HMS Roberts, (M) HMS Orion, (CL) HMS Aurora, (CV) HMS Illustrious, (CV) HMS Formidable
- At Vietri - Laycock/Commandos
- At Taranto - 1/1 AB
Turn 1b Second Wave
- US: 3/141, 2/142 assault infantry, 3/531 Eng, Depot
- UK: 5H/128, 2/6/Q (169), 70B/167 assault infantry, 46 Eng, Depot
- At Taranto - Depot, Port Inf (Taranto). (BB) HMS King George V, (BB) HMS Howe
Turn 2 9PM
- US: 36/143, 111 Eng, 131, 151 Art, 191, 601, 645, 751 tanks
- UK: 201/56, 64, 65 Art, RSG, RTR tanks, 58 AT, 139/46, 138/46, 71, 172 Art, 2 Scots tank, 67 AT
- At Taranto - 2/1, 4/1 AB, 23 Eng, 7 RHA Art
Turn 3 10AM
- US: 179/45, 160 Art
Turn 4 10PM
- US: 157/45
Turn 5 11AM
- US: 158 Art
Turn 8 12PM
- UK: (BB) HMS Warspite
Turn 10 13PM
- US: 636 tank, 504/82 (airdrop reinforcement)
Turn 11 14PM
- US: 509/82 Bn must air assault w/in 2 hexes of Avellino
- UK: 1st Canadian (All)-C/B-D, 5th Inf. (All) C/A-B, Can Art, RC Eng -C/B-D, 5 Art, RE Eng -C/A-B
Turn 12 14PM
- US: 505/82, (airdrop reinforcement), 180/45, 171 Art
- UK: 131/7Arm, 7 Eng, 5 RTR, 3 RH tank
Turn 13 15AM
- US: 120 Eng, 325/82
- UK: 11H tank, 65 AT, 4 Eng
Turn 14 15PM
- US: 319 Art
- UK: 22/7Arm, 3, 5, RHA Art, 21 Eng
Turn 18 17PM
- End Historical Scenario
Note that 1-0 Port garrisons may enter Salerno and Agropoli on the game turn after they become fully operational.
Initial Setup German
Set up on hex numbers: (E=Entrenchment marker)
Map A
| Hex | Units |
|---|---|
| 1508 | 215 MkIV |
| 2012 | 1/2/16Rcn; 274/AT (Salerno) |
| 2111 | 16/Pio a |
| 2510E | 3/2 Sturm; 2/64 Inf |
| 2608 | 1/16 Art |
| 2810E | 2/2 MkIII; 2/64 Inf |
| 3110E | 2/2 MkIII; 1/79 Inf |
| 3311E | 2/2 MkIV; 1/79 Inf |
| 3410 | 3/16 Art |
| 3612E | 16/Pio b; 1/64 Inf |
| 3913E | 2/2 MkIV; 2/79 Inf |
| 4112 | 2/16 Art |
Map B
| Hex | Units |
|---|---|
| 10A | Garrison (Foggia) |
Map C
| Hex | Units |
|---|---|
| 2631 | 15/29; 29/Rcn |
| 2730 | 71/29; 129/29 Sturm |
| 2209 | 4/1FJ (Gioia) |
Reinforcement Schedule German
Sept 9AM
Turn 1a First Wave
- Map A: 1/HG Pz [Roads A, B]
- Map C: 15/29Pg, 29Rcn and 4/1 FJ released
Turn 2 9PM
- Map A: 3/1 FJ [Roads A, B]
- Map C: 71/29Pg, 129/29 released, 9/26Pz, 26Rcn [Roads A, B]
Turn 3 10AM
- Map A or B: 129/15PG [Road D]
- Map A: 71NW Art [Roads A, B]
- Map C: 67/26Pz, 26IGS, 93 Art, 1/1 Para [Roads A, B]
Turn 4 10PM
- Map A or B: 104/15PG, 115Rcn, 15/Jpz, 115/15, 26MkIII, 26MkIV [Road D]
Turn 5 11AM
- Map A: 2/HG, HG/Auf, HG/Art [Roads A, B]
Turn 6 11PM
- Map A: HG/II, HG/Cor, HG/III, HG/Flak [Roads A, B]
- Map A or B: 29/3PG, 3/103Puma [Roads A-D]
Turn 7 12AM
- Map A: 8/3PG, 3/103Sturm [Roads A-D Or B]
Turn 8 12AM
- Map A: 10A Eng
Turn 9-18
- No reinforcements.
- Variable units: 1SS (7 units), 24 (6 units), 2FJ (3 units), 94 (3 units), 44 (3 units).
Variable Reinforcement Table
Allied (Total allied airfield and Victory Points)
| 2D6 | 0-11 | 12-14 | 15-17 | 18-up |
|---|---|---|---|---|
| 1-2 | - | - | - | - |
| 3 | - | - | - | - |
| 4 | - | - | - | - |
| 5 | - | - | - | - |
| 6 | - | - | - | +1 Air point DRM |
| 7 |
German (Total allied airfield and Victory Points)
| 2D6 | 0-11 | 12-14 | 15-17 | 18-up |
|---|---|---|---|---|
| 1-2 | 1SS, 1 Art, 24 Pz, 2 FJ | + 1 missile DRM | + 1 missile DRM | + 1 missile DRM |
| 3 | 24 Pz, 1Art | 2 FJ | 44 Inf | - |
| 4 | 94, 44 | +1 Air point DRM | 1Art | - |
| 5 | 1Art | 1Art | - | - |
| 6 | + 1 missile DRM | - | - | - |
DRM
- -1 if Allies do not control Battapaglia and Altavilla
- +1 if they are both in Allied control
Notes
Both players roll 2D6 on the bookkeeping phases starting on Game Turn 4. Results indicate available units/effects on turn 5 or later.
The number of Allied naval units is limited by the countermix. Any additional naval units rolled for are ignored.