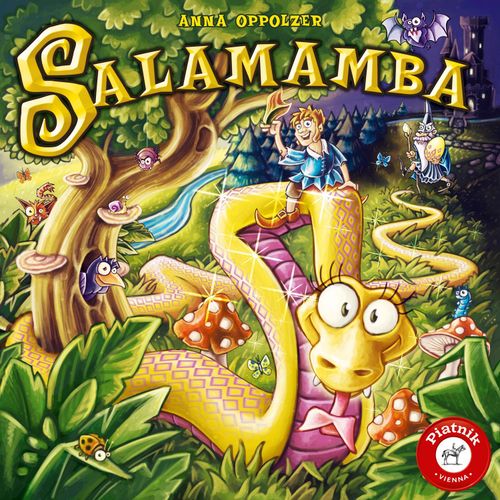
Salamamba
Salamamba Rulebook
Table of Contents
Table of Contents
Components
- 32 mushroom tokens: 8 tokens per board section (2 gnomes, 2 magic items, 2 nasty animals, 1 crystal, 1 exit portal)
- 4 double-sided board sections
- 1 double-sided track card showing the path of the witch
- 14 snake sections
- 2 snake sections with magic fairy dust
- 1 magic die (Zauberwürfel)
- 1 snake die (Schlangenwürfel)
- 3 tunnel tiles
- 24 castle tokens: 6 per room (1 key, 2 magic items, 3 nasty animals), 4 doors
- 3 half-round entrance portals
- 1 witch "Fiesolix" with stand
- 1 golden snake egg with stand
- 1 overview of the effects of the 12 magic items
- 1 rulebook
Transcriber's note: the exact layout of which token goes on which mushroom type and board space is shown only in the printed illustrations (pages 4 and 6 of the German rulebook) and is not transcribed as text here.
Carefully push the parts out of the punch sheets before the first game. Fit the witch Fiesolix and the golden snake egg into their stands. Then the game can begin!
Hello! I am the magic snake Salamamba, and I live with my friends, the gnomes (Wichtel), in the enchanted forest. We have a lot of fun there. But now and then the wicked witch Fiesolix disturbs us. That's him over there, the nasty fellow. When Fiesolix leaves his castle at dusk, he rarely has anything good in mind. Can you help me complete my tasks before Fiesolix reaches the end of his path and his surely abominable goal?
Game Flow
You may be wondering how this game works. I can tell you: you take turns one after another. Whoever is on turn rolls both dice. First the magic die is resolved, which moves the witch and triggers mysterious spells. Then the snake die is used to move Salamamba. Then the dice pass clockwise to the next player. That's all there is to it!
Basic Rules
Before I explain how to set up the playing area and which components you need, I will answer four basic questions for you:
- What do the symbols on the magic die mean?
- What do the symbols on the snake die mean?
- What must be observed when Salamamba is moved?
- How can Salamamba complete her tasks?
1) The Magic Die
The witch moves: Depending on how many wizard hats the die shows, you must move the witch forward along her path by exactly that many steps.
A discovery spell takes effect (eye symbol): The player who rolled may look under any token on any board section, without telling the others what is pictured on it. It is allowed to hint, through facial expression, whether it is worth moving to this token later or whether a danger lurks there instead. The token is then placed face down again on its space.
A twilight spell reveals the secret of a token (arc symbol): The player who rolled may turn over any token and place it face up on its space, visible to everyone.
- If you wake a nasty animal of the witch, it flees immediately to Fiesolix. He then moves forward along his path by as many steps as there are wizard hats on the animal. The animal token then goes back into the box.
- If you uncover a magic item, a gnome, a portal, a crystal or a key, the token stays face up on its space until Salamamba collects it.
2) The Snake Die
Depending on how many snake scales the die shows, Salamamba may be moved 1 to 3 times. There are three options, which may be chosen freely and combined as you wish. Each option counts as one movement:
- Salamamba grows: Any snake section from the supply is always inserted at the front, between head and body. The new snake section may be turned and rotated as desired. The head is pushed forward and attached to the new snake section.
- Salamamba shrinks: A snake section is always removed at the back, between tail and body, and returned to the supply. The tail moves up and is attached to the new end.
- Salamamba turns around: The head and tail sections of the snake are swapped. Salamamba has turned around and from now on slithers in the other direction.
3) Placement Rules
- Salamamba always moves only along the ground. She cannot climb over obstacles (for example a tree, a stream, a stone, and so on). Exception: the effect of some magic items, which allows her to overcome obstacles.
- Salamamba may never be interrupted. That hurts her.
- Salamamba may never leave the board sections! Exception: the start and the end of the game!
- Salamamba may use tree trunks, ladders and other crawl spaces on the board sections and crawl underneath them. Such passages are marked with arrows. She may also crawl into and back out of special tiles such as portals and tunnels. To do so, the head of the snake must lie directly in front of the respective object. When the snake is lengthened, the head comes out again at the other end of the object. Note that a snake section used to lengthen Salamamba may not cover the object.
- Salamamba may never crawl over or under herself!
4) Completing Tasks
To complete her tasks, Salamamba must collect certain tokens on the game board. An overview of the properties of the individual tokens is given at the end of these rules. Salamamba may collect face-up or face-down tokens when she moves over them. A collected magic item may be used once at any time. After that, it goes back into the box.
Game Setup
Once you know all of this, you can decide which variant you want to play:
- Do you want to accompany Salamamba across three chapters and help her complete various tasks? Start with Chapter 1.
- Or do you want to take on the wicked witch straight away and explore her castle? Start with Chapter 3.
Regardless of which variant you choose, for the sake of order we should mention that each chapter can also be played independently of the other two chapters.
In addition, you can choose a difficulty level for each chapter:
- For a simpler game, place the witch on the space on her path marked with 1 star.
- For a somewhat harder game, Fiesolix starts on the space marked with 2 stars.
- For a truly challenging game, place him on the space marked with 3 stars.
Chapter 1: Hide-and-Seek in the Enchanted Forest
Chapter 1 Setup
Lay out the board sections with the four landscapes next to each other, as shown in the illustration.
Roll the starting space for Salamamba with the magic die. Depending on which symbol you roll, she begins her search on a different board section (see the dice symbols in the illustration on the right). Place the snake's head on the corresponding space and the tail section directly behind it. At the start, the tail lies outside the board. Place the remaining snake sections beside the board as a supply.
Take out these tokens, shuffle them with the mushroom side up, and place them on the designated spaces on the board sections according to mushroom type (see the illustration).
The witch is on the path that leads him across the meadow and through the forest. He starts in the direction of the arrow, on one of the spaces marked with a star, depending on the chosen difficulty level.
Place the magic die and the snake die ready. In addition, you need the two snake sections with magic fairy dust, in case you want to redeem the corresponding magic item (jug) during the game. Keep these separate from the other snake sections. Also take out the three tunnel tiles. If you use the magic shovel, you will need a tunnel.
Chapter 1 Task
Hide-and-seek in the enchanted forest. Today is a wonderful day in the enchanted forest. My friends, the gnomes, were just here with me. Since we decided to play hide-and-seek, they hid under the mushrooms, and I get to look for them! But what do I see? The wicked witch Fiesolix is strolling out of his castle gate with a big basket. He surely doesn't want to pick mushrooms? If he discovers the gnomes, it certainly won't end well. I know him! Will you help me find the gnomes before Fiesolix notices them and can fetch his gnome-catching net from the castle?
Salamamba's task: find and collect all eight gnomes.
Whenever Fiesolix lands on a space with a mushroom on his path, or moves past one, he collects a matching mushroom from the board. You may decide together which token he uncovers.
If Fiesolix lands on a space with a fly agaric on his path, you must therefore reveal a fly agaric token in the deciduous forest.
- If it is a gnome, Fiesolix takes one additional step forward on his path. The gnome is returned to its space, face up.
- If it is a token with a nasty animal or a magic item, nothing happens. The token is removed from the board and goes back into the box.
To win, you must have collected all eight gnomes (2 per board section) with Salamamba before the witch returns to his castle and fetches his net.
- Beginner variant: When setting up, look for the four animals with only one wizard-hat symbol. Return the remaining four animals with two wizard-hat symbols to the box.
- Expert variant: Each time Fiesolix uncovers a gnome, he runs even faster to fetch his net. He takes two additional steps forward on his path.
Chapter 2: Good Heavens, Where Is the Egg!
Chapter 2 Setup
Lay out the board sections with the four landscapes as shown in the illustration.
Salamamba starts with her head in the deciduous forest, on the space with the small snake. Place the tail outside the board, attached to the head. Place the remaining snake sections (without the sections with magic fairy dust) beside the board as a supply.
For the three board sections on which the snake does not start, roll an entrance portal with the snake die and place the half-round portal tile according to the roll. Which portal belongs to which board section can be seen from the colour of the butterflies. Depending on how many snake scales the die shows, place the portal next to the space with the corresponding number of butterflies.
Take out these tokens, shuffle them with the mushroom side up, and place them on the designated spaces on the board sections according to mushroom type:
Entrance portals: three half-round portal tiles, in blue, yellow and pink (see illustration).
The witch is moving on the steps of his castle tower and starts at the bottom of the staircase, on one of the spaces marked with a star, depending on the chosen difficulty level.
Place the magic die and the snake die ready as well.
Chapter 2 Task
Fiesolix has picked not only mushrooms but also my golden egg. And now he is on his way to his castle. Right behind him! But somehow Fiesolix has bewitched the forest! The paths are gone! But my friends, the gnomes, know what to do: the castle can be reached through secret portals. Will you help me find the portals and activate them with a crystal before Fiesolix reaches the castle tower, from where he can deactivate them again?
Salamamba's task: find the secret portal that leads into the inside of the castle, and crawl into it.
To get from one board section to the next, you must find the round exit portal under one of the mushrooms on each section, as well as the crystal to activate it. The colour of the portal tells you which board section is the next one you may search with Salamamba. How does this work?
When Salamamba collects a round exit portal, you may place it on any outer edge of the board section on which Salamamba currently is. The portal must be accessible to Salamamba. Think carefully about where you place it, because you may not move it afterwards! This portal is your exit and leads you through the half-round entrance portal of the same colour to the next board section.
Note: the collected green portal from the board section with the castle gate is placed next to it, outside the board section. After all, you want to get into the castle.
To crawl through an exit portal, you also need a crystal to activate it. Only when you have found both do you move Salamamba toward the exit portal. To leave a board section, Salamamba's head must lie directly in front of the exit portal. When the snake is lengthened, her head then comes out again on the first space after the entrance portal of the corresponding board section. When lengthening Salamamba, note that the snake section inserted behind the head may not protrude beyond the board section!
To win, Salamamba's head must lie on the space with the castle gate of the last board section before Fiesolix has reached the very top of his castle tower.
- Beginner variant: When setting up, look for the four animals with two wizard-hat symbols and eight magic items (instead of four). You then also need the two snake sections with magic fairy dust and the three tunnel tiles. Return the remaining four animals with one wizard-hat symbol to the box.
- Expert variant: Each time Salamamba uncovers a portal, Fiesolix senses the growing magic emanating from the snake and hurries even more to climb the steps of his castle tower. He takes one additional step forward.
Chapter 3: The Search for the 4 Magic Keys
Chapter 3 Setup
Lay out the board sections with the castle rooms kitchen, parlour (Kaminstube), laboratory and library next to each other, as shown in the illustration.
Place a locked door on each space with a key. The bookcase behind which the secret entrance to the chamber lies, in which Fiesolix has hidden the golden egg, goes on the corresponding space in the library.
Place the golden egg on the space marked with an egg.
Place Salamamba's head on the entrance space of the kitchen, with her tail directly behind it (it again protrudes beyond the edge of the board). Place the remaining snake sections (without the sections with magic fairy dust) beside the board as a supply.
Shuffle the tokens with the printed backs face down and place them on the correspondingly marked board spaces.
The witch is on the staircase of his castle tower and starts at the top of the tower, on one of the spaces marked with a star, depending on the chosen difficulty level.
Place the magic die and the snake die ready.
Chapter 3 Task
Fiesolix has stolen my golden egg. But I managed to sneak unnoticed into the castle and have landed in the kitchen. Of course the witch hides the egg well behind many locked doors. Typical! Please help me search the individual rooms, because the keys to the room doors must be somewhere. Perhaps I will even find useful magic items along the way that can help me? But be careful: the castle is teeming with very many, particularly nasty animals! And once I have the egg, I should get out of the castle as quickly as possible, before Fiesolix can close and bolt the castle gate and I can no longer get out!
Salamamba's task: find all four keys, collect the egg, and quickly leave the castle again.
To move from room to room, you must find and collect the respective key for the room door. Only then can you remove the door token and advance into the next room. In the library, the golden egg is behind the secret door in the bookcase. To take the egg, however, it is not enough to merely open the secret door; Salamamba must also crawl into the small chamber.
As soon as you have the egg, the snake must quickly leave the castle again. From this moment on, you no longer roll the magic die. The witch now always moves two steps forward on his path. Fiesolix is hurrying very much, because he wants to reach the castle gate, close it, and thus prevent Salamamba's escape.
To win, Salamamba must at least stick her head out of the castle before Fiesolix reaches the last space on his path.
- Beginner variant: Fiesolix has stumbled over one of his nasty animals and sprained his foot. As soon as Salamamba has found the egg, Fiesolix therefore moves only one step forward on his path, instead of two.
- Expert variant: Fiesolix is wearing his bewitched high-tech sports shoes today. As soon as Salamamba has found the egg, he even moves three steps forward on his path.
Overview and Effects of the Tokens
-
Magic items: A collected magic item may be used at any time. Several items may be used one after another immediately. A magic item may be used once in one of two ways. Either
- a) the witch may be moved back one space on his path, provided the token shows a yellow star. After that the magic item is removed from the game; or
- b) the effect of the respective item is applied. After that too, the token is removed from the game.
You must therefore think carefully about how you use the magic items. The effects of the individual items are as follows:
- Magic book: The book contains a spell with which you may re-roll any one die. You must use the magic book before you resolve the dice.
- Magic broom: You may immediately rearrange all tokens on one board section as you wish, on the marked spaces. In this way you can bring tokens you want to collect closer to Salamamba and banish the nasty animals to a corner.
- Magic balloon: With the magic balloon, Salamamba can fly over an obstacle that would otherwise block her way. Fly Salamamba over the obstacle by simply placing a snake section over it.
- Magic glasses: With the magic glasses you may look at any token on any board section. Depending on what is pictured on the token, you must act immediately accordingly.
- Magic jug: Take one of the snake sections with magic fairy dust and lengthen Salamamba. The magic fairy dust allows you to cross obstacles such as trees, stones or water with these sections. When the section is removed from the snake, it goes out of the game. In this case the tail section may, by way of exception, also lie on an obstacle when it moves up.
- Magic orb: With the magic orb you can look into the future. Decide the result of both dice yourself. The magic orb must be used before the dice are rolled. Instead of rolling, turn each die to the side of your choice and act accordingly.