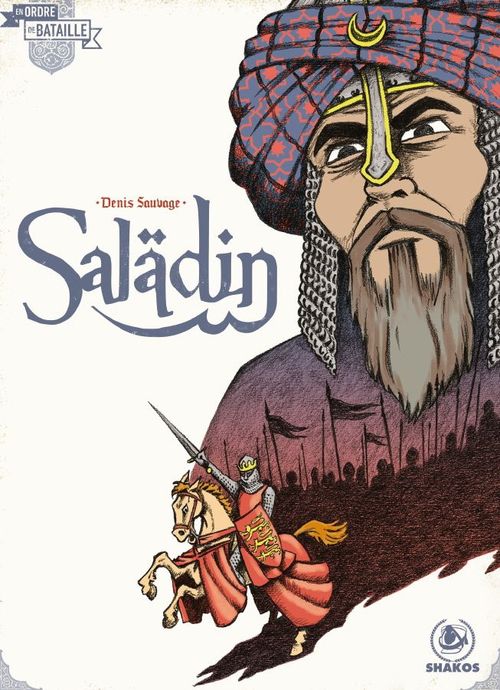
Saladin
Saladin Rulebook
Table of Contents
Table of Contents
For Parents and Teachers
This game is designed to act as a fun and highly instructive working model of historical events.
Engaging with the game will encourage any child to understand why certain important events occurred, as well as what may have happened if different decisions had been made.
Easy rules and attractive components will help the younger player ease into the educational and sociable pastime of historical gaming.
Enjoy the game!
Game Contents
- 1 double-sided game board in A3 format (Hattin side and Arsuf side).
- 28 Banner cards — 14 for the Ayyubids (8 for the Hattin scenario and 6 for the Arsuf scenario), 14 for the Crusaders (8 for Hattin and 6 for Arsuf).
- 4 Leader cards — 2 Saladin cards, 1 for the Hattin scenario, 1 for the Arsuf scenario, 1 Richard the Lionheart card, 1 Guy de Lusignan card.
- 115 wooden bars representing Lances — 59 for the Ayyubids, 56 for the Crusaders.
- 26 wooden Order tokens — 13 for the Ayyubids, 13 for the Crusaders.
- 1 Shield wall marker for the Crusaders.
- 1 Fire marker for the Ayyubids, used in the Hattin scenario.
- 6 Combat dice — 3 for the Ayyubids, 3 for the Crusaders.
- 1 rulebook.
Setup
-
Place the game board between you, then select the scenario you want to play. One of you takes the role of the Ayyubids under command of Saladin, the other one the role of the Crusaders. Read carefully the Special rules of the scenario before starting. The Arsuf scenario is the easiest to play for a first game.
-
Set up the Banner cards of your side as specified by the scenario: they represent troops with their leader. The Leader card is the commander-in-chief of the army.
-
To win at Saladin, you must be the last player still having Order tokens. These tokens are first available in your Available Orders Pool. When you use them during the turn, move them to the Spent Orders Pool. They will be available again the next turn. You will lose permanently Orders at the beginning of each turn depending on the Banners you have lost previously. You will also lose Orders permanently by losing a certain number of Lances.
-
Lances represent the troops associated with the Banners. They are set up on the game board following the instructions of the scenario. On the Banner cards are listed the Actions that the player can perform during the battle. Each Action lists a number of Orders to spend in order to perform the Action and resolve its effects.
The game board carries, for each side: the Available Orders Pool, the Spent Orders Pool, the Losses Track on which eliminated Lances are placed, and the printed locations for each Banner's Lances.
Key Game Terms
To fully understand the fundamentals of the game, it is important to remember the definitions of the following terms that are used in these rules:
Banner
A Banner represents a set of troops — horsemen, bowmen, pikemen, crossbowmen — gathered under the same command. A Banner is symbolized by a card and is associated with one or more locations on the game board.
Each Banner card shows: the name of the Banner, the coat-of-arms of the Banner, the location for the Lances on the game board, the Actions available, the scenario played, and the symbol indicating an Ordered Banner.
A Banner is said to be Deployed if it is on its front side and Ordered if it is on its back.
Leader
The commander-in-chief of each army is represented by a Leader card, which shows the name of the Leader, its Action, and the scenario played.
Like a Banner, a Leader card is said to be Deployed on its front side and Ordered on its back.
Order
An Order is a token of the color of its side. These tokens represent the command capability of armies.
- An Order is said to be Available when it is situated in the player's Available Orders Pool. A player uses their available Orders to perform an Action with an activated Banner.
- An Order is said to be Spent when it has been used previously and is situated in the player's Spent Orders Pool. At the beginning of a new turn the Orders in the Spent Orders Pool become available again and are moved back into the Available Orders Pool.
An Order can be permanently lost, it is then placed back in the game box and can never be returned to play. When a player must place an Order in the game box, he must first remove it from the Available Orders Pool and then from the Spent Orders Pool if the Available Orders Pool is empty. The first player to place back their last Order in the game box loses immediately.
Lance
A Lance is represented by a wooden bar of the color of its camp. These bars represent the troops associated with the various Banners on the battlefield.
On the game board the eliminated Lances are removed from bottom to top and from left to right, by following the numbering (1, 2…).
An eliminated Lance is placed on the player's Losses Track located on the game board.
A player must immediately place back in the box 1 Order when they lose their 6th Lance. The 6 Lances are then also placed back in the game box and can in no case return to play. If other Lances are subsequently eliminated they are placed again on the Losses Track. In the event that a player has to replace 1 eliminated Lance, they must take it from the Losses Track, never from the game box. If there is no Lance available on the Losses Track, they cannot replace a Lance.
A Banner that no longer has Lances on the game board is eliminated and the corresponding card is given to their opponent. An eliminated Banner can never come back into play. During the Chaos phase, a player loses an additional 1 Order for each of their Banners in possession of their opponent.
Status
A Banner can have either Uncommitted or Committed status. The Uncommitted status indicates that the Banner fights its opponent at a distance — shots from archers, crossbowmen — or remains in reserve. The Committed status means that the Banners fight in melee.
The status of a Banner affects the game in different ways:
- On the game board, a Banner can have two locations to place its Lances depending on its status. A color code is used to determine the status of the Banner: sand color for the Uncommitted Lances location, white color for the Committed Lances location. A Banner can have only one location on the game board but may be Committed due to an enemy Banner.
- On the cards, some Actions are dependent on the status of the Banner, and can only be chosen if the Banner is in the corresponding status. A color code allows you to determine the possible Actions according to the status of the Banner: sand color for Uncommitted, white color for Committed.
Combat dice
Each player has at their disposal a set of Combat dice. Combat dice are rolled to determine the outcome of an Action. The die faces are:
| Face | Effect | Number of sides |
|---|---|---|
| Blank | Nothing | 2 sides |
| Single stroke | Eliminate 1 Lance | 2 sides |
| Double stroke | Eliminate 2 Lances | 1 side |
| Slash | Spend 1 Order | 1 side |
Action / Reaction
A Banner can perform an Action, or sometimes a specific kind of Action called Reaction. Most of the time, the player has to choose an enemy Banner as the target of the Action or Reaction. The enemy Banners that a Banner can target are shown on its card. Conversely, the card shows the opposing Banners that can target it.
Next to each coat of arms a symbol specifies the status needed for the Action to be performed, or if a Reaction can be carried out. The three symbols are: Reaction, Committed and Uncommitted.
Example — Banner of Ala al Din: Ala al Din can target two named Banners; Ala al Din can be targeted by three named Banners.
Example — Banner of Richard: it can target a Banner if its status is Committed or Uncommitted; it can be targeted by one Banner in Reaction, and by another in Reaction or if Committed.
Each Banner has a number of different Actions or Reactions available. Each Action lists the following information from left to right:
- The cost in Order(s).
- The name of the Action (without effect on the game).
- If this Action is also available when the Banner is Ordered.
- The effects of the Action. Results on Red dice are applied to the Ayyubids Banner and effects on Green dice are applied to the Crusaders Banner. In general, you need to roll 1 or more Combat dice to determine the outcome of an Action.
- The possible status change of the Banner: from Uncommitted to Committed, or from Committed to Uncommitted.
A Reaction additionally shows the condition of its use. A Reaction is used to counter an adverse Action. If the condition of use is valid, it interrupts the Action. Its effects are resolved immediately. The Action of the enemy Banner is canceled, but the Order(s) expense remains effective, and the enemy Banner card is turned to its Ordered side if necessary. The Banner that has just carried out the Reaction remains on its Deployed side.
Sequence of Play
A turn is divided into four phases:
- Chaos
- Initiative
- Activation
- Redeployment
One phase must be completed entirely before moving on to the next.
Chaos
Starting the second turn of the game, each player places back in the box one Order plus one additional Order per Banner given to their opponent.
Initiative
The player with the fewest Orders in their Available Orders Pool has the initiative. In case of a tie, the scenario specifies which player has the initiative. The player with the initiative is the one who will choose whether or not to start the Activation phase. A Leader may have an Action to seize the initiative and use it during the Initiative phase. In this case, he is turned on its Ordered side.
Chaos and Initiative example — Battle of Arsuf. This is the beginning of a new turn, the Crusaders player gave the Banners of Naplouse and Sablé to their Ayyubids opponent in previous turns. So they must return 3 Orders to the box. The Crusaders player has 5 Orders left, and the Ayyubids player has 7. It is the Crusaders player who has the initiative, unless the Ayyubids player decides to activate their Leader. This is what the latter does. So it is the Ayyubids player who wins the initiative for this turn. The Ayyubids Leader card is turned over on its Ordered side.
Activation
Starting with the player designated during the Initiative phase, players will alternate activations or pass. A player can pass only if all their Banners and Leader cards are on their Ordered side. A player who has passed can no longer choose activation; their opponent, however, can continue to perform activations until they also pass. Upon activation, the player activates a Banner or their Leader.
Activating a Banner
By activating a Banner the player must, in order:
- Choose an Action on their selected Banner card.
- Spend the necessary Orders.
- Choose a valid target for this Action.
- Ask if the targeted Banner performs a Reaction, if possible. In this case solve the effects of the Reaction and proceed to step 7. A Banner that performs a Reaction remains on its Deployed side.
- Simultaneously apply the effects of the Action to the targeted Banner and the acting Banner by rolling the indicated Combat dice if needed.
- Move the Lances on the game board if the Banner moves from Uncommitted to Committed or vice versa.
- Turn the Banner card to its Ordered side if it was on its Deployed side. Leave the card on its Ordered side if it was already on that side.
Activating a Leader
By activating a Leader the player must, in order:
- Choose on their Leader card one of the available Actions.
- Apply the effects of the Action.
- Turn the Leader card on its Ordered side.
Banner and Leader activation example — Battle of Arsuf. It is the turn of the Crusaders player to perform an activation. They decide to activate the Banner of Henry II. They choose the Loose Action, targeting the Ayyubids Banner of Ala Afdal. They therefore spend 1 Order from their Available Orders Pool and move it to their Spent Orders Pool. They throw 1 Combat die that eliminates 1 Lance from the Ala Afdal Banner. The lost Lance is placed on the Ayyubids Losses Track. The Crusaders player turns the Banner of Henry II to its Ordered side. It is the turn of the Ayyubids player to perform 1 activation. They choose to activate their Leader and select as Action, recover 1 spent Order. They move 1 spent Order from the Spent Orders Pool to their Available Orders Pool and then turn their Leader to their Ordered side.
Reaction example — Battle of Arsuf. It's the Crusaders player's turn to activate a Banner. They decide to activate Naplouse and choose the Charge Action. They therefore spend 2 Orders and target Sulaymân, the only Banner that can be targeted. The Ayyubids player decides to perform their Reaction, Evade, with Sulaymân — which is possible because Sulaymân can target Naplouse in Reaction, is on its Deployed side and Naplouse performs a Charge. Both players roll 1 Combat die and apply the results. Naplouse becomes Ordered but Sulaymân remains Deployed. Both Banners remain Uncommitted as the Naplouse Action is canceled.
Special cases and consequences of activation
- A Banner on its Ordered side can still be activated to perform an Action.
- If a player's Available Orders Pool is empty and one of their Banners is still on their Ordered side, they must activate it using the Action with a cost of 0. Important note: a player always has the option to choose an Action with a cost of 0 even if their Available Orders Pool is not empty.
- The cost in Orders to activate a Banner is increased depending on the Lances lost previously. According to the "cost increased by 1" symbol unveiled on the game board, the cost of activating the Banner is increased by 1, 2, and so on. Exception: there is no additional cost to an Action with a cost of 0.
- A Banner can change its status from Uncommitted to Committed or vice versa according to the indications of the Action performed. In this case, you must move the Lances of the Banner concerned to the appropriate location on the game board. This change therefore involves changing the status of the enemy Banner.
- A Combat result that requires to lose 1 Order has no effect if the target player's Available Orders Pool is empty.
- A Banner that no longer has Banners to target because they have lost all their Lances is removed from the game and placed back in the game box. Since this Banner was not given to their opponent, the player will not lose an additional Order in the Chaos phase of the next turn and it will no longer be necessary to activate it.
Game example — Battle of Arsuf. The Crusaders player activates Sablé using the Regroup Action. The player spends 2 Orders because of previously lost Lances. There is no dice to roll to resolve this Action. Sablé becomes Uncommitted. Its Lances are moved to the Uncommitted locations on the game board. Therefore, the status of the Banner of Saphadin changes from Committed to Uncommitted. In Arsuf, the Ayyubids Banners changing status always remain on the same location.
Game example — Battle of Arsuf. The Banners of Richard and Bourgogne have lost all their Lances. The Ayyubids player eliminated them. Saladin's Banner no longer has a target and is therefore removed from the game.
Redeployment
All cards of Banners and Leaders still in play are returned to their Deployed side. Orders located in the Spent Orders Pool are moved to the Available Orders Pool and become available again for the next turn. The turn is over.
Victory Conditions
The game ends immediately when one of the players puts their last Order in the box. Their opponent is declared the winner.
In the event that both players put their last Order in the game box simultaneously, the winner is the one who had the most Orders by totaling those of in their Available Orders Pool and Spent Orders Pool just before the end of the game.
In case of a tie, count the remaining Lances on the board — even those of the Banners that were set aside because they no longer had a target. The player with the highest number of Lances remaining is declared the winner. In the event of another tie, the game is a draw.
The Battle of Hattin — 1187
In the early summer of 1187, the king of Jerusalem, Guy de Lusignan, was in a delicate situation. The truce with Saladin was broken, mainly due to raids led by Renaud de Châtillon. Saladin laid siege to Tiberias hoping to lure the Frankish army to a favorable battlefield. The Latin Lords, overconfident, fall into the trap. The Franks are surrounded not far from an elevation called the Horns of Hattin. Saladin's troops set fire to the brush thus exacerbating his opponents' already dire thirst. The Knights of Raymond III charge to break the encirclement. Ayyubid foot soldiers move aside to let them pass and flee. Harassed from all sides, Lusignan takes refuge on the heights of the Horns before being crushed and forced to surrender. The Frankish army is dispersed or destroyed. After this great victory, Saladin retakes Jerusalem.
Set up the pieces and Banner cards as shown on the scenario setup diagram of the Hattin side of the game board.
Special rules
-
Crusaders — Hattin pieces and Banner cards, 12 available Orders.
-
Ayyubids — Hattin pieces and Banner cards, 12 available Orders.
-
Initiative in case of a tie — Ayyubids.
-
Statuses — The Banners of Ridefort and Husam Lulu can never be Committed. Those of D'Ibelin, Naplouse, Châtillon, Raymond III and Saladin have two locations differentiated by a color code on the game board, Uncommitted and Committed. These Banners change locations on the game board if their status is modified. The Banners of Keukburi, Saphadin, Manguras and Taqui al Din have only one location on the game board and their status is the same as the one of the Crusaders Banner that targets them.
The Lusignan Banner has two locations on the game board. On the one it occupies at the beginning of the scenario, Lusignan is always Uncommitted. If the Banner is moved to the Horns of Hattin it will have the same status as the Banner of Saladin which is the only one that can target it.
-
Cards — the Banners of Lusignan, Châtillon, Saladin and Manguras each have two cards. The cards available at the beginning of the scenario are those that do not have the Horns symbol. They are replaced when Lusignan moves to the Horns of Hattin.
-
Husam Lulu — Husam Lulu's Banner is not given to the Crusaders player when it looses its last Lance. It is simply placed back in the box.
Scenario-specific Actions
Lusignan (Leader). Once per game, the Crusaders player can activate their leader Lusignan to move all the Lances of the Lusignan Banner to the locations of the Horns of Hattin on the game board. The Crusaders player recovers 1 Order placed back in the game box and adds it to their Available Orders Pool. This Action becomes mandatory as soon as the sum of the Orders in the Available Orders Pool and the Spent Orders Pool of the Crusaders player is strictly less than 5. In this case, if the Lusignan Leader card is on its Deployed side, the Action will have to be the next Crusaders player Action. If the Lusignan card is on its Ordered side, the Action will have to be the first one performed by the Crusaders player during the next turn.
As Lusignan's Lances are moved to the Horns, the Banner cards of Lusignan, Châtillon, Saladin and Manguras are replaced. The new cards are placed on their front or back side depending on whether they were Deployed or Ordered before they were replaced.
Saladin (Leader). Once per game, if the Lusignan's Banner has moved to the Horns of Hattin or is eliminated and if Châtillon's Banner is also eliminated, the Crusaders player must immediately place 1 Order back in the box.
Saladin / Ridefort (Reinforce). The Banner of Saladin or Ridefort places 1 of its Lances on the location of the last lost Lance of the Banner of Saphadin or Manguras for Saladin, and Lusignan for Ridefort.
Husam Lulu (Set Fire). Husam Lulu's Banner places the Fire marker on the game board in front of the locations of Husam Lulu's Lances. The Crusaders player must move 1 Order immediately to their Spent Orders Pool.
Husam Lulu (Feed Fire). To perform this Action, the Fire marker must be on the game board. The Crusaders player must move 1 Order immediately to their Spent Orders Pool. If at the end of the turn, the Fire marker is still on the board and Husam Lulu's Banner has not performed the Feed Fire Action, the marker is removed.
Taqui al Din. In the event of a Charge or Uncontrolled Charge by the Banner of Raymond III, the Banner of Taqui al Din undergoes the effects of 1 Combat die. The Banner of Raymond III must remove 2 Lances that are placed back directly in the game box, not on the Losses Track.
Lusignan (Shield wall). The Crusaders player places on the game board the Shield wall marker in front of the locations of Lusignan's Lances. All Ayyubids Actions against the Banner of Lusignan will use 1 less Combat die. The marker is removed during the Redeployment phase of the turn.
The Battle of Arsuf — 1191
En route to Jerusalem, Richard the Lionheart's crusader army is attacked by Saladin's army near Arsuf. Mastering the impetuosity of his knights in the face of Ayyubids' harassment, Richard manages to retain control of his troops under a hail of arrows. Crusader resistance exhausts Saladin's horsemen. Richard, his hand possibly forced by a Hospitaller charge from out his army's rear guard, launches a powerful charge of his own. Disorganized and surprised, the Ayyubid army fells apart. This great victory deters Saladin from ever facing Richard again in open battle. Yet the crusaders would fail to liberate Jerusalem, and the Crusade fails in front of its main goal, the gates of the Holy City.
Set up the pieces and Banner cards as shown on the scenario setup diagram of the Arsuf side of the game board.
Special rules
- Crusaders — Arsuf pieces and Banner cards, 11 available Orders + 1 in Arsuf.
- Ayyubids — Arsuf pieces and Banner cards, 12 available Orders.
- Initiative in case of a tie — Crusaders.
- Orders — the Crusaders player recovers a twelfth Order as soon as the two Ayyubids Lances in Arsuf are eliminated. This Order is made available and placed directly in their Available Orders Pool.
- Statuses — the Banners of Lusignan, Henry II, Aslam and Saladin can never be Committed. Those of Sablé, Bourgogne, Richard and Naplouse have two locations on the game board differentiated by a color code, Uncommitted and Committed. These Banners change locations on the game board if their status is modified. The Banners of Saphadin, Ala Afdal, Ala al Din and Soulaymân have only one location on the game board and their status is the same as that of the Crusaders Banner that targets them.
Scenario-specific Actions
Aslam (Reinforce). The Banner of Aslam places 1 of its Lances on the location of the last lost Lance of the Ala Afdal or Ala al Din Banners.
Aslam (Reinforce Arsuf). The Banner of Aslam places 1 of its Lances on the location of the last lost Lance in Arsuf.
Saladin (Sacrifice). The Crusaders player must place 1 Order in the Spent Orders Pool, then Saladin's Banner suffers the adverse effects of 2 Combat dice.
Henry II (Shield wall). The Crusaders player places on the game board the Shield wall marker in front of the locations of Henry II's Lances. All Ayyubids Actions against the Banner of Henry II will use 1 less Combat die. The marker is removed during the Redeployment phase of the turn.
Lusignan (Assault on Arsuf). The target of this action are the 2 Ayyubids Lances located in front of Arsuf. If these 2 Lances are eliminated, the Crusaders player recovers 1 Order which is immediately placed in the player's Available Orders Pool.
Player Aid — Symbols
Symbols used on the game board
| Symbol | Meaning |
|---|---|
| Stacked round tokens (green / red) | Available Orders Pool, Ayyubids / Crusaders |
| Slashed round token (green / red) | Spent Orders Pool, Ayyubids / Crusaders |
| Sand-coloured numbered strip | Status of the Banner: Uncommitted |
| White numbered strip | Status of the Banner: Committed |
| Token marked +1 (green / red) | Cost of the Action increased by 1 |
| Token marked with a cross (green / red) | Give the Banner to your opponent |
| Banner pennant | Place the 6 Lances and 1 Order in the box |
Symbols used on the cards
| Symbol | Meaning |
|---|---|
| Cross emblem | Scenario card: Hattin |
| Dome emblem | Scenario card: Arsuf |
| Furled banner | Banner on its Ordered side |
| Green roundel | Card used if Lusignan is at the Horns |
| Green square | Reaction |
| Blue starburst square | Committed |
| Yellow square | Uncommitted |
| Upward chevron | Status change from Uncommitted to Committed |
| Downward chevron | Status change from Committed to Uncommitted |
| Numbered round token (green / red) | Cost in Orders of the action |
| Green / red die | Number of Combat dice to roll |