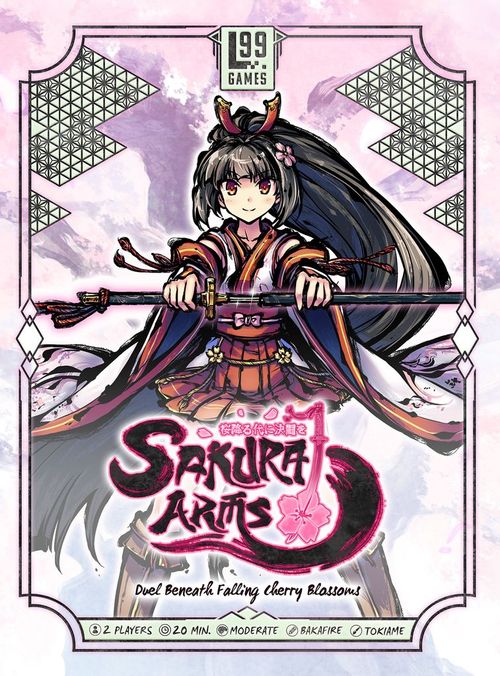
Sakura Arms: Yurina Box
Sakura Arms: Yurina Box Rulebook
Table of Contents
Table of Contents
Game Overview
New Act: A Duel Beneath Falling Cherry Blossoms is a duel board game for two players. You duel your opponent through three steps: Twin Palms in Bloom, Deckbuilding Before Your Opponent, and the Sakura Blossom Duel. Reduce your opponent's Life to 0 and you win.
Twin Palms in Bloom
Choose two Megami to dwell in your two hands.
Deckbuilding Before Your Opponent
Both players confirm which two Megami their opponent has chosen, then build their decks openly, in front of their opponent. The cards available to you change according to which Megami you host.
Sakura Blossom Duel
Using the deck you built, you duel your opponent. The state of the duel is shown by the various areas on the board and the 36 Sakura Crystals (tokens) scattered across them. For example, if 5 Sakura Crystals are sitting on the Range area, the distance between you and your opponent is 5. Seize an advantageous range, unleash your attacks, and whittle away your opponent's Life.
Contents
Megami Tarot
A card representing each Megami (character). This box includes one Megami Tarot for each of its six Goddesses—Yurina, Shinra, Oboro, Tokoyo, Himika, and Yukihi.
Concentration Cards (2)
Cards used to track how much Concentration each player currently holds.
Cards
Each Goddess included in the box contributes:
- Normal Cards (7 per Goddess): Cards representing techniques usable through that Goddess's blessing.
- Special Cards (4 per Goddess): Cards representing finishing moves.
Boards (2)
The boards represent the duel arena in which the players fight. The boards have several areas for placing Sakura Crystals. How the state of the duel is shown depends on how many Sakura Crystals sit in each area, as follows:
- Life: Represents a player's vitality. Reduce your opponent's Life to 0 and you win.
- Range: Represents the distance between you and your opponent. You cannot use an Attack card whose Range doesn't match. At most 10 Sakura Crystals may sit here. Which side of the board the crystals are stacked on has no special meaning—only the count matters (for example, an empty gap on the left side does not mean the same thing as one on the right).
- Aura: Sakura Crystals you have wrapped around yourself. Used to guard against your opponent's attacks. At most 5 Sakura Crystals may sit here.
- Flare: Sakura Crystals dedicated to your body. Needed to use Special cards.
- Dust: Represents Sakura Crystals that have lost their power. When Sakura Crystals are placed in Dust, turn them face down. Sakura Crystals that took damage to Aura, or that were spent from Flare to pay for a Special card, are placed here.
Note: Life, Aura, and Flare belong separately to you and to your opponent. Range and Dust are each single, shared areas between the two players.
Sakura Crystals (40)
Tokens representing the fragments of the Megami's power scattered across the duel arena. 36 are used in the game; 4 are spares.
How to Read a Card
- Card Name
- Card Number and User: Shows the card's number and which Megami's card it is.
- Card Type: Every card has one of the types Attack, Action, or Attachment. See each card type's resolution rules (below) for details.
- Subtype: A card may carry the subtype Reaction or All-Out. A card with Reaction can be used to interrupt your opponent's attack. A card with All-Out can only be used on your turn, and you may do nothing else that turn.
- Text: The card's effect.
- Range (Attack cards only): The Range within which the Attack card can be used.
- Damage (Attack cards only): The damage the attack deals. The left number is damage to Aura; the right number is damage to Life.
- Cost (Attachment cards only): How many Sakura Crystals are placed on top of the card when it is played as an Attachment.
- Upkeep (Special cards only): The cost required to use a Special card. To use a Special card, you must move that many Sakura Crystals from your Flare to Dust.
Some effects are shown with arrows between little icons, as in the diagram in the source rulebook. These indicate moving Sakura Crystals from the area on the left of the arrow to the area on the right (a blue icon is your own area, a red icon is your opponent's). If the arrow points both ways, you may choose either direction—for example, from Range to Dust, or from Dust to Range.
Game Setup and Deck Building
Setting Up the Board
Place the board(s), then place Sakura Crystals on top of them. The starting values printed on each area show how many Sakura Crystals sit in that area when the game begins:
- Each player's Life: 10 each
- Each player's Aura: 3 each
- Range: 10
- Dust: 0
Twin Palms in Bloom
Each player chooses two Megami they will host. Display the Megami you have chosen (using the Megami Tarot cards, for instance) so your opponent can see them.
Deckbuilding Before Your Opponent
Once you know which two Megami your opponent has chosen, both players build their decks at the same time. A deck consists of 7 Normal cards and 3 Special cards. From the 14 Normal cards contributed by your two Megami, choose 7 to use; from the 8 Special cards they contribute, choose 3. Build your deck in secret so your opponent cannot see its contents (if deckbuilding feels difficult, you can use one of the sample decks listed in the source rulebook's Sample Decks section instead).
Place your built deck in front of your side of the board. The 7 Normal cards become your draw pile; the 3 Special cards are laid out face up (unused) beside it.
Duel Preparation
- Determine who goes first by any fair method.
- Shuffle your draw pile well, and each player draws 3 cards.
- Each player may perform one hand mulligan. Choose any number of cards from your hand, put them face down at the bottom of your draw pile in whatever order you like, then draw that same number of new cards from the top.
- The first player sets their Concentration to 0; the second player sets theirs to 1.
Once these steps are complete, setup is finished and the duel begins.
How to Proceed Through a Duel
Starting with the first player, alternate turns following the steps below. The moment either player's Life reaches 0, the game ends, and the player with Life remaining wins.
Start Phase
Perform the following four things, in order:
- Gain Concentration. Increase your Concentration by 1. Concentration can never exceed 2.
- Remove Sakura Crystals from Attachment cards. If you have Attachment cards in play, move one Sakura Crystal from on top of each of them to Dust. Note: this applies to your opponent's Attachment cards as well as your own.
- Reshuffle your draw pile (optional). You may shuffle your draw pile, discard pile, and facedown pile together into a new draw pile. If you reshuffle this way, you take 1 damage to Life.
- Draw cards. Draw 2 cards from your draw pile.
Main Phase
Choose either a Standard Action or an All-Out Action.
- Standard Action: You may do either of the following, any number of times, in any order and combination: use a card that isn't All-Out; perform a Basic Action.
- All-Out Action: You may do the following once: use an All-Out card.
End Phase
If you have 3 or more cards in hand, discard cards from your hand face down until you have 2.
Then proceed to your opponent's Start Phase.
Skipping the Start Phase
On the very first turn only, both players skip the Start Phase and begin their turn from the Main Phase.
Discarding Attachment Cards
An Attachment card with no Sakura Crystals left on top of it is discarded to the discard pile. When this happens, resolve its [On Discard] effect if it has one. If more than one [On Discard] effect would resolve at the same time, the player whose turn it is chooses the order.
Example: On your Start Phase, your Attachment card "Pressure" (1 Sakura Crystal remaining) and your opponent's Attachment card "Shockglass" (1 Sakura Crystal remaining) are both in play. First, move one Sakura Crystal from each Attachment card to Dust. Both Attachment cards are now discarded, so their [On Discard] effects resolve. You resolve "Pressure" first, attacking your opponent for 3/–; then you resolve "Shockglass," taking a 1/– attack from your opponent and moving one Sakura Crystal from Dust to Range.
Fatigue
If you would draw a card but your draw pile is empty, you instead take 1 damage to either Aura or Life. If your Aura has no Sakura Crystals on it, you must choose Life. Fatigue applies regardless of how you were drawing the card, and once for each card you failed to draw.
Example: During your Start Phase you draw 2 cards, but your draw pile has only 1 card in it. You have two options. One: reshuffle your draw pile first, making a new one, so you can draw both cards without issue. Two: draw the 1 available card and take 1 instance of Fatigue damage—choosing Aura (move one Sakura Crystal from Aura to Dust) or Life (move one Sakura Crystal from Life to Flare).
How to Use Cards
During your Main Phase you may use unused (face-down) Normal cards from your hand. Normal cards have no additional cost beyond this; you may use as many as you like as long as you have them in hand.
To use a Special card, you must pay its Upkeep: move that many Sakura Crystals from your Flare to Dust. If you don't have enough Sakura Crystals in Flare, you cannot use it.
To use an Attack card, its Range must match. Range matches when the current Range value is within the card's printed Range window.
Example: There are 3 Sakura Crystals on Range, so the current Range is 3. A card with Range 3–4 is called "Slash" and can be used. A card with Range 4–10 called "Shoot" cannot.
The card played resolves differently depending on its type—Attack, Action, or Attachment. Each is detailed below.
Basic Actions and the Expert's Range
If you couldn't advance, retreat, or firm up your guard in a duel, it wouldn't be much of a fight. Basic Actions are these fundamental moves. For example, performing Advance moves a Sakura Crystal from Range to your own Aura, closing the Range by 1.
If you have chosen a Standard Action on your Main Phase, you may perform a Basic Action by paying one of the following costs (you may pay it as many times as you can afford):
- Reduce your Concentration by 1.
- Put 1 card from your hand face down into your facedown pile.
Note: Concentration is a resource meant for Basic Actions. Your hand can also serve as that resource, but if you use a card this way, you don't get its normal effect.
There are five kinds of Basic Actions; you choose one whenever you pay the cost. Normally four are available—Advance, Retreat, Wrap, and Devote. Depending on which you choose, move 1 Sakura Crystal as follows:
- Advance: Range → your Aura.
- Retreat: your Aura → Range.
- Wrap: Dust → your Aura.
- Devote: your Aura → your Flare.
While the current Range is at or below the Expert's Range, you cannot perform Advance—you may perform Withdraw instead. The Expert's Range is normally 2, but card effects can change it.
- Withdraw: Dust → Range.
Note: You cannot choose a Basic Action that has no Sakura Crystal available to move—for example, Advance when your Aura already holds 5, or Retreat when your Aura holds 0.
How Cards Are Placed
As a game progresses, cards move through several states—draw pile, discard pile, and so on. There is no fixed rule for where on the table you arrange them, but keep the orientations below so the states stay distinguishable:
- Draw pile: Normal cards, face down, portrait orientation.
- Discard pile: Normal cards, face up, portrait orientation. Mostly cards discarded because they were used.
- Facedown pile: Normal cards, face down, landscape orientation. A card paid as the cost of a Basic Action goes here. It's similar to the discard pile, but your opponent cannot look at its face—only you can (think of it as a discarded card whose identity is hidden from your opponent).
- Attachment pile: Normal cards, face up, portrait orientation. These are Attachment cards currently in play. They sit in the same orientation as the discard pile, but are told apart from it by having Sakura Crystals on top.
- Hand: Held in your hand, kept separate from your draw pile and facedown pile.
- Special cards: Laid out in portrait orientation. All start Unused; once used, a card becomes Used. Which side faces up depends on this: Unused cards are face down, Used cards are face up. Your opponent cannot see the face of your Unused Special cards—only you can.
Attack Card Resolution
Resolve an Attack card using the steps below:
- The opponent targeted by the Attack may use one card with the Reaction subtype—this is called Reacting. If they react, resolve the reacting card first. Note: even if the reacting card is itself an Attack card, no further Reaction may be made to it.
- Check again whether Range still matches (a Reaction may have changed it). If Range no longer matches, the Attack fails—neither its damage nor its [After Attack] effect occurs. If Range still matches, the Attack succeeds.
- The attacked player chooses whether to take the damage to Aura or Life, and takes it.
- If the Attack card has an [After Attack] effect, resolve it.
- Whether it succeeded or failed, place the used Attack card into the discard pile (or mark it Used, if it's a Special card).
Attacks Caused by Card Effects
A card's effect can sometimes cause an Attack even without an Attack card being used. Resolve it using the steps below:
- Check whether the Attack's Range matches. If it doesn't, nothing happens and the remaining steps are skipped.
- The attacked opponent may React.
- Check again whether Range matches. If it doesn't, the Attack fails and the remaining steps are skipped.
- The attacked player chooses Aura or Life and takes the damage.
- If the Attack has an [After Attack] effect, resolve it.
Choosing Damage
When taking damage from an attack, the attacked player may choose whether to take it to Aura or Life. If the number of Sakura Crystals on the attacked player's Aura is less than the Aura-damage amount, they must choose Life instead (except for the case directly below).
As an exception, if either the Aura-damage or Life-damage value is "–", the player must choose damage to the other stat.
If an attack's damage to Aura is 6 or more, treat it as 5 instead when choosing and resolving damage (an attack with the Transcend keyword ignores this cap).
Resolving Damage
There are two kinds of damage—damage to Aura and damage to Life—each resolved as follows:
- Damage to Aura: Move that many Sakura Crystals from Aura to Dust.
- Damage to Life: Move that many Sakura Crystals from Life to Flare.
Think of it this way: damage to Aura means you guarded the attack; damage to Life means you took the attack on your body.
Attack Example: The current Range is 3, so you attack with "Slash," a 3/1 Attack card (Range 3–4). Your opponent's Aura is currently 2, so as things stand they'd have to take the damage to Life—so they React with "Shockglass." "Shockglass" resolves first, reducing "Slash" to 2/1 (a –1/+0 modifier). Your opponent then guards with Aura, moving 2 Sakura Crystals from Aura to Dust. Your turn ends. On your opponent's Start Phase, "Shockglass" is discarded (no Sakura Crystals remain on it), triggering its 1/– attack. Range is still 0–10, so it matches; since the Life-damage value is "–," the damage must go to Aura. Your opponent moves 1 Sakura Crystal from Aura to Dust, then, from "Shockglass"'s [On Discard] effect, also moves 1 Sakura Crystal from Dust to Range.
Action Card Resolution
Resolve the Action card's effect. Afterward, place the used Action card into the discard pile (or mark it Used, if it's a Special card).
Attachment Card Resolution
Resolve an Attachment card using the steps below:
- Move Sakura Crystals onto the Attachment card equal to its Cost, drawn from Dust and/or your Aura in any combination you like (but you must move up to the full Cost if you are able to). The card becomes an Attachment card in play. If it has an [On Deploy] effect, resolve that too.
- While Sakura Crystals remain on top of an Attachment card, its [While Deployed] effect is active.
- If an Attachment card has no Sakura Crystals left on top of it, it is immediately discarded (or marked Used, if a Special card). If it has an [On Discard] effect, resolve it.
Attachment Example: "Voiceless Wall" is deployed—you move 3 Sakura Crystals from Dust and 2 from Aura onto it, so Aura hits 0 and its [On Deploy] effect "Voiceless Ice" also triggers. Your opponent replies: "Then I'll deploy 'Oppression'—1 Sakura Crystal from Dust, 1 from Aura, bringing my Aura to 4, and I advance to end my turn."
Keyword Effects and Basic Principles
+X/+Y
This modifier changes an Attack's damage. The left value adjusts damage to Aura; the right value adjusts damage to Life. This modifier has no effect on a damage value that is "–."
Negate
This effect stops an Attack's damage and/or its [After Attack] effect from resolving. Negating damage cancels only the damage; negating the [After Attack] effect cancels only that; negating the Attack itself cancels both.
Remove
This effect removes a Special card from the game. That card is no longer referenced for the rest of the game.
Reaction-Proof
A property some cards carry. You cannot React to an Attack that has Reaction-Proof. When written as "Reaction-Proof (Normal cards)," only a card meeting the condition named in the parentheses may React to it.
Opening
A property some Attachment cards carry, representing an action that leaves you exposed. While that Attachment is deployed, if you take 1 or more damage to Life by any method other than your own draw-pile reshuffle, all Sakura Crystals on that Attachment card are sent to Dust and the card becomes a facedown card. Because it does not become a discard-pile card this way, its [On Discard] effect does not trigger. Note: damage to Aura does not trigger this.
Reuse / Instant Reuse
Properties of Special cards, representing the ability to reuse that card. Both are active only while the card is Used; once the condition printed on the card is met, the card returns to Unused. Reuse is checked only during your own End Phase. Instant Reuse is checked continuously, and applies the instant its condition is met.
Cowed
A player state. A Cowed player does not gain Concentration during their Start Phase—instead, they simply stop being Cowed. Being made Cowed again while already Cowed does not stack. Note: even attempting to gain Concentration while already at 2 still removes Cowed.
Transcend
A property of Attack cards. Damage to Aura from an Attack is normally capped at 5 when chosen and resolved. A card with Transcend ignores that cap and can deal 6 or more.
Finality
A card property. Once a player finishes resolving a card with Finality, that player cannot use any more cards or perform Basic Actions for the rest of that turn.
Unavoidable
A property of Attack cards. An Attack with Unavoidable skips the second Range check that normally happens after the opponent Reacts.
Basic Principles
- When moving a Sakura Crystal, if the destination area cannot hold any more, don't move it (so, for example, you cannot Advance via a Basic Action if your Aura is already at 5).
- When a card's effect or damage processing calls for moving Sakura Crystals but there aren't enough available, move as many as you can.
- If a card has multiple effects, resolve them in order from top to bottom.
- A card's effect takes precedence over the rules.
- If a card effect that allows something contradicts one that forbids it, the forbidding effect wins.
Goddess-Specific Rules
Three of this box's six Goddesses—Oboro, Shinra, and Yukihi—carry extra rules of their own beyond the systems above, drawn from the source rulebook's notes for these Goddesses (Yurina, Tokoyo, and Himika need no additional rules; the source document's notes for other Goddesses sold in other boxes are not reproduced here, as they aren't included in Yurina Box).
Oboro
Some of Oboro's cards have the Setup ability.
Setup: If you are about to reshuffle your draw pile, you may use one card with Setup from your facedown pile, once, immediately before doing so.
Yukihi
If you host Yukihi, during setup prepare the Umbrella card and set it to the "Closed" position.
Some of Yukihi's cards carry an Open/Closed icon. These cards' Range, damage, and text can all change depending on whether the umbrella is currently open or closed.
Once during your End Phase, you may open or close the umbrella. If you do, flip the Umbrella card over to change its state.
Shinra
If you host Shinra, during setup attach the Strategy Board to the board, and prepare one Strategy Token each of "Divine Calculation" and "Fiendish Scheme." Place the "Divine Calculation" token face down in the Strategy Board's active slot, and the "Fiendish Scheme" token face down in its inactive slot—these become your initially prepared Strategy.
Some of Shinra's cards execute a Strategy. When resolving such an effect, turn the Strategy Token in the active slot face up: if it is "Divine Calculation," resolve the card's Divine Calculation effect; if "Fiendish Scheme," resolve its Fiendish Scheme effect.
Once a Strategy has been executed, prepare the next one: secretly choose a Strategy Token, and place it face down in the active slot, with the other face down in the inactive slot.
Note: if, for any reason, no Strategy is prepared by your End Phase, prepare one then.