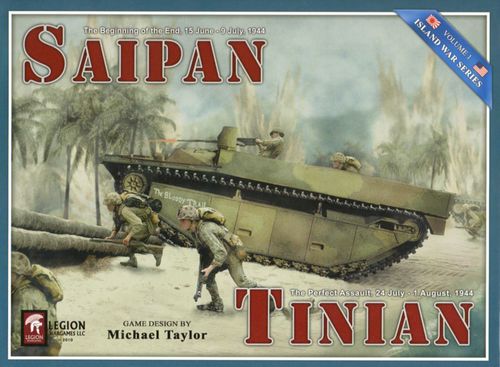
Saipan & Tinian: Island War Series, Volume I
Saipan & Tinian: Island War Series, Volume I Rulebook
Table of Contents
Table of Contents
- Rule 1 – INTRODUCTION
- Rule 2 – GAME COMPONENTS
- Rule 3 – BASIC CONCEPTS
- Rule 4 – SEQUENCE OF PLAY
- Rule 5 – ZONES OF CONTROL
- Rule 6 – MOVEMENT
- Rule 7 – TRANSPORTATION LINES
- Rule 8 – STACKING
- Rule 9 – GROUND COMBAT
- Rule 10 – ARMOR & ANTI-TANK
- Rule 11 – ARTILLERY UNITS
- Rule 12 – AIR & SURFACE SUPPORT
- Rule 13 – SUPPLY
- Rule 14 – DISRUPTION
- Rule 15 – ENGINEERS & FORTIFICATIONS
- Rule 16 – REPLACEMENTS
- Rule 17 – REINFORCEMENTS
- Rule 18 – AMPHIBIOUS LANDINGS
- Rule 19 – SPECIAL RULES
- Rule 20 – VICTORY CONDITIONS
Rule 1 – INTRODUCTION
The Island War game system is a simulation of ground combat in the Pacific during World War II. Each game in the system represents a battle between US and Imperial Japanese forces on one of the many Pacific islands. The playing pieces represent combat units that did, or could have, participated in these battles. The maps represent the actual terrain over which those units fought.
Two sets of rules are provided. The first contains the Series Standard Rules that are common to all the games in the Island War system. The second set contains the Exclusive Rules for each game in the system, which includes the Initial Deployment and the Reinforcement Schedule.
The games are designed for two players, but can accommodate multiple players. For example, one player can play the US Marines, a second the US Army, and a third the Japanese.
Rule 2 – GAME COMPONENTS
Guam contains the following:
- One 22x34 and one 17x22 map sheets
- One Series Standard Rulebook
- One Guam Exclusive Rulebook
- Two US Player Charts
- One Japanese Player Chart
- Two Combat (double-sided) Charts
- One Terrain Effects Chart
- Three counter sheets (176 counters per sheet)
- Two six-sided dice & 6 counter bags
Maps: Each map sheet portrays the combat area. A hexagonal grid is superimposed over the map to regulate movement and to position the counters. Counters: There are several types of counters in the game; combat units, non-combat units, and game markers.
Rules: Each game in the series comes with a Standard Rules set that apply to all games in the series and an Exclusive Rules set that pertain only to an individual battle.
Charts and Tables: Various charts and tables come with each game to assist in keeping track of certain game functions and as a quick reference to certain rules.
Dice: Six-sided die rolls are used throughout the game to determine the outcome of events such as combat, Disruption, etc.
Rule 3 – BASIC CONCEPTS
3A. Terms and Definitions
-
Units: The term "unit" refers to ground units only. The term "forces" refer to ground, naval and air units collectively. The Unit Counter Information Chart displays the layout of symbols, names and ratings (combat and movement factors) used in the game.
-
Size: Units have a military size (echelon) based on the amount of personnel, equipment and command structure that they are composed of.
III = Regiment II = Battalion I = Company ••• = Platoon
-
Class: Class will affect a unit's movement and combat capabilities. Units are divided into four general classes. See the Unit Counter Information Chart for a complete list of unit types of each class.
- Infantry
- Combat/Motorized (C/M)
- Artillery
- Other
-
Armor: Armor is a sub-class of C/M and consists of the following unit types:
- Tank
- Light tank (including flame-thrower tank)
- Amphibious tank
-
Stacking Points (SPs): A SP value measures the size of a unit. SP values are as shown on the Stacking Value Table and are necessary for stacking and transportation rules.
-
Heavy Equipment (HE): The Unit Counter Information Chart lists the unit types that have Heavy Equipment which may affect certain activities.
3B. Game Scale
Ground and time scales vary from game to game. See the Exclusive Rules for each game.
3C. Game Mechanics
-
Die Rolls: When a die roll requires one six-sided die it is expressed in the rules as "1d6". Rolls requiring two six-sided dice are expressed as "2d6". Any adjustment to a die roll, such as terrain effects, is referred to as a Die Roll Modifier (DRM).
-
Fractions: Unless a rule specifically states to round up or down, always retain fractions.
-
Cumulative Effects: Unless stated otherwise, effects on a unit's combat ratings and all DRMs are cumulative.
Example: A unit conducting a Combat Assault into a mountain hex across a steep hex-side has its Attack Strength halved and receives a –3 DRM. A unit that has its Attack Strength halved twice attacks at 1/4 its Attack Strength.
-
Accumulation: Unless stated otherwise, units may not accumulate any abilities from one Game Turn to another unless specifically allowed by the rules.
Example: Unused MPs may not be saved and used in a subsequent Game Turn.
Rule 4 – SEQUENCE OF PLAY
This game is played in a set number of Game Turns, composed of alternating Player Turns. One US Player Turn and one Japanese Player Turn make up one Game Turn. During each Player Turn players maneuver their units and resolve combat according to the following outline and within the limits provided by the following rules. At the conclusion of the last Game Turn the Victory Conditions are consulted and a winner is determined.
The Game Turn is divided into a First Player Turn and a Second Player Turn. The Exclusive Rules will indicate which player is the First or Second Player. The player whose Player Turn is currently in progress is the Phasing Player. This is a brief outline of the activities that may take place during each phase but players should refer to the Master Sequence of Play when playing the game.
1. FIRST PLAYER-TURN
- A. Initial Phase: The Phasing Player checks the weather (First Phasing Player only), receives reinforcements and replacements, performs withdrawals, and other special activities. The Non-Phasing Player removes Disruption.
- B. Bombardment Phase: The Phasing Player designates units and/or A/SSPs used to conduct Bombardments and their target hexes. Consult the Bombardment Results Table and apply the results immediately. Artillery units that Bombard cannot move in the next friendly Movement Phase or provide Support during the next Combat Phase.
- C. Movement Phase: The Phasing Player may move all, some or none of his units within the limits and restrictions of the rules of Movement, Zones of Control, Terrain Effects and the Exclusive Rules of the game. The Phasing Player may amphibiously land Assault Wave units, and bring Reinforcements onto the map as allowed by his Reinforcement Schedule and the Reinforcement rules.
- D. Combat Phase: The Phasing Player uses his units and A/SSPs to attack the non-Phasing Player's units. The Phasing Player has two attack options: Fire Combat and Assault Combat. The Phasing Player may execute his attacks in any order he desires. During the Combat Phase, no unit may move, except when called for as a result of combat or if marked as Reserve.
- E. Exploitation Phase: The Phasing Player moves his eligible ground units and amphibiously lands Assault Reserve Wave units and Reserve Wave units.
- F. Night Exploitation Phase (Japanese only): On PM Game Turns, the Japanese player may choose to use special night exploitation movement and combat during his Player Turn.
2. SECOND PLAYER-TURN
The Second Player now becomes the Phasing Player and executes Movement and Combat in the sequence described above.
3. END OF GAME TURN
The Game Turn marker is advanced one space along the Turn Record Track.
Rule 5 – ZONES OF CONTROL
5A. Zones of Control
The Zone of Control (ZOC) of a unit represents the control a unit exerts (direct and indirect fires, patrols, etc.) over nearby terrain. ZOCs affect many activities in the game, as covered in the appropriate rules. Units exert ZOCs as follows:
- Every unit exerts a ZOC in the hex it occupies.
- A unit exerts a ZOC into the six hexes adjacent to the hex it occupies (including enemy occupied hexes). Exceptions: Platoon-sized and Disrupted/Badly Disrupted units never exert a ZOC outside the hex they occupy.
- A unit prohibited from entering a specific terrain type or crossing a specific type of hex-side does not exert a ZOC into that hex or across that hex-side.
Example: A unit prohibited from entering a mountain hex does not exert a ZOC into that hex. A unit prohibited from crossing a steep hex-side does not exert a ZOC across the hex-side and therefore does not exert control into the adjacent hex.
A unit may temporarily lose its ZOC under certain conditions or while conducting certain activities (such as same-hex combat, being the target of an Overrun Attack, etc.). A unit that loses its ZOC does not have a ZOC for any game purpose until it regains its ZOC.
5B. Hex Ownership
A player owns a hex if at least one of his units:
- Exerts an uncontested ZOC into the hex, or
- Was the last to exert an uncontested ZOC into the hex.
A unit exerts an uncontested ZOC into a hex if:
- It itself occupies the hex (regardless of the presence of enemy ZOCs), or
- No unit of the opposing side exerts a ZOC into the hex.
Unless specified in a rule, when a player gains ownership of a hex he immediately owns the hex for all game purposes.
Example: If a US unit moves into an unoccupied enemy-owned airfield hex, the US player immediately gains ownership of that hex, even if a Japanese unit exerts a ZOC into this hex.
Rule 6 – MOVEMENT
6A. Movement During the Movement Phase
The Phasing Player may move any or all of his eligible units in this phase. He is never required to move any unit during this phase.
A unit's Movement Allowance (MA) is the number of MPs it may normally spend in a Movement Phase. A unit's MA may be modified due to various rules such as Disruption, Reserve status, amphibious landing penalties, etc. A unit may move up to the limit of its MA, and may never exceed it. A unit spends MPs as it moves from hex to hex or while conducting certain activities as specified in the appropriate rules.
-
Effects of Terrain and Weather: The unit spends MPs for each hex entered. The amount depends upon the type of terrain in the hex being entered, the unit class, and the current weather condition. The Terrain Effects Chart (TEC) lists the MP cost of each terrain type. Unless noted on the chart, the movement effects of a terrain type affect all units. Some types of terrain affect units by class or type, as listed on the TEC.
Some hexes have multiple types of terrain. In such cases, unless noted in the rules (for example roads), moving units must pay the MP cost of the terrain feature with the highest MP cost.
A unit must spend additional MPs to cross hex-sides that have MP costs listed on the TEC. The MP cost to cross a hex-side is in addition to the cost to enter the hex, as shown by the plus sign (+) in front of the cost.
Example: It costs an Infantry unit 2 MPs to cross a steep hex-side, in addition to the cost of the hex it is entering on the other side of the steep hex-side.
A unit may not enter a prohibited hex or cross a prohibited hex-side. Prohibited terrain types are listed on the TEC.
-
Restrictions: A unit may never spend more MPs than its modified MA in any one phase. A unit may expend all, some or none of its available MPs to conduct movement or special activities, or a combination of the two. Any unused MPs may not be accumulated from Game Turn to Game Turn or transferred to another unit. Once a player has completed the movement and/or activities of a unit and has begun moving another, he may not go back to the first unit to move it or expend its MPs any further during the phase. A player may not change his move without the consent of the opposing player.
In general, a unit may not enter a hex occupied by an enemy unit. Exceptions, covered in the appropriate rules, include amphibious landings and Overrun Attacks.
-
Zones of Control Effects: Unlike many hex-based wargames, a unit is not required to stop when entering an enemy ZOC, and pays no MP penalty if doing so. However, when a unit exits a hex that is in an enemy ZOC it must spend a certain number of MPs to leave the hex, in addition to the MP cost for the terrain of the hex being entered. The MP costs are given on the Enemy ZOC Movement Cost Table on the Players Aid Card.
6B. Special Movement
-
Minimum Move: A unit with a printed MA of 1 or more may always move a single hex (except into or across prohibited terrain) in a phase in which it may move. To do so, the unit must spend all of its available MPs to enter the adjacent hex from the hex it started the phase in, even if the cost would exceed the number of MPs the unit has available that phase. It may exit an enemy ZOC or move from enemy ZOC to enemy ZOC when using this one-hex minimum move ability. A unit may not spend MPs prior to, during, or after this movement for any other purpose when using this one-hex minimum move.
If a unit is located in the same hex with a landing craft it may use a minimum move to embark onto it. It may also disembark from a landing craft and remain in the same hex. A unit may not conduct an Overrun Attack when performing a minimum move.
-
Overrun Attack: A unit or stack of units of the Phasing Player may conduct a special type of attack during the Movement and Exploitation Phases called an Overrun Attack. An Overrun Attack may be executed when the Phasing Player believes the opposition to be weak enough to eliminate without having to stop and conduct an assault.
All units conducting an Overrun Attack must have sufficient MPs to pay the terrain cost to enter the hex being overrun, including any hex-side terrain features crossed, plus 3 additional MPs.
The stacking limit of the defender's hex limits the number of units that may conduct an Overrun Attack against the hex (although each player can stack to this limit). They cannot cross or enter prohibited terrain; however, overrunning units may use road movement rates to enter the hex being overrun. For ZOC MP cost purposes, all enemy units in the hex being overrun temporarily lose their ZOC, including in their own hex; ZOC MP costs must be paid normally, though, if enemy units in adjacent hexes exert a ZOC into the hex from which the Overrun Attack is initiated and/or the hex being overrun.
2a. Overrun Attack Procedure:
- Move a single unit or a single stack of units adjacent to the enemy units and declare an Overrun Attack against that hex.
- Total the Attack Strength of the overrunning units, modified for terrain in the hex being overrun as per the Combat Effects column on the TEC, and compare it to the total Defense Strength of the hex being overrun as an odds ratio, attacker to defender, rounding down (see 9A.2 for examples of odds calculation). Applicable DRMs for terrain (in the Assault Combat DRMs column on the TEC), any fortification in the hex being overrun, the hex-side being crossed, as well as Armor Bonus and Anti-tank Effects, are applied as one-column shifts for determining the final odds ratio (shift to the left for each negative DRM, shift to the right for each positive DRM). Armor Bonus may be used by both the attacker and defender, and Anti-tank Effects by the defender (see Rule 10). If the odds are 8:1 or greater the Overrun Attack is successful. If the odds ratio falls below 8:1 the Overrun Attack fails.
6C. Movement During the Exploitation Phase
-
Regular Exploitation: The following MAs apply during the Exploitation Phase:
- C/M units: 1/2 their printed MA
- All other units: 1 MP or Minimum Move [Exception: Units with a printed MA of 0 cannot move during the Exploitation Phase]
Movement during the Exploitation Phase is conducted in the same manner as movement during the Movement Phase. A unit with no Exploitation MA may not move in the Exploitation Phase.
-
Japanese Night Exploitation: The Japanese player has a special Night Exploitation Phase in which he can conduct movement and combat. After the regular Japanese Exploitation Phase of any PM Game Turn is completed the Japanese player may declare a Night Exploitation Phase, with the following effects:
- All Japanese units may move as per Regular Exploitation.
- After movement, Japanese units may conduct Assault Combat (only), attacking with a -1 DRM (in addition to any normal combat DRMs).
- All artillery Offensive and Defensive Support is halved (1/2). A/SSPs, if available, cannot be used.
Rule 7 – TRANSPORTATION LINES
There are two types of transportation lines in Guam, roads and trails. A unit may use transportation lines when it moves between hexes directly connected to one another by the line. See the TEC for MP costs.
7A. Roads
A unit moving along a road pays the MP cost for clear terrain for each hex it enters. The actual terrain costs for hexes entered and hex-sides crossed are ignored.
Road movement has the same limitations as regular movement. For example, enemy ZOCs and Interdiction affect road movement.
Unless prohibited by the Exclusive Rules a unit may always use a road. Roads may be used in both the Movement and Exploitation Phases. Units may enter and exit prohibited terrain using road movement as long as the same road connects the entry and exit hexes.
Rule 8 – STACKING
Placing two or more units in a single hex is considered stacking. Only a limited number of SPs may stack in a hex and each unit has a SP value, based on its unit size (see the Stacking Value Table).
As shown in the Stacking Summary Table, the Stacking Points column lists the number of SP's worth of units that may normally stack in a hex. This column includes all unit types, including artillery. The Additional Artillery SPs column is the number of artillery class SPs (only) that may stack in a hex that may stack in the hex beyond the normal stacking limit. Amtrac, amphibious tank, and DUKW units count as 0 SPs when they are in a shallow reef hex and 1 SP in all other hexes.
The stacking limit is in effect at the end of each of the following phases: Movement, Combat, and Exploitation/Night Exploitation.
[Exception: Beachhead stacking limits are in effect at all times (see 18C.2)].
At the end of any of these phases neither side's units may be in violation of the stacking limit in any hex. The stacking limit of a hex also limits the number of units that may overrun it from an adjacent hex (see 6B.2). Non-Phasing Player units are not considered when calculating the stacking limit of a hex for Phasing Player units that are conducting an Overrun Attack or amphibious landing.
Note that the stacking limit is not in effect during the Initial Phase and reinforcements and replacements entering play may violate the stacking limit during this phase only.
Rule 9 – GROUND COMBAT
During the Combat Phase the Phasing Player's units may attack adjacent enemy units. In this phase, the Phasing Player is the attacker and the non-Phasing Player is the defender. There are two types of ground combat that may take place during the Combat Phase:
- Fire Combat
- Assault Combat
An enemy-occupied hex may be attacked only once per Combat Phase. The Phasing Player must indicate the target hex and the type of attack he will be using. Fire and Assault Combat cannot be used against the same hex in the same phase.
9A. Combat Procedure
During the Combat Phase, the Phasing Player may conduct a series of attacks, one after another, in any order and in any combination of combat types. Attacking is voluntary, except in amphibious landings (when friendly and enemy units occupy the same hex) or in the case of a failed Overrun Attack. The attacker does not have to announce all of his attacks before resolving any attack. He may see the results of one before declaring another.
-
Fire Combat: This represents units attempting to cause enemy casualties by direct fire without getting in too close. It is a lower-risk attack, but it does not take ground or attempt to drive the enemy back.
- The Phasing Player designates a target hex and totals the Attack Strengths of all units conducting Fire Combat.
- The non-Phasing Player totals the Defense Strengths of all units in the target hex that will return fire. If he is attacked from several hexes, the non-Phasing Player must designate the hex he will return fire into.
- Each player rolls 1d6 and consults the Fire Combat Results Table, applying any appropriate weather, terrain, and fortification DRMs for each opponent's target hex. Immediately assign any Combat Losses by placing Hit markers under the affected units. The owning player allocates Combat Losses to his units. Combat Losses are applied to both sides simultaneously.
-
Assault Combat: This type of combat represents a unit attacking in order to drive the enemy from its position and to take ground. It is a higher-risk attack, but it can eliminate the enemy or force them to retreat.
- The Phasing Player designates a target hex and all the units participating in the attack.
- The Phasing Player totals the Attack Strengths of his attacking ground units.
- The Phasing Player allocates Offensive Support from artillery units and A/SSPs.
- The non-Phasing Player may move any of his Reserve units which have not already moved during the current Combat Phase.
- The non-Phasing Player totals the Defense Strengths of his defending units.
- The non-Phasing Player allocates Defensive Support from artillery units and A/SSPs.
- Compare the total Attack Strength and the total Defense Strength in the form of an odds ratio, attacker to defender, rounding down. The attacker rolls 1d6, adds any applicable DRMs, and cross-references the modified result with this odds ratio column of the Assault Combat Results Table. The indicated result is applied immediately.
9B. Combat Restrictions
The following restrictions apply to ground combat:
- No unit may attack or be attacked more than once per Combat Phase.
- All units defending in a hex must be attacked collectively, with their Defense Strengths combined into one single Defense Strength.
- Each individual attack must be made against units occupying a single hex.
- Units in the same hex may attack into different hexes as part of different combats.
- A unit may not split its Attack Strength to attack more than one hex or "give" some of its Attack Strength factors to other friendly units.
- Units may not conduct Assault Combat into or across prohibited terrain.
- Units may conduct Fire Combat across or into prohibited terrain.
- Only Artillery-class and Armor sub-class units may cause Combat Losses to Armor units in Fire Combat. At least one of the above type of units must be included in the Fire Combat in order to inflict any Armor Combat Losses.
9C. Terrain Effects on Combat
The terrain in the defender's hex affects assault combat, but the terrain in hexes occupied by attacking units does not. Any hex-side terrain feature across which an attack is made affects Assault Combat but not Fire Combat.
Units cannot conduct Assault Combat into or across prohibited terrain unless a road connects the two hexes (crosses the hex-side). In Fire Combat defending units apply terrain and fortification DRMs based on the attacker's hex into which they are returning fire. The Combat DRMs and Combat Effects columns on the TEC summarize these effects. Terrain may affect combat by halving the Attack or B/S Strength of some or all of the attacking units (Assault Combat) and/or by applying DRMs to the combat die roll (Fire and Assault Combat). Fire Combat is only affected by DRMs.
Terrain effects for hexes that contain multiple terrain types are not cumulative and the defending unit benefits only from the most advantageous terrain feature. However, the terrain effects of a hex and hex-side are cumulative.
Note: The maximum negative DRM is -4. There is no limit for positive DRMs.
Example: A unit defending in a rough hex behind a steep hex-side would benefit from both. A unit defending in Assault Combat in a hex with a town and mountain terrain sees its attackers' Attack Strength halved and receives a -2 DRM for the mountain terrain, not a cumulative -3 DRM.
9D. Combat Resolution
Combat results may affect one side only, both sides, or neither side. The owning player immediately applies the combat result to his affected units. All results on the left side of the slash affect the attacker; all results to the right affect the defender.
-
Assault Combat Results:
- AE/DE: Attacker Eliminated/Defender Eliminated. Eliminate all the affected side's units.
- AH/DH: Attacker Halved/Defender Halved. Eliminate half of the affected side's total Combat Strength.
- AQ/DQ: Attacker Quartered/Defender Quartered. Eliminate a quarter of the affected side's total Combat Strength.
- AS: Attacker Stopped. No effect.
- r or R: Retreat. Retreat the affected side's units one hex (r) or two hexes (R).
- HX: Half Exchange. Eliminate half the total Combat Strength from the side with the lower total (or defender if both sides are equal). The other side must eliminate a number of Combat Strength factors that equal the amount lost by the lower side.
- QX: Quarter Exchange. Eliminate a quarter of the total Combat Strength from the side with the lower total (or defender if both sides are equal). The other side must eliminate a number of Combat Strength factors that equal the amount lost by the lower side.
To calculate Combat Losses in each of the results above, the attacker uses his Attack Strength and the defender his Defense Strength. This is based on the units' printed Combat Strengths (minus any combat loss markers). When a side must eliminate a quarter or half of its total Combat Strength the number must equal or exceed the amount mandated by the results (round fractions up).
-
Fire Combat Results: The numbers on the Fire Combat Table are the number of Combat Losses suffered by the enemy unit or units in the target hex. The owning player allocates Combat Losses to his units.
-
Hit Markers and Combat Losses: Hit markers are used to show losses suffered by units in combat. They are placed under affected units. As a unit receives more Combat Losses, flip or exchange the markers to display its current number of Combat Losses.
9E. US Combat Ineffective Units
Some US units will become Combat Ineffective (CI) when, due to Combat Losses, their Attack or Defense Strength reaches the CI Number shown on their counter.
When this occurs the unit is flipped over to its reverse side. Remove or adjust the Hit markers to reflect its current Attack Strength.
Example: A Marine battalion with a printed Attack Strength of 8, a CI Number of 4, and having previously lost 3 strength points (has a "3" Hit marker) suffers 2 additional Combat Losses. These 5 Combat Losses reduce its Attack Strength to 3, which is less than its CI Number. The battalion is flipped to its reverse side, with a printed Attack Strength of 4, and its "3" Hit marker is changed to a "1" Hit marker.
The Combat Strengths and MA on the unit's reverse side are printed in white to indicate the unit's CI status.
- CI units cannot conduct Assault or Fire Combat attacks.
- They defend, return fire, and move normally.
The unit may receive replacements that will bring its Attack Strength above its CI level. When this occurs flip the unit to its front side and place or adjust Hit markers under it to reflect its new Attack Strength.
9F. Movement After Combat
Retreats and advances are not considered regular ground movement, but they are forms of movement. They are subject to the following restrictions. If any unit is unable to retreat within these restrictions, it is eliminated.
-
Retreats: When a unit must retreat, the owning player moves it away from the hex it occupied during combat. Units that must retreat 2 hexes (R result) must move two hexes away from the defended hex. Each hex entered during the retreat must be one of the following, in priority order:
- a. A hex not in an enemy ZOC where the stacking limits will not be violated by the retreat.
- b. A hex not in an enemy ZOC where the stacking limits will be violated by the retreat.
- c. A hex in an enemy ZOC, already occupied by a friendly unit, where the stacking limits will not be violated by the retreat.
- d. A hex in an enemy ZOC, already occupied by a friendly unit, where the stacking limits will be violated by the retreat.
If a retreating unit ends its retreat in violation of the stacking limit it must continue to retreat (according to the same priorities listed above) until it reaches a hex where it does not violate the stacking limit. This continued retreat cannot move closer to the hex it originally defended. If it cannot do this it is eliminated. Units without a retreat route, except into or across prohibited terrain or into an enemy ZOC not occupied by a friendly unit, are eliminated.
Units retreating to a friendly-occupied hex that is subsequently attacked in the same Combat Phase contribute nothing to the defense of the hex. Their Defense Strengths are ignored for odds ratio calculation, for all exchange and Combat Loss purposes, and for any Armor Bonus, Anti-tank Effects and AA Fire. These units are affected by any mandatory retreats (and any subsequent effects thereof) and AE or DE results.
-
Determined Defense: Japanese units in a hex containing a fortification counter (see 15B) or a hex defined as a fortified position in the Exclusive Rules may ignore a retreat result by taking one step loss (per unit).
-
Advances: Only units conducting Assault Combat may advance after combat. The attacking units may advance into the defender's hex, up to the stacking limit of the hex, if it is totally vacated by the defending enemy units. Advance after combat is voluntary but must be done immediately upon resolution of the attack and before any other attack is resolved. Artillery units providing Support may not advance after combat. However, artillery units that participated in an Assault Combat or Banzai Attack with their Attack Strength of 1 or 2 (see Rule 11) may advance.
9G. Zero-Strength Units
A unit with an Attack Strength of zero cannot attack by itself. It may participate in an attack made by at least one other unit that has an Attack Strength greater than zero. It may also advance after combat. Zero-strength units participating in an attack are affected by any combat results of the attack.
Units with a Defense Strength of zero not stacked with other units with a Defense Strength greater than zero are automatically eliminated if attacked in Assault Combat or by an Overrun Attack.
9H. Mandatory Combat Losses
Units with special combat abilities (such as Armor, anti-tank, or engineers) are required to take Combat Losses if their special abilities are used and the combat results indicate a Combat Loss to their side. In such a case, at least one of the units with the special capability (owning player's choice) must take a Combat Loss.
If units with special capabilities are used, special units that are outside a fortification (such as a heavy AA unit using its anti-tank capability) must take at least 1 Combat Loss first. If any Combat Losses are taken from units under a fortification, then the same Combat Loss requirements are in effect for those units.
Combat results that affect the entire stack are still applied as normal. Mandatory Combat Losses are not additional Combat Losses applied to a stack. They count towards the overall combat result requirement for Combat Losses.
If any Amtrac, amphibious tank, or DUKW units are involved in an Assault Combat attack or defense where an unmodified (natural) "3" is rolled (marked with a * on the CRT) and US forces suffered at least one strength point Combat Loss, any one unit of the involved above types (owning player's choice) suffers one Combat or Step Loss, in addition to the combat results.
9I. Same-Hex Combat
During an amphibious landing both friendly and enemy units may occupy the same hex at the start of a Combat Phase. In such instances the friendly units in the hex must attack the enemy units there. Note that units conducting an amphibious landing may attack in conjunction with friendly units in other hexes, including artillery Support and A/SSPs. This same-hex combat is resolved according to the standard Assault Combat rules with modifications detailed in 18J.
All units (both sides) involved in same-hex combat exert no ZOC into any adjacent hexes.
9J. Retreat Before Combat
Some units may have the capability to retreat before combat. Those units will be identified in the Exclusive Rules. Generally they will be recon, light infantry, commando or raider type special units.
-
Procedure: After the attacker has declared an attack (Fire or Assault Combat) against a hex, including any Support, the defender may designate any of his eligible units as attempting to Retreat Before Combat. He then rolls 1d6 for each of them, adding any applicable DRMs, and consults the Retreat Before Combat Table.
- Retreat Successful: Retreat the unit one hex in accordance with the retreat rules (see 9F.1).
- Retreat Failed: The unit cannot retreat and remains in the hex. Any combat die roll against at least one defending unit in the hex that failed to Retreat Before Combat benefits from a +1 DRM.
-
Restrictions: If the defender's hex is totally vacated, the attacker is still considered to have "attacked" the hex. He cannot reallocate the original attacking units, and any Support allocated, to another hex. Attacking units may advance.
Rule 10 – ARMOR & ANTI-TANK
Certain units have armor and anti-tank capabilities which are used in Assault Combat and Overrun Attacks only. Those units are divided into two basic combat unit categories:
- Armor: Tank, light tank, flame-thrower tank, and amphibious tank units.
- Anti-Tank: Anti-tank and heavy anti-aircraft units.
10A. Combat Effects
The combat effects below do not apply when the defending units are in a mountain or swamp hex. Roads do not negate this terrain restriction.
-
Armor Bonus: In Assault Combat Armor units can provide the following DRMs:
- +1 DRM when at least 1/3 of the attacking force's ground Attack Strength is from Armor units.
- -1 DRM when at least 1/3 of the defending force's ground Defense Strength is from Armor units.
In Overrun Attacks these DRMs apply as one-column shifts.
Do not take artillery Support or A/SSPs into account when calculating Armor Bonus. Also note that both attacker and defender might benefit from an Armor Bonus (which would cancel each other out).
-
Anti-Tank Effects: The Defense Strength of defending anti-tank and heavy anti-aircraft units is deducted from the attacking Armor units' Attack Strength when calculating for Armor Bonus. It does not alter the Armor units' Attack Strength for combat resolution, just Armor Bonus calculation.
10B. Mandatory Combat Losses
If the attacker or defender qualifies for the Armor Bonus, even if the Bonus was negated by the defender's Anti-tank Effects, Mandatory Combat Losses (see 9H) is in effect for the Armor units involved.
Rule 11 – ARTILLERY UNITS
Most artillery units are indirect-fire artillery units and have a B/S Strength (see Unit Counter Information Chart). These units may participate in combat in non-adjacent hexes within their printed Range; this may take the form of Bombardment or Support.
Note: Artillery units without a B/S Strength (i.e., anti-aircraft and anti-tank units) are direct-fire artillery units or artillery units without guns. They conduct Assault and Fire Combat like non-artillery units, and are not governed by Rule 11.
-
Range: In order to use an artillery unit's B/S Strength, the target hex must be within the printed Range of the unit. Artillery units firing at a target hex farther than 1/2 of their printed Range have their B/S Strength halved. Range is counted from the artillery unit's hex (not included) to the target hex (included).
A unit's B/S Strength may not be split between combats and can only be used against one enemy-occupied hex at a time. Artillery units involved in combat from a non-adjacent hex do not suffer any combat results. Artillery units can also participate in Assault or Fire Combat from adjacent hexes in which case they do suffer combat results.
-
Fortifications: Units may not use their B/S Strength if placed under a Level 2 or 3 fortification [Exception: Coastal Defense units (see 18F)]. Such units may defend normally, including benefiting from the fortification.
-
Assault/Fire Combat: When an enemy unit attacks an artillery unit in Assault or Fire Combat, the artillery unit uses its Defense Strength. An artillery unit cannot provide Defensive Support during the Combat Phase it is attacked.
An artillery unit attacking in Assault Combat (including Banzai Attacks) or Fire Combat is considered as having a printed Attack Strength of:
- 2 for a battalion/regiment-sized unit
- 1 for a battery-sized or smaller unit
Any Hit marker reduces this Attack Strength as normal. The unit cannot provide Offensive Support during the Combat Phase it is attacking.
US artillery units have a reverse side that is marked "Fired". US units that Bombard or provide Support are flipped over to their reverse (Fired) side. A Japanese unit that Bombard or provide Support is marked by placing a "Fired" marker on it. Units become available to Bombard or provide Support again during the owning player's next Initial Phase: flip them back to their front side (US) or remove the "Fired" marker (Japanese) at this time.
11A. Artillery Support
An artillery unit's B/S Strength may be used to Support friendly units conducting Assault Combat or units defending against such attacks. An artillery unit cannot be used for both Offensive and Defensive Support in a single Game Turn.
-
Offensive Support: In order to provide Offensive Support to friendly units conducting an Assault Combat attack, an artillery unit must be within range of the attacked hex. The B/S Strength of the artillery unit, modified by range and per the Combat Effects column of the TEC, is added to the total Attack Strength of the ground combat units.
-
Defensive Support: In order to provide Defensive Support to friendly units attacked in Assault Combat, a non-Phasing artillery unit must be within range of at least one hex occupied by attacking enemy units. In addition, the artillery unit cannot be adjacent to an enemy unit. The B/S Strength of the artillery unit is added to the total Defense Strength of the defending units. No terrain modifiers apply, but range may affect this support strength.
-
Support Limits: The amount of artillery that may provide Offensive or Defensive Support to friendly units is limited by the size of the friendly force:
- The number of artillery SPs that may provide Offensive Support in a single Assault Combat cannot exceed twice (x2) the total SP value of the attacking ground units [Exception: A minimum of one artillery unit (of any size) may provide Offensive Support, whatever the total SP value of the attacking units].
- The number of artillery SPs that may provide Defensive Support in a single Assault Combat cannot exceed the total SP value of the defending ground units.
Example: A Marine battalion (3 SPs) conducts Assault Combat attack. Up to 6 SPs of artillery units may provide Offensive Support. If the battalion is defending, up to 3 SPs of artillery units may provide Defensive Support.
11B. Bombardment
Artillery units may be used to Bombard enemy units. All Bombardments are carried out during the Bombardment Phase.
A hex may be Bombarded any number of times during the Bombardment Phase. The Phasing Player may see the results of a Bombardment before deciding to Bombard the same hex again or not.
-
Procedure:
- The Phasing Player designates the target hex.
- The Phasing Player specifies which artillery units and how many A/SSPs, if any (see Rule 12), are Bombarding, and computes the total B/S Strength (taking into account any Combat Effects due to terrain).
- He rolls 1d6, applying any DRMs for terrain/fortifications, and cross-references the modified result with the appropriate column on the Bombardment Results Table.
-
Effects: Each "D" result achieved places a Disruption hit (D-hit) on one unit in the targeted hex and that unit becomes Disrupted. The owning player allocates all D-hits on his units [Exception: If the target hex of a US Bombardment contains an Exposed (see 19B.2) Japanese artillery unit, the US player may place any or all D-hits on that artillery unit]. Any unit that receives a D-hit while Disrupted becomes Badly Disrupted and any unit that receives a D-hit while Badly Disrupted suffers one Combat Loss.
-
Restrictions: Artillery units used in Bombardment cannot be used in Offensive or Defensive Support for the remainder of the Game Turn. Artillery B/S Strength and A/SSPs are halved if no friendly Non-Disrupted unit is adjacent to the target hex.
-
Terrain: Bombarded units benefit fully from the terrain and any fortifications in the hex they occupy, but do not receive any hex-side benefits.
11C. Anti-Aircraft Fire
Anti-Aircraft (AA) units may engage ASPs in an attempt to abort their use in Offensive or Defensive Support, Bombardment, or Interdiction. Each AA unit has an AA Strength printed on its counter. Some Coastal Defense units, classified as dual purpose, have an AA Strength as well as a B/S Strength. Each non-Badly Disrupted AA unit may fire once per Player Turn. Rotate the unit after it fires to note that it is no longer eligible to fire that Player Turn.
-
Procedure: After a player allocates ASPs to any activity the other player may immediately attempt to abort them.
- Any eligible AA unit within Range of the target hex of the ASPs may fire.
- Compute the total AA Strength of all firing units. Roll 1d6 for each AA Strength point directed against the ASPs and consult the Anti-Aircraft Table.
-
Effects: Each Abort result aborts one ASP which is considered used but has no effect at all on the Assault Combat, Bombardment, or Interdiction mission.
Rule 12 – AIR & SURFACE SUPPORT
A/SSPs are used for Bombardment and Offensive/Defensive Support exactly as if they were artillery B/S Strength points and may be combined with artillery fire. ASPs (only) may also be used for Interdiction. Players keep track of the expenditure of A/SSPs by using the appropriate display tracks on their player chart.
A/SSPs have unlimited Range. They may attack any enemy unit or hex on the map (unless otherwise stated in the Exclusive Rules).
The Initial Deployment of each scenario allocates a number of A/SSPs to the players. This amount might be modified in a later Reinforcement Phase, as given in the Reinforcement Schedule of the Exclusive Rules. During the US Player's Initial Phase the US Player has the number of A/SSPs available reset to his current allotted amount (either the amount at the beginning of the game or a new amount given in a later turn). The allotted amount of A/SSPs is available on EACH turn. A/SSPs are allocated for the entire Game Turn, not Player Turn. Players keep track of the expenditure of A/SSPs by using the appropriate display tracks on their player charts. A/SSPs may not be accumulated from Game Turn to Game Turn. If they are not used in the Game Turn allocated by the Reinforcement Schedule, they are forfeited.
Example: The US Player has 6 Air and 6 Surface Support Points at the start of Game Turn 1. During his Player Turn he uses 4 Surface points in Bombardments and 2 air points in Offensive Support. During his opponent's Player Turn, he will have 2 Surface points and 4 Air Support Points available for use as Defensive Support. Any unused A/SSPs at the end of Game Turn 1 will be lost. On Turn 2 US Initial Phase the Support Points will reset to 6 Air and 6 Surface Support Points.
-
Bombardment and Support Restrictions:
Bombardment/Offensive Support: The Phasing Player may assign all available ASPs to one target hex, or may split them up between as many targets as desired. SSPs are limited to 3 maximum per target hex.
Defensive Support: The non-Phasing Player may assign up to 2 ASPs to each Assault Combat against a defender's hex. SSPs are limited to 1 maximum per defender's hex.
Each SSP used in a coastal hex, or in a hex adjacent to a coastal hex, has its effects doubled. However, it still counts as one point for Support restriction purposes.
-
Air Interdiction: Available ASPs may be used to disrupt enemy troop movement through Interdiction, which takes place at any time during the enemy Movement Phase or during the friendly Combat Phase against moving enemy Reserve units. Interdiction can target any hex, or any unit or stack after it enters any hex. Only one mission may be conducted per unit or stack in a given hex. The same unit or stack may be targeted when it enters another hex, or the same hex may be targeted if a different unit or stack enters it.
Before the Japanese player moves the US player may also target any individual hexes for Interdiction. An Interdiction hex is designated, and a number of ASPs are assigned to the mission. After all AA Fire against the ASPs has been resolved, roll 1d6 for each ASP reaching the Interdiction hex and consult the Interdiction Table. If the Interdiction is successful place the appropriate Interdiction marker in the hex. Any unit or stack that exits a hex with an Interdiction marker must spend additional MPs equal to the number of MPs indicated on the marker. The Interdiction marker remains in the hex for the remainder of the phase in which it was placed.
Rule 13 – SUPPLY
13A. US Supply
During the Initial Phase of each US Player Turn, all US units on the map must be able to trace a Line of Communications (LOC) back to any Beachhead marker. Units that cannot trace an LOC are Isolated. Isolated units have their movement, attack and Support capabilities severely restricted.
-
Line of Communication: A LOC is a series of connected hexes, of any length, that can be traced from the unit to a Beachhead marker. An LOC cannot be traced through prohibited terrain (for that unit class) or through an enemy ZOC. Friendly units negate enemy ZOCs in the hex they occupy for the purpose of tracing LOCs.
-
Effects of Isolation: The following restrictions apply to a US unit that is Isolated:
- Its Attack or B/S Strength is halved for all attacks (including Bombardment and Support).
- Its MA is unaffected but the unit cannot increase the distance (in hexes) between itself and the closest Beachhead marker.
Isolation also affects replacements (see Rule 16).
13B. Japanese Supply
No supply rules or restrictions apply to Japanese units (unless otherwise stated in the Exclusive Rules). These are considered to be in supply at all times. Isolation has no effect on their movement or combat capabilities and so it isn't judged at the beginning of the Japanese Player Turn, but does affect Replacements (see Rule 16).
Rule 14 – DISRUPTION
Units become Disrupted (or Badly Disrupted) as described in the various rules. Place a Disrupted (or Badly Disrupted) marker on a unit to show its status. A unit that becomes Disrupted (or Badly Disrupted) remains so until the start of the next non-phasing player's Initial Phase; at this point remove all markers from friendly units.
Example: A Japanese unit Disrupted during the US Player Turn would remain Disrupted throughout the remainder of the US Player Turn and throughout the entire following Japanese Player Turn. The Disruption is removed during the next US Initial Phase.
Disruption effects are:
- Disrupted: A Disrupted unit has its Attack Strength and MA halved, loses its ZOC into adjacent hexes, and cannot bombard or provide artillery Support to other units.
- Badly Disrupted: A Badly Disrupted unit suffers the same effects as a Disrupted unit (per above), plus it cannot move or attack, has its AA Strength reduced to zero and its Defense Strength halved, and it is not taken into account for Armor Bonus and Anti-tank Effects calculation.
Rule 15 – ENGINEERS & FORTIFICATIONS
15A. Combat Engineers / Flame-thrower Tanks
-
Combat Engineers: When a combat engineer unit is involved in an Assault Combat attack against a hex containing a town or fortification a +1 DRM applies to the combat die roll.
Note: Construction engineers are not considered combat engineers and do not have this special combat capability.
-
Flame-thrower Tanks: When a flame-thrower tank unit is involved in an Assault Combat attack against a hex containing a fortification, a +1 DRM applies to the combat die roll.
If these special abilities are used, Mandatory Combat Losses (see 9H) are in effect for the involved units. Only one +1 DRM, either for combat engineers or flame-thrower tanks, may be used per Assault Combat.
15B. Japanese Fortifications
A fixed number of fortification counters might be available to the Japanese player for deployment prior to game start. These represent mines, concrete bunkers, pillboxes and spider-hole defenses.
Once placed in a hex they cannot be moved. Japanese fortifications provide a defensive DRM for all Japanese units occupying the fortification (place the unit underneath the fortification counter). Fortification counters are not units. They do not count against the stacking limit of a hex; however, a maximum of 1 fortification counter may be placed in a hex.
Counter Levels:
- Level 1 = -1 combat DRM.
- Level 2 = -2 combat DRM.
- Level 3 = -3 combat DRM.
Japanese units in a fortified position may ignore a retreat result by taking a Combat Loss. A fortified position is any hex that contains fortification counters or a terrain type that is designated as being fortified in the Exclusive Rules.
Ranged units (artillery and anti-aircraft) cannot provide Support, Bombard, or fire AA if they occupy a Level 2 or 3 fortification [Exception: Coastal Defense units (see 18F)]. However, such a unit may be in the hex but not occupy the fortification, in which case may fire as normal. Simply place the unit on top of the fortification counter. The US player may choose to Bombard only the Exposed support unit (ignoring the fortifications DRM), but any result only applies to the targeted unit.
With the exception of bombardment (above), any eligible unit defending in the hex occupies the fortification, the entire hex benefits from the fortification DRM.
If Combat Losses are indicated, all units stacked with, but not under, a fortification counter, must take a Combat Loss prior to any units under a fortification counter.
US units may not use Japanese fortifications. If a US unit occupies or moves into a hex that has an unoccupied Japanese fortification counter the counter is permanently eliminated and removed from play.
Rule 16 – REPLACEMENTS
16A. Replacement Points
Replacement Points (RPs) represent replacement personnel and equipment, casualties returned to duty, or groups/small units that were separated from their parent unit during combat and have rejoined the unit. Players receive RPs as follows:
- At game start, as part of the Initial Deployment
- During the game, per the Reinforcement Schedule.
- During the game as a result of combat or transfers.
Each RP is equal to 1 combat strength point of a unit. RPs are used to replace (return to play) eliminated units and to rebuild reduced units (remove Hit markers from). RPs are based on contingents, and RPs of one contingent may not be used for other contingents.
Example: Imperial Japanese Army RPs cannot be used to replace Imperial Japanese Navy units.
There are three types of RPs: Infantry (Inf), Artillery (Art), and Armor (Arm). Note: These labels are terms of convenience. Each of these types actually represents more than just its specified type.
- Arm RPs replace C/M class units.
- Art RPs replace Artillery class units.
- Inf RPs replace Infantry and Other class units.
16B. General Replacement Pool
This general pool holds all the replacement points that all Repl Sources from a particular side may draw from. Both players keep track of available RPs in the pool by using the Replacement Point Track found on each player's individual chart. The Rem. Markers go on the Casualty Tracks and the REPL markers go on the Replacement Tracks to indicate the current number of RPs available. The Initial Deployment and Reinforcement Schedule will list the starting level and any RPs that arrive during the game. As RPs are gained and used move the appropriate marker along the track.
16C. Replacement Sources
Both sides have Replacement Sources (Repl Sources) which receive Special RPs and RPs allocated by the reinforcement schedule. RP Sources are points of entry for replacements from the RP track and for replacement units from the Replacement Pool.
-
US Repl Sources. All Beachhead markers are Replacement Sources for the US player. Both USMC and US Army contingents may use any US Beachhead as a replacement source. See 18C.2 for more details about Beachhead units. US RP Sources (Beachheads) are never Isolated (Rule 16C.3 below).
-
Japanese Repl Sources. Headquarters (HQ) units or Replacement Source markers are Japanese Replacement Sources.
Headquarter units count as zero (0) SP for stacking purposes, move like Infantry units, and have a (0) attack factor and therefore cannot attack by themselves. If eliminated they generate no Special RPs but may be replaced at no RP cost.
Replacement Source markers represent specific locations used as a logistical center. They may not move. They have a strength of zero (0) and do not generate special RPs. If eliminated (by a US unit entering their hex) they cannot be replaced.
-
Japanese RP Source Isolation. A Japanese RP Source is Isolated if it cannot trace a LOC to another RP Source of the same contingent. A LOC is a series of hexes (of any length) that are free of enemy ZOC. Friendly units negate enemy ZOCs in the hex they occupy for the purpose of tracing this LOC. However, the LOC cannot cross terrain prohibited to that type of RP. Isolation status is judged at all times during the game.
When a Japanese RP Source becomes Isolated for a particular RP type, the Japanese player must allocate up to one half (round down) of the available RPs on the RP Track to the Isolated RP Source. The Japanese player must then keep track (on a piece of paper) of the actual number of RPs (number and by type) held by the Isolated RP Source. Adjust the appropriate markers on the RP Track to reflect this allocation. Afterwards, only Special RPs traced to that particular isolated RP Source may be allocated to the Isolated RP Source.
At the moment the RP Source is no longer Isolated (can trace an LOC to another RP Source of the same contingent), all RPs held by the RP Source are reallocated back to the RP track (the general pool).
-
RP Source Elimination. If a non-isolated Japanese RP Source is eliminated the owning player must eliminate RPs from the RP Track. This amount is determined by dividing the number of available RPs (of each type) by the number of non-Isolated RP sources in play (the RP Sources in play must be of the same contingent if Japanese), round down all fractional results.
16D. Special Replacements
-
Combat. When strength factors are eliminated due to combat the owning player receives Special RPs [Exception: Overrun Attacks or if Isolated]. All contingents may receive Special RPs.
When a side loses combat factors or units the owning player immediately notes the actual strength point loss. Each player has Casualty Tracks, based on contingents and RP type, located on both player charts. At the beginning of the game place the RP Remainder markers in the "0" (zero) space. As a contingent takes a Combat Loss of a particular type, advance the appropriate Remainder marker to the right (next higher numbered space). When the marker is in the "3" space (US) or "5" space (Japanese) and the contingent takes another Combat Loss (the loss) cycle the marker back to the "0" space and advance the Replacement Point Track marker for that contingent by one.
-
Isolation. If a unit is Isolated from a RP Source at the time it sustains Combat Losses it does not generate Special RPs. A unit is Isolated if it cannot trace a series of hexes, of any length, to any friendly RP Source, free of enemy ZOC, and does not cross prohibited terrain for that replacement type. Friendly units in a hex negate an enemy ZOC in that hex.
-
Transfer. During a friendly Initial Phase units that are stacked together in the same hex, or are adjacent to each other during the friendly Initial Phase, may transfer combat factors from unit to unit. The units must be of the same contingent and use the same type of RP. Combat factors cannot be transferred across prohibited hex-sides. Units may also transfer combat factors to the Replacement Pool if it can trace a LOC to any RP Source (same contingent for the Japanese player).
A maximum of 1 step may be transferred to the Replacement Point Track per unit each turn. For each step transferred, adjust up or place one hit marker on the unit. Adjust the RP markers as the RPs are added to the pool. Transfers to the RP Pool are conducted after drawing RPs from the pool. RPs transferred to the pool cannot be used in the same Initial Phase.
Both sides may not transfer points that would eliminate a unit, reduce it from normal to CI status, or transfer points from a CI unit.
16E. Replacing/Rebuilding Units
RPs may be used to replace eliminated units (removed from the map) or rebuild reduced units (still on the map). A player may conduct replacement or rebuilding only during the Initial Phase of his Player Turn.
-
Replacing Eliminated Units. The RP cost to replace a unit is its highest combat strength, either attack or defense. Japanese HQ units are replaced at no cost. The player spends the RPs required to replace the unit and places it in the same hex of any Replacement Source (same contingent for Japanese units). The unit does not have to be rebuilt to full strength, but at least one RP must be used in order to return the unit to the map. Place Hit markers under the unit to show combat strength not replaced.
Replaced Japanese HQs units are placed in, or adjacent to, any Japanese occupied hex if that hex is not in a US ZOC or prohibited terrain. Friendly units do not negate US ZOCs for this rule.
-
Rebuilding Reduced Units. To receive RPs a reduced unit must not be Isolated. A unit is Isolated if it cannot trace a series of hexes, any length, to any friendly RP Source, free of enemy ZOCs, and does not cross prohibited terrain for that replacement type (unit or point). Friendly units in a hex negate an enemy ZOC in that hex. The Replacement Source must be of the same contingent.
The player spends any number of the available and appropriate RPs to rebuild the unit, removing Hit markers as they are replaced.
A unit does not have to be rebuilt back to its full strength, but it cannot receive more RPs than the number of step losses it has suffered (back to its printed full strength). Each new RP adds one point to the attack and defense factor.
Example: if a 2-3-8 unit has two hits it current combat strength is 0-1-8. If it receives one RP its new combat strength will be 1-2-8 (with one Hit marker still under the unit counter).
Rule 17 – REINFORCEMENTS
Players receive reinforcements during the course of game, as found on the Game Turn Track. A player's reinforcements are placed on the map or in the Off Shore Holding Box during his Initial Phase. The stacking limit may be temporarily violated. Reinforcements may only be placed in friendly-owned hexes or Holding Boxes. If placed in a hex, the hex may be in an enemy ZOCs only if that hex is occupied by a friendly unit.
17A. Concepts
The Reinforcement Schedule uses the following terms and concepts:
Reinforcements may be specified to arrive in an on-map hex (hex number listed if applicable) or to an off-map holding box. When a specific hex is listed, place the reinforcements at that location if it is friendly owned. Reinforcements that are unable to enter play as specified are forfeited (they do not count as eliminated for Victory Condition purposes).
Withdraw: Specifies when a unit or units must be withdrawn (removed) from play. If no unit on the map or in an off-map holding box can be withdrawn, then a unit of equal or greater combat strength is removed from the Replacement Pool. If the above conditions cannot be met, fulfill the requirement as much as possible by selecting a unit on the map (owning player's choice). Simply remove the withdrawing unit from the map, off-map holding box, or Replacement Pool; it is out of play (it is not eliminated) and cannot return unless specified in the Exclusive Rules.
Some units that are withdrawn may count for victory points (see Rule 20). Any US unit that is voluntarily withdrawing (not specified by the order of battle or Exclusive Rules) from the map must first move to a Beachhead before it can be withdrawn and count for Victory Points.
17B. Conditional Reinforcements
Players may receive conditional reinforcements. A player receives a conditional reinforcement during the player's Initial Phase in which he meets the conditions for its appearance. These reinforcements and their conditions for arrival are listed in the Exclusive Rules.
17C. Offshore Holding Boxes
In general, all U.S. reinforcements are usually placed in the Offshore Holding Box. They are immediately available to be assigned to an Amphibious Landing Planning Box.
Rule 18 – AMPHIBIOUS LANDINGS
Both sides may plan and execute amphibious landings. The Exclusive Rules will detail the amphibious capacity and capabilities of each side. On-map units may also conduct landings to another on-map hex (see 18K). There are two basic types of amphibious landings: Opposed and Unopposed.
- Opposed Landings are landings conducted adjacent to or in an enemy ZOC.
- Unopposed landings are landings conducted in friendly-owned hexes or enemy-owned hexes that are not adjacent to or in an enemy ZOC.
Rules for conducting landings by on-map units to another on-map hex (not the Offshore Holding Box) will be covered later.
In Opposed landings, if the assault wave (conducting an opposed landing) clears the Beachhead hex of enemy ZOCs, any follow-up units (Assault Reserve Wave and Reserve Wave) will land unopposed.
Amtracs and DUKWs are Amphibious Transports. They are represented by counters and act as ground units. All other transports, such as LCVP, LCM, LCT, LSM, and LST are Naval Transports. Naval Transport is notional, and is represented by the Offshore Holding Boxes and the landing capacity of the Beachhead Planning Boxes. All units not being transported by Amtrac or DUKW are assumed to be transported by Naval Transport when they are assigned to an Amphibious Landing Box. See 18K for more details about amphibious transports and Naval Transport.
18A. Planning and Preparation
Amphibious landings must be planned in advance. All planning and preparation occurs during the player's Initial Phase. Unless specified in the Exclusive Rules, all initial US units that are available at the start of the game are placed in the Offshore Holding Box (the transport ships). Prior to the start of the game all hex locations (only) for Beachheads that will be established (landed) during the first Game Turn must be written down. During the US Initial Phase, units chosen by the US player to conduct an amphibious landing are assigned to a Beachhead.
Move the units from the Offshore Holding Box and place them in Amphibious Landing Boxes located on the US player chart. Any Beachheads to be established during the game must be planned (locations written down) at least one full Game Turn in advance.
A player may also cancel a landing during the phase in which it is to occur. The player may cancel the entire landing, or any/all of the assault reserve and reserve waves or units. Units assigned to a Beachhead Planning Box are never required to conduct a landing. Units or waves that have their landing cancelled are moved back to the Off Shore Holding Box and are available to land the following player turn.
-
Offshore Holding Box. The Offshore Holding Box represents the US naval troop transports deployed offshore.
All US units are placed here unless they are in a Floating Reserve or Demonstration Holding Box, deployed on map, moved onto the map by amphibious landing, eliminated and in the Replacement Pool, permanently withdrawn or eliminated from the game, or are uncommitted optional units. Units cannot move from the Offshore Holding Box to the map until they are assigned to (and placed in) an Amphibious Landing Box.
Any US unit that begins the movement or Exploitation Phase in a Beach (Rule 18C.1) or Beachhead hex may return to the Offshore Holding Box (no Disruption check, no advance planning). Simply transfer the unit from the Beachhead and place it in the Offshore Holding Box. Amtracs and DUKWs that land units at a Beachhead during the movement or Exploitation Phases may unload their cargo in the Beachhead hex (only) and immediately return to the Offshore Holding Box (not the Amphibious Landing Planning Box).
The Exclusive Rules will give further instructions regarding which units and/or side may conduct amphibious landings, and any other special rules for the scenario.
-
Amphibious Landing Planning Boxes. Each Beachhead marker has a corresponding Amphibious Landing Planning Box. The Planning Box is divided into three boxes, labeled Movement Phase (Assault Wave), Exploitation Phase (Assault Reserve), and Exploitation Phase (Reserve).
Each box has a maximum SP capacity printed in the box. All amphibious tank, Amtrac, and DUKW units do not count against this capacity. This is the maximum capacity of the Planning Box; normal stacking rules still apply for the target hex of the landing (same hex combat or normal stacking rules). See 18C.2 and 18H about Beachhead stacking.
a. Assault Wave: Units assigned to the assault wave conduct opposed or unopposed amphibious landings during the Movement Phase.
b. Assault Reserve Wave: Units assigned to the assault reserve may only land during the Exploitation Phase. All assault reserve units have 1/2 their normal movement (including C/M units) allowance during the Exploitation Phase.
c. Reserve Wave: Units in the Reserve Wave may only land during the Exploitation Phase. Reserve units cannot use exploitation movement, even if the unit is normally eligible to do so. Reserve units may, however, use minimum (1 hex) movement.
Once the player assigns a unit to a Beachhead Planning Box the unit may not be reassigned to another Beachhead until the next friendly Initial Phase.
18B. Pre-Landing Bombardment
During the Bombardment Phase of the first Game Turn in the game that US amphibious landings are planned to occur, all Japanese units within 3 hexes of a planned Beachhead location for this Game Turn are automatically Badly Disrupted (see Rule 14). Fortifications are not affected and fortification DRMs will still apply to combat against these units. Note: The fortification's DRM is not affected by halving, but unit strengths are.
Any landings adjacent to enemy units Badly Disrupted from this bombardment are still considered Opposed.
18C. Beaches and Beachheads
-
Beaches. Coastal hexes that are suitable for amphibious landings from offshore are marked on the map with a beach arrow. The arrow points to the eligible coastal hex.
Beachheads may only be placed in these hexes. All other coastal hexes are prohibited for Beachhead marker placement. Some arrows may have an additional DRM for Disruption that applies to all units landing in the hex.
-
US Beachheads. Beachhead markers represent a logistics point on a beach where supplies and reinforcements flow through. Various units served as shore parties, represented by the defense factor of the Beachhead. The US player has a limited number of Beachhead markers in the game.
Only the US player has Beachheads. They are units, are affected by combat results like normal units, but they cannot move or attack, and count as all the additional artillery SPs (4 or 3 SPs) for stacking purposes. Beachhead markers may only be placed in a beach hex. Once placed it may not be moved or removed (except due to a combat result). If a Beachhead marker is forced to retreat it is eliminated and may not be replaced (it does contribute to the Replacement Pool as infantry). If all Beachhead markers are eliminated the game ends in a Japanese Major Victory.
Units may continue to land, withdraw, and pass through a Beachhead as long as the stacking limit of the Beachhead hex (9 SP for clear, 6 SP for non-clear) has not reached its maximum limit. This may occur due to Disrupted units in the hex or units that do not have enough MPs remaining to exit the Beachhead hex, or by player choice. Once a Beachhead has reached its maximum stacking limit units cannot amphibiously land, pass through, or withdraw from the hex until the stacking limit is reduced below the maximum stacking limit. Exception: A unit may land in an adjacent Beachhead marker/hex instead of the one it is assigned to if the assigned Beachhead has reached its SP stacking limit. Units unable to land must return to the Offshore Holding Box.
-
Demonstration Beachheads. These are fake Beachheads and are non-functional. The Exclusive Rules may assign units to a Demonstration Landing. The Demo Beachhead marker is placed in the planned hex during the US Initial Phase. If there is a demonstration landing in play the US player selects one beach hex as the demonstration landing Beachhead hex.
18D. Landing Procedure
The Phasing Player may perform amphibious landings during his Movement and Exploitation Phases. Units assigned to an Amphibious Landing Planning Box are never required to conduct a landing. The Phasing Player may choose to cancel the landing of any units (even a whole Wave) during the phase in which it is to occur.
Unopposed Landings.
- Assault Wave: During the Movement Phase place landing units and a Beachhead marker in the target hex. As each unit is placed in the hex the owning player checks for Disruption. The landing itself costs 1/2 of the unit's MA. This cost is paid prior to the Disruption check.
- Assault Reserve Wave: During the Exploitation Phase each unit is placed in the target hex. The owning player checks for Disruption. The landing itself costs 1/2 of the unit's MA. This cost is paid prior to the Disruption check.
- Reserve Wave: Units in the Reserve Wave may only land during the Exploitation Phase, checking for Disruption as each unit lands. If eligible (after Disruption checks) they may use minimum movement (1 hex) after landing.
Opposed Landings.
- Assault Wave: During the Movement Phase place landing units in the target hex and check each unit for Disruption. The landing costs the entire MA of the unit. If the target hex is US controlled at the end of the Combat Phase place a Beachhead marker in the hex.
- Assault Reserve Wave: During the Exploitation Phase each unit is placed in the target hex. The owning player checks for Disruption. The landing itself costs 1/2 of the unit's MA. This cost is paid prior to the Disruption check.
- Reserve Wave: Units in the Reserve Wave may only land during the Exploitation Phase, checking for Disruption as each unit lands. If eligible (after Disruption checks) they may use minimum movement 1 hex) after landing.
18E. Landing Disruption
Units conducting an amphibious landing may become Disrupted, Badly Disrupted, or suffer losses. The Phasing Player consults the Landing Disruption Table for each unit that is conducting an opposed or unopposed amphibious landing.
As each unit lands in the hex roll 1d6 and check the result. Units that are being carried as cargo (for example, a Marine unit being carried by an Amtrac unit) check for Disruption with their transport as one (as though both transport and cargo are a single unit). All modifiers for both unit(s) and the transport apply to the die roll. Each transport/cargo stack is checked separately.
Landing Disruption effects apply to both transport and cargo. Amphibious units (rule 18I.1) are not considered HE (heavy equipment) for amphibious landing Disruption. Badly Disrupted units cannot move for the remainder of the Game Turn.
18F. Coastal Defense (CD) Guns
CD units have a deployed counter (CD symbol) and a crew counter (same unit ID).
-
Deployed CD Units. Deployed CD guns have a Range and Field of Fire (FOF), or the Exclusive Rules may designate specific hexes or areas (with boundaries printed on the map) that are within the FOF. Any enemy unit within Range and the FOF of a deployed CD unit is in an enemy ZOC for Landing Disruption and Amphibious Landing purposes.
Deployed CD units may never ground attack (Assault or Fire Combat) or move. They may Bombard enemy units in or adjacent to coastal hexes that are within their FOF. In ground combat they defend normally. CD units are considered artillery units for Offensive and defensive Support purposes but can only support friendly units that are in or adjacent to hexes in their FOF (all normal support rules apply).
A manned CD unit that suffers a retreat result is considered totally eliminated (CD unit and crew). It cannot absorb an additional hit and ignore the retreat result. Otherwise, when a deployed CD unit is eliminated (i.e. CD Suppression) place its crew counter in the Replacement Pool. Eliminated crews are replaced as infantry.
CD units are considered infantry for Combat Losses and special replacements. CD unit Combat Losses are based upon their Defense Strength, not their B/S Strength. Eliminated or abandoned CD units may never be replaced (do not place in Replacement Pool).
-
CD Crews. During the Japanese player's Initial Phase the guns may be voluntarily abandoned by removing the Deployed CD counter from play and replacing it with its corresponding (same unit ID) crew counter. Abandoned guns may not be re-manned (they are permanently eliminated). All Deployed CD unit Combat Losses are transferred to the crew counter.
18G. Activities Ashore
A unit conducting an amphibious landing is affected in several ways depending upon the type of amphibious landing being conducted.
Opposed Landings
- All landing units lose their ZOC, except for the hex they occupy, for the remainder of the Movement Phase and during the entire Combat Phase. Units regain their ZOC at the beginning of the Exploitation Phase.
- Assault wave units spend their entire MP allowance when conducting an opposed amphibious landing.
- Any landing unit that is not amphibiously trained has its attack strength halved. This halving is in addition to any other modifications to the unit's combat strength due to Disruption or terrain.
- Landing units may conduct an Overrun Attack against enemy units in the same hex if the normal overrun conditions are met (except ignore MP costs). The Overrun Attack occurs immediately when enough assaulting units have landed in the hex to achieve 8:1 odds.
- If the overrun conditions are not met and both sides still occupy the same hex, all landing units must attack all enemy units in the same hex using the procedure in rule 9I (Same-Hex Combat) and 18J (Amphibious Assault Combat).
Unopposed Landings
- Assault wave and assault reserve units retain 1/2 of their MA. They may continue normal movement up to their MP allowance, to include any Overrun Attacks. Disruption and terrain may affect the remaining MP allowance.
- Reserve units may only land in the Beachhead hex. After landing any eligible units may use minimum movement (1 hex).
18H. Restrictions
The following additional restrictions apply to all amphibious landings:
- Units remaining in a Beachhead hex cannot violate the Beachhead stacking limit.
- Landings may only be conducted against coastal hexes marked with a beach arrow or in hexes designated in the Exclusive Rules.
- Artillery units (except mountain artillery) conducting an opposed landing cannot provide Support.
- The Exclusive Rules may restrict amphibious landing capabilities for a particular side.
18I. Amphibious Units
-
Amphibious Units. The following units are considered amphibious Units:
- Amphibious Tank.
- Amtracs and DUKWs.
- All units transported by Amtracs and DUKWs.
-
Amphibious Trained Units. The following units are considered amphibiously trained when checking for Disruption:
- All Marine units.
- Amphibious Tank, Amtrac and DUKW.
- All other units labeled "Amphibious".
-
Amphibious Tanks. Amphibious tanks already in a hex on the map may move through and attack from any reef/shallow hex that is adjacent to a coastal hex. It may halt normal movement in such a hex and conduct Overrun Attacks from shallow reef hex, or end the Movement Phase in such a hex and conduct an Assault or Fire Combat attack from it; in both cases, their Attack Strength is halved. During the ensuing Exploitation Phase the unit must return to a coastal or land hex, otherwise it is eliminated.
18J. Amphibious Assault Combat
Landing units that are adjacent to enemy units may conduct Assault Combat against those units. Landing units stacked with enemy units must attack those enemy units in the hex. Both use the normal Assault Combat procedures, taking into account any terrain, disruption, and fortification modifiers.
- Defending enemy units forced to retreat. Units conducting an Amphibious Assault do not have a ZOC outside their hex; retreating enemy units are not affected by ZOC (unless another friendly unit exerts its ZOC into the hex the enemy unit is retreating into).
- Assaulting units forced to retreat. All normal rules of retreat apply except for the following: All non-amphibious units with HE are totally eliminated. For all other units (amphibious transport and its cargo count as a single unit) roll one die for each unit and consult the Amphibious Retreat Table, add any DRMs, roll the die and apply the results immediately. Combat Losses are in combat factors rounding up. Surviving units may retreat back out to sea and return to their originating location (on-map hex or the Offshore Holding Box).
- Neither side forced to retreat. If the combat result does not indicate a retreat, the Phasing Player may voluntarily retreat (Amphibious Retreat Table) or he may recalculate the combat and conduct another round of Assault Combat. Continue this cycle until a retreat result is indicated or the attacker options to voluntarily retreat. All SPs used in the initial Assault Combat round are retained throughout this process.
18K. Amphibious and Naval Transport
Amphibious tractor (Amtracs) and amphibious truck (DUKW) units are amphibious transports and may transport (carry) units, giving the transported units C/M capabilities and/or reducing the chances for Disruption when landing on a beach. C/M units or heavy artillery cannot be transported by amphibious transports; Naval Transport must land them.
-
Amphibious Transports and Carried Units: Each transport unit has a SP limit. This is the maximum number of SPs the unit may transport. To transport a unit both the transport and the unit to be carried must be stacked together (at any time/phase) and the transport has enough free capacity to carry the unit. It does not cost either unit any extra MPs to pick up, transport, or drop off units. Any number of units may be transported, up to the transport's SP limit. US Army amphibious transport may carry USMC units, and vice versa, unless prohibited in the Exclusive Rules.
-
Combat Losses and Cargo Casualties. Certain Assault Combat, Landing Disruption (see 18E), and Amphibious Retreat (see 18J) results will cause a step reduction of an amphibious transport unit that has a reduced step reverse side. If an Amtrac or DUKW was involved in assault combat and the unmodified die roll was a 3, and US forces suffered a Combat Loss, then one Amtrac unit is flipped to its reduced side. Notice that this also reduces its cargo capacity. This reduction may require the US player to "drop off" a unit so that the cargo does not exceed the reduced SP capacity. If already on its reduced side it is eliminated. A DUKW unit (and its cargo) is eliminated if it takes a step reduction.
Each reduced unit counts as a 1-point Combat Loss and each eliminated unit counts as a 2-point Combat Loss (armor) for Replacement and Victory Point purposes.
-
Amtracs. Amtracs are a 2-step unit (they have a reduced strength side). The first step loss flips the unit over to its reverse, reduced capacity side. A second step loss eliminates the unit. If a full strength amphibious transport unit that is carrying cargo takes a 1-step loss the cargo may still land as an amphibious unit. All units being transported lose 1/2 of their current combat factors as casualties. The reduced cargo capacity takes effect at the end of the phase. This may force the US player to drop off a carried unit so that the cargo does not exceed the new capacity. If the amphibious transport unit is eliminated (second step loss) the cargo is also eliminated.
Amtrac units can carry Infantry/other units and mountain artillery (light gun) units. They cannot carry artillery (medium and heavy, AA, etc) or C/M units.
Tank and light tank that are amphibiously landing in a hex stacked with at least one Amtrac unit do not count as Heavy Equipment (HE) for Disruption purposes if the target hex also has a shallow reef.
18L. On-Map Amphibious Landings
Amphibious units that are on the map may conduct amphibious landings to other on-map hexes. These landings are conducted the same as offshore/on-map landings, except for the following:
- No planning/preparation step is required. Simply move to the target hex during the Movement or Exploitation Phase.
- Each shallow reef or sea hex counts as 1 MP.
- Must land in a eligible coastal hex (the Exclusive Rules will designate eligible coastal hexes).
- The landing units cannot end the Player Turn in a shallow/reef hex (unless the shallow/reef hex is also a coastal hex). All rules for amphibious combat, disruption, operations ashore, and retreat apply.
Rule 19 – SPECIAL RULES
19A. Japanese Banzai Attack
The Japanese player may elect to convert any of his assault combat attacks involving infantry and or combat engineer units into a "Banzai" attack.
Banzai Attack Procedure. The Japanese player declares that a regular attack will become a "Banzai" attack before resolving Assault Combat. This is announced after any Offensive and Defensive Support has been allocated and the non-Phasing Player has moved any In Reserve units.
The US player then consults the Banzai Attack Table and rolls 1d6. The result is based on the size of the defender's unmodified, current defense strength (excluding any support).
- 1/4: The Japanese force must immediately take combat losses equal to 1/4 (round down) the total number of steps of the defending units.
- 1/2: The Japanese force must immediately combat losses equal to 1/2 (round down) the total number of steps of the defending units.
- 1:1: The Japanese force must immediately combat losses equal to the defense strength of the defending units.
After losses are applied to the attacking units, the attack factors of all remaining infantry and engineer units are doubled for Assault Combat. The Japanese player must attack with all remaining units; he cannot cancel a Banzai Attack. Artillery providing Support may not be doubled in this type of attack, but it may still contribute normal Support. All artillery units that were allocated to Offensive Support continue to provide Support to the Banzai Attack, even if their total SP value now exceeds the Offensive Support Limit (see 11A.3).
19B. Limited Intelligence and Dummy Counters
-
US Units. During the Japanese Player's Initial Phase, the Japanese player may examine all US units that are adjacent to a Japanese unit. All non-adjacent US units may not be examined (of course he may still look at the top unit but he cannot examine the stack).
If there are two or more US units stacked in a hex, the US player must place the unit with the highest current defensive strength (printed minus any hits) on top of a stack. If this unit is being carried by transport the Japanese player may look beneath the transport counter and examine the uppermost cargo unit only.
-
Japanese Units. All Japanese units, including fortification markers, have a reverse, Hidden side with a depiction of the Rising Sun flag. When Japanese units are deployed on the map their Hidden side should be displayed. This prevents the US player from knowing the actual unit strength, type and ID.
Certain situations during the game will cause the Japanese units to become Exposed. The US player may examine all Exposed Japanese units/stacks. Examining a unit is when a player may look at the combat factors, unit type, echelon and ID, and any Hit or Admin counters that are assigned to that particular unit.
Exception: Japanese units in fortified positions (under fortification counters or in fortified terrain) may not be examined unless involved in assault combat or an overrun attempt (fire combat does not reveal them).
For purposes of Exposure, a hex is considered Clear if it is marked on the TEC with a (c), or if it is marked with an (o) and the other terrain in the hex is considered Clear.
-
Exposure During Movement: All Japanese units that begin, move through, end the phase in, or are placed in a Clear hex are Exposed and may be examined by the US player while they are in the hex. Units that move through a Clear hex but subsequently move into a non-Clear hex are flipped over to their Hidden side. The US player may ask for the Japanese player to interrupt any ongoing movement while he examines the Exposed units. Movement includes all forms of movement, including retreats and advances.
Exception: They are not Exposed if moving at night.
19C. Weather
At the beginning of the US Player's Initial Phase the US Player determines the weather and sea condition for the entire Game Turn. Roll 1d6 and consult the Weather Chart (use both columns for the same die roll result). Weather affects movement as shown on the TEC. Effects on combat are given in the Exclusive Rules. Sea conditions affect amphibious landings.
Rule 20 – VICTORY CONDITIONS
The Exclusive Rules will outline the Victory Conditions and scenario length. Japanese unit survival and US casualties normally determine victory. At the end of the game consult the Victory Table to determine the winner.
Note: The game ends immediately in a Japanese Major Victory if all Beachhead units available to the US player are eliminated during the game.
- Each USMC and US Army combat loss is tracked as a casualty point (CP) on the Casualty Track using the Casualty Point tracking markers, x1, x10, x100.
- Each US unit eliminated increases the CP total. This increase occurs when the unit is removed from the map, and is in addition to combat losses.
- Uncommitted US units may reduce the casualty point total. Uncommitted units are those that remained off map, in a planning box, or in the Offshore Holding Box, for the entire game.
- Each US CI unit permanently withdrawn from the game may reduce the casualty point total.
Note: Victory is not totally relative to the tactical situation on the game map; it is also based on whether a player performs better than his historical counterpart did in the real battle.