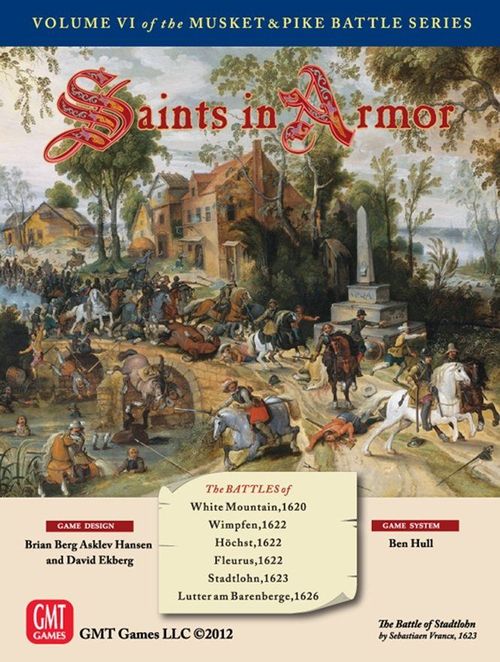
Saints in Armor
Saints in Armor Rulebook
Table of Contents
Table of Contents
- Musket & Pike Battle Series Rules — Version 7.0
- 1.0 Introduction
- 2.0 Components and Terms
- Glossary
- 3.0 Sequence of Play
- 4.0 Initiative and Activation
- 5.0 Leaders and Orders
- 6.0 Facing and Formation
- 7.0 Movement
- 8.0 Stacking
- 9.0 Reaction
- 10.0 Fire Combat
- 11.0 Close Combat
- 12.0 Morale
- 13.0 Rally and Reform
- 14.0 Special Units and Terrain
- 15.0 Determining Victory
- Errata for the Saints in Armor Playbook (from the v7.0 Series Rules)
- Saints in Armor Playbook
Musket & Pike Battle Series Rules — Version 7.0
1.0 Introduction
The Musket & Pike Battle Series (MPBS) is a series of tactical battle games covering the period from 1630 to 1680. The system is meant to highlight the peculiarities of warfare in that period and the impact of the limitations of command and control. To date, six games have been published in this series: This Accursed Civil War (TACW), Sweden Fights On (SFO), Under the Lily Banners (ULB), Gustav Adolf the Great (GAG), Nothing Gained But Glory (NGBG), and Saints in Armor (SiA). The Musket and Pike Dual Pack contains updated versions of This Accursed Civil War and Sweden Fights On.
NOTE: This Rulebook supersedes the earlier versions, and contains many updates. For the most part, these are not new rules, but clarifications of issues from previous games. However, there are some slight, but subtle, rule changes, and experienced players are advised to review the new rules at least once before starting. You should consider any change in this Rulebook or on the Charts (and not mentioned for a specific battle) as applying to all games in the MPBS.
2.0 Components and Terms
A complete game of Musket and Pike Dual Pack consists of:
- Six Counter Sheets
- Four 22" × 34" back-printed maps
- One 22" × 34" single-sided map
- Two identical 11" × 17" Charts and Tables Cards
- Six back-printed 8½" x 11" Battle Cards
- One back-printed 8½" x 11" Player Aid Card #2
- One MPBS Rule book
- One This Accursed Civil War Playbook
- One Sweden Fights On Playbook
- Two 10-sided dice (one red, one blue)
- Plastic storage bags
- One box
2.1 Playing Pieces
2.1.1 TYPES: There are three types of playing pieces:
- Units represent the regiments and brigades of infantry, cavalry and artillery.
- Leaders represent the various individual commanders.
- Markers are used to aid players in noting certain information about a unit or leader.
2.1.2 UNITS: Each unit has four pieces of information and an icon printed on its counter. The icon helps differentiate easily between Infantry, Cavalry and Artillery. Each unit carries either its unit type ("12-24 lb" or "Dragoon") or its name ("I/Skippon" or "Rupert LG"), which is usually the name of its historical commander. Infantry and Cavalry units have strengths from 1 to 20; each strength point representing 80 to 100 men. Artillery units have no strength for game purposes and instead have a Grazing Fire Range followed by a Maximum Range. All units have a Morale Rating from 4 to 8, with higher values being better. Note that leaders are not considered units.
Infantry and Cavalry counters show: icon, name, battle abbreviation, wing, Morale Rating and Strength Points. Artillery counters show: icon, type, Grazing Range, Maximum Range, Morale Rating and an artillery indicator. Cavalry counters carry a cavalry indicator.
NOTE: Double artillery units have the abbreviation "Dbl" in their unit type bars and there are four guns in the icon instead of just two.
2.1.3 LEADERS: Leader pieces have the Leader's name and a leadership rating from 0 to –2 (–2 being best). A leader counter shows the name, the battle abbreviation, the wing and the Leadership Rating.
2.1.4 MARKERS: No Pistols Loaded (see 10.7), One Pistol Used (see 10.7), Wagons (see 14.1), Casualty Point (see 10.6.1), Salvo (see 10.4), Turn (see 3.4 C), Captured Gun (see 10.8.9), Column (see 6.3.4), Open Order (see 6.3.3), Hedgehog (see 6.3.2), No Continue (see 4.4.2), Limbered Guns (see 7.3.3), Morale Shaken (see 12.4), Morale Broken (see 12.4), Formation Broken (see 6.3), Formation Broken & Morale Shaken, Momentum (see 11.3.6), Charge Order (see 5.5), Make Ready Order (see 5.5), Rally Order (see 5.5), Receive Charge Order (see 5.5), Interception Done (see 9.3).
2.2 Charts, Tables and Die
The use of the charts and tables in the game is explained in the rules. The game uses a 10-sided die. The 0 is treated as zero and not ten. Unless specifically mentioned otherwise, use the 0 row on all charts for any roll modified to < 0, and use the 9 row for any roll modified to > 9.
2.3 Terminology
The Glossary (below) contains terms and abbreviations that appear in the rules and charts.
2.4 Scale
- 1 turn: 20-30 minutes
- 1 hex: 100 yards
- 1 strength point: 80-100 men
- 1 artillery unit: 3 to 4 guns or a double battery of 7 to 8 guns
- Cavalry units are regiments or squadrons of 200-500 men.
- Heavy Infantry units are a mixture of pikes and muskets and are regiments or brigades (sometimes called batalia or tertia by the English) of 400-2000 men.
- Light Infantry units are 100-300 musketeers or dragoons.
- Or as otherwise indicated in a scenario.
Glossary
Action: A leader or unit may perform one or more of the following Actions: Move, Fire, Rally, or Reform, within the limitations of their Wing's Orders.
Active: A unit and/or leader of an activated Wing. An Active unit or leader is able to perform Actions. Only one Wing of an army is Active at any given time and only the leader of that Wing, the Army Commander, and the units of that Wing are Active. The Active player is the player who owns the Active units or leaders.
Artillery: Batteries of large caliber field guns. Only guns large enough to have a separate effect in the battle are included. Treat double batteries the same as regular batteries except for Victory Points (15.0) or where specifically mentioned on the charts.
Bypassed: A Wing whose activation has been temporarily interrupted by Preemption is said to be Bypassed, and its Wing Commander is marked with a Bypass marker to denote that status.
Cavalry: During this period, mounted troops were of three main types:
- CUIRASSIERS: Horsemen armored front and back, armed with two pistols and a sword.
- ARQUEBUSIERS: While not as heavily armored as cuirassiers, arquebusiers were armed with a carbine, two pistols and a sword.
- CROATS: Cavalry (not only those from Croatia) that fought in loose formation.
The first two types are considered "formed" cavalry as these types fought mounted and in close formation (three or six ranks deep). Pistol and carbine fire was used extensively as a prelude to or in lieu of close combat with swords. The distinction is as much one of tactics as of equipment as English, Swedish and Bavarian cavalry were typically equipped as arquebusiers (sometimes spelled Harquebusiers) but employed as cuirassiers. Arquebusiers are denoted by a carbine icon above their strength. Croat cavalry units are considered "unformed" cavalry and have a loose formation icon as their main symbol. Unless specifically indicated otherwise, when a rule refers to "Cavalry" it refers to all types. Some games in the series may have other types of Cavalry, such as Polish cavalry.
Continuation: The process by which a Wing that has just finished an activation may attempt to activate a second or third time.
Finished: After a Wing has performed its final activation, its Wing Commander is flipped to his Finished side. This prevents the Wing from being activated again that turn for any reason.
Formation: Large, close formations were critical to the functioning of the low-level tactics and leadership of the day. All units are considered to be in their 'normal' combat formation unless marked otherwise. Infantry would be six to ten ranks deep with a full arm's length between men. Cavalry would be three or six ranks deep with one to two yards between horses. During combat and movement, formations would become congested and disordered, thus reducing the mobility and effectiveness of the unit.
Heavy Infantry: Foot soldiers arrayed in groups or blocks of muskets and pikes. These foot soldiers were organized into regiments or brigades (two or more regiments, grouped together) to maximize the effect of massed musketry and/or massed pikes. Only the pike men wore armor, if available, which would consist of breastplate, tassets (thigh protectors hinged to the bottom of the breastplate) and a helmet. Musketeers wore a wide-brim felt hat and the distinctive bandolier across the chest with small flasks containing pre-measured powder. The musket rest fell out of common use during the period covered. A Heavy Infantry unit that also has an artillery symbol is considered to have inherent regimental artillery. There are also a few Heavy Infantry units that have no pikes, representing units where the pike contingent had been phased out or drastically reduced.
Hits: A unit may incur three different types of hits: Casualty hits (10.6.1), Morale hits (12.4), and Formation hits (6.3.1, 7.3).
Inactive: Any leader or unit that is not part of the currently activated Wing. These units are eligible to react to Actions performed by Active enemy units.
Infantry: Are classified as either Heavy or Light Infantry. When used alone it refers to both Light and Heavy Infantry units.
Light Infantry: Small bodies of musket-armed foot soldiers. They are this period's skirmishers. Since they did not have pikes, they avoided close combat and sought to antagonize the enemy with musketry. There are two types of Light Infantry in the game: Musketeers and Dragoons.
- MUSKETEERS: Musketeers were drawn from regular regiments for special duty. Also called Commanded Muskets.
- DRAGOONS: Regiments of horsemen that carried full-length muskets and fought dismounted as infantry. Dragoons have higher morale ratings than commanded muskets due to the inherent unit integrity of dragoon regiments. Otherwise they function the same within the scope of the game.
Leaders: Army Commanders and Wing Commanders are referred to collectively as Leaders. Leaders are not considered units.
MC: Morale Check. Various situations will call for a morale check on a unit. A die is rolled; modifiers are applied per the rules. If the result is greater than the morale rating of the unit, it has failed the Morale Check and suffers adverse effects (12.0).
Momentum: The added offensive benefit of "charging" an enemy unit. Charges were not generally delivered at a gallop or run during this period, though the rapid approach of these large formations had a considerable effect on stationary defenders. It is used in Close Combat Resolution (11.0).
Morale Rating: Measures a unit's relative staying power, Èlan, aggressiveness and experience. All units have a morale rating from 4 to 8, with higher values being better.
MA: Movement Allowance. A measure of how far a unit can move in an activation, expressed in Movement Points (MP) (7.2).
AC: Army Commander. The Overall Commander of that side's army. He has different capabilities than his subordinate Wing commanders.
Orders: Players assign each of their Wings specific Orders that govern the type and scope of Actions the units of that Wing may perform. The following Orders are possible: Charge, Make Ready, Receive Charge, and Rally.
Non-Phasing or Inactive Player: The player who is not the Phasing player.
Pass: If the Phasing player declines to, or is unable to, activate a Wing, he passes, thus allowing the Non-phasing player to become the Phasing player. If both players pass consecutively, the Activation Phase is concluded and play proceeds to Rout Movement. Flip any Passed WC to his Finished side.
Phasing or Active player: The player who controls the Wing that is currently active.
Preemption: The process by which a Non-phasing player may attempt to interrupt the activation or continuation of a Phasing player's Active Wing and activate one of his own Inactive (but not Finished) Wings instead.
Reaction Zone: The hexes surrounding a unit in which enemy activities may allow the unit to React (9.0). Reaction Zones for Artillery units differ from Reaction Zones for Infantry and Cavalry units, and the zones themselves differ depending on the type of Reaction the unit performs.
Rout: Retreating a Morale Broken unit for any reason is considered a rout. This includes any two hex retreat required when a unit becomes Morale Broken (12.4.3) or any retreat during the Rout Movement Phase (13.4).
Two-hex Unit: A double-size (i.e., rectangular-shaped) Heavy Infantry unit. These units occupy two hexes, and are subject to special rules regarding facing, movement and combat.
Wing: The typical army of this era was composed of three Wings: right, center, and left. A Wing Commander (WC) commands each Wing. The left and right Wings normally consisted of cavalry, while the center was composed of infantry. A Wing with no Heavy Infantry is considered a Cavalry Wing.
3.0 Sequence of Play
Each game turn follows the following sequence:
3.1 Initiative Phase
Players determine who will become the Phasing player and activate the first Wing (see 4.1).
3.2 Activation Phase
The Phasing player can either activate a non-Finished Wing or Pass (4.5). See 4.2 for the sequence Wings must be activated in. When that activation is finished (including any continuation activations [4.3]) the opposing player may activate a Wing or Pass. Generally, players alternate being the Active player and the Inactive Player (see 4.3.2 and 4.4 for exceptions). This phase is repeated until all Wings have been activated or both players pass consecutively.
Sequence of the Activation Phase:
A. Preemption Attempt: When a Wing has been activated, the Inactive player may attempt to interrupt that activation in order to activate one of his Wings first. If the attempt is successful, mark the preempted Wing with the Bypassed marker (4.4.2). The preempted Wing will activate immediately after the preempting Wing has finished its activation(s).
B. Orders Change: The activated Wing may attempt to change its current Orders (5.7).
C. Perform Actions: Each unit in the Active Wing may perform, within the limitations of its Orders, ONE, and ONLY ONE of the following Actions:
- Move (7.0)
- Move and/or Pistol Fire (Cavalry only; 7.0 and 10.2)
- Normal Infantry Fire (10.3)
- Salvo Fire (Heavy Infantry only; 10.4)
- Artillery Fire (10.8)
- Rally (13.0)
- Reform (13.0)
D. Close Combat: Units attack adjacent units in Close Combat (11.0).
E. Continuation Attempt: The activated Wing may attempt to activate a second or third time (4.3). If the attempt is successful, return to step A.
F. Finish and Go to Next Phase: If the Activated Wing fails its Continuation attempt or has completed its third activation this turn, or if the Active player does not wish to continue with the Wing, flip the Wing's leader to his Finished side and then do whichever of the following applies:
- a) If there is a Bypassed Wing, activate it and return to step B.
- b) If there is no Bypassed Wing, players determine the next Wing to be Activated (4.2) and return to step A.
- c) If all Wing Commanders are Finished, proceed to the Rout Movement Phase.
3.3 Rout Movement Phase
All units with broken morale perform rout movement (13.4).
3.4 Marker Removal Phase
A. All Salvo markers are removed. Fired Artillery and Finished Leaders are flipped to their normal side.
B. Check the Leader Replacement Table to determine the fate of any Leaders that were removed from play this turn.
C. Check for Surrendering the Field (4.6). If that does not end the scenario, and there are still turns left to be played, advance the turn marker on the turn track and proceed to the next turn.
4.0 Initiative and Activation
4.1 Initiative Determination
4.1.1 PROCEDURE: During the Initiative Phase the players determine which Wing activates first. Initiative is determined by the Orders currently assigned to each Wing. The player with the most Wings under Charge Orders chooses which eligible Wing to activate first. If there are no Wings under Charge Orders, then the player with the most Wings under Make Ready Orders activates first. If there are no Wings under Make Ready, then the player with the most Wings under Receive Charge Orders activates first. Determine initiative only once per turn, at the very beginning. A Wing may not activate if its leader is not on the map (either from becoming a casualty or from being in Pursuit) when it's time to activate that Wing.
4.1.2 TIE BREAKER: If both players have an equal number of Wings under the "highest" Orders type for the turn, then determine which player has the best Wing Commander under those Orders. A WC with –2 Leadership rating is better than a –1, which is better than a 0. The player with the best WC wins the initiative, and may activate any one of his Wings under the "highest" Orders for the turn. In case of a tie, roll a die. High roll wins.
4.2 Activation Precedence
4.2.1 Each Wing may activate once per turn, either by the normal sequence or Preemption (4.4). Activation alternates between players as long as all Wings under higher precedence Orders are finished before any Wings under lower precedence Orders activate. Preemption (4.4) is the exception to this normal sequence. The precedence of Orders is:
- Charge
- Make Ready
- Receive Charge
- Rally
EXAMPLE 1: Player A has two Wings under Charge Orders and one with Rally Orders. Player B has one Wing with Charge Orders, one with Make Ready and one with Rally. Since Player A has more Wings with Charge Orders, he has the initiative and activates one of his Wings under Charge Orders (his choice). When that Wing is Finished, Player B will activate his Wing with Charge Orders; when he's finished, play now reverts back to Player A, who has the remaining Charge Orders. When all Wings with Charge Orders have finished, then the Wing with Make Ready Orders is activated.
EXAMPLE 2: Player A has two Wings with Charge Orders and two with Make Ready Orders. Player B has one Wing with Charge Orders, one with Make Ready Orders and one with Rally. Barring a preemption, the Wings would activate as follows: Player A Charge Wing 1; Player B Charge Wing; Player A Charge Wing 2; Player B Make Ready Wing; Player A Make Ready Wing 1; Player A Make Ready Wing 2; Player B Rally Wing.
NOTE: It is possible that one player may activate two or more Wings before the other player activates any, since all Wings with Charge Orders activate before any Wings with Orders below Charge.
4.2.2 Units of the currently activated Wing may perform one of the Actions listed in 3.2.C (these actions do not have to be performed in any particular order). The choice of Actions depends on the current Orders for the Active Wing (see 5.6) and, in some cases, the type of unit. As the Active player performs these actions the Inactive player may undertake Reactions (9.0).
4.2.3 If all units of a Wing are removed from play the Wing is no longer considered for activation.
4.3 Continuation
4.3.1 IN GENERAL: As the last thing it does during an activation, a Wing that is not under Rally Orders may attempt to activate again. A Wing can continue up to two times (for a total of three activations). Whether to attempt continuation with a formation is always voluntary.
4.3.2 PROCEDURE: The Active player consults the Continuation Table and uses the current Orders of the Wing to determine the number range he needs to successfully continue. Roll a die and apply any applicable modifiers. If the modified roll falls within the range indicated on the table, the Wing is allowed to activate again. If the modified roll is outside that range, the Wing Commander is flipped to his "Finished" side and the next eligible Wing is activated.
4.4 Preemption
4.4.1 IN GENERAL: The Inactive player may attempt to interrupt the activation (or the continuation) of a Phasing player's Active Wing and activate one of his own Wings first. This is known as Preemption. Preemption attempts are allowed before a normal Wing Activation and after each successful Continuation attempt. A Wing is eligible to attempt Preemption if its Wing Commander is not on his "Finished" side and is currently not under Rally Orders.
Mark a WC that is preempted in his normal Activation with the Bypassed marker to indicate that his Wing will be automatically activated after the preempting Wing is finished. A Bypassed Wing may not be preempted during its first activation of a turn.
4.4.2 PREEMPTING A NORMAL ACTIVATION: The Inactive player consults the Preemption Table, finds the current Orders of the Wing making the attempt and finds the number range needed to successfully preempt. He rolls a die and applies any applicable modifiers. If successful, the Inactive player now activates that Wing (he cannot Pass). He may also try to use Continuation with that Wing as in a normal activation. The Preempted Wing Commander is marked with the "Bypassed" marker to indicate that his Wing will be activated next, after the preempting Wing is Finished.
If the Preemption attempt fails, the leader of the unsuccessful Wing is marked "No Continue." A leader marked No Continue may activate normally, but is not allowed to attempt Continuation. A Leader marked "No Continue" may make another Preemption attempt later on, but if the Preemption attempt fails the leader is flipped to his "Finished" side and forfeits his activation for that turn. If one leader fails a preemption attempt, the player owning that leader may attempt to preempt the same activation with another leader.
4.4.3 PREEMPTING A CONTINUATION: The Inactive player may try to Preempt a Wing after the Active player has successfully rolled for continuation, but before the Active player activates the Wing. The procedure is the same as in 4.4.2 except a successful Preemption cancels the continuation and the preempted Wing Commander is flipped to his "Finished" side instead of being marked with the Bypassed marker. Thus, there is no Bypassed Wing. The penalty for failure is also the same as in 4.4.2.
4.4.4 PREEMPTING A PREEMPTION: Only the Bypassed leader may attempt to preempt a preempting leader's continuation. If successful, flip the leader that wanted to continue to his "Finished" side. If unsuccessful, mark the Bypassed leader with a "No Continue" marker; if he already has one, flip him to his "Finished" side.
4.5 Passing
Rather than activate a Wing, the Phasing player may instead Pass. Exception: You cannot Pass if the Wing is under Charge Orders; see 5.6.1. Flip the Passed WC to his "Finished" side and proceed to the next activation. The Army Commander is not activated (5.1.1) in a phase in which a WC passes.
4.6 Surrendering the Field
During the Marker Removal Phase of each turn, check the Orders for all leaders. If all the leaders of one side are under Rally Orders then that side is considered to have left the field and the scenario ends. (It is possible that both sides might leave the field on the same turn.) Do not consider any complete Wing that has not yet entered the map. Determine Victory as per 15.0, but the side that surrendered the field cannot have a victory level better than a Draw.
5.0 Leaders and Orders
Leaders are used to influence and control the Actions of the units under their command. Each battle, per the scenario rules, will have an Army Commander (AC) and multiple Wing Commanders (WCs).
5.1 Army Commanders (AC)
5.1.1 Most armies have an AC who is activated each and every time a Wing of his army is successfully activated (including Continuation and Preemption activations, but not if the WC is preempted or passes). An AC is never marked as Finished and therefore may activate multiple times during a game turn. Orders restrictions (see 5.6) do not apply to Actions performed by an AC. In addition, an AC Action overrides Orders restrictions, and counts as a unit's action for that Activation Phase. (For example, an AC can Rally a unit whose WC is under Charge Orders, and that unit does not have to, and indeed cannot, move at least 1 hex closer to the nearest enemy unit that activation.)
5.1.2 An Army Commander may Intercept, advance or retreat after Close Combat with any unit he is stacked with or that advances or retreats through his hex (swept up in the advance or retreat). He may move with a unit that routs, whether from Close Combat, during Rout Movement, or for any other reason.
Besides those Actions, an AC may perform any ONE of the following Actions each time he is activated:
- Influence An Orders Change: If the AC is stacked with or adjacent to the Wing Commander (WC), the AC may add his leadership rating to a WC's Orders change attempt.
- Move: An AC has a movement allowance of 8 and may move by himself or with any unit he is stacked with.
- Influence Continuation Or Preemption: If the AC is stacked with or adjacent to the WC, the AC may add his leadership rating to a WC's Continuation or Preemption attempt. If an AC attempts a Preemption, whether successful or not, that counts as the AC's Action for the activation.
- Reform: Reform one unit (and only one unit) (13.0) stacked with or adjacent to the AC. The unit need not be part of the Active Wing.
- Rally: Automatically Rally one unit (13.0) it is stacked with or attempt to rally one unit (and only one unit) it is adjacent to. The unit need not be part of the Active Wing.
5.2 Wing Commanders (WC)
5.2.1 Wing Commanders (WC) command a Wing of the army. A Wing may consist of Infantry, Cavalry, Wagons, and/or Artillery. WCs are assigned per scenario special rules and may only be changed as a result of a Leader leaving the game due to casualty or pursuit. At the end of each Perform Actions step of a Wing's activation, the WC for that Wing must be stacked with a unit of his Wing. A unit stacked with its WC may not intentionally be moved out of the stack if that would leave the WC alone in the hex unless the WC is still able to use his action for that step to move to another unit of his Wing.
5.2.2 A Wing Commander must Intercept, advance or retreat after Close Combat with any unit he is stacked with or that advances, retreats, or routs through his hex (swept up in the advance or retreat). He may, but need not, move with a unit that routs during the Rout Movement Phase. If a unit the WC is accompanying retreats or routs off the map, you may immediately place the leader on any other unit of his Wing.
Besides those Actions, a WC may perform any ONE of the following Actions each time his Wing is activated:
- Move: A WC has a Movement Allowance of 8 and may move by himself or with any unit he is stacked with.
- Allow Units to Rally or Reform: A WC may allow units to Rally or Reform (13.0), if the current Orders for that Wing allow it.
5.3 Leader Casualty and Replacement
5.3.1 CASUALTY: Leaders may be removed from play by Fire Combat, Close Combat, or if stacked with a Cavalry unit that pursues off map (see 10.10, 11.8, 11.7). A leader is automatically removed if an enemy unit occupies his hex, all units that he is stacked with are eliminated, or he is the target of a Close Combat and the leader is alone in the hex.
5.3.2 EFFECTS: A Wing may not activate, continue, or preempt if its Wing Commander has been removed.
5.3.3 REPLACEMENT TABLE: Leaders removed from play are either eliminated, left off map in pursuit, or returned to play. During the Marker Removal Phase, players roll on the Leader Replacement Table for each leader removed that turn. If a Wing Commander does not return, replace him with a generic leader unless the scenario's rules identify a specific replacement. If there are no remaining units from the Wing in play (including reinforcements) there is no replacement.
5.3.4 PLACEMENT: A replacement WC or one returning to play is placed on any unit of the Wing. This does not change the Wing's Orders status. Place any leader returning after being out for a turn on any unit of his Wing during the Marker Removal Phase of the turn after his fate was determined. If there are no units of his Wing left on map or as reinforcements when he is due to return, he does not return, but does not count as a loss for Victory Points, either. Place a returning AC on any friendly unit.
EXAMPLES OF LEADER REPLACEMENT:
- A WC is removed as a result of Fire combat during Turn 1. In the Marker Removal Phase of Turn 1, the player rolls a "1" on the Leader Replacement Table. A replacement Leader is immediately placed on a unit of that Wing. During the Marker Removal Phase of Turn 2, that replacement Leader is removed, and the original WC is placed on any unit of the Wing. Note that if all units of that Wing were eliminated during Turn 2, the WC would not return to play.
- A WC is eliminated in Close Combat. In the Marker Removal Phase, a "6" is rolled on the Leader Replacement Table. The WC is permanently out of play, and a replacement Leader is immediately placed on a unit of that Wing. Note that if there were no units of that Wing left on the map at the end of the turn, no roll would be made.
5.3.5 If the Army Commander is eliminated, either a specifically named AC or the senior Wing Commander (as specified in the scenario rules) takes over his command. A generic leader counter immediately replaces the Wing Commander, unless indicated otherwise by the scenario rules. Place a specifically named replacement AC on any friendly unit.
5.4 Command
5.4.1 IN GENERAL: In order to operate at full effectiveness, units must be in command. Command is determined by Wing and applies only to units (except Wagons), not to Leaders. (Leaders and Wagons are always considered "in command.") Each unit is assigned to a specific Wing as part of a scenario's set-up, and you cannot reassign a unit to another Wing during the game.
5.4.2 TRACING COMMAND: A unit is considered to be in command if, at the moment it is activated or Reacts, it is able to trace a line of communication (LOC) to its WC. Units may trace their LOC three hexes (if Cavalry) or two hexes (any other unit type) to its WC, or to a unit of the same Wing that is able to trace its own LOC to another unit of the same Wing and so on until one unit of the chain is able to trace its LOC directly to the WC. Thus, command can be traced across large areas, as long as each unit is within either two or three (depending on unit type) hexes of each other, and at least one unit in the chain is within range of the WC. LOC cannot be traced through a hex containing an enemy unit, or terrain that is impassable. A disabled or captured artillery unit cannot be used to trace an LOC.
A leader stacked with a two-hex infantry unit must be specifically placed in one of its two hexes.
NOTE: Command is traced at the instant a specific unit wishes to move. Thus, a Wing Commander or another unit could move to bring an out of command unit back into command before that unit moves. Conversely, if a WC is killed during a Reaction, any units of his Wing that have not yet activated are Out of Command.
5.4.3 OUT OF COMMAND EFFECTS: Any unit that cannot trace command is limited in what it can do:
- If not adjacent to an enemy unit, it must move as quickly as possible to place itself back in command. If adjacent to an enemy unit, it may remain where it is or move back into command. The unit ignores any movement restrictions on it due to its Orders until it is back in command, at which point it may then perform its normal activation with any movement points remaining. If its Wing Commander is not currently on the map, it may not move at all. Exception: An out of command Artillery unit does not have to follow this restriction if it is unlimbered. Once in command, the unit may then use any remaining MPs freely, within the Orders restrictions of its Wing. Thus, a unit one hex out of command can move one hex back into command and then continue with its Wing during the same activation using its remaining movement points. If for any reason (facing, terrain, etc.) a unit cannot move closer to being in command, the owning player must at least reface the unit so as to make the required movement easier in a later activation.
- The only fire it may perform is Reaction Fire (see 9.4). Exception: unlimbered Artillery units may fire even if out of command.
- An Out of Command unit may NOT move adjacent to an enemy unit. It may perform all types of Reaction (Reaction Fire, Reaction Movement, and Interception) normally, but cannot move adjacent to enemy units when doing so. (Thus, it must be adjacent to any enemy unit it attempts to Intercept.)
- A Heavy Infantry unit may attempt to form Hedgehog (6.3.2) as a Reaction even if out of command.
- An Out of Command unit may not Reform or Rally unless adjacent to or stacked with the Army Commander.
NOTE: The ability of the AC to reform and rally a unit is not affected by the command status of that unit. In effect, the AC himself is placing the unit in command for purpose of being reformed or rallied.
5.5 Orders in General
5.5.1 Orders represent what a Wing is prepared to do during the turn. Orders can limit or restrict what units of that Wing can do. Orders restrictions apply only to units, not to Leaders, and apply only during the Wing's activation. (Thus, a friendly unit under Charge Orders adjacent to an enemy unit may still Intercept during an enemy activation.) All Wings begin the game with one of four specific Orders (5.6), but those Orders can change during the game (5.7).
5.5.2 The act of changing Orders is not automatic, but depends on the Wing's current Orders and its desired Orders. The leadership rating of the WC (and possibly the AC) influences the ability to change Orders. The current Orders for a Wing are designated by placing the appropriate Orders marker on or near the Wing Commander or on the appropriate Orders box on a battle's scenario card if it has one.
5.5.3 The players may secretly choose their Orders before a game begins, and then reveal them simultaneously. There are Historical Orders provided for each battle that the players may choose to use by mutual consent.
NOTE: Orders are assigned to the Wing as a whole, not to individual units.
PLAY NOTE: For a more historical game, use the Historical Orders; for a more balanced game, select your own Orders.
5.5.4 An unlimbered Artillery unit is exempt from orders restrictions and is not forced to limber to get into command. However, wagons and limbered artillery units are subject to all command restrictions except when the Anti-Suicide Clause below applies.
5.6 Four Types of Orders
Line of Sight (LOS) does not affect Orders in any way. Commanders generally had enough situational awareness of the enemy to allow charging regardless of LOS. The rules here are summarized on the Orders Summary Chart and the Orders Restriction Chart.
5.6.1 CHARGE: A unit under Charge Orders must attempt to end its activation at least one hex closer to the enemy unit closest to it, even if this movement puts the active unit out of command. Exception: If the closest enemy unit is already adjacent to the front of another friendly unit, then the active unit may instead move toward the next closest enemy unit that's not already adjacent to the front of a friendly unit. If for any reason (facing, terrain, etc.) a unit cannot move closer to the nearest enemy unit, the owning player must at least reface the unit so as to make the required movement easier in a later activation. A unit must be under Charge Orders to move adjacent to an enemy unit.
NOTE: Which enemy unit is considered "closest" is determined on a unit by unit, hex by hex basis. Thus, enemy interceptions that occur during an activation may affect which unit is considered the "closest" one for the unit that is intercepted or for friendly units that move after the interception.
If the active unit starts or moves adjacent to an enemy unit that is not in the front of another friendly unit, the active unit may not move further other than to change facing, wheel, or exchange stacking positions with an artillery unit stacked in its hex (8.3.1). Exception: An active unit need not stop if the enemy unit is a lone artillery or wagon unit. See 11.5.1. Determine which enemy unit an active unit must move towards the instant the active unit begins to move. If two or more enemy units are equally distant, the player owning the charging unit can choose which one of the enemy units it charges. A Wing under Charge Orders may NOT Pass when activated. A unit under Charge Orders may not perform a Reform or Rally Action (13.2) or use the Withdraw option in Reaction Movement (9.2.4).
PLAY NOTE: Given the conditions above, a given enemy unit will cause only one friendly unit to "stick"; other friendly units can move past the enemy unit, or move away if they started adjacent.
Anti-Suicide Clause: A Light Infantry, unformed Cavalry, wagon, or limbered Artillery unit is never required to move adjacent to the front of an enemy Heavy Infantry unit. If an enemy Heavy Infantry unit is the closest enemy unit to the Infantry, unformed Cavalry, or Artillery unit, the moving unit must move towards the HI unit, but does not have to move adjacent to its front even if the moving unit begins the activation two hexes away from the HI unit. This clause does not apply to an advance after a close combat.
5.6.2 MAKE READY: A unit under Make Ready Orders may move, but may NOT move adjacent to an enemy unit. A unit may perform a Reform Action, but not a Rally Action, if stacked with or adjacent to its Wing Commander.
5.6.3 RECEIVE CHARGE: A unit under Receive Charge Orders may move a maximum of one hex, but may not move adjacent to an enemy unit. A two-hex unit may change facing by wheeling one hex (assuming it is allowed to enter the hex and has the movement points to do so) as long as at the end of its move at least one half of the unit is adjacent to the hex it started in, and neither half is adjacent to an enemy unit it did not start adjacent to. A unit may perform a Reform Action. A unit may perform a Rally Action if stacked with or adjacent to its Wing Commander.
5.6.4 RALLY: A unit under Rally Orders may move, but may not end its movement closer to any enemy unit than the distance it started the activation from that unit. This applies separately to each enemy unit. A unit may perform a Reform or Rally Action. Its Wing Commander may not attempt Continuation or Preemption.
5.6.5 ALL ORDERS TYPES: Units may engage in Fire Combat and Close Combat, and their Army Commander may perform Reform and Rally Actions on them. They may change facing, even if they start adjacent to an enemy unit. Orders have no affect on advances and retreats after Close Combat. A two-hex unit with one side adjacent to an enemy unit may pivot so that both sides are adjacent to that enemy no matter what its Orders are.
5.7 Changing Orders
5.7.1 WHEN: Only an Active Wing may attempt to change its Orders, and only during the Orders Change Segment. It must be attempted before any units in the Wing perform any Action.
5.7.2 PROCEDURE: To change Orders, the phasing player consults the Orders Change Table and cross-references the Active Wing's current Orders with the desired Orders. Roll the die and apply any applicable modifiers. If the Wing is successful in changing its Orders, the new Orders are in effect for that activation. A Wing that fails to change Orders must activate under its current Orders. Exception: 5.8.
NOTE: It is not possible to make certain Orders changes.
5.7.3 MODIFIER NOTE: When attempting to change to Rally, there is a modifier if more than half of the Wing's units are Morale Broken, Morale Shaken, or have been eliminated. Treat units that have pursued off-map, or voluntarily exited the map to fulfill scenario victory conditions, as eliminated when determining whether to use this modifier. Ignore Artillery and Wagons when making this calculation.
5.8 Mandatory Rally Orders Change
At the beginning of an activation, if all Cavalry and Heavy Infantry units of the activated Wing are either eliminated, off-map, Formation Broken, Morale Shaken, or Morale Broken, then that Wing's Wing Commander must be placed under Rally Orders. This Orders change is automatic, and that WC cannot attempt another Orders change this activation. The player cannot Pass for that activation. A Wing cannot be forced under Rally Orders if any units of that Wing have not yet arrived as Reinforcements.
6.0 Facing and Formation
6.1 Facing
Position each unit in its hex so that its front faces a vertex of its hex. Exception: Two-hex units in Column, 6.3.4. The top of the unit is its front. Single hex units have two frontal hexes, two flank hexes, and two rear hexes. Two-hex units have three frontal hexes, two flank, and three rear hexes. Leaders, limbered guns, wagons, and Morale Broken units have no facing.
6.2 Changing Facing
6.2.1 MOVEMENT COST: Units must pay movement points to change facing.
- Cavalry and Light Infantry: 1 MP per vertex changed.
- Single hex Heavy Infantry: 2 MPs per vertex changed.
- Two-hex units: Must "wheel" forward to change facing. One half of the unit remains in its hex while the other moves and pivots around the stationary hex. It costs one MP plus the terrain cost incurred by the moving portion of the two-hex unit (see Terrain Effects Chart) to wheel one hex. Two-hex units may not wheel backwards.
- Heavy Infantry in column: A Heavy Infantry unit in column pays 2 MPs per hexside or vertex to change facing.
EXAMPLE: A two-hex unit wheels one hex in a clear terrain hex. The total MP cost is two.
6.2.2 COUNTER MARCH: A unit may change facing 180° at a cost of two movement points. Not actually an "about face," this represents the file leaders retiring to the rear followed in turn by the rest of the file.
Note to Owners of the first edition of TACW: The Backstep maneuver has been removed from the series, and is no longer available even in the TACW scenarios.
6.2.3 ARTILLERY: An Artillery unit not on its Fired side can change facing any number of vertices in lieu of firing (whether normal fire or Reaction Fire). Flip the Artillery unit to its Fired side if it changes facing. Limbered guns have no facing, so you don't have to pay any facing change costs for them.
6.2.4 FACING AND ENEMY UNITS: A unit that changes facing when adjacent to an enemy unit triggers Reaction Fire (9.4).
6.3 Formation
6.3.1 FORMATION STATES: A unit is always in one of seven formation states: Formation Normal, Formation Shaken, Formation Broken, Hedgehog (6.3.2), Open Order (6.3.3), Column (6.3.4) or Morale Broken with no formation (12.4.3). Formation states do not apply to Wagons or Artillery. Formation states are denoted by a marker except for Formation Normal (represented by the front of unit with no marker) and Formation Shaken (represented by the back of unit with no marker). Close Combat (11.2.F), Artillery fire, and movement through rugged terrain will degrade a unit's formation, from Formation Normal to Formation Shaken to Formation Broken. Ignore additional Formation Hits on Formation Broken units (except: 10.6.6). Formation effects are listed below and are summarized on the Formation Effects on the Movement Chart.
- Formation Normal — No restrictions.
- Formation Shaken — A unit's movement allowance is halved, and it suffers adverse Fire and Close Combat modifiers.
- Formation Broken — A unit has no movement allowance, and suffers adverse Fire and Close Combat modifiers. Formation Broken units advance after Close Combat normally.
6.3.2 HEDGEHOG: This formation (also known as Schiltron) is available only to Heavy Infantry units that have pikes.
- a. A unit in this formation may not fire, initiate Close Combat, or voluntarily move and suffers adverse Fire Table modifiers. (Artillery stacked with a unit in Hedgehog may not fire, either.) The benefit of this formation is that the unit does not have any Flank or Rear facing and receives beneficial Close Combat modifiers.
- b. Units may form a Hedgehog in their activation phase by expending four movement points, or when eligible as Reaction Movement at no movement point cost (see 9.2.3). A unit must be in one of the following formation states to form Hedgehog: Formation Normal, Open Order (6.3.3), or Column (6.3.4); Formation Shaken units may attempt to enter Hedgehog as Reaction Movement only; if successful, flip the unit to its Formation Normal side. Mark the unit with a Hedgehog marker to show its new formation.
- c. To exit a Hedgehog and return to Formation Normal takes a total of three Reform Actions (6.4). The first Reform Action removes the Hedgehog marker and leaves the unit in Formation Broken status with the same facing as when it entered Hedgehog. Then returning to Formation Normal is the same as for any other Formation Broken unit.
- d. Units in Hedgehog retreat from and advance after Close Combat normally.
- e. Units in Hedgehog ignore Formation Hits from Close Combat (11.2 F) and retreat or advance after Close Combat (11.4.10), but treat any Formation Hit from Fire Combat (10.0) as a Casualty instead. If a unit in Hedgehog suffers a Morale Broken result, it becomes Morale Broken with no formation (12.4.3), and the Hedgehog marker is removed.
COMMENTARY: This is an early form of a square in which pikes formed in a large mass facing in all directions to defend against a Cavalry attack. The muskets either took refuge under the pikes or made themselves scarce.
6.3.3 OPEN ORDER: Units in this formation do not take any Formation Hits from movement. They may engage in all other Actions normally. Units in Formation Normal may enter Open Order with a Reform Action. A player may choose to have units begin a scenario in it. If so, the players secretly choose which units will be in Open Order before a game begins, and then reveal them simultaneously.
Units may also change from Open Order to Formation Normal with a Reform Action. If a unit in Open Order incurs a formation "hit" from Fire or Close Combat it is immediately Formation Broken and the Open Order marker is removed.
EXAMPLE: Two heavy infantry units — one Formation Normal and one in Open Order — move forward two hexes (4 MPs each). Both belong to a wing under Make Ready orders. The Formation Normal unit takes two Formation Hits due to the terrain — one for moving down a steep slope hexside and one for crossing a stream hexside. The owning player marks the unit as Formation Broken. The unit in Open Order does not take any Formation hits for its movement.
NOTE: To get the Broken unit back to Formation Normal the unit needs to conduct two Reform actions. Make Ready Orders allow reforms only with a stacked or adjacent leader present.
COMMENTARY: This represents a loose version of the normal battle formation used when crossing rough terrain. What the formation gained in maneuverability it lost in cohesion, thus the penalties.
6.3.4 COLUMN: Changing from column to battle line was exceedingly difficult in this period. Units may be in Column Formation only if they are specified to begin a scenario in that Formation or they enter as reinforcements. Units in Column have their movement allowance increased by two and do not incur formation "hits" from movement. Single hex units in Column move and have their facing treated normally. When a two-hex unit is in Column, its right half is treated as the "head" of the column, with that hexside (which normally would be its flank) as the unit's front. Place the column marker on the right half of the two-hex unit and facing in the proper direction.
Tail: Because all movement is keyed on the "head," this may cause the "tail" to pivot about. Such pivoting is done without additional cost but cannot be done into a hex prohibited to movement.
Column to Battle Line: Units may change from Column to Formation Broken for Infantry, or from Column to Formation Shaken for Cavalry, with a Reform Action. When changing a two-hex unit out of Column, the player can choose which half, left or right, becomes the new front. (In other words, he can leave the unit with the orientation it had when in Column, or flip it 180°.)
Combat: Units attacked (whether by Artillery, Muskets, Pistols, or in Close Combat) while in Column have the Column marker removed and are immediately Formation Broken (faced as desired by the owning player) and must take a Morale Check before the combat is resolved. Units in Column may not fire, initiate Close Combat, or perform any type of Reaction, including Interception.
6.4 Formation Recovery
Units must use a Reform Action (13.2.3) to recover from formation hits, to voluntarily change out of Hedgehog, Open Order, or Column. Each Reform Action improves a unit's formation state by one level; i.e., from Formation Broken to Formation Shaken is one Action. It would take a unit two Actions to fully recover a Formation Broken unit to Formation Normal.
NOTE: Certain Orders prevent units from undertaking a Reform Action unless the AC performs the action.
7.0 Movement
7.1 Movement in General
7.1.1 BASICS: Units and leaders move one at a time, expending movement points for each hex entered (see the Terrain Effects Chart [TEC]). There is no movement cost for moving adjacent to an enemy unit. Units must move directly into their front hexes. A unit needs to change facing to move into a flank or rear hex (see 6.2). Leaders use the Cavalry column on the TEC. (If the terrain is prohibited to cavalry, they use the LI column instead). If a unit does not have enough movement points to enter a hex, it may not do so; there is no minimum one hex movement allowed unless a scenario specifically mentions it.
7.1.2 TWO-HEX UNITS: If one half of a two-hex unit moves through different terrain than the other half, always use the higher MP cost (and Formation Hit cost, if any). If one half of a two-hex unit crosses a hexside feature before the other half does, the MP cost (and any Formation Hit cost) of the hexside feature is paid twice (at the moment each half crosses).
7.2 Movement Allowances
7.2.1 Movement allowances are not printed on the counters. The movement allowance for each unit type is listed below.
| Unit type | Movement Allowance |
|---|---|
| Cavalry and Leaders | 8 MPs |
| Light Infantry | 6 MPs |
| Cavalry/Light Infantry stack | 6 MPs (8.2) |
| Heavy Infantry | 4 MPs |
| Wagons* and Limbered Guns | 2 MPs |
| Unlimbered Artillery | 0 (may not move) |
| Morale Broken units | 0 (may only move in the Rout Movement Phase) |
*Wagon units may only move when allowed by specific scenario instructions.
EXAMPLES OF MOVEMENT: The cavalry unit and the Musketeer unit both pay an additional MP to cross the hedge and to rotate one vertex. The hedge causes a formation hit on the cavalry unit but not on the light infantry. The 2-hex heavy infantry unit rotates 180º (Counter March) and then moves forward two hexes for a cost of 2 MPs.
NOTE: A unit's formation may also affect its movement allowance (see 6.3).
7.3 Movement and Formation Hits
7.3.1 Certain types of terrain will cause a formation hit to some types of units. This is noted on the Terrain Effects Chart. These formation hits apply any time a unit that's not in Open Order (6.3.3) or in Column (6.3.4) enters or crosses such terrain, whether due to regular movement, reaction movement, pursuit, retreat, advance after combat, or Advancing or Retreating Fire. (Do not apply any hits if a unit starts a scenario in such a hex or just changes stacking order or facing without wheeling into the hex.) While such hits are applied immediately, the movement effect of a formation hit is applied after movement is completed. In other words, a unit's movement point allowance is determined when the unit begins to move, and should the unit's Formation State change during movement the unit retains the movement points it had when it started moving. Thus, a Cavalry unit that starts stacked with a Light Infantry unit has a movement allowance of 6, even if it moves off the Infantry unit. Exception: A unit must stop moving as soon as it incurs a Formation Hit that causes it to become Formation Broken. These formation hits also apply if a unit pursues, retreats, or advances after combat, but in such cases the exception does not apply; i.e., a unit can continue even if doing so renders it Formation Broken. A non-LI or formed Cavalry unit will incur a Formation Hit for crossing a Gentle Slope hexside (up or down) only when it crosses a second Gentle slope hexside during the same movement activity (which includes regular movement, Interception, Withdraw Reaction Move, Pursuit, or advance or retreat after combat).
EXAMPLE: A formed Cavalry unit that moves down a steep slope and across a stream would incur two formation hits and stop.
7.3.2 TWO HEX UNITS: For two-hex units, if one half moves through terrain that causes a formation hit while the other is in clear terrain, the entire unit is still affected. Similar to 7.1.2, if one half of a two-hex unit crosses a hexside feature before the other half does, the formation hit of the hexside feature is paid twice (at the moment each half crosses).
7.3.3 LIMBERED GUNS: Artillery may limber or unlimber in lieu of moving or firing on a given turn. This means an artillery unit may not move or fire during the whole turn in which it limbers or unlimbers. Once limbered, mark the unit with a Limbered Guns marker. Limbered guns may not fire, have a movement allowance of 2 and use the Heavy Infantry column of the TEC. Limbered guns do not take formation hits from movement. Limbered guns are subject to Out of Command effects (5.4.3). Limbered guns are treated as normal Artillery for all other purposes. (Limbering is not available to Artillery in This Accursed Civil War due to the limited nature of artillery transport in the English Civil War.) A Limbered Artillery unit may not go into Column or assume Open Order. A Limbered Artillery unit may enter a hex with a friendly Infantry or Cavalry unit if allowed to stack with that unit by 8.1.1. However, it must then stop for the current activation. Either unit may move out of the hex in a future activation, but they may not move together as a stack.
7.3.4 INTEGRATED ARTILLERY: A Heavy Infantry unit that also has an artillery symbol on it contains regimental artillery. You do not need to limber and unlimber these units to move; when you move the Infantry, the artillery is considered to be moving with it. However, terrain effects that apply to Artillery units also apply to any Heavy Infantry units with integrated regimental guns.
7.3.5 BRIDGES: Any unit that is not a two-hex Heavy Infantry unit may enter a bridge hex or cross a bridge hexside normally, and may initiate Close Combat from a bridge hex or across a bridge hexside if otherwise allowed. If a two-hex Heavy Infantry unit is in Column, or Routing, it may cross a bridge as if it were another road hex or hexside except that it may not end an activation in a bridge hex or straddling a bridge hexside.
If not in Column, a two-hex Heavy Infantry unit uses the following to cross a bridge hex or hexside that it cannot otherwise cross.
- The unit's formation must be Formation Normal or Open Order.
- The unit must start the activation adjacent to the bridge hexside or hex with the bridge in one of its front hexes or hexsides.
- The unit then uses its whole movement allowance to cross the bridge and ends up on the other side such that the bridge is in one of the unit's rear hexes or hexsides. In essence, it "squeezes" across the bridge.
- It maintains the same facing after the crossing and the other hex it ends up in must be one it could enter in normal movement.
- After crossing, a Formation Normal unit becomes Formation Broken.
A two-hex infantry unit may initiate combat across a bridge hexside or bridge hex against an enemy unit on the other side, but is considered to be Formation Broken during the Close Combat. If victorious, it may advance across the bridge following the movement rules and restrictions.
7.4 Reinforcements
If a scenario calls for reinforcements, and if those reinforcements have their own Wing Commander, then that Wing may enter the map during the indicated turn under Make Ready Orders. The Wing is ignored for all purposes before its turn of entry, but at the start of that turn it is counted for determining who has Initiative. The owning player may activate the reinforcing Wing's WC in its normal place in the Orders sequence for the turn that the Wing enters, and so the WC can be used for Preemption attempts and can attempt to change orders before entering. If the indicated entry hex is blocked by enemy units, then the units may enter at the nearest unblocked hex. Units may enter in Normal, Open Order or Column formation at the owner's discretion unless noted otherwise in the scenario rules. If only one entry hex is specified, the units must enter sequentially, with each unit after the first having one less movement point per unit that has entered in front of it. Example: Four Heavy Infantry battalions enter at hex 1101; the first has 4 MPs, the Second 3, the third 2, and the last 1. If only one hex is specified, a two-hex unit may enter in that hex and one of the adjacent hexes.
8.0 Stacking
8.1 Basic Rule
8.1.1 Stacking refers to having more than one unit in a hex. The basic rule is one unit per hex. The exceptions are:
- A 1 or 2 strength Light Infantry unit may stack with a Cavalry unit (8.2).
- One Artillery unit or one Wagon may stack with an Infantry or Cavalry unit (8.3 and 8.5).
- Two Artillery units or two Wagons may stack with a two-hex Heavy Infantry unit (one Artillery unit or Wagon in each hex) (8.3 and 8.5).
- Two Cavalry units may stack together momentarily to perform Cavalry Incorporation (8.4).
8.1.2 The stacking rules are in effect at all times. Units may not move through friendly units during movement, Interception, or retreats. Exception: Units may move (8.3), Intercept (9.3) or retreat (11.4.3) through friendly Wagon and Artillery units.
8.2 Cavalry and Light Infantry Stacking
8.2.1 A 1 or 2 strength Light Infantry unit may stack with one Cavalry unit of the same Wing. While stacked, treat the units as one unit, with the same facing, same Formation state, and same Morale state. The effects of this are as follows:
- The movement allowance of the combined stack is 6 for all purposes using the Cavalry movement point costs on the TEC.
- Both units may Fire, and both may Reaction Fire when the stack is fired upon. Accumulate the effects of both fires before implementing any results.
- Both units must share the same facing.
- If the stack engages in Close Combat the Light Infantry unit is ignored for all purposes. If the Cavalry unit is eliminated, the Light Infantry unit is, too.
- If a Cavalry unit retreats or advances after combat, the Light Infantry unit goes along with it. If the Cavalry unit pursues (11.7) the Light Infantry unit is left behind (11.7.3).
- Both units in the stack suffer all formation and morale hits/effects. Only one of the units (owner's choice) takes an inflicted casualty hit. If either unit reaches its casualty threshold, the entire stack suffers the effects.
- The morale rating of the Cavalry unit is used for all Morale Checks (10.6.2).
- They Rally or Reform together, using one action.
- If forced to Rout Move, split the stack and move each unit its full movement allowance.
- The Cavalry unit may intercept, leaving the Light Infantry unit behind (but with a MA of only 6, it can't intercept enemy Formation Normal cavalry).
DESIGN NOTE: The Cavalry / Light Infantry combination was a physically integrated unit, as the musketeers were formed into platoons of 40 to 60 men interspersed between the squadrons of cavalry. The tactic was primarily defensive and was meant to supplement the firepower of the cavalry line. It was made popular by the Swedes in the 1630s, but was controversial. It could still be found in use in the 1670s.
8.2.2 A Cavalry unit that moves into a hex that already contains a Light Infantry unit must stop — it may not pass through. The converse is also true, a Light Infantry unit must stop if it moves into a hex that contains a Cavalry unit. The moving unit must change its facing to be the same as the non-moving unit's; if it can't do so, it can't enter the hex. If the unit in the hex has not yet moved in the activation, it may not move that activation. In the next activation, the units may move together as a stack. When units move together to form a stack, both units assume the worst morale and formation state of either units. Thus, if a Morale Shaken/Formation Normal Cavalry unit stacks with a Morale Normal/Formation Shaken Light Infantry unit, both units are now Morale Shaken/Formation Shaken.
8.3 Stacking with Artillery
8.3.1 When a unit stops movement in a hex occupied by an Artillery unit, the player must decide which unit will be on top of the stack. Only the unit on top may engage in Fire Combat or be the target of Fire Combat; the bottom unit may not fire but may otherwise React and is subject to Grazing Fire (10.8.3). If an Artillery unit is stacked on top of a two-hex Infantry unit, the half of the Infantry unit not stacked with the Artillery unit can still fire. Captured and Disabled artillery units must always be placed and remain at the bottom of a stack.
8.3.2 The order of the stack may only be changed by the non-Artillery unit performing a Move, Advancing Fire, or Retreating Fire Action when activated OR in lieu of a Reaction Fire by the Artillery unit. In the latter case, neither the Artillery unit nor the unit it is stacked with perform Reaction Fire; instead, the Artillery unit is flipped to its Fired side and placed at the bottom or top of the stack. If already on its Fired side, only a Move, Advancing Fire, or Retreating Fire Action by the non-Artillery unit can change the stack order. A Formation Broken unit may change stacking position with an artillery unit.
8.3.3 An Artillery unit and the other unit stacked with it may be in different morale or formation states and may face different directions. An artillery unit may stack with a unit of any Wing.
8.3.4 If a two-hex Infantry unit is stacked with an Artillery unit in each hex, both Artillery units must be in the same position — either on top or on bottom. If an Artillery unit stacked on top of an Infantry or Cavalry unit is disabled, the Infantry or Cavalry unit suffers any excess losses. It may react in such a situation if otherwise eligible.
8.4 Cavalry Incorporation
If a Cavalry unit has taken casualties it may incorporate other Cavalry units (with the same or different morale) to replace some or all of its losses, but never more than its printed strength. The moving Cavalry unit moves into the hex containing the unit to be incorporated. The non-moving unit is removed from play and is counted for victory points as an eliminated unit. The moving unit removes a number of casualties equal to the remaining strength of the non-moving unit and ends its movement. A unit may be brought back above its Casualty Threshold through this process. The unit assumes the worst Morale state of the two combining units.
If the non-moving unit had more strength points remaining than the moving unit could absorb, they are lost.
EXAMPLE: At 1st Newbury, Rupert's 4-8 Cavalry squadron has 2 casualties. His 2nd squadron, a 4-7 also has 2 casualties. The owning player moves the 4-8 to the 2nd squadron hex. 2nd Squadron is removed from play and the 2 casualties are removed from the 4-8 squadron.
8.5 Stacking with Wagons
Whenever a friendly infantry or cavalry unit is in the same hex with a Wagon, always place the Wagon at the bottom of the stack. There is no cost to do so and while stacked together the Wagon is always considered at the bottom of the stack. A Wagon unit cannot stack with an artillery unit or another Wagon. If an enemy infantry or cavalry unit enters a hex with a Wagon, it is considered captured; see 14.1.
9.0 Reaction
9.1 Basic Concepts
9.1.1 REACTION IN GENERAL: Under certain conditions, the Inactive player may interrupt his opponent's current activation to react with his Inactive units. Reaction by an Inactive unit is permitted only when triggered by specific activities of an Active unit occurring in the Inactive unit's Reaction Zone. Reaction Zones are described in 9.1.2. For each trigger, a unit may Reaction Move or Reaction Fire, but not both (in other words, Reaction Fire and Reaction Movement are mutually exclusive). Only units of the Inactive player may React. Exceptions:
- A Cavalry unit of the Active Player may Reaction Fire, but not Reaction Move, against a successful Interception (9.3).
- A unit of the Active Player may Reaction Fire or Reaction Move (but not Intercept) in the Close Combat Segment against an Inactive Unit that advances or pursues after Close Combat (11.4.9) or changes facing as part of the advance.
9.1.1a GENERAL RESTRICTIONS:
- A unit may only attempt one Reaction or one Interception per Trigger.
- A single triggering event enables all eligible inactive units to react or attempt Interception. A player need not declare all eligible reactions or Interceptions at once; he may await the resolution of the one before declaring another. However, if a single action triggers Reaction from more than one unit, any "forced Hedgehog" attempts under 9.2.3 must be done first.
- A unit may Intercept or Reaction Move even if adjacent to an enemy unit and regardless of Orders Restrictions.
- A Morale Broken unit may not React or Intercept.
- An Out of Command unit may React, but may not move adjacent to an enemy unit in doing so.
- A unit may perform Reaction Fire only against the unit that triggers the reaction.
- During an Interception, the unit performing Reaction Fire does so before the moving unit fires.
9.1.2 REACTION ZONES: Reaction Zones vary depending on the type of unit reacting, whether the reacting unit Reaction Fires or Reaction Moves, and what type of Reaction Movement the unit performs. A unit may only perform one Reaction to any trigger in overlapping Reaction Zones.
- An Artillery unit may Reaction Fire to enemy Fire up to its maximum range (counter-battery fire), and Reaction Fire to other triggers up to its Grazing Fire Range. An Artillery unit may only Reaction Fire through its frontal arc.
- A non-Artillery unit may Reaction Fire into any hex adjacent to its front or flank.
- An eligible unit may perform Reaction Movement when an enemy unit moves into one of the hexes mentioned for the specific type of Reaction Movement in cases 9.2.2, 9.2.3, and 9.2.4.
9.1.3 TRIGGERS: An eligible Inactive unit may Reaction Move or Reaction Fire each time:
Movement Triggers
- An Active unit enters any hex in the Inactive unit's Reaction Zone by normal movement, Advancing or Retreating Fire, or Cavalry Artillery Displacement (10.8.6).
- An Active unit ends an advance or pursuit in the Inactive Unit's Reaction Zone; or
- An Active unit changes facing in the Inactive unit's Reaction Zone (including the stationary half of a two hex unit that pivots); or
- An Active unit initiates a charge from an adjacent hex; or
Non-Movement Triggers
- A stack of Active Units changes stacking in the Inactive unit's Reaction Zone; or
- An Active unit performs a Reform or Rally Action in the Inactive unit's Reaction Zone; or
- An Active unit performs any type of fire on the Inactive unit (only the Inactive unit that was the target of the fire may react).
And (applies to all of the above) the Inactive unit has a clear LOS to the event triggering the reaction.
EXAMPLE: At Edgehill, Rupert's 3-8 Cavalry unit moves adjacent to Ramsey's 4-6 Cavalry unit. When it moves adjacent, Ramsey may fire. Then Rupert fires (a Cavalry unit may fire at any point in its movement see 10.2) at Ramsey, who then can fire again in reaction. Rupert defeats Ramsey in Close Combat and advances into a hex adjacent to a 2-6 Dragoon unit that may now Reaction Fire due to Rupert entering its Reaction Zone.
9.1.4 TWO-HEX UNITS: Both halves of a two-hex unit must undertake the same type of Reaction, and both halves may React (if otherwise eligible) even if only one half was triggered.
9.1.5 ARTILLERY UNITS: Artillery units on their Fired side may not react. Flip any Artillery unit that does React to its Fired side. Thus, Artillery units can only React once per turn, and only if they have not yet fired.
9.1.6 REACTION EFFECTS ON MOVEMENT: As with Formation Hits due to terrain (7.3.1), an Active unit's Movement Allowance is determined when the unit starts to move. Any change to this Movement Allowance during the movement due to any Reaction, including an Interception, does not change this Movement Allowance. Exception: As soon as a unit becomes Formation Broken it must cease movement. Conversely, the movement allowance for an Inactive unit is determined at the start of each Reaction, so that any changes to its movement allowance from one Reaction does affect later Reactions.
9.2 Reaction Movement
9.2.1 IN GENERAL: Reaction Movement occurs as soon as it is triggered: the Active player stops his movement, the Inactive player performs his Reaction Movement, and then the Active player resumes where he left off. There are three types of Reaction Movement (9.2.2-9.2.4). There is no limit to the number of times a unit may perform Reaction Movement — it may do so each and every time a Reaction is triggered. However, a unit may use only one type of Reaction Movement per trigger. A unit may Reaction Move even if in the frontal hex of an enemy unit.
A unit may only Reaction Move each time it does so up to the limit of its current Movement Allowance.
9.2.2 FACING CHANGE: If an enemy unit whose movement allowance (including the effects of Formation Hits) is the same as or less than the reacting unit's movement allowance moves adjacent to the reacting unit's flank or rear, the reacting unit may change facing as follows:
- a) Single hex non-Artillery units may change facing by up to two hex vertices.
- b) Two-hex units may pivot (6.2.1) half their counter up to two hexes. The new hex or hexes that the moving half of the unit enters during a Reaction Facing Change may not be adjacent to an enemy unit unless the wheeling unit is under Charge Orders. A two-hex unit under any Orders may also pivot and move adjacent to an enemy unit if the pivoting unit's stationary half is already adjacent to that enemy unit, and the pivoting half does not move adjacent to any other enemy unit.
9.2.3 FORM HEDGEHOG: If an Active Cavalry unit (that is, a cavalry unit of the Active player) expends movement points into or within two hexes of an Inactive Heavy Infantry unit's front or flank, and that HI unit is in one of the formation states listed in 6.3.2b (including Formation Shaken), the HI unit may attempt to form Hedgehog as a Reaction by passing a MC. A failed MC prevents the unit from forming Hedgehog and lowers its Morale status by one (see 12.0). An eligible Heavy Infantry unit must attempt to form Hedgehog each time an Active enemy Cavalry unit enters one of its rear (not flank) hexes. Note, the Heavy Infantry unit is not required to remain in that formation just because a Cavalry unit is adjacent to its rear.
9.2.4 WITHDRAW: If an enemy unit whose movement allowance (including the effects of Formation Hits) is the same as or less than the Reacting unit's movement allowance performs a 9.1.3 Movement Trigger within two hexes of the Reacting unit, the eligible reacting unit may move up to its full movement allowance (including the effects of Formation Hits) away; i.e., end its move further away from the triggering unit than when it started. A unit may perform a Withdraw Reaction Move only once per enemy activation. To be eligible, a unit must be:
- Under Rally Orders, or
- A leader alone in a hex, or
- A Cavalry unit not under Charge Orders approached by Heavy Infantry.
A unit performing a Withdraw Reaction Move may not move adjacent to any enemy unit. Units retreating in this fashion do not simply back up — all normal rules of movement, facing and formation hits apply.
9.3 Interception
9.3.1 ELIGIBILITY: An Inactive Cavalry unit may attempt to intercept an Active enemy unit if the following conditions are met:
- a) The enemy unit performs a 9.1.3 Movement Trigger anywhere within four hexes of a friendly Cavalry unit, and
- b) The enemy unit is in the Cavalry unit's Front or Flank arcs (trace this arc straight out one flank of the unit, then around its front to the other flank), and
- c) The Cavalry unit is not Formation Broken, and
- d) The Cavalry unit has a clear LOS and a clear movement path not through a "dead zone" (10.9.3B) to the moving unit, and
- e) The Cavalry unit has enough MPs to move to a hex adjacent to (or is already adjacent to) the moving unit and does not become Formation Broken before it's adjacent to the moving unit.
- f) The Cavalry unit has not already attempted an Interception during the current enemy Wing activation, and
- g) The movement allowance of the Cavalry unit (including the effects of Formation Hits) is the same as or greater than the enemy unit's movement allowance.
NOTE: Unlike other Reactions, an eligible cavalry unit may attempt Interception only once per enemy activation, whether the attempt is successful or not. A continuation is a new activation.
9.3.2 PROCEDURE: The moving unit stops while the Reacting Cavalry unit checks on the Interception Table to determine if its Interception attempt is successful. The current Orders of the Cavalry unit is found on the Interception Table and a die is rolled. Apply any applicable modifiers. If the die roll falls within the range on the table the Interception is successful. If it fails, the Cavalry unit remains in place and is marked with an Interception Done marker (it may still React). Cavalry may not intercept an Interception. Two or more Cavalry units may attempt to intercept the same moving unit, but fully resolve each attempt before going on to the next. A player does not have to declare all attempts before rolling; he may declare one, resolve the Interception, and then declare another.
9.3.3 SUCCESSFUL INTERCEPTION: If successful, the owning player must move the Cavalry unit adjacent to the enemy unit it is intercepting. Each hex entered must be 1 hex closer to the intercepted unit. All normal movement rules and formation hits apply. An intercepted enemy Cavalry unit (only) may Reaction Fire (9.4) and may do so even if the intercepting unit starts the Interception adjacent. After Fire Combat is resolved, the intercepting Cavalry unit may engage in Close Combat, which is resolved immediately.
NOTE: The intercepted unit may not perform Reaction Movement in response to the Interception because only inactive units may so React.
EXAMPLE OF INTERCEPTION: The 2-hex heavy infantry unit wants to move forward 4 hexes but is stopped in hex A by the opposing player who wishes to conduct an interception with his cavalry unit. The cavalry unit is currently under Charge orders so a die roll of 0–5 is required for a successful interception. The cavalry unit's Original Morale is 8, so the die roll will be modified by –1. If the interception is successful, it will allow the cavalry to intercept the heavy infantry unit in its rear.
9.3.4 After any post-Interception Close Combats are resolved, the Active player resumes the interrupted action of the intercepted unit (assuming it's still on map), and then continues with other units of the activated Wing. Formation Hits incurred during the Close Combat do not affect the remaining movement allowance of the intercepted unit, unless it became Formation Broken. An intercepted unit loses any Momentum (11.3.6) accumulated up to the time of the Interception, and must satisfy the requirements for Momentum from the point at which it resumes movement.
9.3.5 Cavalry that intercepted may still undertake Actions when its Wing is activated. A Cavalry unit in a Wing that is Finished may also intercept.
9.3.6 Mark any unit that attempts Interception with an Interception Done marker to indicate that it cannot attempt to intercept again this activation. Remove all Interception Done markers in the Finish Phase at the end of the current activation.
9.3.7 Cavalry may intercept through a friendly artillery unit, though it loses Momentum for doing so. Cavalry may not intercept through enemy artillery units.
9.4 Reaction Fire
9.4.1 There is no limit to the number of times Infantry may use Reaction Fire as long as each is triggered separately. Reaction Fire is handled in the same manner as regular Fire (10.0). Cavalry is subject to pistol limitations (10.7) and Artillery may still only fire once per turn. For Reaction Fire, Heavy Infantry may use Salvo Fire (10.4) and all Infantry may use Skirmishing Fire (10.3.3), but no unit can use Advancing Fire (10.3.2) or Retreating Fire (10.3.4). Generally, perform each Reaction Fire as soon as it is triggered. However, a unit eligible for Reaction Fire against both sides of the same two-hex unit does not Reaction Fire until both fires from the two-hex unit have been resolved.
9.4.1a HEAVY INFANTRY REACTION FIRE (Optional Rule): If a Heavy Infantry unit performs Reaction Fire and its unmodified die roll is 5 or more, that HI unit cannot perform Reaction Fire again during the same activation. An HI unit is not required to perform Reaction Fire when first triggered, so the unit can hold its fire for possible later use. If a double-sized HI unit rolls a 5 or more when the first half of the unit fires, the other half may still fire during that fire opportunity, but not later in the Activation.
DESIGN NOTE: A line of single-sized HI units, such as in the ULB Freiburg scenario, will draw more fire than a similar line of double units. This rule is intended to help compensate for that, but is considered optional at this time.
9.4.2 HEAVY INFANTRY REACTION FIRE VS. MOVING CAVALRY: Modify the Reaction Fire die roll by –1 if the target is a Cavalry unit that has advanced after combat, or moved one or more hexes, before entering the firer's Reaction Zone.
9.4.3 ARTILLERY REACTION FIRE: Artillery may Reaction Fire on any unit in its LOS that fires on its hex, or moves within its Grazing Fire Range. The target unit must be within range and within the Artillery unit's frontal arc.
9.4.4 In addition to regular fire, changing the position of Artillery in a stack in lieu of actually firing is also considered to be "Reaction Fire" (see 8.3.2).
9.4.5 TAKING COVER: If a unit in a Castle, Town, Village or Chateau hex is eligible for Reaction Fire against enemy Musket or Pistol (but not Artillery) Fire, the unit may "take cover" instead of returning fire. If the unit takes cover, it does not fire, and any enemy Musket or Pistol fire against it that Activation has no effect (even if technically the offensive fire comes before the Reaction Fire). This benefit applies only to units in Castles, Towns, Villages, or Chateaux, and not to units in other terrain like redoubts or entrenchments.
10.0 Fire Combat
10.1 Basic Fire Rules
10.1.1 IN GENERAL: Units may fire as an Action during their Wing's activation. Inactive units may use Reaction Fire (see 9.4). A unit can fire at any non-Wagon enemy unit or leader that is within its Range and Line of Sight. Exception: 8.3.1. Fire combat is voluntary; no unit is ever required to fire.
10.1.2 RANGE: Range is the number of hexes from the firing unit to the target, counting the target unit's hex but not the firing unit's hex. The range for all Infantry and Cavalry units is one hex. The range for Artillery units is printed on the counter.
10.1.3 FIRE AND FACING: Infantry and Cavalry may fire into their front or flank hexes. Artillery may fire through its frontal hexes only. No unit may ever fire through its rear hexes. Each hex of a two-hex unit can only fire into hexes adjacent to itself (for example, the left side can't fire into the right front hex). Facing does not apply to pistols used by Cavalry in Close Combat.
10.1.4 OTHER BASICS: Units may not combine fire. Each unit fires individually and the results are applied immediately. A given unit may be the target of more than one Fire Combat in an activation. Units fire by hex, so a two-hex Heavy Infantry unit would fire twice, but the fire from both halves is together considered one action and both are resolved before the enemy gets any Reaction Fire. A two-hex unit does not have to fire at the same target unit. If the same unit receives fire from both halves of a two-hex unit, any casualties or formation hits incurred are cumulative, but the unit performs only one Morale Check, with a +1 modifier to the roll if a second MC is incurred.
EXAMPLE OF FIRING: Unit A uses Advancing Fire — it moves one hex forward, fires both sides with –3 modifiers at unit X, after which unit X conducts Reaction Fire. Unit B uses Skirmishing and fires once at unit Y and once at unit Z. Reaction Fire by units Y and Z is conducted after each unit is fired upon. Unit C uses Retreating Fire and fires once at unit Z with a –3 modifier. After unit Z has conducted Reaction Fire against C, unit C backs up one hex.
10.1.5 INTEGRATED ARTILLERY: A Heavy Infantry unit that also has an artillery symbol on it contains regimental artillery. This artillery does not fire separately. Instead, the effects of this Artillery fire are integrated into the Heavy Infantry with Regimental Artillery Musketry Table. Use this table when firing Heavy Infantry units that have artillery symbols, and use the regular Heavy Infantry table when firing other Heavy Infantry units. This inherent artillery is not limited to just one fire per turn as normal Artillery is; you can use the Heavy Infantry with Regimental Artillery Musketry Table each time the unit fires.
10.2 Cavalry Pistol Fire
Cavalry may undertake a Movement Action then fire at any point in their movement; a separate Fire Action is not needed. A Cavalry unit may use Pistol Fire without moving. A Cavalry unit can only fire one pistol during a Movement Action. Exception: An active unit that is Intercepted may fire during the Interception and then, if victorious, again in its own attack that activation. A Cavalry unit may only fire twice before it needs to reload (see 10.7).
EXAMPLE OF FIRE RESOLUTION: Note that strength points have no bearing on heavy infantry fire resolution. The sequence of Musket Fire is listed below: A. Unit A moves forward one hex to the hex shown and then uses Advancing Fire to fire twice at unit X, with a –3 modifier to both fires. B. Unit X fires two times at unit A (Reaction Fire triggered by unit A entering its Reaction Zone.) C. Unit B fires once at unit Y. D. Unit B fires its second shot at unit Z. Note that this fire is considered frontal fire. E. Unit Y fires back (Reaction Fire triggered by step C). F. Unit Z fires back firing two times (Reaction Fire). G. Unit C fires at Z using Retreating Fire (–3) and then moves back one hex. H. Unit Z fires back (Reaction Fire) applying a –3 modifier (as this is part of the Retreating Fire action of unit C). Since only one hex of the 2-hex unit is adjacent, Z can fire only one time.
10.3 Normal Infantry Fire
10.3.1 Infantry may only fire as a separate Action. They may not fire after undertaking any other Action. Some fire options require the firing unit to move — this is an inherent part of the Fire Action, and does not require the use of Movement Points. Infantry have three normal fire options. All three are available to all types of Infantry:
10.3.2 ADVANCING FIRE: The activated unit moves 1 hex directly forward (incurring any Formation Hits due to terrain), and then fires with a –3 Advancing Fire modifier at an enemy unit in one of its front hexes. Apply all hits and make any necessary MCs on the target unit. Eligible enemy units may then React, though if they Reaction Fire there is no modifier.
- To use Advancing Fire, a unit must be under Charge Orders and not Formation Broken.
- A unit cannot wheel or change facing as part of Advancing Fire.
- A unit cannot perform Advancing Fire into a hex it is prohibited from entering.
- Because the movement and fire are considered one action, a Cavalry unit may not React until after the fire has been resolved.
COMMENTARY: Also called Firing by Introduction. This fire was achieved by the front rank advancing to its officer or Sergeant and firing, then standing fast to reload, while the next rank advances beyond it. This was also known as a Caracole. It was desirable to fire the last volley as the advancing volleys tended to be less effective, so the tactics called for the defender to hold their fire until the enemy had completed their advance. He who fires last, fires best, as it were.
10.3.3 SKIRMISHING: The activated unit fires and then the target unit (if it survives) may Reaction fire. No movement is involved. Apply all hits and make any necessary MCs on the target unit before it fires back.
COMMENTARY: Also called Firing at the Steadfast. The musketeer would fire and then move to the rear by the right hand through the ranks.
10.3.4 RETREATING FIRE: The activated unit fires with a –3 Retreat Fire modifier at an enemy unit in one of its front hexes. Apply all hits and make any necessary MCs on the target unit. Eligible enemy units may then React, though if they Reaction Fire they also use the –3 Retreating Fire modifier. The activated unit then moves 1 hex backwards into any of its rear hexes (incurring any Formation Hits due to terrain).
- To use Retreating Fire, a unit may not be under Charge Orders or be Formation Broken.
- A unit must retain its current facing when it moves backwards.
- A unit cannot perform Retreating Fire into a hex it is prohibited from entering.
COMMENTARY: Also called Fire by Extroduction. This was a means by which a block of musketeers could retire but still give fire unto the enemy. The opposite of Introduction, Extroduction was firing by rank and retiring to the rear.
10.3.5 INFANTRY STACKED WITH ARTILLERY: An infantry unit stacked with an artillery unit may perform Advancing Fire or Retreating Fire without leaving the hex.
A. Prerequisites to Both:
- The artillery unit cannot have a Disabled or Captured marker, but can be on its Fired side.
- The hex in question is adjacent to an enemy unit.
B. Advancing Fire. If the infantry unit starts under the artillery unit, place the infantry on the top of the stack. Fire the infantry unit as with Advancing Fire, above. (The infantry unit can be under any Orders to do this.) Eligible enemy units may then React as with Advancing Fire.
C. Retreating Fire. If the infantry unit starts on top of the artillery unit, fire the infantry unit and perform Reaction with eligible enemy units as with Retreating Fire, above. Then place the infantry on the bottom of the stack. The infantry unit cannot do this if under Charge Orders.
10.4 Salvo Fire (Heavy Infantry Only)
A unit may use Salvo Fire only once per turn and only into frontal hexes. The unit is marked with a Salvo Marker as a reminder. If the unit fires again in the same turn (using Normal Infantry fire) its Fire die roll is modified by –1. Salvo Fire by an Active unit triggers Reaction Fire. Salvo Fire may also be used when a unit Reaction Fires. Targets of Salvo Fire must make a Morale Check (see 10.6.3). Salvo Fire is a separate and distinct action from Normal Fire (10.3) and has no movement component, and thus cannot be used in conjunction with Advancing or Retreating Fire. If only half of a two-hex unit Salvo fires in any one fire opportunity, mark the whole unit as having Salvo fired. However, both sides may Salvo Fire during the same fire opportunity, and in this case neither fire suffers the –1 modifier.
NOTE: Scenario instructions may limit which units have Salvo capability. This tactic was also known as volley or salvee.
10.5 Fire Combat Procedure
10.5.1 Heavy Infantry
- A) Designate the target unit
- B) Determine if the fire is from the firing unit's front or flank hexes
- C) Determine which Musketry table to use
- D) Determine whether to use the front, flank or salvo column on the Musketry table
- E) Roll the die and apply any applicable modifiers
- F) Cross-reference the die roll under the appropriate column to find the results
- G) If both halves of a two-hex HI unit are firing at the same target, find the result for the second half's fire before applying both results
- H) Apply the results
10.5.2 Light Infantry
- A) Designate the target unit
- B) Find the Commanded Muskets and Dragoons column on the Light Infantry and Cavalry Fire Table
- C) Roll the die and apply any applicable modifiers
- D) Find and apply the results
10.5.3 Cavalry Fire
- A) Designate the target
- B) Find the Cavalry Pistol Fire column on the Light Infantry and Cavalry Fire Table
- C) Roll the die and apply any applicable modifiers
- D) Find and apply the results
- E) Mark the Cavalry unit with the appropriate Pistol marker
10.6 Fire Combat Results
NOTE: Fire combat is asynchronous and results are applied immediately.
10.6.1 CASUALTIES: Fire combat results include casualties (or hits) to the target unit. Place a Casualty Point marker under the unit counter to indicate the total number of hits the unit has taken. Artillery is eliminated if it takes a hit, and is immediately replaced with a 'Disabled Guns' marker (10.8.9). Any other unit is eliminated when it has taken hits equal to or greater than the printed strength. A unit's current strength is its printed strength less any casualties it has incurred.
10.6.2 MORALE CHECKS: Casualties may also require a unit to check morale. When a unit suffers casualty hits from Fire Combat, compare the unit's current morale to the number of casualty hits it incurred in the Fire Combat (see below). Note that fire combat from a single unit can never cause more than one Morale Check to a target no matter how many hits it achieves.
- Current unit morale of 6 or less — One Morale Check on any casualty hit result during fire combat.
- Current unit morale of 7 — One Morale Check on two or more casualty hits during one fire combat.*
- Current unit morale of 8 — One Morale Check on 3 or more casualty hits during one fire combat.*
*The hits must occur during one Fire Combat from one unit. A two-hex Heavy Infantry unit is considered one unit even if it rolls twice on the fire table against the same target.
10.6.3 SALVO FIRE AND MORALE: All units must check morale if they are the target of Salvo Fire, whether they suffer a hit from that fire or not. If a unit is the target of Salvo Fire by both sides of a two-hex unit at the same time, the unit incurs only one Morale Check due to Salvo Fire.
NOTE: A unit Salvo Fired at by both sides of a two-hex unit suffers only one Morale Check for the Salvo, but could accumulate two more Morale Checks under 10.6.3 if the results of both fires included MC results.
10.6.4 CASUALTY THRESHOLD: A target unit that is at or above its Casualty Threshold (12.5) at the moment it is fired on must make a Morale Check on any hit resulting from that fire combat in addition to any Morale Check required by 10.6.2.
10.6.5 MULTIPLE MORALE CHECKS: A unit that must make multiple Morale Checks due to a combination of casualty hits, Salvo Fire and Casualty Threshold rolls the die only once and adds +1 for each Morale Check required beyond the first. (The maximum would be a MC +3, for Casualties from fire combat MC (10.6.2), a Salvo Fire MC (10.6.3), a Casualty Threshold hit MC (10.6.4), and finally for a Musketry Table result calling for a MC if the firing unit has organic Regimental Artillery.)
EXAMPLE: A unit with an original morale of seven takes two hits from Salvo Fire. Instead of rolling two times, the owning player rolls once and adds +1 to the result.
10.6.6 FORMATION HITS: If a target unit is already Formation Broken, Morale Broken (no formation), or in Hedgehog, then any Formation Hit on that unit caused by Artillery, Heavy Infantry, or Light Infantry fire becomes a Casualty hit instead. If a unit is the target of fire by both sides of a two-hex unit at the same time, and both fires result in a Formation Hit, the unit incurs both hits.
10.7 Cavalry Ammunition Supply
10.7.1 Cavalry went into battle with their pistols (and sometimes carbines) already loaded. Cavalry units have two "shots" before their pre-loaded weapons are expended.
10.7.2 When a Cavalry unit fires, mark it with a "1st Pistol Used" marker. If it is already marked with a "1st Pistol Used" marker, then mark it with a "No Pistols" marker.
10.7.3 NO PISTOLS: Cavalry marked "No Pistols" may not perform a Fire Action or Reaction Fire.
10.7.4 RELOAD: Cavalry may reload by performing a Reform Action in lieu of changing its Formation State. For each such Reform Action, reduce a unit's Pistols marker one level, from "No Pistols" to "1st Pistol Used," or remove the "1st Pistol Used" marker. Thus, it takes two Reform Actions to fully reload if both pistols have been used.
10.8 Artillery Fire
Artillery is divided into three classes, 12-24lb, 4-8lb, and 3lb. The English referred to these classes as Culverins, Sakers and Falcons respectively. Individual games may include other types.
10.8.1 Artillery may only fire ONCE per game turn through the frontal hexes, either when their Wing is activated or as Reaction Fire. Artillery may fire even if out of command (in which case they fire during the activation of the Wing they were last in command with).
10.8.2 PROCEDURE:
- A. Find the range from the Artillery unit to the target unit. Make sure the Artillery unit has a clear Line of Sight (see 10.9).
- B. Cross-index the Artillery class and the range on the Artillery Range Table. The result will be the range modifier.
- C. Roll the die and apply the modifiers on the Artillery Fire Table. Find the result on that table. Apply the result to the target unit. Flip the Artillery unit to its Fired side.
10.8.3 GRAZING FIRE: If the target of Artillery Fire is within the Grazing Fire Range printed on the Artillery counter, then each unit along the Line of Fire (LOF) to, in, and/or beyond the Target's hex to the extent of Grazing Fire Range is attacked with a separate die roll. Trace the LOF from the center of the Artillery unit's hex through the center of the intended target unit's hex along a straight line within the artillery unit's frontal arc to the end of the Grazing Fire Range. A Line of Fire is similar to but different than a Line of Sight (10.9.5):
- While the LOF must go through the center of the intended target unit's hex, it need only enter the hex of other units within Grazing Fire Range.
- A LOF goes through both enemy and friendly units.
- A LOF does not extend across slope hexsides, either up or down, gentle or steep.
- A LOF extends one hex beyond any non-slope hexside feature that is not immediately adjacent to the firing unit. Ignore such features that are immediately adjacent to the firing unit.
10.8.4 GRAZING FIRE AGAINST TWO HEX UNITS: If the line of fire traces through both hexes of a two-hex unit, then the unit is attacked twice (once for each hex).
10.8.5 GRAZING FIRE ALONG A HEX-SPINE: Grazing fire does not affect both the left and right hex if the fire is traced along a hex spine. The firing player must decide which side the grazing fire will affect and this will hold true for the length of the grazing fire.
EXAMPLE OF GRAZING FIRE: Unit A fires at unit X. Friendly unit B is not in the grazing fire path. Unit C fires on unit Z. Unit Y is in the Grazing Fire path and suffers artillery fire also.
10.8.6 CAVALRY ARTILLERY DISPLACEMENT: A Cavalry unit that…
- …is Formation Normal or Formation Shaken and
- is not stacked with an LI unit and
- is fired on by artillery and
- suffers a Formation Hit…
…may avoid the formation hit by displacing to a flank hex while retaining the same facing. If the result includes other effects in addition to the Formation Hit, the Cavalry unit may avoid the Formation Hit but not the other results. Stacking rules may not be violated, and the hex the unit enters cannot be in the grazing fire path of the artillery unit it's trying to avoid. A unit may not move into a hex that would cause it to take a Formation Hit. Orders restrictions on moving in relation to enemy units still apply (5.6). This displacement is in lieu of any Reaction (9.0) that the Cavalry unit might be eligible for (such as Reaction Fire), and does trigger Reaction if performed by an Active unit.
10.8.7 FORMATION HITS: Artillery that takes a formation hit checks morale instead. Thus, if it gets a "FH + MC," make a Morale Check with a +1 modifier.
10.8.8 MORALE BROKEN: Artillery that becomes Morale Broken does not retreat. It is unable to fire or change facing until rallied.
10.8.9 ELIMINATION: Artillery units that are eliminated by any means (Fire, Close Combat, being retreated through) are marked with a Disabled Guns marker. The Artillery unit counter is never removed from play. If an enemy unit enters an Artillery unit's hex during movement or advance after Close Combat, the Artillery unit is captured; flip the Disabled Guns marker over to its captured side. If a friendly unit reenters the hex, flip the marker back to its Disabled side. This way ownership of the guns (for determining victory) may change hands several times before a battle is over. Disabled, captured or recaptured guns may never be re-crewed by either side.
Disabled and captured artillery units are no longer considered to be units for purposes of tracing command ranges, being combat targets, blocking LOS, or affecting movement orders, and are always placed at the bottom of a stack.
10.9 Line of Sight (LOS)
10.9.1 LOS may not be traced through hexes containing Wagons, Heavy Infantry, or Cavalry units, but these hexes do not block Grazing Fire (10.8.3). An LOS may be traced through other units and leaders. Exception: An enemy artillery unit blocks LOS for determining whether Interception is possible (9.3.1d).
10.9.2 IN HEX FEATURES: Line of sight may be traced into, but not through blocking terrain. Terrain will be designated as blocking line of sight by the battle-specific rules or the TEC. A hex of a higher elevation than both the firing unit's hex and the target unit's hex is always blocking terrain, if that higher elevation is defined by Steep slopes. Elevations defined by Gentle slopes never block LOS. An artillery unit may not fire over or through a friendly or enemy unit, even if that unit does not otherwise block LOS, unless it's in a dead zone.
10.9.3 HEXSIDE FEATURES: Certain hexside features will block LOS as listed on the TEC.
A. Reciprocal Hexside Features: As an exception to the general rule, a unit firing through an adjacent reciprocal hexside feature (14.4) may fire into the adjacent hex even if the intervening hexside normally blocks LOS.
B. Slopes. Slopes are defined in the battle specific rules as steep or gentle. Both stop Grazing Fire (10.8.3). Gentle slopes have no other effect on fire or movement (except: see 7.3.1). A Steep slope represents the military crest of a convex slope. It produces a "dead zone" where LOS is blocked. This "dead zone" extends 1 hex from the slope between the higher unit and the nearest hex that contains a steep slope hexside. This same amount of dead zone applies to any further steep slope hexsides at lower elevations. Thus, if an Artillery unit is 1 hex away from a hex that contains a steep slope hexside, a 1-hex "dead zone" extends on the other side of the slope that the spotting unit cannot trace an LOS into. Blocking terrain and units in the dead zone are ignored when tracing an LOS. Cavalry cannot Intercept through a "dead zone."
10.9.4 HEX FEATURES: Certain terrain types that take up a whole hex are marked on the TEC as blocking LOS. An LOS can be traced into such a hex, but not through it. Exception: If the unit tracing the LOS is on the uphill side of a steep slope, then the terrain blocks LOS only in the hex immediately "behind" the terrain feature (as you trace the LOS). Ignore any blocking terrain that's at a lower elevation than both the firing and target units.
10.9.5 PROCEDURE: Units trace a Line of Sight by tracing a line from the center of the firing unit's hex to the center of the target unit's hex. If the line is traced through any portion of a hex with terrain listed on the TEC as blocking, then the LOS is blocked and Fire Combat may not be performed. An LOS that passes along a hex spine is blocked only if both hexes sharing that spine contain blocking terrain or units. An LOS to a two-hex unit is traced to either hex the unit occupies (firer's choice).
LOS is Reciprocal: If unit A can see unit B, then unit B can see unit A. Trace from the higher unit to the lower unit in cases where the LOS rules result in different answers depending on which unit you start with.
10.10 Leader Casualties
Leaders may be killed or wounded by fire combat. If a leader is in a hex that is fired on with any result other than Miss, roll one die on the Leader Casualty Table before making any Morale Check. On a "9" the leader is removed from play. See 5.3.3 for replacing a leader.
11.0 Close Combat
11.1 Close Combat in General
11.1.1 WHEN: Close Combat takes place at the end of each Wing Activation, after the Active player has finished all other Actions with that Wing's units, including Fire Combat, Movement, Rally and Reform Actions. It can also take place as part of a successful Interception.
11.1.2 WHO: Both the Active and Inactive player may conduct Close Combat during the Close Combat phase by designating which attacking units are attacking which specific hexes containing enemy units and leaders. The Active player may attack in Close Combat only with those units that are part of his Active Wing, though Orders are irrelevant when determining who can perform Close Combat. The Inactive player may attack any adjacent hex containing an enemy unit from the Active Wing if the Inactive Player's unit has not been designated as a target. The attacking unit must be adjacent to the defending unit (Exception: Cross-bridge attacks, 7.3.5) and the defender must be in one of the attacker's frontal hexes. A unit cannot perform Close Combat against a hex it is prohibited from entering. Close Combat is always voluntary, and not all enemy units adjacent to the attacker's frontal hexes must be attacked. However, if an Active unit designated to Close Combat is the target of an Inactive Close Combat, or the situation changes due to Reaction Movement or Interceptions, the Active unit must continue its Close Combat if a) it remains in place after all reactions and enemy combats are resolved and b) there is still an enemy unit in the target hex.
11.1.3 TWO-HEX INFANTRY UNITS: These units may only attack a single hex. The defending unit must occupy, or have at least one hex (for two-hex units) in the center front hex of the attacking unit. Exception: Swedish Style units (14.5). When attacked, a two-hex unit defends as a whole, even if the attacker is adjacent to just one of its hexes. The uninvolved side cannot perform Reaction Close Combat by itself.
NOTE: This represents the inherent inflexibility of the musket and pike formations. The pikes were in one large block in the center of the formation with the muskets divided evenly on either side. Thus, a two-hex unit may only Close Combat with units in its front center hex.
11.1.4 MULTI-HEX COMBAT: A unit may only attack one hex. However, more than one unit may attack the same hex. Combine the strengths of all units attacking the same hex. Similarly, if both hexes of a two-hex unit are being attacked, the strengths of all the attacking units are combined, and the attack is resolved as one Close Combat. If units of different types (Cavalry or Infantry) and/or different terrain attack a hex, the modifiers most advantageous to the defender are used.
EXAMPLE OF CLOSE COMBAT: The Royalist player (units A, B, and C) is the Active player and designates Close Combat first. Unit A will attack unit X, and unit B will attack unit Y. Note that B cannot Close Combat Z because it is not in the front center hex. The Inactive (Parliament) player may instigate Close Combat with Z because that unit is not a target of any Close Combat.
11.1.5 ORDERS AND ACTIONS NOT RELEVANT: Orders do not restrict eligibility for Close Combat and the Active player's units may conduct Close Combat even if they have just performed an Action in the current Activation.
11.2 Close Combat Procedure
- A. The Active player designates all hexes that will be attacked in Close Combat.
- B. The Inactive player may designate any Inactive unit not already designated as a defender to attack in Reaction Close Combat.
- C. The Inactive player resolves all Reaction Close Combat first, starting at either the left or right side of the line and proceeding down the line. Once all Close Combats by the Inactive player have been resolved, follow the same procedure for the Active player's units. Complete the following steps for each Close Combat before starting the next one.
- D. For each Close Combat, players calculate modifiers, then the Attacker rolls on the Close Combat Table and finds the results.
- E. Apply the results of the close combat, including any routs, retreats, advances after Close Combat, and Cavalry pursuits.
- F. Both attacker and defender in each Close Combat suffer a formation hit. Exception: If a unit is already marked Formation Broken or in Hedgehog there is no further effect.
- G. The losing side may perform Reaction Fire, Reaction Movement or (for the Inactive Player only) Interception with eligible units in response to an enemy advance after combat. The winning side may not react in response to a retreat or rout.
NOTE: The Inactive player may attack a unit that has been designated, by the Active player, to attack a different unit. Since the Inactive player's units resolve Close Combat first, you may use this method to help out a less able unit by attacking his attacker.
11.3 Close Combat Modifiers
11.3.1 Players should refer to the Close Combat Table and to the Terrain Effects Chart (TEC) for applicable modifiers. If there is a question as to which modifier to apply, always use the one most advantageous to the defender. Note that the modifiers for Formation state, Salvo, and Momentum can only be applied once per combat, no matter how many units of a side those modifiers apply to. Within this restriction, all modifiers are cumulative. However, if the final total of all modifiers exceeds +4, reduce the total to +4. Similarly, if the final total is less than –4, increase the total to –4.
11.3.1a SPECIAL TERRAIN CASES:
- See 14.4 for effects of reciprocal hexside features.
- Do not apply any Formation Hits for crossing a hexside feature unless and until the unit advances across it as a result of the Close Combat.
- A two-hex HI unit may initiate Close Combat across a bridge or through a bridge hex as set forth in 7.3.5.
11.3.2 LEADERSHIP EFFECTS: If a leader is stacked with a participating attacking or defending unit, the owning player(s) must modify the die roll by 1 in his favor. Only one leader on each side can influence each Close Combat die roll.
11.3.3 MORALE DIFFERENTIAL: Take the highest morale rating from the attacking units and subtract from this number the morale rating of the defender. The result (+/-) is the die roll modifier for morale.
11.3.4 STRENGTH RATIO: Compare the total current strength points of all attacking units to the current strength points of the defender and express the comparison as a simple ratio (casualties are deducted from a unit's strength when calculating strength ratio). Fractions are rounded down in favor of the defender. The die roll is modified for the following ratios:
| Ratio | Modifier |
|---|---|
| 4:1 or greater | +2 |
| 2:1 or greater | +1 |
| 1:2 or less | –1 |
| 1:4 or less | –2 |
Use the highest number that applies (that is, these are not cumulative).
11.3.5 CAVALRY vs. HEAVY INFANTRY: If Cavalry is attacking Heavy Infantry use only half the Infantry strength (dropping fractions) for the strength ratio calculation.
EXAMPLE: If 3 Cavalry points attack 18 Heavy Infantry points, the strength ratio would be 3 to 9 (1:3 strength ratio).
11.3.6 ATTACKER MOMENTUM: If any attacking Heavy Infantry or Cavalry unit: (a) Moves two hexes — through or across clear terrain or slope hexsides only — into combat; and (b) Does not change facing, fire, displace, or lose an Interception in those two hexes; then the attacker may add one of the following die roll modifiers to his Close Combat roll:
- +2 if the moving unit is Cavalry
- +1 if the moving unit is Heavy Infantry
Mark any unit eligible for this bonus with a Momentum marker at the completion of its movement, and remove the marker at the completion of Close Combat.
No matter how many units may be eligible for a Momentum modifier, this modifier may only be used once in any Close Combat. Thus, if two Cavalry units are attacking together and each meets the Momentum requirements, the Momentum modifier is +2, not +4. If only one of them met the Momentum requirements, the modifier would still be +2.
11.3.6a SPECIAL MOMENTUM CASES:
- Crossing a slope or performing Close Combat across a reciprocal hexside feature (14.4) does not prevent Attacker Momentum.
- Any hex entered during an advance after an Interception Close Combat does not count for Momentum.
- In the case of a successful Interception (9.3), the intercepting unit is eligible for the Momentum modifier, but the intercepted unit is not.
- A unit that is successfully Intercepted (9.3.3) loses any Momentum it may have acquired up to the point of Interception, but this does not stop it from reacquiring Momentum if it continues its Activation after the Interception is resolved.
- Any unit attacked in Reaction Close Combat may still use Momentum if it remains eligible to make the original attack after the combat is resolved.
- A cavalry unit stacked with light infantry can acquire Momentum.
- A unit in Open Order can acquire Momentum.
- A cavalry unit loses Momentum if it moves or Intercepts through or into an artillery unit that is not Disabled or Captured (9.3.7 and 11.5.1).
- An active unit that Reacts in the Close Combat Segment against an inactive unit that advances loses any Momentum it may have acquired.
11.3.7 FLANK AND REAR ATTACKS: Modify the die roll by +1 for each flank or rear hex the defender is attacked from. Thus, a two-hex unit attacking a unit from both a flank and a rear hex would get a +2 modifier. Note that defenders in Hedgehog or units that are Morale Broken have no flank or rear hexes.
11.3.8 CLOSE COMBAT MATRIX: Some unit types are more effective against certain types of targets. Consult the Close Combat Matrix to determine if any modifiers apply. Note that Artillery is ignored in Close Combat (11.5). Use the modifier that helps the defender the most. (For example, a heavy infantry unit defending in Hedgehog uses the Hedgehog column, not the Hv Inf column.)
11.3.9 CAVALRY PISTOL FIRE: Cavalry units involved in Close Combat have the option to expend a pistol shot in Close Combat, regardless of their facing in relation to the enemy unit. The attacker announces his intention to do so first, followed by the defender. For each attacking unit that expends a pistol shot, apply a +1 modifier to the Close Combat roll. If the defender expends a pistol shot, apply a –1 modifier. Do not resolve Pistol Fire; simply mark the Cavalry units as having expended a pistol shot and then apply the modifier. Using the Pistol Fire modifier during Close Combat does not affect Momentum.
11.4 Close Combat Results
11.4.1 Results from the Close Combat table are applied immediately and affect all units indicated. Note that a unit does not spend Movement Points when it retreats, and retreat Movement is not a Reaction trigger.
Attacker/Defender Morale Broken: No matter what the unit's current Morale state is, mark the unit with a "Morale Broken" marker and retreat the unit two hexes according to 11.4.2. Retreat in this case means the unit runs away towards the nearest friendly map edge.
Attacker/Defender Morale Shaken: The unit(s) becomes Shaken and is retreated one or two hexes as appropriate. The one or two hex retreat is an orderly withdrawal — the unit simply "backs up" the required number of hexes away from the enemy unit, while still retaining its formation and facing.
Eliminated: The unit is removed from the map. Cavalry may pursue eliminated units (see 11.7).
NOTE: In pursuit of eliminated units, the Cavalry unit is chasing the fugitives from the field.
11.4.2 RETREAT PRIORITIES: When you retreat a unit, you must follow these priorities, in order starting with the first:
- You must move it away from the enemy unit it was involved in the Close Combat with. This is the most rigid requirement, and means that you may not move the retreating unit into a hex adjacent to that involved enemy unit.
- You must then move it towards the friendly map edge for that battle. As long as you do not move the unit adjacent to the involved enemy unit, you may move it adjacent to other enemy units. If a unit reaches the last hex on a friendly map edge and must retreat further, it must retreat off map and is eliminated.
- You must then have it follow the path of least resistance, that is, the path that would cost the least number of movement points to reach the map edge.
11.4.3 STACKING AND RETREATS: Units may not retreat into or through friendly units during a retreat. Exception: A unit may retreat from, into, or through a hex with an Artillery unit, but the Artillery unit is immediately marked with a Disabled Gun marker. A Light Infantry/Cavalry stack will retreat together. A Light Infantry unit that retreats may end its retreat stacked with a Cavalry unit and vice-versa. In that case, however, if the unit doesn't retreat the required distance, apply 11.4.5. A unit may retreat through a Wagon unit without affecting either the retreating unit or the Wagon.
11.4.4 TWO-HEX UNITS IN RETREAT: Both halves of a two-hex unit must retreat, even if only one half was attacked. In other words, a two-hex unit cannot retreat by pivoting.
11.4.5 UNITS UNABLE TO RETREAT: If a unit is Morale Broken and cannot retreat its full required distance due to stacking restrictions or enemy units, it must use the Unable to Retreat Table. Roll the die, apply any applicable modifiers and find the result. A Stand Result returns the unit to Morale Shaken (and Formation Broken), in essence a "free" rally. If a Morale Broken unit is required to retreat two hexes but can only retreat one, retreat it one hex and then roll on the Unable to Retreat Table. If the unit is Morale Shaken at the start of the retreat (i.e., not from rolling on the Unable to Retreat Table) and cannot retreat it suffers a casualty point for each hex it was unable to retreat.
11.4.6 ADVANCE AFTER COMBAT: Results include attacker or defender advances after Close Combat. If the defender's hex is empty, the attacking unit must advance while the defending unit may advance or choose to remain in its original hex. If there are two or more attacking units, only one unit advances per defender hex; the attacker must select the highest morale unit to advance. If more than one qualifies, then the owning player may choose which to advance. If a two-hex unit retreats the victorious player may advance into either of the vacated hexes or both. An advancing unit does not expend movement points, so it can advance even if it has no current Movement Allowance.
11.4.7 ADVANCE AND FACING: A unit may advance or pursue in any direction, regardless of its current facing. A one-hex unit that advances or pursues may change facing, but only by one hexside. This occurs before any Reaction due to the Advance.
11.4.8 TWO-HEX UNITS IN ADVANCE: If a two-hex unit advances after combat, both halves of it must advance if possible. If attacking a one-hex unit and only a one-hex gap opens after the retreat, then the two-hex unit must wheel so that only one half enters the vacated hex. A two-hex unit cannot change facing after advancing.
11.4.9 REACTION: Advance and Pursuit after Close Combat triggers Reaction (9.0) except from units involved in the Close Combat causing the result.
11.4.10 FORMATION HITS: If moving into that hex would cause a formation hit, advancing, pursuing, or retreating into it causes one as well. This is in addition to the formation hit normally incurred by engaging in Close Combat (11.2.F).
11.5 Artillery in Close Combat
11.5.1 An enemy artillery unit alone in a hex is automatically captured when a friendly unit enters its hex during movement, performs a Close Combat against it, OR advances or pursues into the hex after Close Combat. The friendly unit automatically enters the hex and does not take a Formation Hit (unless called for by the terrain). A Cavalry unit that moves through an enemy artillery unit loses Momentum, but an infantry unit does not.
NOTE: This section also applies to lone Wagon units. See 14.1.
11.5.2 Artillery stacked with another unit in Close Combat is ignored. If the non-Artillery unit loses the Close Combat and an attacking unit enters the hex then the Artillery unit is captured and a Captured Guns marker is placed on it. If an Artillery unit is stacked with half of a two-hex Heavy Infantry unit, and the other half of the HI suffers an elimination or retreat result from Close Combat, leave the Artillery unit but place a Disabled marker on it (treat it as a retreat through the Artillery as per 11.4.3).
11.6 Light Infantry in Close Combat
Light Infantry may initiate and participate in Close Combat ONLY against other Light Infantry and lone artillery and wagon units. If a Light Infantry unit with a current strength of one alone in a hex is attacked in Close Combat by anything other than another one strength point Light Infantry unit, it is automatically eliminated. The attacker advances into the hex and does not take a Formation Hit (unless called for by the terrain). A Light Infantry unit stacked with an Artillery unit that is "ignored" per 11.5.2 is not considered to be alone in its hex.
11.7 Cavalry Pursuit
11.7.1 Some results on the Close Combat Table require victorious Cavalry units to check for pursuit. A unit is required to pursue even if its current movement allowance is 0. Exceptions:
- If the Broken unit or Eliminated unit is Light Infantry, do not check for pursuit; instead the Light Infantry either retreats away (if Morale Broken) or is eliminated, and the Cavalry advances after Close Combat normally.
- If any Morale Broken unit rallies due to the Unable to Retreat Table ignore the Pursuit requirement.
11.7.2 PROCEDURE: Before conducting advance after combat roll on the Cavalry Pursuit Table for each Cavalry unit that participated in the attack. There are three possible results:
A) Break Off: The Cavalry unit does not pursue. Instead, it performs a normal advance after combat (see 11.4.6).
B) Pursue and Eliminate: Advance the Cavalry unit along the retreat path into the hex occupied by the retreating unit and then eliminate the retreating unit and capture any artillery and wagons in hexes the Cavalry moves through or ends in. If the "retreating" unit was eliminated by the combat result, leave the pursuing Cavalry unit in the hex that it advanced into. Note that this pursuit movement can trigger a Reaction (but not from the retreating unit), but only at the completion of the pursuit. This includes forcing any Heavy Infantry unit that the pursuing unit is adjacent to at the end of a non-Interception pursuit to attempt to form Hedgehog (9.2.3). Eliminate the retreating unit even if it retreats off map, or the Cavalry unit is prevented from advancing the whole retreat path. No matter what its previous state, mark the Pursuing Cavalry unit as Formation Broken.
C) Pursue off Map: Remove the pursuing cavalry unit from the map and eliminate the retreating unit (if not already eliminated by the combat result). A Cavalry unit or leader that pursues off map is not eliminated (nor counted for VPs), but the unit may not return to the map during the game (however, a leader accompanying a pursuit may [see 5.3]). A pursuit off-map does not trigger Reaction Movement or Reaction Fire. Any artillery or wagon unit that was stacked with the retreating unit is captured.
NOTE: If Pursuit is called for by the Cavalry Pursuit Table, Cavalry must pursue, including any leaders stacked with Cavalry. Be careful that your Wing Commander does not leave the map at a bad time!
11.7.3 Cavalry stacked with Light Infantry will leave the Infantry behind, but leaders will pursue along with any Cavalry with which they are stacked.
11.7.4 If the Cavalry Pursuit die roll calls for the Cavalry unit to advance into the Broken unit's hex, but the unit was eliminated in the same Close Combat by a previous Cavalry Pursuit roll or the combat result, treat any Cavalry Pursue and Eliminate result (not a Pursue off map result) as a Break Off.
EXAMPLE: Three Cavalry units must check for Cavalry Pursuit in This Accursed Civil War. The first roll is a 3, which causes the elimination of the Broken unit. Mark the pursuing unit as Formation Broken. The second roll is another 3, but since the unit is already eliminated it is treated as a Break Off and the pursuing unit's Formation is not affected. The third roll is a 6, which causes the third Cavalry unit to be removed (it pursued the routed units off the map).
11.7.5 If a Cavalry unit must pursue, and there was more than one defeated unit, the Cavalry first pursues a unit that was in one of its front hexes; if there were none, then a unit in one of its flank hexes. (Pursuer's choice if all attacking units were in the same type of hexes.) The unit may pursue only one of the defeated units, and only that unit is affected by the pursuit.
11.8 Leader Casualties in Close Combat
Leaders stacked with a unit that participates in Close Combat may become a casualty. At the end of each Close Combat that involved a leader, roll on the Leader Casualty Table for each leader. On a "9", the leader becomes a casualty and is removed (5.3.1). If a leader is stacked with a unit which is eliminated the leader is automatically removed.
12.0 Morale
12.1 Morale in General
All units have a base morale between 4 (worst) and 8 (best) printed on the counter. In addition, units have four morale states: Normal, Shaken, Broken and eliminated.
12.2 Morale Check (MC)
To Check Morale roll the die and add the leadership rating of any one leader the unit is stacked with (you may not use both an AC and a WC if both are stacked in the hex). If the adjusted die roll is equal to or lower than the unit's current morale, it passes. If higher, lower the unit's morale status one level; i.e. Normal to Shaken, Shaken to Broken, Broken to eliminated.
EXAMPLE: A unit with a morale rating of 7 would pass its morale check on a die roll of 0–7. It would fail on an 8 or 9.
12.3 When to Check Morale
A unit must make a MC for:
- Casualty Hits and MC results from Fire Combat (10.6.2).
- Being fired upon by Salvo Fire (10.6.3).
- Any result that inflicts Casualty hits after its Casualty Threshold is reached (12.5).
- If an Artillery unit, receiving a formation hit result from fire (10.8.7).
- If a Heavy Infantry unit, attempting to form Hedgehog during Reaction Movement (9.2.3).
- Attempting to Rally unless being rallied by the AC or its WC in the same hex (13.2.5 and 13.3.3).
- Having a unit Rout move through it.
12.4 Morale Results
12.4.1 Units that fail a Morale Check lose one level of morale. A Normal unit becomes Shaken, a Shaken unit becomes Broken, and Broken units are eliminated. Markers are provided to indicate a unit's current morale state. A successful Rally Attempt raises the unit's morale by one level.
12.4.2 MORALE SHAKEN: A unit that becomes Morale Shaken has its morale rating reduced by one.
EXAMPLE: A unit with a printed morale of 7 would have a current morale of 6 if shaken.
12.4.3 MORALE BROKEN: Morale Broken units have no formation, and have a morale of 1. Since Morale Broken units have no formation, they have no facing and enemy units cannot get flank or rear shifts when attacking them. Whenever a unit becomes Morale Broken, it must immediately retreat two hexes away from the enemy unit that caused it to become Morale Broken (or towards its friendly map edge if due to a failed Rally roll) using the 11.4.2 priorities. If it can't retreat due to stacking or terrain, then it uses the Unable to Retreat Table (see 11.4.5). Morale Broken units must move in the Rout Movement Phase (see 13.4) except Morale Broken Artillery. Morale Broken units may not perform any action except Rally and may not React or initiate Close Combat (if attacked in Close Combat, they defend normally, which means they can advance and cavalry can use pistols and pursue). When Rallied, the unit is Morale Shaken and Formation Broken, and the player may choose the unit's facing. Apply Formation hits as per 10.6.6.
12.4.4 MORALE BROKEN ARTILLERY: An Artillery unit that is Morale Broken may not perform any type of fire, normal or reaction. Artillery never retreats or uses rout movement; if Morale Broken, it stays in place until rallied or eliminated.
12.4.5 STACKING EFFECTS ON MORALE CHECKS: If a stack contains both Light Infantry and Cavalry, use the Cavalry's Morale rating for all Morale Checks (see 8.2.1). If a stack contains Artillery and another unit and one of them fails a Morale Check, the other unit is not affected.
12.4.6 COMPOUNDED MORALE RESULTS: If a Morale Shaken unit suffers a Morale Shaken or Morale Broken result, it becomes Morale Broken. If a unit is Morale Broken and receives any adverse Morale result, treat it as an Eliminated result.
12.5 Casualty Threshold
12.5.1 Check the Threshold Table whenever a unit takes a casualty. Find the unit's printed morale and read across to find out how many hits it can take for the unit to reach its Casualty Threshold.
12.5.2 EFFECTS: A unit that reaches its Casualty Threshold:
- a) Immediately lose one morale level (12.4.1).
- b) May never be rallied past Morale Shaken.
- c) Must make a MC when they suffer any Casualty hits in a subsequent Fire Combat (10.6.4), in addition to any other MCs called for.
EXAMPLE OF CASUALTY THRESHOLD: All the units above have just reached their Casualty Threshold. Each unit must now reduce their morale one level becoming Morale Shaken. Note that units which start with 4 or less Strength Points and have an Original Morale of 8 have no Casualty Threshold.
If a unit reaches its Casualty Threshold in the same fire combat that calls for a MC, make the MC against the lower Morale.
13.0 Rally and Reform
13.1 Basic Concept
As a battle progresses, the formation and morale of a unit begins to suffer. Rally and Reform Actions can remove formation hits and return units to normal morale.
13.2 Procedure
13.2.1 WHEN: Rally and Reform are Actions and can only be conducted:
- a) When the unit's Wing is active and the Wing's Orders allow it (5.6), or
- b) By the Army Commander (13.3), regardless of what Orders the unit is under, and
- c) The Army Commander or Wing Leader has not performed any other action this Activation (5.1.2 and 5.2.2).
13.2.2 ENEMY UNITS: A unit that Reforms or successfully Rallies when adjacent to an enemy unit triggers Reaction Fire.
13.2.3 THE REFORM ACTION: Any unit in an Activated Wing under Rally or Receive Charge Orders may Reform. Any unit in an Activated Wing under Make Ready Orders that is stacked with or adjacent to its Wing Commander may Reform. No units may Reform while under Charge Orders (Exception: 13.3). When a unit Reforms, it may do one of the following:
- It may remove one formation hit.
- If a Cavalry unit, it may reload one level of pistols (10.7.4).
- If in Hedgehog formation, it may return to Formation Broken (6.3.2c).
- It may go from Formation Normal to Open Order or vice versa (6.3.3).
- If in Column formation, an Infantry unit may go to Formation Broken or a Cavalry unit may go to Formation Shaken (6.3.4). (A unit may not enter Column formation using a Reform Action.)
13.2.4 THE RALLY ACTION: A successful Rally Action restores a Morale Shaken unit to Morale Normal, or converts a Morale Broken unit to Morale Shaken (and Formation Broken). Any unit in an Activated Wing under Rally Orders may attempt to Rally. Any unit in an Activated Wing under Receive Charge Orders that is stacked with or adjacent to its Wing Commander may undertake a Rally Action (see also 13.3). Note that units that have reached their Casualty Threshold cannot be rallied to better than Morale Shaken (12.5.2).
13.2.5 RALLY ACTION PROCEDURE: Rally is automatic (gain one Morale level) if the unit is stacked with its WC. If not, the unit must make a Morale Check. Modify the Morale Check die roll by the WC's Leadership Rating if the WC is adjacent to the unit. If the modified roll is less than or equal to its current morale, the unit passes, and it gains one Morale level. If it fails, it loses another Morale level. Thus, a Morale Broken unit that fails a Rally Action Morale Check is eliminated. A Morale Broken unit that Rallies can be faced in any direction the owner player desires. A rallied Cavalry unit maintains the same Pistol level it had before the Rally Action.
13.3 Army Commanders (ACs) Influence on Reform and Rally
13.3.1 The AC can Rally or Reform any unit, regardless of that unit's Orders. He may also do so to a unit that is not in the Activated Wing, even from a Wing that is Finished.
13.3.2 REFORM: An AC may automatically Reform one unit it is stacked with or adjacent to each time the AC is activated.
13.3.3 RALLY: An AC may automatically Rally one unit it is stacked with (gain one Morale level) or attempt to Rally one unit it is adjacent to. Use the same procedure described in 13.2.5, using the Army Commander's Leadership Rating as a die roll modifier.
13.4 Rout Movement
13.4.1 Units that are Morale Broken must move in the Rout Movement Phase. All routed units must move towards a friendly map edge (as designated for each scenario) by attempting to use their full non-routed movement allowance. Only one hex of a two-hex unit (owner's choice as to which one) needs to use its full MA. They do not have a formation state and do not take formation hits for movement. Routing units follow the line of least resistance, so they may move around other units even if that means they temporarily move in a direction other than towards a friendly map edge. A unit may rout through a friendly unit as long as stacking restrictions are met. The stationary unit must make a Morale Check.
NOTE: Rout Movement is less restrictive than retreating from combat (11.4.2 to 11.4.5). For instance, two-hex units may pivot (for instance, to "squeeze" through a one-hex gap) when performing Rout Movement.
13.4.2 Units that cannot rout move their full movement allowance (see 13.4.1) must stop and lose one strength point for each movement point they cannot move, whether due to the presence of other units or lack of sufficient MPs to enter a hex. If this causes them to reach their Casualty Threshold, immediately implement the effects of 12.5.2 (thus eliminating any Morale Broken units).
13.4.3 Units that rout fully or partially off the map are eliminated.
14.0 Special Units and Terrain
14.1 Wagons
Wagons are treated like limbered artillery units. See section 8.5 for restrictions for stacking with a Wagon. Besides providing a modifier, a Wagon is ignored in any Close Combat against a stack containing a Wagon. For Close Combat against a lone Wagon unit, apply 11.5.1 by substituting "Wagon" for "artillery" in that section. A Wagon unit cannot retreat. If an enemy unit enters a Wagon unit's hex during movement or advance after Close Combat, the Wagon unit is captured; flip the counter over to its other side. This way ownership of the Wagons (for determining victory) may change hands several times before a battle is over. Units stacked with Wagons receive modifiers for Fire and Close Combat (see the TEC). A Wagon unit cannot be the target of Fire Combat. Unless otherwise indicated for a scenario, Wagon units may not move. A Wagon that is allowed to move does so as if it were a limbered artillery unit (7.3.3).
14.2 Heavy Infantry Units with No Pikes
Scenario setups may indicate certain Heavy Infantry units do not have pikes. A Heavy Infantry unit with no pikes is treated the same as any other Heavy Infantry unit with the following exceptions:
- a) It may not form Hedgehog.
- b) It has different modifiers on the Close Combat Matrix.
14.3 Dismounted Cavalry
Scenario setups may indicate certain Cavalry units are dismounted. A dismounted Cavalry unit is treated as any other Cavalry unit for Fire combat and Victory Points and as a Heavy Infantry unit with no pikes for other purposes. That means, among other things:
As Cavalry:
- It uses the Cavalry Fire tables, and so can't perform Advancing, Skirmishing, Retreating, or Salvo Fire.
- It can Move and Fire in the same activation.
- It can use Pistols in Close Combat and must track Pistol ammunition.
- It is worth the same number of Victory Points as any other Cavalry unit.
As HI:
- It has a Movement Allowance of 4 and uses the HI column on the TEC.
- It is treated as a Heavy Infantry unit with no pikes for Close Combat.
- It cannot form Hedgehog.
- It is not considered Cavalry for Interception, Reaction, and Pursuit purposes.
14.4 Reciprocal Hexside Features
Certain hexsides provide terrain benefits to units on both sides of the terrain feature.
- If two enemy units are on either side of a reciprocal hexside, the first unit to move adjacent to the hexside receives any Defensive Fire benefit as between those two units only. Both units can see (and React) through the hexside normally.
- Where the TEC indicates that a reciprocal hexside blocks LOS, the hexside does not block the LOS (or the Line of Fire) for any unit that has the benefit of the hexside. Conversely, a unit firing from a hex not adjacent to the hexside may trace an LOS (and a Line of Fire) into any hex directly behind the reciprocal hexside, but not beyond. Exception: If the unit tracing LOS is on the uphill side of a steep slope, a hedge or berm hexside does not block LOS in any way.
- Unless mentioned otherwise in the scenario rules, performing Close Combat directly across a reciprocal hexside does not prevent attacker Momentum, but crossing one during any type of movement robs a unit of any Momentum acquired up to that point.
- Any Close Combat modifier applies to any unit attacking across the hexside, regardless of who was there first.
This rule applies to any hexside terrain feature identified as reciprocal in a battle's special rules, as well as to:
- Any hedge hexside
- Any stream hexside
- Any bridge hexside
- Any berm or elevated road hexside
- Any abatis hexside
- Any entrenchment, fortified line, or redoubt hexside
14.5 Swedish Style Heavy Infantry Brigades
Some two-hex Heavy Infantry units have icons that indicate they are Swedish Style units. These units have a special Close Combat capability. As an exception to 11.1.3, such an HI unit may Close Combat an enemy unit in any of its (the HI unit's) three frontal hexes.
14.6 Croat Cavalry Units
Apply a mixture of cavalry and light infantry rules to units of this type.
As Cavalry:
- Croat Cavalry units have a Movement Allowance of 8 and use the Cavalry column on the TEC (but do not take Formation Hits).
- They may use their pistols in Close Combat (11.3.9) or Fire Combat (10.2), where they get a +1 DRM (as they carried carbines like Arquebusiers). They are subject to Cavalry Ammunition Supply (10.7).
- They can use Cavalry Artillery Displacement (10.8.6), Interception (9.3), and Cavalry Reaction Movement (9.2.4), and can force HI units into Hedgehog (9.2.3).
As LI:
- They do not take Formation Hits from terrain.
- They may use the "Anti-Suicide Clause" (5.6.1) when under Charge Orders, so they are not required to move adjacent to the front of an HI unit.
These units are also handled as their own types on the Close Combat Matrix and for Victory Points.
Optional Rule: Players desiring a simpler game can choose to disregard all the Croat Cavalry special rules and just treat such units as Arquebusiers instead. If this option is used, we recommend that the units in question start in Open Order formation.
DESIGN NOTE: This is in fact what was done for the earliest games in the series, and is certainly a valid design choice as players might feel that these rules might be too much hassle for too little effort.
15.0 Determining Victory
Players earn Victory Points (VPs) for eliminating enemy units and leaders, inflicting enemy losses, and disabling and capturing enemy Artillery and Wagons. At the end of the game, determine victory as follows:
- TACW: Subtract the Royalist VP total from the Parliament VP total.
- SFO, GAG, and NGBG: Subtract the non-Swedish VP total from the Swedish VP total.
- ULB: Subtract the non-French VP total from the French VP total.
- SiA: Subtract the Protestant VP total from the Catholic VP total.
Players receive VPs for the following events:
| Event | VPs |
|---|---|
| Eliminated formed Cavalry Unit | 10 |
| For Each Casualty Point on formed Cavalry still on map at end | 2 |
| Eliminated unformed Cavalry Unit | 5 |
| For Each Casualty Point on unformed Cavalry units still on map at end | 1 |
| Eliminated Two-Hex Heavy Infantry Unit | 10 |
| Eliminated One-Hex Heavy Infantry Unit | 5 |
| For Each Casualty Point on Heavy Infantry still on map at end | 1 |
| Eliminated Light Infantry Unit | 0 |
| Captured Double 12-24 lb Artillery Unit | 30 |
| Captured Double 4-8 lb Artillery Unit | 20 |
| Captured Double 3 lb Artillery Unit | 10 |
Notes:
- For a Named WC Eliminated, express his rating as a positive number.
- Individual scenarios may have VP awards in addition to these or that supersede these.
- Units and leaders that have left the map in pursuit are not considered eliminated, nor are VPs awarded for their Casualty Point losses.
- The VPs for eliminating an Army Commander only apply to the original AC, not to his replacement. Conversely, a non-generic, named, replacement leader counts as a Named Wing Commander for VP purposes.
- For any scenario where VPs are awarded for control of geographic locations, that side which last had a friendly unit pass through a hex is said to control that hex. Unless specifically mentioned, a unit does not have to remain in the hex to get the VPs.
Errata for the Saints in Armor Playbook (from the v7.0 Series Rules)
White Mountain
- Bohemian Protestant Setup, Chateau Stern Garrison (Correction): Change the setup hex for the first Jung-Anhalt unit from 2823 to 2825.
- Terrain Effects Chart (Correction): On the TEC Addendum on the back of the Playbook, the Combat Effects for an Abatis hexside should be 0 for Fire and –1 for Close Combat. These effects are correct on the TEC on the battle-specific card.
- Terrain Effects Chart (Change): For the WM: Wall row, change the HI & LI columns to read "All + FB." Then add a note to each that reads "Unit must be Formation Normal."
Wimpfen
- Special Rule 5B, third bullet (Correction): Remove "or Artillery" from this bullet.
- Special Rule 5B, last paragraph (Clarification): The phrase "behind the barrier" means southeast of the pike wagon hexsides to, and including, the row of hexes from 3012 to 3021.
- Special Rule 5C (Correction): Replace the word Hedge with Hedge Lined Road in both places.
- Special Rule 8 (Clarification and Change): A unit in Open Order within three hexes of the marker becomes Formation Broken and then makes a Morale Check. A unit in Hedgehog is not affected by the explosion.
- Terrain Effects Chart (Clarification): The Combat Effects of a Pike Wagon hexside are not as clear on the TEC on the back of the Playbook as they are on the battle-specific card. Use the latter during play. Infantry units may perform Close Combat going both directions across a Pike Wagon hexside.
Höchst
- Special Rule 10 (Clarification): Protestant units that have entered the Höchst Bridge Box voluntarily do not count as being off-map or eliminated for purposes of MPBS rule 5.8.
- Map Key (Correction): Marshy Stream should say Sulzbach Stream.
Fleurus
- Special Rule 5 (Clarification): Treat the six hexes as Chateau terrain also for regular movement. When moving out of the Chassart, treat the wall as Entrenchment terrain. A close combat from inside the Chassart against a hex with buildings is treated as if against Chateau terrain.
- Player Victory Conditions (Correction): The range for a Marginal Catholic Victory should be 20 to 39.
Stadtlohn
- Special Rule 5D (Correction): The combined Raised Road/Ditch hexes should be hexes 1611 & 2110.
- Special Rule 6 (Clarification): Even though this wing has only wagons and a WC, it is treated in all ways as a normal wing. This includes continuations, Orders changes, and command. Note that because it has no HI or Cavalry units that it is not affected by series rule 5.8.
Lutter
- Catholic League Setup (Correction): The Right Wing under Desfours is a Cavalry Wing, not an Infantry Wing.
- Map: On the Terrain Key, Lake should be Pond. Also, hex 2409 is a Marsh hex. The Bridge has no effect.
Saints in Armor Playbook
General Information
All scenarios throughout this Playbook use the following information.
Counters
Color Codes: All leaders bear the same color as the nationality of the army or contingent they were in, not necessarily the color of their nationality of birth.
Protestant Forces and their Allies (Units: Top / Stripe / Bottom; Leaders: Top / Stripe / Bottom; Battles):
| Nationality or Army | Unit Top | Unit Stripe | Unit Bottom | Ldr Top | Ldr Stripe | Ldr Bottom | Battles |
|---|---|---|---|---|---|---|---|
| Germans & Austrians in Bohemian service | Black | White | Med. Gray | — | — | — | WM |
| Germans in Mansfeld's Army | Black | White | Med. Gray | Black | White | Dark Gray | W, F |
| Germans in Baden-Durlach's Army | Black | Black-Yellow | Med. Gray | Black | Black-Yellow |
Catholic Forces and their Allies:
| Nationality or Army | Unit Top | Unit Stripe | Unit Bottom | Ldr Top | Ldr Stripe | Ldr Bottom | Battles |
|---|---|---|---|---|---|---|---|
| Imperial (Germans & Florentine) | Reddish-Orange | Yellow | Tan | Reddish-Orange | Yellow | Brown | WM, S, L |
| Catholic League (Lorrainers, Germans, & Bavarians) | Blue | Blue-White | Tan | Blue | White and Blue (Bavaria) | Brown | WM, S, L |
| Spanish | Dk. Yellow | Red | Lt. Yellow | Dark Yellow |
Counter Notes
- A generic replacement leader is called an Oberst (in German-speaking armies) or a Maestro de Campo (Spanish).
- Some units and leaders have more than one counter with the same unit name. Each unit has a designation on it indicating which battle it appears in. Unlike earlier games in the series, units (including artillery) and leaders are not shared between battles. Each battle has its own set of counters.
- Exception: in order to fit the replacement counters into the game (see next), we had to use generic Obersts for the Catholic League. That is, there are three CL Obersts that are used in any battle that requires a non-named CL replacement leader.
- There are nine replacement counters for units on the countersheet for Nothing Gained But Glory, the previous game in the Musket and Pike Battle Series, that are not used in Saints in Armor. (One is actually a replacement for Gustav Adolf the Great as its replacement in NGBG was incorrect.) There is also one two-hex replacement unit for Gustav. The replacement unit counters are:
- Nyborg: The Trampe leader had a gray stripe along its right side.
- Malmö: One of the Grandvillier units had a white stripe on its left side.
- Landskrona and Warksow: Two Danish units for Landskrona and four Danish units for Warksow should have had white boxes around their morale ratings.
- Alte Veste (GAG): The Henderson unit should have had a white background color.
- Alte Veste (GAG): The O.H. Fugger two-hex unit had an incorrect Wing designation.
- Counter Errata for Saints in Armor: Errors on two counters were noticed after Sheets 1 and 2 had been printed but before Sheet 3 went to press. The two counters are the Catholic Longvy unit at Fleurus (whose ratings on its front are missing) and the one-hex Protestant Red Rgt. unit at Lutter (whose Morale Value colors are wrong). We were able to provide replacement counters on the marker sheet so just ignore the incorrect units on the first two sheets.
Unit Types
| Setup abbr. | Counter letter | Type |
|---|---|---|
| Arty | (none) | Artillery |
| Cuir. | (none) | Cuirassier |
| Arq. | A | Arquebusier |
| CrC. | C | Croat Cavalry |
| HI | (none) | Heavy infantry |
| LI | L | Light infantry, dismounted dragoons, or detached musketeers |
Note: While in some games in the series the HI units are called "brigades," in others they are called "battalions." Generally, the Swedes and English called such units "brigades" and the Danes, French, Spanish, and Bavarians used "battalions." For purposes of play, treat both terms the same, and any MPBS rule that refers to brigades applies equally to battalions.
Wing Designations
| Wing Name | Counter Abbr | Battle |
|---|---|---|
| Left | L | WM W H F L |
| Center | C | WM W H F L |
| Right | R | WM W H F L |
| Transylvanian | T | WM |
| 1st Echelon | 1E | WM L |
| 2nd Echelon | 2E | WM L |
| 3rd Echelon | 3E | L |
| League | L | WM |
| Rearguard | Rg |
Battle Designations
| Battle | Counter Abbr |
|---|---|
| White Mountain | WM |
| Wimpfen | W |
| Höchst | H |
| Fleurus | F |
| Stadtlohn | S |
| Lutter | L |
Abbreviations Used in the Setups
Ranks: Col — Colonel; GenKom — Generalkommisar; GenLt — Generalleutnant (Lieutenant General in German); Graf — Count; LtCol — Lieutenant Colonel; Markgraf — Margrave; Obr — Oberst (Colonel in German); ObrLt — Oberstleutnant (Lieutenant Colonel in German); ObrWM — Oberstwachtmeister (Major in German).
Nationalities and Armies: Au. — Austrian; Bav. — Bavarian; Boh. — Bohemian; Bur. — Burgundian; CL — Catholic League; Cr. — Croatian; Da. — Danish; Du. — Dutch; Fl. — Florentine; Fr. — French; Ge. — German; He. — Hessian; It. — Italian; Lo. — Lorrainer; Mor. — Moravian; Ne. — Neapolitan; Sil. — Silesian; Sp. — Spanish; Sv. — Swedish (Svenska); Trs. — Transylvanian; Po. — Polish; Wal. — Walloons.
Other abbreviations used: AKA — Also known as; KIA — Killed in Action; WIA — Wounded in Action; POW — Captured (Prisoner of War); Lber — Pounder (as a measure of gun size); IR — Infantry Regiment; CR — Cavalry or Cuirassier Regiment.
Special Rules Applicable to All Scenarios
1. Terms and Definitions: For all scenarios the term "Catholic" is used for the Catholic League, the Imperial army, and the armies of Spain, while the term "Protestant" is used for the Bohemians, the Danes, and the various German forces opposed to the Holy Roman Emperor. We are very aware of the limitations of these simplified terms, and they are used for consistency only.
2. Maps: A hex with three or less trees is considered a Clear, not a Woods, hex. Disregard all minor tracks and minor building art such as the mill in hex 3318 at Wimpfen or the Pöbbecken Mill at Lutter. Ignore all faded minor streams and use whatever other terrain is in the hex. These features have no effect on play and are only included for artistic purposes and attention to historical detail.
3. Setups:
- A. Unless otherwise indicated units may always start in Open Order instead of Normal Formation as per series rules 6.3.3.
- B. Unless otherwise indicated, when a line in a setup chart includes more than one type of unit or units with different values, the owning player may choose how to distribute those units among the indicated setup hexes, one per hex.
- C. Unless a specific setup location is indicated, Wing Commanders start stacked with any unit in their Wing as per 5.2.1, and Army Commanders start stacked with or adjacent to any unit of their army.
- D. Any date in parentheses is a date in the old style (Julian) calendar. (While Catholic countries adopted the Gregorian calendar in the 1580s, Protestant areas of Germany didn't adopt it until about 1700.)
- E. As much as possible, a leader's name and rank appear in the leader's native language, even if that leader is better known under another version of his name. For instance, the leader called Braunschweig here is more often known (at least in English) as Brunswick.
- F. If a leader's nationality is not indicated, he is of the same nationality as the army he is in.
4. Historical Orders: The use of the designated Historical Orders is strongly recommended in all scenarios, and is often essential for play balance.
5. Victory Determination: Always subtract the points accumulated by the Protestant player from those accumulated by the Catholic player. Listed historical losses only include units removed from play and not losses to on-map units or leader losses.
6. Changes to the MPBS Series Rules for all scenarios
A. 7.3.3 Limbered Guns: Artillery units cannot limber. Any artillery unit that is designated to setup limbered may unlimber, but once unlimbered it cannot limber up again.
Design Note: Most of the artillery in this period was very heavy (in actual weight, not caliber) and required time as well as large numbers of horses and oxen to move. For these reasons they were very rarely moved around on the battlefield once emplaced.
B. 10.4 Salvo Fire: Salvo fire is not available to any HI units.
Design Note: Salvo fire was not used at this early stage of the 30 Years War. It was introduced by the Swedish army when it intervened in 1630 and eventually adopted by most armies.
C. 11.3.6 Attacker Momentum: Only Cuirassier Cavalry units are eligible for the +2 Momentum modifier in Close Combat. Other cavalry units only receive a +1 modifier.
Design Note: The training and doctrinal differences between the close-combat oriented Cuirassiers, the shooting-oriented Arquebusiers, and the skirmishing Croats and Hussars was more pronounced during the early part of the Thirty Years War.
D. 15.0 Determining Victory: Eliminated Heavy Infantry with a printed strength greater than 20 SPs are worth 15 VPs at game end instead of the normal 10.
Design Note: The early battles covered in this game saw some very large infantry formations compared to the later battles of the century covered in the other games in the series. For this reason we made this rule, as the loss of one of these manpower-heavy units was felt deeply. As a side note, the deeper formations used during this period is also the reason why it generally takes more SPs to have enough frontage to be classified as a two-hex unit compared to other games in the series.
7. Croat Cavalry: Units of this new type have a "C" in front of their SP values and are listed as CrC in the setups. This type represents not only true Croat cavalry, but other nationalities that fought similarly in loose formation. Units of this type use the following special rules.
- A. Like LI, they do not take Formation Hits from terrain.
- B. Like LI, they may use the "Anti Suicide Clause" when under Charge orders (Series Rules 5.6.1), and are not required to move adjacent to the front of an HI unit.
- C. Like Cavalry, they have 8 movement points and use cavalry MP costs, can sidestep artillery fire, can use cavalry reaction movement, can intercept, and can force HI units into Hedgehog formation.
- D. Like Cavalry, they can use pistols in Close Combat and fire on the Cavalry Fire table.
- E. To account for their lower status (at the time) and value (gameplay-wise) they are only worth 5 VPs if eliminated, and a step loss on them is only worth 1 VP.
- F. Modify the Close Combat Matrix as follows to account for them:
| Attacker | Cuirassier | Arquebusier | Croat Cav |
|---|---|---|---|
| Cuirassier | 0 | +1 | +2 |
| Arquebusier | –1 | 0 | +1 |
| Croat Cav | –2 | –1 | 0 |
| Heavy Inf | +1 | +2 | +3 |
| Light Inf | NA | NA | 0 |
| HI No Pikes | –1 | 0 | +1 |
Design Note: We felt that the use of light cavalry on the battlefield was more significant during these battles and therefore decided to make them a distinct unit type to show both their disadvantages as well as their unique strengths. The rules above are in effect a mixture of the regular series rules for Cavalry and Light Infantry.
- G. Optional Rule: Players desiring a simpler game can choose to disregard all the rules above and just treat all C type cavalry as Arquebusiers instead. If this option is used, we recommend that the units in question setup in Open Order formation.
Design note: This is in fact what is done in earlier games in the series, and is certainly a valid design choice as players might feel rule 7 to be too much hassle for too little effect.
8. Heavy Artillery: Some battles contain a new gun type with a longer range. A heavy artillery unit is treated as normal artillery in all respects except for new columns on the Artillery Range Chart and the Artillery Fire Table. A heavy artillery unit is worth the same number of Victory Points as a 12-24lb gun if captured or disabled. The counters for these units are labeled 26-48lb.
Design Note: Heavy Artillery used as a term in the game for guns with a caliber larger than 24 lbs. The early period of the Thirty Years War saw more widespread use of these very heavy pieces in battles than the later period, where they were usually found only as part of the siege train due to the huge efforts required to move them. Because of their low rate of fire they do not get the usual +1 DRM when firing at adjacent units, but their bigger caliber makes them more effective at longer ranges.
9. Units with Special Rules: Units affected by a scenario specific rule (that is, a rule besides these standard SiA rules) are marked with a white border around their unit names as a reminder of the special rule.
Design Note: As many of the battles included in SiA are not classic set-piece battles and were often heavily influenced by unusual events and circumstances, the scenarios often contain a lot of important special rules besides this set of standard SiA rules. We hope this innovation in MPBS graphics will help players remember the special rules in the heat of battle. We have also aimed at making those scenario special rules that are used in multiple battles (for example, Catholic Command Rivalry and the various garrison units) similar in wording and effect to help players remember them.
10. Variant Rule — Protestant Command: In the standard scenarios, the Protestant player has no leaders that function as Army Commanders at any of the battles. As an alternative to this, at the beginning of each turn before determining Initiative, the Protestant player declares whether the historical commander will act as an Army Commander or a Wing Commander for the current turn.
- If he chooses to have him function as a WC, mark the leader with the WC marker and play normally with no AC this turn.
- If he chooses to have him function as an AC, mark the leader with the AC marker and treat him as an AC in all respects this turn. However, he is not considered to be a WC for his own Wing for the current turn; treat that Wing as having no leader as per MPBS rule 5.3.2.
When using this variant do not remove the overall commander from play if his Wing has no units left on the map. Instead, place the AC marker on him and treat him permanently as the Army Commander for the rest of the scenario.
The overall commanders for the scenarios are as follows:
- White Mountain: Due to the total breakdown of command this variant cannot be used at this battle.
- Wimpfen: Duke Georg Friedrich of Baden-Durlach.
- Höchst: Duke Christian of Braunschweig.
- Fleurus: Peter Ernst II, Graf von Mansfeld.
- Stadtlohn: Duke Christian of Braunschweig.
- Lutter: King Christian IV of Denmark-Norway.
If the overall commander is lost there is no senior WC to replace him in his capability as AC (although he is replaced as a WC normally), and this variant rule is ignored for the rest of the game from that point on.
Battle 1 — White Mountain (Bílá hora)
November 8 (October 29), 1620. On the western side of Prague in the Kingdom of Bohemia (what is today the Czech Republic).
Order of battle rosters (unit names, ratings and setup hexes) are printed on the battle's setup pages of the Playbook and are not reproduced here; the rules content for the battle follows.
Special Rules
1. Slopes: All slope hexsides are steep.
2. Retreat Edges: The Protestant retreat edge is the southern (35xx) edge. The Catholic retreat edge is the northern (10xx) edge.
3. Senior Wing Commanders: Protestant: Irrelevant as they have no Army Commander. Imperial: Tiefenbach. Catholic League: Tilly.
4. Saints in Armor Special Rules: For this battle, use all the Special Rules Applicable to All Scenarios found in the introductory section of this Playbook.
5. Special Terrain Features:
- A. Litowitz Stream: Treat the hexsides of this stream as a Marshy Stream hexside terrain.
- B. Cliff Hexsides: These hexsides (as along the 2326-2426 hexside) are impassable to all units. See the Terrain Effects Chart Addendum on the back cover of this Playbook.
- C. Chateau Stern (Star Palace): This complex is defined as the area within the walls on the south-eastern corner of the map. The Chateau Stern itself is the structure in hex 2426 and is treated as a Chateau hex. The light brown area near the Chateau (as in hex 2527) is the courtyard and is treated as normal clear terrain.
- D. Wall Hexsides: The Walls surrounding the complex are impassable to cavalry but can be scaled by infantry units that are Formation Normal or in Open Order. Mark any unit as Formation Broken after it crosses a Wall hexside. Units cannot attack across a Wall hexside in any way. See the Terrain Effects Chart Addendum on the back cover of this Playbook.
- E. Entrenchments: Treat the Entrenchment hexsides (such those around hex 2320) as normal MPBS Entrenchment hexsides. For the effects of the Abatis hexsides (such as hexside 2217/2218), see the Terrain Effects Chart Addendum on the back cover of this Playbook.
Design Note: The Chateau Stern was used for hunting by the kings of Bohemia. The game park of the Chateau Stern was surrounded by stone walls about three meters tall. Catholics forces scaled the wall during the last phase of the battle.
6. Star Palace Garrison: The Saxe-Weimar and Jung-Anhalt HI units that set up inside the Chateau Stern complex are marked with a white border around their unit names. When inside the complex, these units are considered to always be In Command and they may ignore the requirement of Charge Orders to move closer to enemy units. If they leave the complex they are subject to the normal rules for command and orders.
7. Uncooperative Transylvanians: The Transylvanian (T) wing is uncommitted (inactive) at the start of the scenario. Flip the WC (Kornis) to his "Finished" side when setting up the battle. Keep him on that side until the Transylvanian Wing is committed. While uncommitted, units of this Wing act as if out of command (MPBS 5.4.3) when performing reactions.
During the Marker Removal Phase of any turn the Bohemian player may attempt to commit the Transylvanian Wing. To do so, he rolls the die:
- If the result is 7, 8, or 9, the attempt is successful. Flip the WC to his non-Finished side. The WC and the units of the Wing function normally thereafter.
- If the result is 4, 5, or 6, nothing happens. The Wing stays uncommitted and the Bohemian player may attempt to commit it again next turn.
- If the result is 3 or less, the roll is unsuccessful. Instantly remove all remaining Transylvanian units and treat them as units that have pursued off map in all regards. At the end of the game, only count Transylvanian units eliminated before this event occurs for VPs.
Mark the current status of the Transylvanian Wing by placing the Transylvanian Status Marker with the appropriate side up in the Transylvanian Status Box on the map.
8. Catholic Command: The Catholic army has two ACs to reflect its composition as two separate armies.
- Bucquoy is activated only when the First Echelon or Second Echelon Wings are activated. He may only affect WCs and units of those two Wings. This also applies to his replacement.
- Maximilian is activated only when the Catholic League Wing is activated. He may only affect WCs and units of that Wing. This also applies to his replacement.
9. Protestant Command: Add 1 to all Protestant Preemption, Continuation, and Orders Change die rolls. In addition, start all Protestant Wing Commanders on their Finished sides. Thus, they will not activate on GT 1, though their units may still react normally.
Design Note: In addition to the lack of an AC, this represents the command friction that plagued the Protestant side before and during the battle.
10. Emphasizing the Defeat: At the end of the game, award the Catholic player VPs for the following geographical and psychological objectives. Note that LI units and Morale Broken units do not count for satisfying the first two bullets.
- Award him 20 VPs if there was at least one Catholic unit inside the Chateau Stern complex at the end of the game.
- Award him 20 VPs each for hexes 2514 and 2718 if the hex was last occupied by a Catholic unit.
- Award him 10 VPs if the Transylvanian Wing left the field either by an unsuccessful commitment check (see Special Rule 7) or by having all of the units of the Wing eliminated, in Pursuit, or in a Morale Broken state.
Design Note: The loss of their dominating position atop White Mountain as well as the breaching of their secure flank posed by the Star Palace was a powerful blow to Protestant morale and reinforced their feeling of defeat as their position became untenable. This, along with the flight of the Transylvanians, was a big factor in the collapse of the army's morale.
Start Time: 12:00 PM (Turn 1).
Maximum Duration: 7 turns (through the end of the 1:40 PM turn). Historically, the Bohemians surrendered about 2:00 PM.
Historical Starting Orders
Protestant: Right, Center, and Left Wings start under Receive Charge Orders. Mark all the WCs as Finished (see Special Rule 9). Transylvanian Wing starts under Receive Charge Orders, though inactive (see Special Rule 7).
Catholic: Imperial First and Second Echelons start under Charge Orders. Catholic League Wing starts under Make Ready Orders.
Player Victory Conditions
| VPs | Type of Victory |
|---|---|
| 156 or more | Decisive Catholic Victory |
| 131 to 155 | Marginal Catholic Victory |
| 111 to 130 | Draw |
| 86 to 110 | Marginal Protestant Victory |
| 85 or less | Decisive Protestant Victory |
Basic Victory Levels — Protestant: Horse 190 points in play / 50 losses; Foot 85 / 50; Artillery 40 / 40; Total 315 / 150.
Basic Victory Levels — Catholic: Horse 160 points in play / 20 losses; Foot 95 / 5; Artillery 45 / 0; Total 300 / 25.
Historical Outcome: Catholic Points 200 (includes 50 Catholic bonus VPs as per scenario Special Rule 10); Protestant Points 25. Result: A Decisive Catholic Victory with a VP differential of 175. Historically, the battle was a complete rout of the Protestant forces. The Catholic player must achieve something similar to win the game, as he is superior in numbers, quality, and leadership.
Battle 2 — Wimpfen
May 6 (April 26), 1622. About 40 kilometers (25 miles) southeast of Heidelberg.
Special Rules
1. Slopes: All slope hexsides are steep.
2. Retreat Edges: The Protestant retreat edge is the southeastern (35xx) edge. The Catholic retreat edge is the northwestern (10xx) edge.
3. Senior Wing Commanders: Protestant: Irrelevant as they have no Army Commander. Catholic League: Lintelo.
4. Saints in Armor Special Rules: For this battle, use all the Special Rules Applicable to All Scenarios found in the introductory section of this Playbook.
5. Special Terrain Features:
-
A. The Böllinger Bach: The Böllinger Bach was swollen from rain and had marshy banks. It is impassable for all units except at the bridge between hexes 3316-3317 (Böllinger Hof). The bridge is treated as a normal MPBS bridge hexside.
-
B. Pike Wagons: The following rules apply to the use of the barrier of hexsides in front of the Protestant center. These hexsides do not block LOS and are Reciprocal Hexside Features (MPBS rule 14.4) except as modified in the next paragraph. The southeast side where the Protestants set up is considered the "inside."
Apply the modifiers for Fire Combat and Close Combat across a pike wagon hexside as follows:
- Apply the –2 Fire Combat modifier only to a fire against an LI unit defending inside the barrier.
- Apply the +2 Fire Combat modifier only to a fire by an LI unit firing from inside. In addition, this fire will cause a formation hit if the modified die roll is 8 or more (in addition to the step loss).
- Apply the –2 Close Combat modifier to Close Combats against an LI unit or Artillery unit going either direction.
- HI units do not benefit from these modifiers. A Cavalry unit cannot move or perform Close Combat across a pike wagon hexside.
Design Note: The additional firepower of these wagons was directed outward, but they formed an obstacle that affected assaults going both directions. Formed HI units were too unwieldy and large to benefit from the wagons and are better used a bit further back.
All Protestant units behind the barrier may ignore the requirement of Charge Orders to move closer to enemy units or to move back into command if either would require them to move outside of the barrier. ("Behind the barrier" means southeast of the pike wagon hexsides to, and including, the row of hexes from 3012 to 3021.)
-
C. Hedge Lined Road Hexes: Hexes 2623 and 2624 are standard MPBS Hedge Lined Road hexes.
5. Obereisesheim Garrison: The Helmstatt HI unit that sets up in the town is marked with a white border around its name. As long as it remains in or adjacent to one of the town hexes, it is considered to always be in command and it may ignore the requirement of Charge Orders to move closer to enemy units. If it leaves this area it is subject to the normal rules for command and orders.
6. Catholic Command: Tilly is AC for the Catholic side but cannot aid any units or the WC of the (Spanish) Right Wing. Tilly is activated only when the Catholic Center or Left Wings are activated. He may only affect WCs and units of those Wings. This also applies to his replacement.
7. Surprise Attack: The cavalry of the Catholic Left Wing start the scenario Formation Shaken to simulate that they were taken completely by surprise by Baden's sudden cavalry attack.
Historical Note: Baden-Durlach had moved almost all of his cavalry from the left over to the Right Wing. This move was either not seen by the Catholics or it was interpreted as the cavalry leaving the battlefield.
8. "The Holy Virgin in the Smoke": At the end of any turn, after the Marker Removal Phase, if at least two Catholic HI units are adjacent to the pike wagon hexside terrain, the Catholic player rolls the die. If the result is 8 or 9, a powder wagon has exploded with devastating effect. Continue to roll each turn until the event happens or the game ends.
If an explosion occurs, roll again and find the wagon unit that has the number from the die roll on it. Remove the unit (no one can get VPs for it) and replace it with the Whoom!! marker. Any unit of either side stacked with the marker immediately becomes Morale Broken and routs two hexes. (Eliminate any unit that is already Morale Broken.) Any unit of either side within three hexes of the marker takes a formation hit and must immediately make a Morale Check. (A unit in Open Order within three hexes of the marker becomes Formation Broken and then makes a Morale Check. A unit in Hedgehog is not affected by the explosion. Apply MPBS rule 10.6.6 if the unit is already Formation Broken.) If the unit fails this MC it becomes Morale Broken and routs two hexes. The hex with the marker is impassable for the remainder of the battle.
9. Prominent Leader: Georg Friedrich, Markgraf of Baden-Durlach, was a prominent Protestant leader and opponent of the Habsburg emperors and his loss would have been a serious blow to the Protestant cause. Therefore he is worth 10 VPs if eliminated.
Start Time: 2:00 PM (Turn 1).
Maximum Duration: 15 turns (through the end of the 6:40 PM turn).
Historical Starting Orders
Protestant: Right Wing starts under Charge Orders. Center and Left Wings start under Receive Charge Orders.
Catholic League/Spanish: Right and Center Wings start under Charge Orders. Left Wing starts under Make Ready Orders.
Player Victory Conditions
| VPs | Type of Victory |
|---|---|
| 130 or more | Decisive Catholic Victory |
| 100 to 129 | Marginal Catholic Victory |
| 60 to 99 | Draw |
| 30 to 59 | Marginal Protestant Victory |
| 29 or less | Decisive Protestant Victory |
Basic Victory Levels — Protestant: Horse 80 points in play / 60 losses; Foot 50 / 45; Artillery 30 / 30; Wagons 50 / 40; Total 315 / 150.
Basic Victory Levels — Catholic: Horse 115 points in play / 40 losses; Foot 75 / 0; Artillery 40 / 5; Total 230 / 35.
Historical Outcome: Catholic Points 175; Protestant Points 45. Result: A Decisive Catholic Victory with a VP differential of 130. Historically, the result was a massive Catholic victory that was due in part to a good bit of luck at just the right time. The result could easily have been different and the large spread in the VCs for such a small battle reflects that.
Battle 3 — Höchst
June 20 (June 10), 1622. On the western side of Frankfurt am Main, Germany.
Special Rules
1. Slopes: All slope hexsides are steep.
2. Retreat Edges: The Protestant retreat edge is the southwestern (35xx) edge. The Catholic retreat edge is the northeastern (10xx) edge.
3. Senior Wing Commanders: Protestant: Irrelevant as they have no Army Commander. Catholic: Anholt.
4. Saints in Armor Special Rules: For this battle, use all the Special Rules Applicable to All Scenarios found in the introductory section of this Playbook.
5. Special Terrain Features:
- A. Entrenchments: Treat the hexsides between 2214/2115 and 2214/2215 as standard MPBS Entrenchment hexsides.
- B. Trench Hexes (hexes 1816, 1817, 1916, and 1918) and the Sossenheim Ruins + Trench Hex (hex 1917): See the Terrain Effects Chart Addendum on the back cover of this Playbook. In addition, units in these hexes may use the provisions of MPBS 9.4.5 to take cover.
- C. Redoubts (hexes 2114 and 2315): See the Terrain Effects Chart Addendum on the back cover of this Playbook.
- D. The Nidda River: Treat these hexsides as standard MPBS River hexsides (that is, they're impassable).
- E. The Sulzbach Stream: To enter a Sulzbach stream hex, a unit must start adjacent to the hex and use its full movement allowance to enter the hex. The same procedure is used when a unit wishes to move out of a Sulzbach stream hex. Ignore the cost of the terrain in the hex being entered, but apply any FHs normally.
- F. Off-Map Movement: Both players may move units off the map at the designated map-edge areas. It costs a unit 1 MP to move off the map.
6. Protestant Garrisons:
- A. Sossenheim: The Köchler HI and LI units that set up in the Sossenheim area are marked with a white border around their unit names. Any of those units that remain in or adjacent to a Trench hex are considered to always be in command and may ignore the requirement of Charge Orders to move closer to enemy units. Any of those units that leave this area are subject to the normal rules for command and orders.
- B. Redoubts: The three LI units that set up in the Redoubt area (see setup listings) are marked with a white border around their unit names. Any of those units that remain in or adjacent to a Redoubt hex are considered to always be in command and may ignore the requirement of Charge Orders to move closer to enemy units. Any of those units that leave this area are subject to the normal rules for command and orders.
7. Catholic Command: Tilly is AC for the Catholic side but cannot aid any units or the WC of the (Spanish) Right Wing. Tilly is activated only when the Catholic Center or Left Wings are activated. He may only affect WCs and units of those Wings. This also applies to his replacement.
8. Musketeer Shortage: Subtract 1 from all rolls on the Heavy Infantry Musketry Table.
Design Note: Both sides detached large numbers of musketeers from the regiments so that the ratio of pikes to muskets was unusually high.
9. Höchst Off-Map Bridge Status: At the start of the game place the Game Turn marker on the Turn Record Track with the side that says "Bridge Blocked" showing. During the Initiative Phase of all turns starting with Game Turn 4, the Protestant player rolls to determine if the Protestant baggage train has cleared the bridge at Höchst (just off map) sufficiently for units to begin using it. If the roll falls within the range of rolls listed on the Turn Record Track for that turn, the bridge is now open for units to cross. Flip the Game Turn marker to the "Bridge Open" side and stop rolling each turn.
10. Additional Victory Points: In addition to the standard MPBS rules for accruing Victory Points (15.0), both players may receive additional VPs in the following ways.
A. Key Positions: The following hexes provide the listed number of VPs to the player controlling them at the end of the scenario:
- 1917 (Sossenheim village) — 15 VPs
- 2016 (Sossenheim bridge) — 15 VPs
- 2114 and 2315 (the redoubts) — 10 VPs each
A player controls a hex if one of his units occupies the hex or was the last to have passed through the hex. All hexes start under control of the Protestant player.
B. Prominent Leader: Duke Christian of Braunschweig was a prominent Protestant leader and opponent of the Habsburg emperors and his loss would have been a serious blow to the Protestant cause. Therefore he is worth 10 VPs if eliminated.
C. Contesting the Protestant retreat route: Both players may move units off the map at the designated map-edge areas. It costs a unit 1 MP to move off the map.
(1) The Höchst Bridge Box: Both players may move units off the map between hexes 3505 and 3515 (inclusive) into the Höchst Bridge Box. Place the units of both sides that exit into a stack in the Höchst Bridge Box in the order exited. The conditions for obtaining the additional VPs and the number of VPs awarded vary by side. Any casualties on units that have exited do provide VPs for the opponent as usual.
Protestant
- Starting on the turn the Höchst Bridge is open per Special Rule 9 (and not before), the Protestant player may start moving units off map into the Höchst Bridge Box. The Protestant player earns 15 VPs at the end of the game for each Protestant Cavalry unit (of either type) and each HI unit (of either size) so exited.
- Morale Broken Protestant units still rout off the map edge normally and are still treated as being eliminated. They do not earn the Protestant player any VPs.
Catholic
- The Catholic player may move units off map into the Höchst Bridge Box during any turn regardless of the status of the bridge. However, only units exited on or before GT 15 earn VPs. The Catholic player earns 30 VPs at the end of the game for each Catholic Cavalry unit (of either type) and each HI unit (of either size) so exited.
- In addition to the above, if the Catholic player exits at least two units into the Höchst Bridge Box before the Protestant player does, the Catholic player earns an additional one-time award of 80 VPs.
- A Catholic Cavalry unit that gets a "Pursue Off-Map" result is not considered to be in the Höchst Bridge Box.
(2) The Nidda River: The Catholic player may move cavalry units off the map between hexes 3518 and 3526 (inclusive) into the Nidda River Box. If he moves at least two such units into the box, he receives VPs for the turn that the second unit enters the box according to the following schedule. Additional units provide no additional VPs. Place the units on the Turn Record Track in the box for the turn the second one exits as a reminder when calculating VPs at the end of the game.
| Turns | VPs |
|---|---|
| 1 to 5 | 30 |
| 6 to 10 | 20 |
| 11 to 15 | 10 |
| 16 to 18 | 0 |
Clarification (official errata): Protestant units that have entered the Höchst Bridge Box voluntarily do not count as being off-map or eliminated for purposes of MPBS rule 5.8.
11. Free Setup Variant: If using the variant, both players may set up their units as they like within the areas defined below. The Protestant player sets up his units before the Catholic player does so. Note that it is intentional that some of the Wings have overlapping setup zones. All units must be set up in Command, either of their Wing Commander or under the provisions of Special Rule 6 for Protestant garrisons.
Protestant:
- Cavalry Reserve Wing: Set up anywhere on the southwest side of the Sulzbach Stream.
- Main Infantry Wing: Set up anywhere on the southwest side of the Sulzbach Stream.
- Right Cavalry Wing: Set up southwest of the hedgerow running between 2118 and 2426, between the Sulzbach Stream and the Nidda River.
Catholic: Set up each wing within the rectangle (including the border hexrows) defined by the listed corners.
- Right Wing: 1000 – 1012 – 1800 – 1812.
- Center Wing: 1012 – 1022 – 1912 – 1922.
- Left Wing: 1020 – 1028 – 1520 – 1528.
Start Time: 12:00 PM (Turn 1).
Maximum Duration: 18 turns (through the end of the 5:40 PM turn, Turn 18).
Historical Starting Orders
Protestant: All Wings start under Receive Charge Orders.
Catholic: Center Wing starts under Charge Orders. Right and Left Wings start under Make Ready Orders.
Player Victory Conditions
| VPs | Type of Victory |
|---|---|
| 201 or more | Decisive Catholic Victory |
| 151 to 200 | Marginal Catholic Victory |
| 101 to 150 | Draw |
| 51 to 100 | Marginal Protestant Victory |
| 50 or less | Decisive Protestant Victory |
Basic Victory Levels — Protestant: Horse 120 points in play / 0 losses; Foot 65 / 5; Artillery 15 / 15; Total 200 / 20.
Basic Victory Levels — Catholic: Horse 150 points in play / 0 losses; Foot 60 / 0; Artillery 60 / 0; Total 270 / 0.
Historical Outcome: Catholic Points 80 (20 for losses + 60 for geographical objectives and Nidda River exits); Protestant Points 150 (0 for losses + 150 Höchst bridge box exits). Result: A decisive Protestant victory with a VP differential of –70. Historically, it was a very decisive Protestant victory in game terms, but that was because Tilly failed to press his advantage the way players with the benefit of hindsight will in the game.
Battle 4 — Fleurus
August 29 (August 19), 1622. Northeast of Charleroi, Belgium.
Special Rules
1. Slopes: All slope hexsides are gentle.
2. Retreat Edges: The Protestant retreat edge is the western (35xx) edge. The Catholic retreat edge is the eastern (10xx) edge.
3. Senior Wing Commanders: Protestant: Irrelevant as they have no Army Commander. Catholic: Cariccolo.
4. Saints in Armor Special Rules: For this battle, use all the Special Rules Applicable to All Scenarios found in the introductory section of this Playbook.
5. Special Terrain Feature — Ferme Chassart: Treat the six hexes (2507, 2406, 2407, 2306, 2307, and 2206) as Chateau terrain when attacked from across a Wall hexside and disregard any other terrain in the hex (like gardens or buildings). Treat the defender as being in Clear or Garden when the attack is coming from one hex inside the Ferme to another such hex across a non-Wall hexside.
Official errata clarification: Treat the six hexes as Chateau terrain also for regular movement. When moving out of the Chassart, treat the wall as Entrenchment terrain. A close combat from inside the Chassart against a hex with buildings is treated as if against Chateau terrain.
Design note: The Ferme Chassart was a large farm surrounded by high walls. In effect, the LI inside are almost invulnerable against cavalry, as the cavalry cannot enter by Close combat (11.1.2) and the LI can take cover when being shot at (9.4.5).
6. Ferme Chassart Garrison: The four Spanish LI units that set up inside the Ferme Chassart have a white border around their unit names. When inside the Ferme, these units are considered to always be In Command and they may ignore the requirement of Charge Orders to move closer to enemy units. If they leave the Ferme they are subject to the normal rules for command and orders.
7. Mutinous Protestant Cavalry: The following rules apply to all Protestant Cavalry units.
- A Protestant Cavalry unit may Intercept only when adjacent to an enemy unit.
- A Protestant Cavalry unit moves normally under Charge Orders but must pass a Morale Check to move adjacent to an enemy unit. Make this check just before moving the unit into the hex adjacent to the enemy (that is, at two hexes from the enemy unit). If the unit fails the MC it must stop and cannot move further that activation. However, it does not suffer any Morale hit.
Design note: The cavalry of Mansfeld and Duke Christian had bad morale and was unpaid. Many left just before the battle and a large number of those who stayed seemed to have refused orders to attack.
8. Breakthrough to the Netherlands: Hexes 1109, 1115, 1709, 1813 are worth victory points and are marked on the map. At the end of the game a player receives 15 victory points for each of those hexes that he controls. A hex is controlled by the player who has the closest unit to the hex. If both players are equally close then neither player gets the victory points for that hex.
9. Enemy of the Empire: Mansfeld was an important player in the early part of the war. The emperor had even put a price on his head. Therefore Mansfeld is worth 20 VPs even though he is not an AC.
10. Optional Variant: The Protestant Player can opt to use the three 2-hex HI units instead of the nine 1-hex HI units from the regular setup. Remove all the 1-hex HI and replace them with the three 2-hex HI units named Mansfeld 1, 2, and 3. Set them up in 3013-3014, 3015-3016, and 3017-3018. There is no 2nd Line for the Center Wing in this case.
Design Note: Sources differ on how Mansfeld arranged his infantry and what tactics he used. Some say he had nine small battalions while others give him three large ones. The standard setup assumes that the infantry fought according to the Dutch school, with the smaller battalions. This variant gives the players the opportunity to explore tactics using the larger German-style units.
Start Time: 7:20 AM (Turn 1).
Maximum Duration: 11 turns (through the end of the 10:40 AM turn).
Historical Starting Orders
Protestant: Right and Left Wings start under Charge Orders. Center Wing starts under Make Ready Orders.
Catholic: Right Wing starts under Make Ready Orders. Center and Left Wings start under Receive Charge Orders.
Player Victory Conditions
| VPs | Type of Victory |
|---|---|
| 40 or more | Decisive Catholic Victory |
| 20 to 39 | Marginal Catholic Victory (official errata: the range for a Marginal Catholic Victory should be 20 to 39) |
| –10 to 19 | Draw |
| –30 to –11 | Marginal Protestant Victory |
| –31 or less | Decisive Protestant Victory |
Basic Victory Levels — Protestant (regular setup): Horse 140 points in play / 80 losses; Foot 45 / 20; Artillery 25 / 0; Total 210 / 100.
Basic Victory Levels — Catholic: Horse 90 points in play / 50 losses; Foot 35 / 0; Artillery 25 / 0; Wagons 30 / 20; Total 180 / 70.
Historical Outcome: Catholic Points 100 + 30 for geographical objectives; Protestant Points 70 + 30 for geographical objectives. Result: A Marginal Spanish victory with a VP differential of 30. This is the most even battle in this module, and therefore the only battle where both players must win a military victory and not "just" perform better than historically in order to win a victory.
Battle 5 — Stadtlohn
August 6 (July 27), 1623. Near the border between Germany and the Netherlands, about 70 kilometers (45 miles) east of Arnhem.
Special Rules
1. Slopes: All slope hexsides are gentle.
2. Retreat Edges: The Protestant retreat edge is the south edge of the map (4200-4222). The Catholic retreat edge is the north edge (1000 to 1022).
3. Senior Wing Commanders: Protestant: Irrelevant as they have no Army Commander. Catholic: Anholt.
4. Saints in Armor Special Rules: For this battle, use all the Special Rules Applicable to All Scenarios found in the introductory section of this Playbook.
5. Special Terrain Features:
-
A. The Bog: Bog hexes are impassable.
-
B. The Landwehr: See the Terrain Effects Chart Addendum on the back cover of this Playbook. Apply the Fire Combat and Close Combat modifiers only in attacks against LI units.
Design Note: The Landwehr ditches were old constructed defensive lines. They offered protection for small units but were not usable for large conventional formations.
-
C. The Raised Road: A unit in Column, a limbered gun, or a wagon moving along the road pays only 1 MP per hex. Otherwise, see the Terrain Effects Chart Addendum on the back cover of this Playbook for the costs of entering a Raised Road hex. A Raised Road hex is considered non-clear terrain, so entering such a hex stops Momentum (per MPBS rule 11.3.6). In addition, a Cavalry unit may not intercept through or along a Raised Road hex, but may intercept into such a hex. Note that it does not cause any Formation Hits.
-
D. Combined Raised Road/Ditch hexes: Consider these two hexes (official errata: hexes 1611 and 2110) to be Ditch hexes for units not moving along the road (in Column, limbered, or wagons).
6. Protestant Wagon Train: The Protestant wagons are organized into their own Wing and that Wing is treated as a normal Wing in all respects except that it cannot Preempt.
- The Wagon Wing Commander and his replacement may stack with any wagon unit.
- A wagon has a movement allowance of 2 when moving along the Düving Diek road but only an allowance of 1 otherwise.
- The Catholic player receives 10 VPs for capturing a wagon as per the normal MPBS rules. In addition, the Protestant player receives 10 VPs for each wagon that he moves off the map at hex 4209. A Protestant controlled wagon that is on the map at the end of the game does not provide VPs to either player.
Official errata clarification: Even though this wing has only wagons and a WC, it is treated in all ways as a normal wing. This includes continuations, Orders changes, and command. Note that because it has no HI or Cavalry units it is not affected by series rule 5.8.
7. Poorly Trained and Equipped Protestant Infantry: All Protestant HI units with a printed Morale Rating of 5 suffer a –1 die roll modifier (DRM) when firing on the Heavy Infantry Musketry Fire Table. A reminder of this is printed on the units.
8. Unwilling Rearguard: At the start of the first activation on Turn 1 (and only on Turn 1) of the Protestant player's Rearguard Wing, the Protestant player must decide whether to leave the two HI units of that Wing in the hexes they set up in or to have those units flee.
- If he decides to have the units remain where they are, then the Wing activates normally and he disregards this rule.
- However, if he decides he wants the units to flee, he inflicts a Morale Broken result on them as per MPBS rule 11.4, except that while he must retreat them at least two hexes he may retreat them up to five hexes. This special move counts as the movement for the HI units, but other units in the Wing may activate normally.
- If he decides to flee, he places Morale Broken markers on the two HI units and retreats them two to five hexes (his choice) per MPBS rule 13.4. They are considered Morale Broken for all purposes (so they will rout move again at the end of the turn).
- A player cannot use this rule for any unit that should happen to become Morale Broken before it can activate. If only one of the units is Morale Broken at the time its Wing is activated, the player may use this rule for the other unit.
- Note also that the units in the 1st Line of the Rearguard Wing start with normal Morale Shaken markers on them. These may be removed normally.
- Historical Variant: For a more historical game, consider it mandatory to have the units flee if eligible to do so.
9. Protestant Command Breakdown: Add 1 to all Protestant Preemption, Continuation, and Orders Change die rolls.
10. Catholic Map Entry: The Catholic forces start off map and move onto the map using MPBS rule 7.4 for reinforcements. The Avantgarde Wing enters first and may enter on Turn 1. The Cavalry Wing enters second and may enter on Turn 2, but only after all units of the Avantgarde Wing have entered. The Main Body may enter on Turn 3, but only after all units of the Cavalry Wing have entered. The AC may enter with any Wing.
11. Prominent Leader: Duke Christian of Braunschweig was a prominent Protestant leader and opponent of the Habsburg emperors and his loss would have been a serious blow to the Protestant cause. Therefore he is worth 10 VPs if eliminated.
Start Time: 2:00 PM (Turn 1).
Maximum Duration: 10 turns (through the end of the 5:20 PM turn).
Historical Starting Orders
Protestant: All Wings except the Wagon Wing start under Receive Charge Orders. Wagon Wing starts under Rally Orders.
Catholic: All Wings start under Make Ready Orders.
Player Victory Conditions
| VPs | Type of Victory |
|---|---|
| 200 or more | Decisive Catholic Victory |
| 150 to 199 | Marginal Catholic Victory |
| 110 to 149 | Draw |
| 60 to 109 | Marginal Protestant Victory |
| 59 or less | Decisive Protestant Victory |
Basic Victory Levels — Protestant: Horse 80 points in play / 50 losses; Foot 80 / 80; Artillery 45 / 45; Wagons 60 / 60; Total 265 / 235.
Basic Victory Levels — Catholic: Horse 115 points in play / 10 losses; Foot 70 / 0; Artillery 35 / 0; Total 220 / 10.
Historical Outcome: Catholic Points 235; Protestant Points 10. Result: A Catholic Decisive victory with a VP differential of 225. Due to the VP awards both players can earn from the wagons, their fate will likely decide the game, and it is even possible for the Protestants to win a game victory despite having their army wiped off the map.
Battle 6 — Lutter am Barenberge
August 27 (August 17), 1626. About 40 kilometers (25 miles) southwest of Braunschweig.
Special Rules
1. Slopes: All slope hexsides are steep.
2. Retreat Edges: The Protestant retreat edge is the northeastern (10xx) edge. The Catholic retreat edge is the southwestern (35xx) edge, but retreat the outflanking forces towards their entry hexes (use 1427 for the Right Outflanking Zone).
3. Senior Wing Commanders: Protestant: Irrelevant as they have no Army Commander. Catholic: Anholt.
4. Saints in Armor Special Rules: For this battle, use all the Special Rules Applicable to All Scenarios found in the introductory section of this Playbook.
5. Special Terrain Features:
- A. Streams: Treat the non-faded portions of streams as normal MPBS streams.
- B. Cliff Hexsides: These hexsides (for example 2307-2406) are impassable to all units. See the Terrain Effects Chart Addendum on the back cover of this Playbook.
Official errata (map): On the Terrain Key, Lake should be Pond. Also, hex 2409 is a Marsh hex. The Bridge has no effect. The Right Wing under Desfours is a Cavalry Wing, not an Infantry Wing.
6. Christian's Late Arrival: Christian IV starts the game off map. Until he returns the units of his Wing (the 2nd Echelon) are commanded by the replacement WC, who starts Game Turn 1 on his Finished side. At the beginning of Game Turn 2 the Protestant player rolls to see when Christian returns:
- On a 0 to 7 he returns GT 2.
- On an 8 or 9 he returns GT 3.
On the turn he returns immediately remove the replacement WC and place Christian on any unit of his Wing. He functions normally from that point forward.
7. Royal Commander: Christian IV is worth 20 VPs even though he is not an AC.
8. Catholic Outflanking Move: The Catholic Right (R) Wing starts off map and is not counted for initiative before its turn of entry. In each Initiative Phase beginning with GT 6 the Catholic player rolls the die. The wing enters if the result is within the range for that turn:
- GT 6: It enters on a roll of 0.
- GT 7: It enters on a roll of 0 to 1.
- GT 8: It enters on a roll of 0 to 3.
- GT 9: It enters on a roll of 0 to 5.
- GT 10: It enters on a roll of 0 to 7.
- GT 11: It enters automatically.
On the turn it enters, place the units of the wing within 2 hexes of 1425 but not stacked with any enemy units. If placed adjacent to an enemy unit, that unit may React as if it were normal movement. The units may be placed in Formation Normal, Open Order, or Column.
9. Variant Scenarios: The following variants may be used (in any combination) instead of the standard scenario if both players agree. None of the variants have a cost.
9A. Variant 1 — Free Catholic Setup: The Catholic player may set up each of his wings in one of the following setup zones, some of which overlap. A maximum of 1 wing may be placed in each zone, and two of the zones will be empty. The hexes listed are the corners of each zone, and the hex rows that connect the corners are included in each zone. Ignore the actual wing name when using this rule; for example, the Right Wing can set up in the Left Zone. Only Cavalry Wings can be set up in the two Outflanking zones and only Infantry Wings in the two Center zones.
- Right Outflanking Zone: The units start off map and use Special Rule 8 to enter.
- Right Zone: 2725-2729-3125-3129.
- Right Center Zone: 2717-2725-3117-3125.
- Left Center Zone: 2710-2717-3110-3117.
- Left Zone: 2706-2710-3106-3110.
- Left Outflanking Zone: The units start off map and use Special Rule 8 to enter, but enter along the map edge from 1500 to 1007 (both inclusive).
9B. Variant 2 — More Protestant Troops and Guns: Add some or all of the following units to the Protestant setup: a Swedish Regiment (7-6 HI) and a Volunteers unit (7-6 HI) — if either or both of these regiments are added, then set up them and the rest of the 3rd Echelon freely between 1607-1622. Also artillery: 8-20 (26-48 lb.), 6-17 (12-24 lb.) and 4-14 (4-8 lb.), all in Command range of any 1E unit; and a 3-9 (3 lb.) in Command range of any 2E unit.
Start Time: 1:00 PM.
Maximum Duration: 12 turns (through the end of the 4:40 PM turn).
Historical Starting Orders
Protestant: 1st Echelon starts under Make Ready Orders. 2nd Echelon starts under Receive Charge Orders — note that the WC (King Christian) begins the game off map and the replacement WC is set up on his Finished side (see Special Rule 6). 3rd Echelon starts under Receive Charge Orders.
Catholic: Right Wing starts under Make Ready Orders and starts off-map (see Special Rule 8). Gronsfeld's Detachment starts under Charge Orders. All other Wings start under Make Ready Orders.
Player Victory Conditions
| VPs | Type of Victory |
|---|---|
| 131 or more | Decisive Catholic Victory |
| 111 to 130 | Marginal Catholic Victory |
| 71 to 110 | Draw |
| 51 to 70 | Marginal Protestant Victory |
| 50 or less | Decisive Protestant Victory |
Basic Victory Levels — Danish / Lower Saxon Circle Protestant (regular setup): Horse 150 points in play / 100 losses; Foot 125 / 100; Artillery 15 / 15; Total 300 / 215.
Basic Victory Levels — Catholic League: Horse 195 points in play / 30 losses; Foot 90 / 20; Artillery 45 / 0; Total 330 / 50.
Historical Outcome: Catholic Points 215; Protestant Points 50. Result: Decisive Catholic victory with a VP differential of 165. As players (who have the benefit of hindsight and knowledge of the VCs) won't often repeat the Protestant all-out attack, it's not necessary for the Catholic player to perform nearly as well as historically to win.
Scenario Selection Guide
The scenarios in this game depict a wide variety of situations. To help players decide which scenario to play, this section provides a quick overview of what makes each scenario unique. This section also includes some basic advice to help new players with each battle.
White Mountain. White Mountain is the classic one-sided blow-out battle where one side (the Catholic side) is doing all the moving and attacking, while the other is mostly performing reactions and making small adjustments in the line while hoping to survive. Not all players are masochistic enough to enjoy the Protestant side in this one, but it is an ideal solitaire experience.
Play Tips: The Catholic player has a lot to do and not a lot of time to do it. He must hurry but at the same time avoid blocking his own paths of attack with Formation Broken units from previous attacks. The Protestant player must play a very responsive game with sharp counterattacks when the opportunity presents itself. But he shouldn't help the Catholics kill his units by needlessly exposing them.
Wimpfen. Wimpfen is the only scenario where both sides attack from the start, and is dominated by the unusual pike wagon terrain. There is enough time for each player to halt and reform or re-plan if things aren't going as hoped, so careful planning and execution is really rewarded in this scenario.
Play Tips: The Catholic player has a very tough army, but an equally tough position to attack in the form of the pike wagons. Any HI unit that manages to break into this position will be Formation Broken and reduced by casualties, and will probably be thrown back unless supported by other units. The Protestant player starts with an excellent opportunity for attacking with his right flank, and with luck and skill his cavalry can continue to harass the Catholic HI as they move towards the pike wagons. He should defend his position with harassing LI fire and use his HI units to counterattack anything that breaks through the pike wagon line or attempts to go around it.
Höchst. Höchst is a tricky terrain puzzle where the Protestants must fight a rearguard action to delay the Catholics and then must disengage their army to safety. The special rules section seems daunting but it's really very simple and 90% of the special rules are about the VCs, which have more depth than previous scenarios. The terrain and units mix really rewards clever Catholic play and punishes bad play and the VCs give each player some interesting dilemmas.
Play Tips: The Catholic player has a lot to do, but also a lot of time to do it. What he doesn't have a lot of is units, so he must use his artillery superiority to make the river crossing and Sossenheim assault as safe as possible or risk being stopped completely. For the Protestant player, the key to victory is to know when to stay and when to run. If the Catholics exit too many units too fast he will definitely lose big time, but victory is not won by losing his army on the riverbank either.
Fleurus. This is the only battle where the Protestant player is the overall attacker and it's a classic quantity vs. quality pitched battle. The cavalry mutiny rule will cause much frustration for the Protestant player and gives each side a very distinctive feel. This asymmetry is further enhanced by the different HI formations employed by each side (unless using the optional rules).
Play Tips: The Protestant numerical superiority in cavalry looks overwhelming but it's a fragile and unreliable tool. The Protestant player must be flexible in his attacks as his men probably won't obey all the time. If the Protestants make a wide outflanking move and refuse to impale themselves on the Ferme Chassart complex the Catholic player must remember that his LI are not forced to stay there; they make excellent defensive fire support for the cavalry.
Stadtlohn. This is the most one-sided battle in terms of relative army strengths, but one where both players have lots of decisions to make and room for movement. The Catholics must outrun the ticking clock, while the Protestants must employ both defensive and offensive tactics to delay and annoy the Catholics. This makes it an interesting asymmetric running battle, a type not seen a lot in the MPBS.
Play Tips: The Catholic player must hurry, as each turn takes the wagons closer to safety. As fighting and reforming takes time, he should use maneuver as much as possible. However, he shouldn't overlook the fact that his qualitative superiority means that it's sometimes faster to smash a way through instead of going around. The Protestant player must always keep in mind that his army is a tool that can be expended to save the baggage train. Whenever possible he should keep units in front of enemy wings that are not under Charge Orders so they can't move forward. He should also have his units attack any Catholic units that move around in Open Order or Column formation so they have to spend several turns reforming. Annoy and delay to the death! The Protestants can always buy a new army if the wagons escape.
Lutter. Lutter is the most traditional MPBS battle in SiA. Two (initially) evenly matched armies are fighting each other with a minimal number of special rules. The MPBS rules themselves were enough to show the most important feature of this battle: the Protestants (expecting to fight a rear guard action) are organized in echelons (lines) while the Catholics are deployed in normal wings. This elegantly shows how an order that might be ideal for conditions on one flank might be far less than ideal for the center and other flank. This neatly fits with the historical result where an initially local Protestant counterattack became an attack along the entire line with disastrous results.
Play Tips: The Catholic player is up against good units for a change, so he needs to be careful of counterattacks. He should exploit the command system and the Protestant line deployment by creating situations where no single order is without lost opportunities or unwelcome forced attacks for the Protestants. The Protestant player can attempt to reposition his forces so they are easier to command, but it is a tricky and very time-consuming task to perform completely. Small adjustments are, however, possible and desirable in order to improve the ability to hold the line or follow up attacks. The Protestant player has good units and should consider counterattacks when the Catholic formations are shaken by terrain or combat.
SiA Terrain Effects Chart Addendum
See the regular TEC on the Player Aid Card for any terrain and notes not listed here. Each Battle play aid card also contains the information for the terrain in that battle.
Hex Terrain (MP Cost to Enter: HI / Cav / LI; Blocks LOS; Combat Effects: Fire / Close Combat)
| Hex Terrain | HI | Cav | LI | Blocks LOS | Fire | Close Combat |
|---|---|---|---|---|---|---|
| H: Trench | 2* | 4* | 3 | No | –2 | –2 |
| H: Sossenheim Ruins + Trench | 2* | 4* | 3 | No | –3 | –3 |
| H: Redoubt | 2* | 4* | 3 | No | –2 | –2 |
| H: Sulzbach Stream | All*⁴ | All*⁴ |
Hexside Terrain
| Hexside Terrain | HI | Cav | LI | Blocks LOS | Fire | Close Combat |
|---|---|---|---|---|---|---|
| WM & L: Up Cliff | NA | NA | NA | Yes | 0 | NA |
| WM & L: Down Cliff | NA | NA | NA | Yes | –1@ | NA |
| WM: Wall | 4 + FB | NA | 6 + FB | Yes | NA | NA |
| WM: Abatis | +1* | NA |
Key: WM applies to White Mountain; W to Wimpfen; H to Höchst; S to Stadtlohn; L to Lutter.
- Subtract 2 only when firing at an LI unit in a Ditch hex; subtract 1 only when performing Close Combat against an LI unit in a Ditch hex.
- Subtract 2 when firing against an LI or artillery unit across the hexside and inside the barrier; add 2 when an LI unit fires across the hexside from inside the barrier.
- Subtract 2 when performing CC against an LI or artillery unit across the hexside; Cavalry cannot CC across.
- It costs a unit its full MA to enter the hex and its full MA to leave the hex.
Per official errata, for the WM: Wall row the HI & LI columns read "All + FB," with the note "Unit must be Formation Normal."
Close Combat Matrix (11.3.8)
| Attacker \ Defender | Cuirassier | Arquebusier | Croat Cavalry | Heavy Infantry | Light Infantry | Hedgehog | HI No Pikes |
|---|---|---|---|---|---|---|---|
| Cuirassier | 0 | +1 | +2 | –1 | +2 | –2 | +1 |
| Arquebusier | –1 | 0 | +1 | –2 | +1 | –3 | 0 |
| Croat Cavalry | –2 | –1 | 0 | –3 | 0 | –4 |
Artillery Fire Table (10.8)
| Die Roll | 3 lb | Double 3 lb | 4-8 lb | Double 4-8 lb | 12-24 lb | Double 12-24 lb | 26-48 lb |
|---|---|---|---|---|---|---|---|
| ≤3 | Miss | Miss | Miss | Miss | Miss | Miss | Miss |
| 4 | Miss | Miss | Miss | Miss | Miss | FH | Miss |
| 5 | Miss | Miss | Miss | FH | FH | FH |
FH = Formation Hit, MC = Morale Check.
Die Roll Modifiers: +2 Target is in Hedgehog or Column; –1 Firing Artillery unit is Morale Shaken; +/– Range Modifier (see Artillery Range Chart). See TEC for additional die roll modifiers.
Artillery Range Chart (10.8.2)
Range modifiers by hex range and gun class:
| Hex Range | 3 lb (Falcons) | 4-8 lb (Sakers) | 12-24 lb (Culverins) | 26-48 lb (Heavies) |
|---|---|---|---|---|
| 1 | +1 | +1 | +1 | 0 |
| 2-3 | 0 | 0 | 0 | 0 |
| 4 | –1 | 0 | 0 | 0 |
| 5 | –1 | –1 | 0 | 0 |
| 6 | –2 | –1 | 0 | 0 |