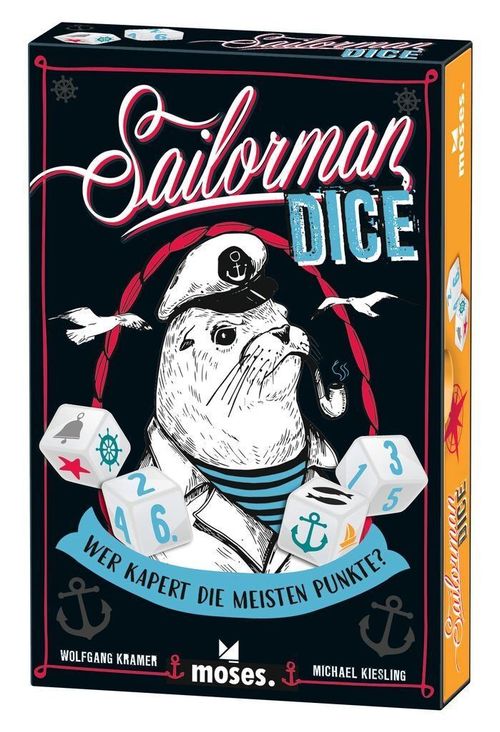
Sailorman Dice
Sailorman Dice Rulebook
Table of Contents
Table of Contents
Game Contents
- 1 map score pad
- 2 symbol dice (anchor, bell, starfish, fish, boat, ship's wheel)
- 2 number dice (numbered 1–6)
You'll also each need a pen.
Setup
Each take a sheet from the score pad. This is your map.
Place the dice at the center of the table.
How to Play
Play in a clockwise direction. The oldest player starts and ticks the "I'm the captain" box at the bottom left of their map. The other players don't tick this box.
Are you the starting player? Then take all four dice and roll them once.
Now you need to put them together in pairs: each should always comprise a symbol die and a number die. Whenever possible, you must record the results of both pairs of dice on your map.
How to Enter Your Results
There are six rows featuring symbols and nine columns on the map. The symbol die in each pair of dice tells you which symbol row you must enter your result in. The number die tells you the number to then enter in this field.
You can put the dice together in pairs, however is best for you. Then enter both results. You're free to decide which number goes where in each row of symbols.
Rules You Must Observe
- The field must be empty. You cannot overwrite a number or cross that has already been entered (see What Does the River Mean?).
- In each row of symbols, the numbers entered must remain the same or increase from left to right.
- In each column, you may enter the numbers as you wish from top to bottom. So they don't have to be equal or ascending.
- There can be any number of empty spaces between your numbers.
- You can make as many crosses as you like before, between, or after numbers that have already been entered. (For more on this, see What Does the River Mean?)
Note: Are you unable to enter a number or can only enter one number? No problem, just fill in whatever you can.
Example I: Florian rolls 2 bells, a 1, and a 5. Unfortunately, he's only able to enter a 3, a 4, or a cross in the bell row so he can't enter any of the results from his two pairs of dice.
Example II: Florian rolls 1 bell, 1 anchor, a 1, and a 6. The pair of dice with the bell is no use to him. But he can form a pair of dice with the anchor. He decides to pair the anchor with the 6, and enters this in his map.
What Do Your Fellow Players Do?
Your fellow players must enter the result of one pair of dice of their choice on their map at the same time as you. Each is able to choose the two dice that are most useful to them. It's important that your fellow players only enter one pair of dice, though, and not both.
Is one of you unable to enter anything? Well, that's just plain bad luck. The same rules apply for entering pairs of dice as above otherwise.
Have you all finished entering your dice? Then it's the next player's turn to roll the dice.
Example: Marion rolls a boat, an anchor, a 3, and a 5. She pairs the boat with the 3 and the anchor with the 5, and enters both results in two free spaces on her map. Her fellow players may only enter one pair of dice. They're free to decide whether they want to pair the boat or the anchor with the 5 or 3.
What Does the River Mean?
A river meanders across your map and has a field in each column and symbol row. Enter your numbers in the river like normal, as described above.
The river fields have a special feature though: Have you entered a number in a river field? And does this result (same symbol row and same number) come up again? Then it's your lucky day. It doesn't matter whether you were able to enter this result or not. What's important is that you already have exactly this result written in the river field. In this case, you can perform what is known as the "sailorman move".
How to Perform the Sailorman Move
Rather than entering this result in the according symbol row, instead make a cross (X) in any of the fields on your map that is still free. This cross has no effect on the order. What's more, any number of crosses may appear in the same symbol row or column.
Note: Your fellow players are also able to perform the sailorman move.
Note: You must decide whether you want to make a cross or enter the number in a symbol row as normal—you can't do both.
Example: Leila rolls a boat, a ship's wheel, a 5, and a 6. She could now pair the ship's wheel with the 5 or the boat with the 6. However she instead decides to pair the boat with the 5 and the ship's wheel with the 6 as these two pairs already appear in the river. So she's able to perform the sailorman move. She enters a cross in the last remaining field in the starfish row for the boat and the 5. For the ship's wheel and the 6, Leila is able to choose: either she can enter a 6 to the left of the existing 6 in the ship's wheel row. Or she can perform the sailorman move again and enter a second cross. She decides to enter the 6.
How Does the Scoring Work?
You earn points as soon as you completely fill a symbol row, column, or sub-area.
Scoring the Symbol Rows and Columns
Have you filled all of the fields in a symbol row or column? Then you immediately earn points. The digit you've entered there the most is decisive, as you'll earn points for its number accordingly. Enter the points in the score box at the end of the symbol row or the bottom of the column.
Have you entered several digits in a symbol row or column an equal number of times? Then it doesn't matter which digit you choose, as the points remain the same.
Note: You don't earn any points for crosses. These merely help you to fill up the symbol rows and columns.
Example: Sami has completely filled the bell symbol row. 3 is the most frequent number—it appears three times. So Sami enters 3 points in the score box at the end of the bell row. He's also filled the third column. The number 2 occurs most often—four times in total. He enters 4 points in the score box at the bottom.
Note: You don't earn bonus points for the columns.
Scoring the Sub-Areas
There are a total of four regions of different colors on your map: mountains (grey), land (green), dunes (yellow), and a river (blue). Each region has two sub-areas. The lighthouse divides the river in two.
Have you completely filled a sub-area? Then you immediately earn points, too. The digit you've entered the most is also decisive here, as you'll earn points for the number accordingly. Enter the number in the left-hand score box for the sub-area at the top of your map. You can tell which score box and sub-areas belong together by the colors and symbols.
Have you completely filled the second sub-area? Then check which digit you've entered the most in both sub-areas. Enter the corresponding number as points in the right-hand score box for this sub-area.
Note: Have you entered several numbers an equal number of times? Then it doesn't matter which number you choose, as the points remain the same.
Example: Sami was the first to complete the bell row, so earns the bonus point. He circles the shell. His fellow players must cross the shell out on their map. They're still able to earn points for the bell row, but won't receive the bonus point. Sami was also the first to fill the third column. He doesn't receive any bonus points for this though.
What Do the Shells Mean?
Shells symbols appear on the score boxes for the symbol rows and sub-areas. These earn you bonus points. Depending on the shell, they can be worth 1, 2, or 4 bonus points.
Were you the first to complete a symbol row or sub-area? Then you nab the bonus points before your fellow players. Circle the shell in the corresponding score box. Your fellow players must then cross the shell out. They cannot earn any bonus points for this symbol row or sub-area anymore. Have one or more players completed a symbol row or sub-area at the same time (i.e., during the same dice roll)? Then they both receive the bonus points.
End of Game
The game ends when one of you has entered points in at least eight score boxes. You should still finish the round, though, so that you've all had the same number of turns rolling the dice. Then it's time to add up your scores:
Final Score
Each of you should check which number forms the largest connected group on your map. Only numbers that are directly adjacent (to the right, left, above, or below) count. Do the numbers border on each other diagonally? Then they're not considered adjacent. Enter the number as points, similar to with the points described above. Write this number in the left-hand final score box with the heading "Schlusswertung" ("Final score").
Repeat this process and see which number forms the second largest connected group. Enter the number as points again—this time, in the final score box on the right.
Note: You're only able to earn points for each contiguous group of numbers once. You can have several contiguous groups of the same digit though.
Example: On Florian's map, the number 4 clearly forms the largest contiguous area. It occurs eight times. The 4 in the bell row is only connected diagonally and therefore doesn't form part of the group—similar to the 4 in the anchor row. Florian earns 8 points for his group of 4 and enters this in the left-hand final score box. His second largest connected groups are for the numbers 6 and 2. Both occur six times. He only earns the 6 points once, though, and enters this number in the right-hand final score box.
Winning the Game
Has everyone worked out their final score? Then add together all of your normal points and bonus points. Whoever has the most points wins. In case of a tie, the player who wrote the most numbers in river fields wins. If there's still a tie, then there are multiple winners.