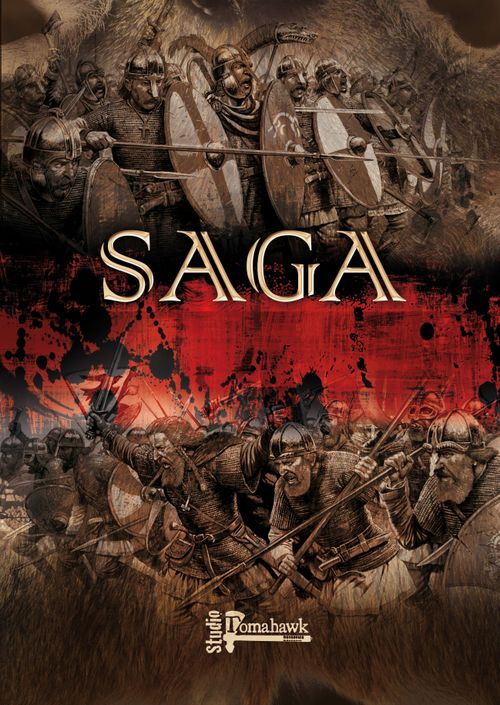
Saga
Saga Rulebook
Table of Contents
Table of Contents
Basics
Units
Figures in Saga are organized into units of 4 to 12 models. A unit can never start the game with fewer than 4 or more than 12 figures. Figures should be based individually; Saga has no fixed base-size rule, though bases should not exceed roughly 3cm across (6cm for riders), with slightly larger bases allowed for Warlords. Facing does not matter — models are assumed to be aware of their surroundings and suffer no penalty for being attacked from the side or rear.
Every figure belongs to one of four classes:
- Hearthguard — a warlord's finest troops, such as Anglo-Danish huscarls or Norman knights.
- Warriors — the bulk of a warband, the part-time or semi-professional fighters called up when a lord needs them, covering troop types such as thegns, ceorls or bondi.
- Levy — poorly-equipped peasants and freemen, typically armed with slings, bows or improvised weapons.
- Warlord — the leader of the warband. A Warlord is a unit in his own right rather than part of another unit, is treated as Hearthguard, and has several special rules and improved stats of his own.
Each class has two key stats, Move and Armour. With few exceptions, all figures of the same class share the same stats — an Anglo-Danish huscarl and a Viking hirdman (both Hearthguard) move and defend identically, even though faction-specific rules can make them behave differently in play. Move is usually M (or L for mounted models); Armour ranges from 2 to 6 and is the number an enemy needs to roll to hit that unit in shooting or melee. Armour can never be modified below 2 or above 6.
Distances
Saga uses four measured distances:
| Abbreviation | Name | Distance |
|---|---|---|
| VS | Very Short | 2" (5cm) |
| S | Short | 4" (10cm) |
| M | Medium | 6" (15cm) |
| L | Long | 12" (30cm) |
Measuring rods are strongly recommended over a tape measure. Distances can be measured at any time during the game. A requirement that a "unit must be within X" means at least one model of that unit must be within X — not necessarily every model, unless stated otherwise.
The Turn
Players alternate turns. Except for the very first thing a player does, a turn in Saga has no fixed structure the way it does in many wargames. A turn begins with the active player rolling his SAGA dice and placing the results on his Battle Board (the Orders phase). He is then free to activate units and use the abilities he has paid for with those dice, in whatever order he likes (the Activation phase), until his SAGA dice are exhausted, at which point his turn ends and his opponent rolls his own dice.
Fractions are always rounded up: losing 1/2 of 5 dice means losing 3 dice.
Building a Warband
Warbands are bought with points (the standard game size is 6 points; new players are encouraged to start with 4-point warbands). Each point buys a different number of figures depending on the class chosen — one point buys 4 Hearthguard, 8 Warriors, or 12 Levy. Figures are then organized into units of 4 to 12 models of a single class. A free Warlord is added once troops are chosen, unless a player instead picks one of the Age of Vikings Heroes.
Orders Phase
SAGA Dice and Ability Boxes
At the start of a turn, a player takes his SAGA dice and rolls them. The number of dice rolled equals the number of units he has on the table, to a maximum of six — Levy units don't count toward this total, while the Warlord counts as two units.
Each rolled die shows a symbol, and these symbols are used to "pay" for abilities on the player's Battle Board. Each Battle Board has fifteen ability boxes. Each box shows, in bold, the name of the ability; in italics beneath it, the phase in which it can be used; and a die-face symbol showing which SAGA dice symbol pays for it. Some boxes list more than one acceptable symbol; others require two different symbols at once, joined by a "+", meaning a die of each type must be spent together.
Boxes in the two rightmost columns of the board (shown with a darker background) can only be paid for once per turn — a single die or die-set activates them once. Boxes in the left-hand columns can be paid for as many times as the player has matching dice, letting the same ability trigger repeatedly in a turn.
Every player owns a set of eight SAGA dice, and the maximum a Battle Board can ever hold or use in a turn is eight, no matter how many units the player controls. If dice are left sitting on ability boxes at the start of a new turn (paid for but not spent), the player may either re-roll them as part of that turn's dice or leave them in place — but each die left on the board reduces that turn's roll by one. Leaving a die in place can be a useful threat against an opponent, since it keeps a hard-to-pay-for ability primed.
Placing SAGA dice onto ability boxes is the Orders phase of a turn.
Activation Phase
Activation Boxes
Every Battle Board has three similar boxes, found in the left-hand column, that let a player spend a die to activate a unit: one for Hearthguard and the Warlord, one for Warriors, and one for Levy. Any SAGA die symbol activates Hearthguard or the Warlord; the other two boxes each require specific symbols tied to that faction's troop types, and Levy are typically the hardest of the three to activate.
Dice placed in these boxes during the Orders phase can be removed one at a time to activate a unit, in any order the player likes, and a unit may be activated any number of times in a turn provided dice remain to pay for it. This process is the Activation phase, and always follows the Orders phase.
Activating a Unit
Once activated, a unit chooses one of three actions:
- Move — the unit moves across the battlefield (see Movement).
- Shoot — only available to units with a ranged weapon (see Shooting).
- Rest — removes one Fatigue marker from the unit.
If a player runs out of dice in the activation boxes and has no other way to activate a unit, his turn ends.
Movement
Unit Coherency
Every model in a unit must stay within VS of the nearest other model of its own unit at all times — this is Unit Coherency, and it applies with no exceptions. A model can never voluntarily end a move out of coherency, and casualties removed from shooting or melee can never be chosen in a way that breaks coherency. Because the Warlord is a unit of one, coherency never applies to him, and there is no rule allowing a Warlord to "join" another unit.
Moving
A unit can move only if it is activated and its controller chooses the Move action; the whole unit moves together, so a player cannot split a unit between moving some figures and shooting with others. Choosing to activate a unit for movement counts as a move even if the player subsequently decides not to actually move any models.
All infantry in Saga move M, with mounted models (see the Norman and Welsh faction rules) moving L. If any model in the unit starts, ends, or passes through difficult terrain during the move, the whole unit's move for that activation is reduced to S.
If a model's move brings it within VS of an enemy model, it must end its move in base contact with that model (or, if within VS of two or more enemies at once, in base contact with any one of them); if it lacks enough movement to reach base contact, it must stop as soon as it comes within VS and can approach no closer. Ending a move in base contact with an enemy model is called charging into melee; a model in base contact with an enemy is "engaged" and does not block other enemy models from moving within VS of it.
Impassable terrain cannot be entered — this includes the space occupied by any model, friend or foe, and the gaps between the models of a unit, which also cannot be moved through.
A unit activated for movement a second (or later) time in the same turn, with at least one of its models within S of an enemy unit, must charge that enemy unit if it is able to. If more than one enemy unit is within S, only the nearest can be charged.
Shooting
Bows, crossbows, javelins and slings let Saga's warriors kill at range. A unit needs a ranged weapon to shoot (usually only Levy, in most warbands); when activated, it may choose the Shoot action instead of moving. Shooting resolves immediately — there is no separate shooting phase or step — and the unit remains free to be activated again later. At least one model must have line of sight to, and be within range of, the target unit.
Shooting is always resolved unit-against-unit; a unit cannot split its shots between two enemy units. Line of sight is a straight, unobstructed line between shooter and target; it is blocked by any model (except a friendly model of the same unit), by the gaps between the models of a unit (friendly or enemy — a player can never shoot "through" a unit), and by terrain features taller than an average standing figure (roughly 35mm for 28mm models), known as tall terrain. Line of sight is checked model by model, so some models in a shooting unit may be able to fire while others cannot.
Weapon ranges: bow, sling and crossbow have range L; javelins have range M.
Resolving Shooting
- Determine the target and Attack Dice. Once the target unit and the number of eligible shooters are known, the attacker (the player doing the shooting) works out his Attack Dice, based on unit class: Levy and Warriors generate 1 die per 2 models; Hearthguard generate 1 die per model; the Warlord generates 2 dice. Only models within range and with line of sight to at least one target model contribute dice.
- Attacker's and defender's abilities. The attacker may use any Battle Board abilities marked Shooting; there is no limit to how many he uses, except that Attack Dice can never be more than doubled by abilities. The defender may then use any abilities marked Shooting/Reaction. Once this step ends, no further SAGA abilities can be triggered for this shooting resolution, even if their effect would apply later — an ability that cannot be used when it should be is simply lost.
- Attack roll. The attacker rolls his Attack Dice; each die equal to or greater than the target's Armour scores a hit. An unmodified roll of 6 always hits; an unmodified roll of 1 always misses. Some abilities allow a re-roll (a re-rolled die can never be re-rolled again) or modify the target's effective Armour.
- Defence roll. The defender takes one Defence Die per hit scored, plus any bonus Defence Dice granted by his own abilities, and rolls them; each 4+ cancels a hit. Defence Dice are capped at twice the number of hits scored, with any excess removed before rolling.
- Remove casualties. The defender loses one model for each uncancelled hit; the defender's controller chooses which models to remove (they need not have been in range or line of sight), subject to Unit Coherency.
Cover
Two kinds of cover exist. Light cover (hedges, small trees, bushes) is unlikely to stop an arrow outright. Heavy cover (a stone wall, a building's doorway) is solid enough to stop one. A unit gains the benefit of cover only if at least two-thirds of its models are within, or (for a linear obstacle) behind, the terrain relative to the firing unit. Light cover lets the defender cancel hits on a 3+ instead of 4+. Heavy cover does the same and also grants +1 Armour.
Weapons
Javelins can be thrown at the end of a Move activation: immediately after moving, provided the unit is not engaged in melee, it may shoot as part of the same activation — this does not count as a separate activation and generates no extra Fatigue. Crossbows reduce the target's Armour by 1 (this reduction is permanent, not just for that shot, and applies to melee too, since crossbow-armed troops trade protection for firepower).
Melee
Melee rules closely mirror Shooting.
Charging into Melee
To fight an enemy unit hand-to-hand, a unit must charge it via a Move activation, with at least one model able to reach base contact with an enemy model (line of sight is not required at this range). After any Reaction abilities are triggered, models move one at a time into contact, following these rules: each model moves, if possible, into base contact with the nearest enemy model, by the shortest practical route around impassable obstacles or slowing terrain (only detouring around terrain if going straight through it would otherwise prevent contact); a model cannot charge an enemy model already in base contact with two of the charging unit's models; if the nearest enemy model is unavailable for this reason, the charging model heads for the next-nearest enemy model instead; a model shielded by an obstacle such as a wall, hedge or window still counts as being in contact if the charger reaches the far side of that obstacle; a model without enough move to reach contact simply moves as close as it can. Once charging movement is complete, the unit must still satisfy Unit Coherency. The charging player chooses the order in which his models move.
Once one model is in base contact with the target unit, both units are considered engaged in melee, and the rest of the charging unit's models may move freely within VS of any enemy model (including other nearby enemy units) as long as they still follow the rules above. During a charge, the gaps between the models of the unit being charged are not treated as impassable for the charging unit.
A unit can never charge two different enemy units at once. The only way to bring two units into melee with a single enemy unit at once is the Warlord's Shoulder to Shoulder special rule (see Warlord Special Rules).
Resolving Melee
- Determine Attack Dice. The attacker (the player initiating the charge) and defender each work out their Attack Dice, based on unit class and the number of models close enough to fight: Levy generate 1 die per 3 models; Warriors 1 die per model; Hearthguard 2 dice per model; the Warlord 5 dice. A model contributes if it is in base contact with an enemy model, or within VS of a friendly model that is in base contact with an enemy model.
- Defender may trade dice for Defence. The defender may choose to remove half (rounded up) of his Attack Dice; for every two dice removed this way he gains one bonus Defence Die for step 4 (rounded up — three dice removed gives two bonus Defence Dice).
- Attacker's and defender's abilities. As in Shooting, the attacker may use any number of Battle Board abilities marked Melee (Attack Dice can never be more than doubled this way), and Fatigue markers on the opposing unit may also be spent at this point (see Fatigue). The defender then does the same. Once this step ends, no further abilities can be triggered for this fight.
- Attack roll. Both sides roll their Attack Dice against the opposing unit's Armour; a roll equal to or greater than that Armour scores a hit, subject to the same re-roll and Armour-modifying ability rules as Shooting.
- Defence roll. Each side takes one Defence Die per hit suffered, plus bonus dice from abilities or from step 2, capped at twice the hits scored; each 5+ cancels a hit.
- Remove casualties. Starting with the defender, each side loses one model per uncancelled hit, chosen by that unit's controller, subject to Unit Coherency.
- Fatigue. Every unit that fought in the melee (attacker and defender alike) gains one Fatigue marker.
- Fallback. Whichever side inflicted more casualties (after step 5) wins the melee, and the losing unit must fall back immediately; a tie is broken in the defender's favour, so the attacker falls back. The falling-back unit's controller moves each model S away from the fight, keeping Unit Coherency, ending as far as possible from the enemy models it fought and never ending within VS of an enemy model, otherwise the move is up to that player. If the falling-back unit cannot legally move every model this way, the winner falls back instead (without counting as "falling back" for ability purposes). A unit that has been entirely destroyed never causes its opponent to fall back.
Only heavy cover matters in melee (light cover is ignored), and only for the defender: at least two-thirds of the defender's engaged models must have heavy cover between their base and the attacker's for the bonus to apply, letting the defender cancel hits on a 4+ instead of 5+ during step 5.
Fatigue
Fatigue markers represent the physical exhaustion, stress and nervous strain that fighting inflicts on Saga's warriors.
Gaining Fatigue
A unit gains one Fatigue marker whenever:
- It is activated for Move a second or later time in the turn (the first Move or Shoot of the turn is free of Fatigue, but every later one costs a marker); a Fatigue gained from a charge move is added immediately after the move, before melee is resolved.
- It is activated for Shoot a second or later time in the turn, once shooting is resolved.
- It fights a melee, as either attacker or defender.
- A friendly unit within S of it is wiped out (its last model removed as a casualty) in melee.
There is no cap on how much Fatigue a unit can carry. Movement or shooting carried out on an opponent's turn (via SAGA abilities) does not generate Fatigue unless stated otherwise.
Resting
Resting is an action performed through activation; it removes one Fatigue marker. It must be a unit's first activation of the turn — a unit already activated for Move or Shoot that turn cannot rest, and a unit can rest only once per turn. SAGA abilities that remove Fatigue are not "resting" and aren't bound by these limits.
Spending an Opponent's Fatigue
A key mechanic in Saga is spending Fatigue markers off an enemy unit — removing one of the enemy's markers to gain a benefit:
- When an enemy unit is activated to move, one of its Fatigue markers can be spent to reduce its move by one range band (M to S, or L to M for mounted models); if it is moving through difficult terrain it then covers only VS.
- When an enemy unit shoots at you, one of its Fatigue markers can be spent during step 2 of Shooting to raise your target unit's Armour by 1.
- During a melee, one Fatigue marker on an opposing unit involved in the fight can be spent during step 3 to raise your own engaged unit's Armour by 1 (in a multi-unit fight, this bonus applies only against the specific enemy unit whose Fatigue was spent), or to reduce that enemy unit's own Armour by 1.
Each of these effects can be used only once per Move, Shoot or Melee — a unit's Move cannot be cut from M straight to VS by spending two Fatigue markers, and Armour in a melee can only be adjusted by 1 in each direction per opposing unit.
Fatigue Limit
Each class has a Fatigue limit, beyond which a unit is considered Weary:
| Class | Fatigue limit |
|---|---|
| Levy | 2 |
| Warriors | 3 |
| Hearthguard and Warlord | 4 |
A Weary unit (Fatigue at or above its limit) cannot be activated to Move or Shoot — activation can only be used to Rest, and any other activation attempt on it simply fails. A Weary unit charged in melee loses half its Attack Dice (rounded down) at the end of step 1.
Terrain
Terrain shapes tactics in Saga, provides cover from missiles, and can factor into scenario objectives. Terrain is described by open, difficult or impassable ground.
- Open terrain — clear ground, plus bridges and roads. Does not affect movement.
- Difficult terrain — woods, rocky ground, walls, buildings, steep hills and similar features that units can enter or cross but which slows them (see Movement).
- Impassable terrain — agreed before the game; lakes, deep rivers or sheer cliffs are typical examples. Table edges are impassable unless a scenario says otherwise.
Terrain is also classified by height (low terrain never blocks line of sight; tall terrain blocks it, though for an area feature line of sight can still enter the area without crossing all the way through it) and by the kind of cover it grants (light or heavy, as described under Shooting and Melee) — open terrain never provides cover.
Buildings
Buildings are always tall, difficult terrain that grants heavy cover. Ordinary buildings can hold up to 8 models; large buildings up to 12. A unit may enter an unoccupied building only if every model can get inside during the same Move activation, and cannot leave again that same turn. Once inside, exact positioning doesn't matter — movement and shooting to and from the building are measured from its walls. A unit occupying a building that's already held by the enemy must charge the building as if it were an enemy unit to fight the occupants; if a building holds more than one enemy unit, the defender chooses which one defends. At the end of such a melee, if the building is still enemy-occupied the attacker must fall back regardless of casualties. When shooting into an occupied building, the shooter chooses which unit inside to target. Models cannot move within VS of an enemy-held building except to charge it.
The Warlord
Every warband is led by its Warlord, who is free (costs no points) unless the player chooses one of the Age of Vikings Heroes instead. The Warlord counts as Hearthguard for activation purposes and is the best fighter a player commands, but his death often ends the game, so he should be used wisely.
A Warlord has Move M, Armour 5 in melee and Armour 6 against shooting (reflecting superior armour), and counts as two units when working out how many SAGA dice are rolled at the start of a turn. All Warlords share the following special rules.
Resilience. A Warlord ignores the first uncancelled hit he suffers in each shooting attack or melee phase — it takes at least two hits against him in the same activation to kill him, and this ignored first hit applies fresh at every separate shooting or melee activation. If a Warlord takes two or more hits in one activation, a friendly non-Levy figure within VS of him can be removed instead of the Warlord, representing loyal retainers throwing themselves in harm's way.
Resolute. Once per turn, a Warlord may be activated for free, without spending any SAGA dice. This free activation can be combined with We Obey (below) to also activate a nearby unit.
We Obey. Once per turn, when the Warlord is activated and Move is chosen, one friendly unit within S of him may also be activated for Move at the same time (it cannot use this activation to Shoot or Rest). It doesn't matter whether that unit has already activated this turn — this counts as a fresh Move activation and generates Fatigue as normal. This is the only way in Saga for two of a player's own units to charge a single enemy unit together (Shoulder to Shoulder, below).
Shoulder to Shoulder. Using We Obey, a Warlord and the unit he activates can charge the same enemy unit together. Move the Warlord first, since his men are assumed to follow him. The two units generate their Attack Dice separately, and SAGA abilities used for one don't affect the other — they remain two distinct units. Before the enemy unit rolls its Attack Dice, its controller must split them between the Warlord and the accompanying unit, sending no more than half at the Warlord (there's no minimum). The Warlord himself faces no such restriction and may direct all his Attack Dice at an enemy Warlord. A Warlord fighting Shoulder to Shoulder can still use Resilience, provided a friendly Hearthguard or Warrior figure is within VS of him when the hits are removed — but casualties on the accompanying unit are always removed first, before Resilience can be applied to the Warlord.
Warlord's Pride. If, when activated for Move, a Warlord is able to charge the enemy Warlord, he must do so — there is no choice in the matter.
Retinue
Beyond the Warlord, a warband's retinue is drawn from three classes:
Hearthguard are the strongest troops a warband can field, and correspondingly rare. Hearthguard have Move M and Armour 5.
Warriors make up the bulk of an Age of Vikings host and can fight well under good leadership; they're widely available, making up in numbers what they lack in training. Warriors have Move M and Armour 4.
Levy are usually called up only in dire need, though some Warlords value their ability to fight at range; they never count as units when rolling SAGA dice. Levy have Move M and Armour 3.
One point buys 4 Hearthguard, or 8 Warriors, or 12 Levy — a warband can mix classes freely across its points. A 6-point warband therefore fields somewhere between 25 models (all Hearthguard) and 73 models (all Levy), plus the Warlord.
When organizing a warband into units: no unit may have fewer than 4 or more than 12 figures; every model in a unit must be the same class; where a weapon choice exists, every model in the unit must be armed alike; the Warlord is always his own unit and can never be folded into another; and any weapon or mount options offered by a warband list must be settled at this point. Larger units are generally more effective in combat and need fewer dice to activate, but fielding too few units reduces the dice a player rolls each turn — and dice are lost as units are destroyed. Warband organization is a real tactical choice with no single right answer.
Factions
The core rulebook covers four factions, each with its own SAGA dice, Battle Board and faction-specific special rules: Vikings, Normans, Anglo-Danes and Welsh.
Vikings
Vikings are the seafaring, raiding and trading peoples of Denmark, Norway and Sweden. A Viking Warlord is typically a jarl or a hersir serving a king; his Hearthguard are drawn from the hird, the sworn household warriors of a Viking lord, some of whom — berserkers and úlfhéðnar — fought themselves into a battle-frenzy as members of cults devoted to Odin. Warriors are free men mustered for the levy, or sailors and merchants in a lord's following; Levy are thralls, the unfree servants at the bottom of Viking society.
Faction rule: One unit of exactly 4 Viking Hearthguard may be designated Berserkers. Each Berserker model generates 4 Attack Dice in melee (instead of the usual 2 for Hearthguard), but their Armour drops to 3. Viking Warriors and the Warlord have no special rules of their own. Viking Levy are armed with bows or slings.
Normans
The Normans descend from Viking settlers granted land in Normandy in the 10th century by the Frankish king Charles the Simple; within a couple of generations the settlers had blended into the local population, though Norse tradition survived in Norman law and language, along with a taste for further conquest that carried Norman armies into England and Sicily. A Norman Warlord is a duke, count or baron; his Hearthguard are knights, usually fighting mounted with lance or spear. Warriors are free men owing feudal service, heavily supplemented by professional mercenaries — commonly called sergeants — hired from France, Flanders, Italy and Spain; Levy are the poorest peasants, called up as skirmishers in dire need.
Faction rule: Most Norman units can take the field mounted. Mounted units move L (reduced to S moving into, out of, or through difficult terrain), can never enter a building (though they may charge a building's occupants normally), suffer -1 Armour when targeted by shooting, and never benefit from any cover, in shooting or melee. Aside from these changes, mounted units behave normally, and a unit that starts the game mounted must remain mounted for the whole game. Norman Warlords, Hearthguard and Warriors may be mounted. One unit of Norman Warriors (up to 8 models), if not fielded mounted, may be armed with crossbows; other foot Warriors have the usual Warrior Move and Armour. Norman Levy are armed with bows.
Anglo-Danes
England opened the 11th century ruled by Sweyn Forkbeard, King of Denmark and Norway, succeeded in 1016 by his son Cnut the Great, whose reign successfully blended Viking and Saxon interests into the North Sea Empire. At the top of Anglo-Danish society stood the king and his court, and the earls who governed large tracts of England and Scandinavia in his name — an Anglo-Danish Warlord likely belongs to one of these courts. Huscarls, an evolution of the Scandinavian hird, form the Hearthguard: well-trained professional soldiers, often landed for their service, who acted as bodyguards and trusted agents in peace and formed the army's elite in war, noted for long mail hauberks and formidable Danish axes. Lesser landowners such as thegns, together with the best-trained men of the fyrd (the general Saxon levy), make up the Warriors; poorer labourers and peasants mustered under the fyrd system, often sent home to farm in practice and used as skirmishers when called up, are the Levy.
Faction rule: Some Anglo-Danish units may be armed with two-handed Danish axes. A unit so armed forgoes its shields in melee and suffers -1 Armour (Armour 5 becomes 4); in exchange, its Attack rolls in melee gain +1 (so hitting Armour 4 only needs a 3). Anglo-Danish Warlords always carry a Danish axe. Anglo-Danish Hearthguard may be armed with Danish axes (and should be modelled with visible two-handed weapons so opponents can tell) — a unit so equipped always fights with axes, gaining the bonus and suffering the penalty above; if armed instead with spears, swords or other weapons, none of this applies. Anglo-Danish Warriors have no special rules. Anglo-Danish Levy are armed with bows or slings.
Welsh
The Welsh of the Viking Age trace back to the Celtic and Romano-British peoples pushed west by Germanic invaders between the 5th and 7th centuries; "Welsh" is a Germanic word for "foreigners", while the Welsh called themselves Cymry ("fellow countrymen"), though Wales remained a patchwork of fiercely independent kingdoms until Gruffydd ap Llywelyn briefly united them in the 11th century. Constantly pressured from the east by the Saxons and raided along the coast by Vikings from Dublin, other Irish raiders, and Vikings of the Kingdom of the Isles, the Welsh fought in a looser order than their neighbours, leaning heavily on terrain to wear down invaders. Each Welsh kingdom was led by a king whose authority rarely reached beyond his own borders, divided into the lands of rival clans — a Welsh Warlord is likely such a king or one of his supporters. Below the king are the uchelwyr, the Welsh aristocracy of clan elders and landowners, and their bodyguard the teulu, sworn to die for their lord and usually drawn from his own family — teulu and uchelwyr form the Hearthguard, often the only Welsh troops with mail, helmets and greaves, frequently fighting mounted while throwing javelins. The bulk of a Welsh host are the priodaur, free clansmen who make up the Warriors, relying on javelins and hit-and-run tactics and often considered undisciplined; at the bottom are the bonheddig, untrained youths and peasants used to harass the enemy and gain experience without the risk of melee — these are the Levy.
Faction rule: Most Welsh units may fight mounted, under the same rules as Norman cavalry above (Move L, reduced to S through difficult terrain; never enter buildings; -1 Armour against shooting; no cover benefit; once mounted, always mounted for the game). Welsh Warlords are armed with javelins and may ride ponies. Welsh Warriors and Hearthguard are armed with javelins, and their lighter armour costs them -1 Armour against shooting (Welsh Hearthguard count as Armour 4 against shooting, Welsh Warriors as Armour 3); mounted Welsh Warriors and Hearthguard suffer this penalty a second time (down to Armour 2 for Warriors, 3 for Hearthguard, against shooting while mounted). Welsh Levy are armed with bows, slings or javelins.
Heroes of the Age of Vikings
Players may choose one of the named Heroes below to lead their warband in place of an ordinary Warlord. A Hero costs 1 point (leaving 5 points for the rest of a standard warband) and otherwise has the base stats of any Warlord — Armour 5, rising to 6 against shooting, 5 Attack Dice in melee, and so on — plus his own set of unique special rules. Two players may field the same faction with the same Hero without issue; one of them is simply an imposter. Each faction has two Heroes in the core rules, plus a set of Mercenaries ("Hired Swords") that any faction can recruit for a price.
Vikings
Harald Hardrada, King of Norway. Gives 3 SAGA dice at the start of each turn (rather than the usual 2 for a Warlord). Has Armour 6 in both shooting and melee, reflecting his service in the Byzantine emperor's own guard. One unit of up to 12 Hearthguard in his warband may be upgraded to Varangians (Armour 6 in shooting and melee, rather than 5) and, like Harald himself, may be armed with Danish axes.
Ragnar Lodbrok, King of Sweden and Norway. Gives 3 SAGA dice at the start of each turn. Ignores the first two hits (rather than one) suffered in each shooting attack or melee. Once per turn, at the start of his turn, he may choose to roll only half his normal SAGA dice allowance — if he does, every unit in his warband gets one free activation that turn without spending any dice.
Anglo-Danes
Harold Godwinson, last Anglo-Saxon King of England. Gives 3 SAGA dice at the start of each turn. Forms a single unit together with his brothers Gyrth and Leofwine (and so does not benefit from Shoulder to Shoulder like other Warlords); Gyrth and Leofwine have Armour 5 (6 against shooting) and each contribute 3 melee Attack Dice, and the whole unit counts as Hearthguard armed with Danish axes. Harold is always the last model removed as a casualty (and takes two hits to remove, per his Resilience) — his brothers must both fall first, swapping Harold's position within the unit if needed to preserve coherency. Resolute applies to this combined unit. The first Fatigue the unit would gain on its own player's turn (not the opponent's) is ignored.
Cnut the Great, first Anglo-Danish King of England. Gives 3 SAGA dice at the start of each turn. May roll up to 7 SAGA dice at the start of a turn (if enough units are on the table), instead of the usual cap of 6, though the overall 8-dice-per-turn limit still applies. May be mounted, or armed with a Danish axe if on foot. While Cnut is on the table, a player may use both the Viking and Anglo-Dane Battle Boards, choosing a mix of Viking and Anglo-Dane SAGA dice to roll each turn — Viking dice can only be spent on the Viking board, and Anglo-Dane dice only on the Anglo-Dane board.
Normans
William the Bastard, Duke of Normandy. Gives 3 SAGA dice at the start of each turn. When using We Obey, may activate two units within S rather than one — but if he does so, neither activated unit may charge into melee from that activation, and any unit activated this way may Shoot or Move (rather than only Move, as We Obey normally requires).
Ivo Taillefer. Gives 3 SAGA dice at the start of each turn. Never suffers Fatigue — any Fatigue he would gain is cancelled outright — and at the start of a Norman player's turn, before rolling SAGA dice, one Fatigue is removed from every friendly unit within M of him. He can never use Shoulder to Shoulder and must always charge alone. If mounted, he may, during the abilities step of any melee, spend any SAGA die on the Norman Battle Board's activation boxes (Knights, Sergeants or Levy) to gain one Attack Die and one Defence Die, as many times per melee as desired, subject to the normal Attack/Defence Dice caps.
Welsh
Maredudd ap Owain, King of the Britons. Gives 3 SAGA dice at the start of each turn. Bribes his opponent's retainers: on the game's first turn, his opponent rolls only a third (rounded up) of his normal SAGA dice; on the second turn, half (rounded up); from the third turn on, the opponent rolls normally. As long as Maredudd is alive, every unit in his warband may be activated by any SAGA die symbol, regardless of class.
Gruffydd ap Llywelyn, High King. Gives 3 SAGA dice at the start of each turn. While he is alive, up to three SAGA dice may be re-rolled once during the Orders phase. All Levy in his warband generate SAGA dice as if they were Warriors. Any unit of Warriors in his warband may swap javelins for bows (Armour 3 in shooting and melee while so armed); any unit of Warriors or Hearthguard may instead give up their javelins, in which case they suffer no Armour penalty against shooting.
Hired Swords: Jarl Sigvald and the Jomsvikings
Adding Sigvald and his Jomsvikings to a warband costs 2 points, and they cannot be taken in a warband led by a Hero. Sigvald arrives with three fellow Jomsvikings, forming a single 4-model unit; Sigvald is not a Warlord (he gains none of the Warlord special rules) and the unit counts as 4 Hearthguard that no other model may ever join. Ordinary Jomsvikings have Armour 4 and generate 1 melee Attack Die each; Sigvald also has Armour 4 but generates 3 melee Attack Dice, so the unit as a whole produces 6 Attack Dice from its four models. Like a Warlord, the unit gives 2 SAGA dice each turn. Sigvald is always the last model removed as a casualty in his unit (swapped within the unit if needed to preserve coherency).
The unit doesn't activate like ordinary Hearthguard: it can never benefit from Battle Board abilities and cannot be activated via We Obey. Instead, during the Orders phase, up to three of that turn's rolled SAGA dice may be set aside next to the unit; at the end of the Orders phase these dice are removed and, for each one, a D6 is rolled. The unit receives free activations that turn (not costing SAGA dice) equal to half the highest of these D6 results (rounded up), plus cumulative bonus effects for the rest of the game turn based on the total of the dice, per the following table:
| Roll | Effect |
|---|---|
| 1 | Nothing. |
| 2-3 | +1 Attack Die and +1 Armour for every model in the unit until the start of your next turn. |
| 4-6 | +1 Defence Die in the abilities step of every melee until the start of your next turn. |
| 7-9 | +2 Attack Dice in the abilities step of every melee until the start of your next turn. |
| 10-11 | +2 Defence Dice in the abilities step of every melee until the start of your next turn. |
| 12-13 | +2 Attack Dice in the abilities step of every melee until the start of your next turn. |
| 14-15 | All Fatigue is removed from the unit, and the first Fatigue it would gain this turn is ignored. |
| 16 | +1 Armour for every model, and the unit may re-roll failed Attack and Defence Dice in every melee until the start of your next turn. |
| 17-18 | Sigvald and his men betray their employer: they do not activate this turn and gain none of the above bonuses. At the start of the opponent's turn, they switch sides for the rest of the game, and the opponent may spend SAGA dice to trigger the Jomsviking Fury table exactly as described above. |
SAGA Abilities
Each faction's Battle Board carries fifteen ability boxes, each usable only in the phase or step named beneath its title. The categories are:
- Orders — usable only on the owning player's turn, during the Orders phase while dice are being placed. Typically these abilities affect the SAGA dice themselves (letting them be re-rolled or their faces changed) or set up an effect lasting the whole turn.
- Orders/Reaction — usable only on the opponent's turn, during his Orders phase.
- Activation — usable only on the owning player's turn, during the Activation phase; typically these activate units or trigger effects tied to activating a unit.
- Activation/Reaction — usable only on the opponent's turn, during his Activation phase; these usually specify exactly when they trigger.
- Shooting — usable only while one of the owning player's own units is shooting, during step 2 of the Shooting sequence.
- Shooting/Reaction — usable only when one of the owning player's units is the target of enemy shooting.
- Melee — usable during step 3 of the Melee sequence, on either player's turn, by whichever player's unit is involved in that fight.
A player can never use a SAGA ability to affect a melee or shooting resolution his own units are not involved in — in a multiplayer game, abilities cannot be spent on a fight between two other players.
Scenarios
The rulebook includes a set of scenarios that vary victory conditions, deployment and table setup beyond a straightforward pitched battle — for example, "The Clash of Steel", a scenario built around a head-on clash between two warbands with no special objectives beyond destroying the enemy. Other scenarios in the book introduce asymmetric deployment, objectives tied to terrain features, or victory conditions other than simple attrition. Players are encouraged to agree on table size, terrain and scenario before a game, and to use the smaller 4-point warband size for their first few games while learning the system.
Reference
Fatigue limits: Levy 2, Warriors 3, Hearthguard/Warlord 4.
Attack Dice (Shooting): Levy/Warriors 1 per 2 models, Hearthguard 1 per model, Warlord 2.
Attack Dice (Melee): Levy 1 per 3 models, Warriors 1 per model, Hearthguard 2 per model, Warlord 5.
Distances: VS 2" (5cm), S 4" (10cm), M 6" (15cm), L 12" (30cm).
Cancelling hits: Defence Dice cancel a hit on 4+ in shooting (3+ with cover) and on 5+ in melee (4+ with heavy cover).